
Baking 100% Rye Bread: A Guide to Success

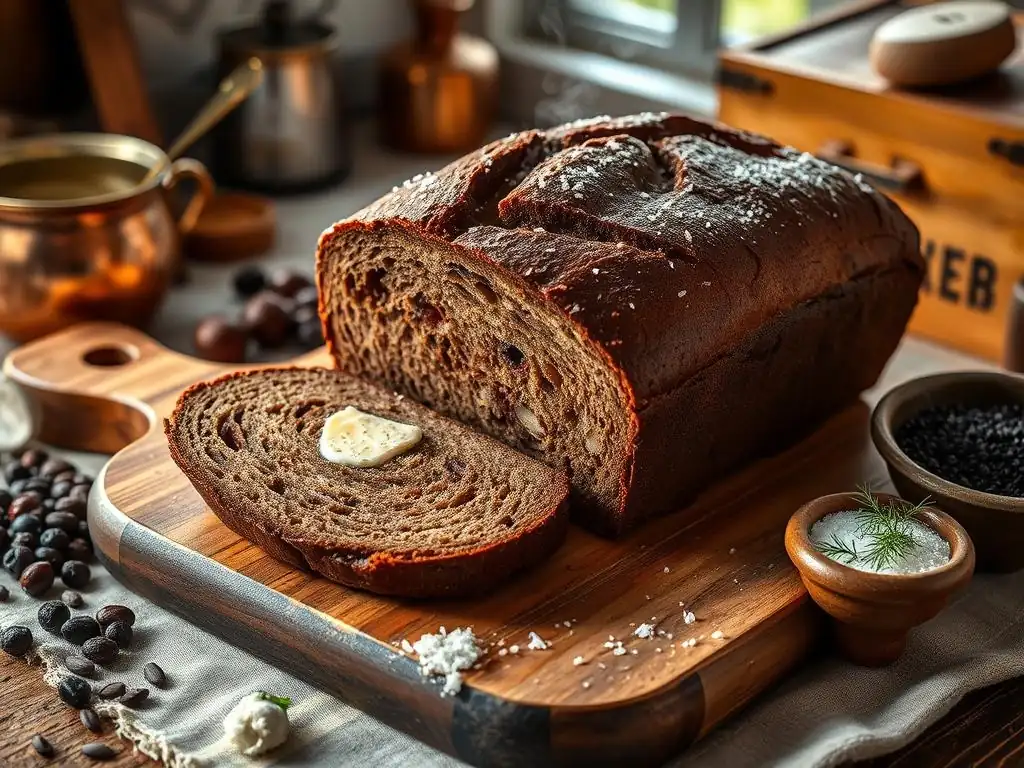
Welcome to BakeWithEase, your haven for all things baking! Ever dreamed of crafting that perfect, deeply flavorful rye bread? Well, dream no longer! This guide unveils a surprisingly simple 100% rye bread recipe easy enough for even novice bakers. But what secrets lie in mastering this ancient grain? Discover the crucial steps and techniques that transform simple ingredients into a culinary masterpiece – and unlock a whole new world of baking possibilities. Read on, and let's bake!
- Baking 100% Rye Bread: A Guide to Success | BakeWithEase
- Introduction to 100% Rye Bread Baking
- Essential Ingredients for an Easy 100% Rye Bread Recipe
-
Step-by-Step: Easy 100% Rye Bread Recipe
- Step 1: Preparing the Rye Bread Starter (Sourdough or Yeast)
- Step 2: Mixing the 100% Rye Bread Dough
- Step 3: Bulk Fermentation of Rye Bread Dough
- Step 4: Shaping the 100% Rye Bread Loaf
- Step 5: Proofing the Shaped Rye Bread
- Step 6: Baking Your 100% Rye Bread
- Step 7: Cooling and Slicing Your Homemade Rye Bread
- Troubleshooting Common Issues When Baking 100% Rye Bread
- Tips for Perfecting Your 100% Rye Bread Recipe
- Storing Your Homemade 100% Rye Bread for Freshness
- Enjoying Your 100% Rye Bread: Serving Suggestions
-
Frequently Asked Questions
- What makes baking 100% rye bread different from baking wheat bread?
- What are some common problems bakers encounter when making 100% rye bread?
- Is a rye starter necessary for a 100% rye bread recipe?
- What are some tips for achieving a good rise in a 100% rye bread?
- Can I add any other ingredients to a 100% rye bread recipe?
- Final Reflection: The Enduring Allure of 100% Rye
- Unleash Your Inner Rye Baker!
Baking 100% Rye Bread: A Guide to Success | BakeWithEase
Introduction to 100% Rye Bread Baking
Why Bake 100% Rye Bread? Understanding the Unique Qualities
Baking 100% rye bread offers a unique and rewarding experience, distinct from baking with wheat flour. Rye flour contains less gluten than wheat, resulting in a denser, moister crumb and a rich, earthy flavor profile. This structure difference means rye dough handles very differently – it's often sticky and doesn't develop the elastic network seen in wheat doughs. The payoff, however, is a bread celebrated for its hearty texture, distinctive taste, and impressive keeping qualities.
Beyond flavor, 100% rye bread is packed with nutritional benefits, including higher fiber content compared to many wheat breads, contributing to a lower glycemic index. It's a staple in many cultures, from the dense Pumpernickel of Germany to the flavorful Rugbrød of Denmark. Mastering a 100% rye bread recipe, even an easy one, opens the door to baking history and a truly satisfying loaf.
The unique characteristics of rye flour necessitate different baking techniques. Instead of extensive kneading to develop gluten, rye dough typically requires gentle mixing. The fermentation process is also different; rye ferments faster and doesn't exhibit the same dramatic rise as wheat dough. Understanding these fundamental differences is key to achieving success.
For instance, high hydration levels are common with rye, often exceeding 80% water relative to flour weight, sometimes even reaching 100% or more depending on the flour type. This high hydration contributes to the bread's characteristic moisture but also makes the dough sticky and challenging to handle. Embracing these differences rather than treating rye like wheat is the first step towards baking a beautiful and delicious loaf of 100% rye bread.
Achieving Baking Success with Rye: An Overview
Success in baking 100% rye bread hinges on patience, understanding rye's unique properties, and following specific steps tailored to this flour. Unlike wheat bread, which relies on gluten structure for its rise, 100% rye bread relies on starches and pentosans (complex carbohydrates) to form its structure. Acidity, often introduced through a sourdough starter or the addition of vinegar or buttermilk, is crucial in 100% rye baking.
This acidity helps to manage enzyme activity that can otherwise break down the starch structure, leading to a gummy crumb. Therefore, a well-maintained rye sourdough starter is often the preferred leavening agent, contributing both rise and essential acidity.
An easy 100% rye bread recipe often simplifies the process, perhaps by using commercial yeast combined with an acidic ingredient, or by providing clear, step-by-step instructions that account for rye's stickiness and fermentation speed. Key factors for success include using the correct type of rye flour, ensuring proper hydration, mixing gently, allowing sufficient fermentation time (but not over-fermenting), and baking with adequate steam to develop a good crust.
Even experienced wheat bakers need to adjust their approach when switching to 100% rye. Paying close attention to dough consistency, fermentation cues (which are subtle with rye), and baking temperatures will significantly improve your results and help you consistently bake delicious, hearty 100% rye bread.
Essential Ingredients for an Easy 100% Rye Bread Recipe
Rye Flour Selection: Choosing the Right Type for Your Bread
Choosing the right type of rye flour is fundamental to the outcome of your 100% rye bread. Rye flour is milled to different extraction rates, impacting its color, flavor, and how it behaves in baking. Light rye flour, similar to white wheat flour, has most of the bran and germ removed. It produces a lighter loaf with a milder flavor.
Medium rye flour contains more of the outer layers, resulting in a darker color and more pronounced rye flavor. Dark rye flour, including Pumpernickel flour (which is very coarse), contains almost all of the grain and yields the darkest, most intensely flavored, and densest loaves. For a standard 100% rye bread recipe, medium or dark rye flour is often preferred for its characteristic taste and color.
The absorption properties also vary between rye flour types. Darker, coarser flours tend to absorb more water than lighter, finer flours. An easy 100% rye bread recipe might specify a particular type, like medium rye, which balances flavor and manageability. If a recipe calls for "rye flour" without specifying, medium rye is usually a safe bet.
Experimenting with different types will reveal how they affect hydration needs, fermentation times, and the final bread's texture and taste. For example, a Pumpernickel bread uses a very coarse rye flour and often involves a long, slow bake, sometimes even steaming, to break down the starches and create its signature dense, sweet loaf. Understanding your flour is the first step to baking great 100% rye bread.
The Importance of Water: Hydration for Rye Bread Dough
Water plays a critical role in 100% rye bread, perhaps even more so than in wheat bread, due to rye's unique starch and pentosan content. Rye flour starches gelatinize at lower temperatures and swell significantly more than wheat starches. Pentosans, which are gummy, water-binding compounds, also absorb a large amount of water.
This high water absorption capacity is why 100% rye doughs are typically much wetter and stickier than wheat doughs, often with hydration levels ranging from 80% to over 100% (based on flour weight). This high hydration is necessary to fully hydrate the flour and ensure a moist, non-gummy crumb in the final bread.
Getting the hydration right is crucial for an easy 100% rye bread recipe. Too little water will result in a dense, dry, and potentially gummy loaf because the starches and pentosans won't be fully hydrated. Too much water can make the dough excessively difficult to handle and may lead to a loaf that collapses during baking.
The exact amount of water needed will depend on the specific type of rye flour used, as well as ambient humidity. It's often best to start with the recipe's recommended water amount and adjust slightly if necessary, aiming for a very wet, porridge-like or thick batter-like consistency rather than a traditional kneadable dough.
Salt's Role in Flavor and Structure of Rye Bread
Salt is an essential ingredient in virtually all bread recipes, including 100% rye bread, serving multiple critical functions. Flavor is the most obvious role; salt enhances the natural sweetness and complex, earthy notes of the rye flour, preventing the bread from tasting bland. Without salt, even the best baked 100% rye bread can fall flat in terms of taste. Typically, salt is added at a concentration of about 1.8% to 2% of the total flour weight, a standard percentage across many bread types.
Beyond flavor, salt affects the dough's structure and fermentation. While salt's impact on gluten development is significant in wheat bread (strengthening the network), its role is slightly different in low-gluten rye dough. It still helps to tighten the structure provided by the starches and pentosans, contributing to a better crumb.
Salt also helps to regulate yeast or starter activity, slowing down fermentation slightly. This slower fermentation can sometimes lead to more complex flavor development. Including the correct amount of salt is a simple but vital step in ensuring your easy 100% rye bread recipe results in a flavorful loaf with good texture.
Optional Ingredients: Caraway Seeds and Other Flavor Enhancers
While rye flour, water, and leavening (and salt) form the core of any 100% rye bread recipe, optional ingredients can significantly enhance flavor and texture. Caraway seeds are perhaps the most classic addition to rye bread, providing a distinct aromatic and slightly peppery note that pairs beautifully with the earthy rye flavor. They can be added whole or lightly crushed to release more aroma. Other seeds like fennel, coriander, or anise can also be used, either alone or in combination with caraway, to add layers of complexity.
Sweeteners like molasses, honey, or dark corn syrup are often added to dark rye breads, particularly Pumpernickel. These sweeteners contribute to color, moisture, and a characteristic sweetness that balances the rye's tang. For example, a traditional German Pumpernickel might use a significant amount of molasses.
Ingredients like cocoa powder or roasted malt flour can deepen the color and add subtle bitter or malty notes. For an easy 100% rye bread recipe, starting with just caraway seeds is a simple way to add traditional flavor without overcomplicating the process. Other additions might include chopped nuts, dried fruits (like raisins or cranberries), or even cooked grains for added texture and moisture.
Step-by-Step: Easy 100% Rye Bread Recipe
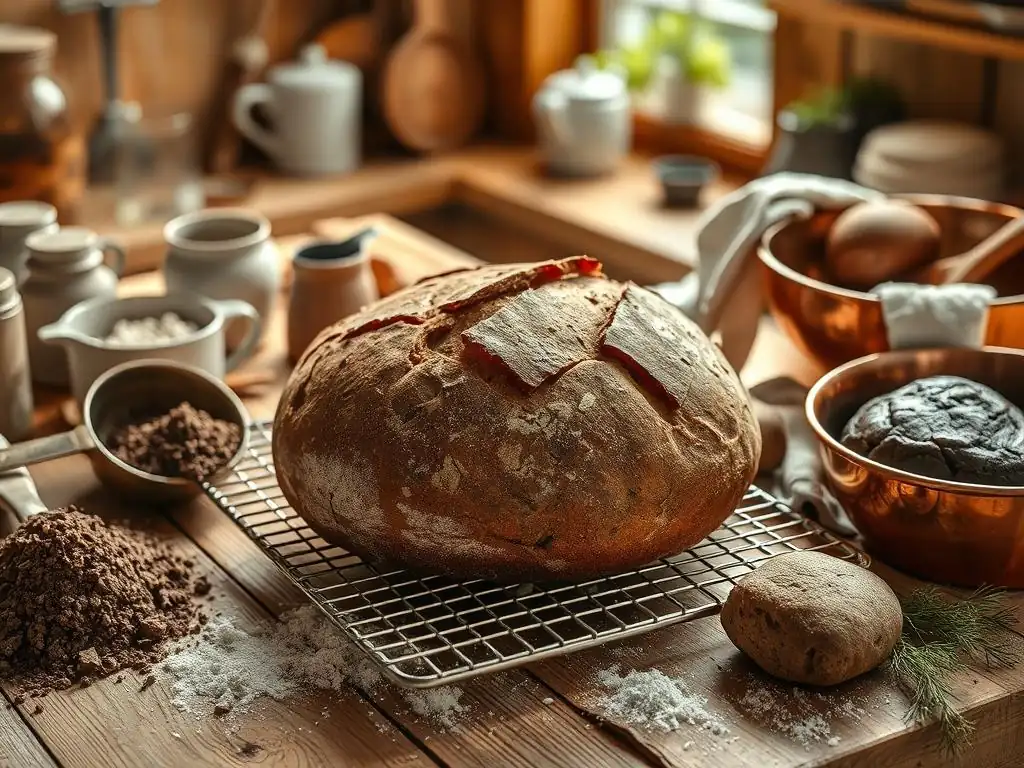
Step 1: Preparing the Rye Bread Starter (Sourdough or Yeast)
The leavening agent is the heart of your 100% rye bread. You have two primary options: a rye sourdough starter or commercial yeast. A sourdough starter, especially one fed with rye flour, provides the characteristic tangy flavor and crucial acidity needed for optimal rye crumb structure. Using a sourdough starter requires planning, as the starter needs to be active and bubbly before baking. This typically involves feeding it 4-12 hours before you plan to mix your dough, ensuring it's at its peak of activity. A mature rye starter, usually 1-2 weeks old and regularly fed, works best.
For a quicker and often simpler approach suitable for an easy 100% rye bread recipe, commercial yeast can be used. Instant dry yeast or active dry yeast can provide the necessary lift. When using yeast, it's often beneficial to add an acidic component like vinegar, buttermilk, or citric acid to the dough. This mimics the acidity provided by sourdough and helps improve the crumb structure of the 100% rye loaf. Using yeast significantly shortens the fermentation time compared to sourdough, making the process faster from start to finish.
Creating a Rye Sourdough Starter: A Detailed Guide
Creating a rye sourdough starter is a straightforward process, even if it requires patience. You'll need equal parts rye flour and water by weight. A common starting point is 50 grams of rye flour and 50 grams of lukewarm water in a clean jar. Mix thoroughly until no dry flour remains, cover loosely, and let it sit at room temperature (ideally 70-78°F or 21-26°C). For the first 24-48 hours, you might see some initial bubbling. After 24 hours, discard half the starter (50g) and feed it again with 50g rye flour and 50g water. Repeat this discard-and-feed process daily.
Within 3-7 days, your starter should become consistently active – showing significant bubbles throughout, doubling in size within a few hours of feeding, and having a pleasant, tangy aroma. Rye starters tend to mature faster than wheat starters. Once it reliably doubles or triples after feeding, it's ready to use in your 100% rye bread recipe easy.
Remember to maintain your starter by feeding it regularly, even when not baking, to keep it healthy and active. Store it in the refrigerator if you don't bake frequently, and feed it a few times at room temperature before baking to wake it up.
Using Commercial Yeast for a Quicker Rye Bread
Using commercial yeast is a fantastic way to bake an easy 100% rye bread recipe without the commitment of maintaining a sourdough starter. You'll typically use a small amount of yeast, perhaps around 1-2% of the flour weight (e.g., 5-10 grams for 500 grams of flour). Instant dry yeast can usually be mixed directly into the dry ingredients. Active dry yeast may need to be proofed first in a small amount of warm water (around 105-115°F or 40-46°C) for 5-10 minutes until foamy, then added to the dough mix.
As rye dough benefits from acidity, incorporating an acidic ingredient is recommended when using commercial yeast. A tablespoon or two of apple cider vinegar or white vinegar per loaf, or substituting some of the water with buttermilk, can provide this needed acidity. This helps the rye starches maintain their structure during baking, preventing a gummy texture. While a yeast-leavened 100% rye bread won't have the complex tang of a sourdough version, it will still be hearty, moist, and delicious, and much quicker to get into the oven.
Step 2: Mixing the 100% Rye Bread Dough
Mixing 100% rye dough is different from mixing wheat dough. Because rye has very little gluten, you don't need to knead it extensively. In fact, overmixing can damage the delicate structure provided by rye's starches and pentosans, leading to a stickier, harder-to-handle dough and a potentially gummy crumb. The goal is simply to combine the ingredients thoroughly until no dry flour remains and you have a homogenous, sticky mixture. This can often be achieved with just a sturdy spoon or a stand mixer with a dough hook on low speed for a few minutes.
The consistency of 100% rye dough will be very wet and sticky, more like a thick batter or paste than a traditional dough. It won't pull away from the sides of the bowl or develop a smooth surface like wheat dough. Embrace the stickiness; this high hydration is necessary for a moist loaf. An easy 100% rye bread recipe will often describe the desired consistency clearly, perhaps comparing it to thick porridge or wet cement. Don't be tempted to add more flour to make it easier to handle; this will reduce hydration and negatively impact the final texture.
Achieving the Right Dough Consistency for Rye Bread
The correct consistency for 100% rye dough is crucial for success. It should be very hydrated, often described as a thick, sticky batter or paste. It will not be elastic or form a smooth ball like wheat dough. When mixing, ensure all the flour is fully incorporated and there are no dry pockets. The mixture should be uniformly wet and sticky. If you lift a spoon or dough hook, the dough should cling to it and fall off in globs rather than stretching.
The ideal consistency can vary slightly depending on the recipe and the type of rye flour used, but generally, it's a consistency that is too wet to knead by hand on a floured surface in the traditional sense. Some recipes might involve mixing the dough directly in the baking pan. For an easy 100% rye bread recipe, mastering this initial mixing consistency is key – trust that the wetness is intentional and necessary for the final texture of your homemade rye bread.
Autolyse: Enhancing Rye Flour Hydration
While traditional autolyse (resting flour and water before adding leavening and salt) is primarily used in wheat baking to improve gluten development, a similar brief rest can be beneficial for 100% rye dough to ensure thorough hydration. Rye flour absorbs water more slowly than wheat. Letting the initial mix of flour and water (and sometimes salt) rest for 20-30 minutes allows the pentosans and starches to fully absorb the liquid. This leads to a more consistent dough texture before the leavening agent is added.
This resting period, sometimes called a "fermentolyse" if the starter is included, helps to avoid dry pockets of flour and ensures that the dough's hydration is uniform. For an easy 100% rye bread recipe, a short rest can simplify the subsequent mixing step, making it easier to achieve the correct sticky consistency without overworking the dough. It's a simple technique that can slightly improve the final crumb of your 100% rye bread.
Step 3: Bulk Fermentation of Rye Bread Dough
Bulk fermentation, also known as the first rise, is the period after mixing where the dough develops flavor and starts to expand. For 100% rye dough, this process is different from wheat. Due to the low gluten content, the dough won't double or triple in size as dramatically. Instead, you'll look for more subtle cues: a slight increase in volume (perhaps 30-50%), the appearance of small bubbles on the surface, and a slightly softer texture. Over-fermenting rye dough can lead to a collapsed structure and a very dense, sour loaf, so monitoring is key.
The duration of bulk fermentation depends heavily on the leavening agent and ambient temperature. With a sourdough starter, it might take anywhere from 1 to 4 hours at room temperature (around 70-75°F or 21-24°C). With commercial yeast, it will be much faster, likely 45-90 minutes. An easy 100% rye bread recipe will provide specific time guidelines, but it's important to watch the dough itself for signs of readiness rather than relying solely on the clock. The dough should appear slightly puffy and show some activity.
Understanding Rye Bread's Unique Fermentation Process
Rye fermentation relies more on the activity of enzymes and the production of acids than on gluten development. The acids produced by sourdough bacteria (or added when using yeast) are crucial for controlling enzyme activity that could otherwise degrade the starch structure, leading to a gummy crumb. This is why a sufficiently acidic environment is vital for a successful 100% rye bread. The fermentation process also develops complex flavors in the rye flour.
Unlike wheat dough, which is often punched down after bulk fermentation, rye dough is typically handled very gently, if at all, after the first rise. The weak structure cannot withstand rough handling. Often, the dough is mixed and fermented in the bowl, then gently scraped or poured directly into the proofing basket or baking pan. Understanding this gentle approach is part of mastering an easy 100% rye bread recipe.
Time and Temperature Considerations for Bulk Fermentation
Temperature significantly impacts the speed of bulk fermentation. Warmer temperatures accelerate fermentation, while cooler temperatures slow it down. For 100% rye dough, a moderate room temperature, around 70-75°F (21-24°C), is often ideal. This allows the leavening agent to work efficiently and the flavors to develop without the process happening too quickly, which could lead to over-fermentation.
Typical bulk fermentation times for a sourdough 100% rye bread might be 1.5 to 3 hours, though this can vary. For a yeast-leavened easy 100% rye bread recipe, bulk fermentation might be as short as 45-60 minutes. It's important to look for those subtle signs of readiness – slight expansion, surface bubbles – rather than waiting for a dramatic doubling in size, which won't happen with 100% rye. If your kitchen is cooler, fermentation will take longer; if warmer, it will be faster. Adjust your timing based on the dough's activity, not just the clock.
Step 4: Shaping the 100% Rye Bread Loaf
Shaping 100% rye dough is quite different from shaping wheat dough due to its stickiness and lack of elasticity. You won't be able to perform traditional shaping techniques like creating surface tension by pulling and folding extensively. The goal is minimal handling to preserve the delicate structure that has developed during fermentation. Excessive handling will degas the dough and can make it even stickier and harder to manage.
For this reason, 100% rye bread is often baked in a loaf pan. This provides the necessary support for the dough during proofing and baking, helping it maintain its shape and rise vertically. If baking freeform, a banneton or proofing basket is essential to hold the dough's shape during the final proof. When transferring the dough, use wet hands or a wet spatula/bench scraper to minimize sticking. Gently coax the dough into the desired shape or pan with as little manipulation as possible. This gentle handling is key to a successful easy 100% rye bread recipe.
Gentle Handling Techniques for Rye Dough
Working with sticky 100% rye dough requires different techniques. Instead of dusting your surface with flour (which can dry out the dough and create dry pockets), it's better to use water. Keep a bowl of water handy and wet your hands or tools (spatula, bench scraper) before touching the dough. This prevents the dough from sticking to everything.
When transferring the dough from the mixing bowl to a pan or proofing basket, gently scrape it out rather than trying to lift or stretch it. If using a pan, simply pour or scoop the dough in and level the top with a wet spatula. If using a banneton, gently coax the dough into a rough shape (often a boule or batard) and place it seam-side up in the well-floured basket.
The key principle is minimal contact and minimal force. Think of pouring or scooping rather than kneading or folding. This is vital for any 100% rye bread recipe easy or complex.
Shaping Options: Round or Loaf Pan
The most common and often easiest way to bake 100% rye bread is in a loaf pan. This method provides crucial support for the wet, low-structure dough, ensuring it holds its shape and achieves a good rise. Simply transfer the dough into a well-greased or parchment-lined loaf pan and smooth the top with a wet spatula. This is particularly recommended for beginners working with an easy 100% rye bread recipe. A standard 8.5 x 4.5 inch or 9 x 5 inch loaf pan works well for most recipes using 500g-700g of flour.
While more challenging, it is possible to bake 100% rye bread freeform as a round (boule) or oval (batard) loaf. This requires using a well-floured banneton or proofing basket during the final proof to support the dough. Dark rye flours or rice flour work well for dusting the banneton as they are less likely to be absorbed by the sticky dough.
When ready to bake, the dough is gently inverted from the banneton onto a baking surface (like a baking stone or Dutch oven). Freeform loaves tend to spread more than pan loaves, but they can achieve a beautiful rustic appearance.
Step 5: Proofing the Shaped Rye Bread
Proofing, the final rise before baking, is another stage where 100% rye bread behaves differently. The dough will expand, but typically less dramatically than wheat dough. You're looking for a visible increase in volume, but it won't necessarily double. The dough should look puffy and feel lighter. Over-proofing is a common issue with rye and can lead to a collapsed or very dense loaf because the fragile structure cannot support excessive gas production.
The duration of proofing depends on the leavening agent, temperature, and dough consistency. With sourdough, it might take 45-90 minutes at room temperature. With yeast, it could be as short as 30-60 minutes. Pan loaves will typically proof until the dough reaches the rim of the pan or slightly above. Freeform loaves proofing in bannetons should show a clear increase in volume and feel airy. An easy 100% rye bread recipe will give a proofing time range, but visual cues and the poke test (with modifications for rye) are better indicators.
Ideal Proofing Conditions for 100% Rye Bread
Consistent temperature is helpful for proofing 100% rye bread. A moderate room temperature, around 70-75°F (21-24°C), is generally suitable. Avoiding drafts is important. If your kitchen is cool, placing the dough in a slightly warmer spot (like an oven with the light on) can help, but be careful not to make it too warm, as this can accelerate fermentation too much.
Humidity also plays a role. Covering the dough loosely with plastic wrap or a damp cloth prevents the surface from drying out and forming a crust, which would restrict the rise. If proofing a freeform loaf in a banneton, placing the banneton inside a plastic bag or covering it with a shower cap works well. Maintaining the right proofing conditions helps ensure your 100% rye bread recipe easy yields a loaf with a good rise and texture.
The Poke Test: Determining Readiness for Baking
The poke test, commonly used for wheat dough, needs adjustment for 100% rye bread. For wheat, you poke the dough gently, and if the indentation springs back slowly, it's ready. Rye dough, having less elasticity, won't spring back in the same way.
For 100% rye, a gentle poke should leave a small indentation that partially springs back, but not completely. If the indentation springs back immediately, the dough needs more proofing time. If the indentation remains completely, the dough is likely over-proofed. It's a subtle difference, and visual cues (puffy appearance, slight size increase) are often just as important. Combining the visual assessment with a gentle poke test will help you determine the optimal time to bake your easy 100% rye bread recipe.
Step 6: Baking Your 100% Rye Bread
Baking 100% rye bread requires high initial heat and often steam to achieve a good crust and support oven spring (the final expansion in the oven). Preheat your oven thoroughly. A common baking temperature is around 450°F (230°C) initially, which may be reduced slightly after the first 10-15 minutes. The total baking time will vary depending on the size and shape of the loaf, but a standard 1-2 pound (approx. 500-900g) loaf in a pan might bake for 45-60 minutes. The internal temperature should reach around 205-210°F (96-99°C) when done.
Steam is crucial in the initial phase of baking. It keeps the surface of the dough moist, allowing it to expand fully before a hard crust forms. This promotes better oven spring and contributes to a thinner, crisper crust rather than a thick, tough one. Techniques for creating steam include using a Dutch oven, placing a tray of hot water in the bottom of the oven, or spraying the oven walls with water. For an easy 100% rye bread recipe, a simple steam method is often recommended.
Oven Temperature and Baking Time for Perfect Crust and Crumb
Starting at a high temperature, such as 450°F (230°C), for the first 10-15 minutes helps set the crust and provides a burst of oven spring. After this initial phase, reducing the temperature to around 400-425°F (200-220°C) allows the interior of the bread to bake through without the crust becoming too dark or hard. The total baking time for a typical loaf is often between 50 and 70 minutes.
You can tell your 100% rye bread is done when the crust is deep brown, and the internal temperature, checked with an instant-read thermometer inserted into the center of the loaf, reaches 205-210°F (96-99°C). If baking in a pan, you can also carefully turn the loaf out of the pan after about 40-50 minutes and tap the bottom; it should sound hollow. Baking thoroughly is essential to prevent a gummy interior. Following the time and temperature guidelines in your easy 100% rye bread recipe is a good starting point, but confirming doneness with temperature is the most reliable method.
Using a Dutch Oven for Enhanced Crust
Baking 100% rye bread in a preheated Dutch oven is one of the most effective ways to create a perfect crust and ensure good oven spring, especially for freeform loaves. The sealed environment of the Dutch oven traps the moisture released by the dough as it heats up, creating a self-steaming effect. Preheat the Dutch oven along with your oven to the high initial temperature (e.g., 450°F or 230°C).
Carefully transfer the proofed dough into the hot Dutch oven. If baking a freeform loaf, you can invert it from the banneton onto parchment paper and then lift the parchment paper to lower it into the Dutch oven. Bake with the lid on for the first 20-30 minutes. This traps the steam. Then, remove the lid and continue baking at a slightly lower temperature (e.g., 400-425°F or 200-220°C) for another 20-30 minutes until the crust is browned and the internal temperature is reached. This method is often incorporated into an easy 100% rye bread recipe designed for freeform baking.
Baking Without a Dutch Oven: Tips and Tricks
If you don't have a Dutch oven, you can still achieve good results with 100% rye bread, especially when baking in a pan. The key is to create steam in your oven manually. One common method is to place an empty metal tray or cast iron pan on the lowest rack while the oven preheats. Just before putting the bread in, carefully pour a cup of hot water (boiling water works best) into the hot tray to create a burst of steam. Close the oven door quickly to trap the steam.
Another method is to spray the walls of the oven with water using a clean spray bottle just after placing the bread inside, repeating a couple of times in the first 10 minutes (open and close the door quickly to minimize heat loss). Some bakers also place a few lava rocks or crumpled metal chains in the steam pan as they hold heat and generate steam more effectively.
Bake pan loaves directly on the oven rack or on a baking sheet. While perhaps not as dramatic as a Dutch oven, these methods will still significantly improve the crust of your easy 100% rye bread recipe baked in a standard oven.
Step 7: Cooling and Slicing Your Homemade Rye Bread
Cooling is arguably the most critical step in baking 100% rye bread, and it requires significant patience. Because of its high moisture content and dense crumb structure, rye bread continues to cook and set internally as it cools. Slicing too early will result in a gummy, sticky crumb, even if the bread was perfectly baked. Resist the temptation!
Allow your 100% rye bread to cool completely on a wire rack for several hours, ideally 4-8 hours, or even overnight for very large or dense loaves. The internal temperature needs to drop significantly for the starches to fully set. This long cooling period is essential for developing the final texture and flavor. Skipping this step will ruin an otherwise perfect loaf baked from your easy 100% rye bread recipe.
Allowing the Bread to Cool Completely
Once your 100% rye bread comes out of the oven, immediately transfer it to a wire cooling rack. This allows air to circulate around the entire loaf, preventing the bottom crust from becoming soggy from trapped steam. Do not cover the bread while it cools, as this will also trap moisture.
As mentioned, the cooling time is extensive – think hours, not minutes. A standard loaf might need at least 4-6 hours, while a very large, dense loaf could benefit from cooling for 8-12 hours. This long wait is necessary for the complex starches and pentosans in the rye flour to fully gelatinize and set, transforming the potentially gummy interior into the desired moist, firm crumb. Patience here is truly a virtue and key to enjoying your homemade 100% rye bread.
Slicing Techniques for Dense Rye Bread
Once the 100% rye bread is completely cooled, it's ready to slice. Because of its density, a sharp bread knife, preferably a serrated one, is essential for clean slices. A non-serrated chef's knife can work if it's exceptionally sharp, but serrations grip the crust and saw through the dense interior more easily.
Slice the bread on a stable surface. For even slices, you can use a bread slicing guide box, but a steady hand and a good knife are often sufficient. Start with a gentle sawing motion, letting the knife do the work rather than pressing down, which can compress the crumb. Slice only what you plan to eat immediately to help keep the rest of the loaf fresh. Mastering the cooling process makes slicing much easier and ensures you get to enjoy the proper texture from your easy 100% rye bread recipe.
Troubleshooting Common Issues When Baking 100% Rye Bread
Dense and Gummy Rye Bread: Causes and Solutions
A dense and gummy crumb is perhaps the most common frustration when baking 100% rye bread. This issue often stems from underbaking or insufficient acidification. Rye starches need enough heat and time to fully gelatinize, and they also need an acidic environment to prevent enzymes from breaking down the starch structure. If the internal temperature doesn't reach 205-210°F (96-99°C), or if the bread isn't cooled completely, the starch won't set properly, resulting in a gummy texture.
To solve this, ensure you are baking the bread long enough, checking the internal temperature with a thermometer. Also, make sure your sourdough starter is active and sufficiently acidic, or if using yeast, that you've added an acidic ingredient like vinegar or buttermilk. Over-mixing can also contribute to gumminess by damaging the structure, so mix gently. Finally, and crucially, always allow the bread to cool completely for several hours before slicing. Addressing these factors will significantly improve the crumb of your easy 100% rye bread recipe.
Flat Rye Bread: Understanding Lack of Rise
Flat 100% rye bread, while never reaching the height of a wheat loaf, indicates a problem with leavening or structure support. The primary cause is often an inactive or weak leavening agent, whether it's a sourdough starter that wasn't active enough or yeast that is old or killed by hot water. If the leavening isn't producing enough gas, the dough won't rise adequately during fermentation or baking.
Another factor is insufficient proofing time (too little rise) or, conversely, over-proofing (the dough rises and then collapses). Rye dough's structure is fragile; if over-proofed, it can't hold the gas. Baking without sufficient support, like in a pan or banneton, or baking without enough initial steam can also lead to excessive spread rather than vertical rise. Ensure your starter or yeast is active, monitor proofing carefully, and use a pan or banneton for support, especially when starting with an easy 100% rye bread recipe.
Sour Taste Issues: Balancing Flavor in Rye Bread
While a pleasant tang is characteristic of sourdough rye bread, an overly sour taste can be off-putting. Excessive sourness in sourdough rye is typically due to over-fermentation or using a starter that is too acidic. Longer fermentation times, especially at warmer temperatures, encourage the production of lactic and acetic acids. Feeding your starter more frequently, using a higher ratio of fresh flour and water when feeding (e.g., 1:3:3 or 1:4:4 starter:flour:water), or using the starter sooner after feeding (when it's less acidic) can help reduce sourness.
If using yeast and an acidifier like vinegar, too much acid can make the bread taste overly sharp or chemically sour. Stick to the recommended amount in your easy 100% rye bread recipe, typically 1-2 tablespoons per loaf. Adjusting fermentation time and temperature is the primary way to control sourness in sourdough rye. Shorter, slightly cooler fermentations tend to produce a milder flavor.
Crust Problems: Achieving the Ideal Rye Bread Crust
Common crust problems with 100% rye bread include a crust that is too thick, too hard, or doesn't brown well. These issues are often related to steam and baking conditions. Insufficient steam during the initial phase of baking prevents the surface from staying pliable, leading to a hard, thick crust that restricts oven spring. Not baking long enough can result in a pale, underdeveloped crust.
To achieve an ideal rye crust – dark, flavorful, and reasonably crisp – ensure you are using an effective steaming method (Dutch oven, steam pan, etc.) for the first part of the bake. Bake at a high enough initial temperature to promote browning.
If your crust is getting too dark before the interior is done, you can tent the loaf loosely with foil for the final portion of the baking time. Conversely, if it's too pale, remove it from the pan (if using one) for the last 10-15 minutes of baking to allow the sides and bottom to brown. Consistent heat and adequate steam are key to a great rye crust.
Tips for Perfecting Your 100% Rye Bread Recipe
Using a Banneton for Enhanced Shape and Structure
Using a banneton (proofing basket) is highly recommended when baking freeform 100% rye bread. Because rye dough is so wet and lacks strong gluten structure, it needs support during the final proofing phase. A banneton, typically made of cane or wood pulp, provides this support, helping the dough hold a round or oval shape and preventing it from spreading outwards prematurely.
To use a banneton for 100% rye, it's crucial to flour it generously. Dark rye flour, rice flour, or a blend works best, as these flours are less likely to be absorbed by the sticky dough than wheat flour. Place the shaped dough seam-side up in the well-floured banneton. The banneton's coil pattern can also impart a decorative design on the crust. Using a banneton is a simple step that significantly improves the shape and structure of a freeform loaf from your 100% rye bread recipe easy.
Scoring Techniques for Rye Bread
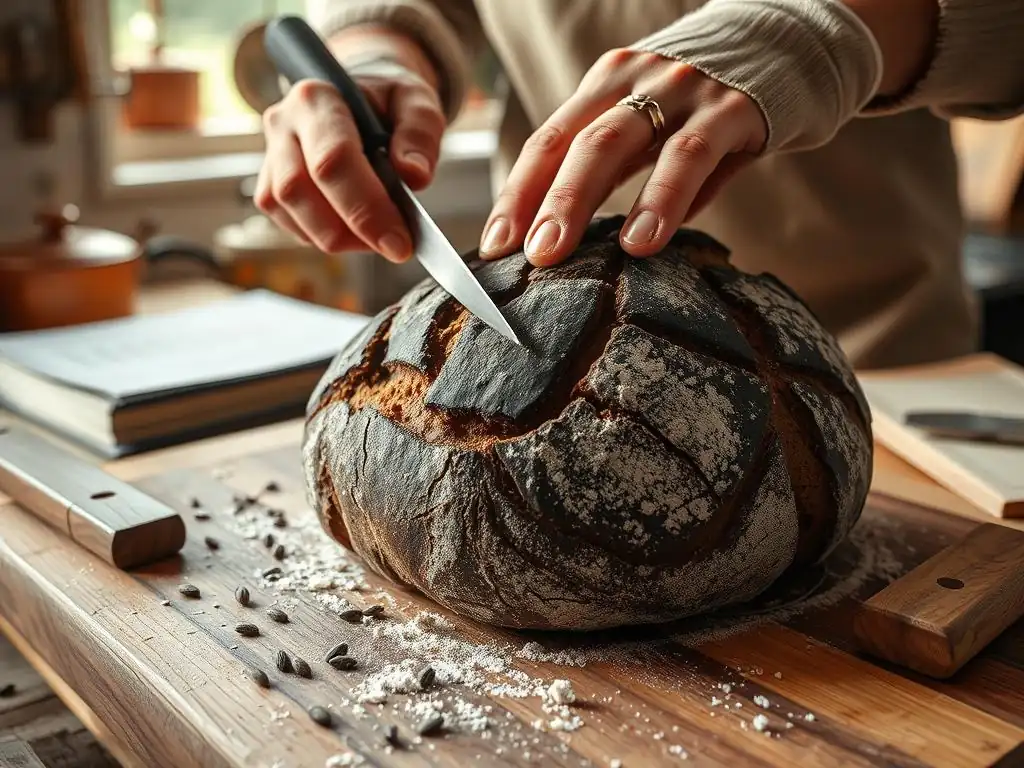
Scoring, cutting slashes into the surface of the dough just before baking, serves multiple purposes in bread making. It acts as a controlled vent, allowing the dough to expand predictably during oven spring and preventing blowouts. It also contributes to the aesthetic appeal of the finished loaf. For 100% rye bread, scoring is less about facilitating dramatic expansion (as rye doesn't spring like wheat) and more about providing a clean release for trapped gases and adding visual appeal.
Because rye dough is sticky and less elastic, scoring can be tricky. Use a very sharp blade (a razor blade or lame is ideal) and make quick, decisive cuts. You don't need deep slashes. A single slash down the center, a few parallel slashes, or simple geometric patterns work well. If baking in a pan, scoring is often unnecessary as the dough expands upwards within the confines of the pan. For freeform loaves from your easy 100% rye bread recipe, a simple score or two is sufficient.
Experimenting with Different Rye Flour Varieties
Once you are comfortable with a basic easy 100% rye bread recipe, experimenting with different types of rye flour can open up a world of new flavors and textures. Try baking a loaf with light rye flour for a milder taste and slightly less dense crumb. Compare it to a loaf made with dark rye or Pumpernickel flour, which will be much darker, denser, and have a more intense, earthy flavor.
You can also try blending different rye flour types, although for a true 100% rye bread, the flour content should only be rye. Some traditional recipes might use a mix of fine and coarse rye meals. Each type will require slight adjustments to hydration and potentially fermentation times. Keeping a baking journal to note your results with different flours will help you discover your favorite type for baking delicious homemade rye bread.
Storing Your Homemade 100% Rye Bread for Freshness
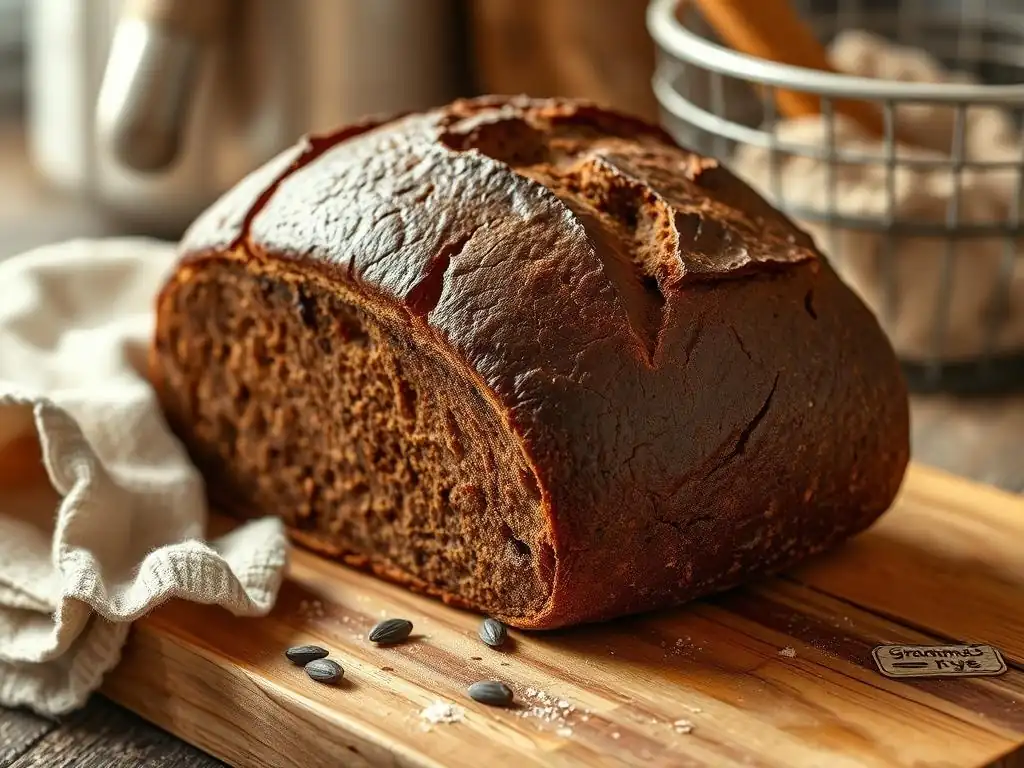
Proper storage is essential to keep your homemade 100% rye bread fresh and prevent it from drying out or becoming moldy. Due to its density and high moisture content, 100% rye bread generally stays fresh longer than wheat bread. Once completely cooled, store the loaf at room temperature.
Wrap the cooled bread tightly in a clean linen towel, a paper bag placed inside a plastic bag, or specifically designed bread storage bags. Avoid refrigerating rye bread, as this can actually accelerate staling. Stored properly at room temperature, a 100% rye loaf can remain fresh and delicious for 4-7 days, or even longer for very dense, dark loaves.
Proper Storage Methods to Maintain Quality
To maintain the quality of your 100% rye bread, ensure it is fully cooled before storing. Wrapping a warm loaf will trap steam and make the crust soggy, potentially leading to mold. Once cool, a breathable wrap like a linen towel or paper bag is good for the crust, but placing this inside a plastic bag or airtight container will help retain moisture in the crumb and extend freshness.
For longer storage at room temperature, wrapping tightly in plastic wrap or placing in a sealed plastic bag or bread box works well. Some traditional methods involve simply storing the loaf cut-side down on a cutting board. The key is to balance allowing the crust to breathe slightly while preventing the interior from drying out. Experiment to see which method works best in your climate and for the specific loaf from your easy 100% rye bread recipe.
Freezing Rye Bread for Later Enjoyment
100% rye bread freezes exceptionally well, allowing you to bake a loaf and enjoy it over a longer period. Ensure the bread is completely cool. You can freeze the whole loaf, half a loaf, or slice it first before freezing. Freezing slices is convenient as you can just take out what you need.
Wrap the bread tightly in plastic wrap, then place it in a freezer bag or wrap it again in aluminum foil to prevent freezer burn. Properly wrapped, 100% rye bread can be stored in the freezer for up to 3-6 months. To thaw, simply remove from the freezer and let it sit at room temperature, either on the counter (if a whole loaf) or on a wire rack (if sliced) for a few hours.
Slices can often be toasted directly from frozen. Freezing is a great way to manage your baking schedule and always have delicious homemade rye bread on hand.
Enjoying Your 100% Rye Bread: Serving Suggestions
Once you've successfully baked, cooled, and sliced your 100% rye bread from an easy 100% rye bread recipe, it's time to enjoy the fruits of your labor! 100% rye bread's dense texture and strong flavor make it an excellent base for a variety of toppings and pairings. Its heartiness stands up well to rich flavors.
Consider classic pairings like smoked salmon, gravlax, pickled herring, or other preserved fish. It's also wonderful with strong cheeses, cold cuts, pâté, or liverwurst. Don't forget simple pleasures like butter, cream cheese, or a drizzle of honey. The possibilities are vast, catering to both savory and slightly sweet preferences.
Pairing Ideas: What to Eat with Rye Bread
Rye bread is a staple in Scandinavian and Eastern European cuisines, and many traditional pairings highlight its best qualities. For example, in Denmark, open-faced sandwiches called smørrebrød are built on slices of dense rye bread, topped with everything from cold cuts and cheese to fish and vegetables.
Other delicious pairings include:
- Avocado or avocado smash
- Hard-boiled eggs
- Sour cream and chives
- Smoked or cured meats like pastrami or salami
- Pickled vegetables (pickles, sauerkraut)
- Cream cheese and smoked salmon
- Nut butter and honey (for a simpler, slightly sweet option)
The robust flavor of 100% rye bread means it pairs well with equally robust toppings. Don't be afraid to experiment with your favorite flavors to find your perfect combination.
Creative Uses for Leftover Rye Bread
If you find yourself with leftover 100% rye bread (though it's so good, this might be rare! ), there are several creative ways to use it. Its dense texture makes it less ideal for soft sandwiches after a day or two, but perfect for other applications.
Consider turning stale rye bread into croutons for soups or salads. Cut it into cubes, toss with oil and seasonings, and bake until crisp. It also makes excellent breadcrumbs, which can be used in meatloaf, meatballs, or as a topping for casseroles. A traditional use is in Panzanella-style salads, where cubes of stale bread soak up vinaigrette and vegetable juices. Finally, some traditional recipes use stale rye bread to make fermented drinks or soups, highlighting its versatility beyond just slicing and serving. Your easy 100% rye bread recipe can provide delicious enjoyment in many forms!
Frequently Asked Questions
What makes baking 100% rye bread different from baking wheat bread?
100% rye bread relies on rye flour's unique starches and lower gluten content. This results in a denser, less elastic dough compared to wheat-based breads. Careful hydration and proofing are crucial.
What are some common problems bakers encounter when making 100% rye bread?
Common issues include a dense, gummy texture, a bread that doesn't rise properly, or a sour flavor that is too intense. These can be caused by incorrect hydration, proofing times, or starter activity.
Is a rye starter necessary for a 100% rye bread recipe?
While not strictly necessary, a rye starter significantly enhances the flavor and texture. It contributes to the characteristic tangy taste and helps to break down the rye flour for better digestibility.
What are some tips for achieving a good rise in a 100% rye bread?
Ensure your starter is active and bubbly. Proper hydration of the dough is also crucial, as is sufficient proofing time at the correct temperature.
Can I add any other ingredients to a 100% rye bread recipe?
Yes! Many bakers add ingredients like caraway seeds, sunflower seeds, or even molasses to enhance the flavor and texture of their 100% rye bread. Experiment and find your favorite additions!
Final Reflection: The Enduring Allure of 100% Rye
Mastering the art of 100% rye bread baking isn't just about following a recipe; it's about connecting with a centuries-old tradition and unlocking a world of flavor and texture. This guide aimed to demystify the process, proving that creating this complex bread can be surprisingly accessible, even for novice bakers. The seemingly daunting task of working with a high-hydration dough, full of character and nuance, can be conquered with patience and the right techniques.
The journey of baking 100% rye bread is a journey of discovery. It's a testament to the enduring power of simple ingredients transformed by time and skill. The deep, complex flavors and satisfying chewiness of the finished loaf are a reward in themselves, but the process also offers a meditative escape from the everyday. It's a connection to a simpler time, a reminder of the artistry involved in food production. Bread is the staff of life,
a simple phrase, yet it speaks volumes about the fundamental importance of this staple food and the satisfaction derived from creating it from scratch.
Now, it's your turn. Don't be intimidated by the challenge. Gather your ingredients, embrace the process, and experience the profound satisfaction of baking your own 100% rye bread. The journey might be slightly challenging, but the reward – a crusty, flavorful loaf baked with your own two hands – is immeasurable. Take the leap, and discover the magic within.
Unleash Your Inner Rye Baker!
Thanks for taking the time to explore the world of 100% rye bread with us! We hope you've gained the confidence to tackle this wonderfully complex loaf. Ready to put your new skills to the test?
- Bake your own 100% rye masterpiece! Use the recipe and tips from the article as your guide, and don't be afraid to experiment with different flours and additions.
- Share your baking journey! Post a picture of your loaf on social media and tag us – we'd love to see your creations!
- Explore other rustic bread recipes on BakeWithEase. You might be surprised by what you discover!
What unique ingredient will you add to your next 100% rye loaf to elevate its flavor profile?