
The Secret to Perfect Focaccia Dimples, Revealed

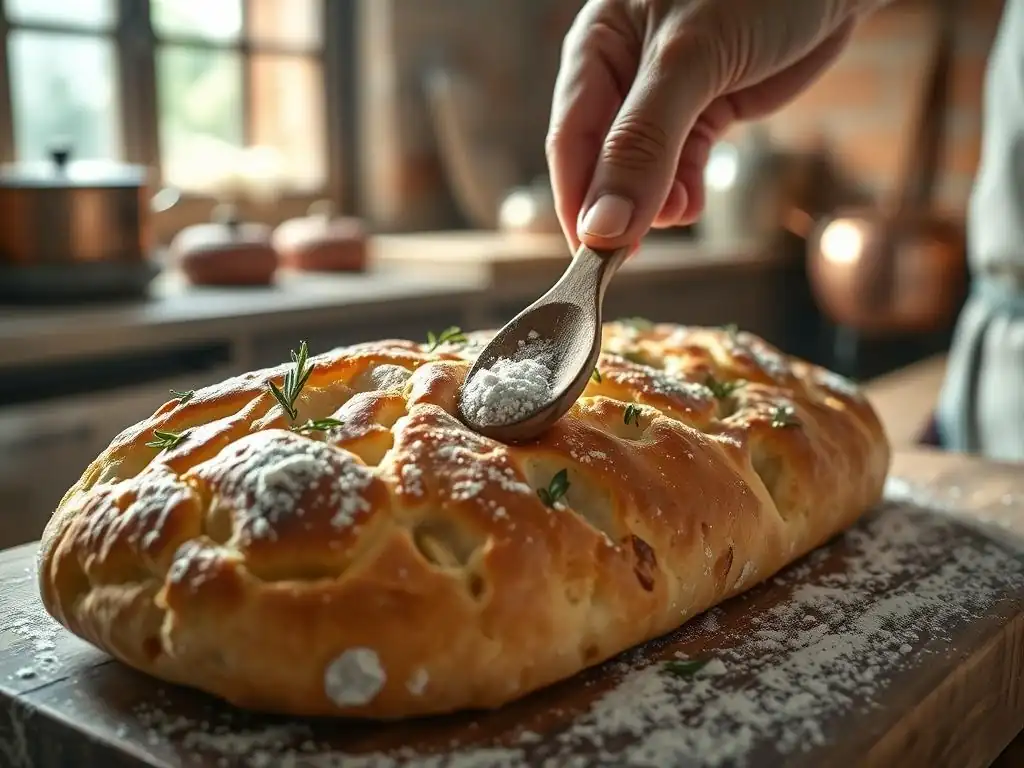
Welcome to BakeWithEase, where baking becomes a joy, not a chore! Ever wondered how professional bakers achieve those irresistible, perfectly dimpled focaccia? Unlocking the secrets is easier than you think. Dive into our latest article to discover the perfect focaccia dimple technique and elevate your bread baking game. Get ready to create focaccia that's not only delicious but visually stunning – let's bake!
- Mastering Focaccia: Achieving Perfect Dimples
- Introduction: The Art and Science of Focaccia
- Dough Hydration and Its Influence on Dimple Formation
- Essential Tools and Ingredients for Optimal Dimple Creation
- Step-by-Step Guide to Achieving Perfect Focaccia Dimples
- Baking for Success: Temperature and Timing
- Troubleshooting Common Dimple Challenges
- Beyond the Basics: Exploring Focaccia Variations
- Serving and Storing Your Focaccia
- Conclusion: Enjoying Your Homemade Focaccia
-
Frequently Asked Questions
- How crucial is the type of flour for achieving perfect focaccia dimples?
- What's the best way to ensure the dimples stay visible after baking?
- Can I use any type of oil for the focaccia dimples?
- How deep should I press when creating the focaccia dimples?
- What if my focaccia dough is too sticky to dimple easily?
- Final Reflection: The Enduring Allure of the Perfect Focaccia Dimple
- Unleash Your Inner Focaccia Artist!
Mastering Focaccia: Achieving Perfect Dimples
Introduction: The Art and Science of Focaccia
Why Dimples Matter: Texture, Flavor, and Visual Appeal
The signature look of focaccia is undeniably its inviting, dimpled surface. These seemingly simple indentations play a crucial role far beyond aesthetics. They create essential pockets that capture and hold generous amounts of olive oil, flaky sea salt, and any herbs or toppings added before baking. As the focaccia bakes, the oil in these depressions infuses the dough, contributing to a rich flavor profile and creating delightful little pools of concentrated deliciousness that are a hallmark of great focaccia.
Furthermore, the dimples contribute significantly to the focaccia's unique texture. The areas between the dimples rise and become airy and slightly chewy, while the dimpled spots are denser, often crisping up beautifully thanks to the pooled olive oil. This contrast between the soft, airy crumb and the slightly crisp, flavorful dimples is what makes each bite of focaccia so satisfying. Mastering the perfect focaccia dimple technique is key to achieving this delightful textural interplay.
BakeWithEase's Guide to Perfect Focaccia Dimples
Achieving those deep, lasting dimples that define perfect focaccia might seem challenging at first glance, but it's a technique that is entirely learnable with the right guidance. At BakeWithEase, we believe that understanding the 'why' behind each step is just as important as the 'how'. This guide is designed to walk you through the process, explaining the science behind dough hydration, the role of ingredients, and the precise technique needed to create those beautiful indentations that will make your homemade focaccia stand out.
We'll cover everything from preparing the ideal dough consistency to the actual fingerwork involved in dimpling and the crucial steps that follow. By following these detailed instructions and tips from BakeWithEase, you'll gain the confidence to consistently produce focaccia with the perfect texture, flavor, and visual appeal that comes from mastering the perfect focaccia dimple technique. Get ready to impress yourself and your guests with your next bake!
Dough Hydration and Its Influence on Dimple Formation
The Importance of High Hydration for Deep, Distinct Dimples
One of the most critical factors in achieving deep, lasting focaccia dimples is dough hydration. Focaccia dough is traditionally a high-hydration dough, meaning it has a high ratio of water to flour. Typical focaccia hydration levels range from 70% to 85%, or even higher for experienced bakers. This high water content results in a very wet, slack, and often sticky dough compared to typical bread doughs. This slackness is fundamental because it allows your fingers to press down easily and deeply into the dough without it offering excessive resistance or springing back immediately.
A lower hydration dough, while easier to handle, would be too stiff. When you try to dimple it, it would resist the pressure, making it difficult to create deep indentations, and the dough would likely spring back significantly, causing the dimples to disappear during proofing or baking. The high hydration ensures the dough is pliable enough to accept and hold those deep indentations, which is a core principle of the perfect focaccia dimple technique.
How Dough Consistency Impacts Focaccia Texture
The extremely wet consistency of high-hydration focaccia dough directly impacts its final texture. After proper fermentation, this slack dough develops an incredibly open and airy internal structure, full of large bubbles. When you dimple the dough, you are essentially pressing down on this airy matrix, pushing the trapped gases to the surface and creating deep wells. This action helps distribute the air pockets, contributing to the characteristic open crumb of focaccia.
This specific dough consistency, achieved through high hydration and adequate gluten development (despite the wetness), results in a focaccia that is wonderfully light and airy on the inside. The areas that are dimpled and filled with oil become slightly denser and often crispier on the surface, while the areas between the dimples remain soft and chewy. This textural contrast, enabled by the dough's initial consistency and the subsequent dimpling, is key to the delightful eating experience of focaccia.
Essential Tools and Ingredients for Optimal Dimple Creation
Choosing the Right Baking Pan for Even Baking
The baking pan you choose plays a role in the success of your focaccia, particularly in achieving a crisp bottom crust that complements the soft, dimpled top. Dark metal pans are often preferred because they absorb and conduct heat efficiently, helping to brown the base effectively. Common sizes like a 9x13 inch rectangular pan or a 10-12 inch round pan work well, providing enough surface area for dimpling while allowing the dough to achieve a good thickness, typically around 1 to 1.5 inches before the dimpling process begins.
Regardless of the material, the pan must be generously oiled. This isn't just to prevent sticking; the oil becomes part of the crust, contributing flavor and helping to create that sought-after crisp bottom. Using a substantial amount of olive oil – often 1/4 cup or more for a standard pan – is crucial. This layer of oil in the pan also helps the dough relax and spread, preparing it for the dimpling step and contributing to the overall perfect focaccia dimple technique.
High-Quality Olive Oil: Flavor and Dimple Definition
Olive oil is perhaps the single most important ingredient in focaccia after flour and water, and its quality matters significantly. Using a good quality extra virgin olive oil provides the best flavor. The fruity, sometimes peppery notes of a good olive oil are integral to the traditional taste of focaccia. This oil is used generously both in the dough, for oiling the pan, and most notably, drizzled over the top before baking.
The olive oil drizzled over the dimpled surface serves multiple purposes. It fills the depressions, making the dimples more defined and visually appealing as the focaccia bakes. It helps prevent the top crust from drying out and allows herbs or other toppings nestled in the dimples to bake without burning. As the focaccia bakes at high heat, the oil in the dimples essentially fries the surface slightly, enhancing both flavor and texture. This liberal application of oil is a non-negotiable part of achieving the perfect focaccia dimple technique.
Flour Selection: Best Flour for Focaccia Structure
The type of flour you use influences the dough's ability to develop gluten and support the high hydration necessary for focaccia. Bread flour, with its higher protein content (typically 12-14%), is often recommended. The higher protein means more gluten can be developed, which provides the dough with the strength and elasticity needed to handle the high water content and hold the structure created by the dimples through proofing and baking.
While all-purpose flour (usually 10-12% protein) can be used, it might result in a slightly less open crumb structure and the dough might be more prone to collapsing or losing its dimple definition if not handled carefully. The strong gluten network developed from bread flour allows the dough to be stretched and dimpled without tearing and provides the scaffolding that helps the dimples remain distinct as the dough expands in the oven. Choosing the right flour is a foundational step in mastering the perfect focaccia dimple technique.
Step-by-Step Guide to Achieving Perfect Focaccia Dimples
Step 1: Preparing the Dough
Begin by preparing your focaccia dough according to your preferred high-hydration recipe. Ensure the dough has gone through its bulk fermentation, developing plenty of air bubbles and increasing significantly in volume. At this stage, the dough should be very bubbly, soft, and relaxed, having completed its initial rise. This fermentation is crucial for developing flavor and the airy structure needed for successful dimpling.
Once the bulk fermentation is complete, generously oil your chosen baking pan. Gently transfer the dough into the prepared pan. The dough will be very soft and may not immediately fill the pan. Allow it to rest for 10-15 minutes, then gently stretch it towards the edges. Repeat this rest-and-stretch process a couple of times over 30-45 minutes until the dough has relaxed enough to mostly fill the pan. Ensure the top surface is coated in oil from the pan as you spread it.
Step 2: Mastering the Dimpling Technique
Proper Finger Technique: Placement and Pressure
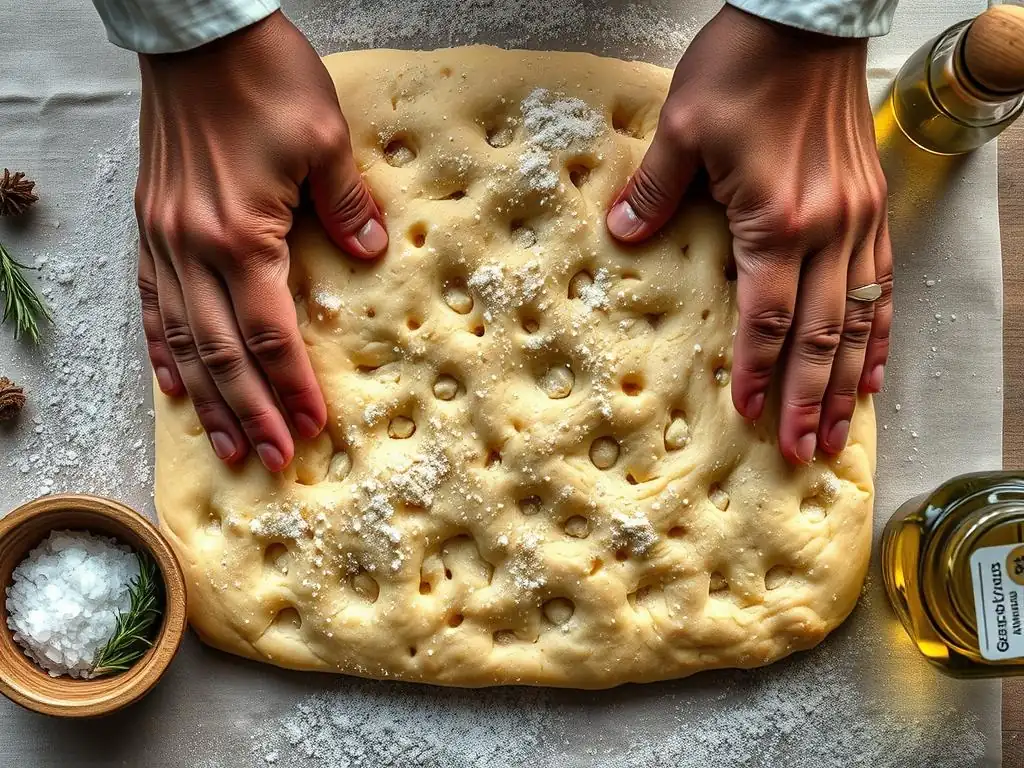
The dimpling itself is a tactile process. Dip your fingertips (index, middle, and even ring fingers together on each hand work well) into a small bowl of olive oil or water to prevent sticking. Now, press your fingers straight down into the dough, going deep – aim to press almost all the way to the bottom of the pan. This is not a gentle poke; you need to apply firm, even pressure.
The goal is to push out the air from where your fingers press, creating lasting indentations, while leaving the surrounding areas to rise. Avoid tearing or dragging the dough. Lift your fingers straight up after pressing. The depth of the dimples is key to the perfect focaccia dimple technique; aim for indentations that are roughly the size of your fingertip pads and about 1/2 inch to 1 inch deep.
Creating Uniform Dimples: Spacing and Symmetry
As you dimple, aim for a relatively consistent pattern across the entire surface of the dough. The dimples should be spaced close enough to cover the surface, typically every 1.5 to 2 inches, but not so close that the dough between them is completely flattened. Think of creating a grid or offset pattern, ensuring you cover the center, edges, and corners.
Consistency in spacing and depth ensures that the focaccia bakes evenly and that you get that characteristic textural contrast in every bite. While perfect symmetry isn't necessary, a uniform approach helps achieve the best results for the perfect focaccia dimple technique, creating a visually appealing loaf with evenly distributed oil pockets and toppings.
Step 3: The Second Proof: Allowing Dimples to Set
After you have finished dimpling the entire surface of the dough, it needs a second proofing period. This is a crucial step often overlooked, but it allows the dough to relax again and rise around the newly formed dimples. During this proof, the gluten structure stabilizes after being manipulated, and the dough expands, further defining the dimples as the areas between them puff up.
Cover the pan loosely with plastic wrap or a clean kitchen towel and let the dough proof at room temperature for 30 to 60 minutes. The exact time will depend on the warmth of your kitchen. You'll know it's ready when the dough looks noticeably puffier, and the dimples are still distinct but have softened slightly as the surrounding dough has risen. Do not over-proof, as this can cause the dough structure to weaken.
Step 4: The Olive Oil Drizzle: Enhancing Flavor and Preventing Burning
Just before placing the focaccia in the oven, give it a final, generous drizzle of high-quality olive oil over the entire surface. Use a substantial amount – don't be shy! The oil will naturally pool in the dimples you've created.
This final layer of oil is essential for several reasons. It adds significant flavor to the finished crust, contributes to its crispness, and creates those delicious, slightly fried pockets in the dimples. If you are adding toppings like herbs or salt, the oil helps them adhere to the dough and prevents delicate items like rosemary from burning in the hot oven. This final drizzle is the crowning touch that enhances both the flavor and the visual appeal achieved by the perfect focaccia dimple technique.
Baking for Success: Temperature and Timing
Achieving a Golden Crust and Fully Cooked Interior
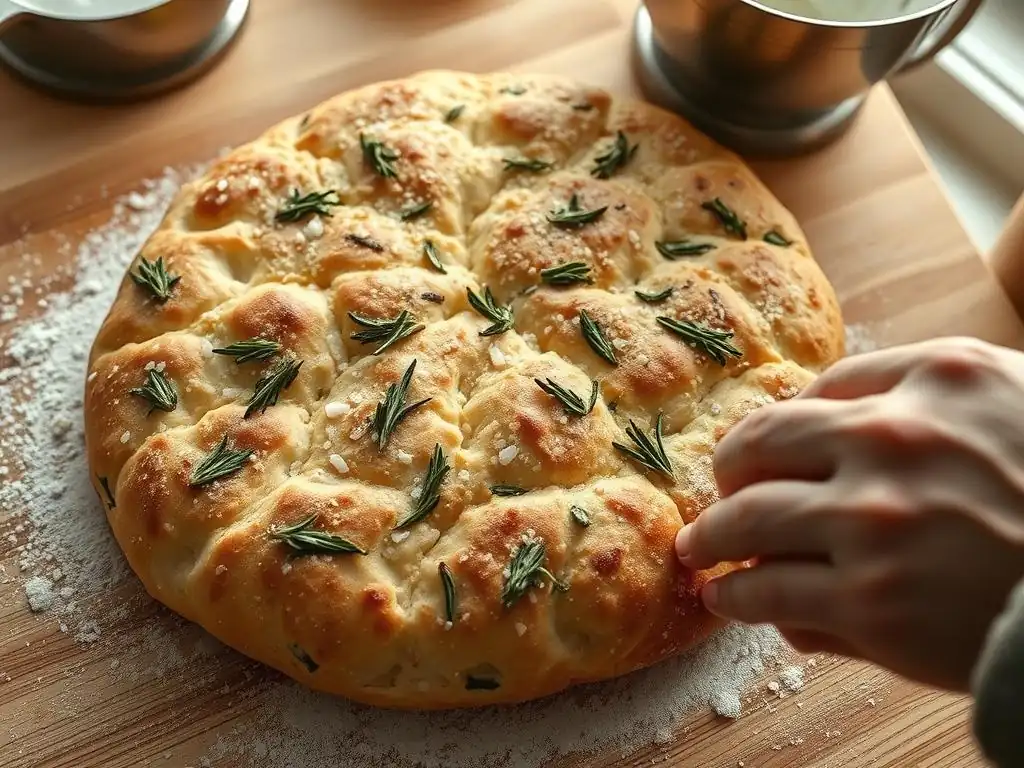
Focaccia is best baked at a relatively high temperature to achieve a beautiful golden crust and ensure the interior cooks through properly. Preheat your oven to a temperature between 400°F and 450°F (200°C to 230°C). The high heat helps the dough rise quickly and sets the crust, contributing to that desirable chewy-crisp texture.
Baking time will vary depending on your oven and the thickness of your focaccia, but it typically ranges from 20 to 30 minutes. You'll know your focaccia is done when the top is deeply golden brown, especially around the edges and between the dimples. The bottom crust should also be golden and feel firm. If you use a thermometer, the internal temperature should register around 200-210°F (93-99°C).
Preventing a Soggy Bottom: Tips for Crispness
A common frustration is a focaccia with a soggy bottom. Several factors contribute to preventing this. First, ensure your pan was generously oiled before adding the dough; this oil helps the bottom crust crisp up as it bakes. Using a dark metal pan can also help as it conducts heat more efficiently to the base.
Baking the focaccia on the bottom rack of your oven can help ensure the base receives sufficient heat. Finally, and perhaps most importantly, once the focaccia is baked, remove it from the hot pan relatively soon after taking it out of the oven and place it on a wire rack to cool for at least 10-15 minutes. This allows steam to escape from the bottom, preventing condensation that can lead to sogginess.
Troubleshooting Common Dimple Challenges
Dimples Disappearing During Baking: Causes and Solutions
One of the most frustrating issues when aiming for the perfect focaccia dimple technique is watching your carefully created dimples vanish in the oven. This usually happens for a few key reasons: the dimples weren't pressed deep enough initially, the dough was under-proofed (too much spring) or over-proofed (structure too weak) after dimpling, or the dough hydration was too low to begin with, making it resistant to holding the shape.
To solve this, ensure you are pressing your fingers deeply into the dough, almost to the bottom of the pan. Make sure your dough has completed its bulk fermentation and is relaxed before the initial pan stretch. After dimpling, allow for adequate, but not excessive, second proofing time (typically 30-60 minutes) where the dough visibly puffs up but the dimples are still present. If your dough consistently springs back too much, consider slightly increasing the hydration in your recipe in future attempts.
Uneven Dimples: Achieving Consistent Results
Sometimes, focaccia comes out with some deep, well-defined dimples next to others that are barely there. This is usually a result of inconsistent pressure or spacing during the dimpling process. You might be pressing much harder in some areas than others, or the spacing between your finger presses varies significantly across the surface.
To achieve more uniform results, take your time during the dimpling step. Dip your fingers in oil or water frequently to ensure smooth pressing without sticking. Try to apply consistent, firm pressure with each press. Mentally divide the focaccia surface and aim for roughly equal spacing between your dimples, perhaps every 1.5 to 2 inches, covering the entire area evenly. Practice makes perfect with this specific part of the perfect focaccia dimple technique.
Dough Sticking: Prevention and Solutions
High-hydration dough is inherently sticky, and it's common for dough to stick to your fingers during dimpling. This can make it difficult to create clean indentations and can sometimes tear the dough surface.
The primary solution is simple: keep your fingers well-oiled or wet. Have a small bowl of olive oil or water right next to your pan as you dimple. Dip your fingertips into the oil or water frequently – every few presses – to ensure they are thoroughly coated. This creates a barrier that prevents the sticky dough from adhering. If dough does stick, gently ease your fingers away and re-oil them before continuing the dimpling process in that area.
Beyond the Basics: Exploring Focaccia Variations
Enhancing Dimples with Herbs and Spices [Examples: Rosemary, Thyme, Garlic]
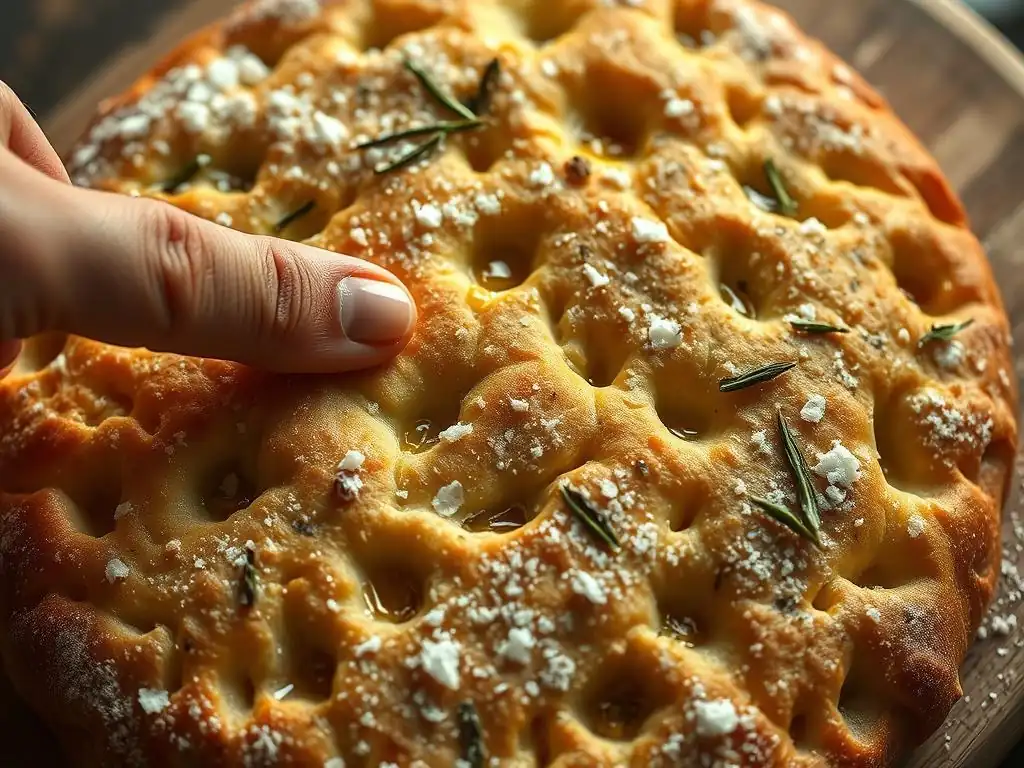
Once you've mastered the perfect focaccia dimple technique, you can enhance both the flavor and appearance by adding toppings directly into the dimples. Fresh herbs like sprigs of rosemary, thyme leaves, or thinly sliced garlic are classic choices. These ingredients are often nestled into the dimples after the final proof and just before the final olive oil drizzle.
Placing herbs and spices within the dimples ensures they are partially submerged in the pooling olive oil, which helps them infuse their flavor into the oil and the surrounding dough as they bake. It also helps prevent delicate herbs from burning on the surface during the high-temperature bake. A generous sprinkle of flaky sea salt over the entire oiled surface is also traditional; the salt crystals catch beautifully in the dimples, providing bursts of flavor and visual appeal.
Creating Unique Dimple Patterns
While a relatively uniform grid of dimples is standard when aiming for the perfect focaccia dimple technique, there's room for creativity. Instead of a simple grid, you could experiment with different finger combinations or even use tools like the rounded end of a wooden spoon handle to create larger or differently shaped indentations.
Consider creating abstract patterns or even attempting simple designs by varying the spacing and depth of your presses. The key principle remains the same: you are creating depressions that will capture oil and toppings. However, the arrangement can be personalized, allowing you to put your own artistic touch on this rustic bread.
Incorporating Fillings into Dimples [Examples: Sun-Dried Tomatoes, Peppers, Artichokes]
Beyond herbs and spices, the dimples are perfect for holding more substantial toppings that can add significant flavor and texture. Halved cherry tomatoes pressed cut-side up into the dimples are a popular addition, as are strips of roasted red pepper, Kalamata olives, or small pieces of marinated artichoke hearts.
These ingredients should be gently pressed into the dimples after they are formed and before the final olive oil drizzle. Ensure they are nestled securely in the depressions so they don't shift or roll off during baking. Incorporating these fillings not only enhances the taste but also makes your focaccia visually stunning, transforming it into a complete dish in itself, built upon the foundation of the perfect focaccia dimple technique.
Serving and Storing Your Focaccia
Pairing Suggestions: Complementary Dishes and Flavors
Freshly baked focaccia, especially when made using the perfect focaccia dimple technique, is incredibly versatile. It's delicious served warm on its own, perhaps with an extra dish of high-quality olive oil for dipping, maybe even mixed with a little balsamic vinegar. Its robust flavor and satisfying texture make it an excellent accompaniment to a variety of meals.
Pair it with hearty soups, such as a classic tomato soup or a rustic lentil stew. It's also wonderful served alongside salads, used as the base for gourmet sandwiches, or enjoyed as part of an antipasto platter with cheeses, cured meats, and marinated vegetables. Its rich, oily crumb stands up well to strong flavors.
Maintaining Freshness: Proper Storage Techniques
Focaccia is undoubtedly at its absolute best when enjoyed the day it is baked, while the crust is crisp and the interior is soft and aromatic. However, if you have leftovers, proper storage will help maintain its quality for a short period. Always allow the focaccia to cool completely on a wire rack before storing. Placing it on a rack prevents steam from being trapped underneath, which can make the bottom soggy.
For storage at room temperature, wrap the cooled focaccia tightly in plastic wrap or aluminum foil. It will keep reasonably well for up to 2 days, though the crust will soften. For longer storage, focaccia freezes very well. Slice it into portions, wrap each piece tightly in plastic wrap, and then place the wrapped pieces in a freezer bag or wrap again in foil. Frozen focaccia can be stored for up to a month. Reheat frozen or refrigerated focaccia gently in a warm oven (around 350°F/175°C) for a few minutes to help restore its texture.
Conclusion: Enjoying Your Homemade Focaccia
Key Takeaways for Focaccia Success
Mastering the perfect focaccia dimple technique is a rewarding process that unlocks the secret to this beloved bread's unique charm. Remember the key elements: start with a high-hydration dough that is well-fermented and relaxed. Be generous with the olive oil, both in the pan and on top. When dimpling, press deeply and evenly across the surface using oiled or wet fingertips. Allow for a sufficient second proof after dimpling to let the structure set. Finally, bake at a high temperature until golden brown, and cool on a wire rack to ensure a crisp bottom.
While it may take a couple of tries to get just right, paying attention to these details will significantly improve your results. Each bake is an opportunity to refine your perfect focaccia dimple technique and understand how the dough responds. The effort is well worth it for the incredible texture, flavor, and visual appeal of homemade focaccia.
Explore More Recipes and Baking Tips from BakeWithEase
Now that you've unlocked the secret to perfect focaccia dimples, your baking journey is just beginning! BakeWithEase offers a wealth of resources to help you explore the wonderful world of baking further. From mastering other bread types like sourdough and baguettes to delving into the delicate art of pastries, cakes, and cookies, there are endless techniques and recipes waiting for you.
Continue to practice the skills you've learned and don't hesitate to try new challenges. Baking is a fulfilling craft that brings joy to both the baker and those who get to share in the delicious results. Visit BakeWithEase for more step-by-step guides, helpful tips, and inspiring recipes to keep your oven warm and your kitchen filled with the aroma of freshly baked goods.
Frequently Asked Questions
How crucial is the type of flour for achieving perfect focaccia dimples?
The type of flour is very important. Using a high-protein flour like bread flour is crucial for gluten development, which provides the structure needed for those beautiful dimples to hold their shape during baking.
What's the best way to ensure the dimples stay visible after baking?
Generously oiling the pan and the dough before dimpling is key. This prevents the dimples from collapsing and encourages even browning within each dimple.
Can I use any type of oil for the focaccia dimples?
While you can use various oils, extra virgin olive oil is highly recommended. It contributes to the flavour and helps create a crispy, golden crust in the dimples.
How deep should I press when creating the focaccia dimples?
Press deeply, but not too deeply. Aim to press down to almost the bottom of the pan, creating defined indentations without tearing the dough. This ensures the dimples are prominent and hold toppings well.
What if my focaccia dough is too sticky to dimple easily?
If the dough is too sticky, lightly oil your fingertips before dimpling. Also, ensure the dough has been properly proofed to develop sufficient strength to maintain the dimple shape.
Final Reflection: The Enduring Allure of the Perfect Focaccia Dimple
The quest for the perfect focaccia dimple is more than just a culinary pursuit; it's a reflection of our desire for mastery and the beauty found in the seemingly simple. The techniques outlined in this article—from the precise finger pressure to the ideal hydration levels—aren't just steps in a recipe; they're a pathway to understanding the fundamental principles of bread baking and the artistry involved in creating a truly exceptional loaf.
This pursuit resonates deeply today, in a world that often prioritizes efficiency over craftsmanship, reminding us of the satisfaction derived from mastering a skill and the joy of creating something beautiful with our own hands.
The impact of focaccia, and its iconic dimples, extends far beyond the kitchen table. It's a symbol of rustic charm, a testament to the power of simple ingredients transformed through careful technique, and a visual feast that delights the eye before it even reaches the palate. The act of creating these dimples, the feeling of the dough yielding beneath your fingertips, connects us to a long tradition of bread making, a legacy passed down through generations. Bread is the staff of life,
they say, and in the meticulous creation of focaccia, we find a deeper appreciation for this fundamental truth.
Now, consider your own journey. Perhaps you've already experimented with different techniques, striving for that perfect dimple. Or maybe this article has inspired you to try your hand at focaccia for the very first time. Regardless, I encourage you to embrace the process, to find joy in the imperfections, and to celebrate the unique beauty of your own focaccia creations. Don't be afraid to experiment, to adjust the techniques to your own style, and to savor the delicious results. The perfect focaccia dimple is a journey, not a destination, and the rewards are well worth the effort.
Unleash Your Inner Focaccia Artist!
Thanks for joining us on this focaccia adventure! We hope you now feel confident in creating those perfectly dimpled, golden-brown loaves. Ready to take your baking skills to the next level?
- Master the art of the dimple: Practice your technique with our recommended flour blend and share your results – tag us with your photos!
- Experiment with unique flavor combinations: Try adding rosemary, olives, or even sun-dried tomatoes to elevate your focaccia game.
- Share your focaccia journey with your baking buddies: Tell them what you've learned today and inspire them to create their own masterpieces!
What innovative focaccia flavor will you create next? Let's share ideas in the comments below!