
Savory Rye Bread with Onion and Herbs

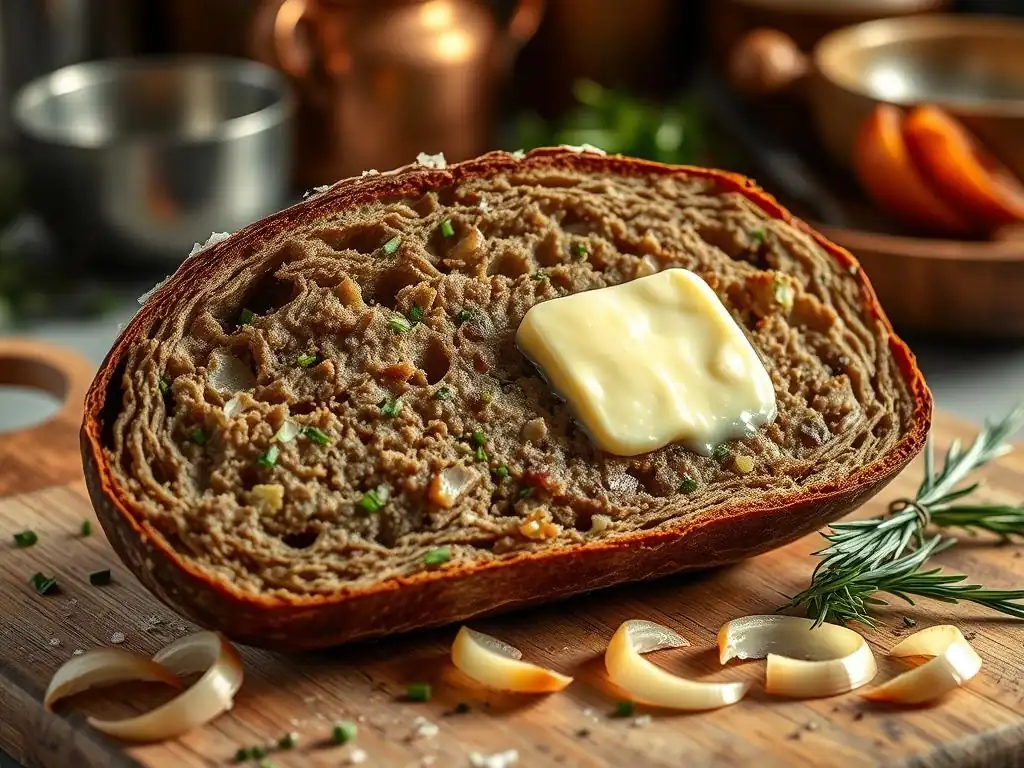
Welcome to BakeWithEase, your kitchen companion for unlocking the delicious world of baking! Ever dreamt of filling your home with the comforting aroma of freshly baked bread? Then you're in the right place. Today, we're diving into the satisfying process of crafting a Savory Rye Bread with Onion and Herbs. But beyond this delectable recipe, get ready to explore a treasure trove of baking secrets and simple techniques that will transform you from a novice to a confident baker. Intrigued? Let's get started and discover how easy it is to create bakery-quality bread at home!
- Savory Rye Bread with Onion and Caraway: A BakeWithEase Recipe
- Introduction: Elevate Your Baking with This Savory Rye Bread Recipe
- Understanding Rye Bread: A Baker's Foundation
- Ingredients for Your Savory Rye Bread
- Step-by-Step: Baking Your Savory Rye Bread
- Adding Onion and Caraway: Flavor Infusion Techniques
- Cooling and Slicing: Presenting Your Savory Rye Bread
- Serving Suggestions: Enjoying Your Homemade Rye Bread
- Troubleshooting Common Rye Bread Baking Issues
- Storing Your Savory Rye Bread for Freshness
- Conclusion: Mastering the Savory Rye Bread Recipe
- Frequently Asked Questions
- Final Reflection: The Enduring Appeal of Savory Rye
- Unleash Your Inner Baker: Craft This Savory Rye Today!
Savory Rye Bread with Onion and Caraway: A BakeWithEase Recipe
Introduction: Elevate Your Baking with This Savory Rye Bread Recipe
Discover the Art of Baking Savory Rye Bread at Home
Embarking on the journey to bake your own savory rye bread at home is a rewarding experience that connects you with age-old baking traditions. Unlike many commercially produced loaves, a homemade savory rye bread recipe allows you to control every ingredient, ensuring a depth of flavor and a texture that is truly unparalleled.
This particular recipe, featuring the aromatic combination of onion and caraway, transforms humble flour, water, and yeast into a crusty, flavorful bread perfect for sandwiches, charcuterie boards, or simply enjoyed with butter. It's a staple in many European kitchens, and bringing this classic into your home kitchen provides a wonderful sense of accomplishment.
Mastering a savory rye bread recipe involves understanding the unique properties of rye flour and how it interacts with other ingredients. Rye flour has a lower gluten content compared to wheat flour, which affects dough handling and the final crumb structure. This recipe guides you through these specifics, making the process approachable for bakers of all levels. By following these steps, you'll learn how to manage the stickier rye dough and achieve a loaf with a satisfying chew and a rich, complex flavor profile enhanced by the savory additions.
Why This Onion and Caraway Rye Bread Recipe Stands Out
This specific savory rye bread recipe distinguishes itself through its thoughtful combination of flavors and techniques designed for the home baker. The inclusion of sautéed onion adds a subtle sweetness and moisture, counterbalancing the characteristic tang of rye. Caraway seeds provide that essential, slightly anise-like warmth that is a hallmark of traditional rye bread, but in this savory version, they are perfectly complemented by the onion. It's not just a basic rye; it's a savory rye bread recipe that delivers a truly memorable taste experience.
Furthermore, the detailed instructions provided here aim to demystify the process, addressing common challenges bakers face with rye dough. We'll cover everything from selecting the right flour blend to achieving optimal proofing and baking temperatures. For instance, incorporating the sautéed onion at the right stage ensures it doesn't inhibit gluten development, while the precise caraway quantity (approximately 1-2 tablespoons for a standard loaf) ensures its flavor enhances, rather than overwhelms, the bread. This savory rye bread recipe is crafted to be reliable, yielding consistent, delicious results every time you bake.
Understanding Rye Bread: A Baker's Foundation
Exploring Different Types of Rye Flour for Baking
Rye flour comes in various forms, each offering distinct characteristics that impact your savory rye bread recipe. Light rye flour, also known as white rye, is milled from the inner part of the rye berry and has most of the bran and germ removed. It produces a lighter loaf with a milder flavor, more similar in texture to wheat bread. Medium rye flour contains more of the bran and germ than light rye, resulting in a darker color and a more pronounced rye flavor. It's a good balance for many recipes.
Dark rye flour is milled from the entire rye berry, including the bran and germ, giving it the darkest color and the strongest, most intense rye flavor. It's also the most challenging to work with due to its low gluten content. Pumpernickel flour is a very coarse grind of whole rye berries, often used for dense, traditional pumpernickel bread.
For this savory rye bread recipe, a blend of bread flour (high protein wheat flour, around 12-14% protein) and medium or dark rye flour (approximately 40-60% of the total flour weight) is often recommended to achieve a good balance of flavor, texture, and manageability. For example, using 60% bread flour and 40% medium rye flour provides a good structure while still delivering that distinct rye taste.
The Unique Characteristics of Rye Bread Dough
Rye dough behaves quite differently from wheat dough, primarily due to the lower quantity and quality of gluten-forming proteins (gliadin and glutenin) in rye. While rye does contain these proteins, they don't form the strong, elastic network that wheat gluten does. Instead, rye flour contains pentosans, complex carbohydrates that absorb a significant amount of water and contribute to the dough's sticky, sometimes gummy texture. This stickiness is a normal characteristic of rye dough and shouldn't be overcorrected by adding excessive flour.
The lower gluten development means rye bread typically has a denser crumb structure compared to wheat bread. However, the pentosans help retain moisture, resulting in a loaf that stays fresh longer. For a savory rye bread recipe, managing this stickiness is key. Techniques like using a wetter dough (higher hydration), minimizing kneading (as excessive kneading won't develop gluten like in wheat), and using a portion of wheat flour can help create a more manageable dough and a lighter crumb while still retaining the distinctive rye flavor and texture.
Ingredients for Your Savory Rye Bread
Essential Rye Bread Ingredients for Optimal Flavor
Crafting a truly exceptional savory rye bread recipe starts with high-quality ingredients. The foundation is, of course, flour – a combination of bread flour and your chosen rye flour (medium or dark works wonderfully here). Water plays a crucial role; filtered water free of harsh chemicals like chlorine is best for yeast activity. Active dry or instant yeast is necessary for leavening, providing the lift and airy texture. Salt is essential for flavor and controlling fermentation; kosher or sea salt is often preferred by bakers.
Beyond the basics, this savory rye bread recipe is elevated by its namesake additions: onion and caraway seeds. The type of onion matters; a yellow or sweet onion, sautéed until soft and slightly caramelized, provides a depth of savory sweetness that complements the rye beautifully. Fresh caraway seeds, with their distinctive aromatic warmth, are paramount. Avoid old, stale seeds, as they will lack potency and can even taste bitter. A little sugar or honey can also be included to feed the yeast and add a subtle sweetness that balances the savory elements.
Bob's Red Mill or King Arthur Rye Flour Recommendations
When choosing rye flour for your savory rye bread recipe, reputable brands like Bob's Red Mill and King Arthur Baking Company offer high-quality options. Bob's Red Mill offers various types, including Organic Dark Rye Flour and Organic Medium Rye Flour, both stone-ground to preserve nutrients and flavor. Their Dark Rye Flour is excellent for a robust, traditional flavor, while the Medium Rye provides a slightly milder taste.
King Arthur Baking Company also provides excellent rye flours, such as their Medium Rye Flour and Pumpernickel Flour. King Arthur's flours are known for consistency and quality, making them reliable choices for achieving predictable results in your savory rye bread recipe. Using a blend, such as 300g of King Arthur Bread Flour and 200g of Bob's Red Mill Dark Rye Flour, can yield a loaf with both good structure and a rich, deep rye flavor. Always check the expiration date or best-by date on the flour packaging to ensure freshness.
The Importance of Fresh Caraway Seeds in Savory Rye Bread
Caraway seeds are perhaps the most defining aromatic element in many traditional rye bread recipes, and their freshness is non-negotiable for a savory rye bread recipe. Old, stale caraway seeds lose their volatile oils, which are responsible for their warm, slightly anise-like, and peppery aroma. Instead of contributing a vibrant, pleasant flavor, stale seeds can taste flat, dusty, or even bitter, detracting significantly from the overall quality of your bread.
To ensure maximum flavor impact in your savory rye bread recipe, purchase caraway seeds from a source with high turnover or a dedicated spice shop. Store them in an airtight container away from light and heat. Before adding them to your dough, you can lightly toast them in a dry skillet for a minute or two until fragrant (be careful not to burn them) or lightly crush them in a mortar and pestle to release their oils. This simple step can intensify their flavor significantly, making a noticeable difference in the final loaf.
Recommended Caraway Seed Quantity
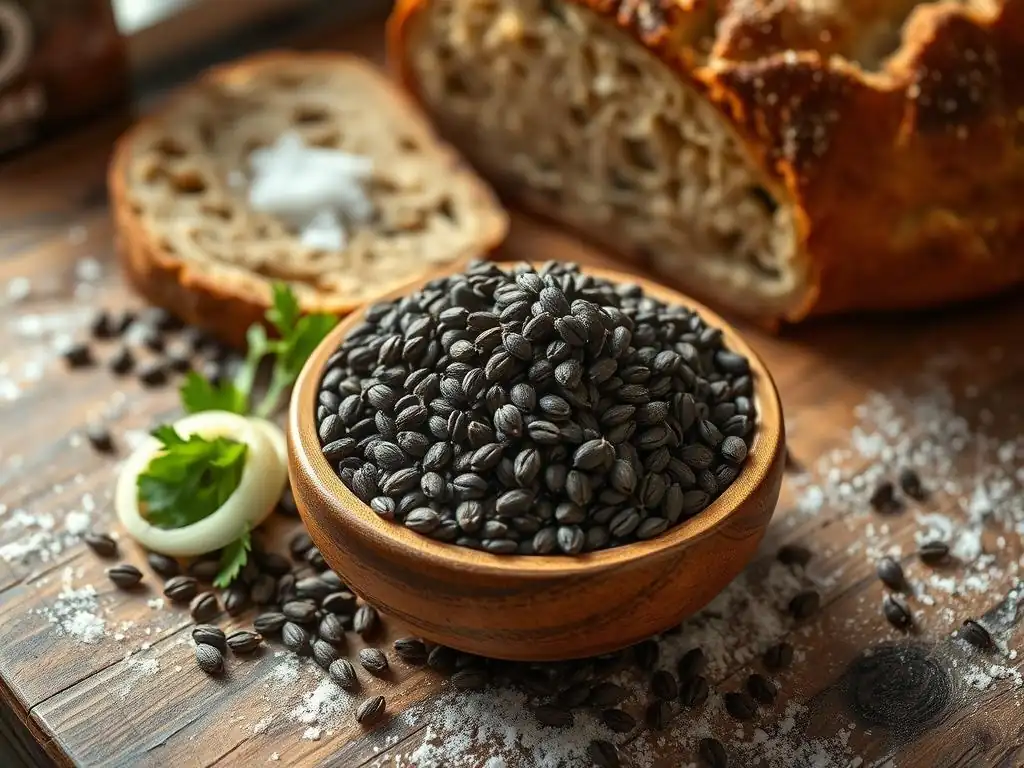
Determining the right amount of caraway seeds for your savory rye bread recipe is a matter of personal preference, but a standard guideline helps achieve a balanced flavor. For a typical loaf made with around 500g of flour total, a range of 1 to 2 tablespoons (approximately 7-14 grams) of whole caraway seeds is commonly recommended. Using less than 1 tablespoon might result in a very subtle caraway note that gets lost among the rye and onion flavors.
Using more than 2 tablespoons, while appealing to some who love a strong caraway presence, can sometimes overpower the other elements and make the bread taste intensely spiced or even medicinal to those with a more sensitive palate. For a first attempt at this savory rye bread recipe, starting with 1.5 tablespoons offers a good balance. You can adjust this amount in subsequent bakes based on how prominent you want the caraway flavor to be. Remember that the flavor will mellow slightly during baking.
Sourcing Quality Onions for Baking
The type and quality of onion used in your savory rye bread recipe contribute significantly to its depth of flavor. While any common onion will work, yellow onions are often preferred for their balance of sweetness and pungency. Sweet onions, like Vidalia or Walla Walla, can also be used, offering a milder, sweeter flavor when sautéed, which can be lovely in this savory rye bread. Avoid red onions, as their color can bleed into the dough, and their flavor profile is less traditional for this type of bread.
Look for firm, dry onions without soft spots or sprouts. The size will depend on how much onion flavor you desire, but typically one medium to large onion, yielding about 1 to 1.5 cups when finely diced and sautéed, is sufficient for a standard loaf. Sautéing the onions slowly over low heat until they are soft and translucent, or even slightly caramelized, is a crucial step. This process sweetens the onions and develops complex savory notes that integrate beautifully into the savory rye bread dough.
Step-by-Step: Baking Your Savory Rye Bread
Preparing the Dough: Mixing and Kneading Techniques
Preparing the dough for your savory rye bread recipe begins with combining the dry ingredients. In a large mixing bowl, whisk together the bread flour, rye flour, salt, and caraway seeds. If using instant yeast, you can add it directly to the dry ingredients. If using active dry yeast, you'll typically activate it first in warm water with a pinch of sugar (see the next section). Gradually add the warm water (usually around 100-110°F or 38-43°C) to the dry ingredients, mixing with a spoon or a Danish dough whisk until a shaggy dough forms.
Rye dough is notoriously sticky, and excessive kneading can actually break down the weak gluten structure rather than develop it. For this savory rye bread recipe, a minimal kneading approach is often best. Once the ingredients are just combined, turn the dough out onto a lightly floured surface (using rye flour or a mix of rye and wheat). Knead gently for only about 5-8 minutes.
The dough will remain sticky and won't become smooth and elastic like wheat dough. Alternatively, you can use a stand mixer with a dough hook for 4-6 minutes on low speed. The goal is just to bring the ingredients together and start a minimal gluten development, not to create a windowpane effect.
Activating the Yeast for a Perfect Rye Bread Rise
Activating the yeast is a critical step in ensuring your savory rye bread recipe rises properly, especially if you are using active dry yeast. Instant yeast can often be mixed directly with the dry ingredients, but active dry yeast requires proofing. To activate active dry yeast, measure the required amount of warm water (specified in the recipe, typically between 100-110°F or 38-43°C) into a small bowl. This temperature range is warm enough to wake up the yeast but not so hot that it kills it.
Stir in the yeast and a pinch of sugar or honey (the sugar provides immediate food for the yeast). Let the mixture sit undisturbed for 5-10 minutes. You should see a foamy layer develop on the surface, indicating that the yeast is active and ready to work. If no foam appears, your yeast may be dead, or the water temperature was incorrect, and you'll need to start again with fresh yeast. Once proofed, add this bubbly mixture to your dry ingredients along with any remaining liquid called for in the savory rye bread recipe.
Achieving the Right Dough Consistency for Savory Rye
Achieving the correct dough consistency is perhaps the most challenging aspect of a savory rye bread recipe due to rye's unique properties. The dough will be significantly stickier and less elastic than a purely wheat-based dough. It will feel heavy and dense compared to a light, airy wheat dough. The key is to resist the urge to add too much extra flour during mixing and kneading. A dough that is slightly sticky to the touch but holds its shape relatively well is often ideal.
If the dough feels excessively wet and won't come together at all, add flour sparingly, perhaps a tablespoon at a time, mixing well after each addition, until it reaches the desired consistency. Conversely, if the dough feels stiff and dry, add a tablespoon or two of warm water. Remember that rye flour absorbs water more slowly than wheat flour, so the dough's hydration level is crucial. A higher hydration (more water relative to flour) can make the dough stickier but also contributes to a moister crumb in the finished savory rye bread.
First Proofing: Allowing the Flavors to Develop
The first proofing, also known as bulk fermentation, is a crucial step where the yeast produces carbon dioxide, causing the dough to rise, and complex flavors begin to develop in your savory rye bread recipe. After mixing and kneading the dough, place it in a lightly oiled bowl, turning the dough to coat all sides. Cover the bowl tightly with plastic wrap or a damp towel to prevent the surface from drying out.
Place the covered bowl in a warm, draft-free place for the first proofing. Ideal temperatures are typically between 75-80°F (24-27°C). The duration of the first proof varies depending on the recipe, yeast type, and ambient temperature, but it usually takes 1 to 1.5 hours.
The dough for this savory rye bread recipe may not double in size like wheat dough; a 50-75% increase is often sufficient. You can check if it's ready by gently poking it with a floured finger; if the indentation remains, it's likely proofed enough. This period allows the yeast to work and the unique flavors of the rye, onion, and caraway to meld.
Shaping the Rye Bread Loaf: Achieving the Perfect Form
Shaping the dough is the next step after the first proofing in your savory rye bread recipe. Gently turn the dough out onto a lightly floured surface. Avoid deflating the dough too much; you want to handle it as little as possible. Rye dough can be less cooperative for shaping than wheat dough due to its stickiness and lower gluten. Resist adding excessive flour during shaping, as this can result in a dry crust.
For a rustic freeform loaf, gently pat the dough into a rough rectangle or circle, then fold the edges into the center to create tension on the surface. Flip the dough seam-side down and cup your hands around it, gently rotating it to create a taut surface. For a loaf pan, simply shape the dough into a log roughly the length of your pan. Place the shaped dough seam-side down into the greased pan. The goal is to create enough surface tension to help the loaf hold its shape during the second proof and baking.
Second Proofing: Ensuring a Light and Airy Texture
The second proofing, or final proof, is where the shaped loaf rises before baking, contributing significantly to the final texture and volume of your savory rye bread recipe. After shaping the dough, place it on a baking sheet lined with parchment paper (for freeform loaves) or in the prepared loaf pan. Cover the dough lightly with plastic wrap or a proofing bag to prevent a skin from forming.
Allow the dough to proof in a warm, draft-free place for 30-60 minutes. Rye dough often proofs faster in the second stage than wheat dough and can overproof easily, leading to a collapsed loaf. Keep a close eye on it. The loaf should increase in size by about 50% and feel light and airy when gently pressed.
An indentation should spring back slowly. If it springs back quickly, it needs more time; if it doesn't spring back at all and seems very fragile, it might be slightly overproofed. Proper second proofing is vital for achieving a good rise and a lighter crumb in your savory rye bread.
Baking Time and Temperature: Mastering the Oven
Baking your savory rye bread recipe at the correct temperature and for the right duration is crucial for achieving a beautiful crust and a fully cooked interior. Preheat your oven to a relatively high temperature, typically between 400-450°F (200-230°C), with a baking stone or steel inside if you have one, for at least 30-60 minutes to ensure it's thoroughly heated.
Steam is also beneficial in the initial stages of baking to promote oven spring and create a crisp crust. You can create steam by placing a pan of hot water on the bottom rack of your oven when you place the bread in.
Carefully transfer the proofed loaf to the hot baking stone or into the preheated loaf pan. Bake for the initial portion of the time (e.g., 15-20 minutes) with steam, then remove the steam pan and reduce the oven temperature slightly (e.g., to 375-400°F or 190-200°C) for the remainder of the baking time, usually another 20-30 minutes, depending on the size of the loaf. The total baking time for a standard loaf is typically 35-50 minutes. The bread should have a deep golden-brown crust and sound hollow when tapped on the bottom.
Monitoring Internal Temperature for Baking Perfection
The most reliable way to know if your savory rye bread recipe is fully baked is by checking its internal temperature. While the crust color and the hollow sound test are good indicators, they aren't foolproof. Use an instant-read thermometer inserted into the center of the loaf (avoid hitting the bottom of the pan or stone).
For a fully baked rye bread, the internal temperature should register between 195°F and 205°F (90°C and 96°C). Baking to this temperature ensures that the starches are gelatinized and the crumb is set, preventing a gummy texture. If the crust is browning too quickly before the internal temperature is reached, you can loosely tent the loaf with aluminum foil for the remainder of the baking time.
Adjusting Baking Time Based on Oven Performance
Every oven is different, and understanding your oven's quirks is key to successfully baking your savory rye bread recipe. Oven temperatures can vary significantly from the dial setting, sometimes by as much as 25-50°F (15-30°C). Using an oven thermometer placed inside your oven can help you verify the actual temperature and make necessary adjustments. If your oven runs hot, you may need to reduce the temperature slightly or shorten the baking time. If it runs cool, you might need to increase the temperature or extend the baking time.
Also, consider whether your oven has hot spots. Some ovens bake unevenly, causing one side of the loaf to brown faster than the other. If you notice this, rotate the loaf halfway through the baking time. The suggested baking times in any savory rye bread recipe are guidelines; always rely on visual cues (crust color, sound when tapped) and, ideally, the internal temperature to determine when your bread is truly done.
Adding Onion and Caraway: Flavor Infusion Techniques
Sautéing Onions for Enhanced Sweetness and Aroma
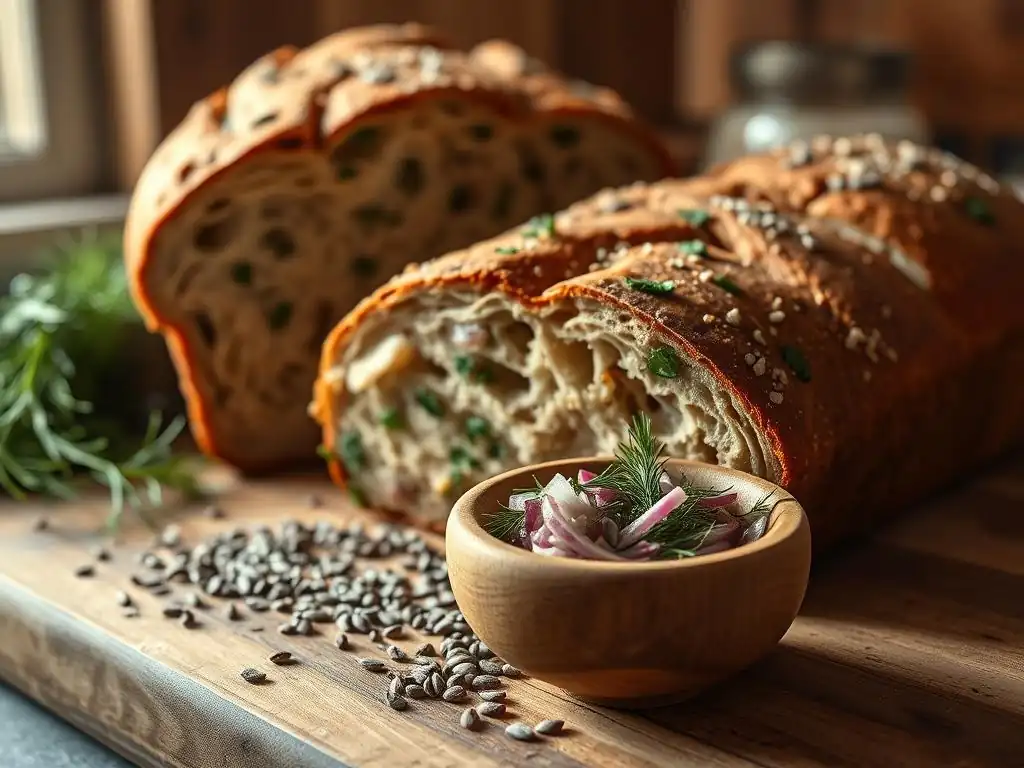
The savory element in this savory rye bread recipe comes significantly from the onions, and how they are prepared makes a huge difference. Simply adding raw onions to the dough can result in a harsh flavor and uneven texture. Sautéing the onions transforms their flavor profile. Start by finely dicing the onion. Heat a tablespoon or two of butter or olive oil in a skillet over medium heat. Add the diced onions and a pinch of salt (salt helps draw out moisture).
Cook the onions slowly, stirring occasionally, until they become soft and translucent, which usually takes 5-10 minutes. For a deeper, sweeter flavor, continue cooking them over lower heat until they just begin to caramelize and turn golden brown, which can take 15-20 minutes or longer. This slow cooking process develops the natural sugars in the onion, adding a layer of sweetness and complexity that beautifully complements the rye and caraway in the savory rye bread. Allow the sautéed onions to cool completely before adding them to the dough, as hot onions can kill the yeast.
Incorporating Caraway for a Balanced Savory Profile
Caraway seeds are the quintessential spice for many rye breads, and their inclusion in this savory rye bread recipe adds a distinctive aromatic note. The seeds have a warm, slightly pungent flavor reminiscent of anise or dill, which pairs exceptionally well with the earthy taste of rye flour and the sweetness of sautéed onions. Incorporating them is straightforward; they are typically added to the dry ingredients at the beginning of the mixing process.
As mentioned earlier, using fresh seeds and potentially lightly toasting or crushing them can enhance their flavor. The quantity used allows you to customize the intensity of the caraway flavor in your savory rye bread. Mixing them into the dry flour mixture ensures they are relatively evenly distributed throughout the dough before the liquid is added. This method helps prevent clumps of seeds and ensures that every slice of your savory rye bread offers that characteristic caraway warmth.
Tips for Evenly Distributing Onion and Caraway in the Dough
Ensuring the onion and caraway are evenly distributed throughout your savory rye bread dough is key to consistent flavor in every bite. For the caraway seeds, adding them to the dry ingredients and whisking them thoroughly before adding any liquid is the most effective method. This allows the individual seeds to be coated by the flour particles, preventing them from clumping together.
For the sautéed onions, which are moist, it's best to add them during the initial mixing phase, after the wet and dry ingredients have just started to come together into a shaggy mass. Add the cooled, sautéed onions and continue mixing or kneading just until they are incorporated throughout the dough. Over-mixing after adding the onions can potentially interfere with dough development. If mixing by hand, gently fold the onions into the dough during the initial few minutes of kneading. If using a stand mixer, add them during the last minute or two of mixing on low speed.
Cooling and Slicing: Presenting Your Savory Rye Bread
Allowing the Bread to Cool Completely: Preventing a Gummy Texture
Patience is perhaps the hardest ingredient to master when baking, especially when it comes to cooling your savory rye bread. After it comes out of the oven, the bread is still undergoing a crucial process called "carry-over baking." The internal temperature continues to rise slightly, and more importantly, moisture is redistributing throughout the loaf. Cutting into a hot loaf of rye bread, especially one with high hydration or added ingredients like onions, will almost certainly result in a gummy, dense, and unpleasant texture.
Place the baked savory rye bread on a wire rack immediately after removing it from the oven. The wire rack allows air to circulate around the entire loaf, preventing the bottom crust from becoming soggy. Allow the bread to cool completely, ideally for at least 2-3 hours, or even longer for very large loaves. This cooling period allows the internal structure to set and the moisture to stabilize, resulting in a proper crumb texture that is not gummy. Resist the temptation to slice it warm!
Slicing Techniques for a Perfect Loaf Presentation
Once your savory rye bread has cooled completely, it's time to slice and enjoy it. Using the right tool is essential for achieving clean, even slices without crushing the loaf. A sharp serrated bread knife is the best tool for the job. The serrations grip the crust and allow you to saw through the bread cleanly.
Place the cooled loaf on a stable cutting surface. Use a gentle sawing motion with your serrated knife, applying even pressure. Avoid pressing down hard, as this will compress the soft interior and ruin the crumb structure you worked hard to achieve. Slice the bread to your desired thickness, whether thick for hearty sandwiches or thinner for toasting or serving with spreads. Proper slicing ensures that the beautiful crust and the interior studded with onion and caraway are presented perfectly.
Serving Suggestions: Enjoying Your Homemade Rye Bread
Pairing Savory Rye Bread with Smoked Salmon, Cream Cheese, or Pickled Herring
Your homemade savory rye bread recipe, with its robust flavor profile, is a perfect partner for a variety of toppings and spreads, particularly those found in Scandinavian and Eastern European cuisines. One classic pairing is with smoked salmon and cream cheese. The rich, slightly salty flavor of smoked salmon contrasts beautifully with the tangy rye and the savory notes of onion and caraway. A smear of plain or herbed cream cheese adds a creamy texture that binds the flavors together.
Another traditional and incredibly flavorful pairing is with pickled herring. The vinegary brine and distinct taste of the herring stand up well to the strong character of the rye bread. Serve slices topped with herring, a dollop of sour cream, and maybe some fresh dill or chives. Other excellent options include gravlax, liver pâté, sharp cheddar cheese, or even just a generous layer of good quality butter. The savory rye bread serves as a sturdy, flavorful base that enhances these rich toppings.
Creating Delicious Sandwiches with Your Savory Rye
The firm texture and bold flavor of savory rye bread make it an ideal choice for creating substantial and delicious sandwiches. Unlike softer white breads, it holds up well to moist fillings and adds its own distinct character to every bite. Classic deli-style sandwiches are a natural fit; think thinly sliced pastrami, corned beef, or roast beef piled high with Swiss cheese, sauerkraut, and Russian dressing for a reuben or reuben-inspired creation.
For a simpler sandwich, try pairing slices of your savory rye bread with mature cheddar cheese and a tangy chutney, or with ham and a sharp mustard. The onion and caraway flavors in the bread complement cured meats and strong cheeses exceptionally well. Even a simple vegetable sandwich with cucumber, tomato, and a spread like hummus or cream cheese is elevated by the unique taste and texture of the homemade savory rye bread.
Troubleshooting Common Rye Bread Baking Issues
Addressing Dense or Gummy Rye Bread
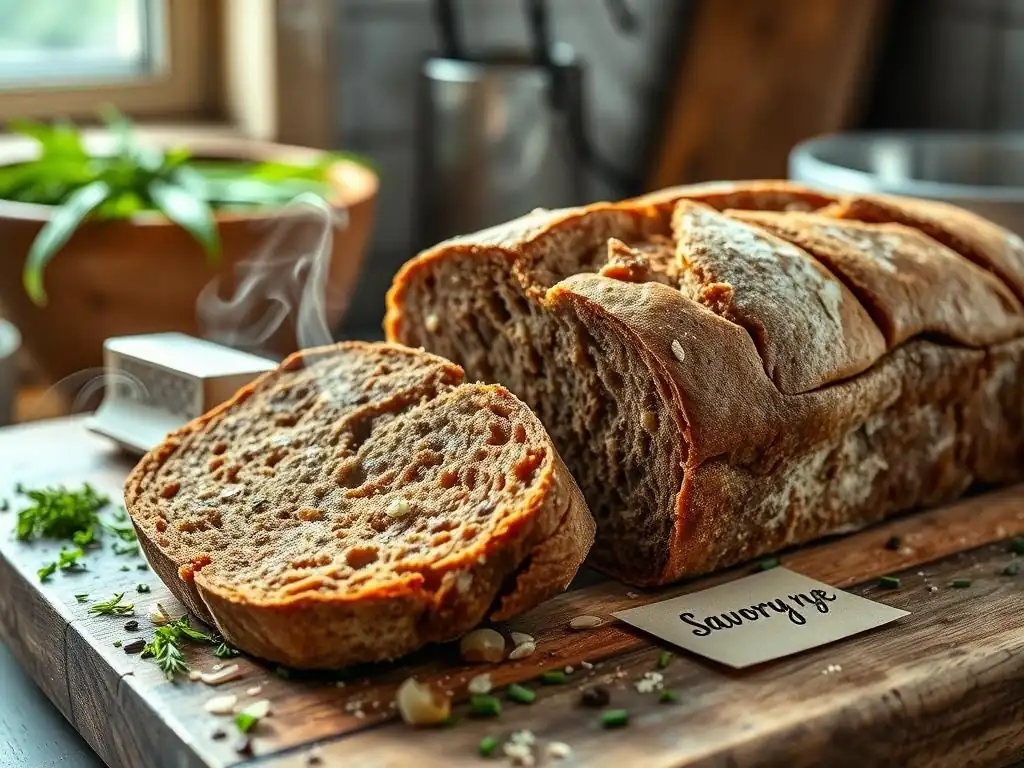
One of the most common frustrations with rye bread, including a savory rye bread recipe, is ending up with a loaf that is too dense or has a gummy interior. Several factors can contribute to this. First, insufficient baking is a primary cause. If the internal temperature didn't reach the target 195-205°F (90-96°C), the starches haven't fully set, leading to gumminess. Ensure you bake until the correct internal temperature is reached.
Another cause is cutting the bread before it has fully cooled. As discussed, the internal structure needs time to set. Over-kneading can also be an issue, as it can break down the delicate rye structure. Rye dough requires minimal kneading. Finally, incorrect hydration (too much water for the amount of rye flour used) or under-proofing can also result in a dense crumb. Ensure your measurements are accurate and that the dough has proofed adequately but not excessively.
Resolving Issues with Insufficient Rise
If your savory rye bread recipe didn't rise as much as expected, several factors might be at play. The most likely culprit is inactive yeast. Ensure your yeast is fresh and that you used the correct water temperature for activation (if using active dry yeast). Water that is too hot will kill the yeast, while water that is too cold won't activate it properly. Using a pinch of sugar during activation helps confirm the yeast's vitality.
Ambient temperature during proofing is also important. Rye doughs often prefer a warm environment (75-80°F or 24-27°C). If your kitchen is cold, the proofing time will be significantly longer, or the dough may not rise sufficiently. Try placing the dough in a slightly warmer spot, like a turned-off oven with the light on, or near a warm appliance. Finally, using old or low-quality flour can sometimes impact rise, as can adding too much salt, which inhibits yeast activity. Ensure salt is measured accurately.
Overcoming a Bitter Taste in Your Rye Bread
A bitter taste in your savory rye bread recipe can be quite off-putting. One potential cause is using old or rancid rye flour. Rye flour, especially whole or dark rye, has a higher oil content than wheat flour and can go rancid more quickly. Store rye flour in an airtight container in a cool, dark place, or even the refrigerator or freezer, to extend its shelf life.
Another source of bitterness can be stale caraway seeds. As mentioned, old seeds lose their pleasant aroma and can develop bitter notes. Ensure your caraway seeds are fresh. Over-fermentation or over-proofing can also sometimes contribute a slightly bitter or overly sour taste, particularly if using a sourdough starter instead of commercial yeast (though this recipe focuses on yeast). Finally, insufficient mixing or uneven distribution of ingredients can sometimes lead to pockets of concentrated flavors that taste bitter.
Storing Your Savory Rye Bread for Freshness
Proper Storage Techniques to Extend Shelf Life
Once your delicious savory rye bread recipe has been baked and cooled, proper storage is key to keeping it fresh and flavorful. Whole loaves stay fresh longer than sliced bread because less surface area is exposed to air. Store a whole loaf at room temperature, wrapped in a linen bread bag, a clean kitchen towel, or loosely in a paper bag. This allows the crust to breathe, helping it stay crisp while protecting the interior. Avoid airtight plastic bags for whole loaves stored at room temperature, as they can trap moisture and make the crust soggy.
If you prefer to slice the bread as needed, store the unsliced portion using the method above. For sliced bread, which dries out faster, an airtight container or a resealable plastic bag works best to prevent moisture loss from the cut surfaces. Stored this way at room temperature, your savory rye bread should remain fresh for 3-4 days. Avoid refrigerating rye bread, as this can actually accelerate staling.
Freezing Rye Bread for Later Enjoyment
Freezing is an excellent way to preserve your homemade savory rye bread recipe for longer periods, up to 3-6 months, without significant loss of quality. Ensure the bread is completely cooled before freezing. You can freeze the loaf whole, in halves, or already sliced. If freezing sliced bread, it's helpful to place a small piece of parchment paper between slices to prevent them from sticking together, allowing you to easily grab just a few slices at a time.
Wrap the bread tightly in plastic wrap, ensuring no surface is exposed to air, then wrap it again in aluminum foil or place it in a freezer-safe bag. This double layer of protection helps prevent freezer burn. To thaw a whole or partial loaf, remove all wrapping and let it sit at room temperature for several hours or overnight.
For sliced bread, you can often toast slices directly from frozen or let them thaw on the counter for 15-30 minutes. Freezing allows you to enjoy the fruits of your savory rye bread recipe baking efforts weeks or months down the line.
Conclusion: Mastering the Savory Rye Bread Recipe
Embrace the Joy of Baking with BakeWithEase
Baking a loaf of savory rye bread with onion and caraway is more than just following a set of instructions; it's an engaging process that yields a deeply satisfying reward. From understanding the unique nature of rye flour to mastering the timing of proofing and baking, each step brings you closer to creating something truly special in your own kitchen. This savory rye bread recipe, tailored for home bakers, aims to make that journey accessible and enjoyable.
With the detailed guidance provided, you're equipped to tackle the nuances of rye dough, infuse it with wonderful savory flavors, and bake a loaf that boasts a beautiful crust and a flavorful, moist interior. The process itself, the aroma filling your home, and the pride of slicing into your freshly baked loaf are all part of the joy of baking that BakeWithEase is dedicated to helping you discover and embrace.
We love seeing what our community bakes! Once you've successfully baked your savory rye bread recipe with onion and caraway, we encourage you to share your results. Whether it's a photo of your perfectly baked loaf, a picture of a delicious sandwich you made, or just a description of your baking experience, sharing helps inspire other bakers and celebrates your achievement.
Consider joining the conversation on baking forums or social media, tagging BakeWithEase if you share photos. Your experience, including any challenges you overcame or tweaks you made to the savory rye bread recipe, can be invaluable to others starting their own baking journey. Happy baking, and enjoy every slice of your wonderful homemade bread!
Frequently Asked Questions
What makes this rye bread recipe "savory"?
The recipe incorporates onion and herbs to create a delicious savory flavor profile, contrasting the often subtle sweetness of rye bread. This results in a more complex and interesting taste experience.
Is this recipe suitable for beginner bakers?
While the recipe isn't overly complex, some baking experience is helpful. Following the step-by-step instructions carefully is key to success, even for beginners.
What kind of rye flour is best for this recipe?
We recommend using a medium rye flour for the best texture and flavor. Light rye flour will result in a milder flavor, while dark rye flour can be too strong.
Can I substitute the herbs in this recipe?
Yes, you can substitute the herbs! We suggest using other savory herbs like thyme, rosemary, or oregano. Adjust the amount to your personal preference.
How should I store the baked savory rye bread?
Store the cooled bread in an airtight container at room temperature for up to three days. You can also freeze slices for longer storage.
Final Reflection: The Enduring Appeal of Savory Rye
The simple act of baking, and specifically crafting a loaf of savory rye bread, connects us to a culinary heritage spanning centuries, a heritage that remains incredibly relevant today. In a world of fast food and processed ingredients, the deliberate process of kneading dough, feeling the texture, and smelling the rising bread offers a powerful counterpoint – a return to mindful creation and the satisfaction of homemade goodness. This recipe, more than just a guide to baking, is a testament to the enduring power of simple, wholesome food.
The aroma of freshly baked rye bread, infused with the pungent sweetness of onions and the bright freshness of herbs, evokes a powerful sense of comfort and nostalgia. It's a smell that transcends generations, reminding us of family gatherings, cozy evenings, and the simple pleasure of sharing a meal. Bread is the staff of life,
a common saying, truly captures the essence of this humble yet profound food. Its ability to nourish both body and soul is a testament to its enduring place in our cultural landscape, a constant in a world of ever-changing trends.
Now, I invite you to take this recipe and make it your own. Experiment with different herbs, add your own personal touch, and share the experience with loved ones. Don't just bake a loaf of bread; bake a connection, a memory, a taste of tradition. Let the simple act of creating this savory rye bread be a reminder of the enduring power of wholesome food and the joy found in the process of making something beautiful and delicious with your own hands.
Here's a Call to Action (CTA) tailored to a blog post about Savory Rye Bread with Onion and Herbs on BakeWithEase.com:
Unleash Your Inner Baker: Craft This Savory Rye Today!
Thanks for taking the time to explore this delicious savory rye recipe! We hope you gained some baking inspiration and discovered a new favorite bread. Now, it's time to get baking!
- Bake your own loaf: Follow the recipe step-by-step and enjoy the satisfying aroma of freshly baked bread filling your kitchen.
- Share your creation: Post a picture of your masterpiece on social media and tag us @BakeWithEase – we'd love to see it!
- Explore more savory bread recipes: Discover other exciting flavor combinations on our website – you might find your next baking adventure!
Ready to transform your kitchen into a fragrant bakery? What unique twist will you add to this savory rye bread recipe?