
Baking Whole Wheat Sandwich Bread That Stays Soft


Welcome to BakeWithEase, your haven for stress-free baking! Ever dreamt of slicing into a loaf of perfectly soft whole wheat sandwich bread, knowing you baked it yourself? We're about to unlock the secrets. Discover how to achieve that coveted tenderness and flavor, bypassing the usual dense, dry results. Intrigued? Let's dive into the art of baking soft whole wheat sandwich bread that will revolutionize your lunchtime experience.
- Baking Soft Whole Wheat Sandwich Bread: The BakeWithEase Guide
- Introduction: The Secret to Soft Whole Wheat Bread
- Understanding Whole Wheat Flour for Bread Baking
- Key Ingredients for Soft Whole Wheat Sandwich Bread
-
Step-by-Step Guide to Baking Soft Whole Wheat Sandwich Bread
- Step 1: Preparing the Dough - Mixing and Initial Rise
- Step 2: Shaping the Dough - Creating the Perfect Sandwich Loaf
- Step 3: Proofing - Achieving the Final Rise for a Light and Airy Bread
- Step 4: Baking - Achieving a Golden Crust and Perfectly Cooked Interior
- Step 5: Cooling and Slicing - Preserving Softness and Flavor
-
Tips and Tricks for Baking Extra Soft Whole Wheat Bread
- Adding a Tangzhong or Water Roux for Enhanced Moisture
- Using Potato Flakes or Mashed Potato for a Softer Crumb
- Incorporating a Pre-Ferment (Poolish or Biga) for Improved Flavor and Texture
- Kneading Techniques for Optimal Gluten Development Without Overworking the Dough
- Adjusting the Recipe for Different Climates and Humidity Levels
- Troubleshooting Common Whole Wheat Bread Baking Problems
- Storing Your Soft Whole Wheat Sandwich Bread
- Variations and Additions to Your Soft Whole Wheat Bread Recipe
- Conclusion: Enjoying Your Homemade Soft Whole Wheat Sandwich Bread
-
Frequently Asked Questions
- What makes BakeWithEase's whole wheat sandwich bread recipe different from others?
- Can I substitute any of the ingredients in the whole wheat sandwich bread recipe?
- How long does the whole wheat sandwich bread stay fresh?
- What are some tips for ensuring my whole wheat sandwich bread rises properly?
- Is it possible to make this whole wheat sandwich bread recipe without a stand mixer?
- Final Reflection: The Enduring Appeal of Soft Whole Wheat
- Unlock the Secret to Soft Whole Wheat Bread!
Baking Soft Whole Wheat Sandwich Bread: The BakeWithEase Guide
Introduction: The Secret to Soft Whole Wheat Bread
Baking your own bread is a rewarding experience, and crafting a delicious, soft whole wheat sandwich bread is a truly satisfying achievement. Many home bakers start with white flour recipes and find the transition to whole wheat challenging, often resulting in loaves that are dense, dry, or crumbly. The unique properties of whole wheat flour require a slightly different approach compared to baking with refined white flour, but achieving a wonderfully soft whole wheat loaf is absolutely within reach with the right techniques and understanding.
The quest for soft whole wheat sandwich bread doesn't have to end in frustration. At BakeWithEase, we believe that understanding the science behind the ingredients and techniques is key to consistent success. This guide will walk you through the specifics of working with whole wheat flour, highlight the crucial role of hydration and other ingredients, and provide a step-by-step process designed to help you bake a loaf that is not only healthy but also boasts that desirable soft texture perfect for slicing and enjoying.
Why Whole Wheat Bread Often Turns Out Dry and Dense
Whole wheat flour contains the entire wheat kernel – the bran, germ, and endosperm. While this makes it incredibly nutritious, the bran and germ components can interfere with gluten development. Gluten is the protein network that gives bread its structure and elasticity, trapping gases produced by yeast to create a light and airy crumb. The sharp edges of the bran can cut through this developing gluten structure, making it harder to build a strong network capable of holding onto moisture and volume, often leading to a denser loaf.
Furthermore, the bran and germ are more absorbent than the endosperm (which is what white flour is made from). This means whole wheat flour requires more water to become adequately hydrated. If a recipe doesn't account for this increased absorption, the dough will be too dry, resulting in a loaf that feels heavy and has a dry, sometimes crumbly, texture. Without sufficient moisture and a well-developed, albeit slightly hindered, gluten network, the bread struggles to expand properly during proofing and baking, contributing to that characteristic density often associated with homemade whole wheat bread.
BakeWithEase's Approach to Baking the Perfect Soft Whole Wheat Sandwich Bread
Our philosophy at BakeWithEase centers around demystifying baking and empowering you with simple yet effective techniques. For baking a soft whole wheat sandwich bread, our approach focuses on maximizing hydration, enhancing gluten development gently, and incorporating ingredients that promote tenderness and moisture retention. We don't just give you a recipe; we explain why certain steps are important and how ingredients interact, so you can adapt and troubleshoot with confidence.
We emphasize using high-quality whole wheat flour, understanding its hydration needs, and employing specific mixing and kneading methods that encourage gluten formation without tearing it down. Additionally, we explore the use of enriching ingredients like fats and sweeteners, and optional techniques such as a tangzhong or autolyse, which significantly boost the dough's ability to hold moisture and create an exceptionally soft crumb. By following our detailed guide, you'll learn how to bake a whole wheat loaf that defies the stereotype of dry, dense whole wheat bread and becomes a staple in your kitchen.
Understanding Whole Wheat Flour for Bread Baking
Working with whole wheat flour requires a slightly different mindset than baking with all-purpose or bread flour. Its unique composition brings incredible flavor and nutrition to your soft whole wheat sandwich bread, but it also presents specific challenges related to texture and structure. Understanding these characteristics is the first step toward mastering the art of soft whole wheat bread baking.
The key difference lies in the presence of the bran and germ. These components, while nutritious, absorb more water and contain enzymes that can potentially degrade gluten over time. This means whole wheat dough often feels different – it can be thirstier and less elastic than white flour dough. Learning how to properly hydrate and handle this type of dough is crucial for developing a good gluten structure and achieving the desired soft crumb in your whole wheat sandwich bread.
The Composition of Whole Wheat Flour and its Impact on Bread Texture
Whole wheat flour is milled from the entire wheat kernel, which consists of three main parts: the endosperm, the bran, and the germ. The endosperm is the largest part, primarily composed of starch and protein (including gluten-forming proteins). The bran is the hard outer layer, rich in fiber and minerals. The germ is the embryo, containing fats, vitamins, and minerals. When these parts are milled together, the resulting flour is "whole wheat."
The bran and germ impact bread texture in several ways. The coarse particles of the bran can physically impede the development of the gluten network by cutting the strands as they form during kneading. This can lead to a weaker structure compared to white bread made solely from the endosperm.
Additionally, the bran and germ absorb more water than the endosperm but release it more readily during baking, which can contribute to a drier loaf if not properly managed. The fats in the germ can also potentially interfere with gluten development if the flour is not fresh or stored correctly, sometimes contributing to stickiness or a weaker dough.
Choosing the Right Type of Whole Wheat Flour
Not all whole wheat flour is created equal when it comes to baking soft whole wheat sandwich bread. Look for flour labeled "whole wheat bread flour" if available, as it often has a slightly higher protein content (around 14-16%) compared to regular whole wheat flour (often 13-14%). Higher protein can help compensate for the gluten-inhibiting effects of the bran and germ, leading to a stronger dough structure. Different wheat varieties also exist; hard red winter wheat is commonly used for whole wheat bread flour due to its high protein content, yielding robust loaves.
Another consideration is the grind of the flour. Some whole wheat flours are finely ground, which helps reduce the bran's interference with gluten. Coarsely ground whole wheat flours, while perhaps adding more texture and flavor, can make it harder to achieve a soft, light crumb. Experimenting with different brands and types of whole wheat flour can help you find the one that best suits your desired soft whole wheat sandwich bread texture and flavor profile. Checking the protein content on the nutrition label can be a helpful indicator.
Storing Whole Wheat Flour to Maintain Freshness and Baking Performance
Due to the presence of the germ, which contains natural oils, whole wheat flour is more susceptible to spoilage (specifically, rancidity) than refined white flour. These oils can go rancid over time, imparting off-flavors to your bread and potentially affecting yeast activity and gluten development. Properly storing your whole wheat flour is essential for baking delicious, soft whole wheat sandwich bread consistently.
The best way to store whole wheat flour is in an airtight container in a cool, dark place. For longer-term storage, the refrigerator or freezer is ideal. In the refrigerator, it can last for several months, and in the freezer, up to a year. Freezing is particularly effective at preventing rancidity. Before using frozen flour, allow it to come to room temperature to ensure accurate measurement and optimal dough consistency. Always check your flour for any off smells before baking; fresh whole wheat flour should have a pleasant, nutty aroma.
Key Ingredients for Soft Whole Wheat Sandwich Bread
While the foundation of your soft whole wheat sandwich bread is, of course, whole wheat flour, several other ingredients play crucial roles in achieving that coveted soft texture and rich flavor. Understanding how each component contributes is vital for successful baking. It's not just about mixing things together; it's about the interaction and balance of these elements.
From providing structure and moisture to enhancing tenderness and fueling the rise, each ingredient in your whole wheat bread recipe serves a specific purpose. Using high-quality ingredients and understanding their functions will significantly impact the final outcome, helping you consistently bake a soft whole wheat sandwich bread that you'll be proud to share.
The Importance of High-Quality Whole Wheat Flour
As discussed earlier, the quality and type of whole wheat flour are foundational to baking soft whole wheat sandwich bread. Using a fresh, high-protein whole wheat bread flour provides the best starting point for developing a strong enough gluten structure to support a soft crumb, despite the presence of the bran. A protein content of 14% or higher is generally desirable for robust bread.
Subpar or old whole wheat flour can lead to a lackluster loaf. If the flour is low in protein, the dough may not develop sufficient strength to hold its shape and volume, resulting in a dense loaf. If the flour is rancid, it will impart an unpleasant bitter or metallic taste, ruining the flavor of your soft whole wheat sandwich bread. Investing in quality flour and storing it properly is a small step that makes a big difference in your baking results.
Hydration: Achieving the Right Moisture Balance for a Soft Crumb
Hydration refers to the ratio of water (or other liquids) to flour in a dough, typically expressed as a percentage of the flour weight. Whole wheat flour is significantly more absorbent than white flour due to the bran and germ. To achieve a soft whole wheat sandwich bread, adequate hydration is absolutely critical. A common mistake is using hydration levels similar to white bread recipes, which will leave whole wheat dough too dry.
For whole wheat bread, hydration levels typically range from 65% to 80% or even higher, depending on the specific flour used and desired texture. A higher hydration dough tends to produce a softer, more open crumb. While wetter doughs can be stickier and more challenging to handle, they are essential for preventing dryness in whole wheat bread. Don't be afraid to add a little extra water beyond the recipe if your dough feels stiff or dry; it's better to work with a slightly sticky dough than a dry one when aiming for a soft whole wheat sandwich bread.
The Role of Fat: Adding Softness and Flavor to Whole Wheat Bread
Fats, such as butter, oil, or even egg yolks, play a significant role in enhancing the softness and tenderness of bread, especially in whole wheat loaves. Fat coats the flour particles and interferes with gluten development to some extent, but in a beneficial way for soft bread. It prevents the gluten strands from becoming too interconnected and rigid, resulting in a more tender crumb.
Incorporating just a few tablespoons of butter or oil per standard loaf can make a noticeable difference in how soft your whole wheat sandwich bread turns out. Fats also contribute to richness and flavor, and they help extend the shelf life of the bread by keeping it moist longer. Aim for around 2-5% fat based on the flour weight for a good balance of softness without inhibiting rise too much.
Sweeteners: Enhancing Flavor and Promoting Yeast Activity

Sweeteners like honey, maple syrup, sugar, or molasses serve multiple purposes in soft whole wheat sandwich bread. Firstly, they provide food for the yeast, helping it to ferment and produce the carbon dioxide gas that makes the bread rise. Yeast activity is often slightly slower in whole wheat doughs compared to white, so providing ample food is beneficial.
Secondly, sweeteners contribute significantly to the flavor profile of the bread, complementing the nutty notes of whole wheat. They also contribute to crust browning during baking through the Maillard reaction and caramelization, resulting in a more appealing color. Finally, sweeteners are hydroscopic, meaning they attract and retain moisture, which helps keep the finished soft whole wheat sandwich bread soft and fresh for a longer period. A typical recipe might include 2-4% sweetener by flour weight.
Yeast: Selecting the Best Yeast for Whole Wheat Bread Baking
Yeast is the leavening agent that makes your soft whole wheat sandwich bread rise. While most types of yeast will work, understanding the differences can help you choose the best one for your process. Active dry yeast and instant dry yeast are the most common forms for home bakers. Instant yeast is often preferred because it can be mixed directly into the dry ingredients without prior proofing and tends to be slightly more vigorous.
Given that whole wheat flour can sometimes slow down yeast activity due to the bran and germ, using a reliable and fresh yeast is important. You might also consider using a slightly higher amount of yeast than you would for a white bread recipe, or allowing a bit more time for rising, especially if using active dry yeast that needs to be proofed first.
Ensuring your water temperature is correct (around 105-115°F or 40-46°C for active dry, or cooler for instant mixed with dry ingredients) is also crucial for activating the yeast properly for a good rise in your soft whole wheat sandwich bread.
Step-by-Step Guide to Baking Soft Whole Wheat Sandwich Bread
Baking a truly soft whole wheat sandwich bread involves careful attention to each stage of the process, from mixing the dough to cooling the final loaf. This step-by-step guide breaks down the key phases, providing specific techniques tailored for whole wheat flour. Following these steps will help you achieve consistent, delicious results.
Remember that baking is both a science and an art, and a little patience goes a long way. Pay attention to the feel of the dough, the signs of proper proofing, and the cues that indicate the bread is perfectly baked. Mastering these steps will empower you to bake beautiful, soft whole wheat sandwich bread loaves time after time.
Step 1: Preparing the Dough - Mixing and Initial Rise
The initial mixing phase is crucial for hydrating the whole wheat flour and beginning the development of the gluten network. Because whole wheat flour absorbs water more slowly than white flour, it's often beneficial to let the dough rest shortly after the initial mix. This resting period, sometimes called an "autolyse" (when only flour and water are mixed), allows the flour to fully hydrate without the stress of immediate kneading.
Begin by combining your liquids (water, milk, etc. ), sweetener, and yeast. If using active dry yeast, let it bloom for 5-10 minutes until foamy. Add your whole wheat flour, salt, and any fats (like butter or oil).
Mix until a shaggy dough forms and there are no dry pockets of flour. At this point, cover the bowl and let the dough rest for 20-30 minutes. This autolyse step helps the bran soften and allows enzymes to start breaking down proteins, which actually aids in gluten development and makes the dough easier to knead later. After the rest, proceed to kneading.
Mixing Techniques for Optimal Gluten Development in Whole Wheat Dough
Kneading is essential for developing the gluten structure that provides strength and elasticity to your soft whole wheat sandwich bread. However, whole wheat dough needs to be handled a bit more gently than white dough because the bran can tear the gluten strands. Over-kneading can lead to a tough or crumbly texture. The goal is to develop a moderate gluten network that is strong enough to hold its shape and trap gases but still extensible enough to allow for a soft crumb.
You can knead by hand or use a stand mixer with a dough hook. For a stand mixer, mix on low speed for about 8-12 minutes after the autolyse. The dough should become smoother and pull away from the sides of the bowl, though it may still be slightly sticky.
By hand, knead on a lightly floured surface for 10-15 minutes. The dough should feel elastic and pass the "windowpane test" (stretching a small piece thin enough to see light through it without tearing), though this test is less clear-cut with whole wheat due to the bran. Don't expect it to be as smooth and elastic as a white dough.
Achieving the Ideal Dough Consistency and Temperature
The ideal dough for soft whole wheat sandwich bread should be soft, pliable, and slightly sticky. It shouldn't be stiff or dry; if it is, add a tablespoon of water at a time and knead it in until the consistency improves. Whole wheat flour's absorption can vary greatly depending on humidity and the specific grind, so be prepared to adjust the hydration slightly from the recipe. A slightly wetter dough yields a softer crumb.
Dough temperature is also important for consistent yeast activity. After kneading, the dough temperature should ideally be between 75-80°F (24-27°C). You can check this with an instant-read thermometer. If the dough is too cold, the rise will be slow; if too warm, it might rise too quickly and develop less flavor. Place the dough in a lightly oiled bowl, cover it, and let it rise in a warm, draft-free place until doubled in size. This initial rise (bulk fermentation) typically takes 1 to 1.5 hours, but time is less important than the dough doubling in volume.
Step 2: Shaping the Dough - Creating the Perfect Sandwich Loaf
Once the dough has doubled in volume during the initial rise, it's time to shape it into a loaf that will fit neatly into your bread pan. Shaping helps organize the gluten structure and creates tension on the surface of the dough, which contributes to a good oven spring and a symmetrical loaf. Avoid being too rough with the dough at this stage, as you want to preserve the air pockets created during the first rise.
Gently turn the dough out onto a lightly floured surface. You can lightly degas the dough by gently pressing down on it to form a rectangle, but avoid punching it down vigorously. The goal is to redistribute the yeast and even out the temperature, not to completely deflate it. Shaping techniques vary, but a common method for a sandwich loaf involves folding the dough into thirds like a letter, then rolling it up tightly from one end to the other, pinching the seam closed. This creates surface tension and a uniform shape.
Gently Handling Whole Wheat Dough to Preserve Air Pockets
Unlike white dough which can often withstand more vigorous handling, whole wheat dough benefits from a gentler touch during shaping. The gluten network, weakened slightly by the bran, is more susceptible to being torn if handled roughly. Excessive punching or pressing can expel too much of the carbon dioxide gas that the yeast has produced, resulting in a denser final loaf of soft whole wheat sandwich bread.
After the initial rise, gently turn the dough onto your surface. Instead of punching, consider a gentle press down to flatten it slightly. When shaping, use your hands to guide and fold the dough rather than forcing it. The goal is to create surface tension by stretching the outside layer while keeping the inside airy. This gentle approach helps preserve those precious air bubbles that contribute to a light and soft crumb in your finished soft whole wheat sandwich bread.
Shaping Techniques for Uniform Loaf Shape and Rise
A uniform loaf shape is important for even baking and achieving that classic soft whole wheat sandwich bread look. After gently pressing the dough into a rough rectangle, fold the top third down to the center and the bottom third up over the top, like folding a letter. Gently press the seams. Then, turn the dough 90 degrees and roll it up tightly from one short end to the other, creating a cylindrical shape.
As you roll, use the side of your hands to create tension on the outside surface and tuck the dough under slightly as you go. Pinch the final seam closed tightly along the bottom of the loaf. Tuck the ends under as well. The goal is a taut surface and a well-sealed seam. Place the shaped loaf seam-side down in a greased or parchment-lined loaf pan. This tension on the surface will help the loaf rise upwards evenly in the pan during the final proof and baking, contributing to a nice, tall, soft whole wheat sandwich bread.
Step 3: Proofing - Achieving the Final Rise for a Light and Airy Bread
Proofing, or the final rise, is the stage where the shaped loaf increases significantly in volume before baking. This is when the yeast produces the majority of the gas that creates the open, airy structure of soft whole wheat sandwich bread. Proper proofing is crucial; under-proofed bread will be dense, while over-proofed bread can collapse in the oven or have a poor texture.
Place the shaped loaf in the prepared pan, cover it loosely with plastic wrap or a damp tea towel (to prevent a skin from forming), and let it rise in a warm, draft-free place. The ideal proofing temperature is similar to the bulk fermentation temperature, around 75-80°F (24-27°C). You can create a warm environment in a turned-off oven with the light on, or in a microwave that was briefly turned on then off.
Creating the Ideal Proofing Environment
A warm, humid, and draft-free environment is perfect for proofing whole wheat dough. Covering the dough is essential to prevent the surface from drying out, which would restrict its ability to expand. Plastic wrap lightly oiled on the side facing the dough works well, or you can use a large plastic bag to enclose the pan. A damp tea towel is also effective, but ensure it stays damp.
As mentioned, a slightly warm oven that's turned off (with the light on for warmth) is a common technique. You can also place the pan in a larger container with warm water (like a bathtub or large roasting pan), ensuring no water gets into the dough. The goal is a consistent, warm temperature that allows the yeast to work steadily. Avoid placing the dough in a hot spot, which could cause it to rise too quickly or unevenly.
Determining When the Dough is Ready to Bake
Knowing when your soft whole wheat sandwich bread is perfectly proofed takes a little practice. The dough should have increased significantly in volume, typically rising about 80-90% of the way up the sides of the loaf pan or slightly above the rim, depending on the recipe and pan size. It should look visibly puffy and feel light.
A reliable test is the "poke test." Gently press your finger into the side of the loaf. If the indentation springs back immediately, the dough is under-proofed and needs more time. If the indentation remains and doesn't spring back at all, the dough is likely over-proofed. The sweet spot for soft whole wheat sandwich bread is when the indentation slowly springs back halfway. This indicates the gluten structure is developed enough to hold its shape but still has elasticity for oven spring. This usually takes 45-75 minutes, depending on the temperature.
Step 4: Baking - Achieving a Golden Crust and Perfectly Cooked Interior
Baking is the magical phase where your proofed dough transforms into a beautiful loaf of soft whole wheat sandwich bread. Proper oven temperature and baking time are critical for achieving a well-risen loaf with a golden crust and a fully cooked interior. Preheating your oven adequately is the first crucial step.
Preheat your oven to the temperature specified in your recipe, typically between 375°F and 400°F (190°C and 200°C) for sandwich loaves. Ensure the oven is fully preheated for at least 15-20 minutes after it reaches the set temperature, as many ovens beep when they reach temperature but haven't fully stabilized or heated the interior walls. Placing a baking stone or steel in the oven during preheating can help provide a consistent heat source from below, promoting better oven spring.
Oven Temperature and Baking Time for Whole Wheat Bread
The specific temperature and baking time will depend on your oven, the size of the loaf, and the recipe. A common starting point for a standard 1.5 lb (approx 680g) whole wheat sandwich loaf is baking at 375°F (190°C) for 35-45 minutes. Some bakers start at a higher temperature for the first 10-15 minutes (e.g., 400°F or 200°C) to boost oven spring, then reduce it to finish baking.
Keep an eye on the bread as it bakes. The crust should develop a rich golden-brown color. If it's browning too quickly before the interior is cooked, you can loosely tent the loaf with aluminum foil. Baking time is an estimate; it's more important to bake the bread until it reaches the correct internal temperature and passes the tap test, ensuring you have a perfectly baked soft whole wheat sandwich bread.
Using Steam for a Crisper Crust and Improved Oven Spring
Creating steam in the oven during the initial phase of baking is a technique often used to improve the crust and overall rise of bread, including soft whole wheat sandwich bread. Steam keeps the surface of the dough moist and pliable for longer in the hot oven, allowing the loaf to expand fully before the crust sets. This results in better oven spring and a thinner, crisper crust initially (which softens as the bread cools).
There are several ways to create steam in a home oven. One simple method is to place a metal pan (like a broiler pan or old baking sheet) on the bottom rack of your oven while it preheats. Just before placing the bread in the oven, carefully pour about a cup of hot water into the hot pan. Close the oven door quickly to trap the steam.
Be very cautious of the hot steam. Another method is to place a few ice cubes on the preheated baking stone or in a pan below the bread. The steam is most effective in the first 10-15 minutes of baking.
Checking for Doneness: Internal Temperature and the "Tap Test"
To ensure your soft whole wheat sandwich bread is fully baked and not gummy inside, rely on internal temperature and the classic "tap test." The most accurate way to check for doneness is to use an instant-read thermometer. Insert it into the center of the loaf from the bottom or side. Whole wheat bread is typically done when the internal temperature reaches 200-210°F (93-99°C).
The tap test is another good indicator. Carefully remove the loaf from the pan (use oven mitts!) and tap the bottom crust firmly with your knuckles. A fully baked loaf will sound hollow. If it sounds dull or heavy, it needs more time in the oven. If the crust is already dark, return it to the oven out of the pan for a few more minutes directly on the rack, or tent it with foil to prevent further browning while the inside finishes cooking.
Step 5: Cooling and Slicing - Preserving Softness and Flavor
The cooling process is just as important as the baking itself for achieving a soft whole wheat sandwich bread. As the bread cools, residual heat continues to cook the interior, and the structure sets properly. Slicing too early can result in a gummy texture because the internal moisture hasn't had a chance to redistribute and stabilize.
Immediately upon removing the bread from the oven, take it out of the loaf pan. Place the hot loaf on a wire cooling rack. This allows air to circulate around the entire loaf, preventing the bottom crust from becoming soggy as steam escapes. Resist the urge to slice into your beautiful soft whole wheat sandwich bread right away!
Cooling the Bread Completely Before Slicing
Allowing your soft whole wheat sandwich bread to cool completely on a wire rack is essential for the final texture. The internal temperature of the bread continues to drop, and moisture migrates from the center outwards, resulting in an even, soft crumb. This process can take 1.5 to 2 hours for a standard loaf.
Slicing hot bread traps steam inside, leading to a gummy, dense texture. It also makes the bread difficult to slice cleanly. Patience during the cooling phase is rewarded with the perfect texture for your soft whole wheat sandwich bread. Ensure the loaf is cool to the touch, or at least only slightly warm, before slicing.
Slicing Techniques for Even and Consistent Slices
Once your soft whole wheat sandwich bread is fully cooled, you can slice it. Using the right tool makes a big difference in getting even, consistent slices. A serrated bread knife is the best choice, as its teeth can grip the crust and slice through the soft interior without crushing the loaf.
Use a gentle sawing motion with the serrated knife, rather than pressing down hard. Hold the loaf steady with one hand while slicing with the other. For perfectly even slices, you can use a bread slicing guide or box, which provides slots to guide your knife. Slice only as much bread as you plan to eat immediately, as slicing exposes more surface area to the air, which can lead to drying. Store the unsliced portion appropriately to maintain the softness of your whole wheat sandwich bread.
Tips and Tricks for Baking Extra Soft Whole Wheat Bread

Achieving truly soft whole wheat sandwich bread can be elevated further with a few extra techniques. These methods introduce additional moisture, enhance the dough's ability to retain water, or improve gluten handling, all contributing to a more tender and moist final product. Experimenting with these tips can take your whole wheat baking to the next level.
These tips often involve adding a pre-cooked paste or ingredient, adjusting the mixing process, or incorporating a pre-fermented dough. While they add an extra step, the results in terms of softness and longevity are often well worth the effort, especially when aiming for that exceptionally soft whole wheat sandwich bread texture.
Adding a Tangzhong or Water Roux for Enhanced Moisture
A tangzhong (or water roux) is a technique borrowed from Asian baking that significantly increases the softness and shelf life of bread. It involves cooking a small portion of the flour and liquid (usually milk or water) from the recipe into a thick, pudding-like paste before adding it to the main dough ingredients. Typically, this paste uses about 5-10% of the total flour weight and 5 times that amount in liquid (e.g., 20g flour + 100g water/milk).
When flour is heated with liquid to about 149°F (65°C), the starch gelatinizes and can hold significantly more water than raw flour. When this paste is added to the dough, it introduces this bound water, which stays locked within the bread's structure during baking.
This results in an incredibly moist and tender crumb that stays soft for days, making it an excellent technique for soft whole wheat sandwich bread. The process is simple: whisk flour and liquid in a small saucepan, heat over medium heat, stirring constantly, until it thickens to a paste (like a thick gravy or pudding), then cool before adding to the dough ingredients.
Using Potato Flakes or Mashed Potato for a Softer Crumb
Adding cooked potato, either in the form of instant potato flakes or cooled mashed potato, is another time-tested method for creating exceptionally soft bread, including soft whole wheat sandwich bread. Potatoes contain starch that, like the tangzhong method, helps to bind moisture in the dough. They also add a subtle richness and tenderness to the crumb.
For instant potato flakes, you can often substitute a small amount (e.g., 1/4 cup per loaf) for some of the flour or add them directly to the dry ingredients, increasing the liquid slightly to compensate for their absorbency. If using leftover mashed potato (ensure it's plain, without butter or milk added initially), incorporate about 1/2 cup per loaf into the wet ingredients. The potato starch helps keep the crumb moist and soft, contributing to a lovely texture in your soft whole wheat sandwich bread.
Incorporating a Pre-Ferment (Poolish or Biga) for Improved Flavor and Texture
A pre-ferment is a portion of the dough mixed hours or even a day in advance and allowed to ferment. Common types include poolish (equal parts flour and water by weight, with a tiny amount of yeast) and biga (a stiffer dough with less water). Incorporating a pre-ferment adds depth of flavor through longer fermentation and can also positively impact the texture, contributing to a softer crumb and better oven spring in your soft whole wheat sandwich bread.
The longer fermentation period in a pre-ferment allows enzymes to break down starches and proteins, creating compounds that enhance flavor and aroma. It also helps to strengthen the gluten network indirectly. When the pre-ferment is added to the final dough, it kickstarts fermentation and contributes to a more vigorous rise. While adding an extra step, the improved flavor complexity and enhanced texture make a pre-ferment a worthwhile addition for serious soft whole wheat sandwich bread bakers.
Kneading Techniques for Optimal Gluten Development Without Overworking the Dough
As mentioned earlier, whole wheat dough requires careful kneading. Techniques like the "stretch and fold" method can be particularly effective. Instead of continuous kneading, after the initial mix (and optional autolyse), let the dough rest for 10-15 minutes. Then, with wet hands, gently stretch one side of the dough up and fold it over the center. Rotate the bowl and repeat this stretching and folding process 3-4 times.
Repeat the stretch and fold process every 15-30 minutes for the first hour or so of the initial rise. This intermittent handling develops gluten gradually and gently without the tearing action that continuous kneading can cause with bran present. This technique is excellent for high-hydration whole wheat doughs and can lead to a more open and tender crumb in your soft whole wheat sandwich bread than traditional kneading alone.
Adjusting the Recipe for Different Climates and Humidity Levels
Baking is affected by your environment. Humidity and altitude can impact how much water your flour absorbs and how quickly your dough rises. In high humidity, your flour may already contain more moisture, meaning you might need slightly less liquid than specified in a recipe written for a drier climate. Conversely, in low humidity or high altitude, you might need a little more water to achieve the correct dough consistency for soft whole wheat sandwich bread.
Similarly, temperature affects yeast activity. Dough will rise faster in warmer, more humid conditions and slower in cooler, drier ones. Be prepared to adjust rising times based on your environment. Pay attention to the dough itself – its feel and how much it has risen – rather than strictly adhering to times given in a recipe. Learning to read your dough is a key skill for consistently baking soft whole wheat sandwich bread regardless of the weather.
Troubleshooting Common Whole Wheat Bread Baking Problems
Even with the best intentions and techniques, sometimes things don't go exactly as planned when baking soft whole wheat sandwich bread. Understanding common issues and how to address them is part of the learning process. Don't get discouraged; most problems have a solution.
Here we address some of the most frequent complaints about whole wheat bread and provide guidance on how to diagnose and fix them. With a little adjustment, you can turn those baking challenges into successes and enjoy delicious soft whole wheat sandwich bread every time.
Why is My Whole Wheat Bread Dry?
Dryness is one of the most common complaints about homemade whole wheat bread, often resulting in a loaf that crumbles easily. The primary culprit is usually insufficient hydration. Whole wheat flour needs significantly more water than white flour, and if the dough is mixed too stiffly, the finished bread will be dry.
To fix this, ensure you are using adequate liquid in your recipe. Aim for a hydration level of at least 65-75% (by flour weight), and be prepared to add a little extra water during mixing if the dough feels stiff or doesn't come together smoothly. Using techniques like a tangzhong or incorporating potato can also dramatically improve moisture retention. Additionally, ensure you are not overbaking the bread; baking too long at too high a temperature will dry it out. Check for doneness using internal temperature (200-210°F or 93-99°C) rather than just relying on bake time.
A dense loaf means the dough didn't rise sufficiently, either during proofing or in the oven (oven spring). This can be due to several factors, including poor gluten development, insufficient yeast activity, or under-proofing. Whole wheat's bran can hinder gluten, making density a potential issue if not managed.
Ensure you are kneading or using stretch-and-fold techniques effectively to build a moderate gluten network, but avoid overworking which can also cause density. Check that your yeast is fresh and active; old or dead yeast won't produce enough gas. Make sure your water temperature for activating yeast is correct. Most importantly, allow sufficient time for proofing. The dough needs to double in size (or close to it) during the initial rise and show the correct signs during the poke test for the final proof. Baking under-proofed dough guarantees a dense loaf of soft whole wheat sandwich bread.
Why Did My Whole Wheat Bread Not Rise?
A lack of rise, or very slow rise, points directly to issues with yeast activity or the dough environment. Yeast is a living organism, and it needs specific conditions to thrive: food (sugar/flour), moisture, and a suitable temperature. If any of these are off, your dough won't rise as expected for soft whole wheat sandwich bread.
First, check the expiration date on your yeast and ensure it's fresh. If using active dry yeast, proof it in warm water with a pinch of sugar before adding to other ingredients to verify it's alive (it should get foamy). Ensure your liquid temperature isn't too hot (which can kill yeast) or too cold (which makes it sluggish). Make sure your dough is in a warm, draft-free spot for rising, ideally 75-80°F (24-27°C). Insufficient kneading can also result in a poor rise, as the gluten structure isn't strong enough to hold the gas produced by the yeast.
My Whole Wheat Bread is Gummy - What Went Wrong?
A gummy texture inside your soft whole wheat sandwich bread is usually a sign that the bread was not fully baked or was sliced before it had cooled completely. When bread doesn't reach the correct internal temperature, the starches haven't gelatinized and set properly, leaving a wet, paste-like texture.
Ensure you are baking your loaf until it reaches an internal temperature of 200-210°F (93-99°C) using an instant-read thermometer. The tap test should also sound hollow. If the crust is browning too quickly, tent the loaf with foil and continue baking until the internal temperature is reached. Equally important, always let your soft whole wheat sandwich bread cool completely on a wire rack before slicing. Slicing hot bread releases steam prematurely and traps moisture, leading to that undesirable gummy texture.
Storing Your Soft Whole Wheat Sandwich Bread
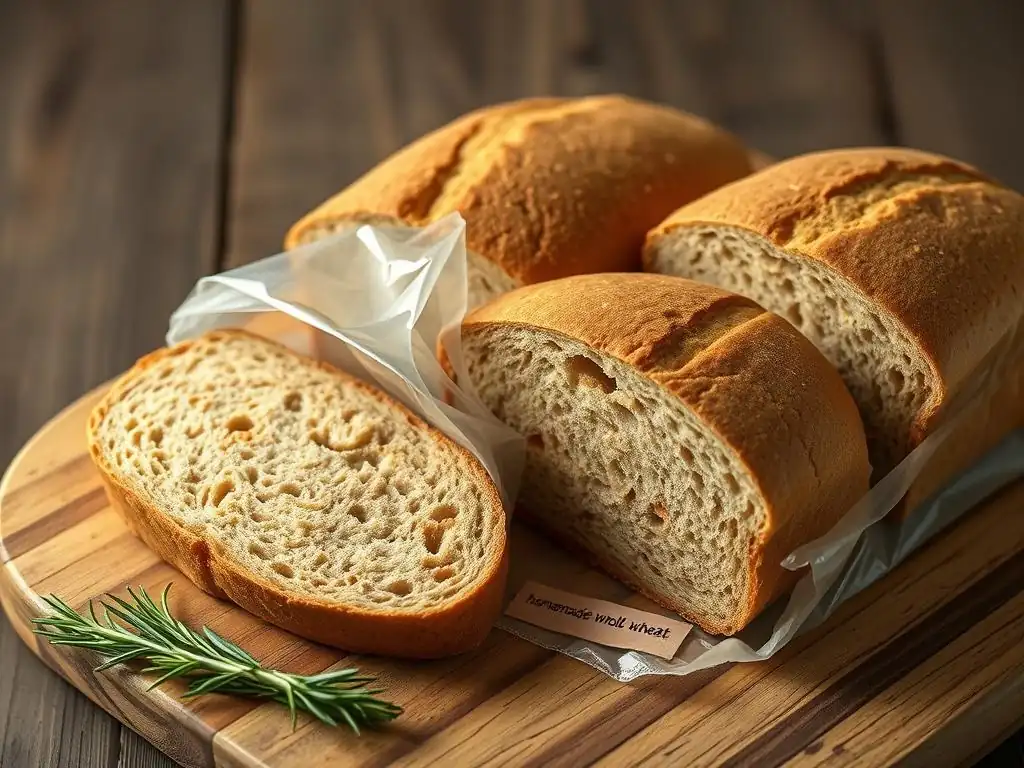
Once you've baked a beautiful, soft whole wheat sandwich bread, you'll want to keep it fresh and soft for as long as possible. Proper storage is key to preserving its texture and flavor and preventing it from drying out too quickly. Whole wheat bread, due to its composition, can sometimes dry out faster than white bread if not stored correctly.
Avoiding refrigeration (unless absolutely necessary in a very humid climate) is generally recommended for short-term storage, as the cool temperatures can actually accelerate starch retrogradation, making the bread stale faster. Instead, focus on methods that protect the crust while allowing some air circulation, or opt for freezing for longer periods to maintain the soft texture of your whole wheat sandwich bread.
Best Practices for Keeping Whole Wheat Bread Fresh
For day-to-day storage of your soft whole wheat sandwich bread, the goal is to protect the cut surfaces from drying out while allowing the crust to breathe slightly. Once the loaf is completely cool, store it at room temperature. A bread box is an excellent option, providing an enclosed space that helps regulate humidity.
If you don't have a bread box, you can wrap the cooled loaf loosely in a clean linen or cotton tea towel, then place it in a paper bag. For cut bread, press the two cut halves together, then wrap the loaf. Plastic bags or airtight containers are effective at preventing drying but can soften the crust. If you prefer a soft crust, a plastic bag works well. For maximum freshness of sliced bread, store it in an airtight container or zip-top bag at room temperature for 2-3 days.
Freezing Whole Wheat Bread for Long-Term Storage
Freezing is the best method for storing your soft whole wheat sandwich bread for more than a few days while preserving its texture. Freezing halts the staling process. Ensure the bread is completely cool before freezing.
You can freeze the entire loaf, half a loaf, or even individual slices. For a whole or half loaf, wrap it tightly in plastic wrap, ensuring no air pockets, then wrap it again in aluminum foil or place it in a freezer-safe bag. For individual slices, it's helpful to freeze them first on a baking sheet until solid, then transfer them to a freezer bag with parchment paper between slices to prevent sticking. Properly wrapped, soft whole wheat sandwich bread can be frozen for up to 3-4 months.
Reheating Whole Wheat Bread to Restore Softness
If you've stored your soft whole wheat sandwich bread and want to enjoy it warm with its original soft texture, reheating can help. Avoid microwaving the entire loaf, as this often makes bread tough as it cools.
To reheat a whole or partial loaf from room temperature, you can wrap it in aluminum foil and warm it in a preheated oven at 300-325°F (150-160°C) for 10-15 minutes, or until warm through. This gentle heat helps to re-distribute moisture. For slices, you can toast them, warm them briefly in a toaster oven, or wrap a single slice in a damp paper towel and microwave it for 15-20 seconds for a quick softening effect. From frozen, you can often toast slices directly or thaw larger pieces overnight at room temperature before reheating.
Variations and Additions to Your Soft Whole Wheat Bread Recipe
Once you've mastered the basic soft whole wheat sandwich bread, you can explore exciting variations by adding ingredients that enhance flavor, texture, and nutrition. Whole wheat flour pairs well with a variety of additions, allowing you to customize your loaf to your liking.
These simple modifications can transform your standard soft whole wheat sandwich bread into something uniquely yours, adding layers of flavor and making it even more enjoyable. Don't hesitate to experiment and find your favorite combinations!
Adding Seeds and Grains for Texture and Flavor
Incorporating seeds and grains is a popular way to boost the nutritional value and add delightful texture and nutty flavor to soft whole wheat sandwich bread. Flaxseeds, chia seeds, sesame seeds, sunflower seeds, pumpkin seeds, and even cooked grains like oats or quinoa work wonderfully.
You can add seeds and grains directly to the dough during the mixing stage. For harder grains or larger seeds (like flax or chia), soaking them in a small amount of hot water for 15-30 minutes before adding them to the dough can help them soften and prevent them from absorbing moisture from the dough itself, which could otherwise make the bread dry.
A common ratio is adding 1/4 to 1/2 cup of total seeds/grains per standard loaf, adjusting the liquid slightly if needed. You can also sprinkle seeds on top of the loaf before baking for added visual appeal and crunch.
Making Honey Whole Wheat Bread
Honey is a natural sweetener that complements the flavor of whole wheat beautifully and contributes to a very soft crumb. Substituting honey for other sweeteners in your soft whole wheat sandwich bread recipe is a simple variation. Honey is sweeter than sugar and also a liquid, so you may need to slightly reduce the amount of other liquids in the recipe.
A common substitution is replacing sugar cup-for-cup with honey, while slightly reducing the total liquid by about 1/4 cup per cup of honey used. Honey also gives the crust a lovely golden hue. Ensure you use a good quality honey for the best flavor. The enzymes in honey can sometimes affect gluten slightly, but in the amounts typically used for sweetness, it primarily contributes to moisture retention, flavor, and crust color, enhancing the softness of your whole wheat sandwich bread.
Creating a Cinnamon Swirl Whole Wheat Bread
Transforming your soft whole wheat sandwich bread into a sweet cinnamon swirl version is a delightful treat. This involves preparing a cinnamon-sugar filling and layering it into the dough during the shaping stage. It's perfect for breakfast toast or sweet sandwiches.
After the first rise and shaping the dough into a rectangle, spread a filling made from ground cinnamon, sugar (brown or white), and perhaps a little melted butter or flour to help absorb moisture, evenly over the surface, leaving a small border. Then, roll the dough up tightly as usual. Ensure the seam is well-pinched to prevent the swirl from unraveling during proofing and baking. Bake as directed for your soft whole wheat sandwich bread. The sugar in the swirl will melt and create a moist, flavorful layer within the loaf.
Exploring Different Whole Wheat Flour Blends
While this guide focuses on 100% whole wheat, you can also create soft whole wheat sandwich bread by blending whole wheat flour with other types of flour. Combining whole wheat with bread flour or all-purpose flour (e.g., a 50/50 blend) is a common approach, especially when starting out. This makes the dough easier to handle as the white flour contributes more readily developed gluten.
You can also blend whole wheat with other nutritious flours like spelt, rye, or oat flour. Each adds unique flavors and textures. When substituting, consider the absorption rate and gluten content of the alternative flour. Rye and oat flour, for example, have little to no gluten, so they should only replace a portion of the whole wheat flour (e.g., 10-20%) unless the recipe is specifically designed for a high percentage of non-wheat flour. Experimenting with blends allows you to customize the flavor, texture, and nutritional profile of your soft whole wheat sandwich bread.
Conclusion: Enjoying Your Homemade Soft Whole Wheat Sandwich Bread
Baking your own soft whole wheat sandwich bread is a journey that involves understanding ingredients, mastering techniques, and learning to read your dough. While whole wheat presents unique challenges compared to white flour, the rewards are immense: a loaf that is not only packed with nutrition and fiber but also boasts a delicious flavor and a wonderfully soft, tender crumb.
From selecting the right flour and ensuring adequate hydration to gentle kneading, proper proofing, and patient cooling, each step contributes to the final outcome. By following the BakeWithEase guide and tips, you can confidently bake soft whole wheat sandwich bread that rivals any store-bought loaf, free from preservatives and full of wholesome goodness.
The Satisfaction of Baking Your Own Healthy and Delicious Bread
There is a unique satisfaction in pulling a warm, golden loaf of soft whole wheat sandwich bread from your oven. The aroma fills your kitchen, and the knowledge that you created something so healthy and delicious from simple ingredients is incredibly rewarding. Homemade bread allows you to control the quality of ingredients and avoid additives often found in commercial loaves.
Enjoying a slice of your homemade soft whole wheat sandwich bread, perhaps with a smear of butter or your favorite sandwich fillings, is a simple pleasure that connects you to the timeless craft of baking. It's a testament to your growing skills and patience in the kitchen, providing a sense of accomplishment with every bite.
BakeWithEase's Commitment to Helping You Master Bread Baking.
At BakeWithEase, our mission is to make baking accessible and enjoyable for everyone, regardless of experience level. We strive to provide clear, detailed guidance that empowers you to tackle recipes like soft whole wheat sandwich bread with confidence. We believe that understanding the 'why' behind baking techniques is just as important as the 'how.'
We hope this comprehensive guide helps you achieve your goal of baking perfect soft whole wheat sandwich bread. Keep practicing, keep learning, and don't be afraid to experiment. Baking is a journey, and we are here to support you every step of the way, helping you bake with ease and discover the joy of creating delicious bread in your own home.
Frequently Asked Questions
What makes BakeWithEase's whole wheat sandwich bread recipe different from others?
Our recipe focuses on techniques for maintaining softness, unlike many whole wheat bread recipes that can be dense. We use specific ingredients and methods to achieve a light and airy texture.
Can I substitute any of the ingredients in the whole wheat sandwich bread recipe?
While you can substitute some ingredients, be mindful of the impact on texture and flavor. Gluten content and hydration levels are crucial for a soft crumb, so altering them may affect the outcome.
How long does the whole wheat sandwich bread stay fresh?
Our recipe is designed to create bread that stays soft for several days. Proper storage in an airtight container at room temperature will help maintain its freshness and prevent staleness for up to 3-4 days.
What are some tips for ensuring my whole wheat sandwich bread rises properly?
Ensure your yeast is active and fresh. Also, maintain a warm, humid environment during the proofing process to encourage optimal rising. Over-proofing can lead to collapse, so watch carefully.
Is it possible to make this whole wheat sandwich bread recipe without a stand mixer?
Yes, you can make the dough by hand, but it will require more kneading and elbow grease. Achieving the desired gluten development is key for a soft texture, so be patient and knead thoroughly.
Final Reflection: The Enduring Appeal of Soft Whole Wheat
The quest for perfectly soft whole wheat sandwich bread is more than just a culinary pursuit; it's a testament to our desire for wholesome comfort. Finding that ideal balance between nutritious whole grains and a tender, yielding crumb is a challenge many home bakers face, and one that resonates deeply with the growing demand for healthier, yet delicious, everyday foods. This article has explored various techniques and ingredients to achieve that perfect loaf, proving that healthy eating doesn't have to compromise on taste or texture.
The journey to mastering soft whole wheat bread has been a personal one, filled with both triumphs and flour-dusted failures. The process itself, from careful ingredient selection to the gentle kneading and precise baking, mirrors a mindful approach to cooking and life. It's a reminder that even seemingly simple tasks can yield profound satisfaction. As the renowned baker, Jim Lahey, once said: Bread baking is a metaphor for life. You put in the effort, you nurture it, and you reap the rewards.
This sentiment perfectly encapsulates the experience of perfecting this recipe, and the broader satisfaction derived from creating something nourishing and delicious from scratch.
Now, I invite you to take what you've learned and embark on your own baking adventure. Don't be afraid to experiment, to adjust the recipe to your preferences, and to savor the process as much as the final product. The soft, wholesome bread you create will not only nourish your body but also serve as a testament to your dedication and skill in the kitchen. Remember, the journey to the perfect loaf is as rewarding as the destination itself. So, gather your ingredients, preheat your oven, and let the baking begin!
Unlock the Secret to Soft Whole Wheat Bread!
Thanks for taking the time to explore the world of perfectly soft whole wheat bread! We hope you now feel confident in tackling this baking challenge. Ready to put your new skills to the test?
- Bake a loaf today! Use the recipe and tips from this article to create your own delicious, soft whole wheat bread. Experiment with different seeds or herbs!
- Share your baking journey! Post a picture of your creation on social media and tag us – we'd love to see your results!
- Leave a comment below and tell us: What's your favorite way to enjoy a freshly baked slice of whole wheat bread?