
OverProofing vs. UnderProofing Rolls: How to Tell

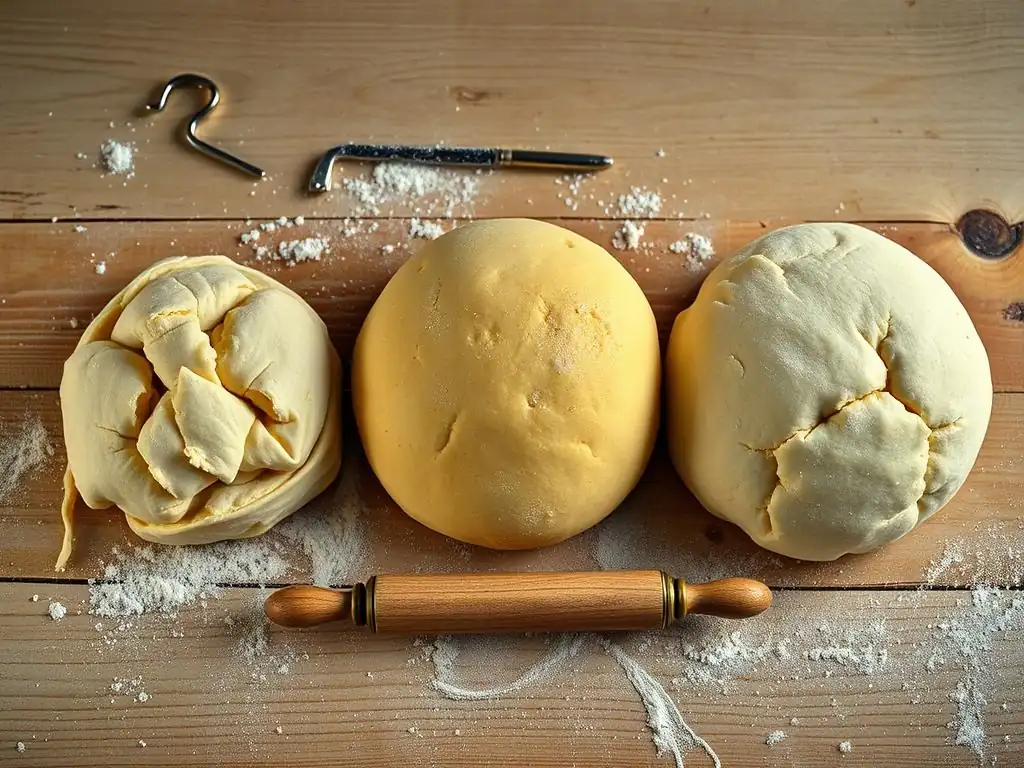
Welcome to BakeWithEase, your companion in creating delicious baked goods! Ever wondered if your rolls are perfectly proofed? Discover the secrets to achieving light, airy perfection in our latest article. We'll guide you through identifying the telltale signs of overproofing vs. underproofing rolls, ensuring your next batch is a guaranteed success. Ready to unlock the key to flawless bread baking? Let's get started!
- Proofing Bread: Achieving the Perfect Rise
- Understanding Proofing: The Key to Light and Airy Bread
- Identifying Under-Proofed Dough: Signs and Remedies
- Identifying Over-Proofed Dough: Signs and Solutions
- Achieving Ideal Proof: Mastering the Process
- Preventing Proofing Issues: Best Practices
- Troubleshooting Common Proofing Problems
- Achieving Baking Excellence: The Perfect Proof
- Frequently Asked Questions
- Final Reflection: The Art and Science of the Perfect Roll
- Unlock Your Baking Potential: Perfect Rolls Every Time!
Proofing Bread: Achieving the Perfect Rise
Understanding Proofing: The Key to Light and Airy Bread
What is Proofing and Why is it Essential?
Proofing is a critical step in baking, particularly when you're learning how to proof rolls or any yeast-leavened bread. It's the final rise of the dough before baking, allowing the yeast to continue its work of fermentation. This process is essential because it’s when your dough develops the light, airy texture and complex flavors that define great bread. Without proper proofing, your rolls would be dense, heavy, and lack the characteristic open crumb structure we all love. Think of it as the moment the dough takes a deep breath and expands, preparing for the heat of the oven.
Beyond just increasing volume, proofing also contributes significantly to the taste and aroma of your baked goods. As yeast ferments, it produces not only carbon dioxide gas but also various organic compounds and alcohol. These byproducts evaporate during baking, leaving behind subtle yet distinct flavors and contributing to the appealing aroma that fills your kitchen. Mastering how to proof rolls correctly is a fundamental skill that directly impacts the final quality, turning simple ingredients into delicious, aromatic baked goods.
The Science of Proofing: Yeast Fermentation and Dough Expansion
At its heart, proofing is a biological process driven by yeast, a living microorganism. When yeast is introduced to a dough containing sugar (which it can derive from flour or added sweeteners) and moisture, it begins to consume these sugars. This metabolic activity, known as fermentation, produces two primary byproducts: carbon dioxide gas and ethanol (alcohol). The carbon dioxide gas is the key player in dough expansion during proofing.
As the yeast produces CO2, this gas becomes trapped within the elastic network formed by gluten proteins in the dough. The gluten structure acts like tiny balloons, inflating as more gas is produced. This causes the dough to rise and increase in volume. Simultaneously, the ethanol and other metabolic byproducts contribute to the flavor profile of the dough. The temperature and humidity of the proofing environment significantly influence the rate of this fermentation process, making controlling these factors crucial for successfully learning how to proof rolls.
Identifying Under-Proofed Dough: Signs and Remedies
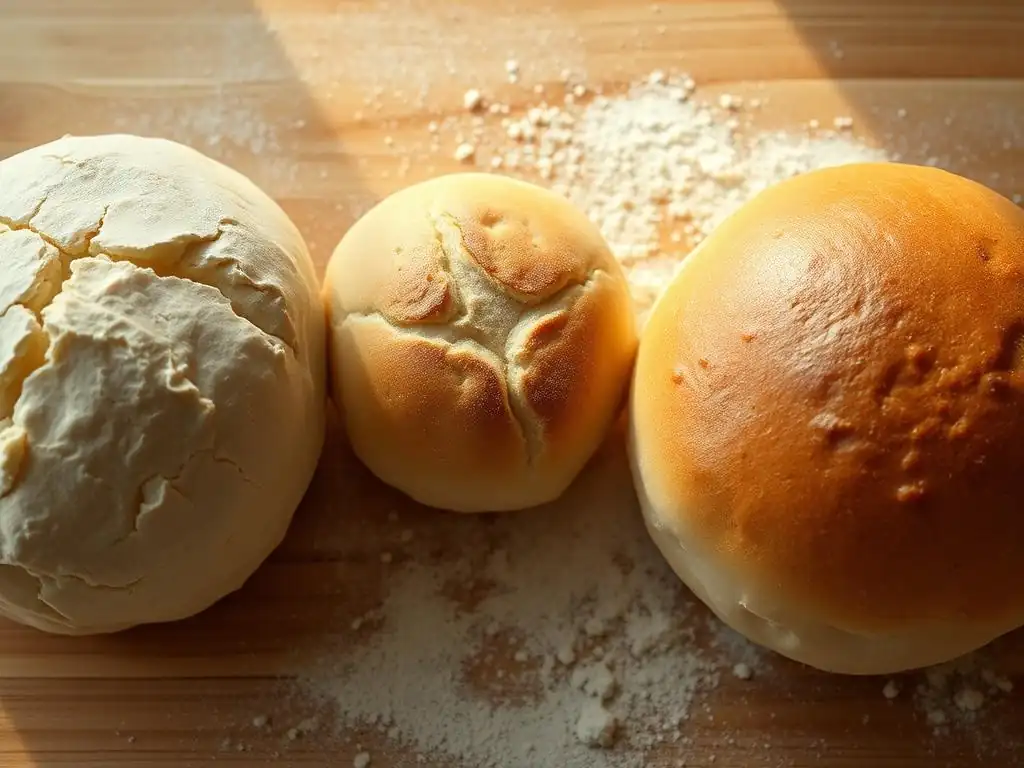
Recognizing the Signs of Under-Proofing
Knowing how to proof rolls means being able to spot when they haven't proofed enough. Under-proofed dough hasn't had sufficient time for the yeast to produce enough gas, resulting in a bake that is often disappointing. One of the most telling signs is the dough's appearance and feel before baking. It will look smaller than expected, perhaps only slightly larger than its original size after shaping, rather than having doubled or nearly doubled in volume as many recipes suggest.
Furthermore, when you handle under-proofed dough, it will feel quite firm and resistant. It might even snap back aggressively when gently pressed. After baking, the tell-tale signs become even clearer. Under-proofed rolls tend to exhibit what bakers call "oven spring" – a rapid, sometimes explosive expansion in the oven – because the yeast is still very active and the gluten structure is tight. While some oven spring is desirable, excessive spring can lead to cracked crusts and a dense, tight crumb structure inside, lacking the open air pockets you want in a well-proofed roll.
Dense Texture and Lack of Air Pockets
The most common outcome of baking under-proofed rolls is a dense, heavy texture. Because insufficient carbon dioxide was produced and trapped during proofing, the dough didn't expand adequately. When you slice open an under-proofed roll, you'll typically see a very tight crumb with small, irregular air pockets, or sometimes hardly any noticeable holes at all. The texture can feel gummy or tough rather than light and fluffy.
This dense crumb is a direct result of the limited expansion during the proofing phase. The gluten network is still strong and elastic, but it hasn't been sufficiently stretched and inflated by gas. When baked, the heat causes the remaining active yeast to produce a burst of gas (oven spring), but this happens too quickly and unevenly to create a well-developed, open crumb structure. The result is a roll that feels heavy for its size and lacks that desirable airy quality.
Insufficient Volume Increase
A key indicator when trying to figure out how to proof rolls correctly is monitoring their volume increase. Under-proofed dough simply hasn't reached the necessary volume. While recipes often specify doubling in size, the exact target can vary based on the dough type and desired outcome. However, if your shaped rolls look only marginally larger than when you first formed them after the recommended proofing time, they are likely under-proofed.
For example, if a recipe suggests proofing rolls until they are visibly puffy and nearly doubled, and yours have only increased by about 30-40%, they need more time. This lack of significant volume increase means the yeast hasn't had sufficient opportunity to ferment and produce enough gas to expand the gluten network fully. The dough still has a lot of rising potential left, which it will try to fulfill rapidly and often imperfectly in the hot oven.
Dough Resists Stretching
Another physical sign of under-proofing is how the dough behaves when gently manipulated. If you try to gently stretch or poke the surface of an under-proofed roll, it will feel firm and resistant. It will likely spring back quickly and forcefully after being poked. This resistance indicates that the gluten network is still relatively tight and hasn't been sufficiently relaxed and expanded by the gas produced during fermentation.
Properly proofed dough, in contrast, will feel soft and yielding. It will hold the impression of a gentle poke and won't spring back immediately. The resistance of under-proofed dough is a clear signal that the gluten structure hasn't been adequately inflated by the yeast's activity, leaving it too tight to expand properly during baking, resulting in a dense final product.
Common Causes of Under-Proofing
Understanding why dough might under-proof is crucial for preventing the issue. One of the most straightforward reasons is simply not giving the dough enough time. Proofing times provided in recipes are often guidelines, and actual proofing can take longer depending on various factors. Rushing the proofing process before the dough has visibly increased in volume and become soft and puffy is a primary cause of under-proofed rolls.
Another significant factor affecting how to proof rolls is the dough's temperature. Yeast activity is highly dependent on temperature; it thrives in warmth but becomes sluggish in cold conditions. If your kitchen is cool, or if the ingredients used were cold (like milk straight from the fridge), the dough's internal temperature will be low. This slows down the yeast's fermentation rate considerably, meaning the dough will take much longer to proof than anticipated, potentially leading to under-proofing if you follow the recipe's time guide rigidly without checking the dough itself.
Inadequate Proofing Time
Insufficient time is perhaps the most frequent culprit behind under-proofed dough. Yeast needs time to consume sugars and produce enough carbon dioxide to inflate the dough. If you cut the proofing time short, the yeast simply hasn't completed its work. A recipe might suggest proofing for 60-90 minutes, but if the dough is in a cooler environment or the yeast is less active, it might need 2 hours or more to reach the desired proof level.
Ignoring the visual cues (like volume increase) and relying solely on the clock is a common mistake when learning how to proof rolls. Always prioritize the dough's appearance and feel over the timer. If the dough hasn't significantly increased in size and still feels firm, it needs more proofing time, regardless of what the recipe's timer says.
Low Dough Temperature
Yeast is most active within a specific temperature range, typically between 75°F and 85°F (24°C and 30°C). Temperatures below this range significantly slow down yeast activity. If your dough is cold, perhaps because the ingredients were cold or the ambient room temperature is low (e.g., below 70°F or 21°C), the yeast will work very slowly. This can lead to severely extended proofing times, and if you stop proofing based on a standard recipe duration, the dough will be under-proofed.
Ensuring the dough maintains a suitable temperature throughout the proofing process is key. Using lukewarm liquids in the dough, allowing ingredients like eggs or milk to come to room temperature, and finding a warm spot for proofing can help prevent the dough from becoming too cold and consequently under-proofing.
Insufficient Yeast
While less common than time or temperature issues, using too little yeast for the amount of flour can also result in under-proofed dough. Yeast quantities in recipes are carefully calculated to achieve a specific rate of fermentation within a reasonable timeframe. If you accidentally halve the yeast, or if your yeast is old and less potent, it won't be able to produce enough gas to adequately leaven the dough within the expected proofing time.
Always check the expiration date on your yeast and store it properly (often in the refrigerator or freezer) to maintain its potency. If you suspect your yeast might be old or less active, you might consider using slightly more than the recipe calls for, or testing its activity by dissolving it in warm water with a pinch of sugar to see if it foams up within 5-10 minutes.
Correcting Under-Proofed Dough: Techniques for Improvement
If you realize your dough is under-proofed before baking, you can often take steps to salvage it. The simplest and most effective remedy is to extend the proofing time. As long as the yeast is still alive and active, giving the dough more time in a suitable environment will allow fermentation to continue, producing more gas and enabling the dough to expand further.
Another method is to gently warm the proofing environment. Since yeast activity is temperature-dependent, increasing the ambient temperature around the dough can speed up fermentation. This needs to be done carefully to avoid over-proofing quickly, but moving the dough to a warmer spot or creating a slightly warmer environment can help the yeast finish its job more efficiently and bring the dough to the correct proof level.
Extending Proofing Time
The most straightforward way to correct under-proofed dough is to simply let it continue proofing. Don't rely on the clock; instead, watch the dough. Place it back in its proofing spot and check it periodically, perhaps every 15-30 minutes, depending on the temperature. Look for the signs of proper proofing: significant volume increase (often doubling or nearly doubling) and a soft, puffy appearance.
Perform the poke test (described later) regularly. When a gentle poke leaves an indentation that springs back slowly or only partially, the dough is approaching readiness. Continue proofing until it passes the poke test and looks appropriately expanded for the type of rolls you are making. This patient approach is often all that's needed to turn under-proofed dough into perfectly proofed rolls.
Warming the Proofing Environment
If your dough is under-proofed due to a cool environment, gently increasing the temperature can help. You can try moving the dough to a warmer spot in your kitchen, like near a sunny window (but not in direct scorching sun) or on top of a warm appliance. Another common technique when learning how to proof rolls is to create a makeshift proofing box in your oven. Turn the oven light on (the heat from the bulb is often enough to create a warm environment, around 75-85°F or 24-30°C) and place the covered dough inside.
Alternatively, you can place the dough in a microwave or turned-off oven alongside a cup of freshly boiled water. Close the door to trap the warmth and humidity. Be cautious not to make the environment too hot, as this can kill the yeast or cause rapid, uncontrolled proofing leading to over-proofing. A gentle warmth is sufficient to encourage the yeast to become more active and complete the proofing process.
Identifying Over-Proofed Dough: Signs and Solutions
Recognizing the Signs of Over-Proofing
Just as under-proofing is detrimental, over-proofing can also ruin a batch of rolls. Dough that has proofed for too long, or too quickly in a warm environment, will show distinct signs. Visually, over-proofed dough often looks excessively large and puffy, sometimes even starting to spread out rather than holding its shape. It might look fragile, with a surface that seems thin and easily disturbed.
When you gently touch over-proofed dough, it will feel extremely soft and delicate. It will likely feel slack and might not spring back at all when poked; instead, the indentation will remain, or the dough might even deflate slightly under your touch. There might also be a strong, overly yeasty or even slightly alcoholic smell, indicating that fermentation has gone too far and the yeast is starting to run out of food and produce off-flavors.
Collapsed or Deflated Dough
A clear and often irreversible sign of over-proofing is when the dough begins to collapse or deflate. This happens because the yeast has produced so much carbon dioxide that the gluten structure, which holds the gas, has become overly stretched and weakened. The gluten network can no longer contain the gas, and the bubbles start to pop, causing the dough to shrink back down.
If you see your rolls, which were previously large and puffy, start to look wrinkled, sunken, or visibly smaller, they are significantly over-proofed. At this stage, the delicate structure needed for a light, airy crumb is often compromised beyond repair for standard rolls.
Unpleasant, Yeasty Aroma
While a pleasant, slightly fermented aroma is desirable in proofed dough, over-proofed dough can develop an overly strong, pungent, and sometimes slightly alcoholic or sour smell. This is because the yeast has consumed most of the available sugars and has moved into later stages of fermentation, potentially producing different byproducts.
This strong, yeasty smell is a signal that the yeast has been active for too long or too intensely. The resulting baked rolls may carry this strong flavor, which can be unpleasant and mask the desired subtle flavors of the bread. Recognizing this aroma is a helpful clue when determining how to proof rolls correctly and avoid pushing them too far.
Weak Gluten Structure
Over-proofing weakens the gluten structure. As the dough expands excessively, the strands of gluten become stretched too thin and can start to break down. This loss of structural integrity is why over-proofed dough feels slack and doesn't hold its shape well. When you try to handle it, it might tear easily or feel floppy rather than having the gentle elasticity of properly proofed dough.
This weakened gluten structure means the dough won't have the strength to support itself during baking. Instead of rising nicely in the oven, over-proofed rolls often collapse further or spread out into flat discs, resulting in a dense, heavy, and poorly shaped final product with a very coarse or uneven crumb.
Common Causes of Over-Proofing
Several factors can lead to dough becoming over-proofed. The most straightforward cause is simply allowing the dough to proof for too long. Leaving the dough unchecked for an extended period, especially overnight at room temperature or while you're away, can easily result in over-proofing, particularly with recipes designed for shorter proofing times.
Another major factor is a proofing environment that is too warm. Just as low temperatures slow yeast, high temperatures accelerate it dramatically. Proofing dough in a very warm spot (e.g., above 85°F or 30°C) can cause it to reach full proof much faster than expected, increasing the risk of overshooting the mark and becoming over-proofed before you have a chance to bake it.
Excessive Proofing Time
Leaving dough to proof for too long is a primary reason it becomes over-proofed. Yeast continues to ferment as long as conditions are favorable and it has food. While longer, slower proofs (like in the refrigerator) can develop complex flavors, leaving dough at warmer room temperature for extended periods beyond its peak proof can lead to the gluten structure breaking down and the dough collapsing.
For example, if a recipe for rolls suggests a 60-minute proof at room temperature, leaving them for 3 hours while you run errands will likely result in over-proofing. Always monitor your dough's progress and use visual cues and the poke test rather than relying solely on the clock, especially if you are unsure how to proof rolls in your specific kitchen environment.
High Dough Temperature
Proofing dough in an environment that is too warm significantly speeds up yeast activity. While warmth is needed for proofing, excessive heat can cause fermentation to happen too quickly and intensely. If the dough's internal temperature gets too high, the yeast can overproduce gas rapidly, stretching the gluten network to its limit prematurely.
Proofing dough directly in a hot sunny window, on a warm stove top, or in an oven that is too warm (even with just the light on, if the bulb is very hot) can lead to over-proofing in a fraction of the expected time. Maintaining a consistent, moderate proofing temperature is vital to prevent the yeast from running wild and damaging the dough structure.
Excessive Yeast
Using too much yeast in a recipe can also accelerate fermentation to the point where over-proofing becomes a significant risk. More yeast means more active microorganisms producing gas simultaneously. This can cause the dough to rise very quickly, potentially reaching full proof and then collapsing before you are ready to bake it.
While some recipes intentionally use more yeast for a rapid rise, it requires vigilant monitoring. If you accidentally add too much yeast or mismeasure, be prepared for the dough to proof much faster than the recipe indicates and be ready to bake as soon as it hits the correct proofing stage to avoid over-proofing.
Handling Over-Proofed Dough: Options and Alternatives
If your dough is slightly over-proofed but hasn't completely collapsed, you might be able to salvage it. Gently re-shaping the rolls can sometimes redistribute the gas and give the gluten a chance to tighten up slightly. After re-shaping, you would need to give the dough a very short second proof (sometimes called a "recovery proof"), perhaps just 15-30 minutes, before baking. This method is risky and works best if the dough is only marginally over-proofed and the gluten structure is still somewhat intact.
For significantly over-proofed dough that has collapsed or is very slack, attempting to bake it as rolls will likely result in flat, dense, and unappealing results. However, over-proofed dough can often be repurposed. The flavors developed during the extended fermentation can still be valuable.
Re-kneading and Re-proofing (If Salvageable)
If your dough is only slightly over-proofed and hasn't fully collapsed, you might be able to gently deflate it, give it a very brief, gentle re-knead (just enough to help the gluten regain a little tension), and then reshape the rolls. Place the reshaped rolls back for a very short second proof. This recovery proof needs to be monitored extremely closely, as the yeast is very active and the dough can over-proof again rapidly.
This technique essentially allows you to redistribute the gas and give the dough a second chance. However, it often results in a slightly less airy crumb than perfectly proofed dough. It's a viable option for marginal cases but won't fully recover severely over-proofed dough where the gluten is significantly degraded.
Repurposing Over-Proofed Dough
For dough that is too far gone to bake as rolls – meaning it has collapsed, is very slack, and won't hold shape – it's often best to repurpose it. Don't waste those ingredients! The dough still contains flour, water, and the flavors developed during fermentation. Over-proofed dough can be transformed into flatbreads, crackers, or even pizza crust.
Simply punch down the dough, give it a light knead if needed, and roll it out very thinly. Bake it immediately without further proofing. The resulting flatbreads or crackers will have a unique flavor profile from the extended fermentation and can be quite delicious, turning a potential baking failure into a new culinary creation. This is a great tip when learning how to proof rolls, as it offers a safety net.
Achieving Ideal Proof: Mastering the Process
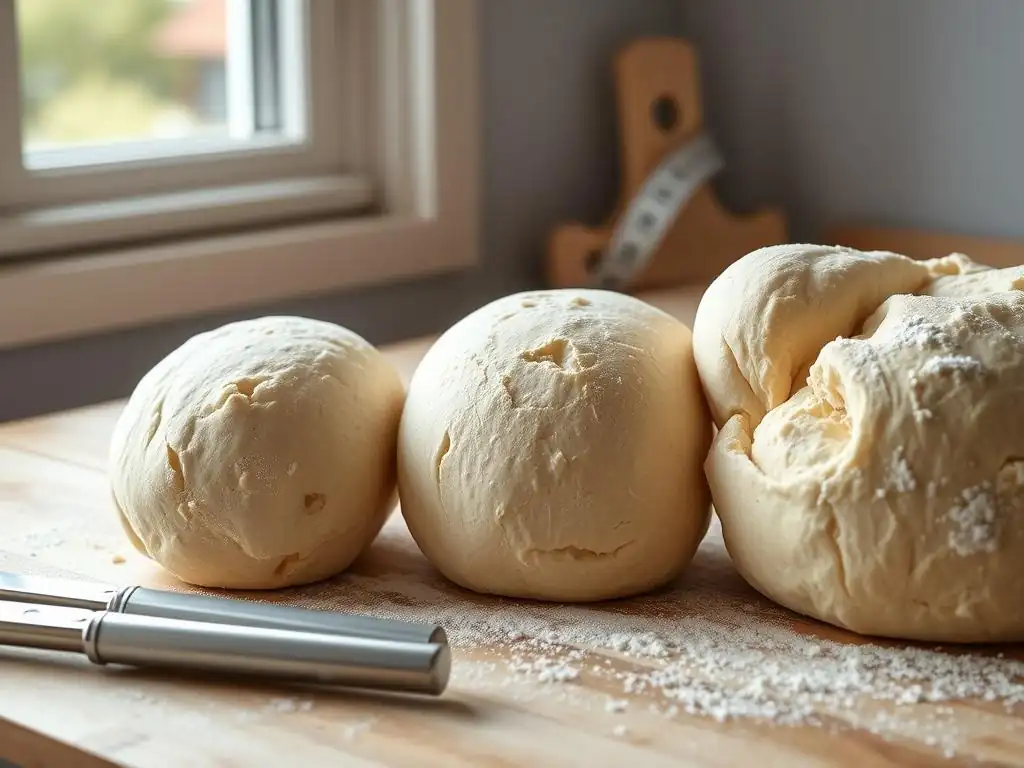
The Poke Test: Assessing Readiness
One of the most reliable ways to tell if your dough is perfectly proofed is the "poke test." To perform the test, gently flour your finger and lightly press it into the surface of the dough, about half an inch deep. Observe how the indentation behaves. If the indentation springs back immediately and completely, the dough is under-proofed. It needs more time to relax and expand.
If the indentation remains completely without springing back at all, or if the dough collapses slightly, it is likely over-proofed. However, if the indentation slowly springs back only partially, leaving a visible mark, your dough is likely perfectly proofed and ready to bake. This test is invaluable when you're learning how to proof rolls, as it gives you a tactile confirmation of the dough's readiness, independent of the clock.
Optimal Proofing Temperature and Humidity
Yeast is happiest and most active within a temperature range of approximately 75°F to 85°F (24°C to 30°C). Proofing within this range allows for a relatively quick and efficient rise, typically within 1-2 hours for many roll recipes. Lower temperatures (e.g., 60-70°F or 15-21°C) will slow down proofing significantly, potentially taking several hours or even overnight (cold proofing, which develops great flavor but requires much more time). Higher temperatures (above 85°F or 30°C) can speed proofing up too much, risking over-proofing and potentially negatively impacting flavor development.
Humidity also plays a role. A slightly humid environment prevents the surface of the dough from drying out and forming a crust, which can restrict the dough's ability to expand evenly. Covering your dough with a damp cloth, plastic wrap (lightly oiled to prevent sticking), or proofing it in a humid environment (like the oven with a cup of hot water) helps maintain the necessary moisture level on the surface.
Proofing Time Guidelines for Various Bread Types
Proofing times vary considerably depending on the type of dough, the amount of yeast used, and the proofing temperature. The times given in recipes are estimates for specific conditions. Generally, dough is considered fully proofed when it has significantly increased in volume (often doubled or nearly doubled) and passes the poke test.
Learning how to proof rolls of different types requires understanding these variations. Lean doughs, enriched doughs, and whole wheat doughs all behave differently during proofing due to their unique compositions. Always use visual cues and the poke test in conjunction with recipe times.
Proofing Lean Doughs (e.g., Baguettes)
Lean doughs, which consist primarily of flour, water, yeast, and salt (like baguettes or many rustic rolls), tend to have a strong gluten structure and benefit from longer, slower proofing periods, often at cooler temperatures. This slower fermentation allows for better flavor development. While a final proof at room temperature might take 60-90 minutes, many bakers opt for a cold proof in the refrigerator for 8-24 hours after shaping.
This extended cold proof slows down yeast activity dramatically while enzymes continue to break down starches into sugars, contributing to a more complex flavor and often a better crust. When learning how to proof rolls that are lean, consider experimenting with cold proofing for enhanced results.
Proofing Enriched Doughs (e.g., Challah)
Enriched doughs contain fats (like butter or oil), sugar, eggs, or milk (such as challah, brioche, or many sweet rolls). These ingredients can affect yeast activity and gluten development. Sugar, up to a certain percentage, can feed the yeast and speed up fermentation, but in high concentrations, it can also inhibit yeast by drawing out moisture. Fats and eggs can tenderize the dough and coat gluten strands, potentially slowing down gluten development and affecting the dough's elasticity.
Enriched doughs often proof a bit differently than lean doughs. They might feel softer and less elastic. Proofing times can vary widely depending on the richness of the dough and the amount of sugar. Pay close attention to the visual signs of puffiness and use the poke test, as the standard "doubled in size" might look slightly different for these doughs compared to lean ones.
Proofing Whole Wheat Doughs
Whole wheat flour contains the bran and germ of the wheat kernel, which can interfere with gluten development. This means whole wheat doughs often have a weaker gluten structure compared to doughs made with white flour. The bran can also act like tiny razors, potentially cutting gluten strands during mixing and kneading.
Because the gluten network might be less robust, whole wheat doughs can be more susceptible to over-proofing and collapsing. They might also appear denser even when properly proofed. When learning how to proof rolls made with whole wheat, be mindful that the dough might not achieve the same airy volume increase as white rolls, and monitor carefully to prevent over-proofing, as the weaker structure is less forgiving. Using slightly warmer proofing temperatures can sometimes help accelerate the rise before the structure weakens too much.
Utilizing Proofing Equipment
While you can successfully proof dough using basic kitchen items, specialized equipment can help you achieve more consistent results, especially when trying to master how to proof rolls in varying conditions. Proofing boxes are a prime example of such equipment.
Alternatively, you can create effective controlled environments using items you already have. Consistency in temperature and humidity is key, and these tools or methods help eliminate variables that can lead to under or over-proofing.
Proofing Boxes and Their Benefits
A proofing box is a temperature and humidity-controlled environment specifically designed for proofing dough. These units allow you to set a precise temperature, ensuring optimal yeast activity regardless of your kitchen's ambient temperature. Many also allow you to add water to create a humid atmosphere, preventing the dough surface from drying out.
Using a proofing box provides a stable environment, making proofing times more predictable and reducing the risk of proofing issues caused by temperature fluctuations or drafts. This consistency is invaluable for bakers who bake frequently or who live in climates with significant temperature variations, helping them reliably achieve the perfect proof for their rolls.
Creating a Controlled Proofing Environment
You don't need a dedicated proofing box to create a controlled environment. A common and effective method is to use your oven with the light on. The heat from the bulb typically raises the temperature inside the oven to a warm, but not hot, level suitable for proofing (around 75-85°F or 24-30°C). Place your covered dough inside the unheated oven with only the light on.
Another technique is to place the covered dough in a turned-off oven or microwave alongside a cup of freshly boiled water. Close the door to trap the steam and warmth. This creates a warm, humid environment ideal for proofing. Just be sure the oven or microwave is off before placing the dough inside! These simple methods help you maintain a consistent temperature and humidity, making it easier to learn how to proof rolls successfully.
Preventing Proofing Issues: Best Practices
Preventing proofing problems starts long before the dough goes in for its final rise. Accuracy in your initial steps is fundamental. Using precise measurements for all ingredients, especially flour, liquid, and yeast, is crucial because the ratio of these components directly impacts dough consistency and fermentation rate. Using high-quality, fresh ingredients ensures that the yeast is active and the flour has good gluten-forming potential.
Properly developing the gluten structure through adequate kneading is another critical preventative step. A well-kneaded dough has a strong, elastic gluten network capable of trapping the carbon dioxide gas produced by the yeast. If the dough is under-kneaded, the gluten structure will be weak and unable to support the rise, potentially leading to a dense crumb even if fermentation is successful.
Accurate Measurements and Quality Ingredients
Precision in baking is paramount, and nowhere is this more true than with the ingredients that affect proofing. Using a kitchen scale to measure flour is highly recommended over volume measurements, as a cup of flour can vary significantly in weight depending on how it's scooped and packed. Accurate liquid measurement is also vital for proper dough hydration, which affects gluten development and yeast activity.
Furthermore, ensure your yeast is fresh and active. Old or improperly stored yeast may be dead or sluggish, leading to slow or no fermentation and under-proofing. Using good quality flour with sufficient protein content for gluten development is also important. Starting with accurate measurements and active ingredients sets the stage for successful proofing when you're learning how to proof rolls.
Proper Kneading for Gluten Development
Kneading, whether by hand or mixer, develops the gluten network in the dough. Gluten is the protein matrix that provides dough with its elasticity and structure, allowing it to stretch and hold the gas produced during fermentation. Dough that is not kneaded enough will have a weak gluten structure, making it difficult for it to trap gas effectively and rise properly during proofing.
You can often tell if your dough is sufficiently kneaded by performing the "windowpane test." Gently stretch a small piece of dough; if you can stretch it thin enough to see light through it without tearing, the gluten is well-developed. Proper kneading ensures the dough has the strength and flexibility needed to expand into light and airy rolls during proofing.
Monitoring Dough Temperature
Maintaining the correct dough temperature throughout the process, not just during proofing, is important. The temperature of your ingredients, the friction from kneading, and the ambient room temperature all influence the dough's internal temperature. Yeast activity begins as soon as yeast meets warm liquid and food.
Keeping track of the dough temperature helps you predict proofing times and adjust accordingly. If the dough feels cool after kneading, you know it will take longer to proof. If it feels quite warm, it will proof faster. Using a thermometer to occasionally check the dough's internal temperature can provide valuable insight and help you better control the proofing process when learning how to proof rolls.
Troubleshooting Common Proofing Problems
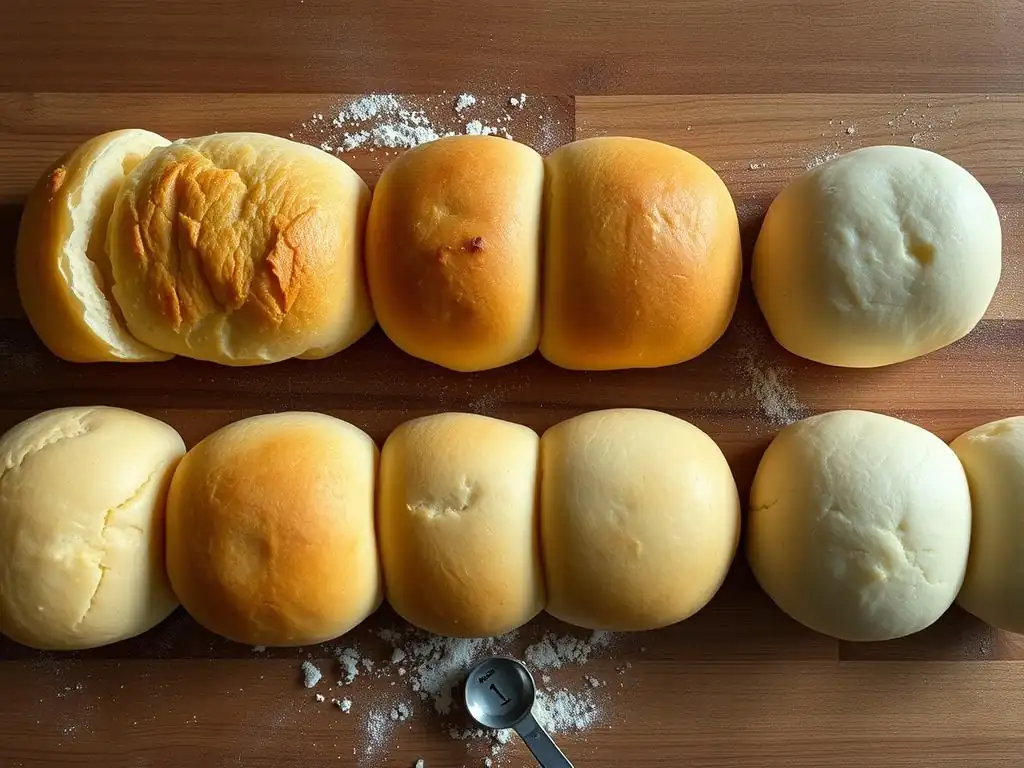
Even with best practices, you might encounter issues. One frustrating problem is when dough fails to rise at all. This is usually due to inactive yeast (either dead or inhibited by cold or too much salt/sugar), or the proofing environment being too cold. Ensure your yeast is viable and your proofing spot is warm enough.
Conversely, sometimes dough rises too quickly. This often happens when the proofing environment is too warm or if too much yeast was used. If you notice your dough is rising much faster than expected, move it to a cooler spot to slow down the fermentation.
Dough Fails to Rise
If your dough shows little to no activity after the initial bulk fermentation or during the final proofing of your shaped rolls, the yeast is likely inactive. The most common reasons are using dead yeast (check the date and test its activity), using liquid that is too hot during mixing (which can kill the yeast), or the dough being too cold (yeast is dormant below certain temperatures).
Ensure your proofing environment is warm enough (ideally 75-85°F or 24-30°C). If the dough is cold, try warming the environment gently. If you suspect the yeast is dead, you may need to start over with fresh yeast. Sometimes, adding a pinch of sugar can help kickstart sluggish yeast, but if there's no activity after a significant time in a warm place, the yeast is likely dead.
Dough Rises Too Quickly
Dough that rises excessively fast is often a sign that the proofing temperature is too high or that too much yeast was used. While a fast rise might seem desirable, it can compromise flavor development and lead to over-proofing quickly.
If your dough is rising too rapidly, move it to a cooler location immediately. The refrigerator is an option to halt the process, though it will require warming up again before baking. For slightly too-fast rises, simply moving to a cooler spot in the kitchen might be enough to slow it down to a more manageable pace, allowing you to monitor it closely and bake at the right time.
Uneven Dough Proofing
Sometimes, you might notice that some parts of your dough or some rolls on a baking sheet are proofing faster than others. This is usually due to inconsistent temperature or drafts in the proofing environment. Areas exposed to a draft or closer to a heat source will proof faster than cooler spots.
To ensure even proofing when learning how to proof rolls, use a consistent environment like a proofing box or a makeshift warm spot in your oven. Rotate your baking sheets halfway through the proofing time if needed. Covering the dough helps protect it from drafts and maintains a more uniform surface temperature and humidity, promoting even rising.
Achieving Baking Excellence: The Perfect Proof
Observational Skills and Adaptability
Mastering how to proof rolls and other bread involves developing keen observational skills. Learn to trust your senses: look at the dough's volume and surface, feel its texture and resistance, and even smell its aroma. Relying solely on recipe times can be misleading because kitchen conditions vary so much.
Be prepared to adapt your proofing time based on what the dough is telling you through the poke test and visual cues. Some days, due to warmer weather or slightly more active yeast, your dough might proof faster than expected. Other days, especially in cooler conditions, it might take significantly longer. Being flexible and responsive to the dough's needs is the mark of an experienced baker.
Continuous Practice and Refinement
Proofing is a skill that improves with practice. Each batch of rolls you bake offers an opportunity to learn more about how your dough behaves in your specific kitchen environment. Pay attention to the outcomes: if your rolls are consistently dense, they might be under-proofed. If they are flat or collapsed, they might be over-proofed.
By consistently applying the techniques for checking proof (like the poke test), controlling temperature and humidity, and observing the dough's characteristics, you will refine your ability to judge the perfect proof. Don't be discouraged by batches that don't turn out perfectly; view them as learning experiences. With dedication and practice, you will consistently achieve beautifully proofed dough and bake delicious, light, and airy rolls.
Frequently Asked Questions
How can I tell if my rolls are underproofed?
Underproofed rolls will appear dense and small, lacking the desired light and airy texture. They may also have a tight crumb after baking.
What are the visual signs that my rolls are overproofed?
Overproofed rolls often collapse slightly or have a sunken appearance. The dough might also have a sour, alcoholic smell.
How does temperature affect the proofing process of rolls?
Warmer temperatures accelerate proofing, while cooler temperatures slow it down. Ideally, proof rolls in a warm, draft-free environment for optimal results.
What is the "poke test" and how does it help determine if my rolls are properly proofed?
The poke test involves gently pressing the dough with your finger. If the indentation slowly springs back, the rolls are likely properly proofed.
Can I save overproofed roll dough?
In some cases, you can try to punch down the dough and reshape it for a second proof, but the results may be unpredictable due to the weakened gluten structure.
Final Reflection: The Art and Science of the Perfect Roll
The quest for the perfect roll, a seemingly simple pursuit, reveals a deeper understanding of baking's delicate balance. Mastering the art of proofing—that crucial window between mixing and baking—is not just about achieving a beautiful rise; it's about unlocking the full potential of your dough, transforming simple ingredients into a culinary masterpiece. This delicate dance between overproofing and underproofing directly impacts the texture, flavor, and overall success of your bread.
The impact of proper proofing extends far beyond the individual baker's kitchen. It speaks to a larger appreciation for the patience and precision required in culinary arts, mirroring the meticulous processes found in many aspects of life. The subtle nuances of dough behavior—the gentle rise, the subtle changes in texture—teach us the importance of observation and adaptation. The most beautiful things in the world cannot be seen or even touched - they must be felt with the heart.
This quote, while not directly about baking, perfectly encapsulates the intuitive understanding needed to master the proofing process. It's about feeling the dough, understanding its needs, and responding accordingly.
Now, consider your own projects, your own creative endeavors. Do you sometimes rush the process, overlooking the crucial steps that lead to success? Or perhaps you overthink, second-guessing yourself and hindering your progress? Take a moment to reflect on your own approach to achieving your goals. Just as with proofing bread, finding the right balance between patience and action, precision and intuition, is key to unlocking your full potential. Embrace the process, learn from your mistakes, and savor the rewards of a perfectly risen loaf—or a perfectly executed project.
Unlock Your Baking Potential: Perfect Rolls Every Time!
Thanks for taking the time to learn about the subtle art of proofing bread rolls! You've now got the knowledge to avoid those dreaded under- or over-proofed disasters. Ready to put your newfound expertise into practice?
- Bake a test batch today! Use what you've learned to create a small batch of rolls, paying close attention to the proofing stages. This hands-on experience will solidify your understanding.
- Share your baking journey! Post a photo of your perfectly proofed rolls on social media and tag us – we'd love to see your success!
- Explore our other baking guides for more tips and tricks to elevate your baking game.
So, what delicious roll recipe will you tackle first?