
GlutenFree Bread Baking: From Mixing to Perfect Slices

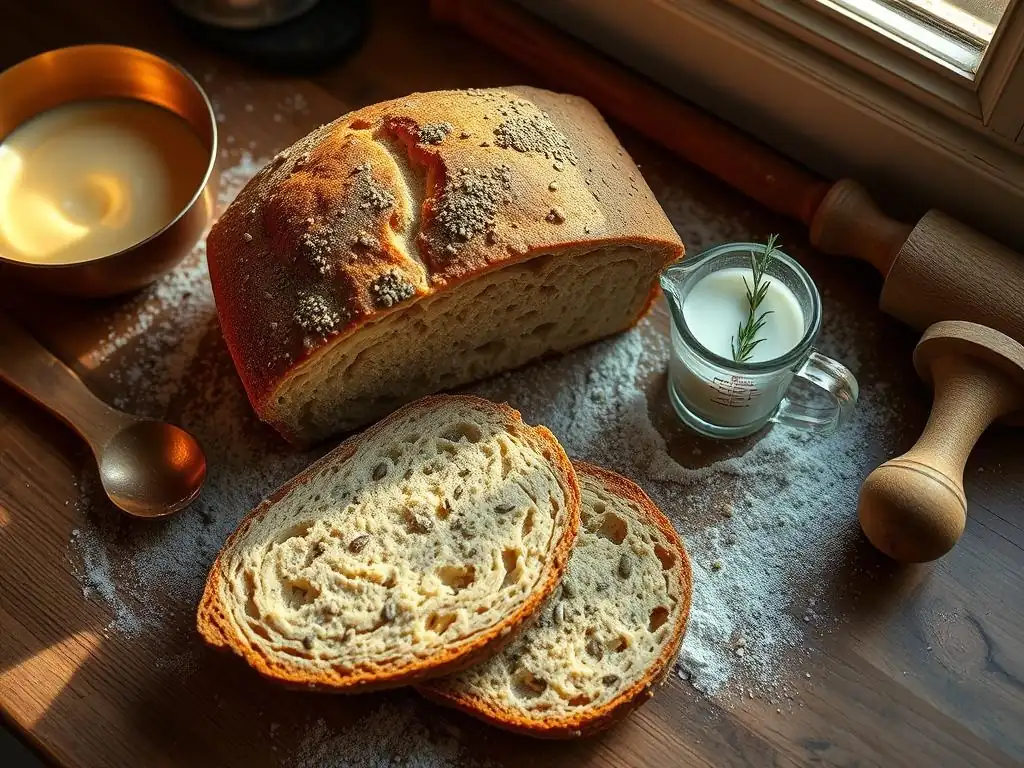
Welcome to BakeWithEase, your companion on a delicious baking journey! Ever dreamt of slicing into a perfectly risen, flavorful loaf of gluten-free bread? Gluten-free bread baking can seem daunting, but it doesn't have to be. Discover secrets to achieving that elusive texture and taste, starting with our essential mixing techniques. Dive in and let's unlock the secrets to success, one slice at a time.
- BakeWithEase Presents: Mastering Gluten-Free Bread Baking - From Mixing to Perfect Slices
- Understanding Gluten-Free Bread Baking Challenges
- Essential Ingredients for Gluten-Free Bread Success
- Gluten-Free Bread Baking Equipment Essentials
- Step-by-Step Guide to Gluten-Free Bread Baking
- Advanced Gluten-Free Bread Baking Tips and Techniques
- Troubleshooting Common Gluten-Free Bread Baking Problems
- Gluten-Free Bread Recipes to Get You Started
- Storing Your Gluten-Free Bread for Freshness
- Enjoying Your Homemade Gluten-Free Bread
- Gluten-Free Bread Baking: Conclusion & Next Steps
-
Frequently Asked Questions
- What are some common challenges when baking gluten-free bread?
- What are the best gluten-free flour blends to use for bread baking?
- What are some essential ingredients, besides gluten-free flour, needed for successful gluten-free bread?
- How important is hydration in gluten-free bread baking?
- What temperature and baking time are typically recommended for gluten-free bread?
- Final Reflection: The Enduring Allure of Gluten-Free Baking
- Unleash Your Inner Baker: Craft the Perfect Gluten-Free Loaf!
BakeWithEase Presents: Mastering Gluten-Free Bread Baking - From Mixing to Perfect Slices
Welcome to Gluten-Free Bread Baking!
Embarking on your gluten-free bread baking journey opens up a world of delicious possibilities. Whether you have celiac disease, a gluten sensitivity, or simply choose to avoid gluten, creating a beautiful, airy loaf from scratch is incredibly rewarding. Unlike traditional wheat-based baking, gluten-free requires a slightly different approach, focusing on ingredient ratios, hydration, and specific techniques to achieve that sought-after texture and rise. Don't be intimidated; with the right glutenfree bread baking tips and a little practice, you can consistently bake loaves that are moist, flavorful, and hold together beautifully.
This guide is designed to walk you through the fundamental principles and essential glutenfree bread baking tips needed to succeed. We'll cover everything from understanding the unique characteristics of gluten-free flours to troubleshooting common issues and sharing foundational recipes. Our goal is to empower you with the knowledge and confidence to move beyond dense, crumbly loaves and bake delicious, satisfying bread that everyone can enjoy. Get ready to transform simple ingredients into bakery-quality gluten-free bread right in your own kitchen!
Understanding Gluten-Free Bread Baking Challenges
Why is Gluten-Free Bread Different?
The primary difference in gluten-free bread baking lies in the absence of gluten. Gluten is a protein network formed when wheat flour is mixed with liquid; it provides structure, elasticity, and helps trap gases produced by yeast, allowing the bread to rise and maintain its shape. Without this natural structure, gluten-free doughs tend to be less elastic, often more batter-like, and lack the inherent ability to hold together and rise as effectively as wheat doughs. This fundamental difference means that traditional wheat bread recipes cannot simply be adapted by swapping flours one-to-one.
Successful gluten-free bread baking requires understanding how different gluten-free flours behave and how to compensate for the lack of gluten. This is where binders like xanthan gum or psyllium husk come into play, mimicking some of gluten's properties by providing structure and preventing crumbling. Mastering glutenfree bread baking tips involves learning new techniques for mixing, proofing, and baking that account for the unique characteristics of these alternative doughs, ensuring your loaf isn't dense, gummy, or dry.
Common Mistakes in Gluten-Free Bread Baking
One of the most frequent mistakes in gluten-free bread baking is treating the dough like wheat dough. Gluten-free doughs are often much wetter and stickier, requiring different handling techniques. Overworking the dough is another common pitfall; unlike wheat dough which benefits from kneading to develop gluten, gluten-free doughs only need to be mixed until combined. Excessive mixing can actually break down the structure provided by binders, leading to a dense texture.
Another mistake is not using a binder or using the wrong amount. Binders are crucial for providing elasticity and structure in gluten-free bread. Too little binder results in a crumbly loaf, while too much can make the bread gummy or heavy. Furthermore, incorrect hydration levels (the ratio of liquid to dry ingredients) can significantly impact the outcome. Gluten-free flours absorb liquid differently than wheat, and getting this ratio right is key to preventing dry or overly wet bread. Paying close attention to these specific glutenfree bread baking tips will dramatically improve your results.
Essential Ingredients for Gluten-Free Bread Success
Gluten-Free Flour Blends: Choosing the Right Mix
Choosing the right gluten-free flour blend is perhaps one of the most important glutenfree bread baking tips you'll receive. A good blend typically combines a mix of starches (like tapioca or potato starch) for lightness and tenderness, and nutrient-rich flours (like brown rice, sorghum, or millet) for flavor and structure. Using a single gluten-free flour, like just rice flour, often results in a dense or gritty texture. Many reputable brands offer pre-mixed all-purpose gluten-free blends designed for baking, but you can also create your own custom blends tailored to specific recipes.
When selecting a blend or creating your own, consider the specific needs of your recipe. A blend heavy on starches might be great for a light, airy loaf, while one with more whole grains will offer a heartier texture and flavor. Always weigh your flour using a kitchen scale for accuracy, as scooping flour can lead to significant variations in volume and hydration, impacting the final result. Experimenting with different blends is part of the fun in gluten-free baking!
Binders and Starches: Tapioca, Potato, and More
Binders are non-negotiable in gluten-free bread baking as they provide the structure that gluten normally would. The most common binders are xanthan gum and psyllium husk (often in powder form). Xanthan gum is used in smaller quantities, typically about 1/2 to 1 teaspoon per cup of gluten-free flour blend, and helps create elasticity. Psyllium husk, often used in slightly larger amounts (around 1-2 tablespoons per cup of flour), provides more structure and a chewier crumb, often preferred in artisan-style loaves. Some recipes use other binders like guar gum or chia seeds.
Starches like tapioca starch, potato starch (not potato flour), and cornstarch are essential components of most gluten-free flour blends. They contribute to the lightness and tenderness of the crumb. Tapioca starch, derived from the cassava root, adds chewiness and helps create a crispy crust. Potato starch provides a light, fluffy texture. Using a combination of starches and flours balances the properties needed for a successful gluten-free loaf. Understanding the role of each ingredient is a key glutenfree bread baking tip for consistent results.
Liquids: Hydration is Key in Gluten-Free Baking
Hydration refers to the ratio of liquid to dry ingredients in your dough, and it's a critical factor in gluten-free bread baking. Gluten-free flours tend to absorb liquid differently and often require more hydration than wheat flours to achieve the right consistency. Gluten-free bread dough is typically much wetter than traditional dough – often resembling a thick batter rather than a firm, kneadable mass. This higher hydration is necessary to prevent the final loaf from being dry and crumbly.
The type of liquid used also matters. Water is common, but milk (dairy or non-dairy like almond or soy milk) can add richness and help with browning. Buttermilk or yogurt can add tang and tenderness. Always measure liquids accurately, and be prepared to adjust slightly based on the specific flour blend you are using and even the humidity of your kitchen. A common starting point for hydration in gluten-free bread is around 80-100% (liquid weight compared to flour weight), significantly higher than many wheat recipes. Getting the hydration right is a crucial glutenfree bread baking tip.
Yeast and Leavening Agents for Gluten-Free Bread
Yeast is the most common leavening agent for achieving a light and airy texture in gluten-free bread, just as it is in wheat bread. Active dry yeast, instant yeast, and fresh yeast are all suitable. Instant yeast is often preferred in gluten-free recipes because it can be mixed directly with the dry ingredients and typically requires only one rise, simplifying the process. Active dry yeast usually needs to be proofed in warm liquid with a pinch of sugar before adding to the dry ingredients to ensure it's alive and active.
Some gluten-free bread recipes also incorporate chemical leaveners like baking powder or baking soda, often in combination with yeast, especially in quick breads or recipes aiming for a softer, cake-like crumb. These agents react with moisture or acidic ingredients to produce carbon dioxide quickly, providing an extra lift. Regardless of the type, ensuring your leavening is fresh and active is vital for a good rise, which is one of the fundamental glutenfree bread baking tips for a well-structured loaf.
Gluten-Free Bread Baking Equipment Essentials
Mixing Bowls and Utensils
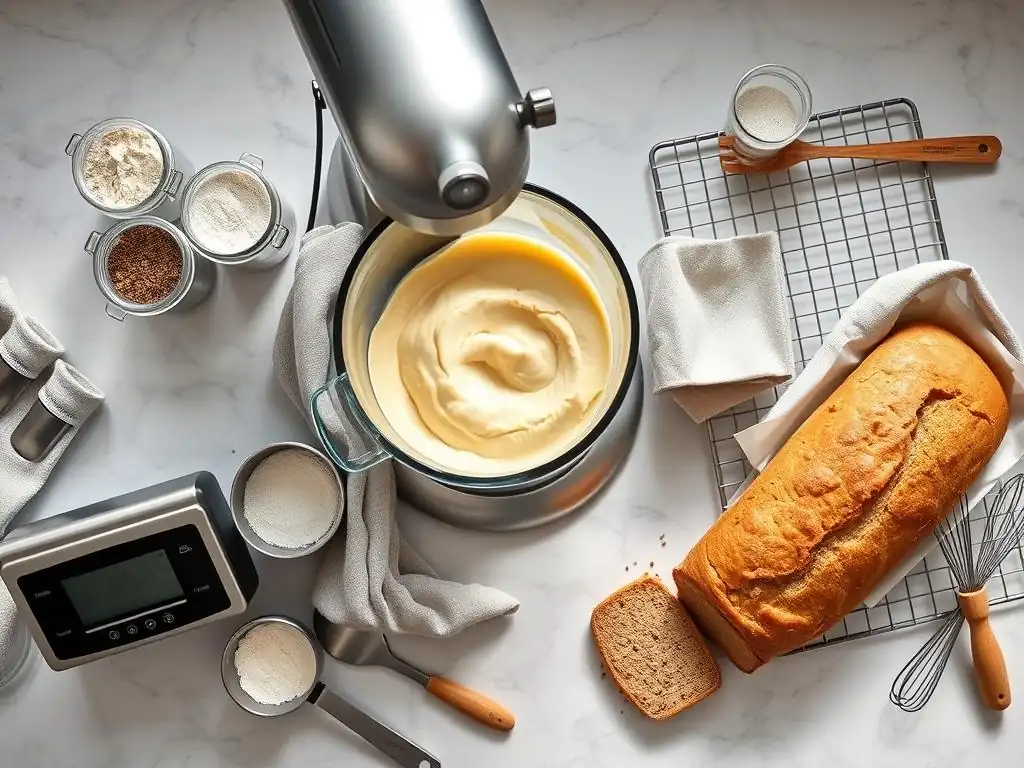
Having the right tools can make gluten-free bread baking much smoother. You'll need a good set of mixing bowls, preferably in various sizes. Since gluten-free dough is often wet and sticky, a sturdy bowl is essential. Glass or ceramic bowls are great as they retain heat well, which can be beneficial during proofing, but stainless steel works perfectly fine too. Avoid plastic bowls if possible, as they can retain grease.
For mixing, a strong spoon or spatula is necessary, especially for incorporating wet and dry ingredients. Because gluten-free dough doesn't require extensive kneading like wheat dough, hand mixing is perfectly adequate for many recipes. However, a stand mixer with a paddle attachment can be very helpful for thoroughly combining the sometimes-sticky dough and ensuring all ingredients are well incorporated without overworking the mixture. These simple glutenfree bread baking tips on equipment can save you effort.
Bread Pans: Size and Material Matters
The type and size of your bread pan significantly impact the shape and crust of your gluten-free loaf. Standard loaf pans (like 9x5 inches or 8.5x4.5 inches) are ideal for creating classic sandwich bread shapes. Metal pans conduct heat efficiently, leading to a good crust formation. Non-stick pans are convenient for easy release, but you may still want to grease and flour (with gluten-free flour) or line the pan with parchment paper, especially for very sticky doughs.
Glass or ceramic loaf pans can also be used, but they conduct heat differently, often requiring a slightly lower oven temperature or longer baking time. They can produce a lovely crust, but be mindful of potential sticking. Using parchment paper to line the pan is a highly recommended glutenfree bread baking tip, as it ensures your precious loaf doesn't stick, making removal effortless and preserving the loaf's shape.
Oven Temperature and Baking Stones
Accurate oven temperature is crucial for successful gluten-free bread baking. Most recipes call for baking temperatures between 350°F and 400°F (175°C to 200°C). It's a good idea to use an oven thermometer to verify your oven's actual temperature, as they can often be inaccurate. Preheating your oven thoroughly is also essential to ensure even baking and proper crust development from the moment the bread enters the oven.
Using a baking stone or steel can help create a more consistent and even heat source for your bread, resulting in a better rise and a crispier bottom crust. Place the stone in the oven while it preheats. When you're ready to bake, carefully slide the pan onto the hot stone.
Alternatively, you can place a pan of water on the bottom rack of your oven during baking to create steam, which helps the crust stay pliable longer, allowing for better oven spring before it sets. These glutenfree bread baking tips related to oven environment can make a big difference.
Step-by-Step Guide to Gluten-Free Bread Baking
Preparing Your Gluten-Free Dough
Begin by accurately measuring all your ingredients. Weighing your gluten-free flour blend and other dry ingredients is highly recommended for consistency. Combine your dry ingredients – the flour blend, binder (like xanthan gum or psyllium husk), salt, sugar (if using), and instant yeast (if not proofing active dry yeast) – in a large mixing bowl. Whisk them together thoroughly to ensure even distribution of ingredients, especially the binder and leavening agents.
In a separate bowl, combine your wet ingredients. This typically includes warm water or milk, oil or melted butter, and any other liquid sweeteners like honey or maple syrup. If using active dry yeast, proof it in a portion of the warm liquid with a pinch of sugar until foamy, usually about 5-10 minutes, before combining with the rest of the wet ingredients. Ensuring your liquids are at the correct temperature (around 105-115°F or 40-46°C for yeast) is a vital glutenfree bread baking tip.
Mixing Techniques for Optimal Texture
Once your dry and wet ingredients are prepared, it's time to combine them. Pour the wet ingredients into the dry ingredients. If using a stand mixer, use the paddle attachment on low speed to initially bring everything together, then increase the speed to medium. Mix for about 3-5 minutes. The goal is to thoroughly combine the ingredients and activate the binder, not to develop gluten (since there isn't any!). The dough will likely be quite wet and sticky, more like a thick cake batter or muffin batter than a traditional bread dough.
If mixing by hand, use a sturdy spoon or spatula. Stir vigorously until all the dry ingredients are incorporated and there are no pockets of flour. Continue stirring or beating for a few minutes to help the binder develop. Avoid the urge to add more flour to make the dough less sticky; excess flour will result in a dry loaf. Proper mixing is one of the key glutenfree bread baking tips for achieving a good crumb structure.
First Rise: Proofing Your Gluten-Free Bread
After mixing, gluten-free bread dough typically undergoes a single rise (proofing) in the pan it will be baked in. Unlike wheat dough which is often proofed in a bowl, the wet nature of gluten-free dough makes it difficult to handle and shape after rising. Lightly grease your loaf pan and, if desired, line it with parchment paper. Transfer the sticky dough into the prepared pan, using a wet spatula or your wet hands to smooth the top.
Cover the pan loosely with plastic wrap or a clean kitchen towel. Place the pan in a warm, draft-free spot to rise. A warm oven (turned off, with the light on) or a microwave are good options. The rise time will vary depending on the recipe, yeast activity, and room temperature, but typically takes 45-90 minutes, or until the dough has nearly doubled in size and the top is rounded. Don't expect the dramatic rise you might see with wheat dough; gluten-free rise is often more subtle. Patience during proofing is a valuable glutenfree bread baking tip.
Shaping Your Gluten-Free Loaf
Many gluten-free bread recipes, especially those with higher hydration, are baked in the pan they are mixed or proofed in and require minimal shaping. The dough is often simply scraped or poured into the prepared loaf pan and smoothed on top with a wet spatula. This simplifies the process and prevents handling the very sticky dough.
For recipes that result in a slightly firmer dough or those intended for freeform loaves (like some artisan-style or sourdough gluten-free breads), shaping might involve gently patting or folding the dough on a lightly floured surface (using gluten-free flour). However, extensive kneading or traditional shaping techniques are usually not necessary or even possible with gluten-free dough. Focus on gently coaxing the dough into the desired shape before the final rise. Minimal handling is a crucial glutenfree bread baking tip for maintaining the structure provided by binders.
Second Rise: Achieving the Perfect Rise
Many gluten-free bread recipes utilize a single rise (proofing) directly in the baking pan. However, some recipes, particularly those for richer or more structured loaves, might call for a second, shorter rise after shaping (if shaping is done outside the pan). If a second rise is required, place the shaped dough back in the prepared pan, cover loosely, and let it rest in a warm place for another 20-40 minutes, or until it has visibly increased in size, though not necessarily doubled.
Be cautious not to over-proof gluten-free dough during either rise. Over-proofed gluten-free dough can collapse in the oven or result in a dense texture. A good indicator is that the dough should look puffy and slightly rounded over the top of the pan. Learning to recognize the signs of proper proofing is an essential glutenfree bread baking tip that comes with practice.
Baking Your Gluten-Free Bread to Perfection
Preheat your oven thoroughly to the temperature specified in the recipe, typically between 350°F and 400°F (175°C to 200°C). Some recipes recommend starting with a slightly higher temperature for the first 10-15 minutes to encourage oven spring, then reducing it for the remainder of the bake. For a good crust, some bakers add steam to the oven by placing a pan of hot water on the bottom rack during the initial baking period.
Bake the bread for the time specified in the recipe, usually 40-60 minutes for a standard loaf. You can tell if gluten-free bread is done when the crust is golden brown and firm, and the internal temperature reaches around 200-210°F (93-99°C) when tested with an instant-read thermometer. Tapping the bottom of the loaf should produce a hollow sound. Baking until fully cooked is one of the most important glutenfree bread baking tips to avoid a gummy center.
Cooling and Slicing: Preventing Crumbling
Once baked, immediately remove the gluten-free bread from the pan and place it on a wire cooling rack. This allows air to circulate around the loaf, preventing the bottom crust from becoming soggy. Cooling is perhaps the most critical step to prevent crumbling in gluten-free bread. It is absolutely essential to let the bread cool completely before attempting to slice it. This can take 1-2 hours, or even longer for larger loaves.
While cooling, the internal structure of the bread sets. Slicing too early will result in a gummy texture and the loaf falling apart. Use a sharp, serrated knife for slicing once fully cooled. Gentle sawing motions work best. Patience during the cooling process is a golden glutenfree bread baking tip!
Advanced Gluten-Free Bread Baking Tips and Techniques
Hydration Levels: Finding the Sweet Spot
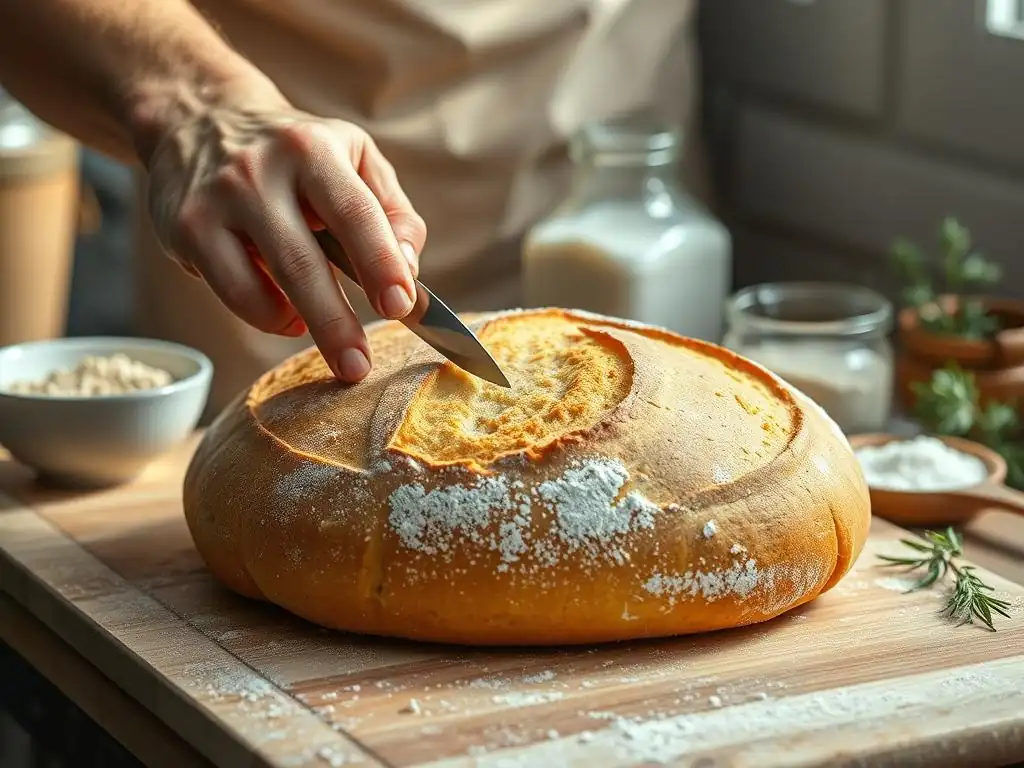
Adjusting hydration levels is a nuanced glutenfree bread baking tip that can significantly impact your final loaf. While many recipes provide a specific amount of liquid, factors like the humidity, the specific brand of flour blend used, and even the age of the flour can affect how much liquid is absorbed. A higher hydration (more liquid relative to flour) generally results in a more open, airy crumb, but also a wetter, stickier dough that's harder to handle. Lower hydration yields a denser loaf but is easier to work with.
Observe your dough's consistency. It should be thick but pourable or scoopable, not stiff or dry. If it seems too dry for the recipe's description, add a tablespoon of liquid at a time until the desired consistency is reached. Conversely, if it seems too wet, resist adding extra flour unless explicitly advised by the recipe; sometimes chilling the dough can help. Experimentation is key to finding the hydration sweet spot for your specific ingredients and environment.
Gluten-Free Sourdough: A Deeper Dive
Venturing into gluten-free sourdough baking is a rewarding advanced technique. It utilizes a gluten-free sourdough starter, which is a fermented culture of gluten-free flour and water containing wild yeast and bacteria. This starter acts as the leavening agent, providing a distinct tangy flavor and often a chewier texture compared to yeast-leavened loaves. Creating and maintaining a gluten-free starter requires regular feeding with gluten-free flour and water, similar to a wheat starter.
Gluten-free sourdough recipes often incorporate binders like psyllium husk to provide structure and elasticity. The process typically involves bulk fermentation (the first rise), shaping (which can be challenging due to the dough's stickiness), and a final proofing, often in a banneton or proofing basket dusted with gluten-free flour or lined with a cloth. Baking gluten-free sourdough often benefits from high heat and steam, frequently achieved using a Dutch oven, which is another excellent glutenfree bread baking tip for crust development.
Adding Flavors and Textures: Seeds, Herbs, and More
Once you've mastered the basics, adding extra ingredients can elevate your gluten-free bread. Incorporating seeds like poppy, sesame, sunflower, or chia seeds adds texture and nutritional value. You can mix them directly into the dough or sprinkle them on top before baking. About 1/4 to 1/2 cup of seeds per standard loaf recipe is a good starting point. Toasting seeds lightly before adding them can enhance their flavor.
Fresh or dried herbs like rosemary, thyme, or dill can infuse your bread with aromatic flavors. About 1-2 tablespoons of fresh herbs or 1-2 teaspoons of dried herbs per loaf is usually sufficient. Other additions like chopped nuts, dried fruits (like cranberries or raisins), olives, or even cheese can transform a basic loaf into something special. Fold these additions in gently during the final stages of mixing. These creative glutenfree bread baking tips allow for endless customization.
Using a Dutch Oven for Gluten-Free Bread
Baking gluten-free bread in a Dutch oven is a highly effective technique for achieving a superior crust and excellent oven spring, particularly for freeform loaves or sourdough. The heavy pot traps steam released from the dough as it bakes, creating a moist environment during the initial phase. This steam keeps the crust pliable, allowing the loaf to expand fully before the heat eventually dries the air and sets the crust, resulting in a beautiful, crispy exterior and a well-risen interior.
Preheat your Dutch oven with the lid on in a hot oven (often 450-500°F or 230-260°C). Carefully transfer your proofed loaf into the hot Dutch oven (often using parchment paper as a sling). Bake with the lid on for the first 20-30 minutes, then remove the lid and continue baking at a slightly lower temperature (around 400-425°F or 200-220°C) for another 20-30 minutes, or until the crust is deeply golden brown and the internal temperature is correct. Using a Dutch oven is one of the most impactful glutenfree bread baking tips for artisan-style results.
Troubleshooting Common Gluten-Free Bread Baking Problems
Dense and Gummy Bread: Causes and Solutions
One of the most frustrating issues in gluten-free bread baking is ending up with a loaf that is dense, heavy, or has a gummy streak. This is often caused by insufficient baking time or temperature. Gluten-free dough is very moist, and it needs adequate time in a hot oven to fully cook through and set the internal structure. An undercooked center will remain wet and gummy.
- Solutions: Ensure your oven is accurately preheated using an oven thermometer. Bake the bread until the internal temperature reaches 200-210°F (93-99°C). If the crust is browning too quickly, tent the loaf loosely with foil for the remainder of the baking time. Another cause can be using too much binder; ensure you are measuring binders accurately, ideally by weight or using the amount specified in a reliable recipe. Over-proofing can also contribute to density.
Crumbling Bread: How to Improve Structure
Crumbling is a common problem when the bread lacks sufficient structure to hold together. This is often due to not using enough binder (xanthan gum or psyllium husk), using the wrong type of binder, or incorrect hydration. A dough that is too dry will also result in a crumbly loaf.
- Solutions: Ensure your recipe includes a binder and that you are using the correct amount. If using psyllium husk, make sure it's the powder form, as whole husks absorb liquid differently. Check your hydration level; the dough should be moist and somewhat sticky before baking. Using ingredients like eggs or yogurt can also add richness and help improve crumb structure. Allowing the bread to cool completely before slicing is perhaps the most critical glutenfree bread baking tip to prevent crumbling.
Flat Bread: Addressing Rising Issues
A flat loaf indicates that the dough didn't rise properly, either during proofing or in the oven (oven spring). This can be caused by inactive yeast, insufficient proofing time, or a lack of structure to hold the rise. Cold ingredients or a cold proofing environment can also inhibit yeast activity.
- Solutions: Check the expiration date of your yeast and ensure it's active, especially if using active dry yeast (proof it first). Make sure your liquid temperature for activating yeast is correct (warm, not hot). Ensure your proofing environment is warm and draft-free. Use the correct amount of binder to provide structure. Don't over-proof; while under-proofing results in a dense loaf, over-proofing can cause the dough to rise and then collapse before or during baking. Using a well-formulated gluten-free bread recipe is a key glutenfree bread baking tip for predictable results.
Burnt Crust, Undercooked Center: Oven Adjustments
This problem indicates that the outside of the bread is cooking much faster than the inside. It's often a sign of the oven temperature being too high, the baking time being too long for the temperature, or the loaf being placed too close to a heating element.
- Solutions: Verify your oven temperature with an oven thermometer; you may need to reduce the temperature slightly. If the crust is browning quickly, tent the loaf loosely with aluminum foil after the first 15-20 minutes of baking. Ensure the loaf is placed on the middle rack of the oven. If using a baking stone, ensure it's not positioned too high. Baking until the internal temperature reaches 200-210°F (93-99°C) is the most reliable way to ensure the center is cooked, even if it means tenting to prevent the crust from burning. Adjusting your bake time and temperature based on observation is an important glutenfree bread baking tip.
Gluten-Free Bread Recipes to Get You Started
Basic Gluten-Free Sandwich Bread Recipe
A basic gluten-free sandwich bread is a great starting point. It typically uses a blend of gluten-free flours (like brown rice, sorghum, or millet) combined with starches (tapioca, potato) and a binder (xanthan gum or psyllium husk). The liquid component is often warm water or milk, with added oil or softened butter for tenderness. Yeast provides the rise, and a touch of sugar feeds the yeast and aids browning.
The process usually involves mixing wet and dry ingredients until a thick, sticky batter/dough forms, transferring it to a greased and lined loaf pan, a single proofing session in a warm place until doubled, and then baking at a moderate temperature (around 375°F/190°C) for about 50-60 minutes. Cooling completely before slicing is non-negotiable for a good result. Mastering a basic recipe is a foundational glutenfree bread baking tip that builds confidence.
Gluten-Free Sourdough Bread Recipe
Gluten-free sourdough requires a bit more commitment due to maintaining the starter, but the flavor is unparalleled. A typical recipe uses a mature gluten-free sourdough starter, a gluten-free flour blend suitable for sourdough (often higher in protein flours like sorghum or buckwheat), water, salt, and a binder like psyllium husk for structure.
The process involves mixing the active starter with water and flour, allowing for an initial rest (autolyse), adding salt and binder, mixing, a bulk fermentation period with optional gentle folds, shaping, a final cold proof in the refrigerator (which develops flavor), and then baking, often in a preheated Dutch oven. This method yields a crusty, tangy loaf. Developing skill with gluten-free sourdough is an advanced but rewarding glutenfree bread baking tip.
Gluten-Free Seeded Bread Recipe
Adding seeds to your gluten-free bread not only enhances flavor and texture but also boosts nutritional value. A seeded gluten-free bread recipe starts with a base similar to the basic sandwich bread, using a gluten-free flour blend, binder, liquid, and yeast. To this, you incorporate a mix of your favorite seeds, such as sunflower, pumpkin, flax, chia, and poppy seeds.
The seeds can be mixed directly into the dough during the final stages of mixing, or some can be reserved to sprinkle on top before baking for visual appeal and extra crunch. The dough preparation, proofing, and baking steps are generally the same as a basic loaf. Ensure the seeds are evenly distributed throughout the dough for consistent texture. Adding seeds is an easy and effective glutenfree bread baking tip to upgrade your loaf.
Storing Your Gluten-Free Bread for Freshness
Proper Storage Techniques
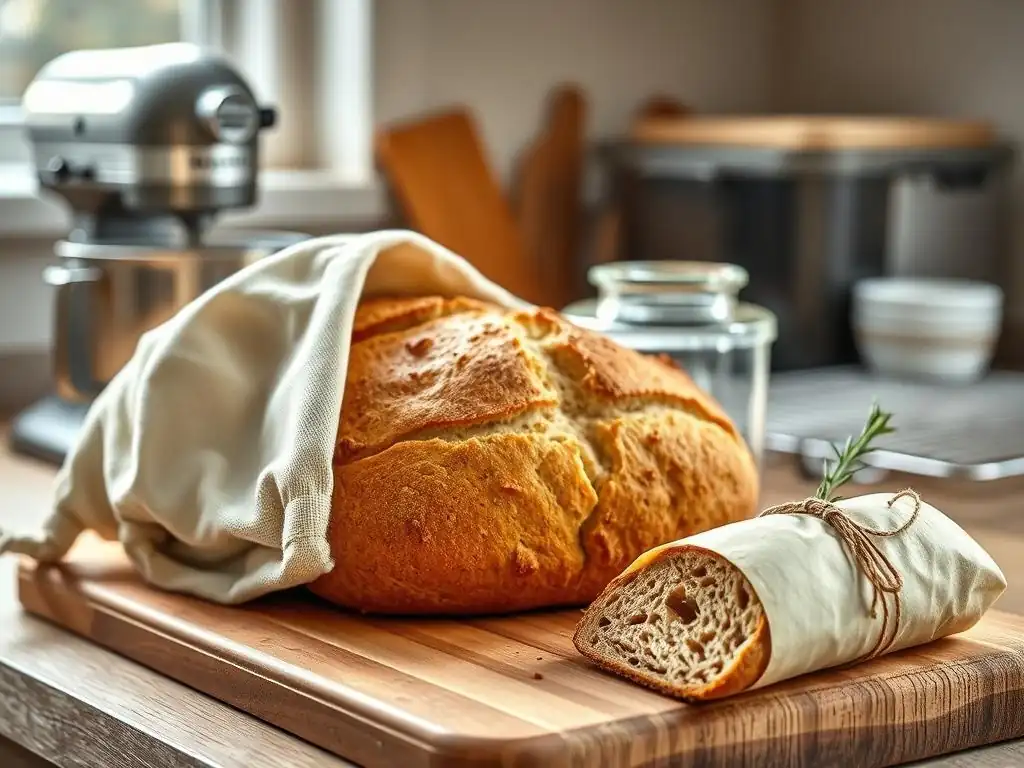
Proper storage is crucial for maintaining the freshness and texture of your homemade gluten-free bread, as it tends to dry out faster than wheat bread. Once the loaf is completely cooled, store it at room temperature for the first day or two. An airtight container, a bread box, or a clean plastic bag works well. Avoid storing it in the refrigerator, as this can actually make it stale more quickly.
For longer storage, or if you won't consume the loaf within 2-3 days, freezing is the best option. Slice the loaf first if you prefer, as it makes thawing individual portions much easier. Ensure the bread is fully cooled before storing to prevent condensation, which can lead to sogginess or mold. Applying these glutenfree bread baking tips for storage will help your hard work last longer.
Freezing Gluten-Free Bread
Freezing is an excellent way to preserve the quality of your gluten-free bread for up to several months. Make sure the bread is entirely cool before freezing. For best results, slice the loaf first. Stack the slices and wrap the stack tightly in plastic wrap, then place the wrapped slices inside a freezer-safe bag or container. This double wrapping helps prevent freezer burn.
Alternatively, you can freeze a whole or half loaf by wrapping it securely in plastic wrap and then in aluminum foil before placing it in a freezer bag. Properly frozen gluten-free bread can retain its quality for 2-3 months. Freezing is a practical glutenfree bread baking tip for busy households or those who don't eat a whole loaf quickly.
Reheating Gluten-Free Bread
When you're ready to enjoy your frozen gluten-free bread, thawing and reheating it properly will restore its texture. For slices, you can often toast them directly from frozen in a toaster or toaster oven. For a whole or half loaf, remove it from the freezer wrapping and let it thaw at room temperature for a few hours.
To reheat a thawed loaf or slices, you can warm them gently in a preheated oven (around 350°F/175°C) for 5-10 minutes, or until warmed through. This can help crisp up the crust slightly. Avoid microwaving frozen or thawed gluten-free bread unless you plan to eat it immediately, as it can become tough or rubbery upon cooling. Knowing how to reheat is as important as the glutenfree bread baking tips themselves!
Enjoying Your Homemade Gluten-Free Bread
Serving Suggestions
Your freshly baked gluten-free bread is ready to be enjoyed! There are countless ways to serve it. The most classic is simply sliced and served with butter, jam, or your favorite spread. It makes fantastic toast, perfect for topping with avocado, eggs, or nut butter.
Use your loaf to make delicious sandwiches or paninis. Its sturdy structure (if baked correctly using these glutenfree bread baking tips!) can hold up to various fillings. Gluten-free bread also makes excellent croutons for salads or breadcrumbs for cooking. Don't be afraid to get creative and explore all the possibilities your homemade loaf offers.
Gluten-Free Bread Pairings
Consider pairing your gluten-free bread with complementary flavors. A seeded loaf pairs wonderfully with savory toppings like cheese or hummus. A slightly sweeter loaf can be a great base for fruit and yogurt. Tangy gluten-free sourdough is excellent with soups, stews, or alongside a cheese board.
Think about the flavors within your bread and how they can enhance a meal. Enjoying the fruits of your labor is the final, and perhaps most satisfying, glutenfree bread baking tip!
Gluten-Free Bread Baking: Conclusion & Next Steps
Furthering Your Gluten-Free Baking Journey
You've taken a significant step in mastering gluten-free bread baking by understanding the unique challenges and essential techniques. From selecting the right flour blend and binder to perfecting your mixing, proofing, and baking, you now have a solid foundation. Remember that practice makes perfect; don't be discouraged by less-than-ideal results on your first few attempts. Every bake is a learning opportunity.
Continue to explore different recipes, experiment with various flour blends and binders, and try adding different flavors and textures. Consider delving deeper into gluten-free sourdough for a more complex challenge and incredible flavor. Share your creations with friends and family! With dedication and these glutenfree bread baking tips, you'll continue to improve and consistently bake delicious, satisfying gluten-free bread from mixing to perfect slices. Happy Baking!
Frequently Asked Questions
What are some common challenges when baking gluten-free bread?
Gluten-free bread often struggles with structure and binding, leading to crumbly textures. It can also be difficult to achieve the desired rise and browning compared to traditional bread.
What are the best gluten-free flour blends to use for bread baking?
A good blend typically includes a mix of starches like tapioca or potato starch, combined with whole grain flours like brown rice or sorghum flour. Experimenting to find a blend that suits your taste is key!
What are some essential ingredients, besides gluten-free flour, needed for successful gluten-free bread?
Ingredients like xanthan gum or psyllium husk are crucial for mimicking the binding properties of gluten. Using eggs or egg replacers can also contribute to structure.
How important is hydration in gluten-free bread baking?
Hydration is extremely important. Gluten-free flours often absorb more liquid than wheat flour, so using the correct water ratio is vital for a good texture.
What temperature and baking time are typically recommended for gluten-free bread?
Generally, gluten-free bread requires a slightly higher temperature (around 375-400°F) and a longer baking time than wheat bread, to ensure it's fully cooked through. Always check for doneness with a toothpick!
Final Reflection: The Enduring Allure of Gluten-Free Baking
The quest for the perfect gluten-free loaf is far more than just a culinary challenge; it's a testament to human ingenuity and our persistent desire to enjoy the simple pleasures of life, even when faced with dietary restrictions. The rising popularity of gluten-free diets highlights a growing awareness of health and individual needs, pushing the boundaries of traditional baking methods and inspiring innovation in the kitchen.
The journey through gluten-free bread baking, as explored in this article, reveals a fascinating interplay between science and artistry. It's a process that demands patience, precision, and a willingness to experiment. The subtle nuances of gluten-free flours, the importance of hydration, and the art of achieving that perfect crumb – these are lessons learned not just in the kitchen, but in the pursuit of mastering a craft. The greatest glory in living lies not in never falling, but in rising every time we fall.
– Nelson Mandela. This quote perfectly encapsulates the spirit of gluten-free baking; it's a journey of trial and error, of learning from mistakes, and ultimately, of achieving delicious success.
Now, it's your turn. Take the tips and techniques shared here, and embark on your own gluten-free baking adventure. Don't be afraid to experiment, to adapt, and to find what works best for you. The reward? The satisfaction of creating something delicious and nourishing, tailored to your specific needs, and the joy of sharing that creation with others. Remember, the perfect gluten-free loaf is out there – waiting for you to discover it.
Unleash Your Inner Baker: Craft the Perfect Gluten-Free Loaf!
Thanks for joining us on this gluten-free baking adventure! We hope you've gained valuable tips and tricks to confidently create delicious bread without gluten. Ready to take your baking skills to the next level?
- Bake your own masterpiece: Try out one of the recipes from the article, and don't be afraid to experiment with different flours and ingredients! This is your chance to perfect your gluten-free bread game.
- Share your success (or even your struggles!): Post a picture of your creation on social media and tag us @BakeWithEase – we’d love to see your results!
- Explore our other gluten-free recipes: Dive into our extensive recipe library for more inspiration and delicious gluten-free options.
What unique flavor combination will you try in your next gluten-free bread baking endeavor?