
Chocolate Lover's Guide to Frozen Desserts: Intense Cocoa Bliss

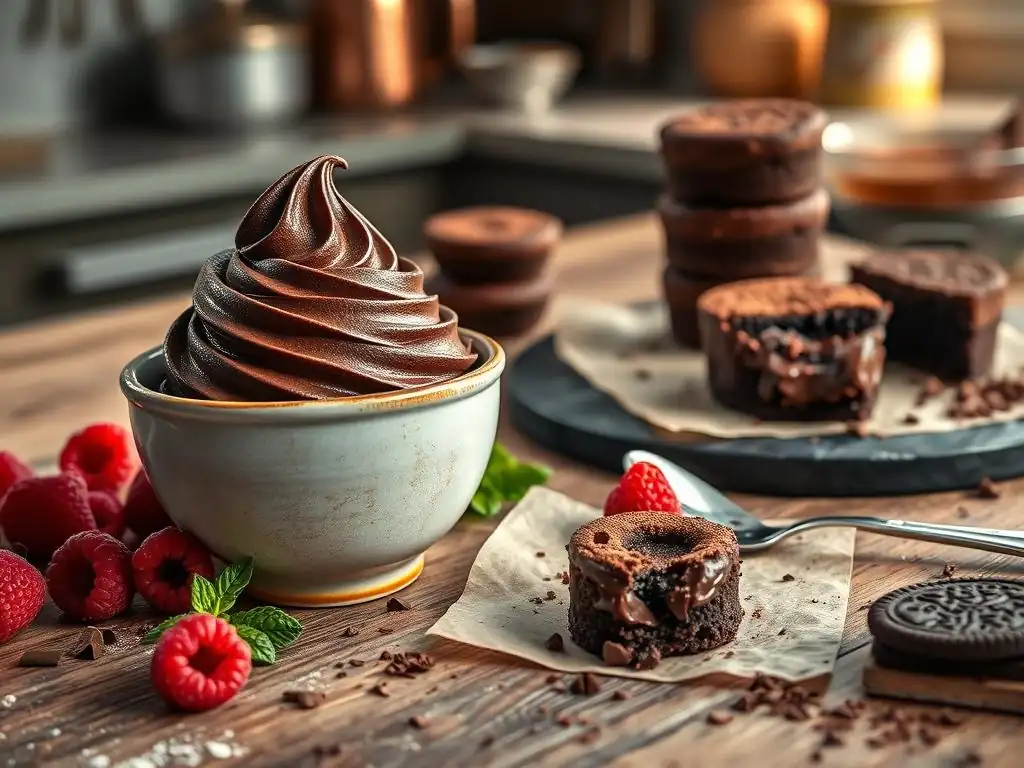
Welcome to BakeWithEase, your kitchen companion for creating delectable treats! Ever dreamt of whipping up a decadent chocolate dessert without spending hours in the kitchen? You're in the right place. Dive into our Chocolate Lover's Guide to Frozen Desserts, where we reveal easy frozen chocolate dessert recipes that will satisfy your cocoa cravings in minutes. Intrigued? Let's unlock the secrets to intense cocoa bliss, one simple recipe at a time...
- Summer Frozen Desserts: Refreshing & Easy
- Indulge in Homemade Frozen Treats
- Why Frozen Desserts are Perfect for Summer
- Mastering Homemade Frozen Treats
- Top 5 Easy Frozen Dessert Recipes
- Tips for Perfecting Your Frozen Dessert Creations
- Beyond the Basics: Exploring Advanced Frozen Dessert Techniques
- The Ultimate Frozen Dessert Experience: Summer Approved.
-
Frequently Asked Questions
- What makes these frozen chocolate desserts "easy"?
- Can I substitute ingredients in these frozen chocolate dessert recipes?
- How long do these frozen chocolate desserts typically take to prepare?
- What are some tips for preventing ice crystals in my homemade frozen chocolate desserts?
- How long can I store these frozen chocolate desserts in the freezer?
- Final Reflection: A Frosty Future for Chocolate Dreams
- Unleash Your Inner Chocoholic: Craft Your Perfect Frozen Treat!
Summer Frozen Desserts: Refreshing & Easy
Indulge in Homemade Frozen Treats
Summer is the perfect time to reach for something cool and satisfying. While the sun shines and temperatures rise, there's nothing quite like a frozen treat to bring a smile to your face. Making these delights at home allows for endless creativity, letting you control ingredients and flavors to suit any craving. Whether you're a fan of fruity sorbets, creamy popsicles, or something richer, the world of homemade frozen desserts is vast and exciting. It's simpler than you might think to whip up impressive frozen creations right in your own kitchen, turning fresh ingredients into icy masterpieces.
Moving beyond the classic scoops, exploring homemade options opens doors to healthier choices and unique flavor profiles. Imagine crafting a vibrant sorbet from peak-season berries or a creamy treat from simple ingredients like frozen bananas. These homemade versions often skip the artificial additives and excessive sugars found in store-bought options, offering a purer taste and a more wholesome indulgence. Plus, the process itself is often a fun and rewarding activity, perfect for involving family or friends. It's a chance to experiment, learn new techniques, and enjoy the delicious results of your efforts.
Why Frozen Desserts are Perfect for Summer
Beating the Heat: A Cool Treat
When the summer heat is at its peak, a frozen dessert offers immediate relief and a delightful sensory experience. The low temperature helps to cool the body down, providing a refreshing escape from the warmth. Unlike heavier baked goods, frozen treats feel light and invigorating, making them the ideal choice for a hot afternoon or a post-barbecue cool-down. Think about the sensation of biting into a frosty granita or licking a cold popsicle – it's a simple pleasure that instantly makes the heat more bearable.
Beyond just cooling you down, frozen desserts also provide hydration, especially those made primarily from fruit or water. A serving of sorbet, for instance, can be upwards of 70-80% water, contributing to your daily fluid intake while simultaneously satisfying a sweet tooth. This makes them a smart choice compared to sugary drinks or heavy snacks when you're trying to stay cool and refreshed. While fruit-based options are popular for their lightness, even some easy frozen chocolate dessert recipes, like a light chocolate mousse pop, can provide a cool, satisfying richness without feeling overly heavy in the heat.
Quick and Easy: Simple Dessert Solutions
One of the greatest appeals of many frozen desserts is their simplicity. Unlike complex pastries that require precise timing and numerous steps, many frozen treats involve minimal preparation and often don't even require an oven. Recipes can range from simply blending frozen fruit to mixing a few ingredients and letting the freezer do the rest of the work. This makes them incredibly accessible, even for novice bakers or those with limited time. You can often go from craving a cool treat to enjoying one in under 30 minutes of active preparation time, plus freezing time.
Consider the ease of making a batch of popsicles; it often involves little more than blending ingredients and pouring them into molds. Granitas require scraping ice crystals periodically but are otherwise hands-off. Even more involved recipes like ice cream or sorbet primarily require mixing and churning, a process simplified by modern appliances. This ease extends to many easy frozen chocolate dessert recipes too, like simple chocolate popsicles or frozen chocolate banana bites, making them perfect for spontaneous summer sweet cravings without a lot of fuss or cleanup.
Mastering Homemade Frozen Treats
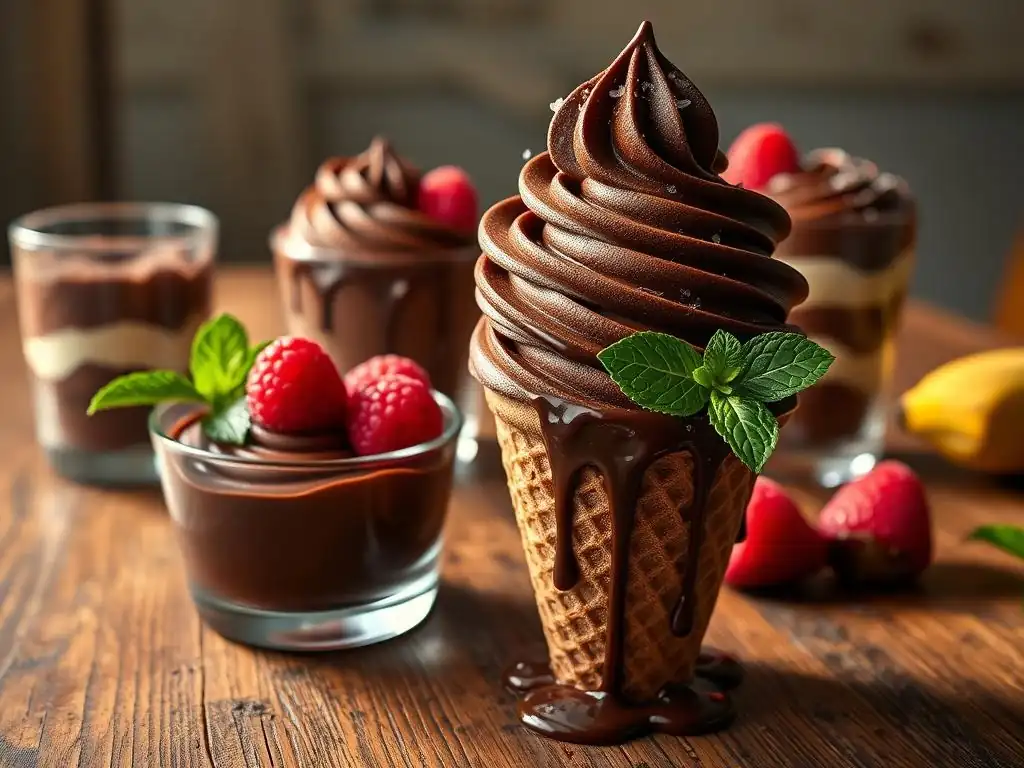
Essential Ingredients for Flavorful Desserts
The foundation of any delicious frozen dessert lies in the quality and combination of its ingredients. Fresh, ripe fruit is paramount for vibrant sorbets and popsicles, delivering natural sweetness and intense flavor. When selecting fruit, aim for peak season produce; for example, strawberries in early summer or mangoes in late spring offer the best taste and texture. The sugar content in the fruit itself contributes to the freezing process, helping to prevent excessive hardness.
Alongside fruit, the base liquid is crucial. This could be water, fruit juice, dairy milk, cream, or non-dairy alternatives like coconut milk or almond milk. The choice of base significantly impacts the texture and richness of the final product.
Creamier bases, like heavy cream or full-fat coconut milk, yield smoother, richer results, ideal for ice cream or creamy pops. Water or juice bases create lighter, icier textures, perfect for sorbets and granitas. Even when making easy frozen chocolate dessert recipes, selecting a good quality cocoa powder or melted chocolate and pairing it with the right base (dairy or non-dairy) is key to achieving that deep, satisfying cocoa flavor and desired texture.
Choosing the Right Fruit for Your Frozen Dessert
Selecting the ideal fruit depends on the type of frozen dessert you're making and the flavor profile you desire. For smooth sorbets that are easy to scoop, fruits with high water content and natural sweetness like strawberries, raspberries, peaches, or mangoes work beautifully. Their pulp freezes smoothly and requires less added sugar to achieve a good texture. Citrus fruits like lemon or lime are excellent for tangy sorbets or ices, providing a refreshing zing, though they may require a higher sugar concentration to balance the tartness and improve texture.
Fruits with lower water content or fibrous textures, such as bananas (when frozen and blended) or avocados (often used in creamy vegan desserts), are fantastic for creating naturally thick and smooth textures without needing dairy or extensive churning. For popsicles, almost any fruit purée or juice can work, but consider fruits that hold their color and flavor well when frozen, like berries, kiwi, or tropical fruits. Using ripe, flavorful fruit ensures your dessert isn't bland and reduces the need for excessive added sweeteners.
Selecting the Best Dairy/Non-Dairy Base
The base you choose dictates the richness, creaminess, and overall structure of your frozen dessert. For classic ice cream, a custard base made with egg yolks, milk, and cream provides unparalleled richness and smoothness. Simpler ice cream bases often just use milk and cream, relying on the fat content for texture. Whole milk and heavy cream offer the best results for dairy-based creaminess due to their fat content, which freezes differently than water, resulting in fewer ice crystals.
For non-dairy options, full-fat canned coconut milk is a popular choice, offering a creamy texture and a subtle tropical flavor that pairs well with many fruits and even easy frozen chocolate dessert recipes. Cashew cream, almond milk, or oat milk can also be used, though they may yield a slightly icier texture unless stabilizers or other ingredients like avocado or frozen banana are added.
When making creamy easy frozen chocolate dessert recipes like a no-churn chocolate ice cream or chocolate popsicles, a blend of full-fat coconut milk or a cashew base often works best to replicate the richness of dairy while keeping it vegan.
Basic Techniques for Making Frozen Desserts
Mastering a few fundamental techniques can elevate your homemade frozen treats from icy blocks to delightful desserts. The goal is often to minimize large ice crystals, which can make a dessert taste grainy or hard. This is achieved through controlling the freezing process and the ingredient composition. Understanding the role of sugar, fat, and alcohol (though less common in simple home recipes) in lowering the freezing point is key.
Regular churning or scraping is a primary technique for many frozen desserts. An ice cream maker churns the mixture as it freezes, constantly breaking up ice crystals as they form, resulting in a smooth, creamy texture. For desserts like granita, manual scraping with a fork every 30-60 minutes achieves a similar effect, creating delicate, flaky ice crystals rather than a solid block.
For no-churn recipes, whipping air into the base (like whipped cream) or using ingredients that don't freeze hard (like condensed milk or fats) is crucial for maintaining a scoopable texture. These techniques are vital whether you're making a simple fruit sorbet or trying your hand at easy frozen chocolate dessert recipes that require a smooth finish.
Achieving a Smooth Texture
Smooth texture is the hallmark of a great frozen dessert, particularly sorbet and ice cream. The primary enemy is the formation of large ice crystals. To combat this, ensure your base mixture is thoroughly chilled before freezing or churning; starting cold helps the mixture freeze faster, reducing the time large crystals have to form. Using an ice cream maker is the most effective way to achieve smoothness in churned desserts, as the constant movement disrupts crystallization.
For no-churn methods, incorporating ingredients that interfere with crystal formation is essential. This includes fats (from cream or coconut milk), sugars (which lower the freezing point), and sometimes stabilizers like a small amount of corn syrup or even alcohol (though use sparingly as too much prevents freezing).
Whipping air into the mixture, as in no-churn ice cream made with whipped cream and condensed milk, also helps create a lighter, smoother texture. Even for easy frozen chocolate dessert recipes like chocolate popsicles, adding a little fat (like coconut milk or cream) or sugar can significantly improve the texture compared to just freezing chocolate milk.
Preventing Ice Crystals
Preventing large, noticeable ice crystals is key to a pleasant mouthfeel. As mentioned, thorough chilling before freezing and churning are primary defenses. For desserts frozen without churning, like popsicles or granitas, ensure the sugar content is balanced; sugar acts as an anti-freeze, keeping the mixture softer. Too little sugar can result in a rock-hard, icy product.
Another technique is to add a small amount of a liquid with a lower freezing point, though this requires caution. A tablespoon of vodka or other clear spirit in a fruit sorbet, for example, can help keep it scoopable. Using condensed milk in no-churn ice cream recipes works because of its high sugar and fat content.
For popsicles, freezing them quickly in the coldest part of your freezer can also help minimize crystal growth. When making easy frozen chocolate dessert recipes like frozen chocolate pudding pops, ensuring the pudding base is smooth and has adequate fat/sugar content before freezing is vital to prevent an icy texture.
Top 5 Easy Frozen Dessert Recipes
Recipe 1: Strawberry Sorbet - A Classic Choice
Strawberry sorbet is a quintessential summer treat, bursting with fresh flavor and a beautiful vibrant color. It's naturally dairy-free and relatively low in fat, making it a refreshing and lighter option. The simplicity of the ingredients – primarily strawberries, sugar, water, and a touch of lemon juice – makes it incredibly approachable for beginners. A good strawberry sorbet captures the essence of ripe berries in a cool, smooth form.
Making strawberry sorbet typically involves simmering water and sugar to create a simple syrup, blending it with fresh or frozen strawberries, and then churning the mixture in an ice cream maker until frozen. The lemon juice is crucial as it brightens the strawberry flavor and balances the sweetness. The resulting texture is delightfully smooth and intensely fruity, a perfect palate cleanser or a light dessert on a warm evening. A standard batch using about 1 pound of strawberries yields roughly 4-6 servings and takes about 20-30 minutes of active time plus freezing.
Ingredients for Strawberry Sorbet
- 1 pound ripe strawberries, hulled and quartered
- 1 cup water
- ½ cup granulated sugar (adjust to sweetness of berries)
- 1 tablespoon fresh lemon juice
- Pinch of salt (optional, enhances flavor)
Step-by-Step Instructions for Strawberry Sorbet
- Combine water and sugar in a small saucepan over medium heat. Stir until sugar is completely dissolved. Bring to a gentle simmer, then remove from heat and let cool slightly. This is your simple syrup.
- In a blender, combine the hulled and quartered strawberries, the cooled simple syrup, lemon juice, and optional pinch of salt.
- Blend until the mixture is completely smooth and no strawberry chunks remain.
- Taste and adjust sweetness or tartness if needed.
- Chill the mixture thoroughly in the refrigerator for at least 2-3 hours, or until very cold.
- Pour the chilled mixture into an ice cream maker and churn according to the manufacturer's instructions, usually for 20-30 minutes, until it reaches a soft-serve consistency.
- Transfer the sorbet to an airtight container and freeze for at least 4 hours, or until firm, before serving.
Tips for Perfect Strawberry Sorbet
- Use the ripest, most flavorful strawberries you can find; this is where the majority of the flavor comes from. Frozen strawberries can also be used, ensuring a consistently cold base.
- Chill the mixture completely before churning. This significantly improves the final texture and prevents ice crystals.
- Don't overfill your ice cream maker; leave room for the mixture to expand as it freezes.
- If you don't have an ice cream maker, you can pour the chilled mixture into a shallow freezer-safe dish and freeze, scraping with a fork every 30-60 minutes until frozen and flaky (this will yield a granita-like texture rather than smooth sorbet).
- For extra smooth sorbet, you can pass the blended mixture through a fine-mesh sieve before chilling, removing any small seeds or fibrous bits.
Recipe 2: Mango Lassi Popsicles - Tropical Delight
Mango lassi popsicles capture the creamy, sweet, and slightly tangy flavors of the popular Indian drink in a convenient frozen form. They are incredibly easy to make, requiring no special equipment beyond popsicle molds. The combination of sweet mango, creamy yogurt, and a hint of spice (like cardamom, optional) is wonderfully refreshing and feels like a mini-vacation with every bite. They are a fantastic way to use ripe mangoes and offer a good source of probiotics from the yogurt.
The base of these popsicles is a simple blend of ripe mango pulp (fresh or frozen), yogurt (dairy or non-dairy), and a sweetener like honey or sugar. Some recipes add a splash of milk or a pinch of cardamom for extra depth. Blending the ingredients until smooth and pouring into molds is essentially the entire process. A standard recipe using about 2 cups of mango pulp and 1 cup of yogurt can yield 6-8 standard-sized popsicles, ready after 4-6 hours of freezing.
Ingredients for Mango Lassi Popsicles
- 2 cups ripe mango pulp (from about 2-3 large mangoes, or use thawed frozen mango chunks)
- 1 cup plain yogurt (dairy or non-dairy, full-fat for creaminess)
- 2-4 tablespoons honey, maple syrup, or sugar (to taste, depending on mango sweetness)
- ¼ teaspoon ground cardamom (optional)
- Pinch of salt (optional)
Step-by-Step Instructions for Mango Lassi Popsicles
- Combine the mango pulp, yogurt, sweetener, optional cardamom, and salt in a blender.
- Blend until the mixture is completely smooth and creamy. Taste and adjust sweetness if needed.
- Carefully pour the mixture into popsicle molds, leaving about ½ inch of space at the top to allow for expansion.
- Insert popsicle sticks into the molds.
- Freeze for at least 4-6 hours, or until completely solid.
- To unmold, run the popsicle molds under warm water for a few seconds until the popsicles slide out easily.
Variations for Mango Lassi Popsicles: Yogurt Type
The type of yogurt you use significantly impacts the texture and tanginess of the popsicles.
- Plain Dairy Yogurt: Using full-fat plain yogurt results in the creamiest texture, closer to traditional lassi. Greek yogurt can also be used for an extra thick and tangy pop, but you might need to add a splash of milk to thin the mixture slightly for pouring into molds.
- Non-Dairy Yogurt: For a vegan version, unsweetened coconut yogurt or cashew yogurt are excellent choices. They provide creaminess and a pleasant flavor that complements the mango. Almond or soy yogurts can also work, but may yield a slightly less creamy result depending on their fat content. Experimenting with different non-dairy options allows you to cater to dietary needs while still enjoying this tropical treat.
Recipe 3: Watermelon Granita - Refreshingly Simple
Watermelon granita is perhaps one of the simplest and most refreshing frozen desserts imaginable. It requires just a few ingredients and no special equipment, making it incredibly accessible. The magic lies in freezing a liquid base and scraping it periodically to create light, icy flakes rather than a solid block. Watermelon, with its high water content and natural sweetness, is the perfect base for this technique.
The process involves blending fresh watermelon (seeds removed) with a little sugar or lime juice if desired, pouring the mixture into a shallow pan, and freezing it. Every 30-60 minutes, you scrape the semi-frozen mixture with a fork, pulling the ice crystals towards the center. Repeating this process creates the characteristic flaky texture of granita. A medium watermelon (about 6-8 pounds) can yield enough purée for a large batch, providing 8-10 servings after about 4-6 hours of freezing and scraping time.
Ingredients for Watermelon Granita
- 6-8 cups cubed seedless watermelon
- 2-3 tablespoons granulated sugar or honey (optional, depending on watermelon sweetness)
- 1 tablespoon fresh lime juice (optional, enhances flavor)
- Pinch of salt (optional)
Step-by-Step Instructions for Watermelon Granita
- Place the cubed watermelon in a blender. If using, add sugar/honey, lime juice, and salt.
- Blend until completely smooth. For an extra smooth texture, you can strain the mixture through a fine-mesh sieve, though this isn't strictly necessary.
- Pour the watermelon mixture into a shallow freezer-safe dish or baking pan (a 9x13 inch pan works well for a standard batch).
- Place the pan in the freezer.
- After 30-60 minutes, or when ice crystals start to form around the edges, remove the pan from the freezer and use a fork to scrape the frozen edges towards the center.
- Return the pan to the freezer and repeat the scraping process every 30-60 minutes until the entire mixture is frozen and has a flaky, granular texture. This usually takes 3-5 hours depending on your freezer.
- Serve immediately in chilled bowls or glasses, scraping up light flakes.
Health Benefits of Watermelon
Watermelon is not just delicious and hydrating; it also offers several health benefits. It is exceptionally high in water content (about 92%), making it excellent for hydration, especially during hot summer months. This aligns perfectly with its role as a refreshing frozen treat.
Furthermore, watermelon is a good source of Vitamin C, an antioxidant that supports immune health, and Vitamin A, important for vision. It also contains lycopene, a powerful antioxidant that gives watermelon and tomatoes their red color and is linked to potential benefits for heart health and cancer prevention. While eating it fresh provides the most nutrients, enjoying it as a simple granita retains much of its nutritional value, offering a guilt-free way to indulge in a sweet, cool treat.
Recipe 4: Lemon Ice - Tart and Tangy
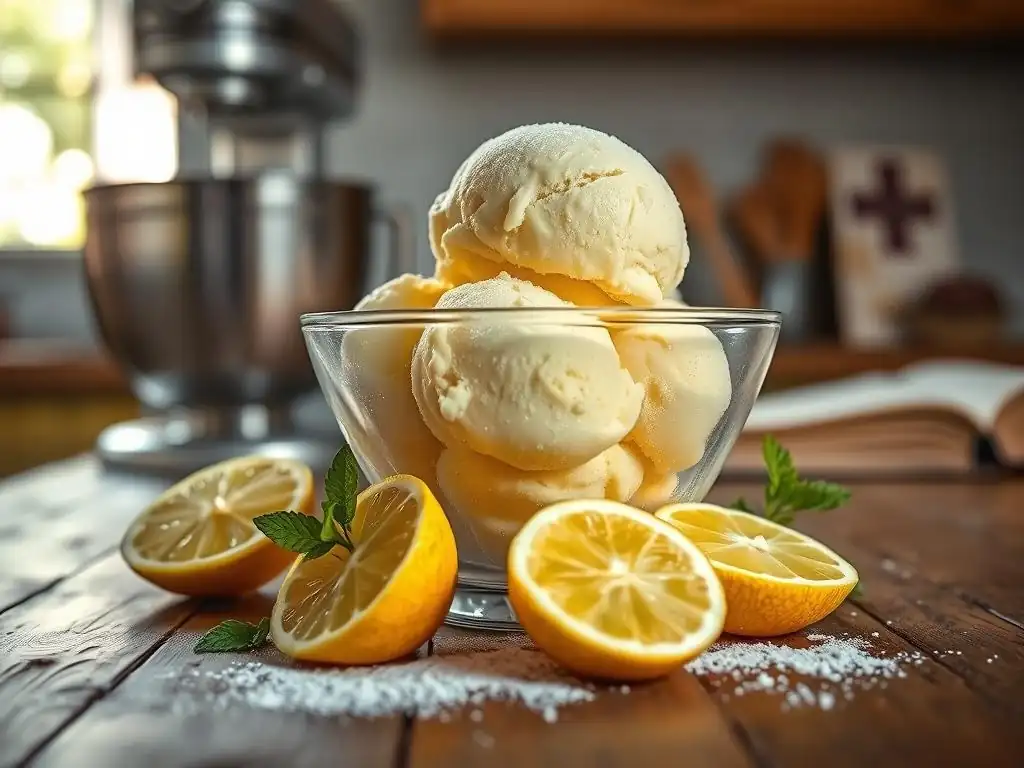
Lemon ice, or granita al limone, is a classic Italian frozen dessert known for its bracingly tart and sweet flavor profile. It's incredibly simple, typically made from just water, sugar, and fresh lemon juice. The result is a palate-cleansing, intensely refreshing ice that's perfect after a rich meal or as a zesty pick-me-up on a hot day. Its simplicity allows the bright flavor of fresh lemons to truly shine.
Creating lemon ice involves making a lemon-flavored simple syrup, chilling it thoroughly, and then freezing it while periodically scraping to form fine crystals, similar to granita. The balance between sugar and lemon juice is crucial; too little sugar makes it too hard and icy, while too much can be overly sweet and syrupy. A typical recipe using about 1 cup of lemon juice and 2 cups of water can yield 4-6 servings and takes about 3-4 hours of freezing and scraping time.
Ingredients for Lemon Ice
- 2 cups water
- 1 cup granulated sugar
- 1 cup fresh lemon juice (from about 4-6 lemons)
- Zest of 1 lemon (optional, for extra flavor)
Step-by-Step Instructions for Lemon Ice
- In a saucepan, combine water, sugar, and optional lemon zest. Heat over medium heat, stirring until the sugar is completely dissolved. Bring to a gentle simmer, then remove from heat.
- Let the simple syrup cool completely. You can speed this up by placing the saucepan in an ice bath.
- Once cool, stir in the fresh lemon juice. Remove the lemon zest if you added it and prefer a smoother texture without the zest pieces.
- Pour the mixture into a shallow freezer-safe dish or pan.
- Place in the freezer. After 30-45 minutes, when ice begins to form around the edges, scrape the frozen parts towards the center with a fork.
- Repeat the scraping process every 30-45 minutes until the entire mixture is frozen and has a light, flaky texture. This usually takes 3-4 hours.
- Scrape into serving dishes just before serving for the best texture.
Serving Suggestions for Lemon Ice
Lemon ice is wonderfully versatile and can be served in several ways. Its primary use is as a refreshing dessert or palate cleanser. Serve it in small chilled bowls or glasses immediately after scraping for the ideal light, icy texture. A sprig of fresh mint or a thin slice of lemon can add a visual and aromatic garnish.
It also pairs beautifully with other desserts. A small scoop of lemon ice can be served alongside a slice of cake (like pound cake or olive oil cake), a fruit tart, or even a scoop of vanilla ice cream for a "shake-up" of flavors and textures. Its tartness cuts through richness, making it an excellent counterpoint to creamier or sweeter dishes.
Recipe 5: Banana "Nice" Cream - A Healthy Alternative
Banana "nice" cream is a revolutionary easy frozen dessert recipe that proves you don't need dairy or added sugar to create a wonderfully creamy, sweet treat. It's made from just one ingredient: frozen bananas. When blended in a food processor or high-powered blender, frozen banana chunks transform into a texture remarkably similar to soft-serve ice cream. It's naturally vegan, gluten-free, and uses the banana's natural sweetness, making it a truly healthy indulgence.
The key to perfect "nice" cream is using very ripe bananas (the riper they are, the sweeter and creamier the result) and freezing them thoroughly. Once frozen, they are blended until they break down from solid chunks into a thick, smooth, and creamy consistency. This transition can take a few minutes of blending and scraping down the sides, but the result is a delicious, guilt-free dessert. One large frozen banana typically yields one generous serving of "nice" cream, ready to eat in about 5-10 minutes of blending time.
Ingredients for Banana "Nice" Cream
- 2-3 ripe bananas, peeled, sliced into chunks, and frozen solid (at least 6-8 hours, preferably overnight)
Step-by-Step Instructions for Banana "Nice" Cream
- Place the frozen banana chunks into a food processor or high-powered blender.
- Process or blend, starting and stopping to scrape down the sides as needed. Initially, the bananas will look crumbly.
- Continue processing. The mixture will go through stages: crumbly, then thick paste, and finally, it will smooth out into a soft-serve consistency. This can take several minutes, so be patient and keep scraping.
- Once smooth and creamy, serve immediately for a soft-serve texture.
Creative Add-ins for Banana "Nice" Cream: Berries, Nut Butter
While plain banana "nice" cream is delicious on its own, it serves as a fantastic base for countless flavor combinations. You can add other frozen fruits, extracts, or mix-ins during the blending process or stir them in at the end.
- Berries: Add a handful of frozen strawberries, raspberries, blueberries, or mixed berries to the blender with the bananas. This creates a beautiful color and adds a tangy fruit dimension. Approximately ½ cup of frozen berries per 2 bananas works well.
- Nut Butter: A dollop (1-2 tablespoons per 2 bananas) of peanut butter, almond butter, or cashew butter blended in adds richness, protein, and a delightful nutty flavor. Peanut butter and banana is a classic pairing!
- Other Ideas: Consider blending in a tablespoon of cocoa powder for a chocolatey version (an easy frozen chocolate dessert recipe! ), a splash of vanilla extract, a pinch of cinnamon, or even some spinach for a green boost (you won't taste it!). Stir in chocolate chips, chopped nuts, or granola after blending for texture.
Tips for Perfecting Your Frozen Dessert Creations
Storing Your Frozen Desserts for Optimal Freshness
Proper storage is key to maintaining the quality and texture of homemade frozen desserts. Air is the enemy, as it promotes the formation of ice crystals and can lead to freezer burn. Always transfer your finished dessert to an airtight container immediately after churning or freezing. Pressing a piece of plastic wrap directly onto the surface of the dessert before putting the lid on can create an extra barrier against air.
For sorbets, granitas, and ice cream, store in a container specifically designed for freezing, ideally with straight sides to make scooping easier. Avoid using containers that are too large, as excess air space can degrade quality faster. Most homemade frozen desserts are best enjoyed within 1-2 weeks for optimal texture, though they will remain safe to eat for longer. Granitas are best served immediately after scraping but can be stored and re-scraped before serving.
Serving Suggestions and Garnishes
Presentation can elevate even the simplest frozen dessert. Serve sorbets and ice creams in chilled bowls or glasses to keep them from melting too quickly. Use an ice cream scoop dipped in warm water for clean, smooth scoops. Granitas and ices are best served in small, elegant dishes, flaked high. Popsicles are perfect served as is, perhaps wrapped in decorative paper for a party.
Garnishes add visual appeal and can enhance flavor. Fresh berries, sliced fruit, a sprinkle of chopped nuts, chocolate shavings (perfect for complementing easy frozen chocolate dessert recipes), a drizzle of honey or a fruit coulis, or a sprig of fresh mint or basil can turn a simple dessert into something special. Consider edible flowers for a touch of elegance. The garnish should complement the main flavor profile of the dessert.
Troubleshooting Common Issues with Frozen Desserts
Even with simple recipes, you might encounter some common issues. Knowing how to address them can save your dessert!
Addressing Grainy Texture
A grainy texture is usually caused by the formation of large ice crystals. This often happens when the mixture freezes too slowly, wasn't sufficiently chilled before freezing/churning, or wasn't churned/scraped frequently enough. For churned desserts, ensure your ice cream maker bowl is frozen solid and the base mixture is very cold.
For granitas, scrape diligently and frequently. For no-churn desserts, ensure you've incorporated enough air (like whipped cream) or used ingredients that promote smoothness (like condensed milk or adequate fat). If a dessert is already frozen and grainy, you can try letting it soften slightly, re-blending it (perhaps with a splash of liquid like milk or juice), and re-freezing, ensuring faster freezing this time.
Preventing Soggy Popsicles
Soggy popsicles typically occur when ingredients separate during the freezing process, leaving a watery, icy layer at the bottom and a concentrated layer at the top. This is common with juice-based popsicles or those with pulp that settles. To prevent this, ensure your mixture is well-emulsified before pouring it into molds.
If using pulp, stir the mixture occasionally as you pour into molds to keep everything suspended. Freezing the popsicles as quickly as possible in the coldest part of your freezer also helps prevent separation. For mixtures prone to separation, like fruit purées, a small amount of a natural thickener like chia seeds (soaked) or a tiny pinch of xanthan gum can help keep ingredients evenly distributed as they freeze.
Beyond the Basics: Exploring Advanced Frozen Dessert Techniques
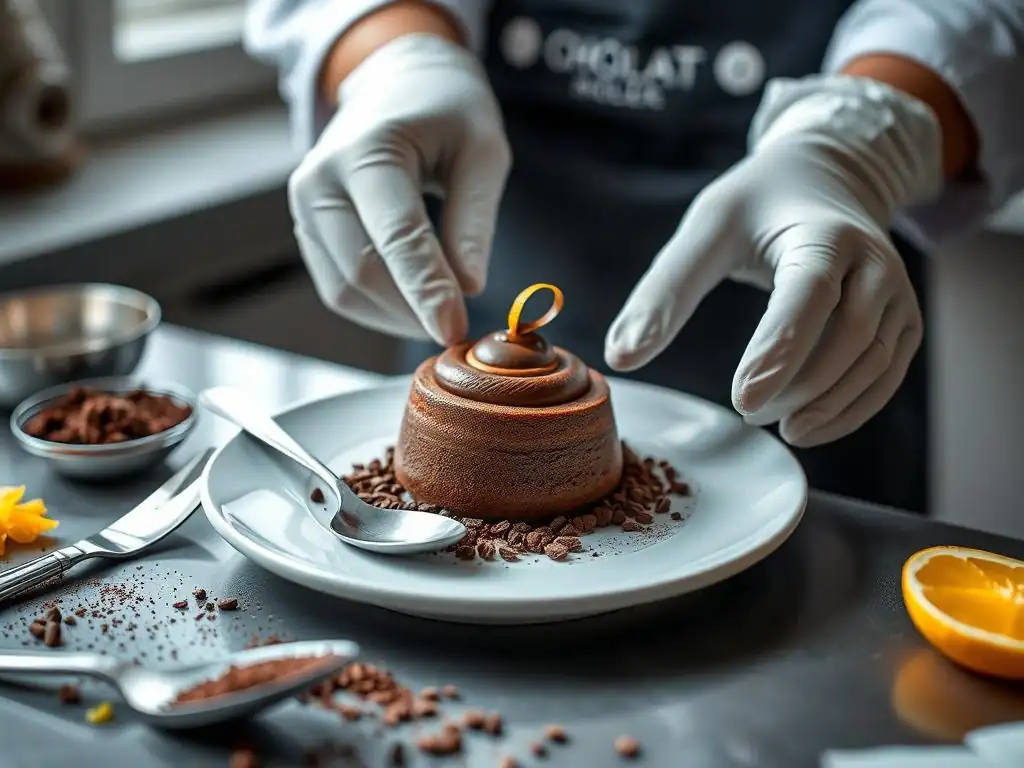
Making Dairy-Free Frozen Desserts
Creating delicious dairy-free frozen desserts has become increasingly popular and accessible. The principles are similar to dairy-based versions, but the key is selecting the right base ingredient to provide creaminess without milk fat. Full-fat canned coconut milk is a staple for its richness and ability to mimic dairy creaminess. Cashews, soaked and blended, can also form a very smooth and neutral-flavored base. Other options include almond milk, soy milk, oat milk, or even a base made from avocado or frozen banana for natural thickness.
The challenge lies in achieving a texture that isn't too icy, as these bases typically have less fat than heavy cream. Using stabilizers like a small amount of guar gum or xanthan gum (follow package directions carefully, a little goes a long way!) can significantly improve texture. Incorporating air by whipping the base (like whipping chilled coconut cream) before freezing is also effective. Many easy frozen chocolate dessert recipes are easily adapted to be dairy-free by simply swapping dairy milk/cream for full-fat coconut milk or a cashew base, ensuring that everyone can enjoy a rich, frosty chocolate treat.
Creating Layered Frozen Treats: Parfaits
Layered frozen treats, such as parfaits or layered popsicles, add visual appeal and textural contrast. This technique involves partially freezing one layer before adding the next, allowing each layer to set enough to maintain distinct lines. For parfaits served in glasses, you can layer different flavors of sorbet, ice cream, or "nice" cream with elements like granola, fruit chunks, whipped cream (dairy or non-dairy), or sauces.
For layered popsicles, pour one layer into the mold and freeze it until firm but not completely solid (usually 45-90 minutes depending on thickness and freezer). Then, add the next layer and repeat the process until the mold is full. This allows for fun color and flavor combinations, like alternating fruit sorbet layers with a creamy yogurt layer, or creating striped easy frozen chocolate dessert recipes popsicles by layering chocolate "nice" cream with a berry layer. Patience is key to ensure each layer sets properly before adding the next.
Experimenting with Different Flavor Combinations: Fruit & Herb
Once you're comfortable with basic techniques, don't hesitate to get creative with flavor combinations. While classic fruit pairings are always a hit (like strawberry-banana or mango-lime), incorporating herbs can add an unexpected layer of complexity and freshness. Herbs like mint, basil, rosemary, or lavender can be infused into simple syrups or blended directly into fruit purées.
Consider pairing strawberry with basil, watermelon with mint, or lemon with rosemary for a sophisticated twist on simple sorbets or granitas. These herb infusions work particularly well with lighter, fruit-based frozen desserts. You can also experiment with spices like ginger, chili, or black pepper to add warmth or a kick. This experimentation allows you to move beyond traditional flavors and create truly unique and memorable frozen treats, expanding the possibilities far beyond just easy frozen chocolate dessert recipes into a world of botanical and spicy delights.
The Ultimate Frozen Dessert Experience: Summer Approved.
Frequently Asked Questions
What makes these frozen chocolate desserts "easy"?
The recipes focus on simple techniques and readily available ingredients, minimizing prep time and complexity. You'll find they are beginner-friendly!
Can I substitute ingredients in these frozen chocolate dessert recipes?
While substitutions are possible, they can affect the texture and flavor. We recommend following the recipe closely for best results, especially for things like chocolate type and freezing agents.
How long do these frozen chocolate desserts typically take to prepare?
Most of these recipes require minimal active prep time, often under 30 minutes. However, freezing time will add several hours, so plan ahead!
What are some tips for preventing ice crystals in my homemade frozen chocolate desserts?
Using high-quality chocolate and adding a stabilizer like corn syrup or alcohol can help. Also, ensure proper freezing temperature and avoid temperature fluctuations.
How long can I store these frozen chocolate desserts in the freezer?
Properly stored, these desserts can last for up to 2-3 months in the freezer. Ensure they are well-sealed to prevent freezer burn and maintain optimal flavor and texture.
Final Reflection: A Frosty Future for Chocolate Dreams
The enduring appeal of chocolate, combined with the refreshing simplicity of frozen desserts, creates a culinary synergy that's as relevant today as it ever was. This isn't just about satisfying a sweet tooth; it's about finding moments of joy and comfort in the everyday, a quick escape crafted from readily available ingredients. The ease and accessibility of these recipes make them perfect for busy lives, proving that indulgence doesn't have to be complicated.
The exploration of easy frozen chocolate desserts has revealed more than just a collection of recipes; it's highlighted the powerful role food plays in our cultural landscape. Chocolate, in particular, evokes strong emotional responses, connecting us to memories, celebrations, and moments of pure bliss. There is nothing better than a friend, unless it is a friend with chocolate.
– Linda Grayson. This sentiment perfectly encapsulates the comforting and social aspects of sharing these simple yet delicious treats. The recipes presented here are not just about individual indulgence, but also about creating shared experiences and fostering connections.
Now, consider your own chocolate cravings. What simple frozen dessert will you create next? Perhaps you'll experiment with a new flavor combination, or maybe you'll adapt one of the recipes to suit your dietary needs. The possibilities are endless, and the journey of culinary exploration awaits. Don't just passively consume; actively create, share, and savor the intense cocoa bliss that awaits you in your own kitchen. Embrace the simplicity, and let the frosty sweetness melt away your worries, one delicious bite at a time.
Unleash Your Inner Chocoholic: Craft Your Perfect Frozen Treat!
Thanks for joining us on this delicious journey into the world of frozen chocolate desserts! We hope you've discovered some new ways to satisfy your cocoa cravings. Now it's time to put your newfound knowledge to the test!
- Whip up your favorite recipe from the article: Challenge yourself to create the intensely decadent chocolate frozen dessert you've always dreamed of. Share your results – we'd love to see them!
- Experiment with different cocoa percentages: See how the intensity of the chocolate flavor changes with different types of cocoa powder or chocolate. Document your findings!
- Share this article with a fellow chocolate enthusiast: Spread the cocoa love and inspire others to create their own frozen chocolate masterpieces.
Ready to dive into a world of frosty chocolate delights? What's the first frozen chocolate creation you'll be tackling?