
Achieving Uniform Sweet Rolls: Cutting and Shaping Tips


Welcome to BakeWithEase, your trusted guide to baking bliss! Ready to elevate your sweet roll game? Discover the secrets to achieving bakery-worthy results with our guide to perfecting sweet roll shaping cuts. Ever wondered how to get those perfectly uniform swirls? Read on and unlock the techniques that will transform your baking!
- Achieving Uniform Sweet Rolls: Cutting and Shaping Tips for Perfect Results
- BakeWithEase' Guide to Perfect Sweet Roll Shaping Cuts
- Why Uniform Sweet Rolls Matter: Achieving Baking Perfection
- Mastering Sweet Roll Dough: Preparation is Key
- Essential Tools for Cutting and Shaping Sweet Rolls
- Cutting Techniques for Uniform Sweet Rolls: Step-by-Step
- Troubleshooting Common Sweet Roll Shaping Problems
- Advanced Sweet Roll Shaping Techniques
- Baking Your Perfectly Shaped Sweet Rolls
- Elevate Your Baking: Sweet Roll Shaping Tips for Success
-
Frequently Asked Questions
- How important is uniform shaping for sweet rolls?
- What are some common mistakes when cutting sweet roll dough?
- What tools are best for achieving precise sweet roll cuts?
- How can I ensure my sweet rolls are consistently sized after shaping?
- What's the best way to prevent the filling from leaking out during baking?
- Final Reflection: The Art and Science of the Perfect Sweet Roll
- Unleash Your Inner Baker: Perfect Sweet Rolls Await!
Achieving Uniform Sweet Rolls: Cutting and Shaping Tips for Perfect Results
BakeWithEase' Guide to Perfect Sweet Roll Shaping Cuts
Welcome to BakeWithEase! Achieving that picture-perfect tray of sweet rolls isn't just about the delicious dough and filling; it's also significantly about how you cut and shape them. Uniformity in size and shape leads to consistent baking and a stunning presentation that delights everyone. This guide will walk you through the essential techniques and tips for perfecting sweet roll shaping cuts, ensuring every single roll is a masterpiece. We'll cover everything from preparing your dough correctly to using the right tools and mastering specific cutting methods.
Whether you're aiming for classic cinnamon rolls or exploring other sweet dough variations, the principles of achieving uniform sweet rolls remain the same. Let's dive into how you can elevate your sweet roll game, moving beyond uneven, misshapen rolls to a tray of beautifully consistent delights. Mastering these techniques is a key step in your intermediate baking journey, bringing you closer to professional-looking results right from your own kitchen.
Why Uniform Sweet Rolls Matter: Achieving Baking Perfection
The Importance of Consistent Size and Shape in Sweet Rolls
Consistency is absolutely crucial when baking sweet rolls. When each roll is roughly the same size and shape, they bake at the same rate. Imagine baking a batch where some rolls are twice the size of others; the smaller ones will likely be overbaked and dry by the time the larger ones are perfectly golden and cooked through. This inconsistency directly impacts the final texture and taste of your batch.
Furthermore, consistent size is key for portion control and presentation. If you're sharing or selling your sweet rolls, having uniform portions is expected. From a baker's perspective, understanding how to achieve this consistency through precise cutting and shaping is a foundational skill. It's not just about aesthetics; it's about ensuring quality and reliability in your baking process. Perfecting sweet roll shaping cuts is the first step towards this consistency.
Visual Appeal and Even Baking: The Benefits of Uniformity
Let's be honest, we eat with our eyes first! A tray of uniformly shaped and sized sweet rolls is incredibly appealing. It signals care, precision, and skill in the baker. While a rustic look has its charm, for classic sweet rolls, uniformity is often the goal for a professional finish. This visual harmony enhances the overall enjoyment of the treat, making them look as delicious as they taste.
Beyond the visual, the real benefit of uniform sweet rolls is the guarantee of even baking. When rolls are the same thickness and diameter, heat distributes evenly throughout the entire tray. This prevents burnt bottoms or raw centers. Each roll rises similarly during proofing and baking, resulting in a consistent, fluffy texture from edge to center across the entire batch. Achieving uniform sweet rolls through careful shaping and cutting techniques directly contributes to both their beauty and their quality.
Mastering Sweet Roll Dough: Preparation is Key
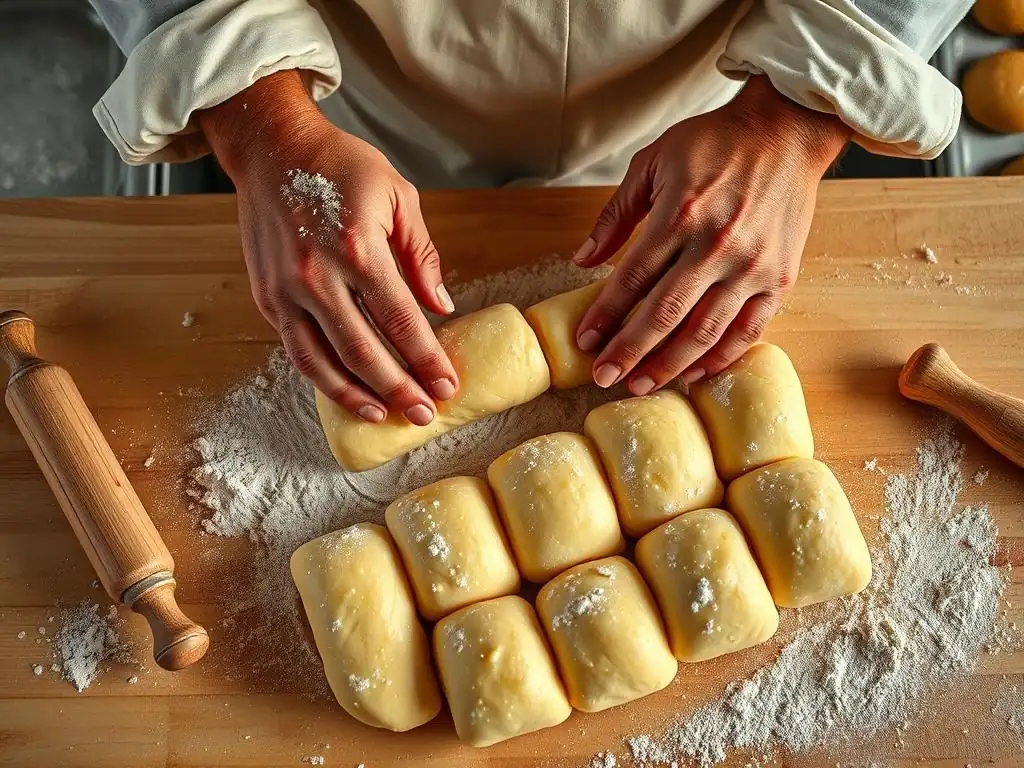
Preparing Your Sweet Roll Dough for Optimal Shaping
The journey to achieving uniform sweet rolls starts with your dough. A properly prepared dough is the foundation for successful cutting and shaping. After the initial mixing and kneading, allowing your dough to complete its first rise (bulk fermentation) is vital. The dough should double in size, indicating the yeast is active and has developed gluten structure. After the first rise, gently punch down the dough to release gases.
For most sweet roll recipes, the dough should be soft, elastic, and slightly sticky. Avoid adding too much extra flour during the initial mixing or kneading, as this can result in a dry dough that is difficult to roll out evenly and prone to tearing when shaping. Aim for a smooth, pliable dough that holds its shape when rolled but is still easy to work with. Proper dough preparation sets you up for perfecting sweet roll shaping cuts.
Chill Time for Easier Handling: The Secret to Neat Cuts
Here's a pro tip that makes a significant difference in achieving neat, uniform sweet rolls: chilling your dough after the first rise and before rolling it out. After punching down the dough, wrap it tightly in plastic wrap and refrigerate it for at least 30 minutes, or up to a few hours. This chilling period firms up the butter or fat in the dough and makes the dough itself less sticky and easier to handle.
When the dough is cold, it's much less likely to stretch or deform as you roll and cut it. This is especially helpful when working with rich doughs containing a lot of butter or sugar. A chilled dough allows for cleaner cuts, whether you're using a knife or dental floss, and makes rolling it into a tight log much simpler. Implementing this chill time is a game-changer for perfecting sweet roll shaping cuts and achieving those clean edges.
Essential Tools for Cutting and Shaping Sweet Rolls
The Best Knives for Clean Sweet Roll Cuts
When it comes to cutting sweet roll logs into individual rolls, a sharp knife is your best friend. A dull knife will compress and squish the dough, resulting in misshapen rolls and uneven layers. The ideal knife is a large, sharp chef's knife or a serrated bread knife. A sharp chef's knife allows for a clean, straight cut with minimal drag.
If using a chef's knife, keep a glass of hot water nearby. Dip the knife in the hot water, wipe it dry, and then make your cut. This slight warmth helps the blade glide through the dough and filling smoothly. A serrated bread knife can also work well, using a gentle sawing motion rather than pressing straight down. Whichever knife you choose, ensuring it is sharp is the most critical factor for clean, uniform cuts.
Using Dental Floss for Perfect Sweet Roll Slices
Perhaps the most popular and effective tool for achieving perfect, un-squished sweet roll slices is plain, unflavored dental floss. Yes, you read that right! Dental floss is thin, strong, and glides through soft dough and sticky filling without compressing the layers. This method is particularly excellent for cinnamon rolls or other sweet rolls with a generous, gooey filling.
To use dental floss, slide a piece (about 12-18 inches long) underneath your rolled and filled dough log where you want to make your cut. Cross the ends of the floss over the top of the log and pull them in opposite directions. The floss will effortlessly slice through the dough, leaving you with a clean, perfectly shaped roll. This technique is a secret weapon for perfecting sweet roll shaping cuts without deformation.
Bench Scrapers and Dough Dividers: Streamlining the Process
For bakers who make sweet rolls frequently or in larger batches, a bench scraper or dough divider can be invaluable tools for streamlining the cutting process and ensuring uniformity. A bench scraper, especially one with a measurement guide along the edge, can help you visually mark your dough log for even slices. It also provides a straight edge for cutting.
Dough dividers, often equipped with multiple blades, are designed specifically for cutting dough into equal portions quickly. While perhaps more of a professional tool, they offer unparalleled precision for achieving uniform sweet rolls. Even without a specialized divider, using a standard bench scraper to gently mark your log before cutting with a knife or floss can significantly improve consistency in size, contributing to perfecting sweet roll shaping cuts.
Cutting Techniques for Uniform Sweet Rolls: Step-by-Step
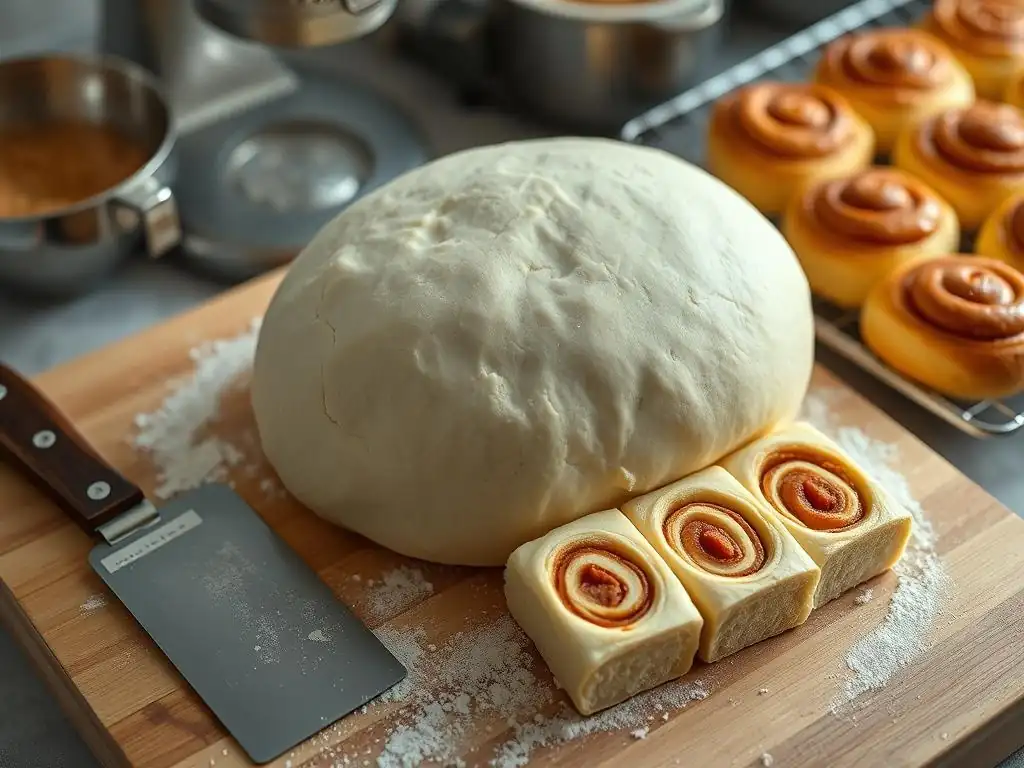
The Log Method: Cutting Even Slices from a Rolled Dough
The log method is the most common technique for shaping sweet rolls, especially those with a spiral filling like cinnamon rolls. It involves rolling out the dough, spreading the filling, rolling the dough into a tight log, and then slicing the log into individual rolls. The key to uniformity here lies in both rolling the log tightly and cutting it precisely.
Rolling the dough into an even rectangle is the first step. Aim for a consistent thickness across the entire sheet, typically around 1/4 to 1/3 inch. After spreading the filling evenly, start rolling from one long edge, keeping the roll as tight as possible to prevent gaps. A tight log results in well-defined spirals in your finished rolls. Once rolled, the log is ready for cutting, where perfecting sweet roll shaping cuts becomes critical.
Step 1: Rolling the Dough into a Tight Log
Begin with your prepared sweet roll dough rolled into a uniform rectangle, usually around 12x18 inches or 14x20 inches, depending on your recipe and desired roll size. Ensure the thickness is consistent across the entire sheet, typically between 1/4 inch and 1/3 inch. Spread your filling evenly over the dough, leaving a small border on the far edge clean. Starting from the long edge closest to you, begin to roll the dough away from you, keeping the roll as tight as possible.
Use your fingers to gently tuck the dough as you roll. Continue rolling until you reach the far edge. Gently pinch the seam to seal the log.
A tightly rolled log is essential for achieving those beautiful, defined spirals in your finished sweet rolls. If the log is loose, the rolls can unravel during proofing or baking. Aim for a log that is uniform in thickness from end to end. If one end is significantly fatter or skinnier, try to gently even it out by rolling it slightly more or less.
Step 2: Marking and Measuring for Consistent Slices
Before you begin cutting, it's helpful to mark your log to ensure your slices are consistent in size. Decide on your desired roll thickness; a common size is about 1 to 1.5 inches thick. Using a ruler or the measurement guide on your bench scraper, make small, light marks along the length of the log at your desired intervals. For example, if you want 1.5-inch rolls from an 18-inch log, you would aim for 12 rolls.
These marks serve as guides for your cuts, helping you maintain uniformity. While you don't have to be absolutely precise down to the millimeter, aiming for cuts that are very close in width will result in rolls that bake evenly and look appealingly consistent. This simple step significantly improves the chances of perfecting sweet roll shaping cuts.
Step 3: Precisely Cutting the Sweet Roll Log
Now comes the moment of truth: cutting the log into individual rolls. As discussed earlier, use a sharp knife or dental floss. If using a knife, position the blade over your first mark and use a decisive, straight-down motion or a gentle sawing motion if using a serrated knife. Try to avoid rocking the knife back and forth, as this can squish the dough.
If using dental floss, slide it under the log at your mark, cross the ends over the top, and pull firmly. This method is often preferred for its ability to make clean cuts without deforming the rolls. Place each cut roll onto your prepared baking sheet, cut-side up. Continue cutting the entire log, using your marks as guides, until you have a tray of uniformly sized sweet rolls ready for proofing.
The Individual Shaping Method: Achieving Unique Sweet Roll Forms
While the log method is classic, sweet rolls can also be shaped individually to create different forms like knots, twists, or buns. This method offers more creative freedom but still requires attention to detail to maintain uniformity in size and weight, which is crucial for even baking. Instead of rolling and slicing a large log, you typically divide the dough into individual portions first.
After the first rise and chilling (optional but recommended), divide the dough into equal pieces. The easiest way to ensure uniformity is to weigh each piece using a kitchen scale. Aim for a consistent weight for each roll, perhaps around 80-100 grams, depending on your desired size. Once divided, each piece is then shaped individually according to the desired form. This approach ensures that although the shapes might differ from a spiral, the overall mass of dough per roll is consistent, aiding even baking.
Shaping Sweet Rolls into Knots, Twists, and Buns
Once your dough is divided into equal portions (by weight is best), you can begin shaping. For knots, roll a piece of dough into a rope, then loosely tie it into a knot. For twists, roll the dough into a longer rope, fold it in half, and twist the two strands together. For simple buns, simply shape each portion into a smooth ball.
The key here is to work quickly and gently with the dough to avoid overworking it. Ensure each shape is roughly the same size and thickness to promote even baking. While the forms are different from the traditional spiral, the principle of uniform size remains paramount for achieving the best results. Perfecting sweet roll shaping cuts in this context means ensuring each piece of dough starts at the same weight and is shaped consistently.
Evenly Distributing Filling for Consistent Flavor
Regardless of the shaping method, ensuring the filling is evenly distributed is vital for consistent flavor in every bite. In the log method, this means spreading the filling all the way to the edges (except the sealing edge) when rolling out the dough. Avoid clumping the filling in the center or leaving large areas bare.
When shaping individually, if your recipe calls for a filling, ensure a consistent amount is placed in or on each dough portion before shaping. For example, if making filled buns, weigh the filling for each bun. This attention to detail ensures that every sweet roll in your batch offers the same delightful balance of dough and filling, contributing to the overall quality and consistency of your baking.
Troubleshooting Common Sweet Roll Shaping Problems
Uneven Sweet Roll Sizes: Causes and Solutions
One of the most common frustrations when making sweet rolls is ending up with rolls of varying sizes. This usually stems from inconsistent cutting or uneven rolling of the dough log. If your log isn't uniform in thickness before cutting, the slices will naturally vary. If you're freehanding the cuts without marking, it's easy for slice widths to drift.
Causes:
- Unevenly rolled dough log.
- Inconsistent slice width when cutting.
- Not dividing dough into equal weights for individual shaping.
Solutions:
- Ensure your dough log is uniformly thick before cutting. Gently reshape it if necessary.
- Use the marking technique with a ruler or bench scraper before cutting.
- Use dental floss or a sharp knife for cleaner cuts that don't compress the dough.
- If shaping individually, weigh each piece of dough for perfect uniformity.
- Practice your cutting technique; the more you do it, the better you'll become at judging consistent widths.
Dough Sticking to the Knife: Prevention Techniques
Dough sticking to your knife is a major impediment to achieving clean, uniform sweet roll cuts. This often happens with soft, slightly sticky doughs or those with gooey fillings. When the dough sticks, the knife drags and deforms the roll as you cut.
Causes:
- Knife is not sharp enough.
- Dough is too warm or sticky.
- Too much filling escaping onto the cutting surface or knife.
Prevention Techniques:
- Use a very sharp knife (chef's knife or serrated).
- Dip your knife in hot water and wipe it dry before each cut (for chef's knife).
- Use dental floss instead of a knife – it rarely sticks!
- Ensure your dough is properly chilled before cutting.
- Avoid overfilling your rolls, which can cause the filling to ooze out during cutting.
- Keep your cutting surface clean and lightly floured if necessary, but avoid excessive flour.
Misshapen Sweet Rolls: Corrective Measures
Sometimes, despite your best efforts, sweet rolls can end up misshapen during cutting, handling, or even proofing. They might be squished, lopsided, or unravel slightly. While prevention is key, you can often gently correct minor imperfections.
Causes:
- Squishing the dough during cutting (dull knife, pressing too hard).
- Rough handling when transferring rolls to the baking sheet.
- Rolls unraveling due to loose rolling or improper sealing of the log.
- Over-proofing, causing rolls to collapse slightly.
Corrective Measures:
- If a roll is slightly squished after cutting, gently reshape it by tucking the edges underneath to form a rounder shape before placing it on the baking sheet.
- Handle cut rolls with care when transferring them. Use a bench scraper to lift them if they are very soft.
- If a roll is starting to unravel, gently push the end back in and tuck it underneath. Ensuring a tight roll initially is the best prevention.
- During proofing, if rolls are expanding unevenly, you can sometimes gently nudge them back into shape, but do so very carefully to avoid deflating them.
- For rolls shaped individually (knots, twists), ensure the initial shaping is firm enough to hold during proofing and baking.
Advanced Sweet Roll Shaping Techniques

Creating Decorative Sweet Roll Designs
Once you've mastered the basics of achieving uniform sweet rolls, you can explore more decorative shaping techniques. These go beyond the simple spiral and can add an extra layer of visual appeal to your baked goods. Consider shapes like pinwheels, roses, or even more intricate braided designs.
- Pinwheels: After rolling out the dough and spreading the filling, cut the rectangle into squares. Place filling in the center of each square, then cut slits from each corner towards the center. Fold alternate points into the center and press down.
- Roses: Roll out the dough thinly. Cut strips about 1-2 inches wide and 8-10 inches long. Spread filling lightly along the strip. Fold the strip in half lengthwise, then roll it up from one end to create a rose shape.
- Swirls/Scrolls: Similar to the log method, but after cutting, you might gently flatten the roll slightly and then shape it into a tighter scroll before proofing.
These techniques require a bit more practice but allow for stunning presentations. Perfecting sweet roll shaping cuts for these methods means ensuring the initial dough pieces or strips are uniform before shaping.
Shaping Braided Sweet Rolls: A Step-by-Step Guide
Braided sweet rolls, often made with a slightly firmer dough than traditional cinnamon rolls, offer a beautiful alternative. They can be filled before braiding or left plain and glazed after baking. Achieving uniform braided rolls starts with dividing the dough into equal portions.
- Step 1: Divide and Shape: Divide your dough into equal portions (weighing is recommended). For each roll, divide the portion into three equal strands. Roll each strand into a rope of uniform thickness and length, usually around 8-12 inches long.
- Step 2: Braid: Pinch the ends of the three ropes together at one end. Braid the ropes together as you would hair, keeping the tension consistent. Pinch the ends together at the other side and tuck them underneath the roll.
- Step 3: Proof: Place the braided rolls on your baking sheet, leaving space for expansion. Proof until puffy but not overly risen, as intricate shapes can lose definition if over-proofed.
Ensuring the ropes are of equal length and thickness is crucial for a symmetrical braid and uniform baking. This method focuses on uniform dough division and consistent rope shaping for perfecting sweet roll shaping cuts in a different form.
For a fun and easy way to create unique sweet roll shapes, especially with kids, consider using cookie cutters. This method works best with dough that is rolled out slightly thicker than for traditional spirals. After rolling out the dough and spreading the filling, use cookie cutters to cut out shapes.
This technique works well for simpler shapes like hearts, stars, or even letters. The dough scraps can be gently re-rolled, though they might result in slightly tougher rolls. While perhaps not aiming for the exact uniform thickness of a sliced log, using consistent-sized cutters ensures that the area of each roll is similar, which helps with even baking. This is a creative approach to achieving visually appealing and somewhat uniform sweet rolls.
Baking Your Perfectly Shaped Sweet Rolls
Arranging Sweet Rolls on the Baking Sheet for Even Baking
How you arrange your perfectly shaped sweet rolls on the baking sheet is the next step towards a successful bake. Leave adequate space between each roll to allow for expansion during proofing and baking. If placed too close, they will merge into one another, potentially baking unevenly where they touch.
For classic cinnamon rolls or other spiral rolls, placing them cut-side up is standard. Use parchment paper or a silicone baking mat on your sheet pan for easy cleanup and to prevent sticking. The space you leave between rolls will depend on how much they are expected to spread; typically, 1-2 inches is sufficient. For rolls that are intended to bake touching (like pull-apart rolls), you would arrange them closer together.
Proofing for Optimal Rise and Texture
Proofing is the final rise before baking and is essential for achieving a light and fluffy texture. Place your shaped sweet rolls in a warm, draft-free place to proof. This could be a slightly warm oven (turned off! ), a proofing drawer, or simply on the counter covered loosely with plastic wrap.
Proofing time varies depending on the recipe, room temperature, and humidity, but it typically takes 30-60 minutes. The rolls should look visibly puffy and have increased significantly in size, perhaps by 50-75%. To test if they are ready, gently press the side of a roll; if the indentation springs back slowly, they are likely ready. If it springs back immediately, they need more time. If the indentation remains, they might be slightly over-proofed. Proper proofing, following your careful shaping and cutting, ensures the rolls bake up light and airy.
Baking Time and Temperature Considerations
Baking time and temperature are critical for achieving perfectly cooked sweet rolls with a beautiful golden-brown color. Most sweet roll recipes bake at temperatures between 350°F (175°C) and 375°F (190°C). The baking time typically ranges from 20 to 30 minutes, depending on the size and thickness of your rolls and your oven.
Since you've aimed for uniform sweet rolls through careful cutting and shaping, you can be more confident that they will all be ready around the same time. Look for visual cues: the tops should be golden brown, and the edges should look cooked through. An internal temperature of around 190-200°F (88-93°C) indicates they are done. If some edges are browning too quickly, you can loosely tent the pan with foil. Relying on uniform shaping makes predicting and executing the correct baking time much easier.
Elevate Your Baking: Sweet Roll Shaping Tips for Success
Practice Makes Perfect: Refining Your Sweet Roll Technique
Like any baking skill, perfecting sweet roll shaping cuts and techniques takes practice. Don't be discouraged if your first few batches aren't perfectly uniform. Pay attention to what went wrong – was the dough too sticky? Was the log uneven? Were the cuts inconsistent? Each batch is a learning opportunity.
With each attempt, you'll develop a better feel for the dough, understand how it behaves when rolling and cutting, and refine your technique with your chosen tools. Perhaps you'll find dental floss works best for you, or maybe you'll master the hot knife trick. Embrace the process, and you'll see noticeable improvement in the uniformity and appearance of your sweet rolls over time.
Exploring Different Sweet Roll Fillings and Flavors
Once you're confident in your ability to create uniform sweet rolls, the possibilities for fillings and flavors are endless! While classic cinnamon and brown sugar is beloved, you can experiment with fruit fillings (apple, berry), nuts (pecan, walnut), chocolate, cream cheese, or even savory options (though the shaping principles remain similar).
Consider the texture of your filling and how it might affect shaping and cutting. A very liquid filling might be messier to work with than a thicker paste. Adjust your technique slightly as needed. Exploring different flavors keeps your baking exciting and allows you to apply your perfected sweet roll shaping cuts to a variety of delicious creations.
We love seeing your baking successes! Once you've created a batch of beautifully shaped, uniform sweet rolls using these tips, consider sharing them with the BakeWithEase community. Tag us on social media or share photos on our forums (if available).
Showing off your perfectly cut and shaped sweet rolls can inspire other bakers and is a great way to celebrate your progress. Whether they are classic spirals, elegant knots, or fun cookie-cutter shapes, the effort you put into perfecting sweet roll shaping cuts is evident in the final result. Happy baking, and enjoy your consistently delicious sweet treats!
Frequently Asked Questions
How important is uniform shaping for sweet rolls?
Uniform shaping is crucial for even baking and a professional appearance. It ensures all rolls bake at the same rate, preventing some from being undercooked while others are overbaked.
What are some common mistakes when cutting sweet roll dough?
Common mistakes include using a dull knife, which tears the dough, and uneven pressure, resulting in differently sized rolls. This can lead to inconsistent baking.
What tools are best for achieving precise sweet roll cuts?
A sharp knife or bench scraper are ideal for clean cuts. Using dental floss or unscented thread is another method for creating even slices without distorting the dough.
How can I ensure my sweet rolls are consistently sized after shaping?
Weighing the dough before dividing it helps ensure even portions. After cutting, gently shape each piece into a uniform ball or desired shape, maintaining consistent pressure.
What's the best way to prevent the filling from leaking out during baking?
Ensure the filling is evenly distributed and not overly generous. Properly sealing the edges of the shaped rolls and placing them close together on the baking sheet can also help.
Final Reflection: The Art and Science of the Perfect Sweet Roll
The quest for the flawlessly shaped sweet roll is more than just a baking challenge; it's a testament to precision, patience, and the enduring power of a perfectly risen, golden-brown delight. From the initial dough preparation to the final bake, each step contributes to the overall aesthetic and, importantly, the even distribution of sweetness and texture throughout the roll. Mastering the cuts and shaping techniques, as explored in this article, elevates the humble sweet roll from a simple treat to a culinary masterpiece.
The impact of consistent, beautiful sweet rolls extends beyond the individual baker. It speaks to a deeper appreciation for craftsmanship and the satisfaction derived from creating something beautiful with one's own hands. The joy of baking lies not just in the result, but in the process itself.
This sentiment perfectly encapsulates the journey of perfecting sweet roll shaping cuts – a journey that demands attention to detail but rewards the baker with immense pride and delicious results. The visual appeal of uniformly shaped rolls also elevates the presentation, transforming a simple breakfast item into something truly special, worthy of sharing and celebrating.
Now, consider your own baking journey. What techniques resonated most with you? Perhaps you'll experiment with different cutting methods, refining your own approach to achieve that perfect, even rise. Don't be afraid to embrace the imperfections; they are part of the learning process. Remember the satisfaction of a perfectly shaped sweet roll, the joy of sharing it with loved ones, and the enduring legacy of baking traditions passed down through generations. Embrace the challenge, refine your skills, and let the aroma of freshly baked sweet rolls fill your home with warmth and happiness.
Unleash Your Inner Baker: Perfect Sweet Rolls Await!
Thanks for taking the time to explore our tips on achieving uniform sweet rolls! We hope you gained valuable insights into creating those picture-perfect pastries. Now it's time to put your newfound knowledge to the test.
- Master the art of rolling: Practice your shaping techniques with your favorite dough recipe. Aim for consistent size and shape for even baking. This is your primary goal!
- Share your creations: Post a picture of your perfectly formed sweet rolls on social media and tag us – we'd love to see your baking triumphs! Let's inspire other bakers!
- Experiment with fillings: Try a new filling or glaze to add your own unique touch. What exciting flavor combinations will you discover?
What innovative sweet roll filling will you create next? Let's hear your ideas in the comments below!