
Vegan and NutFree Sourdough Starter: StepbyStep Maintenance Guide

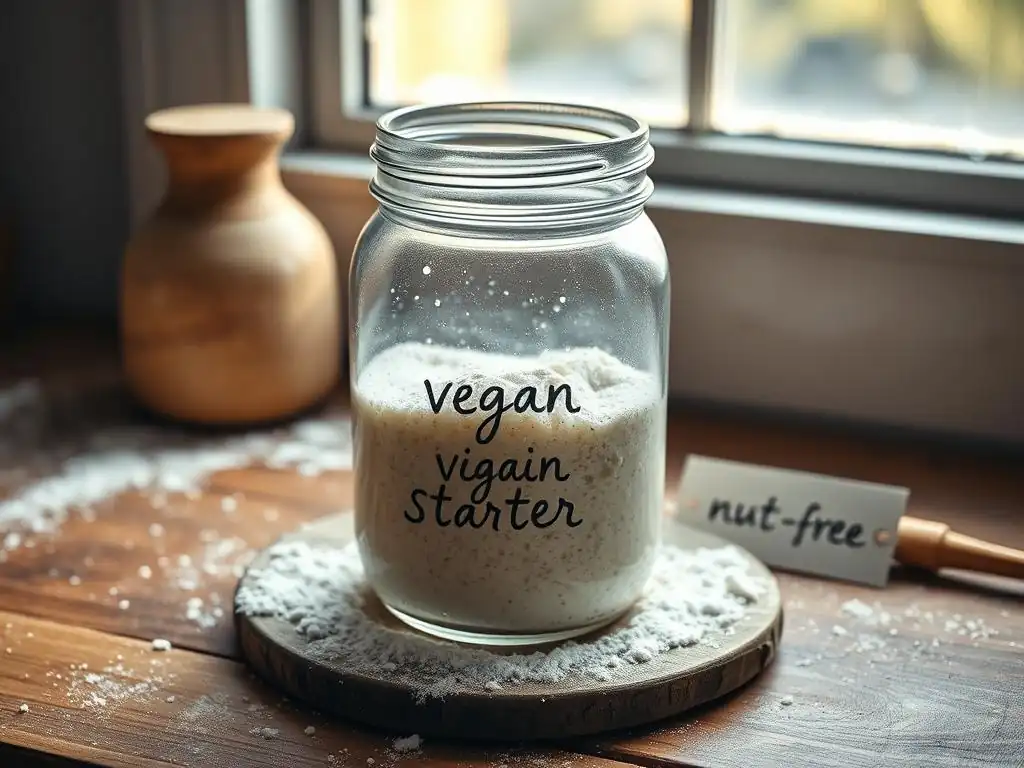
Welcome to BakeWithEase, your ultimate guide to stress-free baking!
Ever dreamed of crafting a delicious, tangy sourdough loaf, but dietary restrictions held you back? Dive in and discover our comprehensive, step-by-step guide to creating a flourishing vegan and nut-free sourdough starter. Unlock the secrets to nurturing your own culture and open a world of possibilities in your kitchen. Ready to break free from limitations and embark on a baking adventure?
- Introduction to Vegan & Nut-Free Sourdough Starters
-
Creating Your Vegan Nut-Free Sourdough Starter: A Detailed Guide
- Ingredients for a Vegan & Nut-Free Starter: Flour and Water Selection
- Step 1: Initial Mixing of Flour and Water (Day 1)
- Step 2: Observing and Waiting (Days 2-5)
- Step 3: The First Feeding (Day 6)
- Step 4: Regular Feedings and Monitoring (Days 7-14)
- Step 5: Achieving a Mature and Active Starter (Day 15+)
- Maintaining Your Vegan and Nut-Free Sourdough Starter for Baking Success
- Troubleshooting Common Vegan Nut-Free Sourdough Starter Issues
- Baking with Your Vegan and Nut-Free Sourdough Starter
- Advanced Techniques for Vegan & Nut-Free Sourdough Baking
- Conclusion: Enjoying Your Homemade Vegan and Nut-Free Sourdough
-
Frequently Asked Questions
- What makes this sourdough starter "vegan" and "nut-free"?
- How often should I feed my Vegan & Nut-Free Sourdough Starter?
- What type of flour works best for this Vegan & Nut-Free Sourdough Starter?
- What are the signs that my Vegan & Nut-Free Sourdough Starter is ready to use?
- Can I use this Vegan & Nut-Free Sourdough Starter for any type of sourdough recipe?
- Final Reflection: Cultivating a Flourishing, Inclusive Sourdough Culture
- Unleash Your Inner Baker: Nurture Your Vegan & Nut-Free Sourdough!
Introduction to Vegan & Nut-Free Sourdough Starters
What is a Sourdough Starter?
A sourdough starter is a living culture of wild yeast and beneficial bacteria, typically Lactobacillus, cultivated from a simple mixture of flour and water. This symbiotic community ferments the flour, producing carbon dioxide which leavens bread, and organic acids that contribute to the distinctive tangy flavor of sourdough. Unlike commercial yeast, which is a single strain selected for rapid and consistent leavening, a sourdough starter is a complex ecosystem that reflects the microbes present in its environment and the flour used.
Over time, with regular feeding and care, a starter becomes a stable and reliable leavening agent. The yeast consumes the sugars in the flour, producing gas, while the bacteria produce lactic and acetic acids. The balance between these organisms and their metabolic byproducts is what gives sourdough its unique character and structure. Maintaining this delicate balance requires understanding the starter's needs for food (flour), hydration (water), and a suitable temperature.
Why Choose a Vegan and Nut-Free Sourdough Starter?
Choosing a vegan and nut-free sourdough starter is essential for bakers with specific dietary needs or allergies. A standard sourdough starter is naturally vegan, as it only requires flour and water. However, ensuring it remains nut-free is crucial for individuals with nut allergies, as cross-contamination can be a significant risk. By intentionally creating and maintaining a starter in a controlled, nut-free environment using certified nut-free ingredients and equipment, you eliminate the risk of introducing allergens.
Furthermore, using a dedicated vegan nut-free sourdough starter allows you to bake a wide variety of delicious leavened goods, from rustic bread loaves to pancakes and pizza dough, that are safe for those following a vegan diet or needing to avoid nuts. This opens up the world of sourdough baking to a broader audience, ensuring that everyone can enjoy the benefits and flavors of naturally leavened baked goods without dietary concerns.
Benefits of Baking with a Vegan Nut-Free Starter
Baking with a robust vegan nut-free sourdough starter offers numerous benefits. Firstly, it provides natural leavening without the need for commercial yeast, which some people prefer for digestive reasons or flavor profiles. The slow fermentation process also contributes to a more complex and nuanced flavor in baked goods, often described as tangy or slightly sour, which develops over hours or even days.
Secondly, for those managing allergies or dietary restrictions, having a reliable vegan nut-free sourdough starter is empowering. It allows for complete control over ingredients, ensuring that baked goods are free from animal products and nuts. This homemade approach guarantees safety and peace of mind, enabling you to bake delicious, naturally leavened items that meet specific dietary requirements, from simple loaves of bread to more elaborate pastries, all while being confident they are safe for consumption.
Creating Your Vegan Nut-Free Sourdough Starter: A Detailed Guide
Ingredients for a Vegan & Nut-Free Starter: Flour and Water Selection
Creating a successful vegan nut-free sourdough starter begins with selecting the right ingredients: flour and water. For a nut-free starter, the primary concern is sourcing flour that is certified nut-free or processed in a dedicated nut-free facility to prevent cross-contamination. While standard all-purpose flour can be used if nut-free, many bakers find success with organic or unbleached varieties as they contain more natural microbes.
The specific type of flour used will influence the starter's flavor and activity level. For instance, using a portion of whole wheat or rye flour can sometimes speed up initial activity due to higher nutrient content, but ensure these are also certified nut-free.
The quality of your water is equally important. Avoid using chlorinated tap water directly, as chlorine can inhibit microbial growth. Filtered or bottled water is ideal. If using tap water, let it sit out in an open container for 24 hours to allow the chlorine to dissipate. The water temperature should be lukewarm, ideally between 70-80°F (21-27°C), as this range is conducive to yeast and bacteria activity. Using water that is too hot or too cold can stress the starter and slow down or prevent fermentation.
Choosing the Right Nut-Free Flour for Your Starter
Selecting the right nut-free flour is paramount for a safe vegan nut-free sourdough starter. Look for flours explicitly labeled "certified nut-free" or produced in facilities free from nut allergens. Common flours like all-purpose white flour, whole wheat flour, or rye flour can be used, provided they meet nut-free standards. Some bakers start their starters with a mix, such as 50% all-purpose and 50% whole wheat, to provide a good nutrient base for the microbes.
The type of flour impacts the starter's personality. Starters made with whole grain flours tend to be more active initially due to higher nutrient content but might require more frequent feeding. White flour starters can be more stable once mature. Experimenting with small quantities of different nut-free flours, like a portion of organic rye, can sometimes help kickstart a sluggish starter due to the abundance of wild yeasts on the grain's surface. Consistency in flour choice during maintenance is key to a stable starter.
Water Quality: What to Consider
Water quality significantly impacts the health and activity of your vegan nut-free sourdough starter. The presence of chlorine or chloramine in tap water can harm the beneficial microbes you are trying to cultivate. As mentioned, letting tap water sit out for 24 hours is a simple way to remove chlorine. For chloramine, which doesn't dissipate as easily, using filtered water (like from a Brita filter) or bottled water is a more reliable option.
The pH of your water can also play a role, though it's less commonly an issue. Slightly acidic water is generally preferred by sourdough microbes. Very hard water (high mineral content) or very soft water can sometimes affect the starter's consistency and activity, but this is usually a minor factor compared to chlorine. Aim for water that is lukewarm, around 75°F (24°C), for feedings, as this temperature encourages microbial activity without being too hot or cold.
Step 1: Initial Mixing of Flour and Water (Day 1)
To begin your vegan nut-free sourdough starter, you'll perform the initial mix. In a clean, non-reactive container (like a glass jar), combine equal weights of nut-free flour and lukewarm water. A common starting point is 50 grams of nut-free flour and 50 grams of water.
Mix thoroughly with a clean spoon or spatula until no dry pockets of flour remain and you have a thick, pasty consistency. Scrape down the sides of the jar and loosely cover the opening with a lid, plastic wrap, or a clean cloth secured with a rubber band. Do not seal it tightly, as the starter will produce gases.
Place the jar in a warm spot, ideally between 70-80°F (21-27°C), away from direct sunlight or drafts. A kitchen counter is often suitable. The goal for the first few days is to simply allow the natural yeast and bacteria present in the flour and air to begin colonizing and fermenting the mixture. You might not see much activity on day one, but the microbial process is beginning.
Step 2: Observing and Waiting (Days 2-5)
After the initial mix, the next few days involve observation and patience. Do not feed your vegan nut-free sourdough starter during this period. Simply keep it in its warm location and observe any changes. You might start to see small bubbles appearing on the surface or throughout the mixture on days 2 or 3. The consistency might also become slightly more liquidy, and you might detect a faint, perhaps slightly unpleasant, smell initially – this is normal as different microbes compete for dominance.
By days 4 or 5, you might notice more significant bubbling, perhaps even some rise and fall in the volume marked on the jar. The smell might start to become more yeasty or slightly sour. This indicates that the wild yeasts are becoming more active. It's important not to be discouraged if you don't see dramatic activity immediately; every starter develops at its own pace depending on temperature, flour type, and ambient microbes.
Step 3: The First Feeding (Day 6)
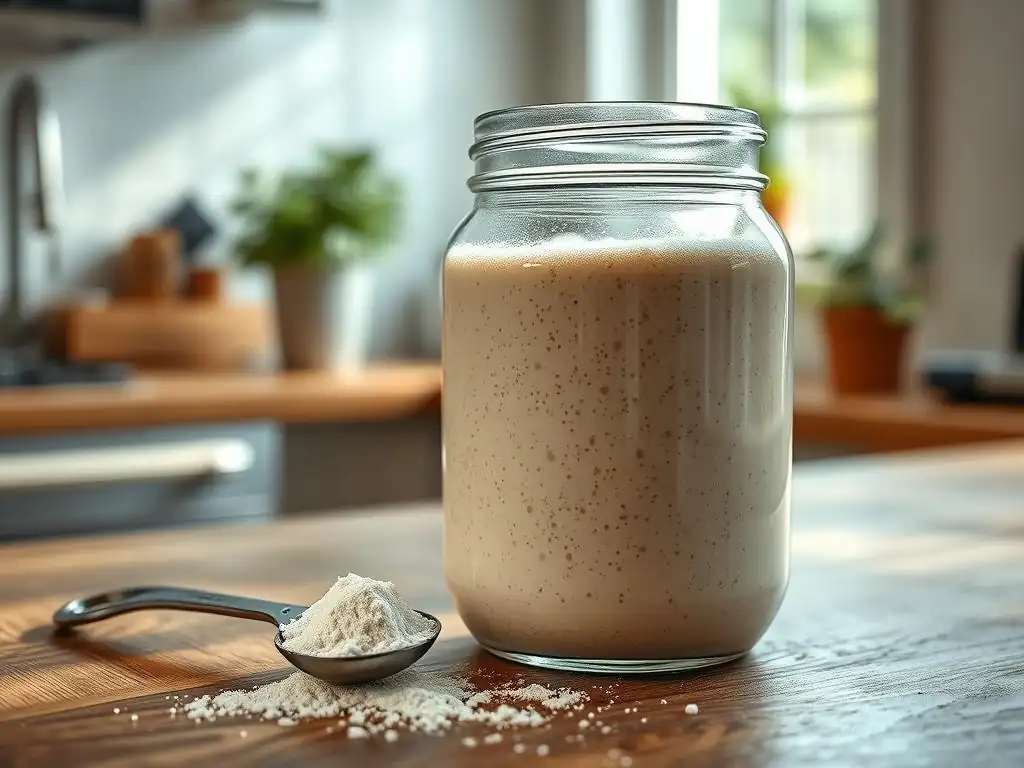
Around day 6, or when you start seeing consistent bubbling activity, it's time for the first feeding of your vegan nut-free sourdough starter. Before feeding, you will need to discard a portion of the starter. Discarding helps manage the volume and ensures that the remaining starter has enough fresh food to thrive. A common practice is to discard about half of the starter, leaving approximately 50 grams.
To the remaining starter, add fresh nut-free flour and lukewarm water, typically in a 1:1:1 ratio by weight (e.g., 50 grams starter : 50 grams nut-free flour : 50 grams water). Mix thoroughly until well combined, scrape down the sides, and cover loosely. Return the jar to its warm spot. After this feeding, you should observe increased activity, with the starter potentially doubling in size within 12-24 hours and showing numerous bubbles.
Step 4: Regular Feedings and Monitoring (Days 7-14)
From day 7 onwards, you will establish a regular feeding schedule for your vegan nut-free sourdough starter. The standard frequency is once every 24 hours, using the 1:1:1 ratio (starter:flour:water by weight) after discarding about half of the previous day's starter. For example, if you have 100 grams of starter, discard 50 grams, and feed the remaining 50 grams with 50 grams of nut-free flour and 50 grams of water.
Monitor your starter's activity closely during this period. Look for consistent doubling in size within 8-12 hours after feeding, a bubbly texture, and a pleasant, tangy, slightly yeasty aroma. The time it takes for your starter to reach peak activity after feeding is a key indicator of its maturity. Continue these daily feedings until your starter shows predictable and vigorous activity, reliably doubling or tripling in size within a reasonable timeframe (usually 4-8 hours) after feeding.
Step 5: Achieving a Mature and Active Starter (Day 15+)
Your vegan nut-free sourdough starter can be considered mature and ready for baking when it consistently shows predictable activity after feeding, typically doubling or tripling in volume within 4-8 hours at room temperature (70-80°F / 21-27°C). It should have a pleasant, tangy smell and a bubbly, spongy texture throughout. This usually takes about 14 days or slightly longer, depending on environmental conditions and feeding consistency.
Once mature, your vegan nut-free sourdough starter is a robust leavening agent. You can now transition to a maintenance schedule that suits your baking habits. If you bake frequently (daily or every few days), you can continue feeding it daily at room temperature. If you bake less often (once a week or less), you can store it in the refrigerator to slow down activity, requiring less frequent feeding. A mature starter is resilient and can often be revived even after periods of neglect.
Maintaining Your Vegan and Nut-Free Sourdough Starter for Baking Success
Understanding Starter Activity: Signs of a Healthy Starter
Understanding the signs of a healthy vegan nut-free sourdough starter is crucial for successful baking. A healthy starter is active and predictable. Key indicators include consistent bubbling throughout the mixture, not just on the surface. These bubbles are evidence of the yeast producing carbon dioxide. A very active starter will show numerous small bubbles, giving it a light, airy, almost foamy texture at its peak.
Another primary sign is volume increase. A healthy starter, when fed, should reliably increase in volume, typically doubling or even tripling within a few hours at warm room temperature. Marking the level of your starter on the jar immediately after feeding helps you track its rise. The starter will reach a peak volume and then slowly start to deflate as the yeast runs out of readily available food. The aroma also indicates health; a healthy starter smells pleasantly tangy, yeasty, and slightly acidic, not like acetone or rotten food.
Visual Cues: Bubbles and Volume Increase
Visual cues are the most straightforward way to gauge the health of your vegan nut-free sourdough starter. Observing the formation of bubbles is fundamental. Initially, you might see just a few surface bubbles, but as the starter matures and becomes active, you will see bubbles forming throughout the mixture, creating a web-like structure. At its peak activity, the starter should look significantly expanded and feel light and airy.
Tracking the volume increase is also vital. Immediately after feeding, mark the level of the starter on your jar with a rubber band or marker. A healthy starter should rise steadily, reaching its peak height before beginning to fall. The speed and height of the rise indicate the starter's vigor. For baking, you typically want to use your starter when it is at or just past its peak, as this is when the yeast is most active and capable of providing optimal lift to your dough.
The Float Test: Is Your Starter Ready?
The float test is a common method to check if your vegan nut-free sourdough starter is active enough to leaven bread. To perform the float test, gently take a small spoonful of starter that is at its peak (or just past) activity – meaning it has recently doubled or tripled in size and is full of bubbles. Carefully drop this spoonful into a glass of lukewarm water.
If the starter floats on the surface of the water, it is considered ready for baking. This is because the starter is sufficiently full of carbon dioxide gas produced by the active yeast, making it less dense than the water. If the starter sinks to the bottom, it may not be active enough yet. This could mean it needs more time to ferment after feeding, or it might indicate that your starter isn't consistently strong and might need a few more days of regular feeding to build strength before attempting a loaf.
Daily Feeding Schedule: Ratios and Consistency
Maintaining a daily feeding schedule at room temperature is key to keeping your vegan nut-free sourdough starter active and ready for spontaneous baking. A common feeding ratio is 1:1:1 by weight (starter:nut-free flour:water). For example, if you keep 50 grams of starter, you would feed it with 50 grams of nut-free flour and 50 grams of lukewarm water daily. This ratio provides enough food for the microbes for approximately 24 hours at typical room temperatures (around 70-75°F or 21-24°C).
Consistency in your feeding time helps establish a rhythm for your starter. Feeding it around the same time each day allows you to predict when it will reach its peak activity. Before each feeding, remember to discard a portion of the starter to manage the volume and ensure the remaining starter gets a significant amount of fresh food. Discarding about half is standard, but you can adjust this ratio (e.g., feeding 1:2:2 or 1:3:3) to influence the fermentation speed or manage the starter's acidity.
Adjusting Feeding Ratios Based on Environment
The ideal feeding ratio for your vegan nut-free sourdough starter can vary based on your environment, particularly temperature. In warmer conditions (above 78°F or 26°C), your starter will ferment faster, potentially peaking and becoming hungry again in less than 24 hours. In this case, you might need to feed it more frequently (twice a day) or adjust the ratio to provide more food relative to the starter amount, such as 1:2:2 or 1:3:3 (starter:flour:water). A higher ratio gives the microbes more food to work through, extending the time until the next feeding is needed.
Conversely, in cooler conditions (below 70°F or 21°C), fermentation slows down. Your starter might take longer than 24 hours to peak. If feeding once a day, you might stick to the 1:1:1 ratio, or even use slightly cooler water. Pay attention to your starter's signs – if it's peaking and falling very quickly, increase the food ratio or frequency. If it's sluggish, try a warmer spot or a slightly higher ratio of starter to food (like 1:0.5:0.5, though this uses more starter).
Maintaining a Consistent Feeding Schedule
Maintaining a consistent feeding schedule is vital for a happy and predictable vegan nut-free sourdough starter. Feeding around the same time each day helps regulate the microbial activity and makes it easier to know when your starter will be at its peak and ready to use for baking. For example, if you feed it every morning at 8 AM, you can typically expect it to be ready for use in the afternoon or evening, depending on the temperature.
Skipping feedings or feeding irregularly can weaken the starter over time, making it less reliable for leavening. If you know you won't be baking for a while, it's better to transition your starter to refrigerator storage, which dramatically slows down its activity and reduces the feeding frequency needed. Consistency builds strength and predictability, which are key attributes of a reliable vegan nut-free sourdough starter.
Storing Your Vegan Nut-Free Starter: Fridge vs. Room Temperature
The choice between storing your vegan nut-free sourdough starter at room temperature or in the refrigerator depends on how often you plan to bake. Storing at room temperature requires daily feeding to keep the microbes active and prevents the starter from becoming too acidic or developing off-flavors. This method is best if you bake every day or every few days, as your starter will always be ready to use within a few hours of its peak after feeding.
Refrigerated storage is ideal for less frequent bakers (once a week or less). The cold temperature significantly slows down microbial activity, meaning the starter requires feeding much less often. This saves on flour and reduces the amount of discard. However, a starter stored in the fridge will need to be "woken up" and fed at room temperature for at least one or two cycles before it's vigorous enough to leaven bread effectively.
Refrigerated Storage: Slowing Down Activity
To store your vegan nut-free sourdough starter in the refrigerator, feed it as usual, let it sit at room temperature for 1-2 hours until you see the first signs of activity (small bubbles), and then place it in the fridge. The cold temperature, typically around 35-40°F (1-4°C), dramatically slows down fermentation. You'll only need to feed it about once a week or even every two weeks, depending on how cold your fridge is and the starter's strength.
When you're ready to bake, take the starter out of the fridge, discard all but a small amount (e.g., 25-50 grams), and feed it at room temperature using your usual ratio (e.g., 1:1:1 or 1:2:2). Let it become active and peak. Depending on how long it was in the fridge, you might need to do this feeding process once or twice to ensure it's fully vigorous and ready for baking. A starter stored in the fridge might take 8-12 hours or longer to peak after being fed at room temperature.
Room Temperature Storage: Frequent Feedings Required
Storing your vegan nut-free sourdough starter at room temperature, ideally between 70-75°F (21-24°C), means keeping it consistently active. This requires daily feeding. Each day, discard a portion of the starter and feed the remainder with fresh nut-free flour and lukewarm water, typically in a 1:1:1 ratio by weight. This ensures the microbes always have fresh food and maintains a balanced microbial population.
The benefit of room temperature storage is that your starter is usually ready to use for baking within 4-8 hours of feeding (once mature). This offers spontaneity for baking. However, it does require daily commitment and results in a significant amount of discard over time. If you find yourself discarding large amounts frequently without baking, consider switching to refrigerator storage to reduce waste and feeding frequency.
Discarding Starter: What to Do with the Excess
Discarding a portion of your vegan nut-free sourdough starter before each feeding is a necessary step to control its volume and maintain a healthy microbial balance. Without discarding, your starter would quickly grow too large to manage, and the ratio of fresh food to active microbes would become too low, leading to a sluggish or overly acidic starter. The discard itself is simply unfed starter.
While the term "discard" might sound like waste, this excess starter is actually a valuable ingredient that can be used in a variety of baked goods where you don't need significant leavening, but want to add flavor and moisture. There are many creative ways to use vegan nut-free sourdough discard, turning a potential waste product into delicious treats.
Vegan Nut-Free Sourdough Discard Recipes
The excess from your vegan nut-free sourdough starter is perfect for recipes that use baking soda or powder for lift, or recipes where a slightly tangy flavor and added moisture are desired. Common uses for vegan nut-free sourdough discard include pancakes, waffles, crackers, flatbreads, muffins, and quick breads. Since the discard is typically unfed or past its peak, it won't provide significant leavening on its own, making it ideal for recipes that don't rely solely on sourdough rise.
When using discard in recipes, remember that it adds both liquid and flour to your mix. You might need to adjust the hydration of the recipe slightly depending on how liquidy your starter is. Look for recipes specifically designed for sourdough discard, ensuring they also align with vegan and nut-free requirements by using appropriate plant-based milk alternatives, vegan butter or oil, and certified nut-free flours. For instance, a simple vegan nut-free sourdough discard cracker recipe might combine discard with extra flour, oil, and salt, rolled thin and baked until crispy.
Composting Your Sourdough Discard
If you don't bake frequently or don't have time to use your vegan nut-free sourdough discard in recipes, composting is an environmentally friendly option. Sourdough discard is essentially fermented flour and water, making it a suitable addition to a compost pile. The microbes within the discard can even help break down other organic materials in your compost.
Simply add your discarded vegan nut-free sourdough starter to your compost bin or pile along with other kitchen scraps and yard waste. Ensure it's mixed in well with other materials to avoid attracting pests or forming a dense, impermeable layer. Composting is a great way to manage excess discard from your vegan nut-free sourdough starter while enriching your garden soil.
Troubleshooting Common Vegan Nut-Free Sourdough Starter Issues
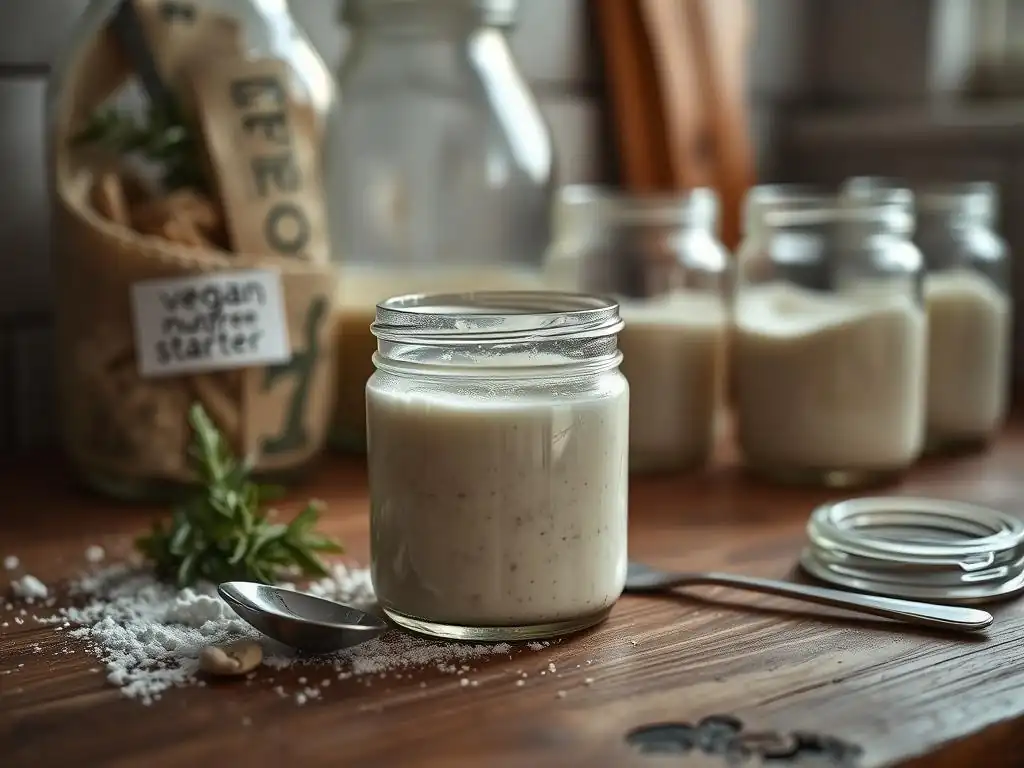
Identifying Problems: Mold, Off-Smells, Lack of Activity
Troubleshooting your vegan nut-free sourdough starter involves recognizing signs that indicate something isn't quite right. The most serious issue is mold, which typically appears as fuzzy, colored patches (green, black, orange, or pink) on the surface. Any sign of mold means the starter is contaminated and should be discarded entirely. Off-smells can also signal problems; a strong acetone or rotten smell indicates the starter is hungry or has an imbalance of microbes.
Lack of activity, or a sluggish starter that doesn't rise much after feeding, is another common issue. This could be due to various factors, including temperature that is too cold, inconsistent feeding, using chlorinated water, or the starter simply needing more time to mature and build strength. Identifying the specific problem is the first step toward fixing it and getting your vegan nut-free sourdough starter back on track.
Addressing Mold Contamination: When to Discard
Mold contamination in your vegan nut-free sourdough starter is a clear sign that the starter is no longer safe or healthy to use. Mold spores can penetrate below the surface, even if you only see patches on top. Unlike mold on hard cheese, which can sometimes be cut away, the structure of a sourdough starter allows mold to spread thoroughly.
If you see any fuzzy mold (green, black, orange, pink, or even white fuzzy patches that aren't just bubbles), you must discard the entire starter and start fresh. Attempting to salvage a moldy starter by just scraping off the top is risky. Ensure your jar is thoroughly cleaned and sanitized before starting a new vegan nut-free sourdough starter to prevent recurrence.
Dealing with Off-Smells: Adjusting Feeding Ratios or Flour
An off-smell, particularly a strong acetone or nail polish remover smell, is usually a sign that your vegan nut-free sourdough starter is hungry. This smell is caused by the yeast producing fusel alcohols, a byproduct when they are stressed and running out of readily available sugars. It indicates the starter has peaked and is past its prime, needing a fresh meal.
To fix this, increase the frequency of feeding or adjust your feeding ratio to provide more food per amount of starter (e.g., switch from 1:1:1 to 1:2:2 or 1:3:3). Ensure you are using lukewarm water and keeping the starter in a warm spot. If the smell persists, try switching to a different type of certified nut-free flour for a few feedings, as different flours contain varying levels of nutrients and microbes that might help rebalance the starter.
Reviving a Sluggish Starter: Tips and Tricks
A sluggish vegan nut-free sourdough starter that isn't rising much after feeding can be frustrating, but it's often fixable. First, ensure the ambient temperature is warm enough, ideally 70-80°F (21-27°C). Cold temperatures significantly slow down microbial activity. If your kitchen is cool, find a warmer spot (like on top of the refrigerator or inside a microwave or oven with the light on).
Next, consider your feeding routine. Are you feeding consistently? Are you using enough fresh flour and water? Sometimes, increasing the feeding frequency to twice a day for a few days can give the starter the boost it needs. Using a small portion of the starter (e.g., 25 grams) and feeding it a larger amount of fresh flour and water (e.g., 100g flour, 100g water) can also help by giving the existing microbes a feast and reducing the acidity.
Increasing Feeding Frequency
Increasing the feeding frequency of your vegan nut-free sourdough starter to twice a day can be an effective way to revive a sluggish culture or strengthen one before baking. Instead of feeding every 24 hours, feed it roughly every 12 hours. Use your standard feeding ratio (e.g., 1:1:1), discarding a portion before each feed.
This more frequent feeding ensures the microbes are constantly supplied with fresh food, preventing them from becoming overly acidic or inactive between feedings. Continue feeding twice a day until you see consistent, vigorous activity – the starter reliably doubling or tripling in volume within 4-8 hours after each feed. Once it's active again, you can switch back to a daily feeding schedule or transition to fridge storage.
Adjusting Temperature for Optimal Activity
Temperature is one of the most critical factors influencing the activity of your vegan nut-free sourdough starter. The optimal temperature range for most starters is between 70-80°F (21-27°C). If your starter is sluggish, the temperature might be too cool. Moving it to a warmer location can significantly increase microbial activity.
Conversely, temperatures above 80°F (27°C) can cause the starter to ferment too quickly, peak rapidly, and become overly acidic or hungry faster. High temperatures can also favor certain bacteria that produce off-flavors. Finding a stable spot within the ideal range is best. If your kitchen temperature fluctuates, consider using a proofing box, an oven with the light on, or even a seedling mat to maintain a consistent, warm temperature for your starter.
Ensuring a Nut-Free Environment: Preventing Cross-Contamination
Maintaining a truly nut-free environment is paramount when working with a vegan nut-free sourdough starter, especially for individuals with severe nut allergies. This goes beyond just using certified nut-free flour. All equipment used – the jar, mixing spoons, spatulas, measuring cups, and even the surface where you work – must be thoroughly cleaned and free from any nut residue.
Dedicate specific tools for your nut-free baking if possible, or ensure everything is washed meticulously, ideally in a dishwasher with a hot cycle. Be mindful of airborne particles if nuts are used elsewhere in the kitchen. Store your vegan nut-free sourdough starter in a container with a secure lid in a location where it won't be exposed to potential nut allergens from other ingredients or cooking activities. Being vigilant about cross-contamination is key to ensuring the safety of your nut-free baked goods.
Baking with Your Vegan and Nut-Free Sourdough Starter
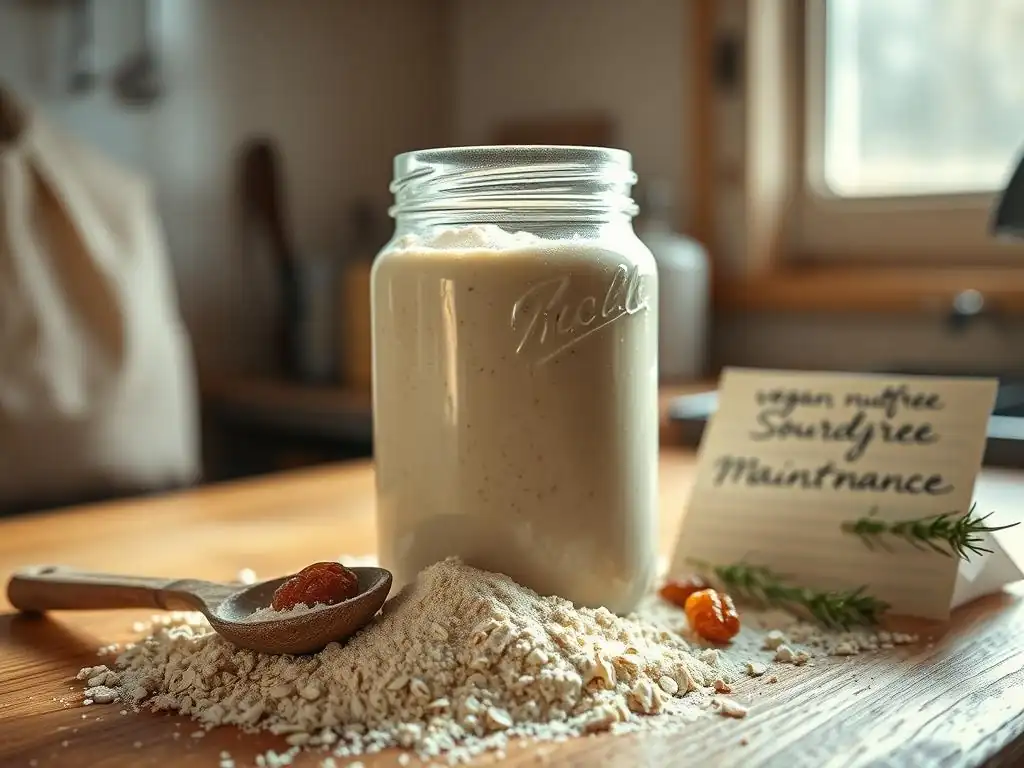
Converting Recipes to Use Your Vegan & Nut-Free Starter
Baking with your newly active vegan nut-free sourdough starter requires understanding how to incorporate it into recipes. Most sourdough recipes call for an active starter, often measured by weight. When converting a standard sourdough recipe, you'll typically replace the commercial yeast and a portion of the flour and water with your starter.
A common approach is to use an equal weight of starter to the total amount of leavening required. For example, if a recipe calls for 100g of starter, this contributes roughly 50g of flour and 50g of water to the overall recipe hydration and flour weight (assuming a 100% hydration starter, which is 1:1 flour:water).
You'll need to adjust the main flour and water quantities in the recipe accordingly. Many resources and online calculators can help with precise conversions based on your starter's hydration level, ensuring your final dough has the correct balance of ingredients for your vegan nut-free baking.
Sourdough Baking Tips for Vegan and Nut-Free Diets
Baking delicious sourdough goods that are both vegan and nut-free involves a few key considerations. Beyond using a reliable vegan nut-free sourdough starter and certified nut-free flours, pay attention to other ingredients in your recipes. Ensure any added fats are plant-based and nut-free (like olive oil, coconut oil, or vegan butter made without nuts). If a recipe calls for milk or yogurt, use suitable plant-based, nut-free alternatives such as soy milk, oat milk, or coconut yogurt.
Hydration levels can sometimes vary slightly when using different nut-free flours compared to wheat. You might need to adjust the water slightly to achieve the desired dough consistency. Pay close attention during the autolyse and kneading stages. Remember the cross-contamination prevention measures discussed earlier – use clean, nut-free equipment throughout your baking process to maintain the integrity of your vegan nut-free baked goods.
Recipe Ideas Using Your Vegan Nut-Free Sourdough Starter
Your active vegan nut-free sourdough starter is a versatile ingredient for a wide range of baked goods. While naturally leavened bread is the classic application, it can also be used in other recipes that benefit from its leavening power and tangy flavor. Think beyond just loaves!
Here are a couple of popular recipe ideas you can explore with your vegan nut-free sourdough starter:
- Vegan and Nut-Free Sourdough Bread: A classic country loaf using your starter, nut-free bread flour, water, and salt. This highlights the starter's leavening ability and flavor.
- Vegan and Nut-Free Sourdough Pizza Dough: A simple dough using starter, nut-free flour, water, olive oil, and salt, resulting in a flavorful, chewy crust.
Many other recipes, like bagels, pretzels, or even enriched doughs (using vegan butter and plant milk), can be adapted to use your vegan nut-free sourdough starter.
Vegan and Nut-Free Sourdough Bread Recipe
Creating a classic vegan and nut-free sourdough bread loaf is a rewarding experience. A basic recipe might involve:
- 200g active vegan nut-free sourdough starter
- 700g certified nut-free bread flour
- 450g lukewarm water (adjust based on flour absorption)
- 14g salt
Mix the starter, water, and flour (reserving a small amount of water if needed for mixing in the salt later) in a bowl until just combined (autolyse for 30-60 mins). Add the salt and remaining water, mixing until fully incorporated. Perform a series of stretches and folds over 2-3 hours.
Allow the dough to bulk ferment at room temperature until significantly increased in volume (timing varies greatly based on temperature and starter strength, often 4-8 hours). Shape the dough and proof in a banneton or bowl (cold proofing in the fridge for 12-24 hours is common for flavor). Bake in a preheated oven, often in a Dutch oven, at around 450-500°F (230-260°C) for 20-25 minutes with the lid on, and another 20-25 minutes with the lid off until deeply colored and cooked through.
Vegan and Nut-Free Sourdough Pizza Dough Recipe
Using your vegan nut-free sourdough starter for pizza dough results in a flavorful, chewy crust. A simple recipe could be:
- 100g active vegan nut-free sourdough starter
- 300g certified nut-free all-purpose or bread flour
- 180g lukewarm water
- 10g olive oil
- 6g salt
Combine the starter, water, and flour, autolyse for 20-30 minutes. Add salt and olive oil, mix until smooth dough forms. Knead for a few minutes. Allow to bulk ferment at room temperature for 3-4 hours, or until doubled. Divide and shape into pizza balls. Rest for 30-60 minutes before shaping into pizzas. Bake on a hot pizza stone or steel at the highest oven temperature (often 500-550°F or 260-290°C) for 8-15 minutes, depending on thickness and temperature. Ensure all toppings are also vegan and nut-free.
Advanced Techniques for Vegan & Nut-Free Sourdough Baking
Autolyse: Improving Dough Hydration and Texture
Autolyse is an advanced technique that can significantly improve the texture and handling of dough made with your vegan nut-free sourdough starter. It involves mixing just the flour and water from your recipe and letting it rest for a period (typically 20 minutes to an hour) before adding the starter and salt. This resting period allows the flour to fully hydrate and gluten development to begin naturally without the interference of salt or the starter's acidity.
The benefits of autolyse include easier mixing, improved dough extensibility (making it easier to stretch and shape), and potentially a better crumb structure in the final bread. For vegan nut-free doughs, which can sometimes be slightly trickier to handle depending on the flour blend, autolyse can be particularly helpful in achieving a smooth, pliable dough. After the autolyse period, the starter and salt are added, and the dough is mixed or kneaded until everything is fully incorporated.
Cold Fermentation: Enhancing Flavor Development
Cold fermentation, or cold proofing, is a technique where the shaped dough (after bulk fermentation) is placed in the refrigerator for an extended period, often 12-48 hours. The cold temperature dramatically slows down the yeast activity, which slows down leavening, but it allows the beneficial bacteria in your vegan nut-free sourdough starter to become more active.
These bacteria produce lactic and acetic acids, which contribute significantly to the complex, tangy flavor profile characteristic of traditional sourdough. Cold fermentation also makes the dough easier to handle and score when it's cold. While not strictly necessary, incorporating a cold fermentation step into your vegan nut-free sourdough baking routine can deepen the flavor and improve the texture of your final baked goods.
Scoring Techniques for Beautiful Loaves
Scoring, or slashing the surface of your shaped dough just before baking, is not just for aesthetics; it serves a crucial purpose in sourdough baking, including with vegan nut-free doughs. As the bread bakes, it undergoes a rapid expansion known as "oven spring." Scoring provides controlled weak points on the dough's surface, allowing the gases produced by the starter to expand without the crust tearing unpredictably.
Proper scoring directs the oven spring, helping the loaf achieve maximum volume and a desirable shape. It also contributes to the development of a beautiful crust. Common scoring patterns include a single long slash, multiple parallel slashes, or decorative patterns. Using a sharp blade (like a razor blade or lame) is essential for clean cuts that open up properly during baking. Experimenting with different scoring techniques can add a professional touch to your homemade vegan nut-free sourdough loaves.
Conclusion: Enjoying Your Homemade Vegan and Nut-Free Sourdough
The Satisfaction of Baking with Your Own Starter
There's immense satisfaction in baking with a vegan nut-free sourdough starter you've nurtured yourself. From the initial mix of flour and water to the moment you slice into a perfectly baked loaf, the process is rewarding. You've created a living culture, learned to understand its needs, and harnessed its power to create delicious, naturally leavened baked goods that are safe for specific dietary requirements.
Holding a warm loaf of vegan nut-free sourdough bread you baked is a testament to patience, practice, and the simple magic of fermentation. It connects you to ancient baking traditions and gives you complete control over the ingredients, ensuring your food is wholesome and meets your needs.
Continuing Your Sourdough Journey
Maintaining a vegan nut-free sourdough starter is an ongoing journey of learning and discovery. As you gain experience, you'll become more attuned to your starter's needs and how it responds to different flours, temperatures, and feeding schedules. Don't be afraid to experiment with different nut-free flours, hydration levels in your dough, and baking techniques.
Your vegan nut-free sourdough starter is a resilient companion in your kitchen. With consistent care and attention, it will continue to provide you with the means to bake nourishing and delicious bread and other treats for years to come. Enjoy the process, share your bakes, and continue exploring the wonderful world of vegan nut-free sourdough.
Frequently Asked Questions
What makes this sourdough starter "vegan" and "nut-free"?
This sourdough starter is vegan because it uses only plant-based ingredients like flour and water. It's nut-free as the recipe explicitly avoids all nut-derived products, ensuring it's safe for those with nut allergies.
How often should I feed my Vegan & Nut-Free Sourdough Starter?
Feeding frequency depends on its environment. At room temperature, feed it once or twice daily. In the refrigerator, it can be fed once a week.
What type of flour works best for this Vegan & Nut-Free Sourdough Starter?
While all-purpose flour works, whole wheat or rye flour provides more nutrients, which can result in a more active and robust starter.
What are the signs that my Vegan & Nut-Free Sourdough Starter is ready to use?
A ready starter will have doubled in size, be bubbly and active, and have a slightly tangy aroma. It should also float in water, indicating it's full of gas.
Can I use this Vegan & Nut-Free Sourdough Starter for any type of sourdough recipe?
Yes, this starter can be used in virtually any sourdough recipe, as long as you adjust the hydration and other ingredients accordingly. Remember to convert the recipe to vegan and nut-free if needed.
Final Reflection: Cultivating a Flourishing, Inclusive Sourdough Culture
The meticulous process of nurturing a vegan and nut-free sourdough starter mirrors the careful cultivation of a more inclusive and accessible culinary landscape. This seemingly simple act of fermentation speaks volumes about our commitment to mindful food choices and the power of adapting traditions to meet diverse needs. It's a testament to the fact that delicious, healthy bread can be enjoyed by everyone, regardless of dietary restrictions.
The journey of creating and maintaining this starter has been a deeply rewarding one, highlighting the interconnectedness of food, culture, and personal well-being. It's a journey that challenges preconceived notions about what constitutes "traditional" baking and opens up exciting possibilities for culinary creativity. Food is symbolic of love when words are inadequate.
- Alan D. Wolfelt. This quote resonates deeply, as the act of sharing homemade bread, regardless of its ingredients, is an act of sharing care and connection.
Now, it's your turn. Consider the possibilities that open up when we challenge established norms and adapt our practices to be more inclusive. Will you embark on your own sourdough journey, experimenting with different flours and techniques to create a starter that reflects your own unique needs and preferences? The rewards – both culinary and personal – are immeasurable. Embrace the process, celebrate the successes, and learn from the setbacks. Your unique sourdough starter, a testament to your creativity and commitment, awaits.
Unleash Your Inner Baker: Nurture Your Vegan & Nut-Free Sourdough!
Thanks for taking the time to explore the world of vegan and nut-free sourdough baking! We hope you found the step-by-step guide insightful and empowering. Ready to put your new knowledge into practice?
- Start your own vibrant sourdough starter today! Follow the detailed instructions in the article to create your own unique culture. This is the cornerstone of your baking journey.
- Share your sourdough journey! Post a picture of your starter on social media and tag us – we'd love to see your progress!
- Consider experimenting with different flours to find your perfect blend. What unique flavors will you discover?
Ready to transform simple ingredients into delicious, healthy bread? What's the first step you'll take to nourish your new sourdough starter?