
Essential Baking Tools: Making Sense of It All for Beginners

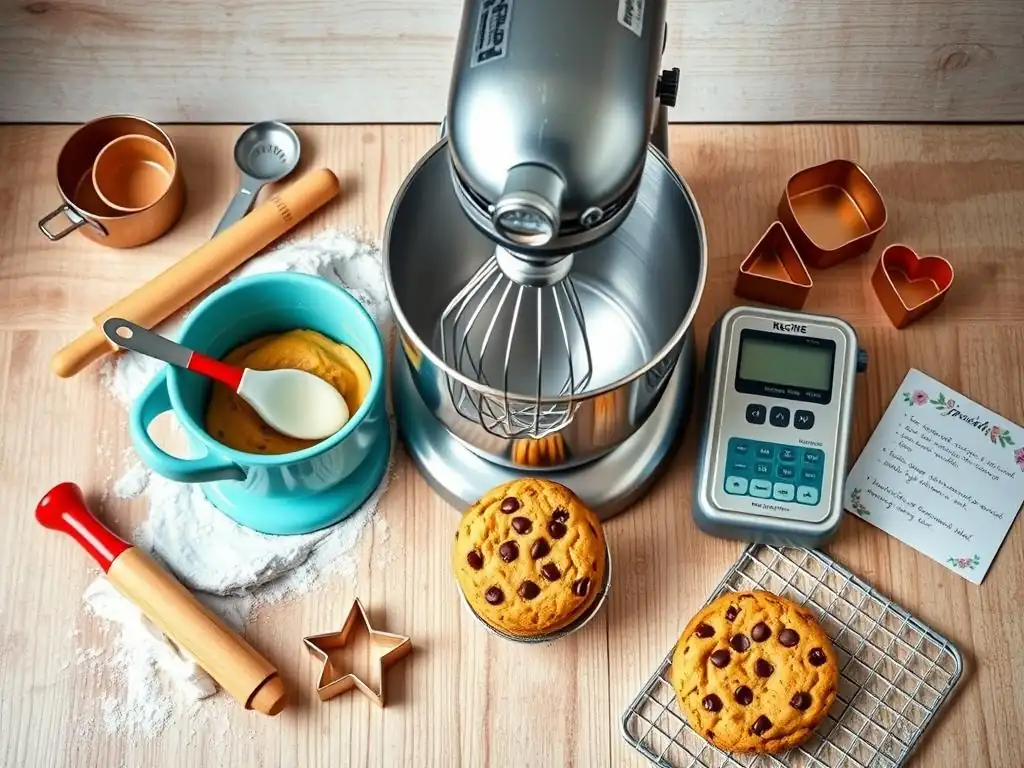
Welcome to BakeWithEase, your kitchen companion for conquering the world of baking!
Feeling overwhelmed by the sheer volume of baking tools out there? You're not alone! Many beginners find themselves lost in a sea of whisks, spatulas, and pans. In this article, we'll cut through the confusion and highlight the essential baking tools for beginners, providing a clear and concise guide to get you started. Discover which tools are truly indispensable and which you can skip (for now! ), setting you up for baking success right from the start. Ready to equip your kitchen and embark on your baking journey? Let's get started!
- BakeWithEase: Your Guide to Essential Baking Tools for Beginner Bakers
- Why Invest in the Right Baking Tools? Beginner's Guide
- Must-Have Baking Tools for Beginners: Your Starter Kit
- Other Helpful Baking Tools for Beginners
- Where to Buy Baking Tools for Beginners: Budget-Friendly Options
- Taking Care of Your Baking Tools: Cleaning and Maintenance Tips
- Mastering the Basics: Using Your New Baking Tools for Delicious Results
-
Frequently Asked Questions
- What are the most essential baking tools for someone just starting out?
- Do I really need a stand mixer, or can I get by with hand tools?
- What type of baking sheets are best for beginners?
- How important is it to have accurate measuring tools?
- Where can I find affordable, good-quality baking tools as a beginner?
- Final Reflection: The Joy of Baking, One Tool at a Time
- Unlock Your Inner Baker: Start Creating Delicious Treats Today!
BakeWithEase: Your Guide to Essential Baking Tools for Beginner Bakers
Welcome to the wonderful world of baking! It's a journey filled with delicious aromas and satisfying results. If you're just starting out, the array of gadgets and gizmos can seem overwhelming. But fear not!
At BakeWithEase, we believe that mastering the basics starts with understanding your equipment. Choosing the right baking tools for beginners doesn't have to be complicated or expensive. This guide will walk you through the absolute essentials, explaining what they are, why you need them, and how they'll help you create delightful baked goods right from your first attempt. Think of these tools as your trusty companions in the kitchen, making the process smoother and more enjoyable.
Getting started with the right baking tools for beginner bakers is crucial for building confidence and achieving consistent results. We'll demystify everything from measuring cups to mixing bowls, ensuring you know exactly what you need and how to use it effectively. Our goal is to equip you with the knowledge to select durable, functional tools that will serve you well as you explore different recipes, from simple cookies to your first loaf of bread. Let's dive in and build your foundational baking toolkit!
Why Invest in the Right Baking Tools? Beginner's Guide
The Importance of Quality Baking Equipment for New Bakers
Investing in quality baking tools for beginners might seem like a significant upfront cost, but it truly makes a difference in your baking journey. Using tools that are poorly made or not designed for the task can lead to inconsistent results, frustration, and even failed recipes. For example, cheap, flimsy cookie sheets might warp in a hot oven, causing cookies to bake unevenly – some burnt, some underdone.
On the other hand, a sturdy, heavy-gauge pan distributes heat more evenly, promoting uniform baking across the entire sheet. This consistency is vital when you're learning, as it helps you understand how ingredients behave and what the expected outcome should be.
Furthermore, quality tools are often more durable and easier to use. A good quality whisk, for instance, will have wires that are securely attached and flexible enough to whip air into egg whites effectively, a task that's nearly impossible with a weak or rigid whisk. Similarly, accurate measuring tools are non-negotiable.
A set of measuring cups and spoons that provide precise measurements is fundamental because baking is a science where ratios matter. Using inaccurate tools can throw off the delicate balance of ingredients, resulting in dense cakes or tough cookies. Investing a little more initially in reliable baking tools for beginners saves you money and heartache in the long run by reducing wasted ingredients and boosting your success rate.
Setting Yourself Up for Baking Success: A Tool Checklist
Setting yourself up for baking success involves gathering a collection of foundational tools that are versatile and essential for most basic recipes. This isn't about filling your kitchen with every single gadget imaginable, but rather focusing on the core items that will enable you to tackle a wide range of beginner-friendly baking projects. Think of this as building a reliable base camp before embarking on a baking adventure. Having the right tools readily available prevents you from having to improvise, which can be challenging when you're just starting out and still learning the nuances of different techniques.
Here is a simple checklist of the absolute must-have baking tools for beginner bakers to get you started. You can tick them off as you acquire them:
- [ ] Dry Measuring Cups (Set)
- [ ] Liquid Measuring Cup (at least 2-cup size)
- [ ] Measuring Spoons (Set)
- [ ] Mixing Bowls (Set, various sizes)
- [ ] Rubber Spatula
- [ ] Whisk
- [ ] Baking Sheets (at least two)
- [ ] Cake Pan (8 or 9-inch round or square)
- [ ] Muffin Tin (12-cup)
- [ ] Cooling Rack
This list covers the fundamental tasks: measuring ingredients accurately, mixing batters and doughs, and baking items like cookies, cakes, and muffins. While other tools are helpful, these form the backbone of your essential baking tools for beginners collection and will allow you to successfully bake a vast majority of simple recipes.
Must-Have Baking Tools for Beginners: Your Starter Kit
Measuring Cups and Spoons: Accurate Baking Starts Here
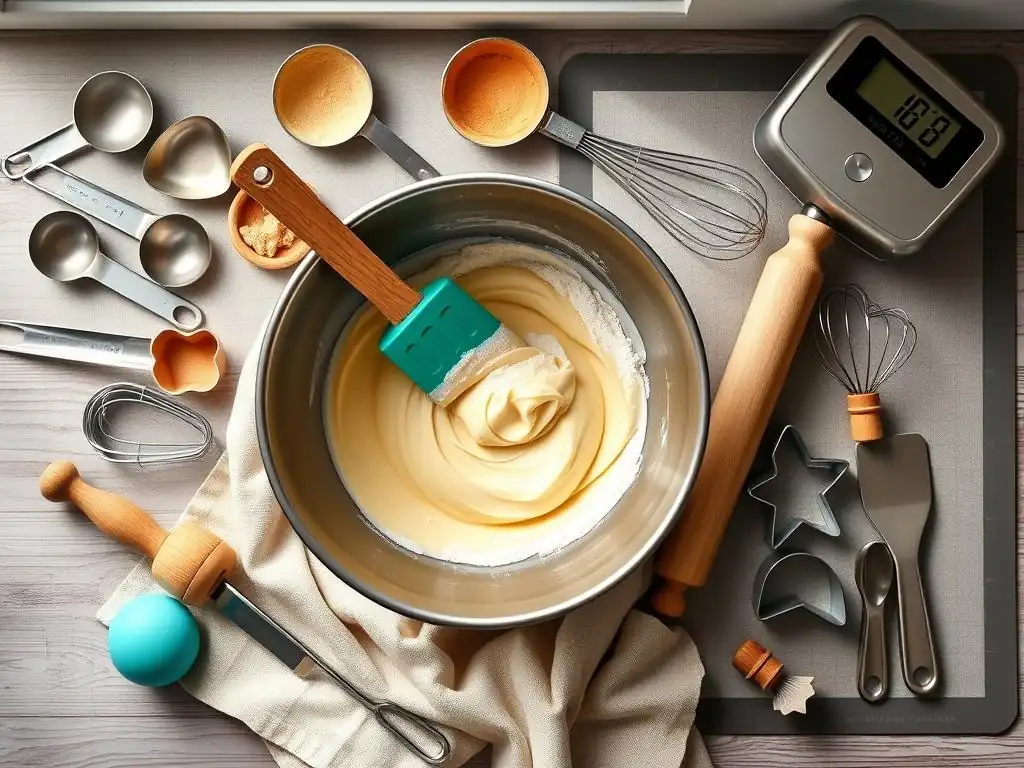
In baking, precision is paramount. Unlike cooking, where you can often adjust seasonings to taste, baking relies on exact ratios of ingredients to achieve the desired chemical reactions and textures. This is why accurate measuring cups and spoons are at the very top of our list of essential baking tools for beginners.
Using the wrong amount of flour, sugar, or leavening agent can drastically alter the outcome of a recipe, leading to flat cookies, dense cakes, or bread that doesn't rise. Investing in a good set of measuring tools ensures you're starting every recipe on the right foot, providing the consistency needed to learn and improve.
Understanding the difference between how you measure dry and liquid ingredients is also crucial. Dry measuring cups are designed to be leveled off, ensuring you get an exact volume of ingredients like flour or sugar. Liquid measuring cups, with their spout and headspace above the highest marking, are designed for accuracy when pouring liquids. Using the correct type of measuring tool for the specific ingredient is a foundational skill for any aspiring baker.
Dry Measuring Cups: Sizes and Uses for Baking Recipes
Dry measuring cups typically come in sets including common sizes like 1/4 cup, 1/3 cup, 1/2 cup, and 1 cup. Some sets might include smaller sizes like 1/8 cup or larger ones like 1 1/2 or 2 cups. These cups are designed to be filled and then leveled off with a straight edge, like a knife or the back of a spatula, to remove any excess and ensure an accurate measure. This method is essential for ingredients like flour, granulated sugar, brown sugar (packed), and oats.
For example, if a recipe calls for 1 cup of flour, you would gently spoon the flour into the 1-cup dry measuring cup until it's overflowing slightly, then sweep off the excess level with the rim. Scooping flour directly from the bag can compact it, leading to using too much, potentially resulting in a dry or heavy baked good. Using these standard sizes makes following most American baking recipes straightforward and is a key step in building reliable baking habits with your baking tools for beginners.
Liquid Measuring Cups: Essential for Accurate Liquid Measurement
Liquid measuring cups are usually made of clear glass or plastic and have markings along the side to indicate volume. They also feature a spout for easy pouring and extra space at the top to prevent spills when filled. Common sizes for liquid measuring cups include 1 cup, 2 cup (or 1 pint), and 4 cup (or 1 quart). You measure liquids like water, milk, oil, or extracts by placing the cup on a flat surface and reading the liquid level at eye level.
A standard 2-cup liquid measuring cup is incredibly versatile for baking tools for beginners, allowing you to measure anything from a few tablespoons up to 2 cups accurately. This is particularly useful when a recipe calls for ingredients like 1 1/4 cups of milk or 1/2 cup of oil, where the ability to see the level clearly against the markings is vital. Using a dry measuring cup for liquids can lead to inaccurate measurements due to the lack of a spout and the difficulty in reading the level precisely.
Measuring Spoons: Getting the Right Amount of Spices & Extracts
Measuring spoons are used for smaller quantities of ingredients, particularly potent ones like spices, extracts, baking powder, baking soda, and salt. A standard set usually includes 1/4 teaspoon, 1/2 teaspoon, 1 teaspoon, and 1 tablespoon. Some sets might include a 1/8 teaspoon or 1/2 tablespoon. Accuracy with these smaller measurements is just as critical as with larger volumes, as even a slight excess or deficit of leavening agents or salt can significantly impact the flavor and texture of your baked goods.
When measuring dry ingredients with measuring spoons, like baking powder or salt, you should fill the spoon and level it off, similar to dry measuring cups. For liquids like vanilla extract or almond extract, fill the spoon just to the brim. These small but mighty baking tools for beginners ensure that the subtle flavors and crucial chemical reactions in your recipes happen exactly as intended.
Mixing Bowls: Choosing the Right Size and Material
Mixing bowls are the workhorses of any baking kitchen, serving as the primary container for combining ingredients, whisking batters, and kneading doughs. Having a set of mixing bowls in various sizes is incredibly useful for baking tools for beginners, allowing you to choose the appropriate size for the task at hand – a small bowl for whisking eggs, a medium one for mixing cookie dough, and a large one for bread dough.
Using a bowl that is too small can lead to spills and difficulty mixing thoroughly, while one that is too large can make it hard to incorporate ingredients properly.
Mixing bowls are available in several materials, each offering distinct advantages. Consider starting with a set that includes at least three different sizes, such as a 1.5-quart, 3-quart, and 5-quart bowl, to cover a range of common baking tasks. The material you choose can depend on your budget, intended use, and personal preference, but each type has characteristics that make it suitable for different aspects of baking.
Stainless Steel Mixing Bowls: Durable and Versatile
Stainless steel mixing bowls are a popular choice among bakers due to their durability, lightweight nature, and versatility. They are non-reactive, meaning they won't interact with acidic ingredients like citrus juice or vinegar, which can sometimes happen with certain metals. Stainless steel bowls are also easy to clean and relatively inexpensive, making them an excellent option for baking tools for beginners. They can withstand vigorous mixing and are less likely to break if dropped compared to glass or ceramic bowls.
While stainless steel bowls don't offer transparency or heat retention like glass, their robustness and ease of handling make them ideal for general mixing, whipping cream, and tossing ingredients. A set of three nested stainless steel bowls (e.g., 1.5 qt, 3 qt, 5 qt) is a fantastic starting point for any beginner baker, providing ample space for most recipes without taking up excessive storage space.
Glass Mixing Bowls: Heat Resistant and Easy to Clean
Glass mixing bowls are another excellent option, particularly for tasks that require visibility or gentle heating. Made from tempered glass, they are often microwave-safe and can be used for melting butter or chocolate in small increments. Their transparency allows you to easily see if ingredients at the bottom are fully incorporated, which is helpful when you're learning to mix thoroughly. Glass is also non-reactive and doesn't retain odors, making it easy to clean.
The main drawback of glass bowls is their weight and fragility compared to stainless steel or plastic. However, their stability on the counter can be an advantage during vigorous mixing. A medium-sized glass bowl (around 2-3 quarts) is a useful addition to your collection of baking tools for beginners, especially for tasks like tempering chocolate or creating custards where gentle heat application or visibility is beneficial.
Plastic Mixing Bowls: Lightweight and Affordable
Plastic mixing bowls are typically the most budget-friendly option and are very lightweight. They are non-reactive and come in a wide variety of sizes and colors. Plastic bowls are durable enough for most mixing tasks and are easy to handle, especially larger sizes that can become heavy when filled. For beginners on a tight budget, a set of plastic bowls can be a cost-effective way to get started.
However, plastic bowls can sometimes retain odors or stains over time, and they may not be suitable for use with hot ingredients or in the microwave unless specifically labeled as such. They can also develop scratches, which can harbor bacteria. While they might not last as long as stainless steel or glass, they are perfectly adequate baking tools for beginners for basic mixing tasks like combining dry ingredients or whipping cream.
Spatulas and Scrapers: Essential for Mixing and Frosting
Spatulas and scrapers are incredibly versatile tools that no baker should be without. They go beyond just mixing; they are essential for scraping down the sides of bowls, folding delicate ingredients, smoothing batters, and frosting cakes. Having a few different types on hand will make many baking tasks significantly easier and more efficient. For beginner bakers, mastering the use of a good spatula can help ensure all ingredients are properly combined and minimize waste.
These tools come in various shapes, sizes, and materials, each suited for slightly different purposes. While you don't need every single type when starting out, a basic collection of rubber spatulas and perhaps an offset spatula will cover most of your initial needs. They are relatively inexpensive but provide immense utility as baking tools for beginners.
Rubber Spatulas: Flexible and Heat-Resistant
Rubber or silicone spatulas are the workhorses of the spatula family. They are characterized by their flexible heads and sturdy handles. Their flexibility allows them to conform to the curve of a mixing bowl, making it easy to scrape down every last bit of batter or dough, ensuring nothing is wasted and all ingredients are incorporated. Silicone spatulas are particularly popular as they are highly heat-resistant (often up to 500°F or 260°C), making them safe for stirring hot mixtures like custards or melted sugar.
A medium-sized rubber or silicone spatula is one of the most essential baking tools for beginners. It's perfect for folding delicate ingredients like whipped cream or egg whites into batters, scraping sticky dough from the sides of a bowl, or even stirring ingredients in a saucepan on the stove. Having at least one, preferably two, of these versatile tools is highly recommended.
Offset Spatulas: Perfect for Frosting Cakes and Cupcakes
An offset spatula is a long, flat metal blade attached to a handle with a slight bend or "offset" in the shaft. This design keeps your knuckles away from the surface you're working on, providing greater control and a smoother finish. Offset spatulas are primarily used for spreading frostings, glazes, and ganaches evenly over cakes, cupcakes, and other baked goods. They come in various sizes, from small ones (4-6 inches) for cupcakes and intricate details to larger ones (8-12 inches) for frosting the sides and tops of cakes.
For baking tools for beginners, a small or medium offset spatula (around 6-8 inches) is incredibly useful for achieving that smooth, professional look on your frosted treats. While you can technically use a knife or regular spatula, the offset design significantly simplifies the process of spreading and smoothing, making frosting much less intimidating.
Bench Scrapers: Dividing Dough and Cleaning Surfaces
A bench scraper, also known as a bench knife or dough scraper, is a flat, rectangular metal or plastic blade with a handle along the top edge. While not always the first tool a beginner thinks of, it's incredibly useful, especially if you plan on baking bread or working with sticky doughs. Its primary uses include portioning dough into equal pieces, lifting and transferring sticky dough from a counter, and scraping up flour or dough remnants from your work surface, making clean-up much easier.
A sturdy metal bench scraper with a measurement guide etched into the blade is a valuable addition to your baking tools for beginners. It helps you achieve consistent sizes when dividing dough for rolls or biscuits (e.g., cutting a loaf of dough into 12 equal pieces) and makes quick work of cleaning flour messes off your counter after kneading or rolling.
Baking Pans: The Foundation of Your Baked Goods
Baking pans are the vessels that give shape to your cakes, cookies, muffins, and loaves. Choosing the right size and type of pan specified in a recipe is crucial for proper baking, as it affects how heat is distributed and how quickly the item cooks through. Using a pan that is too large can result in a thin, dry product, while one that is too small can cause overflow or uneven baking. Having a few basic pans covers the most common types of baked goods you'll likely attempt as a beginner.
Most baking pans are made from metal, often aluminum or non-stick steel, though glass and ceramic are also used, particularly for items like brownies or casseroles (though metal is generally preferred for even heat distribution in cakes and cookies). Starting with the most common types is key for building your collection of baking tools for beginners.
Cake Pans: Round, Square, and Loaf Pans Explained
Cake pans come in various shapes and sizes, with the most common being round, square, and loaf pans. An 8-inch or 9-inch round cake pan is standard for layer cakes. A typical recipe calling for a round pan assumes this size, and it holds roughly 6-8 cups of batter. Square pans, often 8x8 inches or 9x9 inches, are great for brownies, bar cookies, and some types of cakes. An 8x8 inch pan holds about 8 cups of batter, while a 9x9 inch holds about 10 cups.
Loaf pans, typically 9x5 inches, are essential for baking quick breads like banana bread, pound cake, and yeast breads. This size usually accommodates about 6-8 cups of batter or dough. Having at least one of each of these types is a great starting point for baking tools for beginners, allowing you to bake a wide variety of cakes, brownies, and breads.
Cookie Sheets/Baking Sheets: Essential for Uniform Baking
Cookie sheets, also known as baking sheets or sheet pans, are flat, rectangular pans with a raised lip on one or more sides. They are arguably one of the most versatile baking tools for beginners. While called "cookie sheets," they are used for much more than just cookies – roasting vegetables, baking sheet pan dinners, and, of course, baking pastries like croissants or scones. Look for heavy-gauge aluminum or steel pans, as these conduct heat efficiently and resist warping at high temperatures.
Standard sizes include half sheet pans (approx. 18x13 inches) and quarter sheet pans (approx. 9x13 inches). Half sheets are the most common size for home ovens and can hold about 12-24 cookies depending on size. Having two half sheet pans is ideal, allowing you to bake one batch of cookies while preparing the next. Non-stick coatings are popular, but a good quality pan combined with parchment paper or a silicone baking mat works just as well and is often more durable over time.
Muffin Tins/Cupcake Pans: Creating Perfect Individual Treats
Muffin tins or cupcake pans are specially designed pans with multiple individual cups, typically 6 or 12. The standard size has cups that hold approximately 1/2 cup of batter, perfect for standard-sized muffins or cupcakes. These pans are essential for baking individual portions of batter, ensuring uniform size and baking time for each treat. They are usually made of metal, often with a non-stick coating.
A 12-cup muffin tin is a must-have among your baking tools for beginners. It allows you to easily make a batch of cupcakes for a party, bake morning muffins, or even make mini quiches or savory egg cups. The individual cups ensure each item bakes consistently, leading to evenly golden tops and perfectly cooked interiors.
Whisks: Incorporating Air and Blending Ingredients
A whisk is a simple yet indispensable tool used primarily for incorporating air into ingredients (like whipping egg whites or cream) or for smoothly blending dry ingredients into wet ones without creating lumps. The wire loops of the whisk effectively break up clumps and introduce air, which is vital for creating light and airy textures in batters, meringues, and whipped toppings. It's a fundamental component of any collection of baking tools for beginners.
Different types of whisks exist, designed for specific tasks. While a beginner doesn't need every single one, understanding the most common types helps you choose the right one for the job. A good whisk should feel comfortable in your hand and have wires that are flexible enough to get into the corners of your mixing bowl.
Balloon Whisks: For Light and Airy Mixtures
The most common type of whisk is the balloon whisk, characterized by its many wires that fan out into a round, "balloon" shape. The wide base and numerous wires are excellent at incorporating air quickly and efficiently. This makes the balloon whisk ideal for whipping egg whites into stiff peaks for meringues, whipping cream, or creating light batters like those for pancakes or waffles.
A medium-sized balloon whisk (around 10-12 inches long) is the most versatile choice for baking tools for beginners. Its shape allows it to reach a large surface area in a bowl, maximizing its air-incorporating ability. Look for one with a comfortable handle and wires that are sturdy but flexible.
Flat Whisks: For Sauces and Gravies
Flat whisks, sometimes called roux whisks, have wires arranged in a flatter, sometimes triangular shape. While less common in basic baking than balloon whisks, they are excellent for scraping the bottom of shallow pans or pots. They are primarily used for making gravies, sauces, or pan reductions, ensuring no lumps form at the bottom.
While not strictly essential for all beginner baking, a flat whisk can be useful if you plan on making cooked frostings, pastry cream, or other components that involve heating ingredients in a saucepan. However, as core baking tools for beginners, the balloon whisk takes priority.
Other Helpful Baking Tools for Beginners
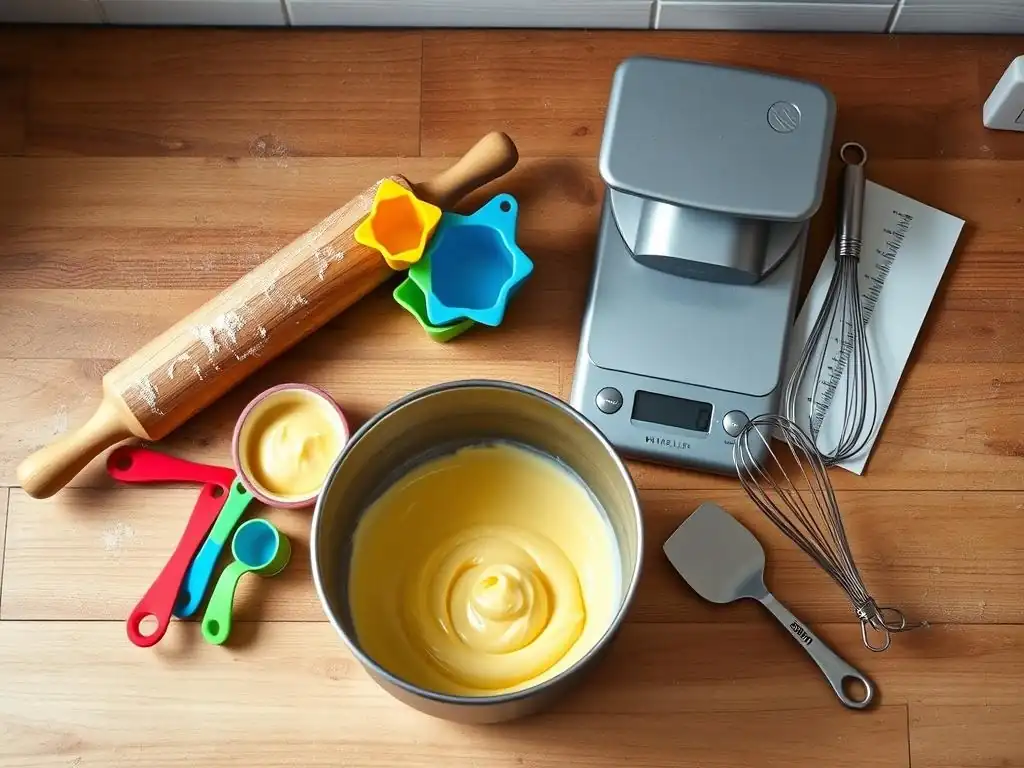
Beyond the absolute essentials, several other tools can make your baking life easier and expand the types of recipes you can tackle. While you don't need these on day one, consider adding them to your collection of baking tools for beginners as you become more comfortable and want to explore new techniques and recipes.
A rolling pin is indispensable if you plan on making rolled cookies, pie crusts, tarts, or pastries. It's used to flatten dough to a uniform thickness, which is crucial for even baking. Rolling pins come in various styles, including American (with handles and a rotating barrel), French (a simple tapered dowel), and adjustable pins with rings to control thickness.
For baking tools for beginners, a basic American-style wooden or non-stick rolling pin is a good starting point. Look for one that feels comfortable in your hands and is heavy enough to make rolling easier but not so heavy that it's unwieldy. A standard 10-12 inch barrel size is versatile for most home baking tasks.
Sifter: Achieving Light and Fluffy Flour
A sifter, or a fine-mesh sieve, is used to aerate dry ingredients like flour, cocoa powder, and powdered sugar, and to remove any clumps. Sifting helps ensure that dry ingredients are evenly distributed throughout the batter or dough, leading to a lighter, more tender texture in the final baked good. It's particularly useful for recipes where a delicate texture is desired, like cakes or pastries.
While you can sometimes whisk dry ingredients together as an alternative, a sifter is a more effective way to guarantee lump-free, aerated flour. A simple crank-style sifter or a fine-mesh sieve (which can also be used for draining or straining) is a useful addition to your baking tools for beginners.
Kitchen Scale: Precise Measurements for Consistent Results
While measuring cups are standard in many recipes, professional bakers often rely on a kitchen scale for the utmost accuracy. Measuring ingredients by weight rather than volume (e.g., 120 grams of flour instead of 1 cup) is significantly more precise, as the density of ingredients can vary depending on how they are stored or scooped. This precision leads to more consistent and reliable results, especially for sensitive recipes like bread or macarons.
A digital kitchen scale that can measure in both grams and ounces is one of the most valuable baking tools for beginners for improving consistency. Many recipes, particularly those from European sources or more advanced baking books, provide measurements by weight. Starting with a scale helps you develop a habit of precision that will serve you well as you grow as a baker.
Cooling Rack: Preventing Soggy Bottoms
A cooling rack is a wire rack with feet that lifts baked goods off the counter, allowing air to circulate around them. This is crucial for preventing condensation from forming on the bottom of hot cakes, cookies, or breads as they cool, which can make them soggy. Allowing items to cool properly on a rack also helps them set and prevents them from continuing to cook from residual heat.
Having at least one cooling rack is a simple but essential step in finishing your baked goods properly. A standard rectangular rack (around 10x16 inches) fits most sheet pans and is perfect for cooling a batch of cookies or a loaf of bread. It's a small investment among baking tools for beginners that has a big impact on the final texture of your treats.
Where to Buy Baking Tools for Beginners: Budget-Friendly Options
Starting your collection of baking tools for beginners doesn't have to break the bank. Many retailers offer quality tools at affordable prices. It's often better to buy a few good quality, essential pieces than a large set of flimsy tools. Researching reviews and comparing prices can help you make smart choices that fit your budget.
Recommended Online Retailers for Baking Supplies
Online retailers offer convenience and a wide selection of baking tools for beginners. Large marketplaces like Amazon have an extensive range of tools from various brands, often with customer reviews that can help you gauge quality. Specialty kitchen supply websites, such as King Arthur Baking or Sur La Table, also offer high-quality tools and often provide helpful product descriptions and baking tips. Comparing prices across different sites can help you find the best deals on the items you need.
Remember to factor in shipping costs when comparing online prices. Signing up for newsletters or keeping an eye out for sales events can also lead to significant savings on essential baking tools for beginners.
Local Kitchen Supply Stores: Finding Quality Tools Near You
Visiting local kitchen supply stores or even the kitchenware section of department stores or large supermarkets can be a great way to find baking tools for beginners. Shopping in person allows you to see and feel the tools before you buy them, assessing their weight, sturdiness, and overall quality. Store staff can often provide helpful advice and recommendations.
Even discount stores or home goods retailers can sometimes carry basic yet functional baking tools for beginners like measuring cups, spatulas, or baking pans at very low prices. While the quality might vary, they can be a good option for getting started on a tight budget. Look for sales or clearance sections to snag deals on foundational items.
Taking Care of Your Baking Tools: Cleaning and Maintenance Tips
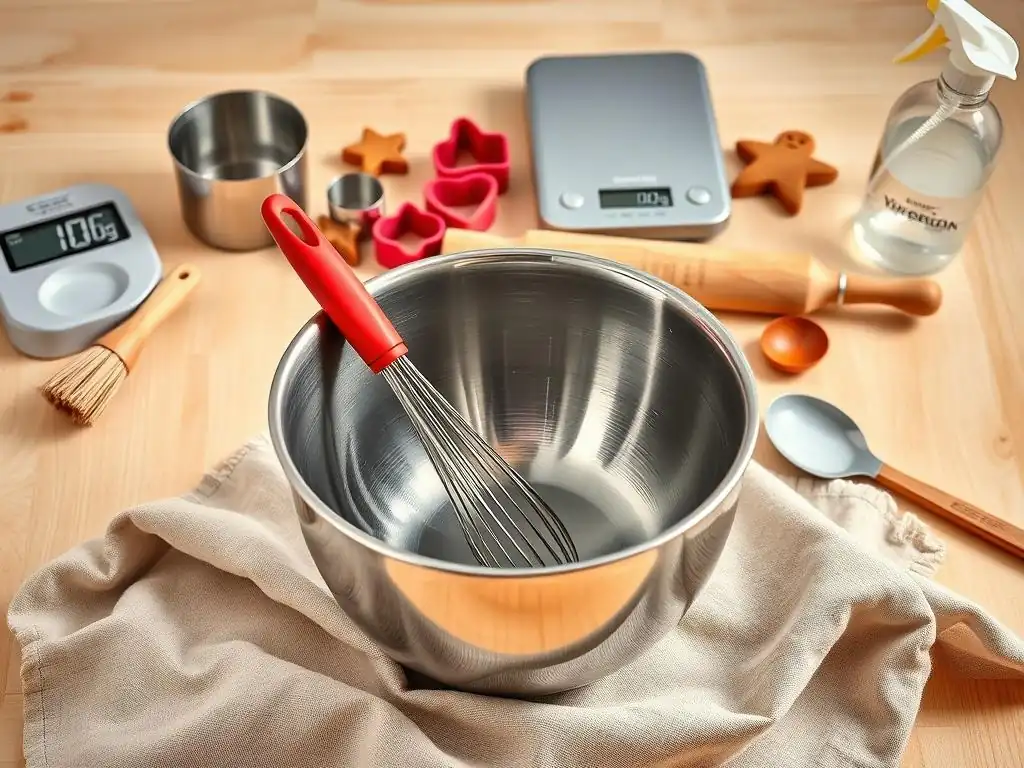
Once you've acquired your essential baking tools for beginners, taking proper care of them is crucial for their longevity and performance. Clean tools are essential for hygiene and prevent flavors from transferring between recipes. Simple cleaning and maintenance habits will keep your tools in top condition for years of baking enjoyment.
Proper Cleaning Techniques for Different Baking Tools
Cleaning techniques vary depending on the material of the tool. Most metal tools like stainless steel bowls, baking sheets, and whisks can be washed with warm, soapy water and a non-abrasive sponge. For stubborn baked-on messes on baking sheets, soaking might be necessary, or you can use a paste of baking soda and water. Always dry metal tools thoroughly to prevent rust. Silicone spatulas and mats are usually dishwasher safe, but hand washing can prolong their life.
Glass measuring cups and bowls are also typically dishwasher safe, but hand washing is often quick and easy. Wooden tools, like rolling pins or wooden spoons, should never be soaked in water, as this can cause them to crack or warp. Instead, wash them quickly with warm, soapy water, rinse, and dry immediately. Proper cleaning is a key part of using your baking tools for beginners effectively and hygienically.
Storing Your Baking Tools to Maximize Their Lifespan
Proper storage helps protect your baking tools for beginners from damage and keeps them organized and easily accessible. Store baking sheets and cooling racks vertically in a rack or stacked horizontally with a piece of parchment paper or a tea towel in between to prevent scratches. Mixing bowls often come in nesting sets, which is ideal for saving space.
Store measuring cups and spoons together, perhaps on a ring or in a dedicated drawer, so you don't have to search for individual sizes. Keep sharp tools like bench scrapers safely stored to avoid accidents. Proper storage not only protects your tools but also makes your baking process more efficient, as you can quickly find the baking tools for beginners you need for your recipe.
Mastering the Basics: Using Your New Baking Tools for Delicious Results
Now that you have your essential baking tools for beginners, it's time to put them to use! The best way to get comfortable with your new equipment is to start baking simple, beginner-friendly recipes. Each recipe you try will help you practice using your measuring tools accurately, mixing techniques with your bowls and spatulas, and understanding how your pans perform in the oven.
Simple Beginner Baking Recipes to Try with Your New Tools
Here are a few classic beginner recipes that are perfect for practicing with your new baking tools for beginners:
- Chocolate Chip Cookies: Uses measuring cups/spoons, mixing bowls, spatula, baking sheets, cooling rack.
- Basic Muffins: Uses measuring cups/spoons, mixing bowls, whisk, muffin tin, cooling rack.
- Simple Loaf Cake (like Lemon or Banana Bread): Uses measuring cups/spoons, mixing bowls, whisk/spatula, loaf pan, cooling rack.
- Brownies: Uses measuring cups/spoons, mixing bowls, spatula, square baking pan.
Starting with these straightforward recipes allows you to focus on the fundamentals of measuring, mixing, and baking without overly complicated techniques. As you gain confidence, you can move on to slightly more challenging recipes.
Troubleshooting Common Baking Issues: The Right Tool for the Job
Sometimes, even with the right baking tools for beginners, things don't turn out exactly as planned. Many common issues can be linked back to improper technique or not using the tool correctly. For example, cookies spreading too much might be due to inaccurate flour measurement (using too little) or placing dough on a hot baking sheet instead of a cooled one. A dense cake could result from overmixing (developing too much gluten) or inaccurate leavening measurements.
Understanding how each tool contributes to the process helps in troubleshooting. If your whipped cream isn't stiffening, your whisk might not be effectively incorporating air, or your bowl might be too large or have residual grease. If your cake sticks to the pan, perhaps the pan wasn't greased and floured properly. Learning to identify these issues and understand how your baking tools for beginners play a role will make you a more resilient and successful baker. Don't be discouraged by mistakes; view them as learning opportunities!
Frequently Asked Questions
What are the most essential baking tools for someone just starting out?
The absolute essentials are measuring cups and spoons for accurate ingredient measurements, a mixing bowl for combining ingredients, and a baking sheet for cookies and other treats. Don't forget a good spatula!
Do I really need a stand mixer, or can I get by with hand tools?
While a stand mixer is helpful, especially for larger batches or certain recipes, you can definitely start with a hand mixer or even just a whisk. It's all about getting comfortable with the basics.
What type of baking sheets are best for beginners?
Look for light-colored baking sheets with a rim. These distribute heat more evenly and prevent cookies from burning too quickly. Avoid dark colored sheets as they over-bake the bottom of baked goods.
How important is it to have accurate measuring tools?
Accuracy is incredibly important in baking! Using precise measurements is crucial for the correct chemical reactions to occur, leading to successful results.
Where can I find affordable, good-quality baking tools as a beginner?
Many department stores and online retailers offer beginner-friendly baking sets at reasonable prices. Look for durable materials and positive reviews to ensure you're getting good value.
Final Reflection: The Joy of Baking, One Tool at a Time
The humble kitchen tool, often overlooked, is the unsung hero of countless delicious creations. Mastering the basics, as we've explored throughout this guide, isn't just about acquiring equipment; it's about unlocking a world of culinary possibilities and fostering a deeper connection with the art of baking. This isn't just about following recipes; it's about understanding the why behind each ingredient and each tool.
The impact of accessible baking knowledge extends far beyond the kitchen. It fosters creativity, patience, and a sense of accomplishment that resonates throughout our lives. Baking, at its core, is a process of transformation, mirroring our own personal growth. The best things in life are homemade.
This sentiment rings truer than ever when considering the satisfaction derived from creating something delicious with your own two hands, using tools you've carefully selected and learned to use effectively.
Now, it's your turn. Don't be intimidated by the seemingly endless array of baking tools. Start small, choose a few essentials based on your interests and baking goals, and embrace the journey. Each perfectly risen loaf, each melt-in-your-mouth cookie, is a testament to your dedication and a delicious reward for your efforts. So, gather your tools, preheat your oven, and let the joy of baking begin!
Unlock Your Inner Baker: Start Creating Delicious Treats Today!
Thanks for taking the time to explore the world of baking with us! We hope you now feel more confident about the essential tools you need to get started. Ready to turn your kitchen into a baking haven?
- Begin your baking journey by making one recipe from the article! Choose your favorite and get started. It's easier than you think.
- Share your baking triumphs (or even your funny baking fails!) with us on social media using #BakeWithEase. We love seeing your creations!
- Explore our website for more beginner-friendly recipes and tips to expand your baking skills.
What delicious treat will you bake first? Let us know in the comments below!