
Simple Sugar Work for Elegant Dessert Decoration


Welcome to BakeWithEase, where creating stunning desserts becomes surprisingly simple! Ever dreamt of adorning your cakes with delicate, handcrafted sugar flowers? Forget complicated techniques and specialized tools. Our guide to easy sugar flower tutorials will unlock the secrets to transforming simple sugar paste into breathtaking edible art. Discover how to add a touch of elegance to any pastry, regardless of your skill level, and prepare to amaze your friends and family. Intrigued? Let's get started and bring your dessert visions to life!
- Mastering Chocolate Tempering for Professional-Looking Desserts: Techniques and Tips
- Understanding Chocolate Tempering for Dessert Decoration
- Essential Equipment and Ingredients for Chocolate Tempering
- Chocolate Tempering Tutorials: Step-by-Step Guides
- Mastering Basic Chocolate Work Techniques for Stunning Results
- Troubleshooting Common Chocolate Tempering Problems
- Incorporating Tempered Chocolate into Elegant Dessert Plating
- Advanced Chocolate Techniques [Optional Section]
- Conclusion: Unleash Your Creativity with Chocolate Tempering
-
Frequently Asked Questions
- What makes BakeWithEase.com a good resource for learning sugar flower techniques?
- Are the sugar flower tutorials on BakeWithEase.com suitable for beginners?
- What types of sugar flowers can I learn to make using BakeWithEase.com's tutorials?
- What ingredients and tools are typically needed for making sugar flowers?
- How can I use sugar flowers to decorate my desserts?
- Final Reflection: The Enduring Allure of Simple Sugar Flowers
- Unleash Your Inner Pastry Artist: Master Simple Sugar Work!
Mastering Chocolate Tempering for Professional-Looking Desserts: Techniques and Tips
Understanding Chocolate Tempering for Dessert Decoration
Elevate Your Desserts with Properly Tempered Chocolate
Achieving that perfect snap and beautiful glossy finish on your chocolate creations is the hallmark of professional-looking desserts. This isn't magic; it's the result of a crucial technique called chocolate tempering. Tempering involves carefully controlling the temperature of chocolate to manipulate the cocoa butter crystals within it.
When cocoa butter is heated and cooled correctly, it forms stable crystal structures, specifically Type V crystals, which are responsible for the desired qualities: a firm texture, a satisfying snap when broken, and a brilliant shine. Without proper tempering, chocolate will cool with unstable crystal forms, resulting in a dull, streaky appearance and a soft, crumbly texture that melts too easily in your hands.
The visual appeal of a dessert is paramount, and tempered chocolate offers an immediate upgrade. Imagine a simple chocolate-covered strawberry with a mirror-like sheen, or a delicate chocolate curl that holds its shape perfectly on a cake. These elements, made possible by tempering, transform everyday treats into elegant plated desserts. Beyond aesthetics, properly tempered chocolate is also more stable at room temperature, making it ideal for decorations that need to hold their form, like intricate chocolate garnishes or molded figures. It also shrinks slightly as it cools, making it easier to release from molds compared to untempered chocolate.
Why Learn Chocolate Tempering? Achieving Shine and Snap
Learning chocolate tempering is a fundamental skill for anyone serious about elevating their baking and dessert presentation. The primary goals are achieving that characteristic "snap" when you break a piece of chocolate and a high-gloss finish. This snap is due to the dense, uniform structure of the stable cocoa butter crystals. Untempered chocolate, in contrast, breaks with a soft crumble because its crystal structure is disorganized and weak. The shine comes from light reflecting off the smooth, stable crystal surface.
Beyond the aesthetic and textural benefits, tempered chocolate is also more resistant to "bloom." Bloom is that unsightly gray or white film that can appear on chocolate over time. It's caused by unstable fat crystals migrating to the surface (fat bloom) or sugar crystals forming due to moisture (sugar bloom). Proper tempering prevents fat bloom by ensuring the cocoa butter is already in its most stable crystalline form. While it doesn't prevent sugar bloom (which is moisture-related), it gives your chocolate the best chance for longevity and pristine appearance, crucial for professional results and successful elegant plated desserts.
Essential Equipment and Ingredients for Chocolate Tempering
Must-Have Tools for Beginners in Chocolate Work
To successfully temper chocolate, you don't need a professional pastry kitchen, but a few key tools make the process significantly easier and more reliable. A reliable digital thermometer is absolutely non-negotiable. Precision in temperature is critical, and a good thermometer allows you to track the chocolate's temperature through the melting, cooling, and rewarming stages. Look for one that can accurately read temperatures in the range needed for chocolate (typically 85°F to 130°F or 29°C to 54°C).
Another essential is a heatproof bowl, preferably glass or stainless steel, for melting the chocolate. A double boiler setup (a bowl set over a pot of simmering water, ensuring the bottom of the bowl doesn't touch the water) is the safest way to melt chocolate gently without scorching it. You'll also need a sturdy spatula, preferably silicone, for stirring.
For the traditional tablier method, a marble slab or a clean, cool countertop is required, along with a metal scraper or palette knife to work the chocolate. Having parchment paper or acetate sheets on hand is also helpful for testing temper and creating simple decorations.
Choosing the Right Chocolate: Couverture vs. Compound
The type of chocolate you use fundamentally impacts the tempering process and the final result. True chocolate, or couverture chocolate, contains a high percentage of cocoa butter (typically 30-39% or more) and no other fats. This high cocoa butter content is what allows it to be tempered to achieve that desirable snap and shine. Couverture chocolate is available in various percentages of cocoa solids (dark, milk, and white) and is the preferred choice for professional chocolate work and elegant plated desserts.
Compound chocolate, on the other hand, uses vegetable fats (like palm kernel oil) instead of or in addition to cocoa butter. While easier to work with as it doesn't require tempering to set, it lacks the flavor complexity, texture, and melting properties of couverture. It doesn't snap, often feels waxy in the mouth, and won't achieve the same glossy finish.
For achieving professional-looking results and mastering chocolate tempering techniques, always opt for high-quality couverture chocolate. The percentage of cocoa solids in couverture chocolate will affect the specific temperature range needed for tempering, so it's important to know what type you are working with.
Food Coloring and Flavors: Enhancing Your Chocolate
Adding color and flavor can significantly enhance your tempered chocolate creations, allowing for stunning and customized dessert decorations. However, it's crucial to use the right types of coloring and flavoring. Since chocolate is fat-based, you must use oil-based or powder-based food colorings specifically designed for chocolate. Water-based gel or liquid colors will cause the chocolate to seize, turning it into a thick, unworkable paste. Add colors sparingly at first, as they can be quite concentrated, and mix them thoroughly into the melted, tempered chocolate.
For flavoring, oil-based extracts or professional chocolate flavorings are best. Avoid alcohol-based extracts (like standard vanilla extract) as the water content can cause seizing. Popular flavor additions include peppermint oil, orange oil, or coffee extract designed for chocolate. As with coloring, add flavorings after the chocolate has been melted and tempered, and start with a small amount, tasting as you go. Remember that adding significant amounts of color or flavor can slightly affect the chocolate's viscosity and temper, so it's often best to add them once you have achieved the correct temper.
Alternatives to Traditional Tempering Methods
While the seeding and tablier methods are classic approaches to tempering, there are alternative methods that can be simpler or quicker, particularly for smaller amounts of chocolate or for beginners. The microwave method is a popular alternative that avoids the need for a double boiler or marble slab. It involves melting the chocolate in short bursts in the microwave, stirring frequently, until most of the chocolate is melted, and the residual heat melts the rest to the correct working temperature. This method relies heavily on careful monitoring and stirring to avoid overheating.
Another approach is using pre-tempered chocolate or chocolate melts, though these are often compound chocolates and won't give the same quality as tempered couverture. For true couverture, some bakers use immersion circulators for very precise temperature control, creating a "sous vide" tempering environment. While these methods offer convenience, understanding the principles of tempering (melting, cooling, and rewarming to specific temperatures) is key to success regardless of the technique used. Even with the microwave method, the goal is still to encourage the formation of those stable Type V cocoa butter crystals.
Chocolate Tempering Tutorials: Step-by-Step Guides
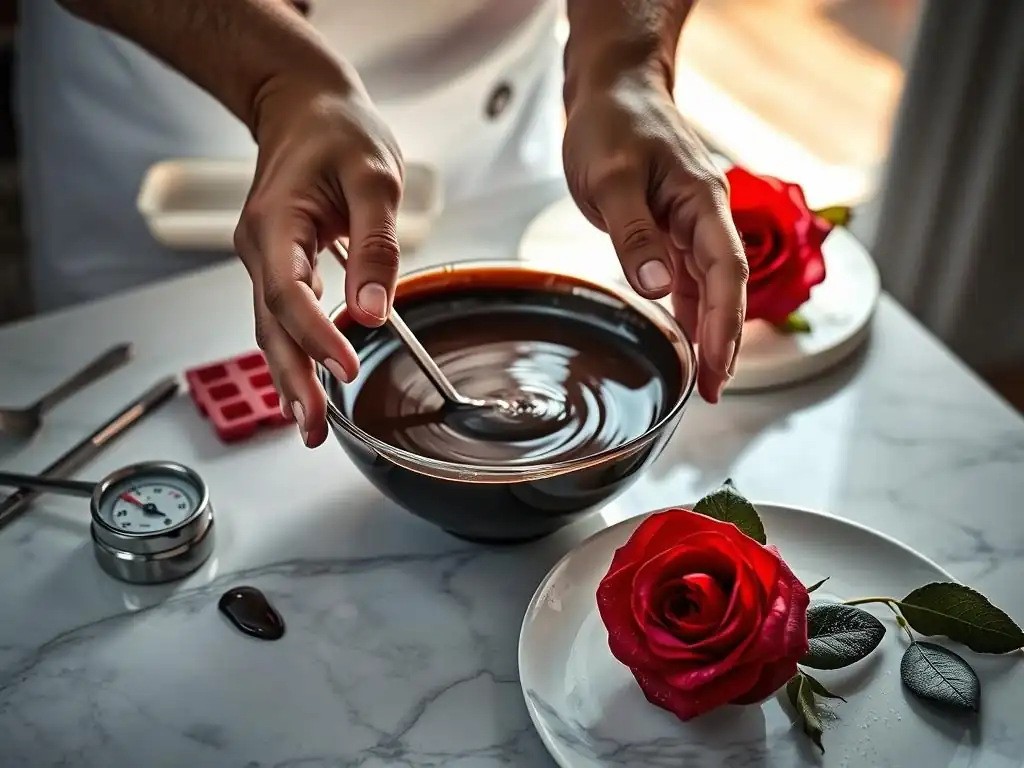
Seeding Method Chocolate Tempering: A Beginner's Guide
The seeding method is often recommended for beginners as it's relatively straightforward and doesn't require specialized equipment like a marble slab. This technique involves melting a quantity of chocolate and then introducing "seed" chocolate (finely chopped, untempered couverture) to cool it down and provide stable cocoa butter crystals to guide the crystallization process. It's a reliable way to achieve temper for dipping, molding, and creating simple elegant plated desserts. Success hinges on accurate temperature control and thorough mixing.
Melting the Chocolate
Begin by finely chopping your couverture chocolate. The finer the chop, the faster and more evenly it will melt. Place about two-thirds of the chopped chocolate in a heatproof bowl set over a pot of gently simmering water (a double boiler). Ensure the water is simmering, not boiling vigorously, and that the bottom of the bowl does not touch the water.
Stir the chocolate gently and consistently with a spatula as it melts. The goal is to melt the chocolate completely until it reaches its initial melting temperature, typically around 113-122°F (45-50°C) for dark chocolate, slightly lower for milk and white chocolate. Remove the bowl from the heat once melted.
Seeding with Untempered Chocolate
Once the chocolate is completely melted and has reached the correct initial temperature, remove the bowl from the heat and wipe the bottom dry to prevent any water from dripping into the chocolate. Immediately add the remaining one-third of the finely chopped, untempered "seed" chocolate to the melted chocolate. Stir continuously and gently.
The purpose of the seed chocolate is twofold: it cools the melted chocolate down, and the stable crystals within the seed chocolate encourage the proper crystallization of the melted chocolate. Continue stirring until all the seed chocolate has melted and the mixture cools down to the working temperature range, typically 88-91°F (31-32°C) for dark, 86-88°F (30-31°C) for milk, and 82-84°F (28-29°C) for white chocolate.
Testing for Proper Temper
The final step in the seeding method is to verify that the chocolate is properly tempered before using it. A simple test involves dipping a piece of parchment paper, the tip of a knife, or a spoon into the chocolate. Wipe off any excess chocolate and set the test strip aside at cool room temperature (around 68-70°F or 20-21°C).
Properly tempered chocolate should set within 3-5 minutes to a hard, shiny finish with no streaks or bloom. If it remains soft, dull, or streaky after 5 minutes, it is not in temper, and you will need to reheat it carefully to the initial melting temperature and repeat the seeding process, perhaps adding a little more seed chocolate if needed. Keep the tempered chocolate at its working temperature while you use it, gently rewarming it slightly over the double boiler if it cools too much and thickens.
Tablier Method Chocolate Tempering: A Classic Technique
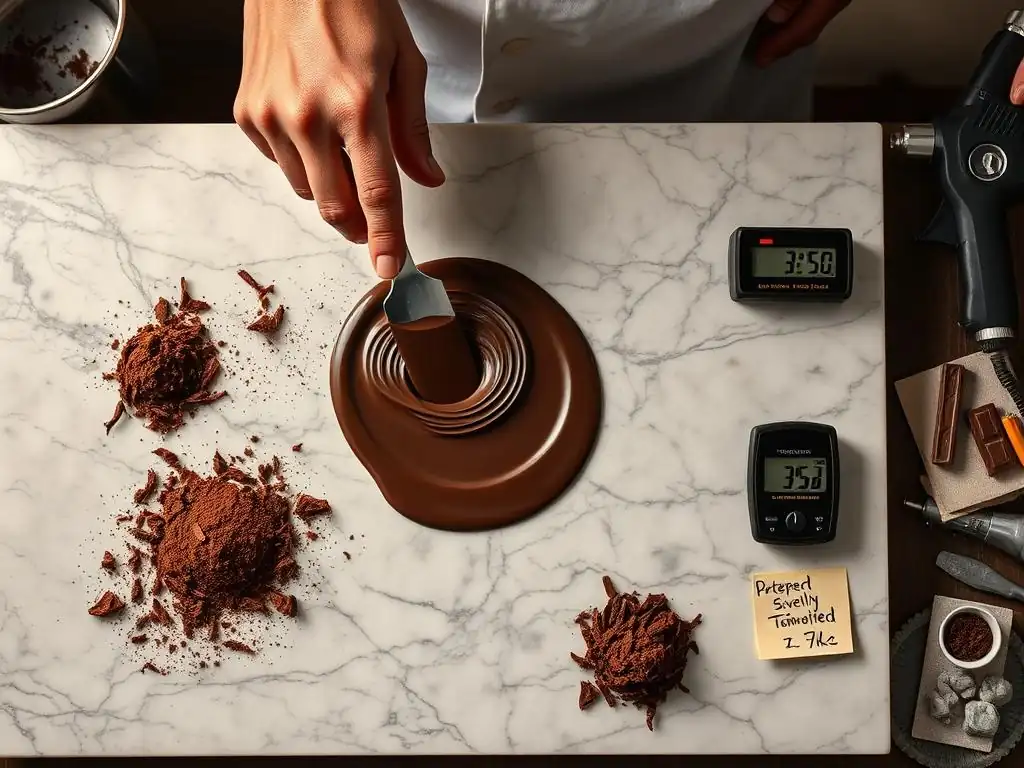
The tablier method, also known as the marble or table method, is a traditional technique favored by professional chocolatiers for its efficiency and control, though it requires a cool, clean surface like marble or granite. It involves pouring melted chocolate onto the cool surface and working it with a scraper or palette knife to rapidly cool it down while agitating it to promote the formation of stable crystals. This physical manipulation is key to success with this method. It's excellent for tempering larger quantities of chocolate for dipping and molding elegant plated desserts.
Melting and Cooling the Chocolate on Marble
Start by melting about two-thirds of your finely chopped couverture chocolate in a double boiler until it reaches the initial melting temperature (113-122°F / 45-50°C for dark, lower for milk/white). Pour approximately two-thirds of the melted chocolate onto a clean, cool marble slab or countertop. Reserve the remaining one-third of melted chocolate in the bowl over the warm (but not simmering) water to keep it warm.
Using a metal scraper and/or a palette knife, spread the chocolate thin and then scrape it back into a pile. Continue this spreading and scraping motion, constantly moving the chocolate, to cool it down rapidly.
Monitoring Temperature and Viscosity
As you work the chocolate on the marble, constantly monitor its temperature with your digital thermometer. The goal is to cool the chocolate down to a temperature slightly below its working temperature range, typically around 82-84°F (28-29°C) for dark chocolate. As it cools, the chocolate will become noticeably thicker and start to set around the edges. This indicates that stable cocoa butter crystals are forming. Keep working the chocolate until it reaches the target cool temperature and has thickened appropriately, but before it becomes too stiff to scrape easily.
Confirming Temper with a Test Strip
Once the chocolate on the marble has cooled to the target temperature and thickened, scrape it back into the bowl with the reserved, still-warm melted chocolate. Stir the mixture thoroughly. The warmer chocolate will gently rewarm the cooled chocolate from the marble, bringing the entire batch up to the correct working temperature range (88-91°F / 31-32°C for dark, etc.). Stir until the mixture is uniform and smooth.
Perform a temper test by dipping parchment paper or a knife tip into the chocolate. A successful temper will result in the chocolate setting quickly (within 3-5 minutes) with a glossy finish and no streaks when left at room temperature. If it doesn't set properly, you may need to repeat the process, ensuring you cool the chocolate sufficiently on the marble.
Microwave Method Chocolate Tempering: A Quick and Easy Approach
For small quantities of chocolate or when time is limited, the microwave method offers a convenient alternative to traditional tempering. It's a simple technique that relies on controlled heating and stirring to achieve temper without a double boiler or marble slab. This method is particularly useful for making small chocolate garnishes or dipping a few items for elegant plated desserts. However, it requires attention and patience to avoid overheating, which is the main pitfall.
Controlled Melting in the Microwave
Finely chop your couverture chocolate and place it in a microwave-safe bowl. Heat the chocolate in the microwave on medium power (around 50%) for very short intervals, typically 15-30 seconds at a time. After each interval, remove the bowl and stir the chocolate thoroughly with a spatula, even if it doesn't look melted. This even distribution of heat is crucial. Continue heating and stirring in short bursts. As the chocolate begins to melt, reduce the heating intervals to 10-15 seconds. Stop heating when about 75-80% of the chocolate is melted.
Stirring and Monitoring Temperature
Once most of the chocolate is melted, remove the bowl from the microwave. Continue stirring the chocolate vigorously and consistently. The residual heat from the melted chocolate will continue to melt the remaining pieces. As you stir, monitor the temperature with your digital thermometer. The goal is to bring the temperature down to the correct working temperature range (88-91°F / 31-32°C for dark, etc.) solely through stirring and the melting of the remaining solid chocolate pieces. This method relies on the solid chocolate pieces acting as "seeds" and the continuous stirring promoting even cooling and crystal formation.
Ensuring Proper Temper with Patience
Keep stirring until the chocolate is completely smooth and has cooled to the target working temperature. This might take a few minutes of continuous stirring. Once it reaches the correct temperature and consistency, perform a temper test by dipping parchment paper or a knife tip into the chocolate. Set it aside at cool room temperature and observe.
Properly tempered chocolate should set quickly (within 3-5 minutes) with a smooth, shiny surface and a firm texture. If it doesn't set correctly, you've likely overheated it. In that case, you would need to add more finely chopped untempered chocolate and stir to cool it down and re-seed, or gently reheat it and try the microwave process again, being even more cautious with heating times. Patience during the stirring phase is key to success with this quick method.
Mastering Basic Chocolate Work Techniques for Stunning Results
Working with Chocolate Molds for Uniform Shapes
Once you have successfully tempered your chocolate, working with molds is a simple way to create uniform, professional-looking decorations. Ensure your molds are perfectly clean and dry; even a tiny drop of water can seize the chocolate. Plastic or polycarbonate molds are common. Gently warm the molds slightly (just above room temperature) if they are cold, as this helps prevent shock chilling and promotes a better finish. Pour or spoon the tempered chocolate into the mold cavities, filling them completely.
Tap the mold firmly on your work surface a few times to release any air bubbles trapped in the chocolate. This ensures a smooth, solid finished piece. Scrape the excess chocolate off the top of the mold using a bench scraper or palette knife to create a clean edge.
Allow the chocolate to set completely at cool room temperature or in the refrigerator if your kitchen is warm. Properly tempered chocolate will contract as it sets, making it easy to release from the mold. You'll often see the chocolate pieces pull away slightly from the sides of the mold when they are ready.
Creating Chocolate Decorations: Curls, Shavings, and Garnishes
Tempered chocolate is perfect for crafting delicate and impressive decorations that elevate elegant plated desserts. Simple techniques can yield beautiful results. To make chocolate curls or shavings, spread a thin layer of tempered chocolate onto a cool surface like the back of a baking sheet or a marble slab. Allow it to set until it is firm but still slightly pliable, not brittle. Then, use a metal scraper or a sharp knife held at an angle to push along the surface, creating delicate curls or shavings.
For other simple garnishes, pipe tempered chocolate onto parchment paper in desired shapes – dots, lines, lattices, or freeform designs. You can also create chocolate shards by spreading tempered chocolate thinly and breaking it into irregular pieces once set. Another popular technique is to dip fruits (like strawberries or orange segments) or cookies into tempered chocolate for a classic finish. The key is working quickly once the chocolate is tempered and keeping it at the correct working temperature for optimal results.
Coloring and Flavoring Techniques for Customized Chocolate
Adding color and flavor to your tempered chocolate allows for incredible customization and creativity in your dessert decorations. As mentioned, always use oil-based or powder colorings and oil-based flavorings to avoid seizing the chocolate. Add the coloring or flavoring after the chocolate has been tempered. Start with a very small amount and stir thoroughly to distribute it evenly. Remember that color intensity can deepen slightly as the chocolate sets.
To create marbled effects, temper white chocolate and a colored/flavored dark or milk chocolate separately. Drizzle spoonfuls of each color onto parchment paper or into a mold, then swirl gently with a skewer or toothpick. For a speckled effect, flick tempered colored chocolate onto a surface coated with tempered chocolate of a different color. Layering different colored tempered chocolates in molds or drizzling them over desserts also creates visually appealing results, perfect for adding a unique touch to elegant plated desserts.
Storage and Handling of Tempered Chocolate
Proper storage is essential to maintain the quality and temper of your chocolate creations. Once tempered chocolate has set, store it in a cool, dry place away from direct sunlight and strong odors. An ideal temperature range is 60-68°F (15-20°C) with low humidity (below 50%). Storing chocolate in the refrigerator is generally not recommended unless it's sealed airtight, as condensation can form, leading to sugar bloom. If you must refrigerate, place the chocolate in an airtight container before chilling and allow it to come to room temperature slowly before opening the container to prevent condensation.
Handle tempered chocolate decorations carefully as they are delicate and sensitive to warmth. Use gloves if possible to avoid leaving fingerprints and melting the chocolate with the heat from your hands. Properly stored tempered chocolate can last for several months, retaining its snap and shine. If it loses its temper (becomes dull or streaky), you can re-temper it following the same techniques.
Troubleshooting Common Chocolate Tempering Problems
Preventing Bloom in Tempered Chocolate
Bloom is a common issue that affects the appearance of chocolate. Fat bloom, the most frequent type, is a grayish or white film caused by unstable fat crystals migrating to the surface. It happens when chocolate is not properly tempered or is stored at fluctuating temperatures. The best way to prevent fat bloom is to ensure your chocolate is perfectly tempered before use and stored at a consistent, cool temperature. Avoid rapid temperature changes.
Sugar bloom appears as a grainy, white surface and is caused by moisture coming into contact with the chocolate surface. This dissolves the sugar, which then recrystallizes on the surface as the moisture evaporates. Prevent sugar bloom by keeping chocolate away from water or steam during tempering and storage. Store chocolate in a dry environment and avoid refrigerating it uncovered. While bloomed chocolate is still safe to eat, its texture and appearance are compromised.
Dealing with Overheated or Under-Tempered Chocolate
If your chocolate is overheated during the melting process, it can burn or scorch, developing a bitter taste and becoming unusable for tempering. Always melt chocolate gently over low heat or in short microwave bursts. If you accidentally overheat it, there's no way to recover the temper in that batch; you'll need to start with new chocolate.
If your chocolate is under-tempered (meaning it hasn't formed enough stable crystals), it won't set properly, will be soft and dull, and prone to bloom. This often happens if the cooling phase wasn't sufficient or if the seed chocolate wasn't stirred in thoroughly.
To fix under-tempered chocolate, gently reheat it back up to its initial melting temperature (113-122°F / 45-50°C) and then repeat the tempering process from the beginning, being careful to hit the correct temperatures during the cooling and rewarming phases. Adding a little more seed chocolate during the seeding method can help if you suspect the crystal structure wasn't adequately established.
Achieving the Right Consistency for Dipping and Coating
The ideal consistency of tempered chocolate for dipping and coating is fluid enough to coat items smoothly but thick enough to adhere without dripping excessively. The correct temperature for working with tempered chocolate is crucial for achieving this consistency. If the chocolate is too cool, it will be too thick to work with; if it's too warm, it will be too thin and won't set with a good snap.
Keep your tempered chocolate within its working temperature range while you use it. Use a thermometer to check periodically. If it starts to thicken, gently warm it slightly over the double boiler for just a few seconds, stirring constantly, until it reaches the correct fluidity. Be very careful not to overheat it, or you will break the temper. If it seems too thin, it might be too warm; allow it to cool slightly while stirring. Achieving the perfect dipping consistency comes with practice, but maintaining the correct working temperature is the most important factor.
Incorporating Tempered Chocolate into Elegant Dessert Plating
Chocolate Decorations as Cake and Cupcake Garnishes
Tempered chocolate decorations are a fantastic way to add sophistication and visual interest to cakes and cupcakes. Simple tempered chocolate curls, shavings, or piped shapes can transform a plain frosted cake into an elegant centerpiece. Molded chocolate pieces like squares, rectangles, or intricate shapes can be placed strategically on top or around the base of a cake.
For cupcakes, a swirl of frosting topped with a delicate tempered chocolate garnish, such as a chocolate fan, a piped design, or a small molded piece, elevates them from simple treats to elegant plated desserts. You can also create chocolate collars or wraps for cakes by spreading tempered chocolate onto acetate strips, letting it set partially, and then wrapping it around the cake before the chocolate fully hardens. Once set, the acetate is peeled away, leaving a perfect chocolate band.
Using Tempered Chocolate to Create Dessert Sauces and Drizzles
While not a tempering process itself, tempered chocolate can be used to create rich and glossy chocolate sauces or drizzles that set beautifully on cold desserts. Simply melt tempered chocolate gently until it is just warm enough to drizzle smoothly. Because it was tempered, it will retain some of its desirable properties, though a liquid sauce won't have the same snap as a solid piece.
For a sauce that hardens slightly upon contact with a cold dessert (like ice cream), use tempered chocolate melted to just above its working temperature. Drizzle it over the cold surface, and it will set quickly with a nice sheen. You can also mix tempered chocolate with a small amount of warm cream or butter to create a ganache-like sauce that remains more fluid but still has a lovely glossy finish due to the properties of the tempered chocolate used. This adds a touch of elegance to plated desserts.
Designing Chocolate Showpieces for Events
For special occasions or advanced elegant plated desserts, tempered chocolate can be used to create impressive showpieces. This can range from simple structural elements like chocolate rings or spheres to complex sculptures. These pieces require a good understanding of tempering and often involve techniques like casting, molding, and assembling multiple tempered chocolate components.
Creating a chocolate showpiece might involve tempering large quantities of chocolate, using specialized molds, and employing techniques like airbrushing with colored cocoa butter for intricate details. While this is a more advanced application of chocolate tempering, the fundamental principles of achieving and maintaining temper remain the same. A well-executed chocolate showpiece can be the stunning focal point of a dessert table or a plated dessert presentation.
Advanced Chocolate Techniques [Optional Section]
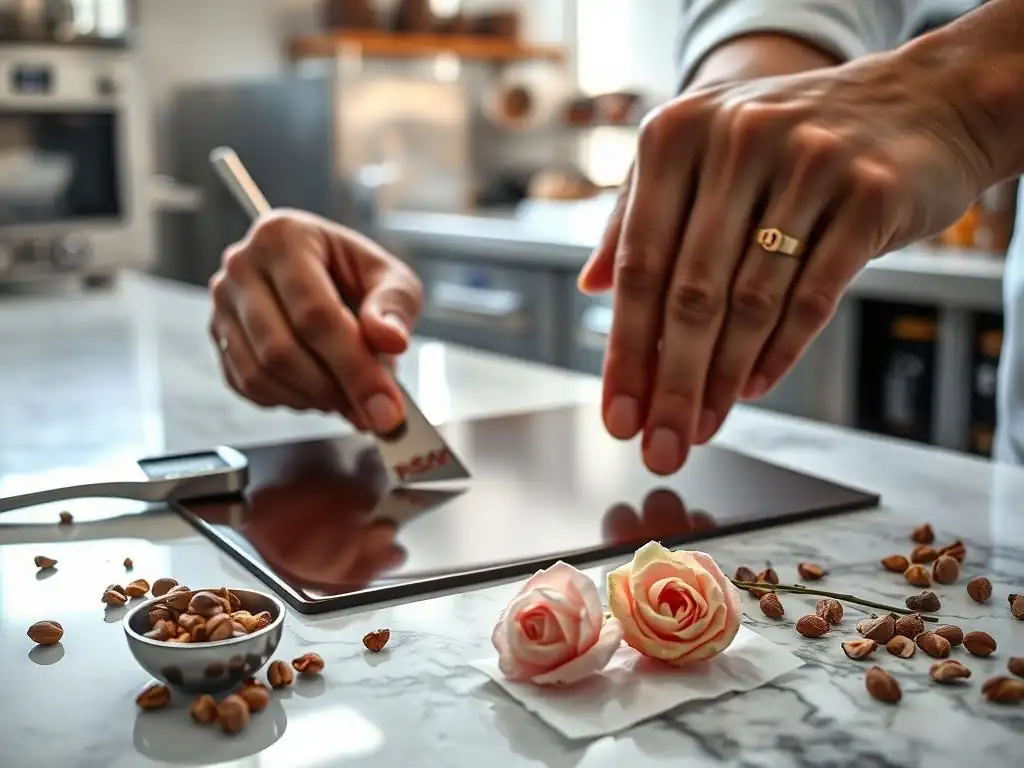
Creating Chocolate Sculptures
Chocolate sculpting is an art form that requires significant skill in tempering and working with chocolate in its various forms. It involves creating three-dimensional structures using tempered chocolate as the primary medium. Techniques can include casting chocolate into molds, building structures by layering or assembling tempered chocolate pieces, and even carving partially set or fully set chocolate.
Specialized tools are often used, including heat guns for smoothing or joining pieces, carving tools, and airbrushes for applying colored cocoa butter. Maintaining the tempered state of the chocolate throughout the process is critical, as is working in a cool, controlled environment. Sculpting allows for incredible creativity, from realistic figures to abstract designs, pushing the boundaries of elegant plated desserts and edible art.
Using Airbrushing for Chocolate Details
Airbrushing is a technique used by chocolatiers to add fine detail, shading, and vibrant colors to tempered chocolate creations. It involves using an airbrush tool to spray a fine mist of colored cocoa butter onto the surface of set, tempered chocolate or into molds before casting. This allows for smooth gradients, intricate patterns, and realistic effects that are difficult to achieve with traditional brushing or painting.
Specialized fat-soluble or cocoa butter-based colors are used, which are designed to mix smoothly with melted cocoa butter. The colored cocoa butter is typically heated and kept at a working temperature suitable for spraying. Airbrushing requires practice to control the spray pattern and achieve the desired effect, but it opens up a wide range of artistic possibilities for decorating tempered chocolate showpieces and individual bonbons.
Incorporating Inclusions into Tempered Chocolate
Adding inclusions like nuts, dried fruit, crispy rice cereal, or cookie pieces to tempered chocolate is a simple way to add texture and flavor. However, it's important to incorporate them correctly to avoid issues. Ensure that any inclusions are completely dry, as moisture can cause the chocolate to seize or lead to sugar bloom over time.
Add inclusions after the chocolate has been tempered and is at its correct working temperature. Stir them in gently but thoroughly to distribute them evenly without introducing too much air. The proportion of inclusions to chocolate is important; too many can make the mixture difficult to work with, while too few won't provide the desired texture. Tempered chocolate mixed with inclusions can be poured into molds, spread into sheets for bark, or used for dipping, adding an extra dimension to your elegant plated desserts.
Conclusion: Unleash Your Creativity with Chocolate Tempering
The Art of Chocolate: A Rewarding Baking Skill
Mastering chocolate tempering is more than just a technical skill; it's an entry into the artistic world of chocolate work. The ability to transform humble chocolate into glossy, snapping, stable creations opens up a vast realm of possibilities for decorating and enhancing your baked goods and elegant plated desserts. While it may seem intimidating at first, with practice and attention to detail, anyone can learn to temper chocolate successfully using methods like seeding, tablier, or even the quick microwave approach.
The reward for learning this skill is the ability to consistently produce professional-quality chocolate elements – from simple dipped strawberries to intricate molded shapes and garnishes. It adds a level of sophistication and polish to your baking that is immediately noticeable and appreciated. Embracing the art of chocolate tempering is a journey of learning and creativity that significantly expands your baking repertoire.
Where to Find Inspiration for Your Chocolate Designs
Inspiration for chocolate designs is everywhere! Look to nature for organic shapes and textures. Explore art and architecture for structural and geometric ideas. Browse pastry books and online platforms featuring professional desserts for examples of how chocolatiers use tempered chocolate in elegant plated desserts. Social media is a treasure trove of visual ideas, showcasing everything from simple chocolate curls to elaborate showpieces.
Consider the dessert you are decorating and how chocolate can complement its flavors and textures. Think about color combinations, layering, and how different forms of chocolate (molded, piped, shaved) can be combined. Don't be afraid to start simple; even a few well-placed, perfectly tempered chocolate dots or a delicate chocolate shard can make a significant impact. Experiment with different techniques and let your creativity guide you.
Baking with Ease: Further Resources for Elegant Desserts
At BakeWithEase.com, our goal is to make baking accessible and enjoyable for everyone, and that includes demystifying techniques like chocolate tempering. We believe that with clear instructions and a little practice, you can achieve stunning results in your own kitchen. While mastering tempering takes patience, the foundational steps are straightforward.
Explore our other resources for elegant plated desserts, from classic cake recipes to delicate pastries. We provide simple recipes, techniques, and tips to help you build confidence and expand your baking skills. Whether you're perfecting your chocolate work, trying your hand at easy sugar flower tutorials (a beautiful complement to chocolate! ), or simply looking for your next baking project, BakeWithEase is here to guide you on your journey to creating delicious and beautiful desserts.
Frequently Asked Questions
What makes BakeWithEase.com a good resource for learning sugar flower techniques?
BakeWithEase offers simple recipes and step-by-step guides, making it easier for bakers of all levels to learn and master sugar flower creation. We focus on easy-to-find ingredients and clear instructions.
Are the sugar flower tutorials on BakeWithEase.com suitable for beginners?
Yes! Our tutorials are designed with beginners in mind, focusing on basic techniques and simple flower designs. We provide clear instructions and visual aids to ensure success.
What types of sugar flowers can I learn to make using BakeWithEase.com's tutorials?
You can learn to make a variety of flowers, from simple daisies and roses to more complex blooms. The tutorials cover different techniques and styles, allowing you to expand your skills.
What ingredients and tools are typically needed for making sugar flowers?
Common ingredients include powdered sugar, gum paste, and food coloring. Essential tools often involve flower cutters, veiners, and rolling pins.
How can I use sugar flowers to decorate my desserts?
Sugar flowers can be used to adorn cakes, cupcakes, and other desserts, adding an elegant and personalized touch. They can be arranged in bouquets or scattered individually for a beautiful presentation.
Final Reflection: The Enduring Allure of Simple Sugar Flowers
The art of crafting delicate sugar flowers, once considered an exclusive skill, is experiencing a delightful resurgence, fueled by the accessibility of online tutorials and a growing desire for personalized, elegant desserts. This renewed interest speaks to a deeper human need for creativity and the joy of transforming simple ingredients into breathtaking works of art. The beauty of a perfectly formed sugar rose, painstakingly crafted from sugar paste, transcends mere decoration; it represents dedication, patience, and the sweet reward of artistic expression.
The impact of easily accessible sugar flower tutorials is undeniable. It's democratized a skill previously confined to professional pastry chefs, empowering home bakers to elevate their creations and add a touch of personalized artistry. The best things in life are homemade,
a sentiment perfectly captured by the dedication and love poured into each meticulously crafted sugar flower. This shift reflects a broader cultural trend towards valuing handmade items and appreciating the artistry behind seemingly simple things. It's a movement away from mass-produced uniformity and towards the unique beauty of individual expression.
Now, it's your turn. Don't be intimidated by the seemingly intricate world of sugar flower crafting. Take a deep breath, gather your supplies, and try your hand at creating your own sugar blooms. Embrace the process, celebrate the small victories, and remember that the journey of learning is just as rewarding as the final, breathtaking result. Let the simple elegance of sugar flowers inspire you to add a touch of sweetness and artistry to your life, one petal at a time.
Unleash Your Inner Pastry Artist: Master Simple Sugar Work!
Thanks for diving into the world of elegant dessert decoration with us! We hope you've discovered the joy and simplicity of creating stunning sugar work. Ready to take your baking to the next level?
- Craft your masterpiece: Try out one of the sugar techniques from the article – even a small detail can make a huge difference! Which one will you tackle first?
- Share your sugary success: Post a picture of your creation on social media and tag #BakeWithEaseSugarArt – let's inspire each other!
- Explore more sugar techniques: Search "sugar work tutorials" on your favorite video platform for even more inspiration and techniques to master.
What's your favorite sugar work technique, and what dessert will you adorn with it next?