
How to Plate Desserts Like a Pro (Without the Stress)

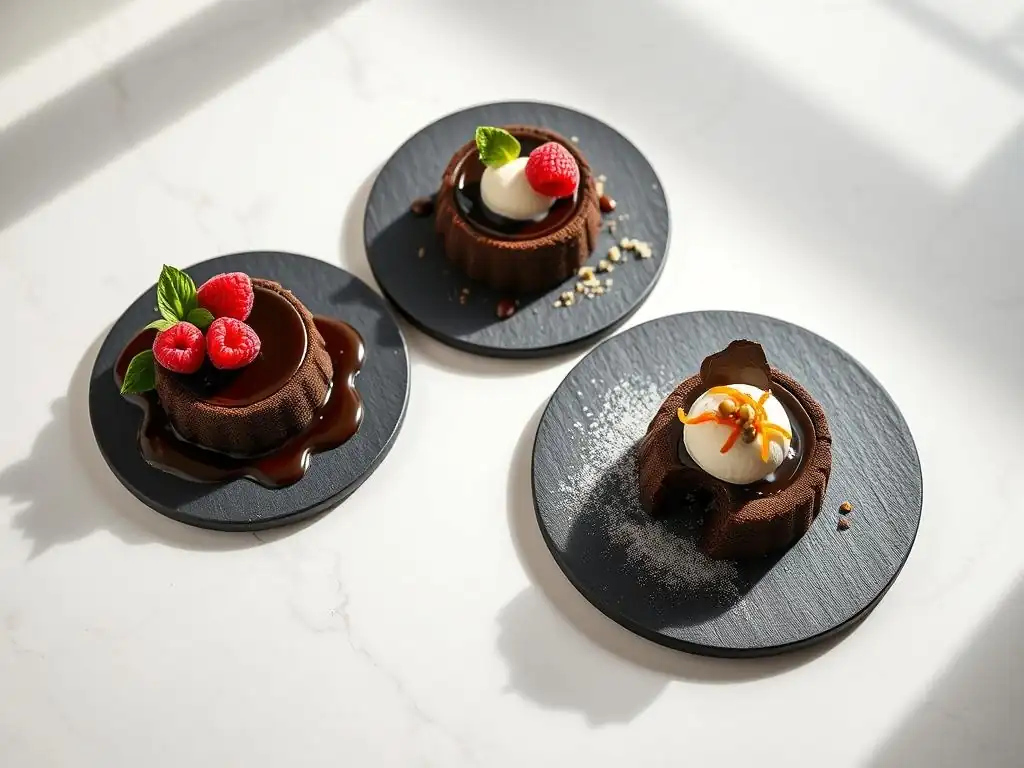
Welcome to BakeWithEase, your guide to unlocking baking brilliance! Ever wondered how to transform a simple dessert into a culinary masterpiece? This week, we're diving deep into the art of elegant dessert plating techniques. Discover insider secrets to elevate your creations, impress your guests, and turn everyday treats into unforgettable experiences. Get ready to plate like a pro – without all the fuss! Intrigued? Keep reading to uncover the secrets...
- Mastering Dessert Plating: From Home Baker to Dessert Artist
- Introduction to Professional Dessert Presentation
- Mastering the Fundamentals of Dessert Plating
- Key Elements of Stunning Dessert Plating
- Simple Dessert Plating Techniques for Beginners
- Advanced Dessert Plating Techniques for the Aspiring Pro
- Sauce Plating Techniques: Mastering the Artful Application
- Textures and Garnishes: Adding Depth and Dimension
- Avoiding Common Dessert Plating Mistakes
- Examples of Elegantly Plated Desserts
- Tips for Practicing Your Dessert Plating Skills
- Conclusion: Elevating Your Desserts with Stunning Presentation
-
Frequently Asked Questions
- How important is plating in the overall dessert experience?
- What are some basic tools I'll need for elegant dessert plating?
- Can elegant plating be achieved with simple desserts?
- What's the best way to choose a plate for dessert plating?
- How can I practice elegant plating without wasting ingredients?
- Final Reflection: The Art of Effortless Elegance in Dessert Plating
- Unleash Your Inner Pastry Chef!
Mastering Dessert Plating: From Home Baker to Dessert Artist
Introduction to Professional Dessert Presentation
Elevating Home Baking with Restaurant-Quality Presentation
Transforming your homemade desserts from delicious treats into stunning works of art is more accessible than you might think. While the taste and texture are paramount, the visual appeal significantly enhances the enjoyment of a dessert. Think of it as the first bite – your eyes consume the presentation before your palate experiences the flavors. Mastering elegant dessert plating techniques allows you to showcase your baking skills in a new light, impressing friends and family with presentations that rival those found in fine dining establishments, all from the comfort of your kitchen.
Adopting professional plating principles isn't about complexity; it's about thoughtful execution. It involves understanding how different elements interact on the plate – from the main component to sauces, crumbles, and garnishes. By focusing on balance, contrast, and composition, you can turn a simple cupcake or cookie into something truly special. This guide will walk you through the essential concepts and practical steps needed to elevate your dessert presentation, making every sweet creation a feast for the eyes.
Why Dessert Presentation Matters: Enhancing the Dining Experience
The visual aspect of a dessert plays a crucial role in the overall dining experience. A beautifully plated dessert can build anticipation, stimulate the appetite, and even influence the perception of taste. When a dessert is presented with care and attention to detail, it signals quality and craftsmanship, elevating the perceived value of your baking efforts. It’s not just about making it look pretty; it's about creating a cohesive sensory experience where sight, smell, and taste work together harmoniously.
Consider the difference between a slice of cake haphazardly placed on a plate versus one thoughtfully arranged with a swirl of sauce, a sprinkle of crumble, and a delicate garnish. The latter not only looks more appealing but also suggests a higher level of skill and care went into its creation. Studies have shown that presentation can impact how intensely flavors are perceived, making elegant dessert plating techniques a powerful tool in your baking arsenal. It turns eating dessert from a simple act into a memorable occasion.
A Baker's Guide to Impressive Dessert Plating
This guide is designed for home bakers looking to take their skills to the next level by focusing on presentation. We'll demystify the techniques used by professional pastry chefs and show you how to apply them in your own kitchen with minimal stress and maximum impact. Whether you're working with a classic chocolate cake, delicate macarons, or a rustic fruit tart, the principles of elegant dessert plating can be applied to enhance its appeal.
We will cover everything from essential tools and foundational concepts like composition and balance to specific techniques for working with sauces, textures, and garnishes. You'll learn how to avoid common plating pitfalls and find inspiration through examples of beautifully plated desserts. By the end of this guide, you'll have the knowledge and confidence to approach dessert plating with creativity and precision, transforming your delicious baked goods into visually stunning masterpieces.
Mastering the Fundamentals of Dessert Plating
Essential Tools for Precise and Creative Plating
Having the right tools can significantly simplify the plating process and allow for greater precision and creativity when applying elegant dessert plating techniques. You don't need a professional kitchen's worth of gadgets, but a few key items can make a big difference. A squeeze bottle with a fine tip is indispensable for controlled application of sauces, allowing for intricate lines, dots, or swirls. Offset spatulas, available in various sizes, are excellent for lifting delicate items, spreading purées smoothly, or smearing sauces across the plate.
Other useful tools include fine-point tweezers for placing small garnishes like microgreens or edible flowers precisely, and ring molds or pastry rings for creating perfectly round bases or stacking layers neatly. A small sieve is perfect for dusting powdered sugar or cocoa powder evenly over a dessert or using a stencil. While some items might seem specialized, many are affordable and widely available, representing a small investment for a significant upgrade in your plating capabilities.
Understanding Plate Composition: Balance, Height, and Color
Effective plate composition is the cornerstone of elegant dessert plating techniques. It involves arranging the elements on the plate in a way that is visually balanced and appealing. Think about the rule of thirds, often used in photography: mentally divide your plate into a 3x3 grid and place key elements along the lines or at their intersections rather than directly in the center. This creates a more dynamic and interesting composition.
Balance refers to distributing visual weight across the plate. If you have a tall element, balance it with something flatter or spread out. Height adds dimension and drama; consider stacking components or adding a vertical garnish. Color contrast is also vital – a dessert with varying colors is inherently more appealing.
A white panna cotta benefits greatly from the vibrant red of a raspberry coulis or the deep green of a mint leaf. Aim for a harmonious arrangement where each element has a purpose and contributes to the overall aesthetic without making the plate look cluttered. A common guideline is to leave about 60% of the plate empty, known as negative space, to allow the dessert to breathe and stand out.
Choosing the Right Plate to Complement Your Dessert
The plate itself is the canvas for your dessert art, and choosing the right one is crucial for applying elegant dessert plating techniques effectively. The color, shape, and size of the plate should complement, not compete with, your dessert. White plates are classic and versatile because they make the colors of the dessert pop and provide a clean background. Darker plates can create striking contrast, especially with lighter or brightly colored desserts.
Consider the shape: round plates are traditional and offer a clear boundary for composition, while square or rectangular plates can encourage more linear or geometric arrangements. The size should be appropriate for the portion; an overly large plate can make a small dessert look insignificant, while a too-small plate will look crowded. A standard dessert plate is typically around 7-8 inches in diameter. Ultimately, the best plate enhances the dessert's visual appeal and fits the overall style you want to convey, whether rustic, modern, or classic.
Key Elements of Stunning Dessert Plating
Sauces: Adding Flavor, Moisture, and Visual Interest
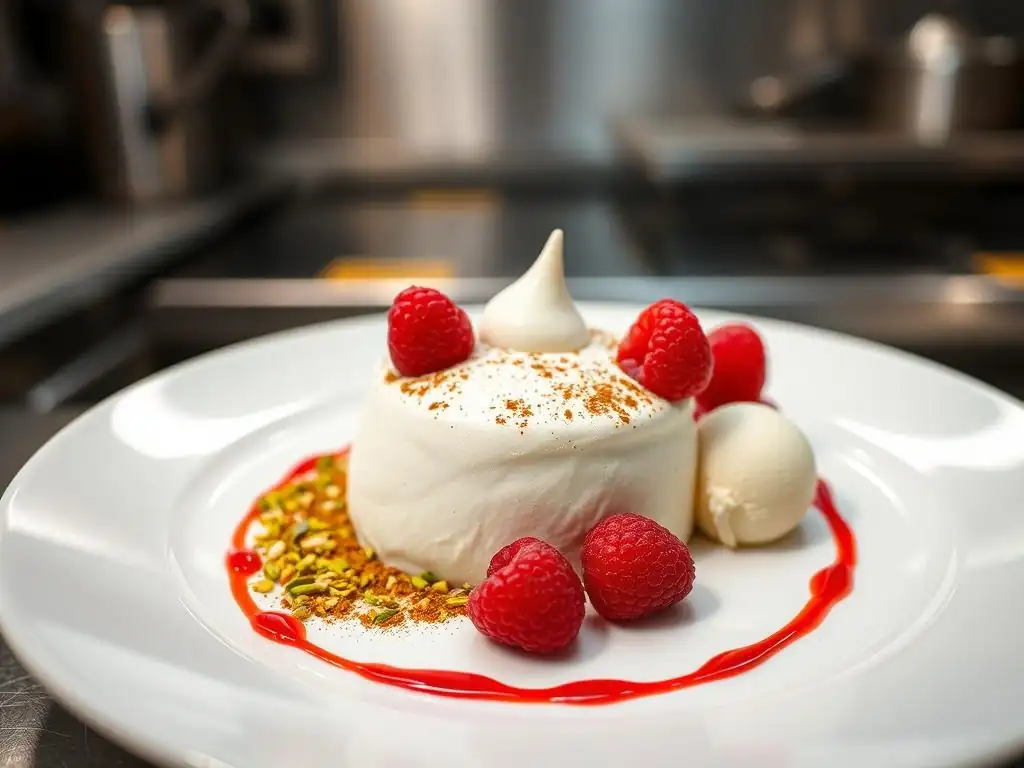
Sauces are one of the most dynamic elements in elegant dessert plating techniques, serving multiple purposes beyond just flavor. They add moisture to potentially dry components, introduce complementary or contrasting flavors, and provide a fluid medium for creating visual designs on the plate. A vibrant raspberry coulis can cut through the richness of a chocolate dessert, while a smooth caramel sauce adds a layer of sweetness and warmth.
The consistency of your sauce is critical for plating; it should be thick enough to hold its shape when drizzled or swirled but fluid enough to spread smoothly. Techniques range from a simple pool beneath the dessert to intricate drizzles, swooshes, or dot patterns created with a squeeze bottle or spoon.
For example, a classic technique involves placing a spoonful of sauce on the plate and dragging the back of the spoon through it to create a graceful smear. A typical sauce application might involve using 1 to 2 tablespoons of sauce per dessert portion, ensuring it enhances the look and taste without drowning the main event.
Textures: Creating Contrast with Crumbles, Streusels, and More
Texture is a vital component of a truly memorable dessert experience, and incorporating contrasting textures into your plating adds depth and excitement. Soft, smooth elements like mousses or panna cottas benefit immensely from the crunch of a crumble, toasted nuts, or brittle. Conversely, a crisp cookie or tart shell can be softened visually and texturally with a dollop of cream or a smear of sauce.
Common textural elements used in elegant dessert plating techniques include streusels (like a classic oat or almond streusel), cookie crumbs (think crushed Oreos or graham crackers), candied nuts, toasted coconut flakes, chocolate shavings, or even edible soil made from crushed cookie and cocoa powder. These elements can be sprinkled around the plate, placed in small piles, or used to create a base for the main dessert component.
For instance, a lemon posset, which is entirely smooth, becomes far more interesting plated on a bed of buttery shortbread crumble. Aim for at least two distinct textures on your plate to create a dynamic contrast.
Garnishes: The Finishing Touch for an Elegant Presentation
Garnishes are the decorative elements that provide the final flourish in elegant dessert plating techniques. They can add color, height, freshness, and a hint of flavor. The key is that a garnish should always be edible and ideally contribute positively to the overall taste profile, or at least not detract from it. Common garnishes include fresh berries, a sprig of mint or other complementary herbs (like basil with strawberries or rosemary with apple), a dusting of powdered sugar, chocolate shards, spun sugar, or edible flowers.
Placement is crucial. Garnishes should be placed thoughtfully to enhance the composition, perhaps highlighting a specific element or adding a pop of color where needed. Avoid overloading the plate with too many garnishes; a few well-placed items are far more effective than a cluttered mess. For example, a single, vibrant raspberry placed strategically near a chocolate element, or a delicate mint sprig tucked alongside a fruit tart, can elevate the entire presentation. Consider the scale of your garnish relative to the dessert – a large dessert can handle a slightly larger garnish, while small components require delicate touches.
Simple Dessert Plating Techniques for Beginners
The "Line" Technique: A Clean and Modern Approach
The "Line" technique is one of the simplest yet most effective ways to achieve an elegant dessert plating. It involves creating one or more clean lines of sauce or purée across the plate, serving as a base or backdrop for your main dessert component. This technique is modern and minimalist, drawing the eye along the lines and towards the main element. It works particularly well with dense desserts like brownies, flourless chocolate cakes, or cheesecakes.
To execute this, use a squeeze bottle or a spoon to draw a straight or slightly curved line (or parallel lines) of sauce or purée across the plate. For a spoon smear, place a dollop of sauce and drag the back of the spoon smoothly across the plate in one motion.
Ensure the sauce is the right consistency – not too thin that it spreads uncontrollably, and not too thick that it breaks. You can then place your dessert component, perhaps a slice or a quenelle, strategically on or near the line, adding a few textural elements or a simple garnish to complete the look.
The "Pool" Technique: Showcasing Sauces and Creams
The "Pool" technique is perhaps the most classic approach to elegant dessert plating, providing a luscious bed for your dessert. It involves pouring a small amount of sauce, coulis, or cream onto the plate to form a pool, into which the main dessert component is then placed. This technique is excellent for desserts that pair well with a generous amount of sauce, such as molten lava cakes, panna cotta, or bread pudding.
To create a perfect pool, pour the sauce gently into the center of the plate, allowing it to spread naturally into a roughly circular shape. Avoid pouring too much, which can look messy. The size of the pool should be proportionate to your dessert component – large enough to cradle it but leaving ample negative space around the edges of the plate.
For instance, a portion of panna cotta might sit perfectly within a 3-inch diameter pool of berry coulis. You can then add textural elements around the edges of the pool or a garnish on top of the dessert.
The "Stacked" Approach: Adding Height and Dimension
Adding height is a simple yet powerful way to elevate your dessert presentation and apply elegant dessert plating techniques that create visual interest. The "Stacked" approach involves arranging components vertically rather than horizontally. This technique is particularly effective for desserts with distinct layers or components that can be easily stacked, such as layered cakes, shortcakes, or even cookies and cream desserts.
Start with a stable base component, like a cake layer, a cookie, or a small pastry. Then, carefully layer additional elements on top, such as cream, fruit, mousse, or another cake layer. Use something to help maintain stability if needed, like a dab of ganache or cream cheese frosting between layers.
A classic example is plating a slice of layer cake standing upright rather than lying flat, perhaps leaning slightly against a dollop of cream. For a lighter dessert, you might stack delicate components like meringues and berries with whipped cream in between. This verticality draws the eye upwards and makes the dessert feel more substantial and impressive.
Advanced Dessert Plating Techniques for the Aspiring Pro
Utilizing Templates for Intricate Designs
For those looking to add more intricate and precise patterns to their elegant dessert plating, templates can be invaluable tools. These are often made from plastic or metal and feature cut-out designs ranging from simple geometric shapes to complex lace patterns. They allow you to create perfect, repeatable designs using powdered sugar, cocoa powder, or even fine crumbs.
To use a template, simply place it carefully onto the plate where you want the design to appear. Then, lightly dust your chosen powder or fine ingredient over the template using a small sieve or shaker. Lift the template straight up and away from the plate to reveal the design. This technique is fantastic for adding a sophisticated touch to single-serving desserts, like a créme brûlée or a chocolate tart, adding a precise visual element that is difficult to achieve freehand. Practice is key to lifting the template cleanly without smudging the design.
Creating Edible Soil and Crumble Compositions
Moving beyond simple sprinkles, creating composed arrangements with edible soil, crumbles, and other textured elements adds a sophisticated, artistic dimension to your elegant dessert plating. Edible soil, typically made from blitzed dark cookies (like Oreos without the filling) mixed with a little cocoa powder or melted chocolate, provides a realistic, earthy texture and color.
You can use edible soil to create a "garden" effect on the plate, perhaps with a dessert element nestled within, or use it to form defined shapes or paths. Combine different crumbles – like a light shortbread crumble, a dark chocolate crumble, and a green pistachio crumble – to create varied textures and colors within a single composition.
These elements can be placed using spoons, offset spatulas, or even ring molds to define areas on the plate. For example, a deconstructed cheesecake might feature separate piles of graham cracker crumble, berry compote, and cream cheese mousse, artfully arranged on a plate.
The Art of Chocolate Decoration: Adding Elegance and Flair
Chocolate is a versatile medium for adding elegant decoration and flair to dessert plating. Techniques range from simple chocolate shavings and curls to more complex elements like tempered chocolate shards, fans, or even molded shapes. Using tempered chocolate allows you to create shiny, snappy decorations that hold their shape at room temperature.
Simple methods include using a vegetable peeler to create chocolate curls from a bar of chocolate or grating chocolate over the finished dessert. For shards or fans, spread a thin layer of melted tempered chocolate onto parchment paper, allow it to set slightly, and then cut or scrape shapes before it hardens completely. More advanced techniques involve piping intricate designs onto acetate or using chocolate transfer sheets. A delicate chocolate shard leaning against a mousse or a few chocolate curls scattered over a cake slice can add a touch of professional polish and reinforce the flavors within the dessert.
Sauce Plating Techniques: Mastering the Artful Application
Achieving Perfect Sauce Consistency for Plating
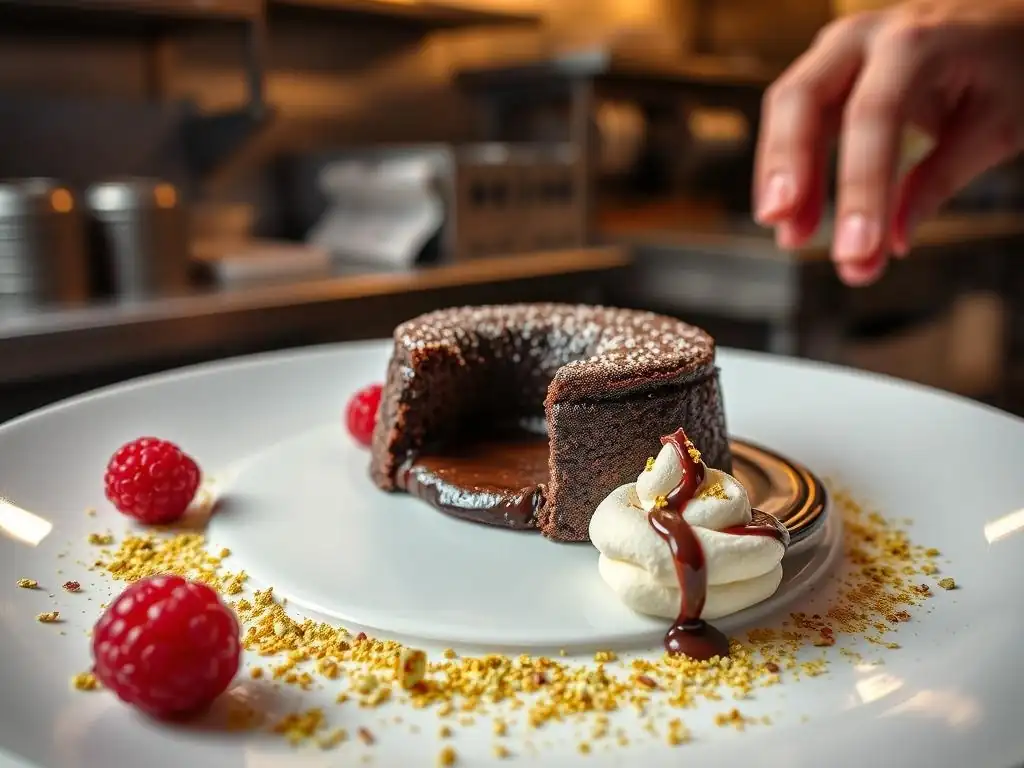
The success of elegant dessert plating techniques often hinges on the consistency of your sauces. A sauce that is too thin will run everywhere and look messy, while one that is too thick will be difficult to manipulate and may appear clumpy. The ideal consistency for plating is typically similar to that of a thin yogurt or thick cream – pourable but with enough body to hold a shape briefly.
To adjust consistency, if a sauce is too thick, you can often thin it with a small amount of liquid relevant to the sauce (like fruit juice for a coulis, milk or cream for a ganache, or water for a simple syrup-based sauce). Heat gently while stirring.
If a sauce is too thin, you can reduce it by simmering it gently to evaporate excess liquid, or thicken it with a slurry of cornstarch or a knob of butter whisked in (for savory sauces, less common for dessert, but the principle applies). Always test the consistency on a plate before committing to plating your final dessert portions.
Techniques for Drizzling, Swirling, and Smearing Sauces
Mastering sauce application is key to creating visually appealing patterns using elegant dessert plating techniques.
- Drizzling: Use a spoon or a squeeze bottle. For controlled lines or dots, a squeeze bottle is best. Hold it a few inches above the plate and apply even pressure. For a more freeform, artistic drizzle, dip a spoon into the sauce and let it fall naturally onto the plate in thin streams.
- Swirling: Pour a small amount of sauce onto the plate and use the tip of a skewer or toothpick to gently swirl it into patterns. This works well with two contrasting sauces swirled together.
- Smearing: Place a dollop of sauce on the plate. Use the back of a spoon or an offset spatula to smoothly drag the sauce across the plate in one fluid motion, creating a graceful arc or line. This requires a sauce that is smooth and not too thick.
Practice these techniques on a blank plate before plating your actual dessert. Experiment with the amount of sauce and the speed of your movements to achieve different effects.
Raspberry Coulis, Chocolate Ganache, and Caramel Sauce Plating Ideas
Here are some specific ideas for plating with common dessert sauces, applying elegant dessert plating techniques:
- Raspberry Coulis: Its vibrant color makes it perfect for contrast.
- Pool: Create a bright red pool for a chocolate lava cake or panna cotta.
- Dots: Use a squeeze bottle to create varying sizes of dots around a white dessert like cheesecake.
- Swirl: Swirl it into a white chocolate ganache or crème anglaise pool for a marbled effect.
- Line: Draw a clean, bright line across the plate for a modern look with a tart or pastry.
- Chocolate Ganache: Rich and dark, it provides deep contrast.
- Smear: Create a dramatic dark smear across a white or light-colored plate, placing a fruit tart or light mousse on or near it.
- Drizzle: Drizzle in a fine pattern over a contrasting element, like a scoop of vanilla ice cream or a light-colored cake.
- Pool: A small, intense pool can be a base for a contrasting flavor, like a mint panna cotta.
- Caramel Sauce: Its warm color and fluidity are great for classic or rustic presentations.
- Drizzle: Drizzle generously over apple pie or bread pudding.
- Crosshatch: Create a simple crosshatch pattern over a smooth surface like cheesecake using a squeeze bottle.
- Pool: A warm pool is perfect for desserts like sticky toffee pudding or churros.
- Combined: Swirl caramel and chocolate sauces together for a visually and flavorful dynamic.
Remember to consider the main dessert's flavor and color profile when choosing and applying the sauce.
Textures and Garnishes: Adding Depth and Dimension
Homemade Streusel Recipes: Oat, Nut, and Spice Variations
Homemade streusel is a fantastic way to add texture and flavor depth to your elegant dessert plating. It's simple to make and can be customized easily. A basic streusel recipe involves rubbing together flour, sugar, and cold butter until crumbs form. The ratio is typically 2 parts flour, 1 part sugar, 1 part butter by weight.
- Oat Streusel: Add rolled oats to the basic mixture (e.g., 1 part oats). This adds a rustic texture and nutty flavor, great for fruit crumbles or apple desserts. Bake until golden brown, about 10-15 minutes at 350°F (175°C).
- Nut Streusel: Incorporate finely chopped nuts like almonds, pecans, or walnuts (e.g., 1/2 to 1 part nuts). This adds crunch and richness, pairing well with chocolate or caramel desserts.
- Spice Streusel: Add warming spices like cinnamon, nutmeg, or cardamom (e.g., 1 teaspoon mixed spice per cup of flour). Perfect for autumnal desserts like pumpkin pie or spiced apple cake.
Once baked and cooled, streusel can be sprinkled around the plate or placed in small piles to add a contrasting crunchy element.
Employing Candied Nuts, Toasted Coconut, and Cocoa Nibs for Texture
Beyond streusel, several other ingredients offer wonderful textural contrast for elegant dessert plating techniques.
- Candied Nuts: Nuts coated in a hardened sugar syrup provide a sweet crunch. Pecans, walnuts, or almonds are excellent choices. They can be placed individually or in small clusters. A typical recipe involves boiling sugar and water to a syrup, adding nuts, and stirring until the sugar crystallizes or caramelizes around them.
- Toasted Coconut: Shredded or flaked coconut, lightly toasted in a pan or oven until golden brown, offers a delicate crunch and tropical flavor. It's perfect for desserts with tropical fruits or coconut elements. Toasting takes just a few minutes in a dry pan over medium heat – watch carefully as it burns quickly.
- Cocoa Nibs: These small pieces of crushed, roasted cocoa beans provide an intense chocolate flavor and a pleasant, slightly bitter crunch. They work well with richer chocolate desserts or those needing a counterpoint to sweetness. A small sprinkle can add a sophisticated touch.
These elements should be used sparingly to provide pops of texture rather than overwhelming the plate.
Selecting and Arranging Fresh Herbs, Edible Flowers, and Fruit for Harmony
Garnishes should enhance both the look and potentially the flavor of the dessert.
- Fresh Herbs: Mint is classic, pairing well with chocolate, fruit, and dairy. Basil works surprisingly well with strawberries or lemon. Rosemary can complement apple or pear desserts. Use small, fresh sprigs or individual leaves. Place them thoughtfully, perhaps tucked slightly under a component or standing upright.
- Edible Flowers: Violas, pansies, nasturtiums, and borage flowers add delicate color and beauty. Ensure they are specifically sold as edible and are pesticide-free. Use them sparingly – one or two well-placed blossoms can make a statement. Their vibrant colors are perfect for adding visual pop to neutral-colored desserts.
- Fresh Fruit: Berries, citrus segments, or thin slices of fruit can add freshness, color, and flavor. Choose fruit that complements the dessert's flavors. A few perfect raspberries, a fanned strawberry, or a curl of candied orange peel can elevate a simple dessert. Arrange fruit naturally, perhaps clustered or scattered artfully.
When selecting garnishes, think about color harmony and contrast, as well as flavor compatibility. The garnish should feel like an integrated part of the dessert, not an afterthought.
Avoiding Common Dessert Plating Mistakes
Overcrowding the Plate: Maintaining Negative Space
One of the most frequent errors in elegant dessert plating is putting too much on the plate. A cluttered plate looks messy and overwhelms the viewer. Just as in art or design, negative space (the empty area on the plate) is crucial. It allows the elements you do include to stand out and gives the eye a place to rest.
Aim for a composition where roughly 60% of the plate is left clear. This allows the main dessert component, sauces, and garnishes to be the focal point. Before plating, visualize how your elements will fit. If you have many small components, consider grouping them or using a smaller portion size. A simple dessert with thoughtful placement is always more elegant than a plate piled high with too many competing elements.
Ignoring Contrasting Textures: Creating a Balanced Experience
A dessert that is uniformly soft or uniformly crunchy can be monotonous. Elegant dessert plating techniques emphasize creating a balanced sensory experience, and texture plays a huge role in this. Failing to include contrasting textures is a common mistake that results in a less engaging dessert.
If your main dessert is soft (like a mousse, panna cotta, or pudding), ensure you add something crunchy like a cookie crumble, toasted nuts, or a brittle shard. If your dessert is primarily crunchy (like a tart or a cookie), add a smooth element like a sauce, cream, or purée. Aim for at least two distinct textures on the plate – for example, a smooth créme brûlée topped with crunchy caramelized sugar and served with a crisp biscotti. This contrast makes each bite more interesting.
Neglecting the Overall Composition: Ensuring Visual Appeal
Sometimes, bakers focus on individual elements (a perfect sauce smear, a beautiful garnish) but fail to consider how they all work together on the plate. Neglecting the overall composition means the final presentation lacks harmony and visual appeal.
Before you start plating, take a moment to plan where each element will go. Think about balance (distributing visual weight), flow (how the eye moves across the plate), and focal point (what you want the viewer to see first). Use principles like the rule of thirds or creating asymmetrical balance. Ensure colors and shapes work together. Step back and look at the plate from different angles. Does it look balanced? Is it interesting? Does it highlight the best aspects of the dessert? A little planning goes a long way in creating a cohesive and elegant presentation.
Examples of Elegantly Plated Desserts
Chocolate Lava Cake with Raspberry Coulis and Pistachio Crumble
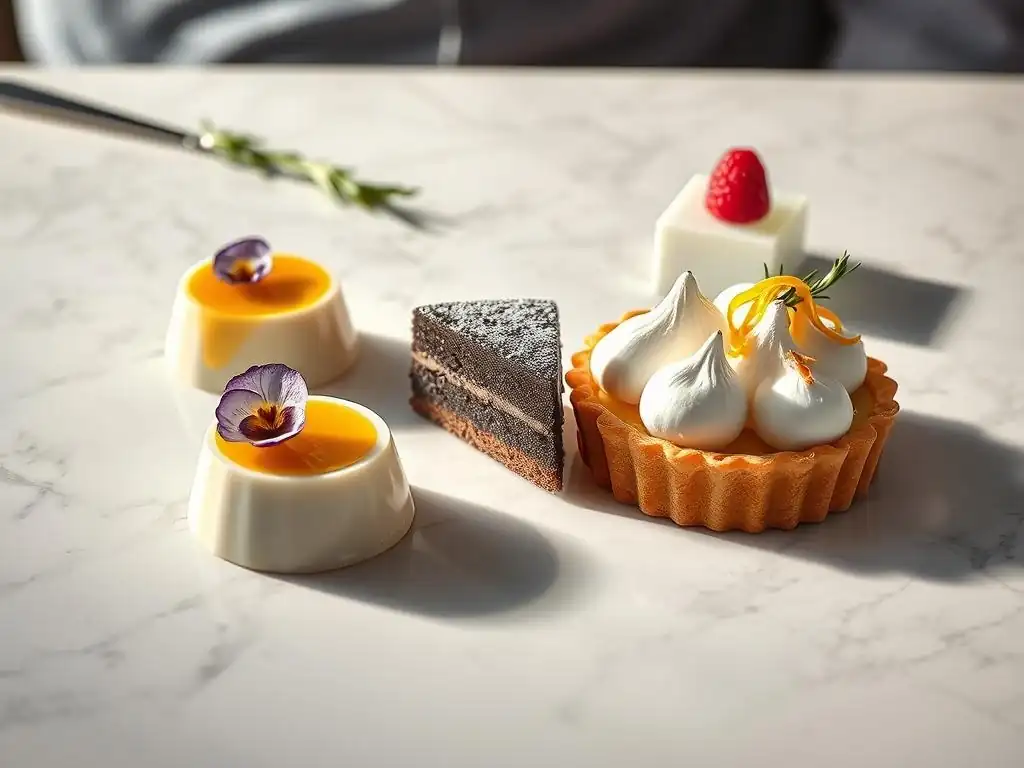
This is a classic example that perfectly illustrates elegant dessert plating techniques involving sauce, texture, and garnish. A warm chocolate lava cake, perhaps 3 inches in diameter and 2 inches tall, is placed slightly off-center on a white plate. A vibrant red raspberry coulis is either pooled beneath the cake or smeared artfully across the plate, drawing the eye towards the rich chocolate.
Around the plate, or sprinkled over the coulis, is a scattering of bright green pistachio crumble (made from crushed pistachios, a little sugar, and butter, baked until crisp). The contrast between the dark chocolate, red coulis, and green crumble is visually striking. A final touch might be a single perfect raspberry placed near the cake or a delicate mint leaf. This plating highlights the key elements: the gooey interior of the cake, the tartness of the coulis, and the crunch of the crumble.
Lemon Tart with Meringue Kisses, Candied Lemon Peel, and Basil Garnish
This example showcases how to plate a tart elegantly using multiple components for texture and visual interest. A slice of bright yellow lemon tart, perhaps 1.5 inches wide at the base and 1 inch tall, is placed slightly off-center on a clean plate. Small, delicate meringue kisses (baked until crisp) are scattered around the plate or artfully placed near the tart slice, adding height and a contrasting white color and airy texture.
Thin strips of translucent candied lemon peel are placed on top of or alongside the tart, adding a sophisticated touch and reinforcing the lemon flavor. A few small, fresh basil leaves or delicate basil sprigs are tucked amongst the meringues or near the tart slice. The green of the basil provides a surprising but harmonious color contrast with the yellow and white, while the various textures (crisp tart shell, smooth lemon filling, airy meringue, chewy peel) create a dynamic experience.
Grilled Pineapple with Coconut Sorbet, Macadamia Nut Brittle, and Mint
This dessert demonstrates elegant plating techniques for lighter, fruit-based creations. A thick slice of grilled pineapple, showing beautiful grill marks and caramelized edges, is placed as the main component. A quenelle (an oval shape formed with two spoons) of creamy white coconut sorbet is placed alongside the pineapple.
Scattered around the plate are shards or pieces of golden macadamia nut brittle, adding a significant crunch and nutty flavor contrast. A drizzle of light caramel sauce or a passion fruit purée could be added for moisture and visual flow. The garnish might be a vibrant green mint sprig placed on top of the sorbet or near the pineapple. This plating emphasizes freshness, varying textures (soft pineapple, smooth sorbet, crisp brittle), and complementary flavors.
Tips for Practicing Your Dessert Plating Skills
Start with Simple Desserts and Gradually Increase Complexity
Don't feel pressured to create elaborate, multi-component plated desserts right away. Begin practicing elegant dessert plating techniques with simpler desserts you are comfortable baking. Plate a single cookie with a drizzle of chocolate sauce and a sprinkle of sea salt. Practice making a perfect pool of raspberry coulis for a scoop of vanilla ice cream. Work on your smear technique with a simple fruit purée.
As you gain confidence and feel more comfortable manipulating different elements, gradually introduce more components like crumbles, multiple sauces, or more intricate garnishes. Starting simple allows you to focus on mastering one or two techniques at a time, building a strong foundation before tackling more complex presentations.
Analyze Restaurant Dessert Plates for Inspiration
One of the best ways to learn elegant dessert plating techniques is to observe how professionals do it. The next time you dine out, pay close attention to how the desserts are plated. What kind of plate is used? Where are the main components placed? How are the sauces applied? What textures and garnishes are included? How is negative space used?
Take mental notes or even discreetly sketch the plating if you can. Look at photos of restaurant desserts online or in cookbooks. Try to identify the techniques used and think about how you could replicate them at home with your own desserts. Analyzing professional work provides valuable insights into composition, balance, and the creative use of elements.
Practice Regularly and Embrace Experimentation
Like any skill, mastering elegant dessert plating techniques requires practice. Don't be discouraged if your first attempts aren't perfect. Set aside time specifically for plating practice. Bake a batch of simple cookies or cupcakes and spend an hour experimenting with different sauces, dusting patterns, and garnish placements.
Try different plate shapes and colors. Experiment with combining various textures and flavors in your plating. Keep a small notebook or take photos of your plating experiments to track what works and what doesn't. Embrace experimentation – sometimes the most creative and beautiful plating comes from trying something new and unexpected. The more you practice, the more intuitive and stress-free elegant dessert plating will become.
Conclusion: Elevating Your Desserts with Stunning Presentation
Recap of Key Dessert Plating Techniques
We've explored how mastering elegant dessert plating techniques can transform your home baking. We covered the importance of presentation, essential tools, and fundamental principles like composition, balance, height, and color. We delved into key elements such as sauces, textures, and garnishes, discussing how each contributes to the final visual and sensory experience.
We also outlined simple techniques like the "Line," "Pool," and "Stacked" methods for beginners, and touched upon more advanced approaches like using templates, creating edible soil, and working with chocolate decorations. Finally, we looked at mastering sauce application and selecting appropriate textures and garnishes, along with common mistakes to avoid. The examples provided illustrate how these principles come together in real-world dessert plating scenarios.
Embrace Creativity and Develop Your Signature Style
Now that you have a foundation in elegant dessert plating techniques, it's time to let your creativity shine. Think about the specific dessert you've created – what are its key flavors, textures, and colors? How can your plating highlight these aspects? Don't be afraid to develop your own signature style. Perhaps you love geometric patterns, or maybe you prefer a more organic, rustic approach.
Experiment with different combinations of sauces, crumbles, and garnishes. Try plating the same dessert multiple ways to see which presentation you like best. Your plating should feel like an extension of your baking personality. The goal is to create presentations that are not only visually appealing but also authentically yours.
Transform Your Baking with Beautiful Dessert Presentation
Applying elegant dessert plating techniques is a powerful way to elevate your entire baking experience. It adds an extra layer of artistry and care to your creations, making them even more special for those who get to enjoy them. It turns serving dessert into a moment of delight and anticipation.
By paying attention to composition, texture, color, and the thoughtful placement of each element, you can transform even simple desserts into stunning masterpieces. So, gather your tools, bake your favorite treat, and start practicing. With patience and creativity, you'll soon be plating desserts like a pro, sharing not just delicious food, but beautiful edible art with the world.
Frequently Asked Questions
How important is plating in the overall dessert experience?
Plating is extremely important. It elevates the visual appeal of your dessert, adding to the overall enjoyment and creating a more memorable experience.
What are some basic tools I'll need for elegant dessert plating?
You don't need fancy gadgets! Start with a squeeze bottle, offset spatula, and a few different sized spoons. These will give you great control.
Can elegant plating be achieved with simple desserts?
Absolutely! Even a simple scoop of ice cream can look elegant with a well-placed sauce swirl and a garnish of fresh fruit or herbs. It's all about presentation.
What's the best way to choose a plate for dessert plating?
Consider the dessert's colors and textures. A white or neutral plate often provides a clean canvas, but a contrasting color can also make your dessert pop.
How can I practice elegant plating without wasting ingredients?
Practice with sauces and decorations on a plate before adding the actual dessert. You can also use inexpensive ingredients like yogurt or pudding for mock plating.
Final Reflection: The Art of Effortless Elegance in Dessert Plating
Mastering elegant dessert plating isn't about achieving unattainable perfection; it's about expressing creativity and joy in a way that enhances the dining experience. This article explored simple yet impactful techniques, demystifying the process and empowering you to create stunning presentations without the pressure of culinary school. The beauty lies in the details, and those details, as we've seen, are surprisingly accessible.
The impact of visually appealing food extends far beyond mere aesthetics. It elevates the entire dining experience, transforming a simple dessert into a moment of celebration. As we explored various techniques, from strategic sauce drizzling to the artful placement of garnishes, I was reminded of the quote by Julia Child: Find something you're passionate about and keep tremendously interested in it.
This passion, whether it's for baking, cooking, or simply enjoying delicious food, is what truly elevates the art of plating. It's the energy and care that shines through, making each plate a unique expression of that passion.
Now, I invite you to take what you've learned and experiment! Don't be afraid to try new things, to break the rules, and to find your own unique style. The next time you prepare a dessert, consider the visual narrative you want to create. Let your plating reflect your personality and the joy you find in the process. Remember, the most elegant plating is the one that brings you and your guests the most pleasure. So go forth, and plate with confidence!
Unleash Your Inner Pastry Chef!
Thanks for taking the time to elevate your dessert plating skills! You've learned valuable techniques to create stunning presentations that will wow your guests. Now it's time to put your newfound knowledge into practice.
- Master a signature dessert plate: Choose one dessert from the article and practice plating it until you feel confident. Aim for perfection!
- Share your creations: Post a picture of your masterpiece on social media and tag us @BakeWithEase – we'd love to see your beautiful work!
- Challenge a friend: Invite a friend to a dessert-making competition and put your new plating skills to the test.
Ready to transform your desserts from delicious to dazzling? What's the first dessert you're going to plate like a pro?