
Pizza Dough for Grilling: Adjusting Your Recipe

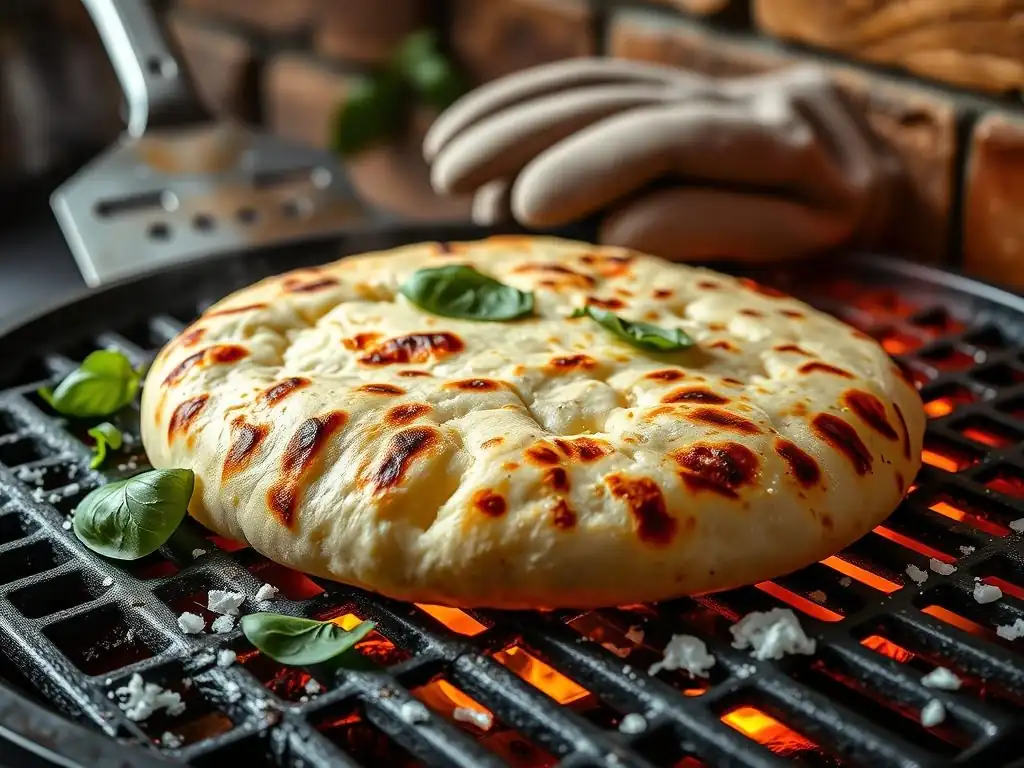
Welcome to BakeWithEase, your guide to unlocking baking brilliance! Ever wondered how to achieve that perfect, smoky char on your homemade pizza? This article delves into the delicious world of grilling pizza dough, offering expert insights on adjusting your recipe for exceptional results. Discover the secrets to a crispy crust and avoid common grilling pitfalls. Are you ready to elevate your pizza game? Read on to master our grilling pizza dough recipe!
- Grilling Pizza Dough Recipe: The BakeWithEase Guide to Perfect Grilled Pizza
- Why Grill Your Pizza Dough? Unlocking Smoky Flavor
- Adjusting Your Pizza Dough Recipe for the Grill: A Step-by-Step Guide
- The Perfect Grilling Pizza Dough Recipe: BakeWithEase's Tested Formula
- Mastering the Grilling Technique: Achieving Pizza Perfection
- Troubleshooting Common Grilling Pizza Dough Problems
- Advanced Grilling Pizza Dough Techniques: Elevate Your Pizza Game
- Beyond the Basics: Creative Grilled Pizza Ideas
- Storing Leftover Grilled Pizza Dough: Keeping Your Dough Fresh
-
Frequently Asked Questions
- How does a pizza dough recipe for grilling differ from a regular pizza dough recipe?
- What kind of flour is best for grilling pizza dough?
- What's the best way to prepare the grill for cooking pizza dough?
- How do I prevent my pizza dough from sticking to the grill?
- How do I know when the pizza dough is cooked enough on the grill?
- Final Reflection: The Unexpected Joy of Grilled Pizza
- Unleash Your Inner Pizzaiolo: Grill-Ready Dough Awaits!
Grilling Pizza Dough Recipe: The BakeWithEase Guide to Perfect Grilled Pizza
Taking your pizza game from the oven to the grill unlocks a whole new dimension of flavor and texture. A well-executed grilling pizza dough recipe yields a crust with a unique smoky char, a crispy exterior, and a wonderfully chewy interior that's hard to replicate indoors. This guide from BakeWithEase will walk you through the essential steps to adjust your standard pizza dough for the high heat and open flame of the grill, ensuring your next pizza night is a smoky success.
Why Grill Your Pizza Dough? Unlocking Smoky Flavor
Grilling pizza is more than just a cooking method; it's an experience that infuses your dough with delicious smoky notes and creates a distinctly different crust texture compared to baking in a conventional oven. The intense, direct heat of the grill cooks the dough incredibly quickly, resulting in a crispy bottom while maintaining a tender crumb.
The Appeal of Grilled Pizza: A Unique Baking Experience
Grilled pizza offers a culinary adventure that delights the senses. The direct heat source caramelizes the sugars in the dough rapidly, leading to beautiful char marks and a complex flavor profile that includes subtle smoky undertones from the grill itself. This method often produces a crust that is lighter and airier than oven-baked versions, with a satisfying crunch that gives way to a chewy interior.
It's a fantastic way to enjoy pizza during warmer months, moving the heat and mess outdoors while achieving restaurant-quality results with your own grilling pizza dough recipe. The speed of cooking also means you can make multiple pizzas relatively quickly, perfect for entertaining.
Beyond the unique flavor, grilling pizza is a dynamic cooking process. Unlike setting a timer on an oven, grilling requires active participation – watching the dough, managing the heat, and making quick adjustments. This hands-on approach can be incredibly rewarding, turning pizza night into an interactive event. The visual transformation of the dough on the hot grates, puffing up and developing those desirable char spots, is part of the fun. Mastering a grilling pizza dough recipe allows you to harness the power of fire to create something truly special right in your backyard.
Grilling vs. Baking: Key Differences in Pizza Dough Preparation
The fundamental difference between grilling and baking pizza dough lies in the heat source and intensity. Ovens typically use indirect, circulating heat, often at temperatures ranging from 450°F to 550°F (230°C to 290°C). Grills, especially gas grills or charcoal grills with direct heat, can reach much higher surface temperatures, often exceeding 600°F (315°C), and the heat comes directly from below. This intense, direct heat requires specific adjustments to your standard grilling pizza dough recipe to prevent burning and ensure even cooking.
One key difference is the speed at which the crust cooks. On a grill, the bottom of the dough hits extremely high temperatures instantly, initiating rapid cooking and charring. This means the dough needs to be robust enough to handle the heat without becoming brittle or burning before the top cooks. Conversely, an oven provides a more consistent, ambient heat that cooks the pizza more slowly and evenly from all sides. Therefore, a successful grilling pizza dough recipe often involves considerations for hydration, flour type, and even sugar content to manage this rapid, high-heat environment effectively.
Adjusting Your Pizza Dough Recipe for the Grill: A Step-by-Step Guide
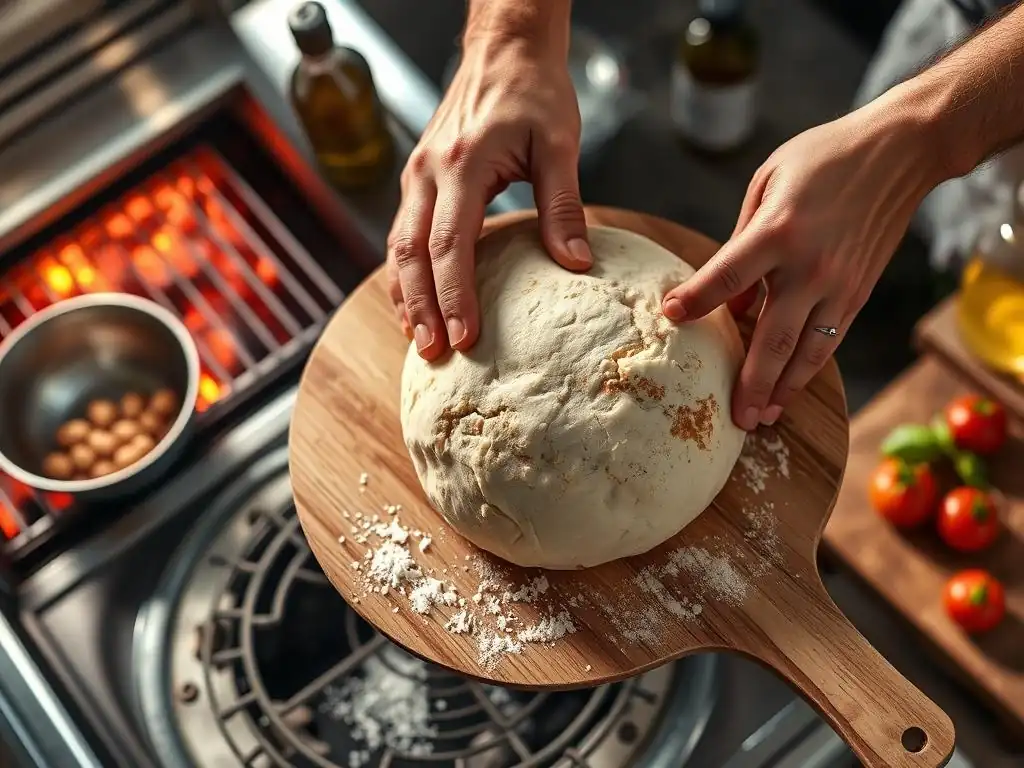
Adapting your favorite pizza dough recipe for the grill is crucial for success. The intense, direct heat presents unique challenges that require specific modifications to your dough's composition and handling. Understanding these nuances is key to achieving that perfect grilled crust.
Understanding the Challenges of Grilling Pizza Dough
Grilling pizza dough presents several unique challenges compared to baking in an oven. The most significant is the direct, high heat source. Unlike an oven where heat circulates, the grill grates transfer intense heat directly to the bottom of the dough.
This can lead to rapid charring or even burning on the exterior before the interior is fully cooked, resulting in a dough that's burnt on the outside and raw on the inside. Another challenge is sticking; dough can easily adhere to hot grill grates if not properly prepared or handled, leading to tearing and a ruined crust. The open environment of the grill also means variable temperatures and potential flare-ups, which require vigilant monitoring and quick adjustments.
Furthermore, the speed of grilling means there's less time for the dough to develop structure and rise compared to the longer bake times in an oven. This necessitates a dough that is resilient and can handle being stretched and moved onto the hot grill without collapsing. Factors like dough elasticity, strength, and hydration level become even more critical when developing a reliable grilling pizza dough recipe. Successfully navigating these challenges requires careful attention to ingredients, mixing, proofing, and the grilling technique itself.
The Importance of Dough Hydration for Grilling
Dough hydration, which refers to the ratio of water to flour by weight, plays a critical role in a successful grilling pizza dough recipe. For grilling, a slightly higher hydration level (often 65% to 70% or even higher) is generally recommended compared to many standard oven recipes (which might be 60-65%). The increased water content helps the dough stay pliable and less likely to dry out or become brittle under the intense, dry heat of the grill. Higher hydration also contributes to a lighter, airier crumb structure, which can be beneficial for a quick grill cook.
A more hydrated dough is also typically less sticky after it's cooked, making it easier to handle on the grill grates, provided the grill is properly prepared. However, excessively high hydration can make the dough difficult to handle and stretch, especially for beginners. Finding the right balance is key – enough water to promote a light texture and resist drying, but not so much that the dough becomes unmanageable. Experimenting within the 65-70% range is a good starting point when perfecting your grilling pizza dough recipe.
Flour Selection for Grilled Pizza: Finding the Right Balance
The type of flour you choose significantly impacts the texture and handling of your grilling pizza dough recipe. Bread flour, with its higher protein content (typically 12-14%), is often preferred for grilled pizza. This higher protein level leads to stronger gluten development, which provides the necessary structure and elasticity to the dough. A strong gluten network helps the dough hold its shape when stretched thinly and prevents it from tearing or collapsing on the hot grill. It also contributes to that desirable chewy texture in the final crust.
While all-purpose flour (around 10-12% protein) can be used, it may result in a slightly less chewy crust and could be more prone to tearing if stretched too thin. Some bakers like to blend bread flour with a small amount of '00' flour (a finely milled Italian flour) for a tender interior crumb while still maintaining structure. Ultimately, the best flour for your grilling pizza dough recipe depends on your desired texture and how you plan to handle the dough, but starting with a good quality bread flour is a reliable choice for grill success.
Sugar's Role in Grilled Pizza Dough: Achieving Optimal Caramelization
Sugar is an optional, but often beneficial, ingredient in a grilling pizza dough recipe, primarily for its impact on crust color and flavor. A small amount of sugar (typically 1-2% of the flour weight) helps promote browning and caramelization on the crust surface when exposed to the high heat of the grill. This leads to those attractive char marks and adds a subtle sweetness that complements the smoky flavor. Without sugar, the crust might take longer to brown, potentially leading to overcooking or drying out before achieving the desired color.
However, care must be taken when including sugar in a dough destined for high-heat grilling. Too much sugar can cause the crust to brown too quickly, potentially burning before the interior is cooked through. It's a delicate balance. The sugar provides readily available fuel for the Maillard reaction and caramelization at high temperatures. Including a modest amount in your grilling pizza dough recipe can significantly enhance the visual appeal and flavor complexity of your finished pizza.
Salt Content in Grilled Pizza Dough: Flavor and Gluten Development
Salt is a non-negotiable ingredient in any pizza dough, including a grilling pizza dough recipe. Its primary roles are enhancing flavor and controlling yeast activity. Salt brings out the natural sweetness of the flour and balances the overall taste of the crust. Without salt, the dough can taste bland and one-dimensional. The typical salt ratio is between 1.8% and 2.2% of the flour weight.
Beyond flavor, salt plays a crucial role in gluten development. It tightens the gluten structure, making the dough stronger and more elastic. This is particularly important for grilled pizza dough, which needs to be robust enough to handle stretching and the heat of the grill. Salt also slows down yeast fermentation, allowing for a slower, more controlled rise that develops better flavor in the dough over time. Ensuring the correct salt content is essential for both the taste and the structural integrity of your grilling pizza dough recipe.
The Perfect Grilling Pizza Dough Recipe: BakeWithEase's Tested Formula
Developing a reliable grilling pizza dough recipe requires balancing hydration, flour type, and fermentation time to create a dough that can withstand the intense heat of the grill while still producing a delicious crust. This formula is designed to be forgiving yet yield excellent results.
Ingredients for the Ultimate Grilled Pizza Dough
This recipe uses a slightly higher hydration and bread flour for structure, perfect for the grill.
- High-quality bread flour: 500 grams
- Lukewarm water (about 90-100°F / 32-38°C): 350 grams (70% hydration)
- Active dry yeast or instant yeast: 2.5 grams (about 3/4 teaspoon)
- Fine sea salt: 10 grams (2% salt)
- Olive oil (optional, for dough and handling): 10-15 grams (about 1-2 tablespoons)
- Pinch of sugar (optional, for browning): 5 grams (1% sugar)
Ingredient Notes:
- Using a digital scale for accuracy is highly recommended for a consistent grilling pizza dough recipe.
- The water temperature is important for activating the yeast.
- Olive oil adds richness and helps with dough handling.
- The sugar is optional but aids in quicker browning on the grill.
Step-by-Step Instructions: Mixing, Kneading, and Proofing Your Dough
Follow these steps carefully to prepare your dough for grilling success.
- Activate the Yeast (if using active dry): In a large mixing bowl, combine the lukewarm water with the yeast and optional sugar (if using). Stir gently and let stand for 5-10 minutes until foamy. If using instant yeast, you can skip this step and add it directly with the flour.
- Combine Wet and Dry Ingredients: Add the flour and salt to the yeast mixture. If using olive oil, add it now.
- Mix the Dough:
- By Hand: Stir with a wooden spoon or spatula until a shaggy dough forms and no dry flour remains.
- Stand Mixer: Attach the dough hook. Mix on low speed until the dough comes together, about 1-2 minutes.
- Knead the Dough:
- By Hand: Turn the dough out onto a lightly floured surface. Knead for 8-10 minutes until the dough is smooth and elastic. It should pass the windowpane test (a small piece can be stretched thinly without tearing).
- Stand Mixer: Increase speed to medium-low. Knead for 6-8 minutes until the dough is smooth, elastic, and pulls away from the sides of the bowl.
- First Proof (Bulk Fermentation): Shape the dough into a ball. Lightly grease a clean bowl with olive oil. Place the dough in the bowl, turning to coat. Cover tightly with plastic wrap or a damp cloth. Let the dough rise at room temperature (ideally 70-75°F / 21-24°C) for 1.5 to 2 hours, or until doubled in size. Alternatively, for a more flavorful crust, refrigerate for 12-48 hours for a slow cold proof.
- Divide and Shape: Gently turn the dough out onto a lightly floured surface. Divide the dough into 2-4 equal portions, depending on your desired pizza size. Shape each portion into a taut ball.
- Second Proof (Bench Rest/Proofing): Place the dough balls on a lightly floured or oiled surface (like a baking sheet lined with parchment paper), ensuring they have space between them. Loosely cover with plastic wrap or a clean kitchen towel. Let rest for 30-60 minutes at room temperature. The dough balls should look visibly relaxed and slightly puffed. This bench rest is crucial before stretching your grilling pizza dough recipe portions.
Mastering the Grilling Technique: Achieving Pizza Perfection
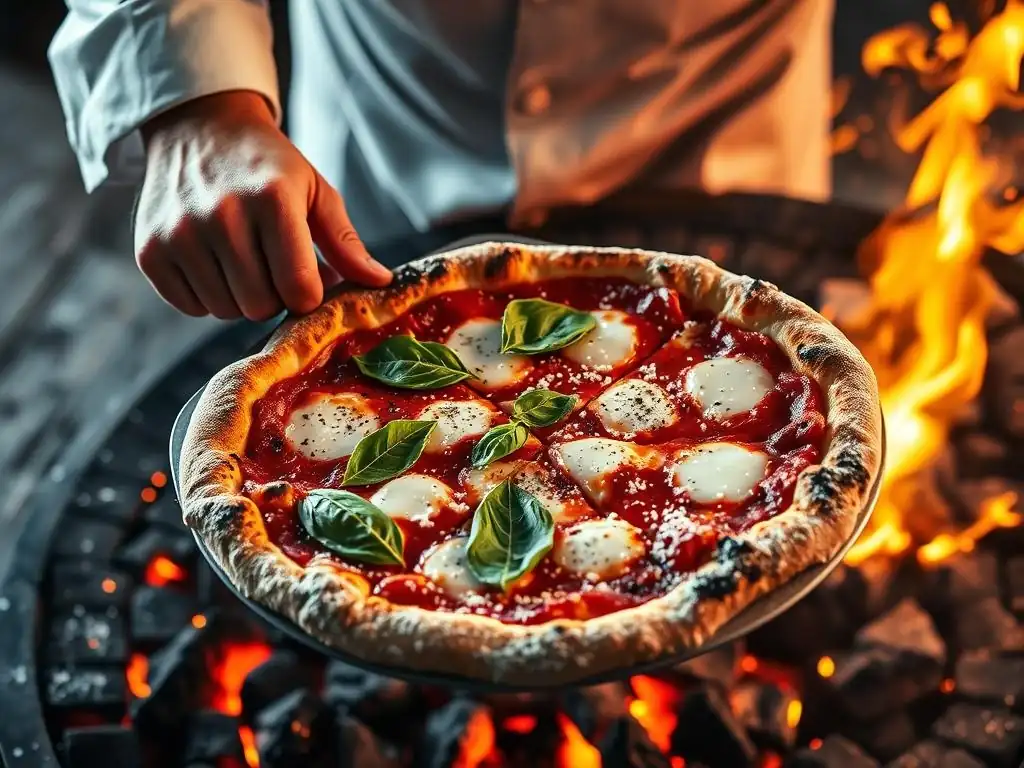
Successfully grilling pizza dough requires attention to detail, particularly regarding grill temperature and dough handling. Follow these steps to ensure a perfectly cooked crust every time.
Preparing Your Grill for Pizza: Temperature Control is Key
Proper grill preparation and temperature management are arguably the most critical factors for a successful grilling pizza dough recipe. You want the grill to be screaming hot, typically aiming for an internal temperature of 500-650°F (260-345°C). For gas grills, preheat with all burners on high for 10-15 minutes with the lid closed. For charcoal grills, pile coals on one side for direct heat and leave the other side empty for indirect heat, or distribute them evenly for high direct heat across the grate.
Once preheated, clean the grill grates thoroughly with a wire brush to remove any residue. This is essential to prevent the dough from sticking. Then, lightly oil the hot grates using tongs holding an oil-soaked paper towel or a grill brush designed for oiling. Be cautious as the oil can flame up.
Maintaining a consistent high temperature allows the dough to cook rapidly, achieving a crispy exterior before the interior overcooks. For gas grills, you might need to adjust burners down slightly after the initial char to manage the heat. For charcoal, adjusting vents controls temperature. Having a high-quality grill thermometer is invaluable when perfecting your grilling pizza dough recipe technique.
Stretching and Shaping Your Pizza Dough for the Grill
Stretching your grilling pizza dough recipe portion requires a gentle touch to maintain the airy structure developed during proofing. Avoid using a rolling pin, which can deflate the dough and result in a dense crust. Start by placing a proofed dough ball on a lightly floured surface. Gently press down from the center outwards, leaving a small rim for the crust.
Lift the dough and let gravity help stretch it, rotating the dough and using your knuckles or the backs of your hands to gently pull and stretch it into your desired shape (usually round or roughly rectangular to fit your grill space). If the dough springs back, let it rest for 5-10 minutes (this is called letting the gluten relax) before trying again. Aim for a thickness of about 1/8 to 1/4 inch (3-6mm), keeping the outer edge slightly thicker for the crust. Practice makes perfect with this step of the grilling pizza dough recipe process.
Grilling Your Pizza Dough: Avoiding Sticking and Burning
Grilling the dough itself is a rapid process. Carefully transfer the stretched dough onto the hot, oiled grill grates. This is often the trickiest part of the grilling pizza dough recipe. You can slide it directly from a pizza peel dusted with cornmeal or semolina, or gently lay it on by hand if comfortable. Close the lid for 1-3 minutes, just until the bottom is set, has visible grill marks, and the top surface begins to bubble and lose its raw look.
Using tongs, flip the dough over to the other side. This first side is now the "presentation" side that will hold your toppings and finish cooking indirectly (or less directly). Cook the second side for another 1-2 minutes, or until it has grill marks and is partially cooked but not yet fully browned. Now the crust is ready for toppings. This two-stage grilling process (cooking one side, flipping, topping, then finishing) helps prevent the bottom from burning while the toppings cook. Keep a close eye on the dough throughout this step of your grilling pizza dough recipe.
Topping Your Grilled Pizza: Tips for a Delicious Outcome
Once the dough has been partially grilled on both sides (flipped once), it's time to add your toppings. Work quickly, as the dough continues to cook. Start with a light layer of sauce; too much sauce can make the crust soggy. Add cheese sparingly, focusing on even distribution. Then, add your pre-cooked or thinly sliced raw toppings. Remember that toppings cook very quickly on a grilled pizza, so ingredients like raw sausage or dense vegetables should be pre-cooked before adding them to the pizza.
Once topped, move the pizza to a cooler part of the grill (if you set up zones) or reduce the heat if possible. Close the lid and continue grilling for another 2-5 minutes, or until the cheese is melted and bubbly and the crust is fully cooked and has achieved your desired level of char. The exact time will vary depending on your grill's temperature and the amount of toppings. This rapid topping and finishing stage is key to completing your grilling pizza dough recipe process successfully.
Troubleshooting Common Grilling Pizza Dough Problems
Even with a great grilling pizza dough recipe, you might encounter issues. Understanding how to identify and fix these problems is crucial for consistently great grilled pizza.
Dough Sticking to the Grill: Prevention and Solutions
Dough sticking to the grill is a frustrating but common problem when using a grilling pizza dough recipe. The primary cause is inadequate grill preparation. Prevention is key:
- Ensure your grill grates are spotlessly clean before heating. Old food residue is a major culprit.
- Preheat your grill to a sufficiently high temperature. Cold or lukewarm grates are more likely to grab onto dough. Aim for at least 500°F (260°C).
- Oil the hot grates generously just before adding the dough. Use a high-smoke point oil like canola or grapeseed.
- Ensure your dough is properly floured or has rested on a surface dusted with semolina or cornmeal before transferring.
- Transfer the dough quickly and confidently onto the hot grates. Hesitation can cause it to stick.
If sticking occurs:
- Immediately use a thin metal spatula or grill scraper to gently loosen the stuck areas. Work quickly before the dough sets too much.
- If a section tears, try to gently push the torn edges back together on the grill.
- Learn from the experience and double-check your preparation steps for the next pizza in your grilling pizza dough recipe batch.
Dough Burning Too Quickly: Adjusting Heat and Cooking Time
A crust that burns on the bottom before the toppings are cooked or the dough is cooked through indicates the grill temperature is too high or the dough is too thin in spots. This is a common challenge with a high-heat grilling pizza dough recipe.
- Solution 1: Reduce Heat: For gas grills, turn down the burners slightly after the initial preheat. For charcoal, spread the coals out more thinly or move the pizza to a cooler zone if you've set one up.
- Solution 2: Adjust Cooking Time: The first side of the dough (direct contact with grates) cooks very fast. Reduce the time on the first side (e.g., from 2-3 minutes down to 1-1.5 minutes) before flipping.
- Solution 3: Adjust Dough Thickness: Ensure your dough is stretched to a relatively even thickness (around 1/8 to 1/4 inch). Very thin spots will burn instantly.
- Solution 4: Use Indirect Heat: After the first flip, move the pizza to a cooler zone of the grill (if available) or turn off the burner directly underneath it (on a gas grill) and rely on ambient heat to finish cooking the toppings and top of the crust. This is an excellent technique for managing heat with your grilling pizza dough recipe.
Dough Not Cooking Through: Achieving a Crispy Crust and Cooked Center
If your grilled pizza crust is pale, dense, or raw in the center despite having grill marks, it usually means the grill temperature was too low, or the cooking time was insufficient.
- Solution 1: Increase Heat: Ensure your grill is properly preheated to a high temperature (500-650°F / 260-345°C) before adding the dough. If using charcoal, add more coals or ensure they are fully lit.
- Solution 2: Cook Longer (Carefully): After adding toppings, continue grilling with the lid closed for a few extra minutes. Monitor closely to prevent burning.
- Solution 3: Manage Toppings: Avoid overloading the pizza with too many wet or heavy toppings, as this can prevent the dough from cooking properly underneath.
- Solution 4: Consider Dough Thickness: If your dough is consistently raw in the middle, you might be stretching it too thick. Aim for a thinner crust (closer to 1/8 inch) when using your grilling pizza dough recipe.
- Solution 5: Use a Pizza Stone/Steel: Grilling on a preheated pizza stone or steel on the grill can help distribute heat more evenly and ensure the bottom cooks through. (See Advanced Techniques section).
Dough Shrinking on the Grill: Preventing Dough Contraction
If your beautifully stretched grilling pizza dough recipe portion shrinks back significantly on the grill, it's usually due to insufficient resting time or improper handling.
- Solution 1: Proper Bench Rest: Ensure your dough balls have had adequate time to rest (30-60 minutes) after dividing and shaping before you attempt to stretch them. This allows the gluten to relax.
- Solution 2: Gentle Stretching: Avoid aggressively pulling or forcing the dough when stretching. Use gravity and gentle pressure. If it resists, let it rest for 5-10 minutes before continuing.
- Solution 3: Avoid Over-Kneading: While strong gluten is good, over-kneading can create a dough that is too tight and prone to springing back. Ensure your kneading stops once the dough is smooth and elastic, not overly tough. A well-proofed grilling pizza dough recipe should stretch easily.
Advanced Grilling Pizza Dough Techniques: Elevate Your Pizza Game
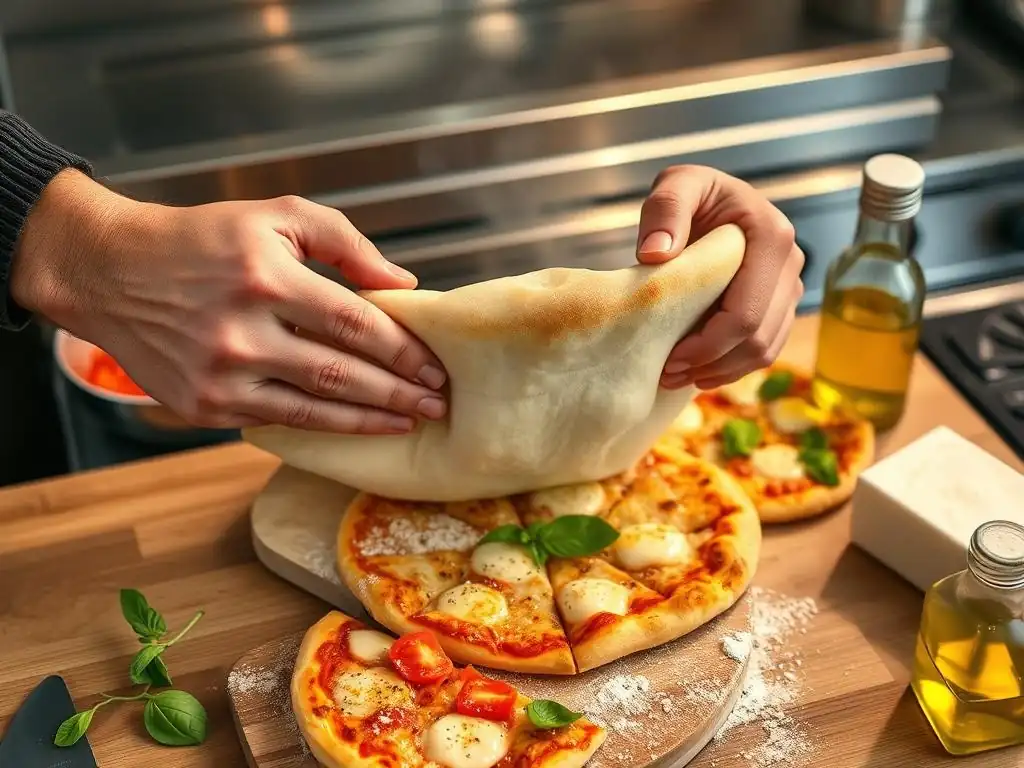
Once you've mastered the basics of grilling pizza dough, you can explore more advanced techniques to fine-tune your results and experiment with different textures and flavors.
Using a Pizza Stone or Steel on the Grill: Enhancing Heat Distribution
Using a pizza stone or baking steel on your grill can significantly improve heat distribution and mimic the effect of a pizza oven floor. Place the stone or steel on the grill grates before preheating. Allow it to heat up with the grill for at least 20-30 minutes, reaching the same high temperature as the grill itself (500-650°F+).
When you're ready to grill, slide your stretched and topped grilling pizza dough recipe directly onto the hot stone or steel using a pizza peel. This provides a consistent, intense heat source directly to the bottom of the crust, resulting in a crispier base and more even cooking. It also helps shield the bottom of the dough from potential flare-ups on charcoal grills. While direct grilling is faster and provides more char, using a stone or steel offers a more controlled cook and is excellent for achieving a uniformly crispy crust when refining your grilling pizza dough recipe skills.
Grilling Pizza Dough Directly on the Coals: For the Adventurous Baker
Grilling pizza dough directly on the coals (or embers) is an ancient technique that yields an incredibly fast cook and intense char. This method is not for the faint of heart and requires practice and careful heat management. You need a bed of hot, glowing coals without active flames.
Stretch your dough as usual. Instead of placing it on grates, carefully lay the dough directly onto a section of the hot embers. It will cook incredibly fast, often just 30-60 seconds per side. Use long tongs to flip it. Once charred on both sides, quickly move it to a cooler area (like a grill grate or a metal pan) to add toppings and finish with residual heat, or finish it under a broiler indoors. This method requires a resilient grilling pizza dough recipe and constant vigilance, but the results are uniquely smoky and crispy.
Experimenting with Different Flours for Unique Flavors and Textures
While bread flour is standard for its strength in a grilling pizza dough recipe, experimenting with other flours can introduce new flavors and textures.
- '00' Flour: Using a portion of '00' flour (mixed with bread flour) can create a very tender interior crumb while maintaining a crispy exterior.
- Whole Wheat Flour: Substituting a small percentage (10-20%) of whole wheat flour adds a nutty flavor and extra fiber, though it can make the dough less extensible. You might need slightly more water.
- Semolina Flour: Adding a small amount (5-10%) of fine semolina to the dough or using it for dusting provides a slightly coarser texture and a pleasant chew.
- Rye Flour: A tiny percentage (under 5%) of rye flour can add a distinct tang and depth of flavor.
Each flour affects gluten development and hydration, so adjustments to your base grilling pizza dough recipe may be necessary. Start with small substitutions and observe how the dough behaves on the grill.
Beyond the Basics: Creative Grilled Pizza Ideas
Once you've mastered the grilling pizza dough recipe, the possibilities for toppings and styles are endless. Grilled pizza is incredibly versatile and lends itself to both savory and sweet creations.
Grilled Pizza Topping Combinations: Inspiration for Your Next Pizza Night
The rapid cooking time of grilled pizza means toppings should be chosen carefully. Lighter, fresher toppings work exceptionally well.
- Classic Margherita: San Marzano tomatoes, fresh mozzarella slices, fresh basil, drizzle of olive oil. Simple, fresh, perfect on the grill.
- Prosciutto and Arugula: After grilling the dough with a light layer of cheese, top with thinly sliced prosciutto and a pile of fresh, lightly dressed arugula after it comes off the grill.
- Grilled Vegetable Pizza: Grill vegetables like zucchini, bell peppers, and onions beforehand. Add them to the grilled dough with cheese.
- Spicy Sausage and Broccoli Rabe: Pre-cook crumbled Italian sausage and blanch broccoli rabe. Top the grilled dough with these, garlic, and provolone cheese.
- Fig and Goat Cheese: A sweet and savory delight. Top with fig jam, crumbled goat cheese, and a sprinkle of fresh rosemary. Add a drizzle of balsamic glaze after grilling.
Remember to avoid excessively wet toppings or too much cheese, which can weigh down the dough and prevent it from cooking evenly on the grill. The best toppings for a grilling pizza dough recipe are those that cook quickly or are added fresh after grilling.
Grilled Dessert Pizza: A Sweet Treat on the Grill
Who says pizza has to be savory? Grilling pizza dough is a fantastic way to create unique dessert pizzas.
- Grilled Fruit Pizza: Grill the dough plain until cooked. Remove from grill. Spread with a sweetened mascarpone or cream cheese mixture. Top with fresh berries, grilled peaches, or grilled pineapple. Drizzle with honey or a balsamic reduction.
- Nutella and Banana: Grill the dough plain. Spread with Nutella after removing from the grill. Top with sliced bananas and a sprinkle of chopped nuts.
- S'mores Pizza: Grill the dough plain. Top with chocolate pieces and marshmallows. Return to a cooler part of the grill or cover briefly until marshmallows are gooey and toasted.
For dessert pizzas, grill the dough first until fully cooked, then remove it from the grill before adding toppings that could melt too quickly or burn (like chocolate or marshmallows) or fresh fruit that you don't want to cook. This ensures a perfectly cooked crust for your sweet grilling pizza dough recipe creation.
Storing Leftover Grilled Pizza Dough: Keeping Your Dough Fresh
Proper storage is key to preserving the quality of your unused grilling pizza dough recipe portions. With the right techniques, you can enjoy delicious grilled pizza again another day.
Proper Storage Techniques for Uncooked Pizza Dough
Uncooked pizza dough can be stored in the refrigerator or freezer.
- Refrigerator: This is ideal for dough you plan to use within a few days. After the initial bulk fermentation (first rise), divide and shape the dough balls. Lightly oil each dough ball and place them in individual airtight containers or freezer-safe bags, pressing out as much air as possible. Refrigerate for up to 3-4 days. Cold fermentation actually improves the flavor and texture of your grilling pizza dough recipe over time.
- Freezer: For longer storage, freezing is an excellent option. After dividing and shaping the dough balls, flash freeze them on a baking sheet lined with parchment paper until solid (about 2 hours). Once frozen, transfer the dough balls to a freezer-safe bag or container, removing excess air. Frozen grilling pizza dough can be stored for up to 2-3 months.
Always label the containers or bags with the date so you know how long the dough has been stored.
Reviving Day-Old Grilled Pizza Dough: Tips and Tricks
If you've stored uncooked grilling pizza dough in the refrigerator, it needs time to come back to temperature and relax before stretching. Remove the dough from the refrigerator 1-2 hours before you plan to grill. Keep it in its covered container at room temperature. The dough should become soft, pliable, and easy to work with.
If you've frozen your grilling pizza dough recipe portions, thawing requires more time. Transfer the frozen dough ball to a lightly oiled container or bag and place it in the refrigerator for 24 hours to thaw slowly. Once thawed, remove it from the refrigerator 1-2 hours before grilling to bring it to room temperature and allow it to relax, as described above. Avoid thawing at room temperature for extended periods, as this can lead to over-proofing and a less desirable crust texture.
Frequently Asked Questions
How does a pizza dough recipe for grilling differ from a regular pizza dough recipe?
Grilling pizza dough requires a dough that's slightly stiffer and less sticky than a typical oven-baked dough. This helps it hold its shape on the grill and prevent it from falling through the grates. Often, the recipe will have slightly less water.
What kind of flour is best for grilling pizza dough?
High-protein flour, like bread flour, is ideal for grilling pizza dough. It creates a strong gluten structure that can withstand the heat and handling on the grill, resulting in a chewier crust.
What's the best way to prepare the grill for cooking pizza dough?
Preheat your grill to a medium-high heat. Ensure the grill grates are clean and oiled to prevent sticking. You can use a grill brush and a paper towel dipped in oil to achieve this.
How do I prevent my pizza dough from sticking to the grill?
Besides thoroughly cleaning and oiling the grates, you can lightly dust the pizza dough with flour or cornmeal before placing it on the grill. Also, ensure the grill is hot enough, so the dough sears quickly.
How do I know when the pizza dough is cooked enough on the grill?
Look for light char marks on the bottom of the dough. The dough should also be puffed up and slightly firm. Flip it over to grill the other side once the first side is cooked enough.
Final Reflection: The Unexpected Joy of Grilled Pizza
The perfect grilled pizza isn't just about a recipe; it's about embracing the unpredictable dance between heat, dough, and your own culinary intuition. This article explored the nuances of adapting your favorite pizza dough recipe for the grill, highlighting the importance of adjustments based on your specific grill, the weather, and even the type of flour you use. Mastering this process unlocks a world of flavor and texture unavailable to oven-baked pizzas.
The journey of perfecting grilled pizza dough has been a fascinating exploration of both precision and improvisation for me. It's a testament to the power of adapting established techniques to new environments. The best recipes are those that inspire, not dictate.
This quote perfectly encapsulates the spirit of grilling pizza. It's not about slavishly following instructions, but about understanding the principles and using them to create something uniquely your own, reflecting your personal style and the resources at hand. The subtle char, the smoky aroma, the slightly crisp crust – these are the hallmarks of a truly memorable grilled pizza experience, and they are born from experimentation and a willingness to learn from each attempt.
Now it's your turn. Don't be afraid to experiment with your favorite pizza dough recipe on the grill. Embrace the challenges, learn from the mistakes, and savor the triumphs. Each grilled pizza you create will be a testament to your culinary journey, a delicious reflection of your personal touch. So, fire up your grill, gather your ingredients, and embark on your own adventure in the world of grilled pizza perfection. The rewards are well worth the effort.
Unleash Your Inner Pizzaiolo: Grill-Ready Dough Awaits!
Thanks for taking the time to explore the art of grilling pizza dough! You've now got the knowledge to create perfectly charred, flavourful pizzas. Ready to take your skills to the next level?
- Master the grill: Try out the adjusted recipe immediately – note the differences in cooking time and crust texture. You might be surprised by the results!
- Experiment with toppings: Go beyond the basics! What unexpected flavour combinations will you create on your next grilled pizza?
- Share your pizza-making journey: Show us your grilled pizza creations on social media! Use #BakeWithEaseGrilledPizza to inspire others.
What unique grilling technique will you try next to elevate your pizza game?