
Troubleshooting Common GlutenFree Bread Baking Problems

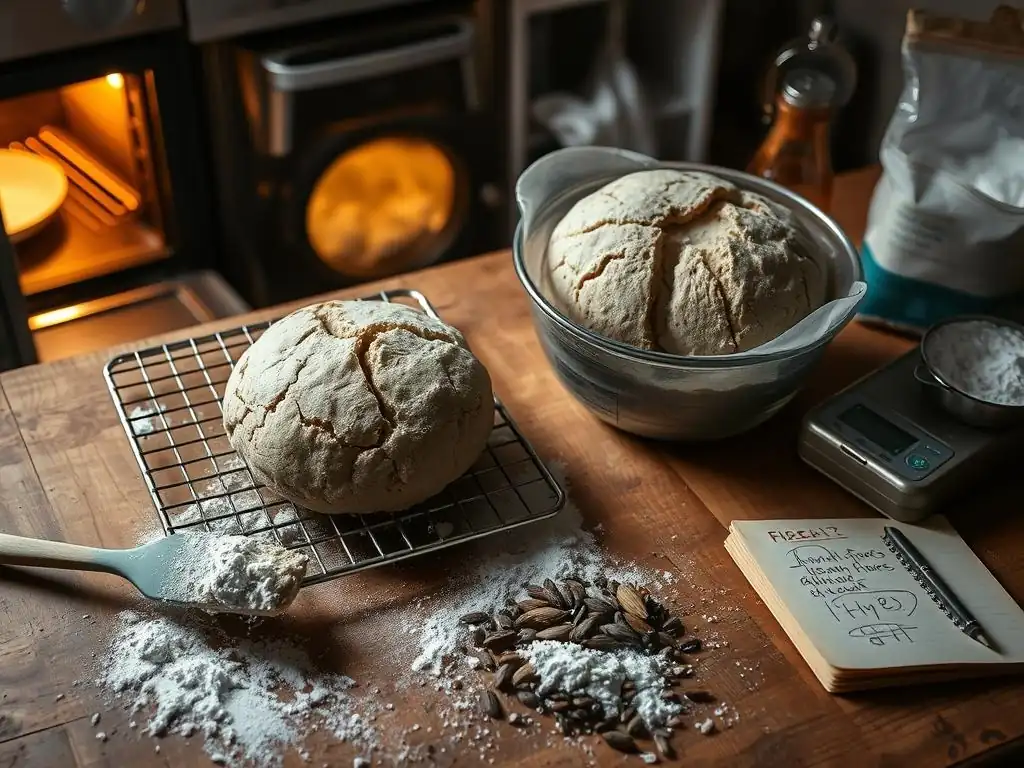
Welcome to BakeWithEase, your trusted companion on your baking journey! Ever wondered why your gluten-free bread just isn't rising the way it should? Or perhaps it's gummy, crumbly, or simply... disappointing? Dive into "Troubleshooting Common GlutenFree Bread Baking Problems" below to unlock the secrets to perfect gluten-free loaves and say goodbye to baking frustrations. Let's bake with ease and turn those gluten-free dreams into delicious reality!
- Troubleshooting Common Gluten-Free Bread Baking Problems: Bake With Ease
- Introduction to Gluten-Free Bread Baking Challenges
- Common Gluten-Free Bread Baking Problems and Solutions
- Optimizing Your Gluten-Free Bread Baking Technique
- Advanced Tips for Gluten-Free Bread Baking Success
- Conclusion: Conquer Your Gluten-Free Bread Baking Challenges
-
Frequently Asked Questions
- What are some common problems people face when baking gluten-free bread?
- Why does my gluten-free bread often turn out dense and heavy?
- My gluten-free bread doesn't seem to rise properly. What could be the reason?
- How can I prevent my gluten-free bread from being too crumbly?
- What are some good gluten-free flour blends to use for successful bread baking?
- Final Reflection: The Joy (and Challenges!) of Gluten-Free Baking
- Unlock the Secrets to Perfectly Gluten-Free Bread!
Troubleshooting Common Gluten-Free Bread Baking Problems: Bake With Ease
Introduction to Gluten-Free Bread Baking Challenges
Why Gluten-Free Bread Baking Can Be Tricky
Gluten-free bread baking presents a unique set of challenges compared to traditional wheat-based baking. The primary hurdle lies in the absence of gluten, the protein network that provides structure, elasticity, and chewiness to conventional bread. Without this vital component, achieving a light, airy texture and a stable crumb can feel like a daunting task. Bakers often encounter issues such as dense loaves, crumbly slices, or bread that fails to rise properly.
Successfully navigating these glutenfree bread baking problems requires a different understanding of dough structure and ingredient interactions. Gluten-free flours lack the inherent ability to form the elastic network needed to trap the carbon dioxide produced by yeast, which is what makes bread rise. This necessitates the use of alternative binders and specific techniques to mimic some of gluten's functions, often involving a blend of different flours and starches, along with gums or seeds like psyllium husk. Mastering these nuances is key to baking delicious gluten-free bread.
Understanding the Role of Gluten in Traditional Bread
In traditional bread making, gluten is developed when water is combined with wheat flour and mixed or kneaded. The proteins glutenin and gliadin link together, forming a stretchy, elastic network. This network acts like a balloon, trapping the gases produced by yeast during fermentation. This trapped gas causes the dough to rise, creating the characteristic airy texture of wheat bread.
Beyond just providing structure for rising, the gluten network also contributes significantly to the texture, shape, and overall mouthfeel of the finished loaf. It gives bread its chewiness and helps it hold its shape during baking. When this network is absent in gluten-free baking, bakers must rely on other ingredients and techniques to replicate these crucial functions, directly addressing the common glutenfree bread baking problems that arise from its omission.
Common Gluten-Free Bread Baking Problems and Solutions
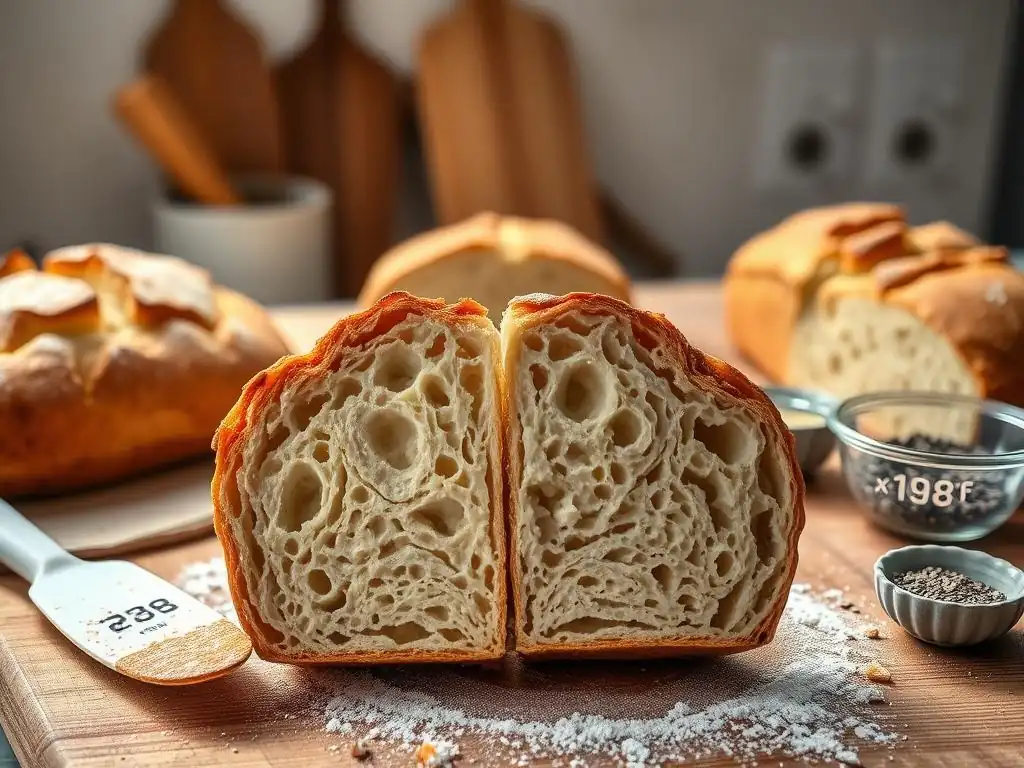
Problem #1: Dense and Gummy Gluten-Free Bread
Cause: Inadequate Starch Blend
Using a gluten-free flour blend that relies too heavily on dense, whole-grain flours without enough lighter starches can result in a heavy, gummy loaf. Starches like tapioca starch, potato starch, or cornstarch are essential for providing lightness and tenderness to gluten-free baked goods. If the ratio of protein-rich flours (like brown rice or sorghum) to starches is too high, the final texture will be dense and potentially sticky or gummy.
A common issue is using a single-ingredient gluten-free flour or a pre-made blend not specifically formulated for bread. These often lack the necessary balance. For instance, a blend that's 80% brown rice flour and 20% tapioca starch might work for cookies but will likely yield a brick-like loaf of bread.
Solution: Adjust Starch Ratio for Lighter Texture
To combat density and gumminess, adjust your flour blend to include a higher proportion of starches. A good starting point for many gluten-free bread recipes is a blend where starches make up roughly 30-50% of the total flour weight. For example, a blend might consist of 40% brown rice flour, 20% white rice flour, 20% tapioca starch, and 20% potato starch. Experimenting with different ratios and types of starch (like substituting some tapioca for cornstarch) can significantly improve texture.
Consider using a blend specifically designed for gluten-free bread, or create your own balanced mix. Adding starches helps absorb liquid and contributes to the airy pockets needed for a lighter crumb. Remember that different starches behave slightly differently; tapioca provides chewiness, while potato starch adds tenderness. Finding the right combination for your recipe is key to overcoming this common glutenfree bread baking problem.
Cause: Too Much Moisture
Gluten-free dough often requires more liquid than wheat dough, but adding too much moisture can lead to a gummy, wet interior that never seems to bake through properly. Unlike wheat flour, gluten-free flours don't absorb liquid in the same way and don't develop a strong protein network to hold excess water. This can leave the inside of the loaf heavy and sticky.
Excess moisture can also hinder proper rising, as the dough becomes too heavy for the yeast and binding agents to lift effectively. The result is a loaf that might look okay on the outside but is dense and unpleasant to eat due to its gummy interior. This is a frequent cause of frustration when troubleshooting glutenfree bread baking problems.
Solution: Reduce Liquid or Increase Flour
Carefully measure your liquids (water, milk, eggs, oil). Gluten-free dough should typically resemble a thick batter or a very wet, sticky dough – not a firm, kneadable mass like wheat dough. If your dough seems excessively liquid, try slightly reducing the amount in your next attempt. Start by decreasing the liquid by 10-15% and see how the dough behaves.
Alternatively, if you've already added the liquid, you can carefully mix in a small amount of your gluten-free flour blend, perhaps 1-2 tablespoons at a time, until the consistency is correct. The dough should drop from a spoon slowly rather than pour easily. Keep a consistent measuring method (like using a scale for accuracy) to better control the moisture level from batch to batch.
Cause: Insufficient Baking Time
Underbaking is a primary culprit behind gummy gluten-free bread. Even if the crust looks golden brown, the interior may still be too wet and undercooked, resulting in a dense, sticky texture. Gluten-free bread often takes longer to bake through than its wheat counterpart because the starches need sufficient heat to gelatinize and set the structure.
Pulling the loaf out of the oven too soon means the internal temperature hasn't reached the point where the structure is fully stable. The steam and moisture inside the loaf haven't had enough time to dissipate or integrate properly, leaving a heavy, wet crumb. This is a critical factor when tackling glutenfree bread baking problems related to texture.
Solution: Bake Longer and Check Internal Temperature
Always bake gluten-free bread until it reaches the correct internal temperature. For most loaves, this is between 200-210°F (93-99°C) when measured with an instant-read thermometer inserted into the center of the loaf. Don't rely solely on visual cues or the time specified in the recipe, as oven temperatures can vary.
If the crust is browning too quickly before the interior is done, loosely tent the loaf with aluminum foil for the last 15-20 minutes of baking. This protects the crust while allowing the inside to finish cooking. Adding an extra 5-15 minutes to the bake time can make a significant difference in preventing a gummy center and achieving a light, well-baked loaf.
Problem #2: Crumbly Gluten-Free Bread
Cause: Lack of Binding Agents
Without the gluten network, gluten-free bread relies heavily on added binding agents to hold it together. If a recipe doesn't include sufficient quantities of ingredients like xanthan gum, psyllium husk, ground flaxseed, chia seeds, or eggs, the baked loaf will lack the structure needed to prevent it from falling apart. The crumb will be loose and fragile.
Different binding agents work in different ways. Xanthan gum and psyllium husk create a gel-like structure that mimics some of gluten's elasticity and binding capabilities. Eggs add protein and fat, which help bind and tenderize. Omitting or reducing these critical ingredients significantly contributes to common glutenfree bread baking problems like excessive crumbling.
Solution: Use Xanthan Gum or Psyllium Husk for Structure
Incorporate an appropriate amount of a binding agent into your recipe. Xanthan gum is a popular choice, typically used at about 1/2 teaspoon per cup of gluten-free flour blend for yeast bread. Psyllium husk (either whole or powdered) is another excellent option, often used at 1-2 tablespoons per cup of flour, and it tends to produce a less gummy texture than xanthan gum for some bakers.
If your recipe already calls for one, ensure you are using the correct type and amount specified. Adding slightly more (e.g., an extra 1/4 teaspoon of xanthan gum or 1/2 tablespoon of psyllium husk) can sometimes help improve structure in a crumbly loaf. Ground flaxseed or chia seeds, when soaked, also form a gel that can aid in binding, offering alternatives or additions to gum-based binders.
Cause: Insufficient Moisture
While too much moisture causes gumminess, too little moisture is a major contributor to crumbly gluten-free bread. Dry dough doesn't have enough liquid for the flours and starches to hydrate properly, nor for the binding agents to activate and form a cohesive structure. The result is a dry, brittle crumb that easily breaks apart.
Factors like using old, dry flour, inaccurate liquid measurements, or baking at too high a temperature can all lead to a lack of sufficient moisture in the final loaf. Recognizing this is key when troubleshooting glutenfree bread baking problems where crumbling is the main issue.
Solution: Add More Liquid or Oil
Ensure your recipe has adequate hydration. As mentioned before, gluten-free dough is usually wetter than wheat dough. If your dough feels stiff or dry before baking, it likely needs more liquid. Try adding an extra 1-2 tablespoons of water, milk, or other liquid specified in the recipe. The dough should be wet and sticky, almost like a thick cake batter or muffin batter, depending on the recipe style.
Adding a bit more fat, such as oil or melted butter (e.g., an extra tablespoon), can also help tenderize the crumb and prevent dryness, which in turn reduces crumbling. Fats coat the flour particles, inhibiting them from sticking together too tightly and creating a softer, less brittle texture.
Cause: Over-mixing the Dough
Unlike wheat dough, which benefits from kneading to develop gluten, gluten-free dough does not require extensive mixing. Over-mixing can introduce too much air or, paradoxically, can sometimes break down the fragile structure created by the binding agents and starches before baking. This can lead to a less cohesive dough and a crumbly result.
While you need to mix enough to fully combine ingredients and activate binders, vigorous or prolonged mixing beyond that point offers no benefit and can be detrimental. This is a subtle but important distinction when addressing glutenfree bread baking problems related to crumb structure.
Solution: Gently Combine Ingredients
Mix gluten-free dough just until the ingredients are thoroughly combined and there are no dry pockets of flour. Use a stand mixer on low to medium speed for a few minutes (typically 3-5 minutes is sufficient) or mix by hand with a sturdy spoon or spatula until smooth. The goal is to hydrate all the flours and fully incorporate the binders and leavening agents.
Avoid the vigorous, prolonged kneading associated with wheat bread. Once the dough is uniform and sticky, stop mixing. Over-mixing will not create more structure; it might actually work against the binding agents you've added to prevent crumbling.
Problem #3: Flat or Collapsed Gluten-Free Bread
Cause: Insufficient Rise
If your gluten-free bread comes out flat or dense, the primary culprit is often insufficient rise during the proofing stage. This can happen for several reasons, including inactive yeast, a proofing environment that is too cold or too hot, or insufficient proofing time. Without adequate fermentation and gas production from the yeast, the dough simply doesn't expand enough to create a light loaf.
Inactive yeast is a common issue. Yeast is a living organism and needs to be fresh and properly activated. If your yeast is old or killed by hot liquid, it won't produce the necessary carbon dioxide to make the bread rise. This directly leads to one of the most visible glutenfree bread baking problems: a flat loaf.
Solution: Optimize Yeast Activation and Proofing Time
Ensure your yeast is active by proofing it first in warm liquid (around 105-115°F or 40-46°C) with a pinch of sugar. It should become foamy within 5-10 minutes. If it doesn't, your yeast is likely dead, and you'll need a fresh packet. Provide a warm, draft-free environment for proofing, ideally around 75-85°F (24-29°C). Options include a slightly warmed oven (turned off! ), a proofing box, or simply covering the dough and placing it in a warm spot.
Monitor proofing time closely. Gluten-free bread often rises faster than wheat bread. Proof until the dough has visibly increased in size, perhaps 50-75%, but not necessarily doubled. Over-proofing can also cause collapse (see below), so finding the sweet spot is crucial. Typical proofing times can range from 30 minutes to an hour, depending on the recipe and environment.
Cause: Oven Temperature Too Low
Baking gluten-free bread in an oven that is not hot enough can result in a loaf that doesn't get the necessary "oven spring" – the final burst of rising that occurs in the initial hot minutes of baking. If the oven temperature is too low, the structure sets too slowly, and the dough can spread outwards rather than rising upwards, leading to a flat loaf.
An inaccurate oven thermostat is a common issue. What your oven dial says might not be the actual temperature inside. Using an oven thermometer is essential for verifying the temperature and addressing this potential cause of glutenfree bread baking problems.
Solution: Ensure Accurate Oven Temperature
Always preheat your oven for at least 20-30 minutes after it indicates it has reached the set temperature. This allows the oven walls and racks to heat up thoroughly, providing consistent heat. Use a separate oven thermometer placed inside to verify that the temperature is accurate. If your oven consistently runs cool, adjust the dial accordingly (e.g., set it 25°F higher than the recipe calls for).
Baking at the correct temperature, often between 350-425°F (175-220°C) depending on the recipe, is vital for setting the structure quickly and achieving good oven spring. A higher initial temperature followed by a slight reduction is common in some recipes to promote crust development and thorough baking.
Cause: Over-Proofing
While insufficient rise leads to flatness, letting gluten-free dough proof for too long can also cause collapse. Over-proofing occurs when the yeast consumes all the available sugars and produces maximum gas before the dough goes into the oven. The structure, which is already fragile in gluten-free dough, cannot hold the excessive gas, and the dough weakens.
When over-proofed dough is moved or placed in the oven, the delicate structure collapses, resulting in a flat or sunken loaf with a potentially dense, gummy texture. This is a tricky balance to manage when troubleshooting glutenfree bread baking problems related to rise.
Solution: Monitor Proofing Closely
Learn to recognize the visual cues of properly proofed gluten-free dough. It should look puffy and have increased in size significantly, but it shouldn't look overly stretched or fragile. A common test is the "poke test": gently poke the dough with a floured finger. If the indentation springs back slowly and only partially, it's likely ready. If it springs back immediately, it needs more time. If it stays indented completely, it's likely over-proofed.
Bake the dough as soon as it reaches the optimal proofing stage. Don't wait too long, especially in a warm environment. If you think your dough is rising too quickly, you can slightly lower the proofing temperature or shorten the proofing time in your next batch. It's better to slightly under-proof than significantly over-proof.
Problem #4: Gluten-Free Bread That is Too Dry
Cause: Overbaking
Baking gluten-free bread for too long or at too high a temperature can easily result in a dry, hard loaf. The excess heat evaporates too much moisture from the interior, leaving the crumb parched and unpleasant. While sufficient baking time is needed to prevent gumminess, there's a point where the benefits cease and detrimental dryness begins.
Relying solely on the recipe time without checking for doneness (like internal temperature) increases the risk of overbaking. Different ovens, loaf sizes, and pan types can all affect baking time, making a thermometer an invaluable tool in avoiding this common glutenfree bread baking problem.
Solution: Reduce Baking Time and Monitor Internal Temperature
As mentioned earlier, using an instant-read thermometer is the most reliable way to determine when gluten-free bread is perfectly baked. Aim for an internal temperature of 200-210°F (93-99°C). Start checking a few minutes before the recipe's minimum suggested baking time.
If the crust is browning quickly but the interior isn't done, tenting with foil is crucial to slow down the crust development and prevent it from becoming too hard and dry while the inside finishes baking. Make a note of the actual time it takes in your oven for future reference, as it might differ from the recipe.
Cause: Using the Wrong Flour Blend
Some gluten-free flours are naturally drier and more absorbent than others. Using a blend that is too heavy on these types of flours without balancing them with more hydrating options or sufficient liquid can lead to a dry loaf. For example, blends high in white rice flour or certain types of bean flours can sometimes result in dryness if not formulated correctly.
A pre-made blend that works well for cakes or muffins might be too low in fat or too high in absorbent flours for successful bread baking. Choosing a blend specifically designed for yeast bread or understanding how different flours behave is key to preventing dryness and other glutenfree bread baking problems.
Solution: Select a Hydrating Gluten-Free Flour Mix
Opt for gluten-free flour blends that incorporate more hydrating flours like oat flour, sorghum flour, or even a small amount of nut flours (like almond flour, though use sparingly in yeast bread). Ensure the blend also includes sufficient starches (tapioca, potato, corn) which contribute to a tender, less dry crumb when properly hydrated and baked.
If using a blend you suspect is too dry, consider adding a bit more liquid than the recipe calls for, or increasing the fat content slightly (see below). Pay attention to how the dough feels; it should be quite wet and sticky, not stiff.
Cause: Insufficient Fat Content
Fat, in the form of oil, butter, or shortening, plays a significant role in the tenderness and moisture retention of bread, including gluten-free varieties. Recipes that are too low in fat can result in a crumb that is dry, crumbly, and lacks richness. Fat coats the starch molecules, preventing them from forming a dense, hard structure and helping the bread stay moist longer after baking.
Many gluten-free bread recipes benefit from a higher fat content than traditional wheat bread to compensate for the lack of gluten structure and inherent moisture from wheat proteins. A lack of adequate fat is a common oversight leading to dry glutenfree bread baking problems.
Solution: Add Oil or Shortening to the Recipe
If you find your gluten-free bread is consistently too dry, try increasing the amount of fat in your recipe. For a standard loaf (around 1.5 - 2 lbs), adding an extra 1-2 tablespoons of a neutral-flavored oil (like vegetable or canola) or melted butter can make a noticeable difference in moisture and tenderness.
Some recipes might call for just a small amount of fat, or none at all. For a softer, moister crumb, aim for a recipe that includes at least 2-4 tablespoons of fat per loaf. This small addition can significantly improve the texture and shelf life of your gluten-free bread.
Problem #5: Gluten-Free Bread with an Unpleasant Taste
Cause: Using Bitter Gluten-Free Flours
Some gluten-free flours, particularly certain whole-grain varieties like buckwheat or millet, can have strong or slightly bitter flavors that are not appealing to everyone, especially in a plain bread. If your flour blend is heavily reliant on these flours without being balanced by milder options, the finished bread can have an off-putting taste.
Even flours like brown rice flour can sometimes have a slightly noticeable flavor profile. The combination of flours in a blend greatly impacts the final taste, and an unbalanced mix can contribute to glutenfree bread baking problems related to flavor.
Solution: Balance Flavors with Other Ingredients
If using flours with stronger flavors, ensure they are balanced within your blend by milder flours and starches like white rice flour, tapioca starch, or potato starch. Consider adding a small amount of sugar (1-2 teaspoons per loaf) to the recipe; while not enough to make the bread sweet, it can help round out and balance any slightly bitter notes from the flours.
Ingredients like a tablespoon of apple cider vinegar or lemon juice, often added to gluten-free bread recipes, can also help neutralize off-flavors and add a pleasant tang. Using dairy or non-dairy milk instead of water can also contribute to a richer, milder flavor profile.
Cause: Insufficient Salt
Salt is crucial in bread making for more than just flavor. It also affects yeast activity and strengthens the dough structure (even in gluten-free baking, it helps binders function). Too little salt results in bland, flat-tasting bread where any off-notes from the flours might become more prominent.
A lack of salt can make the bread taste dull and uninteresting, failing to complement toppings or stand alone. It's a simple ingredient, but its absence is a common reason for disappointing flavor in glutenfree bread baking problems.
Solution: Add an Adequate Amount of Salt to the Recipe
Ensure you are using the correct amount of salt specified in the recipe, and use a good quality salt like fine sea salt or table salt. For a standard loaf, the amount of salt is typically around 1 to 1.5 teaspoons. Avoid using coarse or flaky salts unless the recipe specifies, as they measure differently.
If your bread tastes bland, try slightly increasing the salt in your next batch by a quarter or half teaspoon. Be careful not to add too much, as excessive salt can inhibit yeast activity and make the bread taste overly salty. Finding the right balance enhances all the other flavors in the bread.
Cause: Using Old or Rancid Flours
Gluten-free flours, especially whole-grain varieties or those high in natural oils (like oat or nut flours), can go rancid over time, particularly if not stored properly. Rancid flours develop an unpleasant, often bitter or "off" smell and taste that will transfer directly to your finished bread, regardless of how well you follow the recipe.
Even if not fully rancid, flours that are simply old can taste stale or muted, contributing to a less vibrant flavor in the bread. This is a subtle but significant factor in glutenfree bread baking problems related to taste.
Solution: Ensure Flours are Fresh
Store your gluten-free flours properly to maintain freshness. Keep them in airtight containers in a cool, dark place. For longer storage, or for flours high in oils, the refrigerator or freezer is best. This significantly extends their shelf life and prevents them from going rancid.
Check the expiration dates on your flours and try to use them within a reasonable timeframe after opening. Before baking, give your flours a quick smell test; they should have a neutral or slightly sweet aroma, not an unpleasant or oily one. Discard any flours that smell "off" to ensure the best possible flavor in your gluten-free bread.
Optimizing Your Gluten-Free Bread Baking Technique
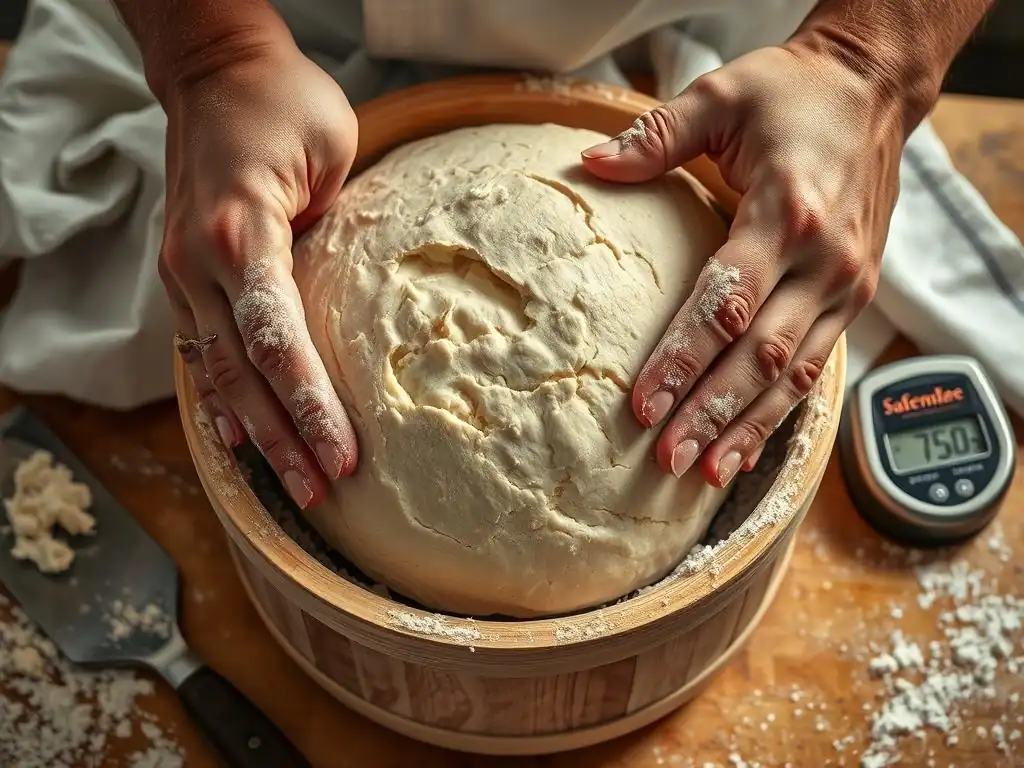
Choosing the Right Gluten-Free Flour Blend for Bread
Selecting an appropriate gluten-free flour blend is perhaps the single most important step in successful gluten-free bread baking. Not all blends are created equal, and a mix designed for cakes or cookies will likely fail when attempting a yeasted loaf. A good bread blend typically includes a mix of whole-grain flours for structure and flavor (like brown rice, sorghum, millet, or oat flour) and lighter starches for tenderness and lightness (like tapioca starch, potato starch, or cornstarch).
Look for blends specifically labeled for "bread" or "yeast baking." These are formulated with ratios of flours and starches, often including binders like xanthan gum or psyllium husk, that are optimized for the structure and rise needed in bread. Alternatively, you can create your own blend based on reliable recipes, allowing you to customize the flavor and texture while addressing common glutenfree bread baking problems proactively. For instance, a blend of 60% whole grain flours (like brown rice and sorghum) and 40% starches (like tapioca and potato) is a common starting point.
Mastering the Art of Gluten-Free Bread Dough Hydration
Gluten-free bread dough is fundamentally different from wheat dough in terms of consistency. It's typically much wetter and stickier, often resembling a thick batter rather than a traditional kneadable dough. This high hydration is necessary because gluten-free flours absorb less liquid than wheat flour, and the extra moisture is needed to help the binders activate and create a cohesive structure.
Learning what the correct dough consistency looks and feels like is crucial. It should be too sticky to knead by hand in the traditional sense. When scooped with a spoon, it should drop slowly and reluctantly. If it's too dry, it will be crumbly; if it's too wet, it will be gummy and may collapse. Many recipes provide a visual description or even a percentage of hydration (the ratio of liquid to flour weight), which can be helpful guides when tackling glutenfree bread baking problems related to texture.
The Importance of Proper Mixing and Kneading Techniques for Gluten-Free Dough
While gluten-free dough doesn't develop gluten through kneading, proper mixing is still vital. The goal is to fully hydrate all the flours and starches and, crucially, to thoroughly distribute and activate the binding agents (like xanthan gum or psyllium husk) and yeast throughout the dough. This ensures a uniform structure and consistent rise.
Mix the dough using a stand mixer with a paddle attachment or dough hook, or vigorously with a sturdy spoon or spatula, until everything is well combined and the dough is smooth and cohesive, usually for 3-5 minutes. Avoid the long, intense kneading used for wheat bread. Over-mixing can sometimes negatively impact the structure created by the binders. The technique is about incorporation and activation, not gluten development, which is a key distinction when addressing common glutenfree bread baking problems with crumb structure.
Perfecting Gluten-Free Bread Proofing and Baking
Successful gluten-free bread relies on careful proofing and precise baking. Gluten-free dough often rises faster than wheat dough, and it can also over-proof more easily, leading to collapse. Proof in a warm, draft-free environment (around 75-85°F or 24-29°C) until the dough has visibly increased in size, perhaps by 50-75%. Use the poke test to check for readiness; a slow, partial spring-back is ideal.
Baking requires a properly preheated oven with an accurate temperature. The initial heat provides oven spring, and baking until the internal temperature reaches 200-210°F (93-99°C) ensures the loaf is cooked through without being dry. Using a thermometer is the most reliable way to avoid under or overbaking, which are frequent glutenfree bread baking problems. If the crust browns too fast, tenting with foil is a simple solution.
Advanced Tips for Gluten-Free Bread Baking Success
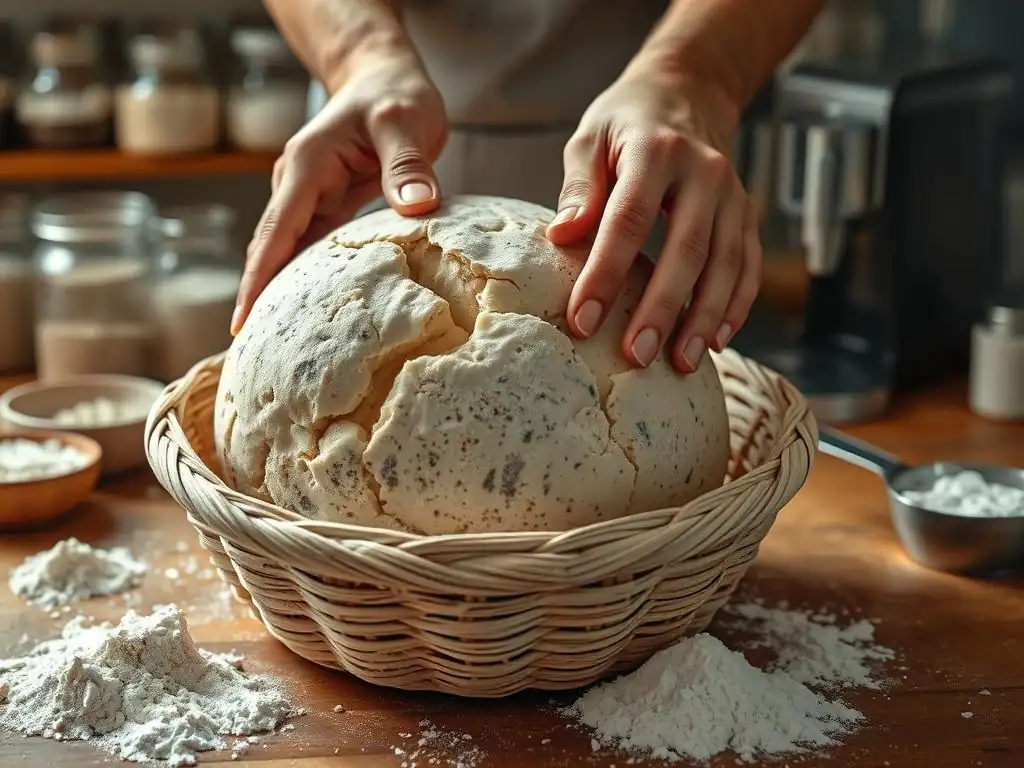
Using a Dutch Oven for Optimal Crust and Texture
Baking gluten-free bread in a preheated Dutch oven can dramatically improve the crust and interior texture. The heavy pot, with its lid on for the first part of baking, traps the steam released from the dough. This steamy environment keeps the surface of the loaf moist initially, allowing it to expand fully before the crust sets. This leads to better oven spring and a lighter, more open crumb.
After 20-30 minutes with the lid on, removing it allows the steam to escape and the crust to brown and crisp up beautifully. This technique effectively mimics the environment of a professional bakery oven with steam injection. Using a Dutch oven is a highly recommended method for achieving superior results and overcoming several common glutenfree bread baking problems like poor rise and a hard crust.
Adding Flavor and Texture with Seeds, Nuts, and Herbs
Once you've mastered the basic gluten-free loaf, incorporating additions like seeds, nuts, dried fruits, herbs, or spices can add wonderful flavor and texture dimensions. Seeds such as poppy, sesame, sunflower, or pumpkin seeds can be mixed into the dough or sprinkled on top for crunch. Chopped nuts like walnuts or pecans add richness and texture.
Dried herbs like rosemary, thyme, or dill, or spices like garlic powder or onion powder, can transform a plain loaf into a savory delight. Add these ingredients during the final stages of mixing the dough. For seeds sprinkled on top, brushing the loaf with a little water or egg wash before baking helps them adhere. These additions not only enhance taste but can also slightly alter the texture, providing a more satisfying bite and further addressing glutenfree bread baking problems related to density or lack of interest.
Storing Gluten-Free Bread to Maintain Freshness
Gluten-free bread tends to dry out faster than wheat bread due to its different structure and lack of gluten's moisture-retaining properties. Proper storage is essential to keep your homemade loaf fresh and palatable for as long as possible. Always allow the bread to cool completely on a wire rack before slicing or storing; slicing a warm loaf traps steam inside, leading to a gummy texture and quicker spoilage.
Once cool, store the bread in an airtight container, a bread box, or wrapped tightly in plastic wrap or beeswax wraps. For longer storage, slicing the cooled loaf and freezing the slices in a freezer bag or container is an excellent option. Frozen slices can be easily toasted or thawed as needed, preserving the quality and preventing waste, which is a practical solution to a common consequence of glutenfree bread baking problems – a rapidly staling loaf.
Conclusion: Conquer Your Gluten-Free Bread Baking Challenges
Frequently Asked Questions
What are some common problems people face when baking gluten-free bread?
Many bakers encounter issues like dense texture, lack of rise, and crumbly consistency when baking gluten-free bread. These are often due to the absence of gluten's binding properties.
Why does my gluten-free bread often turn out dense and heavy?
Gluten-free bread can be dense because it lacks the gluten network that provides structure and airiness in traditional bread. Using the right combination of flours and binders is crucial.
My gluten-free bread doesn't seem to rise properly. What could be the reason?
Insufficient rise in gluten-free bread is often caused by inactive or insufficient yeast, or a lack of structure to hold the gas produced during fermentation. Proper proofing is also essential.
How can I prevent my gluten-free bread from being too crumbly?
Crumbly gluten-free bread is a common problem. Using binders like xanthan gum or psyllium husk helps improve the bread's structure and prevents it from falling apart.
What are some good gluten-free flour blends to use for successful bread baking?
Experimenting with different blends is key. Many bakers find success with blends that include rice flour, tapioca starch, and potato starch, often in combination with a binder to mimic gluten.
Final Reflection: The Joy (and Challenges!) of Gluten-Free Baking
The quest for the perfect gluten-free loaf is a journey shared by millions, and the challenges remain very real. Despite advancements in flours and techniques, achieving that light, airy, and flavorful gluten-free bread many crave continues to be a significant hurdle for home bakers. This article has explored some of the most common pitfalls, offering solutions to help navigate this often frustrating, yet ultimately rewarding, process.
The impact of gluten-free baking extends far beyond simply providing an alternative for those with celiac disease or gluten sensitivity. It represents a growing culinary movement, a testament to the ingenuity and resilience of bakers constantly seeking innovative solutions. The search for the perfect texture, the perfect rise, the perfect crumb—it's a pursuit that mirrors our own human desire for perfection and mastery. The best bread is the bread you bake with love.
While the origin of this quote is uncertain, its sentiment rings true, especially in the context of gluten-free baking, where patience and persistence are paramount.
Now, it's your turn. Consider the tips and techniques discussed in this article, and don't be discouraged by initial setbacks. Experiment with different flours, adjust your hydration levels, and most importantly, embrace the learning process. Each failed loaf brings you closer to that perfect gluten-free bread, a testament to your dedication and a delicious reward for your efforts. The journey might be challenging, but the taste of success is undeniably sweet.
Unlock the Secrets to Perfectly Gluten-Free Bread!
Thanks for taking the time to explore the world of gluten-free baking with us! We hope you gained valuable insights and feel more confident tackling those tricky gluten-free loaves. Now it's time to put your newfound knowledge into action!
- Bake your dream gluten-free bread today! Experiment with a new recipe, focusing on the techniques you learned in the article. Don't be afraid to adjust the recipe based on your own flour blend.
- Share your baking triumphs (and challenges!) with us! We love seeing your creations and hearing your feedback – comment below and let’s connect!
- Explore our other gluten-free recipes for more inspiration. Discover new flavors and techniques to expand your baking horizons.
What unique twist will you add to your next gluten-free bread masterpiece?