
Soft & Chewy Pita Bread: Easy Homemade Recipe

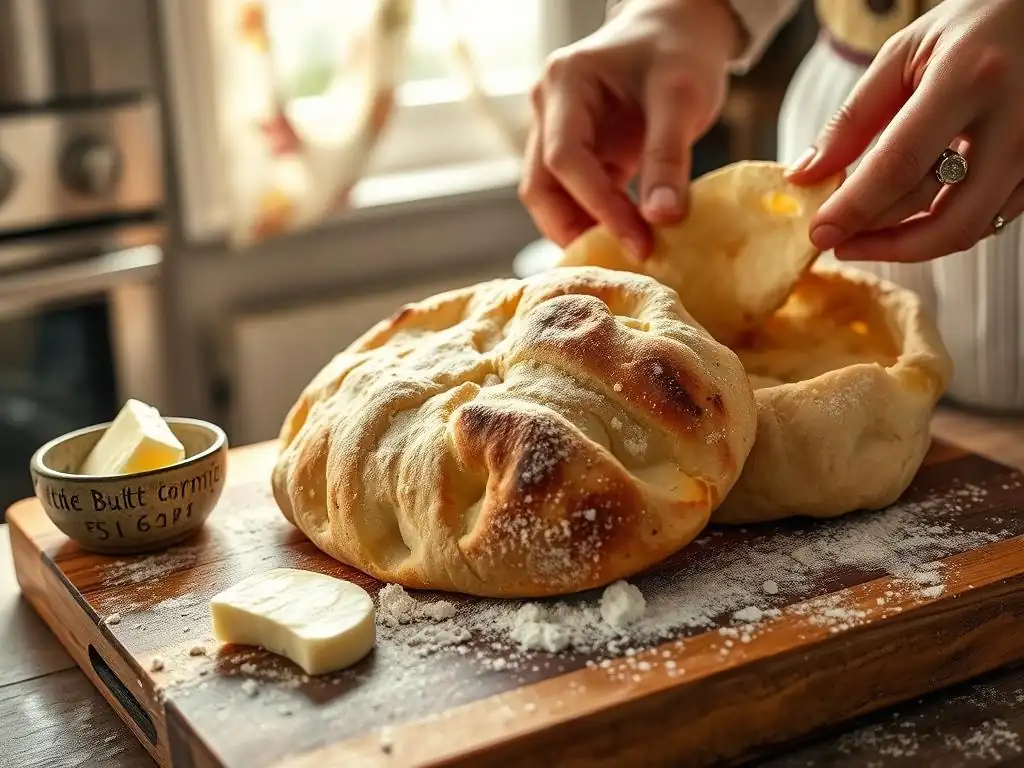
Welcome to BakeWithEase, your haven for effortless baking! Ever dreamed of perfectly puffed, irresistibly soft pita bread? Imagine biting into a warm, chewy pita, fresh from your own oven. Our easy homemade pita bread recipe will guide you through each step, demystifying the process and making delicious, authentic pita bread a reality. Intrigued? Let's unlock the secrets to baking pita bread that rivals the best you've ever tasted!
- Mastering Sourdough Bread: A Comprehensive Guide
- Bake Artisan Sourdough at Home
- Why This Sourdough Bread Recipe Stands Out
- Ingredients for Your Homemade Sourdough Bread
-
Step-by-Step Guide to Baking Artisan Sourdough Bread
- Preparing the Levain: Activating Your Sourdough Starter
- Autolyse: Hydrating the Flour for Enhanced Texture
- Mixing the Dough: Incorporating the Levain and Salt
- Bulk Fermentation: Developing Flavor and Strength
- Shaping the Dough: Building Tension for Optimal Rise
- Proofing: Preparing the Dough for Baking
- Scoring the Dough: Controlling Expansion in the Oven
- Baking the Sourdough: Achieving a Golden-Brown Crust
- Cooling and Storing Your Homemade Sourdough
- Tips for Baking the Best Homemade Sourdough Bread
- Serving Suggestions for Your Freshly Baked Sourdough Bread
- Mastering the Art of Sourdough Baking: Advanced Techniques
- Enjoy Your Delicious Homemade Sourdough Bread!
- Frequently Asked Questions
- Final Reflection: The Simple Joy of Homemade Pita
- Unleash Your Inner Baker: Craft the Perfect Pita!
Mastering Sourdough Bread: A Comprehensive Guide
Bake Artisan Sourdough at Home
Embarking on the journey of baking artisan sourdough bread at home is a rewarding experience that connects you to a time-honored tradition. Unlike commercial yeasts, sourdough relies on a natural leavening agent – a symbiotic culture of bacteria and yeast – to create bread with a unique tangy flavor, chewy texture, and beautiful crust. This guide will walk you through the process, demystifying the steps and helping you achieve bakery-quality results right in your own kitchen.
Creating your own homemade sourdough bread might seem daunting at first, given its reputation for being temperamental. However, with a solid understanding of the fundamentals and a bit of patience, anyone can learn to bake delicious sourdough. This comprehensive guide breaks down the process into manageable steps, focusing on the key elements that contribute to a successful loaf, from nurturing your starter to achieving that perfect golden-brown crust.
Why This Sourdough Bread Recipe Stands Out
This particular sourdough bread recipe is designed to be accessible yet produce truly exceptional results. It balances traditional methods with simplified techniques, making it suitable for both beginners and those looking to refine their sourdough skills. The focus is on understanding the why behind each step, empowering you to adapt and troubleshoot as you gain experience with homemade sourdough.
What sets this guide apart is its emphasis on demystifying common sourdough challenges. We'll delve into the specifics of how hydration levels impact crumb structure, the critical role of fermentation time in developing flavor, and practical tips for achieving that desirable oven spring. By focusing on these core principles, you'll build confidence and consistency in your sourdough baking endeavors.
Achieving the Perfect Crust: A Balance of Steam and Temperature
The hallmark of artisan sourdough bread is its stunning, crackly crust. Achieving this requires mastering the baking environment, specifically the interplay between high temperature and steam. Initially, baking at a high temperature, often around 450-500°F (230-260°C), provides the necessary heat for rapid expansion, known as oven spring. Simultaneously, steam is crucial in the initial phase of baking.
Steam keeps the surface of the dough moist, allowing it to expand fully before the crust sets. Without sufficient steam, the crust forms too quickly, restricting the dough's rise and resulting in a smaller, denser loaf.
Professional bakeries use steam-injected ovens, but home bakers can replicate this by baking in a Dutch oven or by placing a tray of hot water on the bottom rack of the oven during the first 15-20 minutes of baking. A common practice is preheating a Dutch oven at 475°F (245°C) for an hour, then baking the loaf in the covered Dutch oven for 20 minutes to trap steam, followed by removing the lid and baking for another 20-25 minutes at a slightly lower temperature (e.g., 450°F/230°C) to brown and crisp the crust.
Open Crumb Texture: Understanding Hydration and Fermentation
An open, airy crumb with irregular holes is a highly sought-after characteristic in sourdough bread. This texture is primarily influenced by two factors: dough hydration and fermentation. Hydration refers to the ratio of water to flour in the dough. Higher hydration doughs (e.g., 75-80% hydration) are wetter and stickier but inherently have the potential for a more open crumb because there is more water available to turn into steam during baking, creating larger pockets. However, working with high-hydration dough requires more practice.
Fermentation, particularly the bulk fermentation stage, is where the magic truly happens in developing both flavor and structure. During this time, the wild yeasts produce carbon dioxide gas, which is trapped by the gluten network, creating bubbles that will become the open crumb. The bacteria produce lactic and acetic acids, contributing to the characteristic sourdough tang.
Proper fermentation involves developing sufficient dough strength through techniques like folds and allowing the dough to rise adequately but not over-ferment, which can lead to a dense crumb. A typical bulk fermentation might last anywhere from 4 to 12 hours at room temperature, depending on the starter's activity and ambient temperature.
Beginner-Friendly Approach: Simplified Techniques for Success
This guide adopts a beginner-friendly approach by breaking down complex processes into simple, actionable steps. We focus on core techniques that yield excellent results without requiring specialized equipment beyond the basics. For instance, instead of complex kneading methods, we rely on a series of "stretch and folds" during the bulk fermentation to develop gluten strength, a technique that is less labor-intensive and very effective for higher hydration doughs.
Furthermore, the recipe provides clear visual cues and timing guidelines, while also emphasizing the importance of learning to read the dough itself. Understanding how the dough feels, looks, and behaves at each stage – sticky after mixing, smooth and elastic after folds, bubbly and airy after bulk fermentation – is key to successful sourdough baking. We also include tips for managing your sourdough starter, which is the heart of your homemade sourdough, ensuring it's active and ready to leaven your bread.
Ingredients for Your Homemade Sourdough Bread
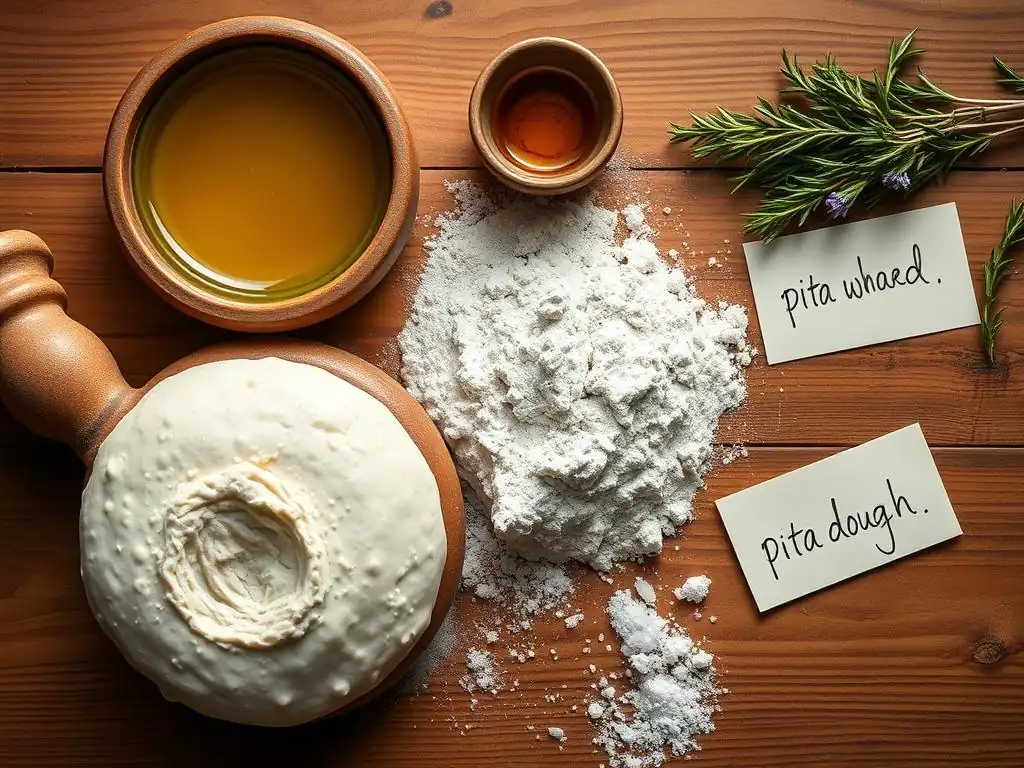
Creating delicious homemade sourdough bread starts with a few simple, high-quality ingredients. The beauty of sourdough lies in its simplicity – flour, water, salt, and your active sourdough starter. However, the quality and type of these ingredients significantly impact the final loaf's flavor, texture, and structure.
Understanding the role of each ingredient is crucial. Clean, filtered water is often recommended as chlorine in tap water can potentially inhibit starter activity. Non-iodized salt is preferred. But perhaps the most critical ingredient, besides the starter, is the flour. The right flour provides the structure and food for your starter and the dough's gluten network.
Essential Ingredients for Authentic Sourdough
At its core, authentic sourdough bread requires just four ingredients: active sourdough starter, flour, water, and salt. The active sourdough starter is paramount; it should be bubbly, doubled in size since its last feeding, and pass the float test (a small piece floats in water). Using an inactive starter will result in a flat, dense loaf.
The ratio of these ingredients, known as baker's percentage, is key. A common starting point for a basic loaf might be 100% flour (e.g., 500g), 70-80% water (e.g., 350-400g), 20% active starter (e.g., 100g), and 2% salt (e.g., 10g). Adjusting these percentages allows for variations in hydration and flavor profile. Using a kitchen scale for precise measurements is highly recommended for consistent results in your homemade sourdough.
Flour Selection: Understanding Protein Content and Gluten Development
The type of flour you choose dramatically affects the structure and texture of your sourdough bread. High-protein flours, such as bread flour (typically 12-14% protein), are ideal for sourdough because they contain more gluten-forming proteins (glutenin and gliadin). When hydrated and worked, these proteins form a strong, elastic network that can trap the gases produced by the starter, allowing the bread to rise and develop an open crumb.
All-purpose flour (around 10-12% protein) can also be used, especially for beginners, as it's slightly easier to handle than high-hydration doughs made with bread flour. Many bakers like to incorporate a percentage of whole wheat or rye flour (e.g., 10-20%) into their dough. While these flours have high protein, the bran and germ can interfere with gluten development, but they contribute significantly to flavor and provide more nutrients for the starter and fermentation process. Experimenting with different flour blends is part of the joy of baking homemade sourdough.
Step-by-Step Guide to Baking Artisan Sourdough Bread
Baking artisan sourdough bread follows a general timeline, but the specific duration of each step depends on factors like ambient temperature, starter activity, and hydration level. This guide provides a standard sequence that can be adapted as you become more familiar with the process and your environment. Patience is a virtue in sourdough baking; rushing steps, especially fermentation, will compromise the final result.
The process essentially involves mixing the ingredients, allowing the dough to ferment and develop strength, shaping it, proofing it one final time, and then baking. Each stage plays a critical role in building the structure, flavor, and appearance of your homemade sourdough. Pay close attention to the dough's feel and appearance at each step rather than strictly adhering to times, especially when starting out.
Preparing the Levain: Activating Your Sourdough Starter
The first step on bake day (or the night before, depending on your schedule) is preparing your levain. The levain is essentially a build of your sourdough starter, fed with a specific ratio of flour and water (commonly 1:1:1 starter:flour:water by weight) several hours before mixing your dough. This ensures you are using the starter at its peak activity.
To prepare, take a small amount of your mature sourdough starter (e.g., 20g), feed it with equal parts flour (e.g., 100g) and water (e.g., 100g), mix well, and let it sit at room temperature. The levain is ready when it has roughly doubled or tripled in size, is full of bubbles, and smells pleasantly tangy. This typically takes 4-8 hours depending on the temperature and starter strength. Using a strong, active levain is non-negotiable for successful oven spring in your homemade sourdough.
Autolyse: Hydrating the Flour for Enhanced Texture
The autolyse step is a simple yet powerful technique. It involves mixing just the flour and water from your recipe together and letting the mixture rest for 20 minutes to an hour before adding the salt and starter. This resting period allows the flour to fully hydrate and enzymes naturally present in the flour begin to break down proteins, which helps in gluten development.
During the autolyse, the dough will feel shaggy and possibly stiff initially, but after resting, it will become noticeably smoother and more extensible. This step makes the subsequent mixing and kneading (or folding) much easier and contributes to a more developed gluten structure, which is essential for achieving an open crumb in your homemade sourdough bread. It also helps reduce the overall mixing time needed.
Mixing the Dough: Incorporating the Levain and Salt
After the autolyse period, it's time to incorporate the active levain and salt into the dough. Spread the autolysed dough out slightly, add the levain on top, and sprinkle the salt over that. Dimple the ingredients into the dough using your fingers, then begin a gentle mixing process. This can be done by hand or with a stand mixer on a low speed.
The goal is to thoroughly distribute the levain and salt throughout the dough until no dry pockets of flour remain and the dough feels cohesive. This might take several minutes of gentle kneading or mixing. The dough will initially be sticky, but as the gluten starts to develop, it will become less so. Ensure the salt is fully dissolved and integrated, as undissolved salt can create tough spots in the final loaf of homemade sourdough.
Bulk Fermentation: Developing Flavor and Strength
Bulk fermentation, also known as the first rise, is arguably the most critical stage for developing flavor and structure in your sourdough bread. This is the period from when the levain and salt are mixed in until the dough is shaped. During this time, the yeast produces gas, causing the dough to rise, while the bacteria produce organic acids, contributing to the characteristic sour flavor.
Throughout bulk fermentation, the dough needs to develop strength. This is typically achieved through a series of "stretch and folds" or "coil folds" performed at intervals (e.g., every 30-60 minutes) during the first few hours. These folds help build the gluten network and evenly distribute the temperature and yeast activity throughout the dough. Bulk fermentation can last anywhere from 4 to 12 hours or even longer, depending on the temperature. The dough should increase significantly in volume (often 50-100%) and feel light and airy before moving to the next step for your homemade sourdough.
Shaping the Dough: Building Tension for Optimal Rise
Once the bulk fermentation is complete, the dough is ready to be shaped. The goal of shaping is to create tension on the surface of the dough, which helps the loaf hold its shape during proofing and baking and contributes to good oven spring. Gently turn the dough out onto a lightly floured surface. Avoid degassing the dough too much; you want to preserve the air bubbles created during fermentation.
There are various shaping techniques, but common methods involve gently folding the dough into a round (boule) or an oval (batard), creating a tight surface tension. For a boule, you might pull the edges towards the center and then flip it over, using the surface tension to create a smooth ball. For a batard, you might fold the dough into thirds like a letter, then roll it up tightly. Practice makes perfect with shaping your homemade sourdough.
Proofing: Preparing the Dough for Baking
Proofing, or the second rise, is the final fermentation stage before baking. After shaping, the dough is placed into a proofing basket (banneton), typically lined with floured linen or rice flour, seam-side up. The basket helps the dough hold its shape as it rises. The proofing environment significantly impacts the final result.
Proofing can be done at room temperature for 1-4 hours, or cold-proofed in the refrigerator for 8-18 hours (or even longer). Cold proofing is highly recommended, especially for beginners. The cold temperature slows down fermentation, making the dough easier to handle, developing deeper flavors, and allowing for better scoring. A cold-proofed dough will retain its shape better when transferred to the oven, leading to superior oven spring in your homemade sourdough.
Scoring the Dough: Controlling Expansion in the Oven
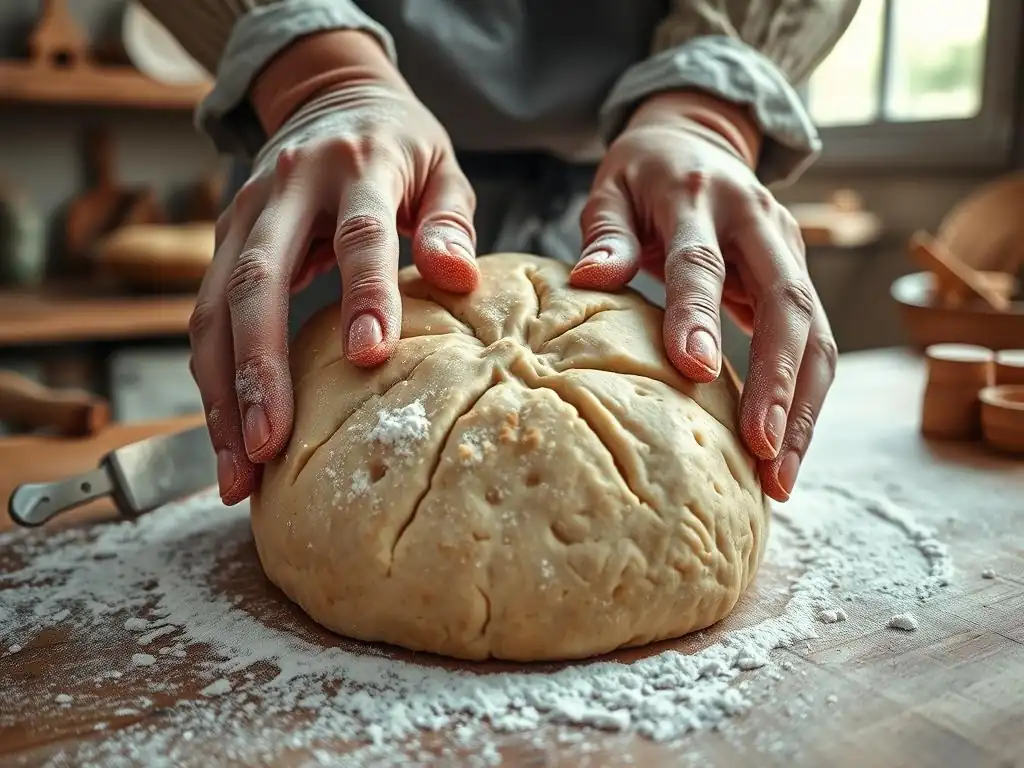
Scoring is the act of cutting slits into the surface of the dough just before it goes into the oven. This isn't just for aesthetics; it serves a crucial purpose. As the dough hits the hot oven, it experiences rapid expansion (oven spring). Scoring provides controlled points for the dough to expand, preventing it from bursting unpredictably.
Using a sharp blade, like a razor blade (known as a "lame"), make quick, confident cuts on the surface of the dough. The depth and pattern of the score influence the final shape and appearance of the baked loaf. For a classic ear, make one deep, sweeping cut at an angle. For a round loaf, a simple cross or geometric pattern works well. Scoring cold-proofed dough is much easier and yields cleaner cuts on your homemade sourdough.
Baking the Sourdough: Achieving a Golden-Brown Crust
Baking is the culmination of all your hard work. As mentioned earlier, baking at high heat with initial steam is key to achieving a beautiful crust and maximizing oven spring. Preheat your oven and Dutch oven (if using) to a high temperature, such as 475°F (245°C). Carefully transfer the proofed dough into the hot vessel.
Bake covered for the first 20 minutes to trap steam, then remove the lid and continue baking at a slightly reduced temperature (e.g., 450°F/230°C) for another 20-25 minutes, or until the crust is a deep golden brown and the internal temperature reaches around 205-210°F (96-99°C). Baking until the crust is dark ensures a crispy texture and fully cooked interior for your homemade sourdough.
Cooling and Storing Your Homemade Sourdough
Patience is required one last time! Once baked, immediately transfer the sourdough bread to a wire rack to cool completely. This cooling period is essential; the internal structure of the bread is still setting, and moisture is redistributing. Cutting into a hot loaf can result in a gummy texture. Allow the bread to cool for at least 1-2 hours before slicing.
For storage, homemade sourdough bread is best kept at room temperature. Once cooled, store the loaf in a paper bag or a bread box to maintain the crust's crispness while keeping the interior relatively soft. Avoid plastic bags, as they trap moisture and will soften the crust. A properly stored loaf can stay fresh for 2-3 days. For longer storage, slice the cooled bread and freeze the slices in an airtight container or bag.
Tips for Baking the Best Homemade Sourdough Bread
Baking consistent, high-quality homemade sourdough bread involves understanding and controlling various factors. While following a recipe is a great starting point, paying attention to nuances like oven spring, hydration levels, and starter health will elevate your baking. Don't be discouraged by initial imperfections; each loaf is a learning opportunity.
Here are some key tips to help you achieve the best possible results with your homemade sourdough. These insights come from the experience of countless bakers who have honed their craft over time. Implementing these can significantly improve the outcome of your next bake.
Oven Spring: Maximizing Rise and Volume
Oven spring is the rapid expansion of the dough during the first 10-15 minutes in the hot oven. Maximizing oven spring is key to a tall, airy loaf. Several factors contribute to good oven spring:
- Active Starter/Levain: A strong, vigorous starter is the foundation.
- Properly Developed Gluten: The gluten network must be strong enough to hold the expanding gases.
- Adequate Bulk Fermentation: Allowing enough time for gas production but not so much that the dough collapses.
- Sufficient Surface Tension: Good shaping technique creates tension that helps the dough push upwards.
- High Initial Heat and Steam: This allows the crust to remain pliable while the dough expands rapidly.
A common issue leading to poor oven spring is under-proofed or over-proofed dough. Under-proofed dough is dense and lacks gas; over-proofed dough has exhausted its leavening power and may collapse. Learning to recognize the signs of properly proofed dough is crucial for achieving impressive oven spring in your homemade sourdough.
Hydration Levels: Adjusting for Different Flour Types
Dough hydration, the ratio of water to flour by weight, significantly impacts the dough's handling characteristics and the final crumb texture. A typical sourdough hydration might range from 65% (stiffer dough, easier to handle) to over 85% (very wet, challenging dough, potential for very open crumb). The optimal hydration level depends on the type of flour used.
Whole wheat and rye flours absorb more water than white bread flour due to the presence of bran and germ. Therefore, a dough containing a significant percentage of whole grains will require more water to reach the same consistency as a dough made solely with white flour. For example, a recipe might call for 75% hydration, but if you substitute 20% of the white flour with whole wheat, you might need to increase the total water slightly (e.g., to 78-80% hydration) to achieve a similar dough feel. Experimenting with hydration is part of mastering homemade sourdough.
Starter Health: Maintaining a Strong and Active Culture
Your sourdough starter is a living culture, and its health is paramount to successful baking. A strong, active starter is one that consistently doubles or triples in size within 4-8 hours after feeding (at room temperature), smells pleasant and tangy (not overly acidic or like acetone), and is full of bubbles.
To maintain a healthy starter, regular feeding is essential. If you bake frequently, keep your starter at room temperature and feed it daily. If you bake less often, store it in the refrigerator and feed it once a week. Before baking, take a small amount from the fridge and feed it at room temperature for 1-3 cycles until it shows consistent activity. Using a robust starter ensures reliable leavening for your homemade sourdough bread.
Troubleshooting Common Sourdough Problems [Dense Crumb, Sour Taste, etc.]
Encountering issues is part of the learning process when baking homemade sourdough. A common problem is a dense crumb, which can result from:
- Inactive Starter: The starter didn't produce enough gas.
- Under-Proofing: Not enough time for gas production during bulk fermentation or proofing.
- Over-Proofing: The dough rose too much and then collapsed, losing structure.
- Poor Gluten Development: The dough wasn't strong enough to hold the gas.
- Insufficient Oven Spring: The dough didn't rise enough in the oven.
If your sourdough is excessively sour, it might be due to:
- Long Fermentation Times at Warm Temperatures: This encourages acetic acid production.
- Infrequent Feeding or Small Feeding Ratios: This allows acids to build up in the starter.
- Using a Larger Proportion of Starter: More starter means more acid producers in the dough.
Addressing these issues often involves adjusting fermentation times, temperatures, starter feeding schedules, and focusing on proper dough development techniques. Keep notes on your bakes to identify patterns and improve your homemade sourdough results.
Serving Suggestions for Your Freshly Baked Sourdough Bread

The aroma of freshly baked homemade sourdough bread is irresistible. Once it has cooled completely, it's ready to be enjoyed in countless ways. Its tangy flavor and chewy texture make it a versatile base for both simple and elaborate pairings.
Whether you're enjoying it warm from the oven or using it days later, your homemade sourdough can elevate any meal or snack. Don's hesitate to get creative with how you serve your delicious creation.
Classic Sourdough Pairings: Soups, Cheeses, and Spreads
Sourdough bread is a natural companion to many dishes. Its robust flavor stands up well to hearty soups and stews, perfect for dipping. Think classic tomato soup, French onion soup, or a rich lentil stew.
It also pairs beautifully with cheese. A simple slice toasted and topped with a good quality cheese, like sharp cheddar, creamy brie, or tangy goat cheese, is a delight. Sourdough also complements various spreads, from simple butter or olive oil to sophisticated pâtés, hummus, or tapenades. A cheese and charcuterie board is simply incomplete without slices of crusty homemade sourdough.
Creative Uses for Sourdough: Toast, Sandwiches, and Croutons
Beyond being a simple accompaniment, homemade sourdough bread is a fantastic base for numerous culinary creations. Toasting slices brings out its flavor and enhances its texture, making it ideal for avocado toast, bruschetta, or garlic bread.
Its sturdy structure makes it perfect for sandwiches, whether a simple grilled cheese or a loaded deli sandwich. Even leftover sourdough can be transformed. Cubes of slightly stale sourdough make the best croutons for salads or soups when tossed with olive oil and herbs and baked until crispy.
Sourdough as a Side: Complementing Main Courses
Served simply with butter or olive oil, homemade sourdough bread is an excellent side dish that complements a wide range of main courses. It can balance richer dishes or add a pleasant tang to lighter fare.
Consider serving warm slices alongside roasted chicken, grilled fish, pasta dishes, or a simple steak. The slightly sour note of the bread provides a refreshing contrast to savory main dishes. Having fresh homemade sourdough on the table instantly elevates any meal into something special.
Mastering the Art of Sourdough Baking: Advanced Techniques
Once you've mastered the basics of baking a standard loaf of homemade sourdough, a world of more advanced techniques and ingredients awaits. These methods can further enhance flavor, texture, and the overall complexity of your bread. Exploring these areas allows you to truly master the art of sourdough baking.
These advanced techniques aren't strictly necessary for a good loaf, but they offer ways to fine-tune your process and experiment with different outcomes. They represent the next step in your journey towards becoming a more accomplished sourdough baker.
Understanding Pre-Ferments: Biga and Poolish
While a sourdough starter (levain) is itself a type of pre-ferment, other types like biga and poolish are commonly used in yeasted breads and can also be incorporated alongside or in place of some of your sourdough starter for unique results. A biga is a stiff pre-ferment (lower hydration), typically made with equal parts flour and water by weight, fermented for a long period (12-16 hours) at room temperature or in the fridge.
A poolish is a liquid pre-ferment (higher hydration), usually made with equal parts flour and water by volume, also fermented for several hours. Incorporating a biga or poolish can add complexity of flavor and improve the dough's structure and extensibility. While less common in pure sourdough recipes, understanding pre-ferments broadens your baking knowledge and can be applied to hybrid sourdough/yeast recipes or to influence specific dough characteristics.
Working with Ancient Grains: Einkorn and Spelt Sourdough
Expanding beyond standard white or whole wheat flour, experimenting with ancient grains like einkorn, spelt, and kamut can introduce exciting new flavors and textures to your homemade sourdough. These grains have different gluten structures and absorption rates compared to modern wheat.
Einkorn, one of the oldest wheat varieties, has a weaker gluten structure and can result in a more tender crumb with a slightly nutty flavor. Spelt is easier to digest for some people and imparts a sweet, nutty taste. Working with these grains often requires adjusting hydration levels and fermentation times, as their gluten develops differently. Incorporating a percentage of ancient grains (e.g., 20-30% of the total flour) into your sourdough is a great way to start experimenting.
Cold Fermentation: Enhancing Flavor and Shelf Life
As mentioned in the proofing section, cold fermentation (or cold proofing) is a technique where the dough undergoes a significant portion of its fermentation at refrigerator temperatures (around 38-40°F / 3-4°C). This dramatically slows down yeast activity but allows the bacteria to continue producing organic acids at a relatively faster rate compared to the yeast.
The result of cold fermentation is a sourdough bread with a more pronounced, complex tangy flavor. The slower fermentation also leads to a stronger gluten network, which can contribute to a better rise and more open crumb. Additionally, cold fermentation can improve the dough's handling properties and extend the shelf life of the baked loaf. Many bakers cold proof their shaped loaves for 12-48 hours before baking, finding it enhances both flavor and convenience for their homemade sourdough.
Enjoy Your Delicious Homemade Sourdough Bread!
Frequently Asked Questions
What makes this pita bread recipe "easy"?
This recipe is considered easy because it uses simple, easy-to-find ingredients and provides step-by-step instructions that are clear and concise, even for beginners. It also avoids complex techniques.
How long does it take to make pita bread from scratch using this recipe?
The total time, including proofing, is around 2-3 hours. However, most of that time is hands-off while the dough is resting, making it a relatively low-effort recipe.
What is the secret to getting the pita bread to puff up properly in the oven?
The key is a very hot oven and ensuring the dough is properly proofed and relaxed. This creates the steam needed for the signature pita pocket to form.
Can I make the pita bread dough ahead of time?
Yes, you can! The dough can be made ahead and stored in the refrigerator for up to 24 hours. Allow it to come to room temperature before baking for the best results.
What are some serving suggestions for homemade pita bread?
Pita bread is incredibly versatile! It's delicious with hummus, falafel, gyros, or simply served with dips and spreads. You can also use it to make homemade pizza pockets.
Final Reflection: The Simple Joy of Homemade Pita
The aroma of freshly baked pita bread, warm and slightly chewy, is a testament to the power of simple ingredients transformed by a little time and effort. This recipe, designed for ease and accessibility, proves that creating delicious, homemade food doesn't require culinary expertise or hours in the kitchen. It's a reminder that even the most basic recipes can hold immense satisfaction.
The act of making your own pita bread connects you to a culinary tradition spanning millennia, a tradition that transcends mere sustenance and becomes a celebration of simple pleasures. It's a tangible connection to the past, a reminder of the human connection to food production, and a powerful antidote to the convenience-driven culture we often find ourselves immersed in. The best things in life are simple.
This sentiment rings especially true when considering the humble, yet deeply satisfying, experience of baking your own pita.
Now, I invite you to consider the possibilities. Imagine the countless meals you can elevate with your own homemade pita, from simple hummus and falafel to more elaborate shawarma or grilled chicken wraps. More than just a recipe, this is a gateway to culinary exploration and self-sufficiency. Take the time, embrace the process, and savor the delicious results. The joy of homemade pita bread awaits.
Unleash Your Inner Baker: Craft the Perfect Pita!
Thanks for joining us on this delicious journey into homemade pita bread! We hope you’ve gained the confidence to tackle this seemingly daunting recipe. Now it's time to put your new skills to the test!
- Bake your own batch of soft and chewy pita: Grab those ingredients and get baking! Use the recipe as your guide, but don't be afraid to experiment with different flours or herbs.
- Share your pita creations: Show us your perfectly puffed-up pitas on social media using #BakeWithEasePita – we can’t wait to see them!
- Try a creative pita pizza: Once you’ve mastered the bread, explore new culinary horizons by using your homemade pitas as the base for a quick and delicious pizza.
What unique topping combination will you create with your freshly baked pita bread?