
The Tools That Transform Dough into Stunning Artisan Loaves

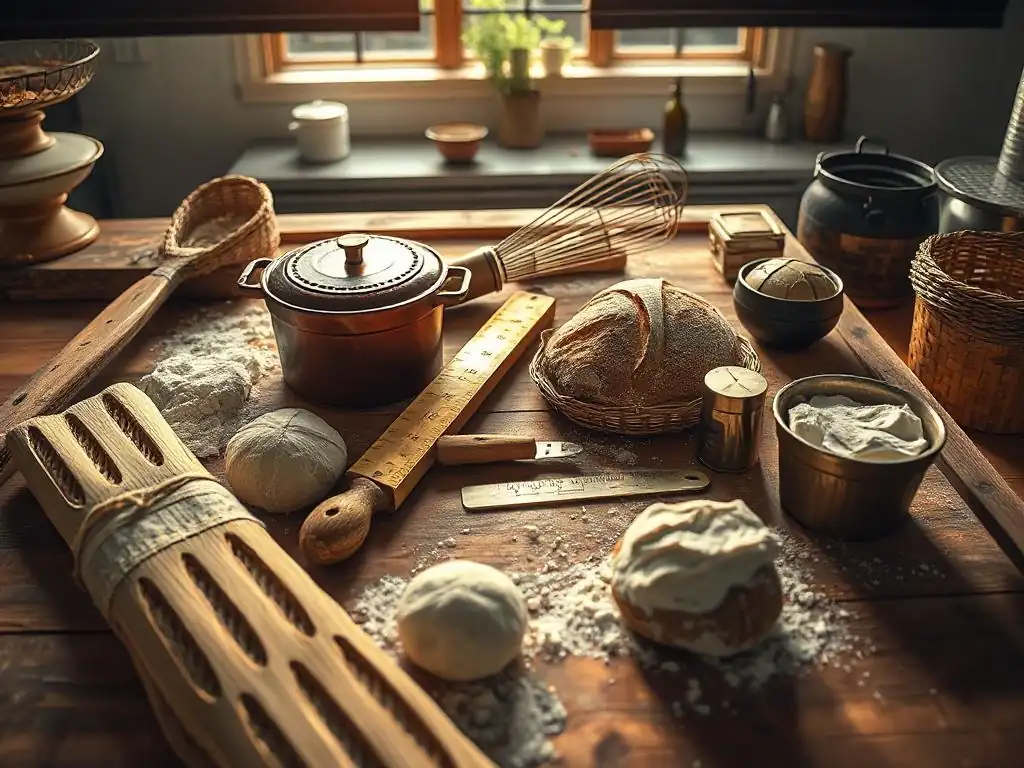
Welcome to BakeWithEase, your sanctuary for all things baking! Ever wondered how professional bakers achieve those beautifully crusty, perfectly textured artisan loaves? It's not just skill – it's also the right equipment. Dive into our latest guide on artisan bread baking tools and discover how the perfect spatula, banneton, or lame can elevate your home baking from ordinary to extraordinary. Ready to unlock the secrets to bakery-worthy bread? Let's get started!
- Tools for Exceptional Sourdough Bread at Home
- Sourdough Baking Tools: From Starter to Stunning Loaf
- Core Equipment for Home Sourdough Bakers
- Achieving the Perfect Sourdough Crust
- Advanced Tools for Sourdough Refinement
- Resources for Sourdough Bakers
-
Frequently Asked Questions
- What are the essential artisan bread baking tools for beginners?
- Why is a dutch oven so important for baking artisan bread?
- What is a dough scraper used for in artisan bread baking?
- What is a banneton (proofing basket) and what does it do?
- Are there any optional artisan bread baking tools that experienced bakers might find useful?
- Final Reflection: The Enduring Craft of Artisan Bread Baking
- Unleash Your Inner Baker: Craft Your Dream Loaf Today!
Tools for Exceptional Sourdough Bread at Home
Sourdough Baking Tools: From Starter to Stunning Loaf
Mastering the art of sourdough baking at home is a rewarding journey, transforming simple flour and water into complex, flavorful loaves. Achieving that perfect rise, chewy interior, and crackling crust relies not just on a vigorous starter and skillful technique, but also on having the right gear.
Think of your kitchen as a baker's workshop; just as a carpenter needs specific tools for woodworking, a sourdough enthusiast benefits greatly from a dedicated set of artisan bread baking tools. These instruments help you handle the often wet and sticky dough, measure ingredients with precision, create the ideal environment for fermentation and baking, and give your finished loaf a professional touch.
Investing in quality artisan bread baking tools isn't just about collecting gadgets; it's about enabling consistency and improving the process. From the initial mixing of the dough to the final slice, each tool plays a specific role in the sourdough process. While some tools might seem specialized, many are versatile and can be used for other baking projects too. Understanding which tools are truly essential for the home baker and how to use them effectively is the first step towards consistently producing stunning artisan loaves that you'll be proud to share (or devour yourself! ).
Essential Equipment for Sourdough Success
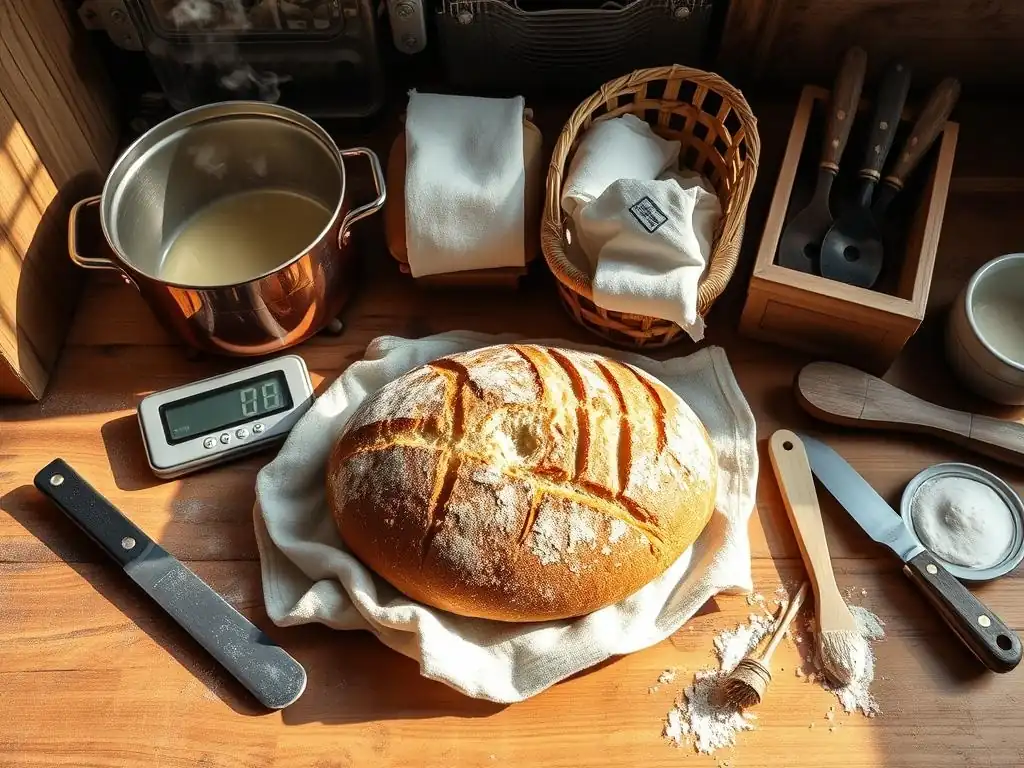
Embarking on the sourdough adventure requires a few fundamental pieces of equipment that make the process manageable and repeatable. At the heart of successful sourdough is precision, especially when it comes to ingredients. Flour, water, and salt ratios are critical, and relying solely on volume measurements can lead to inconsistent results due to variations in flour density and hydration. Therefore, a reliable digital kitchen scale is paramount. It ensures you measure everything accurately by weight, which is the standard in professional baking and essential for mastering baker's percentages.
Beyond accurate measurement, handling the high-hydration dough characteristic of many sourdough recipes requires specific tools. A sturdy bench scraper, for instance, is indispensable for dividing dough, cleaning your work surface, and even transferring dough to the proofing basket or baking vessel.
Similarly, while not strictly mandatory, a dough whisk (sometimes called a Danish dough whisk) is incredibly effective at initially incorporating flour and water without overworking the gluten early on, making the hydration process smoother than with a standard whisk or spoon. These basic yet crucial artisan bread baking tools form the foundation upon which you can build your sourdough skills and consistently achieve excellent results.
Core Equipment for Home Sourdough Bakers
Stand Mixer: Efficient Dough Development (Optional)
While many traditional sourdough bakers swear by hand mixing, a stand mixer can be a significant time and effort saver, especially when dealing with large batches or high-hydration doughs that can be quite sticky and challenging to handle manually. A stand mixer provides consistent kneading, helping to develop the gluten structure efficiently without tiring your arms.
For doughs above 75% hydration, the machine can perform the necessary stretching and folding with its dough hook attachment, which can be particularly difficult and messy to do by hand. It's a powerful tool for busy bakers or those with physical limitations, simplifying a labor-intensive step in the sourdough process.
When considering a stand mixer, models like the KitchenAid Pro Line or a Smeg Stand Mixer are popular choices among home bakers. The KitchenAid Pro Line typically offers robust motors (often around 575 watts or more) and larger capacities, capable of handling doughs made with 8 cups (approximately 1 kg) of flour or more, making it suitable for larger sourdough batches.
The Smeg offers a stylish design alongside reliable performance, often featuring 800 watts of power and a capacity around 4.8 liters, suitable for standard home baking needs. These mixers provide features like planetary action for thorough mixing and durable construction, though they represent a significant investment compared to hand mixing.
The choice between hand mixing and using a stand mixer ultimately comes down to personal preference, batch size, and desired convenience, but the stand mixer certainly falls into the category of valuable artisan bread baking tools for those seeking efficiency.
-
Why a Stand Mixer Can Be Helpful for Sourdough
A stand mixer significantly reduces the physical effort required for kneading, especially for sticky, high-hydration sourdough doughs. It provides consistent gluten development, which is crucial for structure and oven spring. For those baking frequently or in larger quantities, it streamlines the process and saves time.
-
Recommended Stand Mixers: KitchenAid Pro Line, Smeg Stand Mixer - Features, Capacity, and Durability
The KitchenAid Pro Line is known for its powerful motor (often exceeding 500W) and large capacity (typically 6-7 quarts), capable of handling stiff doughs and large flour quantities (up to 8-9 cups). Its all-metal construction ensures durability. The Smeg Stand Mixer offers around 800W power and a 4.8-liter bowl, combining aesthetic appeal with solid performance for typical home baking volumes. Both feature planetary mixing action for thorough incorporation of ingredients.
-
Hand Mixing vs. Stand Mixer: Considering Hydration and Time
Hand mixing is traditional and allows for a direct feel of the dough's development, but it's time-consuming and can be challenging with very wet doughs (above 75% hydration). A stand mixer excels with high-hydration doughs, handling the stickiness with ease and developing gluten faster through mechanical action. For bakers short on time or making large batches, the stand mixer is a clear advantage, while hand mixing offers a more tactile connection to the process.
Digital Kitchen Scale: Precision is Key
In sourdough baking, unlike many other baking disciplines, accuracy is paramount. Using volume measurements (cups and spoons) can lead to significant variations in the amount of flour or water, as flour density changes based on how it's scooped and packed, and liquids can be misjudged. This inconsistency directly impacts the dough's hydration, fermentation rate, and final texture. Weighing ingredients using a digital kitchen scale provides exact measurements, ensuring that your recipes are followed precisely every time. This level of accuracy is fundamental to troubleshooting when a bake doesn't go as planned and essential for reliably replicating successful results.
A good digital scale should be sensitive enough to measure small amounts (like salt or starter increments) and have a decent capacity for larger quantities of flour and water. Scales like the My Weigh KD-8000 are popular for bakers due to their precision (often measuring in 1-gram increments) and features like Baker's Percentage calculation built-in, making formula adjustments easier.
The Ozeri ZK14-S Pronto is another highly-rated option, known for its accuracy, ease of use, and capacity, typically up to 11 lbs (about 5 kg), which is ample for home baking needs. Investing in one of these essential artisan bread baking tools ensures your foundation of ingredient ratios is always solid.
-
Why Accurate Measurements are Essential for Sourdough
Sourdough baking relies on precise ratios of flour, water, and starter to achieve the correct dough consistency, fermentation activity, and final texture. Using a scale eliminates the variability inherent in volume measurements, ensuring consistent hydration and ingredient balance crucial for predictable results.
-
Top Rated Digital Scales: My Weigh KD-8000, Ozeri ZK14-S Pronto Digital Multifunction Kitchen and Food Scale - Features and Accuracy
The My Weigh KD-8000 is favored for its 8kg capacity, 1-gram increments, and features like "Baker's Percentage" mode and a removable protective cover. The Ozeri ZK14-S Pronto is a widely recommended scale with an 11lb (5kg) capacity, also measuring in 1-gram increments, known for its accuracy, slim design, and auto-tare function. Both offer reliable precision needed for sourdough.
-
Baker's Percentage: Understanding and Utilizing Ratios
Baker's percentage expresses all ingredients as a percentage of the total flour weight. For example, if a recipe uses 1000g of flour, 700g of water is 70% hydration (700/1000 * 100). Using a scale allows easy calculation and adjustment of these percentages, providing a universal language for sourdough recipes and simplifying scaling batches up or down while maintaining desired ratios.
Dough Whisk: Gentle Incorporation
The initial stage of mixing sourdough often involves combining flour and water (the autolyse phase) or incorporating the starter and salt into the main dough. A standard whisk or spoon can sometimes struggle with the stickiness of wet dough, leading to clumps and uneven hydration. A dough whisk, with its unique open loop design, is specifically engineered for this task. Its structure allows it to cut through the dough and mix ingredients efficiently without developing gluten prematurely or requiring excessive force.
Using a dough whisk helps bring together the shaggy dough mass quickly and effectively, ensuring all the dry bits of flour are hydrated. It's particularly useful for the initial mix before any kneading or stretching and folding begins.
While you can certainly achieve the same result with your hands or a sturdy spoon, many bakers find the dough whisk to be superior for its speed and ease of use, making it a valuable addition to their collection of artisan bread baking tools. Popular options include the Edward Tools Danish Dough Whisk and the OXO Good Grips Stainless Steel Dough Whisk, both known for their sturdy construction and effective design.
-
The Benefits of a Dough Whisk for Sourdough
A dough whisk is excellent for quickly and efficiently incorporating wet and dry ingredients in high-hydration doughs. Its open design prevents dough from clumping inside the whisk head, making initial mixing easier and less messy than with traditional whisks or spoons.
-
Best Dough Whisks: Edward Tools Danish Dough Whisk, OXO Good Grips Stainless Steel Dough Whisk
The Edward Tools Danish Dough Whisk is a classic, featuring a sturdy wooden handle and durable stainless steel loops. The OXO Good Grips Stainless Steel Dough Whisk offers a comfortable non-slip handle and a robust stainless steel head. Both are effective at cutting through dough and mixing ingredients thoroughly.
-
When to Use a Dough Whisk vs. Other Tools
Use a dough whisk for the initial mixing phase, bringing together flour, water, starter, and salt into a cohesive mass before kneading or stretch-and-folds. For subsequent folding or handling of developed dough, a bench scraper or wet hands are more appropriate.
Bench Scraper: Handling and Dividing Dough
A bench scraper, also known as a dough scraper, is arguably one of the most versatile and indispensable artisan bread baking tools, especially when working with sticky sourdough dough. It's a simple, flat metal or plastic blade with a handle, typically measuring around 6 inches wide. Its primary function is to gather, lift, and turn dough on a work surface without tearing it. This is crucial for processes like stretching and folding, where you need to manipulate the dough gently.
Beyond handling, a bench scraper is essential for portioning dough accurately before shaping. It allows you to cleanly divide a large batch into smaller loaves or rolls. Furthermore, it's an excellent tool for cleaning your work surface, scraping away sticky dough residue quickly and efficiently. Whether metal or plastic, ensure it has a comfortable handle and a relatively sharp edge (especially for metal) for clean cuts. Models like the Spring Chef Dough Scraper or the Winco Blade Scraper are sturdy, reliable options favored by many home bakers for their durability and effectiveness in various dough-handling tasks.
-
Why a Bench Scraper is Indispensable
A bench scraper is crucial for working with sticky dough, allowing you to scrape it from the surface, fold it, divide it cleanly into portions, and transfer it without excessive sticking. It also serves as an excellent tool for cleaning dough residue from your workspace.
-
Top Bench Scrapers: Spring Chef Dough Scraper, Winco Blade Scraper
The Spring Chef Dough Scraper typically features a sturdy stainless steel blade with measurement markings and a comfortable non-slip handle. The Winco Blade Scraper is a professional-grade tool, often made entirely of stainless steel, known for its durability and simple, effective design. Both are highly functional for sourdough tasks.
-
Using a Bench Scraper for More Than Just Dough
Beyond dough handling, a bench scraper is useful for portioning pastry dough, scraping up chopped vegetables, transferring ingredients from a cutting board, crushing garlic, or even smoothing frosting on a cake. Its flat, sturdy blade makes it a versatile kitchen tool.
Proofing Baskets (Bannetons): Shaping and Developing Flavor
Proofing baskets, or bannetons, are specialized containers used for the final rise (proofing) of shaped sourdough loaves before baking. They provide structure to the dough, helping it hold its shape during the crucial final fermentation phase, especially for high-hydration doughs that might otherwise spread out flat. As the dough proofs in the basket, it takes on the basket's shape and pattern (usually a spiral from rattan or a smooth surface from plastic or lined baskets), which transfers to the crust during baking.
Bannetons are typically made from rattan cane, wood pulp, or plastic. Rattan baskets require dusting with flour (often rice flour to prevent sticking) and help wick away a small amount of moisture from the dough's surface, contributing to a better crust. Plastic baskets are easier to clean and don't require heavy flouring.
You can choose between round (for boules) and oval (for batards) shapes depending on your preferred loaf style. Popular options like the Brotdoc Banneton Set (often offering various sizes and shapes) or Hearth & Home Banneton (known for quality rattan) are excellent artisan bread baking tools for achieving well-shaped loaves with attractive crust patterns. Proper care, including brushing out excess flour and allowing them to dry completely between uses, is essential to prevent mold.
-
The Role of Proofing Baskets in Sourdough
Proofing baskets give the shaped sourdough dough structure during its final rise (proofing), preventing it from spreading outwards, especially for high-hydration doughs. They help the loaf maintain its intended shape and contribute a decorative pattern to the crust.
-
Round vs. Oval Bannetons: Choosing the Right Shape
Choose a round banneton (boule shape) for baking round loaves. Select an oval banneton (batard shape) for baking elongated loaves. The choice depends purely on the desired final shape of your bread.
-
Recommended Proofing Baskets: Brotdoc Banneton Set, Hearth & Home Banneton - Size, Material, and Care
Brotdoc sets often include multiple sizes (e.g., 8-inch round for 500g flour, 10-inch oval for 750g flour) and sometimes liners. Hearth & Home typically offers quality rattan baskets in standard sizes. Rattan wicks moisture for a crispier crust but needs dusting; plastic is easy to clean. Care involves brushing out flour and air-drying thoroughly.
-
Maintaining a Clean and Functional Banneton
After each use, tap out excess flour and use a stiff brush (like a pastry brush or dedicated banneton brush) to remove residual flour. Allow the basket to air dry completely in a well-ventilated area before storing. Avoid washing rattan baskets with water frequently; if necessary, a light wipe with a damp cloth followed by thorough drying is best. This prevents mold and ensures the basket remains non-stick.
Achieving the Perfect Sourdough Crust
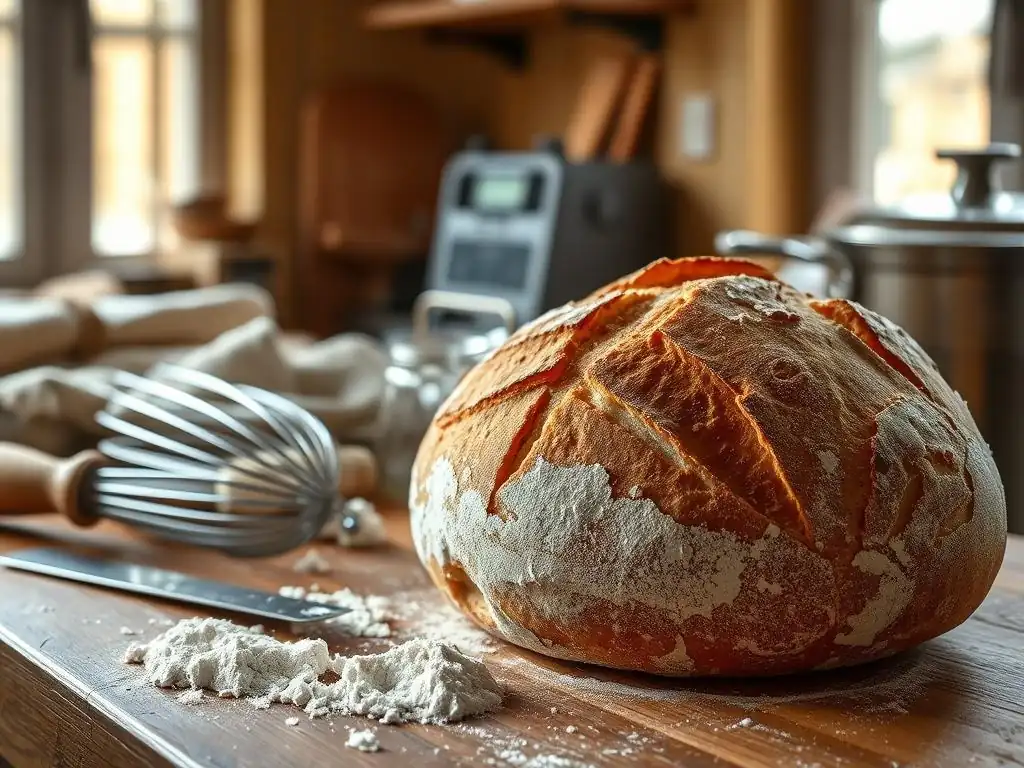
The hallmark of truly great artisan sourdough is its crust – deep brown, crispy, and often exhibiting beautiful 'oven spring' (the final expansion in the oven) and an 'ear' (a flap of crust lifted by controlled scoring). Achieving this requires creating a specific environment within the oven, primarily focusing on managing heat and steam. While a standard oven can bake sourdough, certain tools make producing that desirable crust far more consistent and impressive. These pieces of artisan bread baking tools are key to transforming your dough into a stunning, professional-looking loaf.
The initial phase of baking is critical for crust development and oven spring. High heat is needed to set the structure quickly, while steam keeps the surface moist, allowing the dough to expand fully before the crust hardens. Without sufficient steam, the crust forms too early, restricting expansion and resulting in a dense loaf with a pale, thin crust. Tools like Dutch ovens or baking stones/steels, combined with methods for generating steam, replicate the conditions of professional deck ovens, giving your sourdough the best chance to achieve its full potential in terms of volume and crust quality.
Dutch Oven or Combo Cooker: Creating Steam for Oven Spring
A Dutch oven is widely considered one of the most effective tools for home sourdough baking, particularly for achieving excellent oven spring and a beautiful crust. When a cold or preheated dough is placed inside a preheated Dutch oven with the lid on, the moisture evaporating from the dough is trapped inside the pot, creating a steamy micro-environment around the loaf.
This steam keeps the surface of the dough supple, allowing it to expand rapidly during the initial phase of baking (oven spring) before the crust sets. After about 20-30 minutes, the lid is removed, allowing the trapped moisture to escape and the crust to brown and crisp up beautifully under the dry heat.
Dutch ovens come in various materials, but cast iron (enameled or bare) is preferred for its excellent heat retention and even heat distribution. A standard size around 5-7 quarts is suitable for baking a typical 500g-750g flour loaf. Brands like Staub Cast Iron Cocotte or Lodge Enameled Cast Iron Dutch Oven are highly regarded for their quality and durability.
A combo cooker, which is essentially a shallow pan that doubles as a lid for a deeper pot, offers an advantage for loading dough. You can proof the dough in the shallow pan (or invert the proofed dough into it), score it, and then place the deeper pot over it as the lid, making transferring the dough into the hot vessel much easier and safer than lowering it into a deep, scorching pot. These are indispensable artisan bread baking tools for serious sourdough bakers.
-
Why a Dutch Oven is Ideal for Sourdough
A preheated Dutch oven traps steam released by the dough during the initial baking phase. This steam keeps the dough's surface moist and elastic, allowing for maximum expansion (oven spring) before the crust hardens, resulting in a taller, airier loaf with a thinner, crispier crust.
-
Best Dutch Ovens: Staub Cast Iron Cocotte, Lodge Enameled Cast Iron Dutch Oven - Heat Retention and Size
Staub cocottes are premium enameled cast iron, known for exceptional heat retention, even heating, and durability. A 5.5 or 7-quart size is versatile. Lodge offers more affordable, durable bare or enameled cast iron options; their 6-quart size is popular. Cast iron holds and radiates heat intensely, crucial for a good bake.
-
Combo Cookers: Advantages for Easy Loading
A combo cooker consists of a shallow skillet and a deeper pot that fits together. The advantage is that you can place the dough into the shallow skillet (which acts as the base during baking), score it easily, and then invert the deeper pot over it as the lid. This is much simpler and safer than carefully lowering dough into a very hot, deep Dutch oven.
Baking Stone or Steel: Even Heat Distribution
While a Dutch oven provides controlled steam and excellent radiant heat from all sides, baking on a hot surface like a baking stone or steel offers intense conductive heat directly to the base of the loaf. This rapid transfer of heat from the stone or steel into the dough's base helps create a strong bottom crust and contributes significantly to oven spring by providing an immediate burst of energy to the dough.
Using a stone or steel is the traditional method in ovens that allow for steam injection, but it can also be used in conjunction with other steam methods in a home oven.
Baking steels are typically made from thick steel plates and are more efficient at transferring heat than ceramic stones, heating up faster and retaining more energy. Ceramic stones are more affordable and also provide good results, though they can be prone to cracking if subjected to rapid temperature changes. Thickness matters – a thicker stone or steel (e.g., 1/2 inch steel or 3/4 inch stone) will retain more heat, leading to better results.
Popular options include the NERO Griddle Stone (a thick cordierite stone) or the Original Baking Steel (made from high-performance steel). These artisan bread baking tools provide the necessary thermal mass to give your loaf's base the powerful heat it needs.
-
The Science Behind Baking Stones and Steels for Sourdough
Baking stones (ceramic) and steels (steel) are dense materials that absorb and retain a large amount of heat when preheated in the oven. When the dough is placed on this hot surface, the intense conductive heat transfers rapidly into the base of the loaf, creating a strong bottom crust and providing a powerful thermal boost that aids oven spring.
-
Recommended Baking Stones and Steels: NERO Griddle Stone, Original Baking Steel - Thickness and Heat Capacity
The NERO Griddle Stone is a thick (often around 0.75 inches) cordierite baking stone known for durability and even heat distribution. The Original Baking Steel is typically made from 0.5-inch thick high-performance steel, which heats up faster and holds more heat than ceramic stones, providing superior heat transfer for maximum oven spring and crust development.
-
Using a Stone/Steel in Conjunction with a Dutch Oven
While often used independently with added steam, a stone or steel can also be placed inside the Dutch oven during preheating. This adds another layer of thermal mass and ensures the base of the Dutch oven is intensely hot, providing even more powerful heat transfer to the dough's base for enhanced oven spring. Alternatively, some bakers place the Dutch oven on a preheated stone/steel in the oven to ensure consistent bottom heat.
Lame (Bread Scoring Tool): Controlled Expansion and Artistic Expression
Once your shaped dough has finished proofing, it needs to be scored before baking. Scoring involves making cuts on the surface of the loaf with a very sharp blade. This serves two primary purposes: it controls where the loaf expands during oven spring, preventing it from bursting unpredictably, and it allows you to create beautiful patterns that become decorative features on the baked crust. Without scoring, the rapidly expanding dough would simply find the weakest point to break through, often resulting in an undesirable, uncontrolled split.
A proper bread scoring tool, called a lame (pronounced "lahm"), uses a razor blade or a very sharp thin blade to make clean, swift cuts. The sharpness is key; a dull blade will drag or tear the dough, hindering proper expansion and resulting in a messy score. Lames come in various styles, including straight or curved handles, allowing for different cutting angles.
A curved blade is often preferred for creating the classic 'ear' on a boule, while a straight blade is good for decorative patterns or cuts on batards. Quality lames like the Allezart Lame or the Breadtopia Lame provide a secure way to hold a sharp blade, making precise cuts easier. Mastering this tool is essential for both the structural integrity and aesthetic appeal of your artisan sourdough loaves.
-
The Importance of Scoring Sourdough
Scoring provides weak points on the surface of the dough, directing its expansion during the intense heat of the oven spring. This controlled expansion results in a better shape, prevents blowouts, and allows for the formation of a desirable 'ear' or other decorative patterns on the crust.
-
Top Lames: Allezart Lame, Breadtopia Lame - Blade Sharpness and Handle Comfort
The Allezart Lame often features a comfortable wooden handle and a secure holder for standard double-edged razor blades, allowing for precise cuts. The Breadtopia Lame is also popular, known for its ergonomic design and ability to use standard razor blades, ensuring a consistently sharp edge for clean scoring. Both prioritize safety and ease of use with extremely sharp blades.
-
Basic and Advanced Scoring Techniques
Basic scoring includes a single deep slash down the length of a batard or a simple 'X' or cross shape on a boule. For an 'ear', hold a curved blade at a shallow angle (around 30 degrees) almost parallel to the dough surface and make a swift, confident cut. More advanced techniques involve intricate patterns using multiple shallow cuts or overlapping designs, requiring steady hands and practice with the lame.
Advanced Tools for Sourdough Refinement
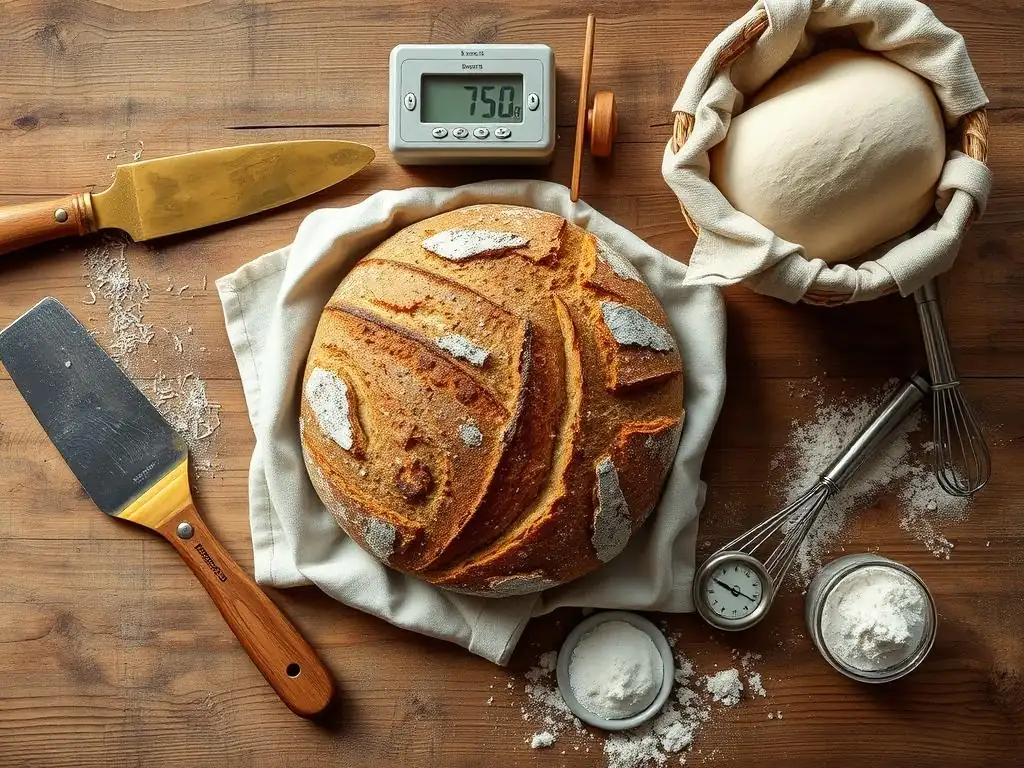
Once you've mastered the core techniques and produced well-shaped loaves with great crusts using the essential artisan bread baking tools, you might find yourself wanting to refine your process further. Advanced tools can help you achieve even greater consistency, troubleshoot subtle issues, or simplify certain steps for a more professional outcome. While not strictly necessary for baking delicious sourdough, these tools offer additional control and convenience for the dedicated home baker looking to elevate their craft.
Refinement in sourdough often involves paying closer attention to variables like temperature and achieving a perfect finish on the baked loaf. Monitoring dough temperature throughout fermentation provides valuable insight into your starter's activity and helps you predict timing more accurately. Similarly, while scoring creates beautiful patterns, achieving perfectly uniform slices after baking can sometimes be challenging with a standard knife. Advanced tools like accurate thermometers and specialized bread slicers address these specific needs, allowing for a deeper understanding and a more polished presentation of your finished artisan loaves.
Thermometer: Monitoring Dough and Loaf Temperature
Temperature is a critical, yet often overlooked, factor in sourdough baking. The activity of your sourdough starter and the fermentation rate of your dough are highly dependent on temperature. Knowing the precise temperature of your starter, the water you're adding, and the dough itself throughout bulk fermentation and proofing allows for much greater control and predictability. For instance, a dough kept at 75°F (approximately 24°C) will ferment significantly faster than one at 68°F (approximately 20°C). Monitoring internal dough temperature helps you understand how ambient conditions are affecting your process and adjust fermentation times accordingly.
Beyond dough fermentation, an instant-read thermometer is invaluable for checking the internal temperature of your baked loaf. Knowing when the bread is fully cooked internally ensures it's not gummy in the center. Most lean sourdough loaves are considered fully baked when their internal temperature reaches around 205-210°F (approximately 96-99°C). Using a reliable thermometer like the Thermapen Mk4 (known for its speed and accuracy) or the Lavatools Javelin PRO Duo provides definitive data points, removing guesswork and contributing to consistent results. These are crucial artisan bread baking tools for bakers who prioritize precision and repeatability.
-
Why Temperature Control is Critical in Sourdough
Temperature significantly influences the activity of wild yeast and bacteria in sourdough starter and dough, affecting fermentation speed, flavor development, and dough structure. Monitoring temperature allows for better control over the process, enabling more predictable timing and consistent results regardless of ambient conditions.
-
Recommended Thermometers: Thermapen Mk4, Lavatools Javelin PRO Duo
The Thermapen Mk4 is a professional-grade instant-read thermometer known for its speed (reading in 1-2 seconds) and accuracy (typically within ±0.7°F). It's durable and water-resistant. The Lavatools Javelin PRO Duo is a highly-rated, more affordable option, also offering fast and accurate readings (within ±0.9°F) and a large, easy-to-read display.
-
Target Temperatures for Dough and Baked Bread
Ideal dough temperature for bulk fermentation often falls within the range of 72-78°F (approximately 22-26°C), though this can vary based on desired fermentation speed and flavor profile. For baked lean sourdough bread, the internal temperature should reach 205-210°F (approximately 96-99°C) to ensure it's fully cooked through.
Bread Slicer: Consistent and Professional Slices
After spending hours crafting a beautiful artisan sourdough loaf, the last step is often cutting into it. While a good bread knife is essential, achieving consistently even slices can be tricky, especially with crusty loaves. A bread slicer provides a guided framework that helps you cut uniform slices every time. This is particularly useful if you plan to toast the bread (even slices toast evenly) or if you appreciate a neat presentation.
Bread slicers range from simple manual guides with slots to more sophisticated electric models. Manual slicers, often made of bamboo or plastic, provide slots to guide your knife. They are compact and easy to use but require a good bread knife.
Examples include the Prodyne Bamboo Bread Slicer. Electric food slicers, like the Chefman Die-Cast Electric Food Slicer, offer more power and adjustability for slice thickness but require more space and cleaning. While not a tool for the baking process itself, a bread slicer is a valuable addition to your collection of artisan bread baking tools for presentation and usability after the bake, ensuring every slice looks as good as the loaf itself.
-
Why a Bread Slicer Can Be a Worthwhile Investment
A bread slicer helps achieve consistently uniform slices, which is desirable for toasting, sandwiches, or simply neat presentation. It makes cutting crusty sourdough easier and safer than freehand slicing, especially for getting straight, even cuts from end to end.
-
Top Bread Slicers: Prodyne Bamboo Bread Slicer, Chefman Die-Cast Electric Food Slicer
The Prodyne Bamboo Bread Slicer is a popular manual guide, offering adjustable slice widths and folding compactly for storage. The Chefman Die-Cast Electric Food Slicer is a more versatile electric option that can slice various foods, including bread, with adjustable thickness settings (typically from paper thin up to 0.5 inches or more).
-
Manual vs. Electric Bread Slicers: Considerations for Home Use
Manual slicers are inexpensive, compact, and require only a bread knife, ideal for occasional use and small kitchens. Electric slicers are faster and offer precise thickness control but are more expensive, bulkier, and require more cleaning. The choice depends on frequency of use, budget, and desired level of automation and precision.
Flour Sifter: Even Dusting for Visual Appeal
Flour dusting serves multiple purposes in sourdough baking, particularly for loaves proofed in bannetons. It helps prevent the dough from sticking to the basket, ensuring a clean release before baking. It also contributes to the visual aesthetic, leaving a pattern of flour on the crust after baking. Achieving an even, light dusting is key; too much flour can result in a thick, unappealing layer on the crust.
A flour sifter, traditionally used for aerating flour or removing clumps, is also an excellent tool for applying a fine, even layer of dusting flour onto your shaped dough or into your proofing basket. Using a sifter breaks up any small clumps in the rice flour or wheat flour you're using for dusting and allows you to distribute it lightly and uniformly over the surface.
Simple squeeze-handle sifters or crank sifters work well. Options like the Bellemain Stainless Steel Flour Sifter or Mrs. Anderson's Baking Flour Sifter are durable and effective for this task, ensuring a professional-looking finish on your artisan sourdough crust.
-
The Purpose of Flour Dusting in Sourdough Baking
Dusting the shaped dough or proofing basket with flour prevents the dough from sticking to the banneton, allowing for easy release. It also creates a contrasting pattern on the baked crust, enhancing the visual appeal of the loaf.
-
Best Flour Sifters: Bellemain Stainless Steel Flour Sifter, Mrs. Anderson's Baking Flour Sifter
The Bellemain Stainless Steel Flour Sifter (often 3-cup capacity with a squeeze handle) is durable and easy to operate for dusting. Mrs. Anderson's Baking Flour Sifter (available in various sizes and styles, including crank or squeeze handle) is another reliable stainless steel option known for its effectiveness in breaking up clumps and providing an even distribution.
Resources for Sourdough Bakers
Embarking on or continuing your sourdough journey is greatly enriched by learning from others and connecting with the baking community. Numerous resources exist to deepen your understanding of the science and art behind sourdough. Exploring recommended sourdough books can provide comprehensive guides to the process, covering everything from starter maintenance to advanced techniques and recipes. Websites dedicated to sourdough offer a wealth of information, including tutorials, forums, and troubleshooting tips.
Beyond static resources, actively joining the sourdough community is invaluable. Online forums, social media groups, and local baking clubs offer opportunities to share your successes, troubleshoot challenges, and gain inspiration from fellow bakers. Seeing others' results, asking questions, and participating in discussions can accelerate your learning and keep your passion for baking artisan bread alive. Don't hesitate to explore these avenues; the collective knowledge and encouragement of the sourdough community are among the best tools available to any aspiring or experienced baker.
Recommended Sourdough Books and Websites
For foundational knowledge, books like "Flour Water Salt Yeast" by Ken Forkish or "Tartine Bread" by Chad Robertson are considered classics, offering detailed step-by-step guides and recipes that have become benchmarks for home bakers. For a scientific approach, "The Sourdough School" by Vanessa Kimbell delves into the health benefits and microbiology. Complementary websites like The Perfect Loaf or King Arthur Baking's sourdough section provide extensive free resources, including starter guides, recipes, videos, and articles covering common issues. These resources are essential companions to your physical artisan bread baking tools.
Joining the Sourdough Community: Sharing Knowledge and Inspiration
Engaging with other bakers online through platforms like Reddit's r/sourdough community or various Facebook groups dedicated to sourdough baking allows for real-time problem-solving and sharing. You can post pictures of your loaves for feedback, ask specific questions about dough consistency or fermentation issues, and learn from the experiences of thousands of other home bakers. This interaction provides encouragement, helps refine techniques, and keeps you motivated to experiment and improve your skills with your artisan bread baking tools.
Frequently Asked Questions
What are the essential artisan bread baking tools for beginners?
Beginners should start with a dutch oven, a dough scraper, and a proofing basket (banneton). These foundational tools will significantly improve your bread baking results.
Why is a dutch oven so important for baking artisan bread?
A dutch oven creates a steam-filled environment inside, crucial for achieving a crispy crust and optimal oven spring. It essentially mimics a professional bread oven.
What is a dough scraper used for in artisan bread baking?
A dough scraper helps you handle sticky dough easily, cleanly transferring it from the bowl to the working surface. It also helps with shaping and dividing dough.
What is a banneton (proofing basket) and what does it do?
A banneton is a basket used to support and shape the dough during its final rise, creating attractive patterns. It also helps to develop the dough's surface tension.
Are there any optional artisan bread baking tools that experienced bakers might find useful?
Experienced bakers often use a lame (scoring tool) for creating precise cuts in the dough before baking, and a baking stone for even heat distribution. These tools can enhance both the look and texture of your loaves.
Final Reflection: The Enduring Craft of Artisan Bread Baking
The pursuit of the perfect artisan loaf is more than just a hobby; it's a testament to the enduring power of craftsmanship in a rapidly changing world. The tools we've explored—from the humble banneton to the precise digital scale—are not mere implements, but extensions of the baker's passion, precision, and artistry. They represent a connection to a tradition that spans centuries, a tradition that continues to thrive and inspire.
The journey of transforming simple flour and water into a masterpiece is deeply rewarding, a process that mirrors the personal growth we all strive for. It's about patience, attention to detail, and a willingness to learn and adapt. The satisfaction of slicing into a perfectly risen loaf, its crust crackling with a symphony of textures, is a powerful reminder of the beauty that can be found in the simplest of things. The best bread is made with love, and that love is tasted in every bite.
This sentiment, though simple, encapsulates the heart of artisan bread baking.
Now, consider your own journey. What tools, both literal and metaphorical, do you employ to craft your own masterpieces? What passions fuel your creative fire? I invite you to reflect on the parallels between the meticulous process of artisan bread baking and your own pursuits. Embrace the challenges, celebrate the successes, and never stop striving for that perfect rise, that perfect crust, that perfect expression of your unique talent. The journey, like the perfect loaf, is worth savoring.
Unleash Your Inner Baker: Craft Your Dream Loaf Today!
Thanks for joining us on this journey into the world of artisan bread making! We hope you've gained valuable insights and inspiration to elevate your baking skills. Now it's time to put that knowledge into action.
- Master a New Technique: Try out one of the bread-making techniques discussed in the article – perhaps the no-knead method or the sourdough starter process. See what delicious results you can achieve!
- Share Your Creations: Post a picture of your freshly baked loaf on social media and tag us @BakeWithEase (fictional social media handle)! Let's inspire each other with our baking journeys.
- Explore Further: Delve deeper into the world of artisan breads by exploring our extensive recipe collection on bakewithease.com (fictional website - replace with actual website if applicable). Discover new flavors and techniques to expand your culinary horizons.
What unique ingredient will you experiment with in your next artisan loaf?