
Your First Scones: An Easy Quick Bread Recipe


Welcome to BakeWithEase, your trusted guide to unlocking baking brilliance! Ever dreamt of effortlessly whipping up warm, crumbly delights? Get ready to banish baking intimidation forever. Dive into our Easy Quick Scones Recipe and discover how simple it is to create bakery-worthy scones in your own kitchen. Curious to learn the secret to perfectly tender scones every time? Let's get baking!
- Classic English Scones: A Beginner's Recipe
- Bake Delicious Scones at Home: A Simple Guide
- Why This Recipe is Perfect for Beginners
- Ingredients
- Step-by-Step Instructions
- Tips for the Best Scones
- Troubleshooting Common Baking Problems
- Serving Suggestions
- Enjoy Your Homemade Scones!
- Frequently Asked Questions
- Final Reflection: The Simple Joy of Baking, One Scone at a Time
- Unlock Your Inner Baker: Bake the Perfect Scone Today!
Classic English Scones: A Beginner's Recipe
Bake Delicious Scones at Home: A Simple Guide
Welcome to the wonderful world of baking! If you've ever felt intimidated by yeast doughs or complex pastries, you're in the right place. Scones are a fantastic entry point into baking because they belong to the family of "quick breads."
This means they use chemical leaveners like baking powder instead of yeast, significantly cutting down on preparation time and complexity. You can mix, shape, and bake a batch of delicious scones in under an hour, making them perfect for a spontaneous weekend treat or a last-minute brunch addition. This easy quick scones recipe is designed specifically with beginners in mind, ensuring a high chance of success and delicious results.
Mastering an easy quick scones recipe opens up a world of possibilities in your kitchen. Unlike many baked goods that require precise timing for proofing or complex folding techniques, scones are forgiving and fast. They offer a delightful balance of a slightly crisp exterior and a soft, fluffy interior. Once you've got the basic technique down, you can experiment with countless variations, from adding fruit and spices to incorporating cheese and herbs. This guide will walk you through every step, providing the confidence you need to bake your first perfect batch.
Why This Recipe is Perfect for Beginners
Simple Ingredients for Homemade Scones
One of the best things about this easy quick scones recipe is that it relies on pantry staples you likely already have. You won't need any exotic flours or hard-to-find leaveners. The core components are basic all-purpose flour, cold butter, sugar, milk, and baking powder.
These simple ingredients, when combined correctly, create the magical rise and tender texture that defines a great scone. For instance, while some recipes call for self-rising flour, this one uses standard all-purpose flour combined with a specific amount of baking powder (typically 2-3 teaspoons per cup of flour) to ensure consistent leavening, which is easier for beginners to measure accurately.
Using readily available ingredients also makes this easy quick scones recipe incredibly cost-effective compared to store-bought options. A typical batch yielding 8-10 scones might cost only a few dollars in ingredients, whereas purchasing the same quantity from a bakery could easily cost $20 or more. Furthermore, working with familiar ingredients helps beginners understand the fundamental roles each plays – how butter creates flakiness, sugar adds tenderness and sweetness, and milk brings everything together. This foundational knowledge is invaluable as you progress in your baking journey.
Quick and Easy Preparation
As the name "quick bread" suggests, the preparation time for this easy quick scones recipe is minimal. Unlike yeast breads that require hours of rising time, scone dough comes together in minutes. The key steps involve quickly cutting cold butter into the dry ingredients, adding liquid, and gently bringing the dough together. There's no kneading required; in fact, overworking the dough is the enemy of tender scones. The entire process from mixing bowl to oven can take as little as 15-20 minutes.
This rapid turnaround makes baking scones an accessible activity even on busy weeknights or for a spontaneous weekend craving. Imagine deciding you want fresh-baked goods at 10 AM on a Saturday and having warm, delicious scones ready to enjoy by 11 AM. This speed contrasts sharply with recipes like sourdough bread, which can take 24 hours or more from start to finish. The simplicity and speed of this easy quick scones recipe build confidence and provide instant gratification, encouraging beginners to bake more often.
Tips for Baking Success
This easy quick scones recipe incorporates several built-in tips to help beginners achieve success. For example, it emphasizes using cold butter, often recommending chilling your butter (and even flour) beforehand. Cold butter melts slowly in the oven, creating steam pockets that result in a light, flaky interior. Another crucial tip is to handle the dough as little as possible; overmixing develops gluten, leading to tough scones. We'll guide you on how to mix just until the ingredients are combined, ensuring a tender crumb.
Furthermore, specific instructions on cutting the scones are provided to ensure even baking. Whether you use a round cutter or simply cut the dough into squares or triangles, consistency in size is key. Baking at a relatively high temperature (often around 400°F or 200°C) is also common for scones; this helps them rise quickly and develop a lovely golden crust before they dry out. These simple, actionable tips significantly reduce the guesswork, making this easy quick scones recipe a reliable starting point for anyone new to baking.
Ingredients
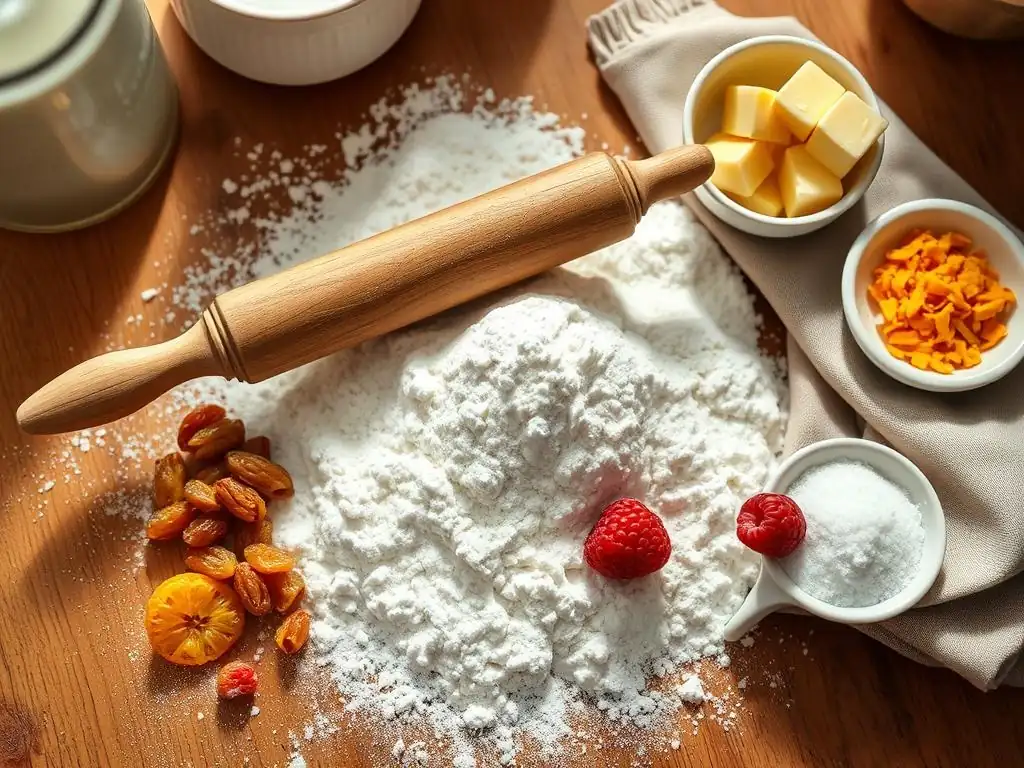
The Key Ingredients for Light and Fluffy Scones
The magic of truly light and fluffy scones lies in the interaction of a few key ingredients, primarily the leavening agent and the fat. Baking powder is the powerhouse in this easy quick scones recipe, providing the lift needed to transform a simple dough into a risen pastry. When combined with liquid and exposed to heat, baking powder produces carbon dioxide gas, creating air pockets within the dough.
Using a sufficient quantity of fresh baking powder (check the expiration date!) is critical for achieving a good rise. A standard ratio often calls for 2-3 teaspoons of baking powder per cup of flour in quick bread recipes like this.
Equally important is the fat, which in classic scones is cold butter. The way the butter is incorporated is key. Instead of melting it, cold butter is cut into the dry ingredients until the mixture resembles coarse crumbs or small peas. As the scones bake, these tiny pieces of butter melt, releasing steam. This steam pushes the layers of dough apart, creating the characteristic flaky layers and tender texture. Using very cold butter, sometimes even frozen and grated, maximizes this effect and is a secret weapon in any easy quick scones recipe.
Flour, Butter, Sugar, Milk, Baking Powder
Let's look at the specific roles of the core ingredients in this easy quick scones recipe. All-purpose flour provides the structure for the scones. While some recipes might use cake flour for extra tenderness, standard all-purpose works perfectly for a beginner-friendly recipe and is widely available. The quantity of flour is crucial for dough consistency; too little makes it sticky, too much makes it dry. A typical recipe might call for about 2 cups of flour, yielding 8-10 scones.
Cold, unsalted butter is preferred because you control the salt content, and its solid state is vital for flakiness, as explained above. Aim for about 1/2 cup (one stick) of cold butter for 2 cups of flour. Granulated sugar adds a touch of sweetness, promotes browning, and contributes to tenderness. About 2-4 tablespoons is standard for a lightly sweetened scone.
Milk provides the necessary liquid to bring the dough together and activates the baking powder. Whole milk or buttermilk (buttermilk adds extra tang and tenderness) are common choices, typically around 3/4 to 1 cup, depending on the flour and humidity. Finally, baking powder, as mentioned, is the primary leavener; approximately 1 tablespoon for 2 cups of flour is a common starting point in an easy quick scones recipe.
Step-by-Step Instructions
Step 1: Preparing the Dough
Begin by combining your dry ingredients: the flour, baking powder, sugar, and a pinch of salt in a large mixing bowl. Whisk them together thoroughly to ensure the leavening and salt are evenly distributed throughout the flour. This is a simple but important step for consistent results in your easy quick scones recipe.
Next, add the cold butter, which should be cut into small cubes (about 1/2 inch or 1 cm). Using your fingertips, a pastry blender, or even a food processor on pulse mode, quickly work the butter into the dry ingredients until the mixture resembles coarse crumbs with some larger, pea-sized pieces of butter still visible. The key is to work quickly to keep the butter cold.
Once the butter is incorporated, make a well in the center of the dry ingredients. Pour in most of the milk (reserve a tablespoon or two just in case you don't need it all). Use a fork or a rubber spatula to gently mix the wet and dry ingredients together until they are just combined. The dough will be shaggy and may have some dry spots; this is okay.
Avoid the urge to overmix. If there are still a lot of dry flour pockets, add the reserved milk a teaspoon at a time until the dough just barely comes together. This gentle handling is crucial for a tender result in your easy quick scones recipe.
Step 2: Cutting and Shaping the Scones
Lightly flour a clean work surface. Gently turn the shaggy dough out onto the floured surface. Pat the dough together carefully; do not knead it. You want to handle it as little as possible. Gently press or roll the dough into a circle or rectangle about 3/4 to 1 inch thick (about 2-2.5 cm). This thickness is important for a good rise and shape. If the dough is too thin, the scones will be flat; too thick, and they might not bake through evenly.
Now it's time to cut your scones. You can use a round cutter (about 2-2.5 inches or 5-6 cm in diameter) for classic round scones. Dip the cutter in flour before each cut to prevent sticking, and press straight down without twisting – twisting can seal the edges and prevent a good rise.
Alternatively, you can shape the dough into a disk and cut it into wedges (like a pizza), or shape it into a rectangle and cut squares or triangles. Place the cut scones onto a baking sheet lined with parchment paper, leaving about an inch between them. Brushing the tops with a little milk or egg wash before baking helps them brown beautifully, a simple step in this easy quick scones recipe that enhances appearance.
Step 3: Baking Your Scones to Golden Perfection
Preheat your oven to a relatively high temperature, typically around 400°F (200°C). This high heat helps the scones rise quickly and set their structure before the butter completely melts out, contributing to that desirable flakiness. While the oven preheats, you can pop the shaped scones into the refrigerator or even the freezer for 10-15 minutes. Chilling them helps ensure the butter is very cold before hitting the hot oven, maximizing the steam effect and resulting in a better rise.
Bake the scones in the preheated oven for about 12-18 minutes. The exact time will vary depending on your oven and the size and thickness of your scones. They are ready when they have risen significantly, are golden brown on top, and a skewer inserted into the center comes out clean.
The bottoms should also be lightly browned. Remove the baking sheet from the oven and let the scones cool on the sheet for a few minutes before transferring them to a wire rack to cool slightly further. Serving them warm is highly recommended to enjoy their fresh-baked texture, a perfect outcome for your easy quick scones recipe.
Tips for the Best Scones
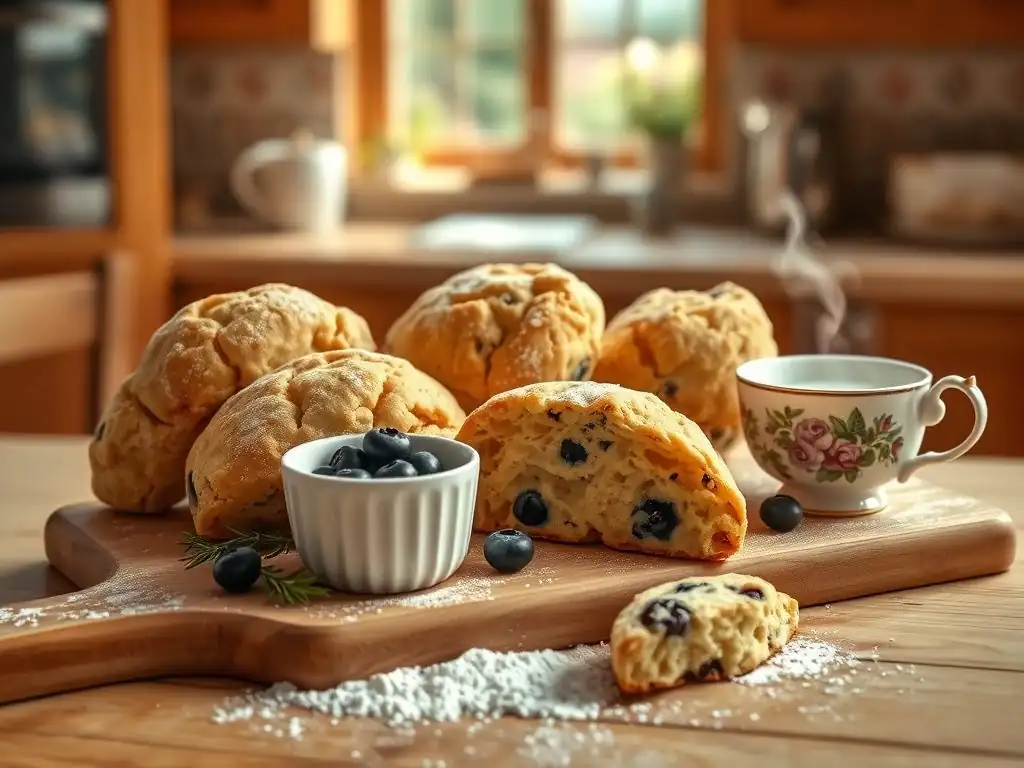
Achieving a Light and Flaky Texture
The secret to truly light and flaky scones lies in how you handle the butter and the dough. As emphasized earlier, using cold butter is non-negotiable. The butter should be cut into small pieces and quickly worked into the dry ingredients until the mixture resembles coarse meal with some pea-sized chunks remaining. Avoid overworking the mixture into a fine powder. Keeping the butter cold ensures it creates steam pockets during baking, which is the primary driver of flakiness. Some bakers even recommend freezing the butter and grating it directly into the flour for maximum coldness and even distribution.
Equally important is minimal handling of the dough once the liquid is added. Overmixing or kneading develops gluten, resulting in tough, dense scones instead of light and airy ones. Mix just until the dry ingredients are moistened and the dough just comes together in a shaggy mass. When shaping, pat it gently rather than kneading. Cutting straight down with a sharp cutter also prevents sealing the edges, allowing the scones to rise freely. These techniques, simple yet crucial, elevate an easy quick scones recipe from good to outstanding.
Variations: Adding Flavor
Once you've mastered the basic easy quick scones recipe, you can easily introduce different flavors. Sweet variations are popular; try adding about 1/2 cup of dried fruit like currants (for classic English scones), raisins, or dried cranberries to the dry ingredients before adding the butter. Fresh berries, such as blueberries or raspberries, can also be gently folded in after the butter is incorporated, though be mindful that they can make the dough wetter. Citrus zest, like lemon or orange, adds a bright, fresh note when added to the dry ingredients (about 1-2 teaspoons).
Savory scones are equally delicious and versatile. Omit the sugar or reduce it significantly (to 1-2 teaspoons) and add ingredients like grated cheese (cheddar, parmesan, or a mix are great, about 1/2 to 1 cup), chopped fresh herbs (rosemary, chives, or thyme, about 1-2 tablespoons), or even cooked, crumbled bacon or sautéed onions. These savory additions are typically stirred into the dry ingredients along with the butter. An easy quick scones recipe serves as a fantastic base for these creative flavor explorations.
Storing and Reheating
Freshly baked scones are always best enjoyed warm from the oven. However, if you have leftovers from your easy quick scones recipe, they can be stored. Once completely cooled, place them in an airtight container at room temperature for 1-2 days. To extend their freshness, you can store them in the refrigerator for up to 4 days. While they won't be as light as when fresh, they will still be enjoyable.
For the best texture when reheating, avoid the microwave if possible, as it can make them rubbery. The ideal method is to gently warm them in a preheated oven or toaster oven at around 300°F (150°C) for about 5-10 minutes until they are warm through. This revives some of the crispness of the crust. You can also split them horizontally and toast the cut sides in a skillet or under a broiler. Properly stored and reheated, your homemade scones can be enjoyed beyond the first day.
Troubleshooting Common Baking Problems
Why Are My Scones Flat?
Several factors can lead to flat scones when using an easy quick scones recipe. The most common culprit is using butter that is too warm or not incorporating it properly. If the butter is soft or melts into the flour before baking, it won't create the steam necessary for a good rise. Ensure your butter is cold and cut it in quickly until distinct pieces remain. Warm hands or working in a hot kitchen can also contribute; consider chilling your ingredients beforehand.
Another reason for flatness is inadequate leavening. Make sure your baking powder is fresh – it can lose its potency over time. Test it by adding a teaspoon to a small amount of hot water; it should bubble vigorously. Using too little baking powder or measuring it incorrectly will also result in less lift. Finally, overworking the dough can develop too much gluten, which makes the dough tough and prevents it from rising freely. Gentle handling is key to achieving height in your easy quick scones recipe.
Why Are My Scones Dry?
Dry scones are typically a result of too much flour or overbaking. When measuring flour, avoid scooping directly from the bag with your measuring cup, as this compacts the flour, leading to using more than the recipe intends. Spoon the flour lightly into the measuring cup and level it off with a straight edge.
A kitchen scale is the most accurate way to measure flour (about 120-130 grams per cup). The amount of liquid needed can also vary slightly depending on the humidity and the specific flour used, so add the milk gradually as instructed in the easy quick scones recipe, adding just enough to bring the dough together.
Overbaking is another major cause of dryness. Baking scones for too long at too low a temperature removes too much moisture. Ensure your oven temperature is accurate (an oven thermometer can help!) and start checking for doneness at the lower end of the suggested baking time range (e.g., at 12 minutes if the range is 12-18). Scones should be golden brown, not deep brown, and a skewer should come out clean, but they shouldn't feel hard or dry to the touch right out of the oven.
Dough Too Sticky?
If your dough is too sticky when following this easy quick scones recipe, it's usually due to too much liquid or not enough flour. The consistency of dough can be affected by the humidity in your kitchen and the type of flour used. If you've added all the liquid and the dough is unmanageably sticky, resist the urge to dump a large amount of extra flour onto it. Instead, lightly flour your work surface and your hands. Gently pat the dough into shape, using minimal additional flour only as needed to prevent sticking.
Alternatively, if you are still in the mixing stage and the dough seems excessively wet after adding the suggested liquid, add an extra tablespoon of flour at a time, mixing gently until the dough just comes together. Remember, a shaggy, slightly sticky dough is preferable to a dry one for tender scones.
It's better to work with a slightly sticky dough using floured hands and a floured surface than to add so much flour that the scones become dry and dense. Adjusting liquid or flour slightly based on feel is a skill you'll develop with practice using this easy quick scones recipe.
Serving Suggestions

Classic Pairings: Jams and Clotted Cream
The quintessential way to enjoy classic English scones is with a generous dollop of clotted cream and a spoonful of jam. This pairing is a cornerstone of a traditional afternoon tea. Clotted cream is a thick, rich cream with a high-fat content, often described as having a slightly cooked or nutty flavor. It provides a luxurious, smooth contrast to the scone's crumbly texture. While authentic clotted cream can be hard to find outside the UK, alternatives like crème fraîche or even whipped cream (though lighter) can be used in a pinch with your easy quick scones recipe.
Strawberry jam is perhaps the most traditional jam pairing, but any fruit jam or preserve works beautifully. Raspberry, blackcurrant, apricot, or cherry jams are all excellent choices. The sweet, sometimes slightly tart fruitiness of the jam cuts through the richness of the cream and butter in the scone. The order of application (jam first or cream first) is a matter of much debate (the "Devonshire method" vs. the "Cornish method"), but ultimately, it's about personal preference.
Elevate Your Scones: Creative Ideas
Beyond the classic, there are many ways to elevate your homemade scones from this easy quick scones recipe. Consider serving them with flavored butters – whip softened butter with honey, cinnamon, herbs (like chives for savory scones), or citrus zest. Lemon curd is another delightful alternative to jam, offering a bright, tangy contrast. For a sweeter treat, drizzle warm scones with a simple glaze made from powdered sugar and milk or lemon juice.
Think about seasonal toppings. In the fall, serve your scones with apple butter or pumpkin spice cream cheese spread. In the summer, fresh berries and a light dusting of powdered sugar are wonderful. Savory scones pair well with cream cheese, smoked salmon, or even alongside a bowl of soup or a salad. The versatility of an easy quick scones recipe makes it a perfect base for culinary creativity.
Seasonal Fruit Pairings
Embracing seasonal fruits is a fantastic way to enhance the enjoyment of your scones throughout the year. In late spring and summer, fresh berries like strawberries, blueberries, raspberries, and blackberries are at their peak. Serve your warm scones with bowls of these fresh fruits, perhaps lightly macerated with a little sugar, alongside whipped cream or clotted cream. A simple strawberry compote or a mixed berry coulis also makes for a vibrant and flavorful topping.
As autumn arrives, stone fruits like plums or peaches can be turned into delicious compotes or roasted slices to serve with scones. Apple butter or pear preserves capture the flavors of the season beautifully. In winter, citrus fruits come into their own; a homemade orange marmalade or a grapefruit curd can provide a burst of sunshine. Even frozen fruits, thawed and gently cooked into a quick sauce, can offer a taste of summer when it's cold outside. An easy quick scones recipe adapts wonderfully to the bounty of each season.
Enjoy Your Homemade Scones!
Frequently Asked Questions
How quickly can I make this scone recipe?
This recipe is designed for speed! You can have freshly baked scones in approximately 30 minutes, making it perfect for a quick breakfast or snack.
What makes this scone recipe "easy"?
The recipe uses simple instructions and common ingredients that are readily available, minimizing complexity for beginner bakers.
Can I modify the recipe to add different flavors?
Absolutely! This recipe is a great base. Feel free to add chocolate chips, berries, or dried fruit to customize your scones.
What are the key ingredients for making successful scones?
The essential ingredients are flour, butter, milk (or cream), and a leavening agent (baking powder). Proper measurement is also crucial.
What's the best way to ensure my scones are light and fluffy?
Avoid overmixing the dough! Gentle handling is key to preventing tough scones. Also, use cold butter for a flaky texture.
Final Reflection: The Simple Joy of Baking, One Scone at a Time
The ease of making delicious scones belies their surprisingly profound impact. From a simple recipe, a world of warmth, comfort, and shared moments unfolds. This isn't just about baking; it's about creating something beautiful and delicious with your own two hands.
The enduring appeal of baking, particularly quick breads like scones, lies in its accessibility and the immediate gratification it offers. It's a tangible connection to a simpler time, a reminder that even amidst the complexities of modern life, joy can be found in the most straightforward of tasks. Baking is at once child's play and adult joy. And love, of course.
This quote perfectly captures the essence of the scone-making experience – a blend of simple pleasure and profound satisfaction.
Now, I invite you to take this recipe and make it your own. Experiment with different additions, share your creations with loved ones, and savor the process as much as the final product. Don't be afraid to get your hands a little messy; the joy of baking, like the crumbly texture of a perfectly baked scone, is best experienced fully and without reservation. Let the simple act of making scones be a reminder of the beauty in everyday moments and the power of creating something delicious and meaningful.
Unlock Your Inner Baker: Bake the Perfect Scone Today!
Thanks for joining us on this delicious journey into the world of scones! We hope you’ve gained the confidence to tackle this seemingly intimidating, yet surprisingly simple, quick bread. Now it’s time to put your new skills to the test!
- Bake your first batch! Grab those ingredients and follow the recipe – you’ve got this! The smell alone is worth it.
- Share your baking triumph! Snap a photo of your golden-brown scones and share it with us – we'd love to see your creations.
- Explore more quick bread recipes: Ready for another challenge? Dive into our recipe archive and discover your next baking adventure.
Ready to conquer the world of baking, one scone at a time? What flavor will your next scone creation be?