
Elegant Choux Swans: A StepbyStep Intermediate Guide

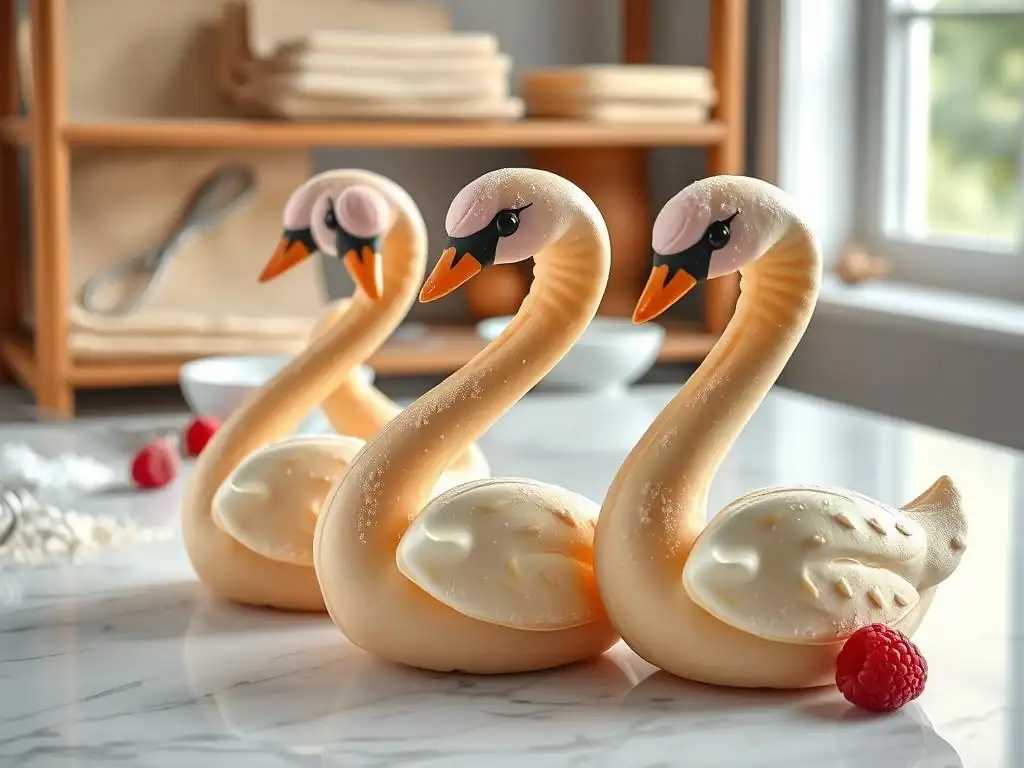
Welcome to BakeWithEase, your haven for unlocking baking brilliance! Ever dreamt of crafting elegant pastries that seem impossibly intricate? This week, we're diving into the enchanting world of pâte à choux with a surprisingly easy choux swan recipe. Prepare to be amazed at how simple it is to create these graceful delights. Intrigued? Let's transform your kitchen into a Parisian pâtisserie!
- Introduction to Choux Swans
- Mastering Choux Pastry: The Foundation
- Shaping the Swans: A Detailed Visual Guide
- Baking Your Choux Swans to Golden Perfection
- Preparing the Filling: Cream Options
- Assembling Your Elegant Choux Swans
- Storing and Serving Your Choux Swans
- Choux Swan Recipe: Printable Recipe Card
- Conclusion: Enjoy Your Choux Swans!
- Frequently Asked Questions
- Final Reflection: The Enduring Elegance of the Choux Swan
- Unleash Your Inner Pastry Chef: Bake Elegant Choux Swans!
Introduction to Choux Swans
Why Choux Swans are a Rewarding Baking Project
Creating elegant choux swans is more than just following an easy choux swan recipe; it's a delightful journey that builds confidence and showcases growing baking skills. The process, from mastering the choux pastry dough to delicately piping the swan shapes and assembling the final creation, requires attention to detail and patience, leading to a truly satisfying result. Many bakers find that successfully creating these delicate pastries marks a significant milestone in their intermediate baking progression, often leading to a desire to tackle more complex patisserie projects.
The visual impact of a plate of perfectly formed choux swans is undeniable, making them ideal for special occasions or simply as a beautiful treat. The sense of accomplishment from transforming simple ingredients into such graceful shapes is incredibly rewarding. While they may look intricate, breaking down the process makes this an achievable project for intermediate bakers looking to expand their repertoire beyond basic cookies or cakes.
Brief History and Origin of Choux Pastry
Choux pastry, or pâte à choux in French, boasts a fascinating history that dates back several centuries. Its origin is often attributed to Pantanelli, the chef of Catherine de' Medici, who supposedly created the dough in Florence around the 16th century. When Catherine married King Henry II, she brought her culinary team, including Pantanelli, to France, introducing this versatile dough to French cuisine.
Over time, the recipe and techniques evolved. The dough became known as pâte à chaud (hot paste) because it is cooked on the stovetop, and later, pâte à choux (cabbage paste) due to the small, round shape of the baked puffs resembling miniature cabbages. It was Antonin Carême, a renowned French chef in the 19th century, who further refined and popularized choux pastry, using it as the foundation for iconic pastries like éclairs, profiteroles, and the impressive croquembouche, solidifying its place in classic French patisserie.
Mastering Choux Pastry: The Foundation
Understanding the Key Ingredients for Choux Pastry
Creating the perfect choux pastry relies on a precise balance of four key ingredients: liquid (water or milk), butter, flour, and eggs. The liquid and butter are heated together, creating a rich base. Typically, a ratio might involve roughly equal parts liquid and butter by weight. The fat from the butter contributes to the pastry's tenderness and richness, while the liquid is essential for hydrating the flour and creating steam during baking.
Once the liquid and butter are simmering, flour is added all at once, and the mixture is vigorously stirred over heat. This step, known as the panada, cooks the flour, gelatinizes the starches, and dries out the dough significantly. A common ratio uses about 1 part flour to 1 part liquid/butter mixture by weight.
Finally, eggs are beaten in gradually off the heat. The eggs are crucial; they provide structure and moisture, allowing the dough to rise dramatically in the oven as steam is generated. The amount of egg is variable, often around 2 parts egg to 1 part flour by weight, but the exact quantity depends on the flour's absorbency and the desired consistency.
Step-by-Step Guide to Making Perfect Choux Pastry
Making perfect choux pastry involves several key stages, starting with combining the liquid and fat. In a medium saucepan, heat water (or milk, or a mix) and cubed butter over medium heat until the butter is completely melted and the mixture reaches a gentle simmer. Avoid a rolling boil, as this evaporates too much liquid.
Next, remove the pan from the heat and add all the flour at once. Stir vigorously with a wooden spoon or heat-resistant spatula until a smooth ball of dough forms and pulls away from the sides of the pan. Return the pan to low heat and continue to cook the dough, stirring constantly, for about 1-2 minutes.
This crucial step dries out the dough, preparing it to absorb the eggs. You should see a slight film on the bottom of the pan. Transfer the dough to a mixing bowl (stand mixer with paddle attachment is ideal, but a sturdy bowl and wooden spoon work too) and let it cool slightly for a few minutes before gradually beating in the eggs, one at a time, ensuring each egg is fully incorporated before adding the next.
Pro Tip: Achieving the Right Dough Consistency
The consistency of your choux dough after adding the eggs is absolutely critical for successful puffing. The dough should be smooth, glossy, and thick enough to hold its shape when piped, but not so stiff that it's difficult to pipe. A classic test is the "V" test: when you lift the paddle or spoon, the dough should hang from it in a V-shape and eventually break off cleanly.
If it's too stiff, the puffs won't rise properly; if it's too wet, they will collapse. You might not need all the egg specified in a recipe or might need a tiny bit more; add the last egg gradually, checking the consistency as you go.
Troubleshooting Common Choux Pastry Problems
One common issue when making choux pastry is the puffs not rising properly or collapsing after baking. This is often due to insufficient drying of the dough during the stovetop cooking phase or adding too many eggs, resulting in a dough that is too wet. Ensure you cook the panada for the full 1-2 minutes over low heat until a film forms on the pan. Also, add eggs gradually and stop as soon as the correct consistency is reached, even if it means not using the entire last egg.
Another problem is uneven baking or dark bottoms. This can be caused by inconsistent oven temperature or placing the baking sheet too low in the oven. Using an oven thermometer is recommended to verify your oven's accuracy. Baking on the middle rack generally provides the most even heat distribution. If bottoms are too dark, try placing a second empty baking sheet on the rack below your choux puffs to act as insulation.
Shaping the Swans: A Detailed Visual Guide
Creating the Swan Body: Piping Techniques
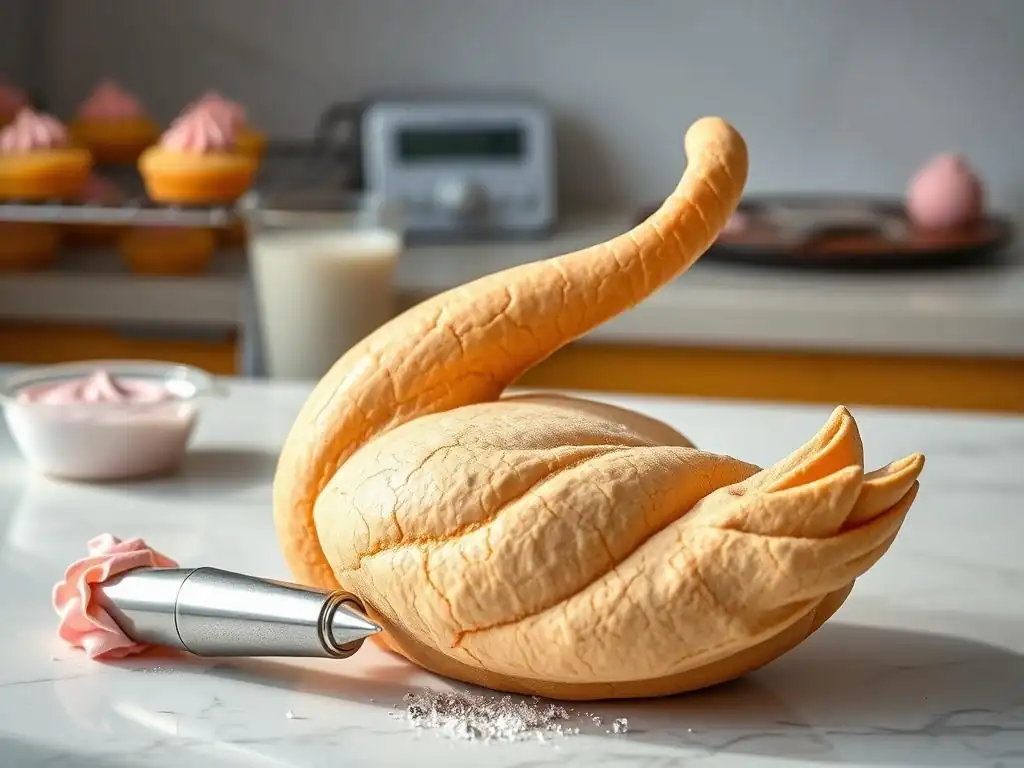
To form the body of the choux swans, you will need a piping bag fitted with a large plain round tip (like an Ateco 805 or similar, approximately 1/2 inch opening). Fill the bag with your prepared choux pastry dough. On a baking sheet lined with parchment paper or a silicone baking mat, pipe mounds of dough.
A simple technique is to hold the bag vertically and pipe a circular mound, or pipe a slightly elongated oval shape for a more classic swan body look. Aim for bodies that are roughly 2 to 3 inches in length or diameter, depending on your desired size. Leave ample space between each body, as they will expand significantly during baking.
Consistency in size is key for uniform swans. Practice piping a few bodies on a scrap piece of parchment first if you're new to this technique. The goal is a smooth, even puff that will bake into a hollow shell, perfect for filling. The shape doesn't have to be perfectly round or oval; the beauty of handmade choux is in their unique character, but aiming for roughly the same volume of dough for each body helps ensure they bake evenly.
Forming the Neck and Head: Achieving the Swan Silhouette
The graceful neck and head are what truly transform a choux puff into a swan. For this part, you'll need a piping bag fitted with a smaller round tip (like an Ateco 802 or similar, approximately 1/4 inch opening). Pipe S-shapes onto a separate baking sheet lined with parchment. Start with a slightly thicker base and taper as you reach the head. The neck should be elegant and elongated, roughly 1.5 to 2 inches tall, depending on the size of your swan bodies.
Pipe slightly more dough at the top of the 'S' to form a distinct head shape. You can even give the head a small beak by gently pulling the tip of the piping bag away at the end of the stroke. These neck pieces are delicate, so pipe them carefully and avoid overcrowding the baking sheet. You'll want to pipe a few extra necks, as they can be fragile after baking.
Using a Template for Consistent Shapes
For bakers who prefer uniformity, creating or using a template can be incredibly helpful for piping the swan necks. You can draw S-shapes of your desired size and shape onto a piece of paper, then place this paper under your parchment paper on the baking sheet. The lines will show through the parchment, guiding your piping. This ensures that all your swan necks are roughly the same size and curvature, contributing to a more polished final presentation of your easy choux swan recipe creation.
Alternative Piping Methods
While a round tip is standard for both bodies and necks, you can experiment with other tips. For a slightly different body texture, you could use a large star tip (like an Ateco 826).
For the necks, if you don't have a small round tip, you could try a very small open star tip, though the classic smooth S-shape is best achieved with a round tip. Alternatively, for the bodies, if you don't have piping bags and tips, you can use two spoons to form rough mounds of dough on the baking sheet, though this will result in a less uniform shape.
Baking Your Choux Swans to Golden Perfection
Oven Temperature and Baking Time
Proper baking is paramount to achieving light, hollow choux shells that don't collapse. A common method involves baking at a higher temperature initially to create a burst of steam for maximum puff, followed by a lower temperature to dry out the shells completely. Preheat your oven to a relatively high temperature, such as 425°F (220°C). Bake the choux bodies at this temperature for about 15 minutes. This high heat rapidly creates steam inside the dough, causing it to expand dramatically.
After this initial high-heat period, reduce the oven temperature to a lower setting, typically 375°F (190°C), and continue baking for another 20-25 minutes, or until the shells are deeply golden brown and feel light and hollow when lifted. The necks, being smaller, will bake faster. Bake the necks at 375°F (190°C) for about 10-15 minutes, or until golden and crisp. The deep golden color is crucial; underbaked choux will collapse upon cooling.
Achieving Even Baking
To ensure your choux swans bake evenly, proper placement in the oven and managing airflow are important. Always bake choux pastry on the middle rack of your oven for the most consistent heat distribution. If baking multiple sheets, it's best to bake them one sheet at a time or use a convection setting if your oven has one, rotating the sheets halfway through the baking time.
Avoid opening the oven door during the first 20-25 minutes of baking for the bodies. Opening the door releases the trapped steam and can cause the pastries to deflate before their structure is set. Once the choux are golden and appear set, you can open the door briefly to check for doneness. They should look firm and not moist on the surface.
Cooling and Preparing for Filling
Cooling choux pastry correctly is as important as baking it properly. Once baked to a deep golden brown, remove the choux bodies and necks from the oven. Immediately pierce the side or bottom of each choux body with a small sharp knife or skewer. This allows steam to escape, preventing the shells from becoming soggy or collapsing as they cool.
Transfer the baked choux bodies and necks to a wire rack to cool completely. Ensure they are fully cooled before attempting to fill them, which usually takes at least 30-60 minutes. Cooling on a wire rack allows air circulation around the entire pastry, ensuring they dry out and become crisp. Choux shells that are still warm when filled can become soft and lose their structure.
Preparing the Filling: Cream Options
Classic Crème Pâtissière Filling Recipe
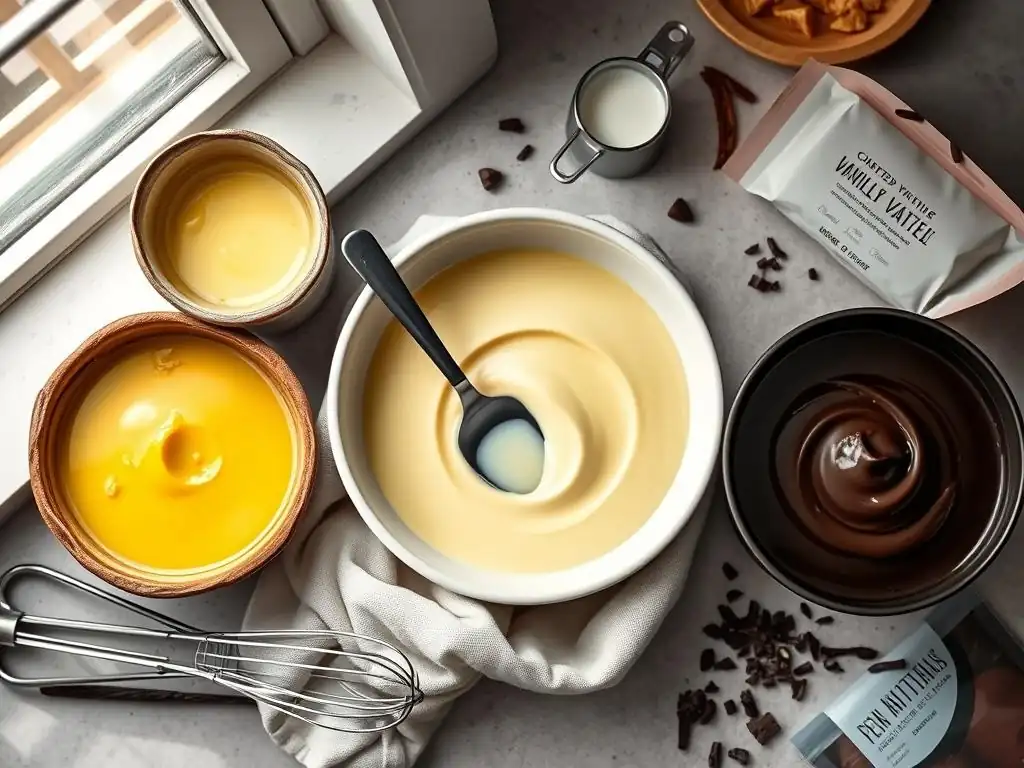
A classic filling for choux swans is rich, smooth crème pâtissière (pastry cream). To make a batch sufficient for approximately 12-15 swans, you might start with about 500ml of milk, heated gently with a vanilla bean or extract. In a separate bowl, whisk together about 100g of sugar, 50g of cornstarch (or a mix of cornstarch and flour), and 4-6 egg yolks until pale and creamy.
Temper the egg mixture by slowly whisking in about half of the hot milk. Pour this tempered mixture back into the saucepan with the remaining milk. Cook over medium heat, whisking constantly, until the cream thickens significantly and comes to a boil.
Boil for 1-2 minutes to ensure the starch is fully cooked and the cream is stable. Remove from heat, stir in a knob of butter for richness and gloss, then strain the cream into a clean bowl. Cover the surface directly with plastic wrap to prevent a skin from forming and chill thoroughly in the refrigerator for at least 2-3 hours until firm enough to pipe.
Whipped Cream Variations
Whipped cream is another popular and lighter filling option for choux swans. Simple sweetened whipped cream is delicious, but you can easily elevate it with variations. For a standard batch to fill about 12-15 swans, whip about 500ml of cold heavy cream with 50-70g of powdered sugar and 1 teaspoon of vanilla extract until medium-stiff peaks form.
You can add flavor variations by incorporating a few tablespoons of liqueur (like Grand Marnier or Frangelico) towards the end of whipping, or by folding in fruit purées (like raspberry or passion fruit) for a fruity twist. To help stabilize whipped cream, especially if the swans will sit out for a short period, consider adding a teaspoon of cornstarch or a commercial whipped cream stabilizer per cup of cream before whipping. This provides a little extra structure.
Chocolate Pastry Cream Filling Recipe
For chocolate lovers, a decadent chocolate pastry cream is an excellent choice. You can adapt the classic crème pâtissière recipe by adding chocolate. Follow the steps for classic pastry cream, but after removing the cooked cream from the heat and stirring in the butter, add about 100-150g of finely chopped dark or milk chocolate (or a mix). Stir until the chocolate is completely melted and the cream is smooth and glossy.
This chocolate version offers a richer, more indulgent filling. Ensure the chocolate is fully melted and incorporated before straining the cream (if desired, though often not necessary with finely chopped chocolate) and chilling it. Chill just as you would the classic version, covering the surface directly with plastic wrap and refrigerating until firm. This provides a delightful contrast to the light choux pastry shell.
Assembling Your Elegant Choux Swans
Cutting and Filling the Swan Bodies
Once your choux bodies are completely cooled and the filling is thoroughly chilled and ready (whipped or piped), it's time to prepare them for assembly. Using a sharp serrated knife, carefully slice off the top third of each choux body horizontally. Set these tops aside; they will become the 'wings' of the swan.
Fill the bottom portion of each choux body generously with your chosen cream filling. You can use a spoon or, for a neater look, use a piping bag fitted with a large round or star tip (like an Ateco 826 or 828). Pipe the filling in a swirl or mound, ensuring there's enough cream to hold the 'wings' and 'neck' in place. A typical choux body about 2.5 inches wide might hold roughly 2-3 tablespoons of filling.
Attaching the Necks and Heads
Now, take the tops you sliced off the choux bodies. Cut each top piece in half horizontally. These two curved halves will form the swan's wings. Gently press these 'wings' into the sides of the cream filling on the filled choux body, positioning them slightly angled upwards to resemble folded wings.
Finally, take your baked choux necks (the S-shapes). Carefully insert the thicker base of one neck piece into the cream filling at the front of the choux body, between the two wings. The cream acts as an adhesive, holding the neck upright. Arrange the necks gracefully to complete the swan silhouette. Handle the necks with care, as they are delicate.
Decorating Your Swans: Finishing Touches
Dusting with Powdered Sugar
A simple yet elegant finishing touch for your choux swans is a light dusting of powdered sugar. Once the swans are fully assembled with their bodies, wings, and necks in place, use a fine-mesh sieve to lightly sprinkle powdered sugar over the tops. This gives them a delicate, frosty appearance, enhancing their graceful look and adding a subtle sweetness.
Adding Chocolate Details
For an extra touch, you can add small chocolate details. Melt a small amount of dark or milk chocolate (about 50g is usually plenty). Using a toothpick or a very fine piping tip, you can dot tiny eyes onto the heads of the swans. You could also drizzle a little melted chocolate over the wings for a decorative effect. Ensure the chocolate is not too hot when applying, especially if dusting with powdered sugar first.
Storing and Serving Your Choux Swans
Best Practices for Keeping Swans Fresh
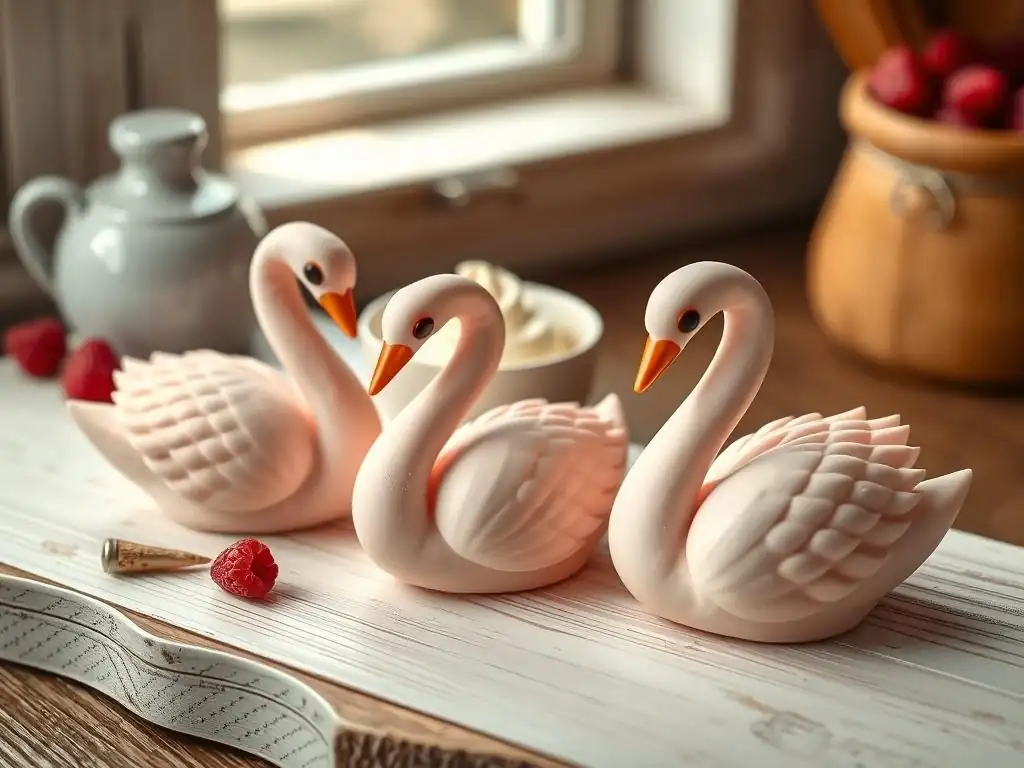
To maintain the crispness of the choux pastry, it's best to store the baked choux shells (bodies and necks) unfilled at room temperature in an airtight container for up to 1-2 days. If you need to store them longer, they can be frozen for up to a month; thaw at room temperature.
Filled choux swans, especially those with dairy-based fillings like pastry cream or whipped cream, must be stored in the refrigerator. However, the moisture from the filling will gradually soften the pastry shells. For the best texture, assemble the swans no more than a few hours before serving. Filled swans can be kept in the refrigerator for up to 12-24 hours, but the pastry will lose its crispness over time.
Serving Suggestions
Choux swans make a stunning presentation for any dessert table. Arrange them on a platter or cake stand. For added flair, you can create a 'pond' effect on the platter using a thin layer of blue-tinted gelatin or a dusting of green powdered sugar to represent grass.
Serve the choux swans chilled directly from the refrigerator if they are filled with cream. Their elegant form makes them a perfect individual dessert. They pair wonderfully with fresh berries or a light fruit coulis. The combination of crisp pastry, rich filling, and graceful shape is sure to impress your guests.
Choux Swan Recipe: Printable Recipe Card
Ingredients List
- For the Choux Pastry:
- 1 cup (240ml) Water or Milk (or half and half)
- 1/2 cup (115g) Unsalted Butter, cubed
- 1 tablespoon Sugar (optional, for slightly sweet pastry)
- 1/4 teaspoon Salt
- 1 cup (125g) All-Purpose Flour
- 4-5 large Eggs, beaten
- For the Classic Crème Pâtissière Filling:
- 2 cups (480ml) Milk
- 1/2 Vanilla Bean, split, or 1 tsp Vanilla Extract
- 1/2 cup (100g) Granulated Sugar
- 1/4 cup (30g) Cornstarch
- 4 large Egg Yolks
- 2 tablespoons (30g) Unsalted Butter, cubed
- For Decoration:
- Powdered Sugar, for dusting
- Melted Chocolate (optional, for eyes)
Step-by-Step Instructions
- Make Choux Pastry: In a saucepan, heat liquid, butter, sugar (if using), and salt until butter melts and mixture simmers.
- Remove from heat, add flour all at once, stir vigorously until dough ball forms.
- Return to low heat, cook and stir 1-2 mins until film forms on pan.
- Transfer dough to bowl, cool slightly. Gradually beat in beaten eggs until dough is smooth, glossy, and forms a V-shape off a spoon.
- Shape Swans: Preheat oven to 425°F (220°C). Line two baking sheets with parchment.
- Fit piping bag with large round tip. Pipe 2-3 inch mounds for bodies on one sheet, spaced apart.
- Fit piping bag with small round tip. Pipe 1.5-2 inch S-shapes for necks on the second sheet. Pipe extras.
- Bake: Bake bodies at 425°F (220°C) for 15 mins. Reduce heat to 375°F (190°C) and bake 20-25 mins more until deep golden.
- Bake necks at 375°F (190°C) for 10-15 mins until golden and crisp.
- Remove from oven, pierce bodies to release steam, cool completely on wire racks.
- Make Pastry Cream: Heat milk and vanilla. Whisk sugar, cornstarch, yolks. Temper yolk mixture with hot milk, return to pan.
- Cook over medium heat, whisking, until thick and boiling (1-2 mins). Remove, stir in butter. Strain if desired. Cover surface with plastic wrap, chill completely.
- Assemble: Slice tops off choux bodies. Slice tops in half horizontally for wings.
- Fill body bottoms with chilled pastry cream (pipe or spoon).
- Insert two wing pieces into the cream on each body.
- Insert a choux neck into the cream at the front of each body.
- Decorate: Dust swans with powdered sugar. Add melted chocolate eyes if desired.
- Serve: Store filled swans in fridge. Serve chilled.
Conclusion: Enjoy Your Choux Swans!
You've successfully navigated the steps to create these beautiful elegant choux swans! This project, while requiring precision and care, is incredibly rewarding and demonstrates a solid understanding of intermediate baking techniques, particularly the foundational art of choux pastry. Each swan represents a triumph of mastering the dough, perfecting your piping skills, and bringing together delicious components into a single, stunning dessert.
Whether you followed this easy choux swan recipe for a special occasion or simply to challenge yourself, take a moment to appreciate your creation. The light, airy pastry, the rich, smooth filling, and the delicate swan shape combine to make a truly memorable treat. Share them with friends and family, or savor them yourself – you've earned it!
Further Baking Adventures: Explore More Choux Pastry Creations
Mastering the pâte à choux for this easy choux swan recipe opens the door to a vast world of other delightful pastries. The same fundamental dough is used to create classic French desserts like long, elegant éclairs, often filled with pastry cream or whipped cream and topped with ganache.
You can also make profiteroles (or cream puffs), which are simply round choux puffs typically filled with ice cream or whipped cream and often served with chocolate sauce. For a truly impressive undertaking, the croquembouche is a cone-shaped tower of cream-filled profiteroles bound together with caramel, a traditional centerpiece for celebrations. Experimenting with these variations allows you to leverage your newfound choux skills in exciting new ways.
Frequently Asked Questions
What is a choux swan and why is it considered an intermediate bake?
A choux swan is a delicate pastry made from pâte à choux dough, shaped to resemble a swan and filled with cream. It's considered intermediate because it requires precise piping techniques and careful handling of the dough to achieve the desired shape and texture.
What are the key ingredients in a choux pastry for these swans?
The key ingredients are water, butter, flour, eggs, and a pinch of salt. These create the pâte à choux dough. Achieving the right balance of these ingredients is crucial for a successful rise and light texture.
Can I make the choux pastry ahead of time?
While it's best to bake choux pastry immediately, you can pipe the swan shapes onto a baking sheet and freeze them for later baking. This allows for easier preparation and timing.
What are some common fillings for choux swans?
Common fillings include whipped cream, pastry cream, or fruit curds. Experiment with different flavors to personalize your choux swan experience.
What tips can help prevent my choux swans from collapsing after baking?
Ensure the oven is at the correct temperature and avoid opening the oven door during baking. Also, allow the swans to cool completely in the oven with the door slightly ajar to prevent deflation.
Final Reflection: The Enduring Elegance of the Choux Swan
The delicate art of crafting choux pastry swans transcends mere baking; it's a testament to the power of patience, precision, and the transformative beauty found in simple ingredients. This seemingly intricate creation, demystified through our step-by-step guide, proves that even ambitious culinary projects are achievable with the right approach and a dash of confidence. The accessibility of this recipe, designed for intermediate bakers, opens a world of creative possibilities for anyone willing to embrace the challenge.
The enduring appeal of the choux swan lies not only in its visual splendor but also in the sense of accomplishment it provides. It's a project that invites us to slow down, to appreciate the subtle nuances of texture and flavor, and to find joy in the process itself. The satisfaction of presenting a beautifully crafted swan, a symbol of grace and elegance, is a reward in itself. The best things in life are not things, but experiences.
This sentiment perfectly captures the essence of creating these delightful pastries – the experience is as valuable, if not more so, than the final product.
Now, it's your turn. Don't be intimidated by the seemingly complex nature of choux pastry. Embrace the challenge, gather your ingredients, and embark on this delightful culinary journey. Let the elegance of the choux swan inspire you to explore your own creative potential, to find joy in the meticulous process, and to share the beauty of your creations with those you love. The sweet taste of success, both literally and figuratively, awaits.
Unleash Your Inner Pastry Chef: Bake Elegant Choux Swans!
Thanks for joining us on this delicious journey into the world of choux pastry! We hope you now feel confident enough to tackle these elegant swans. Ready to take your baking skills to the next level?
- Master the art of the choux swan: Practice makes perfect! Try recreating the recipe, focusing on your piping technique. Even small improvements will make a big difference.
- Share your creation: Show off your beautiful choux swans on social media using #BakeWithEaseSwans – we'd love to see them!
- Explore other choux pastry possibilities: Think beyond swans! What other delightful shapes and flavors can you create with this versatile dough?
What other ambitious baking projects will you tackle now that you've mastered the choux swan?