
Mastering the Art of Layering in Frozen Dessert Terrines

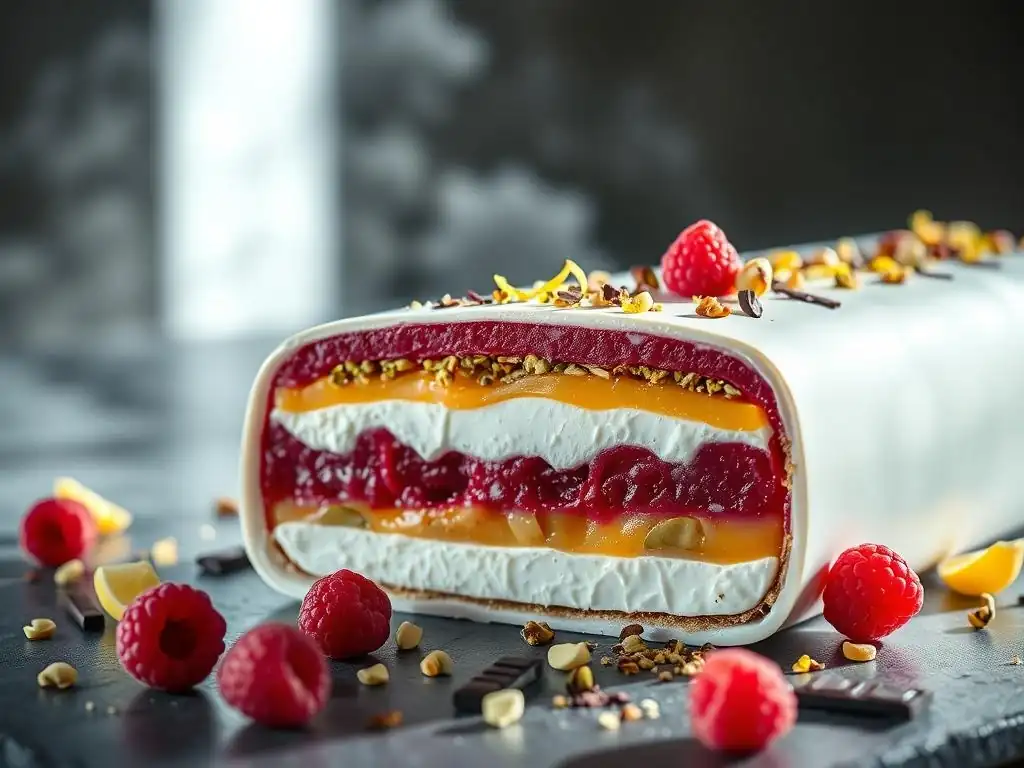
Welcome to BakeWithEase, your companion on the delicious journey of baking! Ever dreamed of creating stunning, layered desserts that look as incredible as they taste? In this article, we're unlocking the secrets to mastering the art of frozen dessert terrine layering. Discover the essential tips and techniques to achieve perfectly defined layers, prevent unwanted ice crystals, and impress your friends and family with a show-stopping frozen masterpiece. Intrigued? Let's dive in and transform your dessert game!
- Introduction to Frozen Dessert Terrines and Layering Techniques
- Essential Tools and Ingredients for Frozen Terrine Layering Success
-
Step-by-Step Guide to Layering Frozen Dessert Terrines
- Preparing Your Terrine Mold for Optimal Layering
- Creating Your First Layer: Base Flavors and Textures
- Building Complexity: Adding Fruit, Nuts, and Crunchy Elements
- Mastering the Art of Even Layering: Tips and Tricks
- Preventing Ice Crystals: Key Techniques for Smooth Layers
- The Final Layer: Finishing Touches and Presentation
- Creative Frozen Dessert Terrine Layering Ideas and Flavor Combinations
- Troubleshooting Common Frozen Dessert Terrine Layering Issues
- Advanced Layering Techniques for Frozen Dessert Terrines
- Storing and Serving Your Layered Frozen Dessert Terrine
- Conclusion: Elevate Your Frozen Desserts with Perfect Layering
-
Frequently Asked Questions
- What is a frozen dessert terrine?
- What are some key considerations when choosing ingredients for a frozen dessert terrine?
- What are some tips for achieving even layers in a frozen dessert terrine?
- How long should I freeze a frozen dessert terrine before serving?
- What are some ways to decorate a frozen dessert terrine before serving?
- Final Reflection: The Enduring Allure of Layered Delights
- Unleash Your Inner Pâtissier: Craft the Perfect Layered Terrine!
Introduction to Frozen Dessert Terrines and Layering Techniques
What is a Frozen Dessert Terrine?
A frozen dessert terrine is essentially a molded frozen confection, often made with layers of different ice creams, sorbets, mousses, cakes, or fruits. It's prepared in a loaf pan or a specific terrine mold, then frozen solid, and typically sliced before serving. The name "terrine" comes from the earthenware mold traditionally used for meat pâtés, but in the world of pastry, it signifies a similar layered, molded structure, only frozen and sweet. These desserts offer a delightful combination of textures and flavors in every slice, making them a sophisticated option for entertaining or a special treat.
Unlike a simple block of ice cream, a terrine allows for a deliberate construction of flavors and visual appeal. Imagine a slice revealing vibrant stripes of raspberry sorbet, creamy vanilla bean ice cream, and perhaps a layer of moist brownie or crunchy praline. The beauty of the frozen dessert terrine lies in this artful arrangement. It transforms simple frozen components into a show-stopping dessert that is both delicious and visually stunning, showcasing the baker's creativity and skill in layering.
Why Layering is Key to a Stunning Terrine
Layering is the heart and soul of a successful frozen dessert terrine. It's what elevates it from a simple frozen block to a visually impressive and texturally complex masterpiece. Careful layering allows you to combine contrasting or complementary flavors and textures in a single bite. Think of alternating creamy ice cream with tangy fruit sorbet, or soft mousse with crunchy nuts. This juxtaposition keeps the palate interested and makes the dessert much more dynamic than a single-flavor creation.
Furthermore, the visual impact of distinct, clean layers is undeniable. A well-layered terrine, when sliced, presents a beautiful cross-section of colors and textures. This visual appeal is a significant part of the dessert's charm and makes it particularly suitable for special occasions. Mastering frozen dessert terrine layering tips is crucial not just for taste but also for creating that 'wow' factor when you present and slice it for your guests. It demonstrates precision and artistry in the kitchen.
Achieving Perfect Layered Frozen Desserts
Achieving perfect layered frozen desserts requires attention to detail and patience, primarily during the freezing process between layers. The key is to ensure each layer is sufficiently firm before adding the next, preventing colors and flavors from bleeding into one another. This often means chilling or partially freezing each component before assembly and then freezing the terrine incrementally. For instance, a soft mousse layer might need 30-60 minutes in the freezer to firm up before a firmer ice cream layer is added on top.
Successful layering also involves managing the temperature of your ingredients. Ice cream or sorbet should be slightly softened – scoopable but not melted – to spread evenly without incorporating too much air or creating uneven thicknesses. Mousse or panna cotta layers should be poured carefully. Using specific frozen dessert terrine layering tips, such as chilling the mold beforehand and working relatively quickly, helps maintain the integrity of each layer and prevents premature melting or mixing.
Essential Tools and Ingredients for Frozen Terrine Layering Success
Must-Have Tools for Precise Terrine Layering
Having the right tools makes the process of layering frozen dessert terrines significantly easier and more precise. A standard loaf pan, typically 9x5 inches, is a common and accessible choice, though dedicated terrine molds with straight sides are ideal for clean slices. Lining the mold is non-negotiable; plastic wrap or parchment paper, with plenty of overhang, is essential for easy removal of the frozen terrine. A flat spatula or offset spatula is invaluable for spreading layers evenly and smoothing the surface before adding the next.
Measuring cups and spoons ensure consistent layer thickness if you're aiming for uniform stripes. For more complex designs or adding elements like fruit purees or sauces between layers, squeeze bottles or piping bags can offer greater control. Finally, a sharp knife dipped in hot water is the secret weapon for clean slicing once the terrine is fully frozen. These tools, combined with solid frozen dessert terrine layering tips, pave the way for a beautifully constructed dessert.
Choosing the Right Ingredients for Layered Frozen Dessert Perfection
Selecting the right ingredients is paramount for both flavor and structural integrity in a frozen dessert terrine. The foundation often involves ice cream, sorbet, or gelato. Choose high-quality options with good density and flavor. Avoid those that are excessively airy, as they can melt too quickly and compromise the layers. Mousses, panna cottas, or even chilled custards can add creamy, softer layers, but they must be stable enough to freeze without becoming icy.
Incorporating varying textures is another crucial aspect. Layers of sponge cake, brownies, or even crushed cookies can provide a delightful contrast to the smooth frozen elements. Adding nuts, chocolate chips, or pieces of candied fruit can introduce pleasant crunch or chewiness. The key is to select components that freeze well and complement each other in taste. For example, a classic pairing might involve layers of dark chocolate mousse, raspberry sorbet, and a thin layer of chocolate cake, showcasing different textures and flavors within the frozen dessert terrine layering.
Ingredient Quality and Its Impact on the Final Terrine
The quality of your ingredients directly impacts the taste, texture, and overall success of your frozen dessert terrine. High-quality ice creams and sorbets, made with real fruit or dairy and less air, will have a smoother texture and richer flavor compared to cheaper alternatives which can become icy when refrozen. For instance, using a premium vanilla bean ice cream with visible flecks of vanilla will yield a far superior flavor profile than one made with artificial extract.
Similarly, the quality of components like chocolate, fruit purees, or nuts matters. Using fine couverture chocolate for a mousse layer will result in a richer, smoother texture and more intense flavor than using compound chocolate. Fresh, ripe fruit purees for a sorbet layer will provide a brighter, more authentic taste. Even seemingly small details, like using fresh, well-toasted nuts, can significantly enhance the final texture and flavor complexity of the frozen dessert terrine. Investing in good ingredients is one of the best frozen dessert terrine layering tips for achieving truly exceptional results.
Step-by-Step Guide to Layering Frozen Dessert Terrines
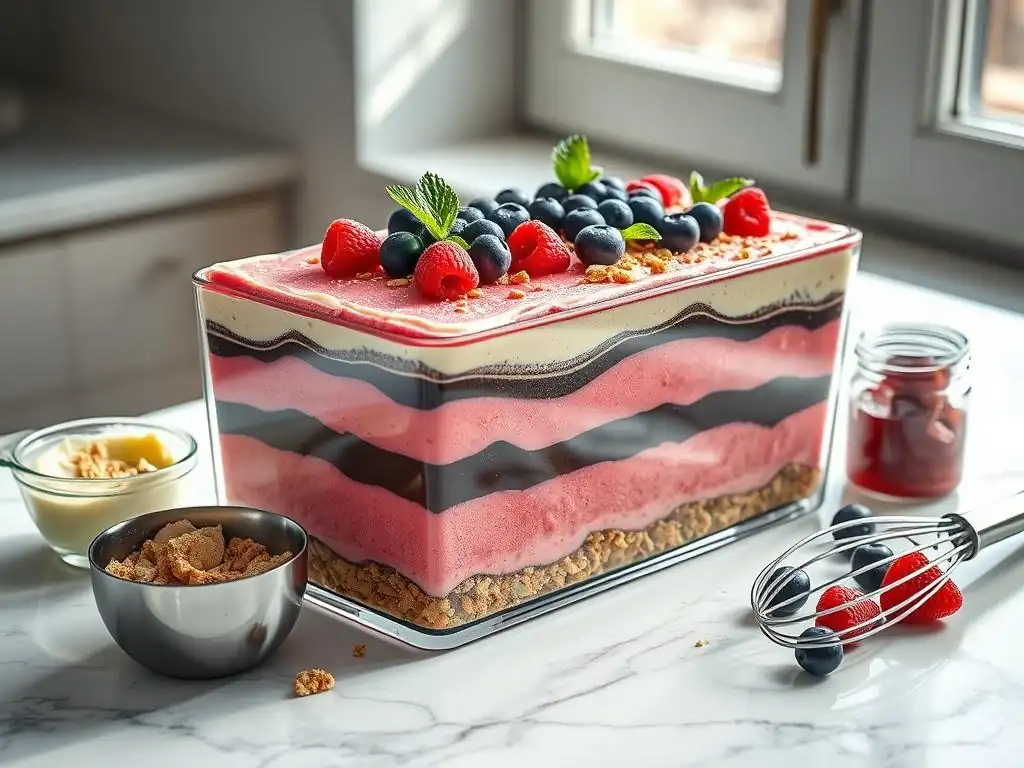
Preparing Your Terrine Mold for Optimal Layering
Proper mold preparation is the critical first step in creating a successful frozen dessert terrine. Start with a clean, dry mold. The most common method is lining it generously with plastic wrap, ensuring there's plenty of overhang on all sides (at least 6-8 inches) to cover the top later and facilitate easy removal. Press the plastic wrap smoothly against the bottom and sides of the mold, trying to minimize wrinkles, as these can show on the finished terrine. For a loaf pan, two pieces overlapped lengthwise often work well.
Alternatively, you can use parchment paper, cutting it to fit the bottom and sides and using additional strips for the ends, again leaving ample overhang. Some bakers lightly grease the mold first to help the lining adhere better. Once lined, place the mold in the freezer for at least 15-20 minutes before you start layering. A chilled mold helps keep your first layer from melting too quickly upon contact, which is a vital part of effective frozen dessert terrine layering tips.
Creating Your First Layer: Base Flavors and Textures
The first layer, which will become the top layer when the terrine is inverted, often sets the stage for the dessert's overall profile. It can be a dense, flavorful component like a layer of cake or brownie, a smooth mousse, or even the first flavor of ice cream or sorbet.
If using ice cream or sorbet, allow it to soften slightly at room temperature until it's pliable enough to spread smoothly, but not melted. For a standard 9x5 inch loaf pan, a layer about 1 to 1.5 inches thick is a good starting point, depending on the total number of layers planned.
Carefully spoon or pour the chosen mixture into the bottom of the prepared mold. Use an offset spatula to spread it evenly across the entire surface and into the corners, ensuring a consistent thickness. Gently tap the mold on the counter a few times to help settle the layer and remove any large air pockets.
Once the layer is smooth, place the mold back into the freezer. Allow this first layer to firm up completely – usually 1-2 hours, or until firm to the touch – before adding the next. This hardening step is fundamental to mastering frozen dessert terrine layering tips and preventing layers from blending.
Building Complexity: Adding Fruit, Nuts, and Crunchy Elements
Intermediate layers are perfect for adding textural contrast and bursts of flavor. Once a base layer is firm, you can introduce elements like fresh fruit (ensure it's cut into small pieces and relatively dry to minimize ice crystal formation), toasted nuts (like pistachios or hazelnuts), chocolate chips, crushed cookies (like Oreos or shortbread), or even a thin layer of a complementary sauce or ganache (ensure these are cooled and slightly thickened).
Distribute these elements evenly over the firm layer. If adding something like crushed cookies, you might press them gently into the surface of the firm layer to help them adhere. If adding pieces of fruit or nuts within a subsequent mousse or ice cream layer, fold them in just before spreading that layer. The goal is to create pockets of texture and intense flavor that provide excitement throughout the terrine slice. This step is where creative frozen dessert terrine layering tips truly shine, allowing for unique combinations.
Mastering the Art of Even Layering: Tips and Tricks
Achieving even layers is key to the visual appeal of a frozen dessert terrine. The most effective method is to add each subsequent layer only after the previous one is sufficiently frozen, usually firm enough that it won't be disturbed when the next layer is spread on top. If a layer is too soft, adding the next will cause them to swirl together. Use your spatula to spread each new layer gently from the center outwards, ensuring it fills the mold completely and has a consistent height across the surface.
For precise, uniform layers, especially if using multiple flavors of ice cream or sorbet, consider measuring the quantity for each layer. For a 9x5 inch loaf pan, approximately 1 to 1.5 cups of softened ice cream per layer often works well, depending on the desired total height and number of layers. Working quickly is also important; the longer your ingredients are out of the freezer, the softer they become, making even spreading more difficult. Returning the mold to the freezer immediately after adding and smoothing each layer is a non-negotiable step among essential frozen dessert terrine layering tips.
Preventing Ice Crystals: Key Techniques for Smooth Layers
Ice crystals are the bane of frozen desserts, turning smooth textures into unpleasant, crunchy ones. Preventing them is vital for perfect frozen dessert terrine layering. One primary cause is temperature fluctuation; repeatedly taking the terrine in and out of the freezer or storing it in an area prone to thawing and refreezing (like the freezer door) should be avoided. Store the terrine deep in the freezer where the temperature is most stable and coldest.
Another key technique is ensuring ingredients are well-covered and sealed. The plastic wrap lining should completely cover the top of the terrine before it goes in for its final freeze, creating a barrier against air and moisture which cause crystallization. Using recipes for mousses or custards that are specifically designed to freeze well, often containing stabilizers like gelatin or a higher fat content, also helps.
Finally, incorporating elements like alcohol or sugar can lower the freezing point and contribute to a smoother texture, though this needs to be balanced carefully. These are crucial frozen dessert terrine layering tips for maintaining quality.
The Final Layer: Finishing Touches and Presentation
The final layer you add to the mold will be the base of your terrine when inverted. This layer should ideally be sturdy enough to support the weight of the terrine during handling and slicing. A layer of cake, a dense mousse, or even a firm ganache works well. Ensure this layer is spread evenly and smoothed flat, as this will be the bottom surface. Once this layer is in place, fold the excess plastic wrap or parchment paper neatly over the top of the terrine, ensuring it is completely sealed.
For an extra layer of protection and to ensure the top is perfectly flat, you can place a piece of cardboard cut to the size of the mold on top before folding over the plastic wrap. This helps press the final layer flat as it freezes. The terrine should then be frozen solid for at least 6-8 hours, or preferably overnight, before attempting to unmold and slice. Proper finishing and freezing are the final steps in applying effective frozen dessert terrine layering tips for a successful outcome.
Creative Frozen Dessert Terrine Layering Ideas and Flavor Combinations
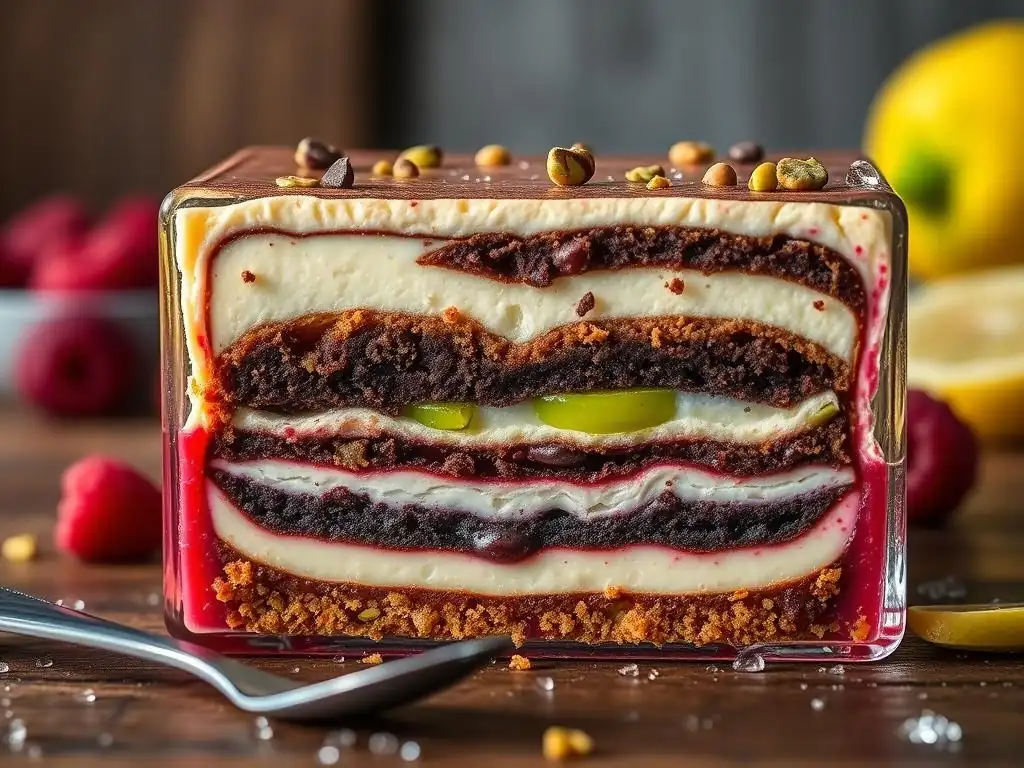
Classic Flavor Pairings for Frozen Terrines
Certain flavor combinations are timeless classics in frozen dessert terrines because they complement each other beautifully. Chocolate and raspberry is a perennial favorite; layers of dark chocolate ice cream or mousse alternating with vibrant raspberry sorbet create a rich yet refreshing contrast. Strawberry and vanilla is another beloved pairing, perhaps using vanilla bean ice cream and fresh strawberry puree or sorbet, possibly with a layer of sponge cake.
Coffee and caramel also work wonderfully together. Imagine layers of coffee ice cream, salted caramel sauce (frozen or swirled), and maybe a layer of crushed biscotti for crunch. Mint and chocolate is refreshing – mint chocolate chip ice cream layered with chocolate fudge sauce or brownie pieces. These classic pairings provide a reliable foundation for practicing your frozen dessert terrine layering tips and guarantee crowd-pleasing results.
Innovative Layering Ideas
Beyond the classics, there's ample room for creativity in frozen dessert terrine layering. Consider using less conventional flavors or textures. Layers of green tea (matcha) ice cream paired with a layer of black sesame mousse offer an intriguing, earthy profile. Tropical fruit combinations like mango sorbet, coconut ice cream, and passion fruit curd can transport you to warmer climates.
You could also incorporate savory notes subtly, like a layer of olive oil cake or a sprinkle of sea salt over a caramel layer. Using different types of frozen elements, like granita alongside sorbet and ice cream, adds unique textural dimensions. Think about incorporating components like cheesecake batter (frozen), or even a layer of frozen yogurt for a lighter touch. Exploring these innovative frozen dessert terrine layering tips allows you to create truly unique and memorable desserts.
Layering with Different Textures: Achieving the Perfect Bite
A truly outstanding frozen dessert terrine offers a variety of textures in every bite. This is achieved by deliberately layering components with different consistencies. Pair smooth, creamy ice cream or mousse with something crunchy, like toasted nuts, crushed cookies, or a thin layer of brittle. Contrast soft, yielding layers like panna cotta with firmer ones like sorbet or gelato.
Incorporating a layer of cake (sponge, brownie, or even pound cake) provides a softer, slightly chewy texture that absorbs some of the melting frozen components. Adding a swirl or thin layer of sauce that freezes to a slightly different consistency (like a fruit coulis or caramel) can also add textural interest. Mastering the interplay of textures through strategic frozen dessert terrine layering tips elevates the dessert experience significantly.
Chocolate and Raspberry Terrine Recipe
Here is a simplified example of a classic Chocolate and Raspberry Frozen Dessert Terrine layering structure:
- Layer 1 (Bottom when served): Thin layer of chocolate brownie or sponge cake
- Layer 2: Raspberry Sorbet (slightly softened)
- Layer 3: Fresh raspberries or raspberry coulis (optional, slightly thickened)
- Layer 4: Dark Chocolate Ice Cream (slightly softened)
- Layer 5 (Top when served): Chocolate Mousse (chilled until firm)
To assemble:
- Line a 9x5 inch loaf pan with plastic wrap, leaving overhang. Freeze mold for 20 mins.
- Press cooled brownie/cake layer into the bottom. Freeze 30 mins.
- Spread softened raspberry sorbet evenly over cake. Freeze 1-2 hours until firm.
- If using, drizzle raspberry coulis over sorbet. Freeze 15 mins.
- Spread softened dark chocolate ice cream over sorbet/coulis. Freeze 1-2 hours until firm.
- Gently pour or spread chilled chocolate mousse over ice cream. Smooth top.
- Fold plastic wrap overhang over the top to seal. Freeze overnight until solid.
This structure provides a balance of rich chocolate, tangy fruit, and varying textures, demonstrating effective frozen dessert terrine layering tips in practice.
Troubleshooting Common Frozen Dessert Terrine Layering Issues
Preventing Layers from Mixing: Stabilization Techniques
One of the most frustrating issues is layers bleeding or mixing together, resulting in muddy colors and flavors. The primary solution is ensuring each layer is adequately frozen before adding the next. For ice cream or sorbet layers, this means freezing until quite firm, not just chilled. For mousse or panna cotta layers, ensure the recipe includes sufficient gelatin or other stabilizers and that the mixture is properly set before pouring it into the mold over a frozen layer.
Working quickly when spreading new layers is also crucial. The less time a soft layer spends in contact with a firm one, the less chance there is for melting and mixing. Chilling your spreading tools (spatulas) can also help keep ingredients firm during the process. These stabilization techniques are fundamental frozen dessert terrine layering tips to maintain clean lines.
Dealing with Uneven Layers: Correction Methods
Uneven layers detract from the visual appeal of a terrine. This often happens if layers are not spread evenly or if the mold is not sitting level in the freezer. To correct unevenness during the process, use an offset spatula to gently push and spread the mixture to achieve a consistent thickness across the surface before freezing. If you notice unevenness after a layer has partially frozen but before it's completely hard, you might be able to gently redistribute the still-pliable parts.
If layers are uneven after freezing, there's not much you can do within the terrine itself. However, for future attempts, focus on spreading each layer meticulously from corner to corner and ensuring the mold is placed on a flat, level surface in the freezer. Practice makes perfect when it comes to mastering the techniques behind these frozen dessert terrine layering tips.
Avoiding Air Pockets: Proper Filling and Packing
Air pockets create gaps in the final slice and can lead to ice crystal formation. They often occur when scooping or pouring ingredients into the mold. To avoid them, ensure your ice cream or sorbet is softened just enough to be spreadable, not airy or whipped. When adding layers, spoon or pour the mixture into the mold and gently spread it, pressing it slightly into the corners and against the sides to eliminate voids.
After spreading a layer, gently tapping the mold on the counter can help settle the mixture and release trapped air bubbles, particularly with mousses or more liquid layers. For thicker layers like ice cream, pressing down gently with the back of your spatula as you spread helps ensure a dense, air-free layer. Proper filling and packing are essential frozen dessert terrine layering tips for a smooth, uniform result.
Addressing Freezing Issues and Texture Problems
Common freezing issues include layers that become too hard or too icy. Over-hardening can occur if the freezer temperature is too low or if the terrine isn't allowed sufficient time to temper before slicing. Icy textures are often due to temperature fluctuations, incorporating too much air, or using ingredients with high water content without proper stabilization.
To address these: ensure your freezer is set to a stable temperature, ideally around 0°F (-18°C). For icy textures, review your recipes – ensure mousses have enough stabilizer, and avoid overly watery components. When using ice cream or sorbet, choose high-quality options known for smooth texture. Always cover the terrine completely with plastic wrap to prevent freezer burn and ice crystals. Allowing the terrine to temper in the refrigerator for 20-30 minutes before slicing significantly improves texture and ease of cutting, a crucial part of serving frozen dessert terrines.
Advanced Layering Techniques for Frozen Dessert Terrines
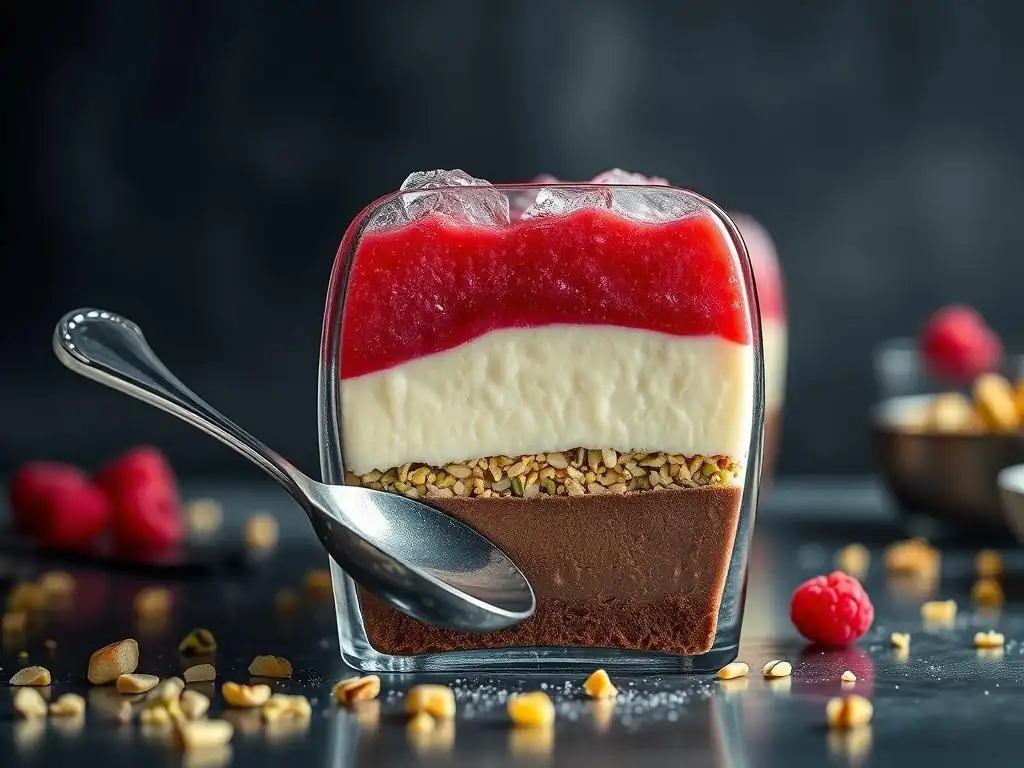
Creating Intricate Patterns with Layering
Beyond simple horizontal stripes, advanced frozen dessert terrine layering tips allow for more intricate patterns. One method is to create a "checkerboard" effect. This involves freezing blocks of different colored/flavored ice creams or mousses separately, cutting them into uniform cubes or rectangles, and then arranging them in a pattern within the mold, filling the gaps with a contrasting, softer layer (like a slightly melted ice cream or a pourable mousse) before refreezing.
Another technique is creating a core layer. You could freeze a cylindrical block of one flavor (e.g., sorbet) and then embed it within a different flavor (e.g., ice cream or mousse) poured into the mold, so that slices reveal a central circle or shape surrounded by another color. These techniques require careful planning and execution but yield stunning visual results, showcasing true mastery of frozen dessert terrine layering.
Using Different Freezing Times for Layer Definition
Manipulating freezing times between layers is key to achieving distinct definitions, especially when using components with different freezing points (like a very soft mousse and a firm sorbet). A soft layer might only need 30-45 minutes to become firm enough to support the next layer without mixing, while a firmer ice cream layer might need 1-2 hours.
For complex patterns like swirls or incorporating delicate elements, you might freeze a base layer until just firm enough to hold its shape, add a swirl of sauce or place delicate pieces, and then immediately add the next layer, freezing them together. This timing precision is a subtle yet powerful aspect of advanced frozen dessert terrine layering tips, allowing for creative textures and visual effects.
Incorporating Sauces and Swirls into Your Layers
Adding sauces and swirls introduces liquid elements that freeze differently and create beautiful patterns. A fruit coulis, caramel sauce, or chocolate ganache can be drizzled or swirled over a partially frozen layer just before adding the next. The key is that the sauce should be cooled and thick enough that it doesn't completely run and mix, but liquid enough to create a swirl.
To create distinct swirls, spread a layer of your main component (e.g., ice cream), then spoon dollops or drizzle lines of your sauce over it. Use a skewer or knife to gently swirl the sauce through the main layer, being careful not to go too deep and disturb the layer below. This technique adds visual interest and pockets of intense flavor, enhancing the overall frozen dessert terrine layering.
Ombre and Gradient Layering Effects
Creating an ombre or gradient effect involves using shades of the same color or closely related colors and layering them from darkest to lightest (or vice versa). This requires careful preparation of your ingredients, perhaps by adding varying amounts of food coloring or flavorings to a base (like a white chocolate mousse or vanilla ice cream) to create several distinct shades.
You would then layer these shades sequentially in the mold, starting with the darkest at the bottom and progressing to the lightest at the top (or vice versa). Spreading each layer smoothly and ensuring they are of consistent thickness is crucial for a clean gradient. For a softer gradient, you might allow the layers to be slightly less firm when adding the next, encouraging a subtle bleed between shades. This artistic approach demonstrates sophisticated frozen dessert terrine layering skills.
Storing and Serving Your Layered Frozen Dessert Terrine
Proper Storage Techniques to Maintain Layer Integrity
Proper storage is crucial to keep your beautifully layered frozen dessert terrine looking and tasting its best. Once fully frozen and sealed with plastic wrap, the terrine should be stored in the coldest part of the freezer, away from the door where temperatures fluctuate most. For added protection against freezer burn and odors, wrap the plastic-wrapped terrine in a layer of aluminum foil or place it inside a rigid airtight container or a freezer bag.
This double-wrapping method creates a strong barrier against air and moisture, the main culprits behind ice crystals and flavor degradation. Stored correctly, a frozen dessert terrine can typically last for 1-2 weeks without significant loss of quality. Maintaining consistent temperature during storage is one of the most practical frozen dessert terrine layering tips for preserving your hard work.
Defrosting and Serving Tips for Optimal Flavor and Texture
Serving a frozen dessert terrine straight from the deep freezer will result in a rock-hard, difficult-to-slice block with muted flavors and textures. To achieve optimal flavor and texture, the terrine needs to temper slightly before serving. The best way to do this is to transfer the frozen terrine from the freezer to the refrigerator about 20-30 minutes before you plan to slice and serve it.
This allows the layers to soften just enough to become scoopable/sliceable and for the flavors to become more pronounced. The exact time will depend on the size of the terrine and your refrigerator's temperature. You'll know it's ready when a knife can be pushed through the layers with some resistance but without extreme force. These serving tips are just as important as the frozen dessert terrine layering tips themselves for a perfect dessert experience.
Presentation Ideas for a Show-Stopping Frozen Terrine
Presenting your layered frozen dessert terrine beautifully is the grand finale. Start by carefully unmolding it. Remove the terrine from the freezer after tempering, unwrap the outer foil/container/bag, then gently lift it out of the mold using the plastic wrap overhang. Peel away the plastic wrap.
To slice, use a sharp knife dipped in hot water and wiped dry between each slice. This creates clean, defined cuts, showcasing your layering work. Arrange slices on chilled plates. Garnish simply to let the terrine's layers be the star: perhaps a fresh berry, a sprinkle of chopped nuts, a drizzle of complementary sauce (like chocolate or raspberry coulis), or a dollop of whipped cream. A few edible flowers can add elegance. The stunning visual effect of well-executed frozen dessert terrine layering will speak for itself.
Conclusion: Elevate Your Frozen Desserts with Perfect Layering
Key Frozen Dessert Terrine Layering Tips
Mastering the art of frozen dessert terrine layering transforms simple frozen components into impressive, multi-dimensional desserts. The key takeaways include meticulous mold preparation by lining it thoroughly with plastic wrap, ensuring each layer is sufficiently frozen before adding the next to prevent bleeding, and spreading each layer evenly for a clean, uniform appearance.
Using high-quality ingredients contributes significantly to both flavor and texture. Incorporating varying textures, from creamy mousses to crunchy nuts or cake layers, creates a more engaging eating experience. Finally, proper freezing time and careful tempering before slicing are crucial for achieving the best possible texture and allowing the layered flavors to shine. These fundamental frozen dessert terrine layering tips provide a solid foundation for creating stunning desserts.
Further Resources for Frozen Dessert Inspiration
To continue your journey into the world of frozen desserts and refine your frozen dessert terrine layering techniques, explore various recipe books focusing on ice cream, sorbet, and frozen pastries. Websites and blogs dedicated to professional pastry techniques often provide detailed guides and innovative ideas for layering and molding frozen creations.
Consider experimenting with different stabilizers like gelatin, agar-agar, or even specialized ice cream stabilizers to improve the texture and stability of your layers. Looking at examples from professional patisseries can also provide inspiration for complex designs and flavor combinations. Practice and experimentation are your best allies in perfecting your frozen dessert terrine layering skills.
Frequently Asked Questions
What is a frozen dessert terrine?
A frozen dessert terrine is a layered frozen dessert, often resembling a loaf or brick. It typically features a variety of flavor and texture combinations, achieved through careful layering of different frozen components.
What are some key considerations when choosing ingredients for a frozen dessert terrine?
When selecting ingredients, consider contrasting textures and complementary flavors. Aim for a balance of creamy, crunchy, and fruity elements. The ingredient quality greatly impacts the final taste and texture.
What are some tips for achieving even layers in a frozen dessert terrine?
To achieve even layers, ensure each component is partially frozen before adding the next. Use a level surface and press gently to eliminate air pockets. Careful planning and preparation are essential.
How long should I freeze a frozen dessert terrine before serving?
A frozen dessert terrine typically needs to freeze for at least 4-6 hours, or preferably overnight. This ensures the layers are firm and hold their shape when sliced.
What are some ways to decorate a frozen dessert terrine before serving?
You can decorate a frozen dessert terrine with fresh fruit, chocolate shavings, or a dusting of cocoa powder. A light drizzle of sauce can also add visual appeal and enhance the flavor profile.
Final Reflection: The Enduring Allure of Layered Delights
The art of layering in frozen dessert terrines isn't merely a culinary technique; it's a testament to the power of visual storytelling and textural complexity. Today, in a world saturated with instant gratification, the meticulous process of crafting a layered terrine offers a refreshing counterpoint – a journey of anticipation and reward that elevates the simple act of dessert into an experience.
The impact of visually stunning desserts on our culture is undeniable. From the meticulously crafted pastries of Parisian patisseries to the vibrant ice cream creations flooding our social media feeds, the aesthetic appeal of food continues to captivate. The pleasure of food is often more than just the taste; it's the experience, the presentation, the story it tells.
This quote perfectly encapsulates the enduring appeal of the layered terrine, a dessert that speaks volumes before a single bite is taken. The careful consideration of color, texture, and flavor combinations in each layer creates a symphony for the eyes and the palate, a testament to the chef's artistry and passion.
Now, consider your own culinary journey. What layers of flavor and texture resonate most deeply with you? What stories do you want to tell through your desserts? I invite you to experiment, to embrace the challenge of mastering the art of layering, and to discover the boundless creative potential within this seemingly simple technique. Don't just create a dessert; create an experience, a masterpiece that reflects your unique culinary voice. The world awaits your layered delights.
Unleash Your Inner Pâtissier: Craft the Perfect Layered Terrine!
Thanks for joining us on this delicious journey into the world of layered frozen dessert terrines! We hope you've gained some valuable insights and inspiration. Now it's time to put your newfound knowledge to the test!
- Create your masterpiece: Choose your favorite flavor combinations and immediately start planning your next terrine creation. Don't be afraid to experiment with textures and colors!
- Share your success: Post a photo of your finished terrine on social media and tag us – we'd love to see your culinary artistry! Use #BakeWithEaseTerrines to join the conversation.
- Explore flavor variations: Browse our recipe section for more inspiring ideas on unique flavor combinations and techniques to elevate your terrine game.
Ready to transform your freezer into a frozen dessert wonderland? What unexpected flavor combinations will you explore first?