
Crusts Matter: Choosing and Making the Perfect Base

Welcome to BakeWithEase!
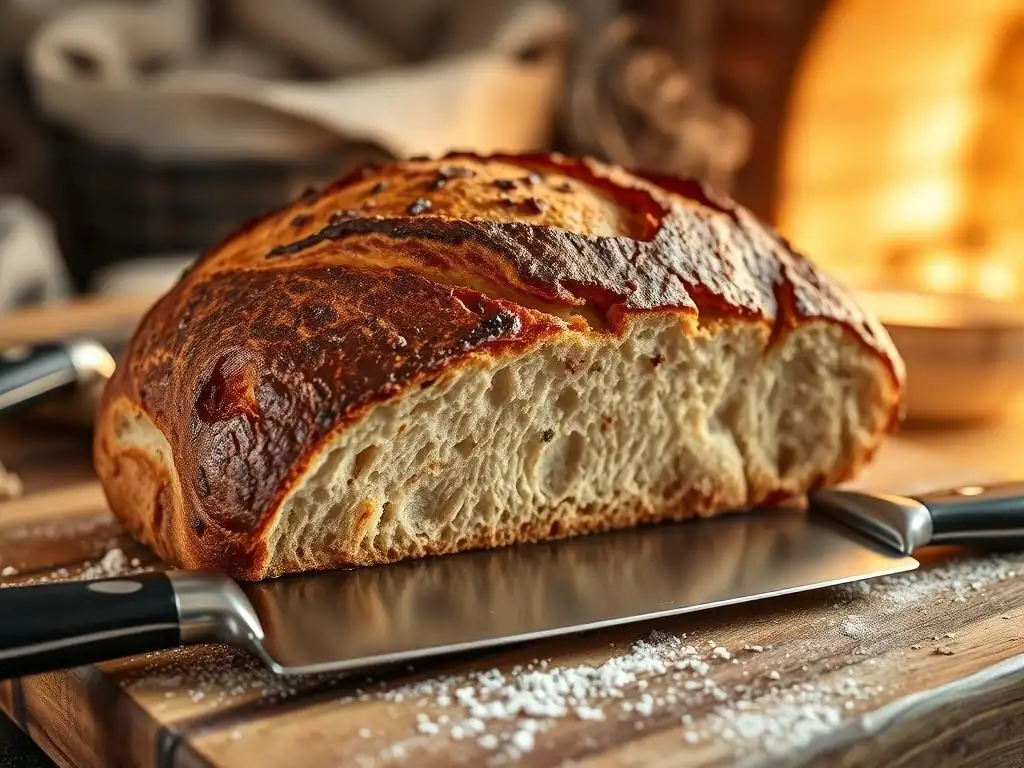
Ever wonder what separates a good sourdough from a great one? It often comes down to the crust. This article delves into the secrets of achieving that perfect sourdough crust, offering tips and techniques you can use today. Get ready to unlock the secrets to a crispy, flavorful base that will elevate your baking and leave everyone craving more. What are you waiting for? Let's explore how to make your crusts truly matter!
- Pizza Perfection: Crafting the Ideal Base
- The Soul of Pizza: Understanding Crust Importance
- Mastering Neapolitan Pizza Dough: Tips & Techniques
- Baking Neapolitan Pizza: Wood-Fired Oven Mastery
- Beyond Neapolitan: Other Dough Options for Your Pizza
- Tips for a Crispy and Chewy Crust Every Time
- Neapolitan Dough Tips: A Summary
- Perfect Neapolitan Pizza Dough Recipe
- Storage and Handling of Pizza Dough
- Elevate Your Pizza: The Power of a Well-Made Crust
-
Frequently Asked Questions
- How do I achieve a crispy sourdough crust?
- What kind of flour is best for a perfect sourdough crust?
- What role does hydration play in sourdough crust development?
- Can I improve my sourdough crust by adjusting my scoring technique?
- What are some tips for maintaining a crispy sourdough crust after baking?
- Final Reflection: The Transformative Power of Crust
- Unleash Your Inner Baker: Craft the Perfect Crust!
Pizza Perfection: Crafting the Ideal Base
The Soul of Pizza: Understanding Crust Importance
Why Crust Quality Dictates Pizza Success
The crust isn't just a vehicle for toppings; it's the foundation, the structure, and often the most memorable part of a truly great pizza. A well-executed crust provides the perfect balance of texture – a crispy exterior giving way to a tender, airy interior. It contributes significantly to the overall flavor profile, whether it's the slightly sweet tang of a long-fermented dough or the rich char from a hot oven.
Without a quality base, even the finest ingredients can fall flat, resulting in a disappointing pizza experience. Think of it as the canvas for your culinary art; a flawed canvas detracts from the masterpiece.
A dough's hydration level, fermentation time, and baking temperature all play critical roles in developing its flavor and texture. For instance, a dough with higher hydration (say, 65-70% water to flour ratio) tends to produce a lighter, airier crust with large bubbles, while a lower hydration dough might be denser and chewier.
Similarly, a long, slow fermentation, often over 24-72 hours in the refrigerator, allows enzymes to break down starches and proteins, developing complex flavors that are simply not present in a quick dough. This process is similar to achieving a perfect sourdough crust, where time is key to flavor development.
Exploring Neapolitan, New York, and Detroit Styles
Pizza styles are often defined by their crust characteristics, offering a delicious diversity across the globe. Neapolitan pizza, originating from Naples, Italy, is renowned for its soft, airy, and slightly chewy crust with characteristic leopard spotting (charred bubbles) from a very high-temperature bake. It's typically thin in the center with a prominent, puffy rim (cornicione). The dough is traditionally made with just four ingredients: 00 flour, water, salt, and yeast, and undergoes a relatively short but intense fermentation.
In contrast, New York-style pizza features a larger, thinner crust that's sturdy enough to be folded in half, a signature eating method. It's crispy on the bottom but still pliable, often achieved with a slightly lower hydration than Neapolitan dough and baked at a moderate-high temperature, around 500-550°F (260-290°C). Detroit-style pizza offers a completely different experience: a thick, rectangular crust baked in a deep pan, often greased with butter or oil.
This results in a crispy, almost fried bottom and edges, with a light, airy interior crumb. It's famous for its caramelized cheese crust that forms where the cheese meets the pan walls. Understanding these distinct profiles helps in choosing or crafting the perfect base for your desired pizza experience.
Mastering Neapolitan Pizza Dough: Tips & Techniques
Achieving Authentic Neapolitan Dough: A Guide
Crafting authentic Neapolitan dough requires attention to detail and patience, focusing on quality ingredients and proper handling. The key is a simple mixture allowed ample time to ferment. Start by dissolving fresh or active dry yeast in lukewarm water (around 75-80°F or 24-27°C). Combine this with Italian 00 flour and fine sea salt.
00 flour is crucial as it has a specific protein content and finely milled texture ideal for the soft, elastic dough needed for a puffy cornicione. Mix until a shaggy dough forms, then turn it out onto a clean surface and knead for 10-15 minutes until smooth and elastic. The dough should pass the "windowpane test," where a small piece can be stretched thin enough to see light through it without tearing.
After kneading, the dough needs a bulk fermentation period, typically 2-4 hours at room temperature (around 70-75°F or 21-24°C), or longer if using less yeast or a cooler environment. The dough should roughly double in size. This is followed by portioning the dough into individual balls (usually 200-280 grams for a single pizza) and a second proofing period, often 6-8 hours at room temperature or a much longer cold fermentation in the refrigerator (24-72 hours or even more).
Cold fermentation develops deeper flavors and improves dough handling. Aim for a total fermentation time that allows the dough to become light and airy, similar to the long fermentation needed for a perfect sourdough crust.
Essential Ingredients: 00 Flour, Water, Salt, Yeast
The magic of Neapolitan pizza lies in its simplicity, relying on the quality of its four core ingredients. 00 Flour, specifically "Tipo 00" Italian flour, is paramount. It's milled very finely and has a moderate protein content (typically 10-12%), which creates a soft, elastic dough that can withstand high temperatures without becoming tough. Using all-purpose flour will produce a different result, usually a chewier, less airy crust. Look for brands like Caputo or Antimo Caputo Pizzeria flour for authentic results.
Water quality matters too. Use cool, filtered water, especially if your tap water is heavily chlorinated. The hydration level is usually between 58-65% of the flour weight for Neapolitan dough, though some recipes go higher. Salt, preferably fine sea salt, is essential for flavor and controlling yeast activity. It should be about 2-3% of the flour weight.
Avoid iodized salt, which can impart an off-flavor. Finally, Yeast (either fresh or active dry) provides the leavening. A small amount is often used for long fermentation periods (e.g., 0.1-0.5% of the flour weight for a 24-hour cold ferment), while larger amounts are used for quicker doughs. The goal is slow fermentation for maximum flavor development, echoing the principles behind achieving a perfect sourdough crust.
Baking Neapolitan Pizza: Wood-Fired Oven Mastery

Step-by-Step: Hand-Stretching and Shaping Dough
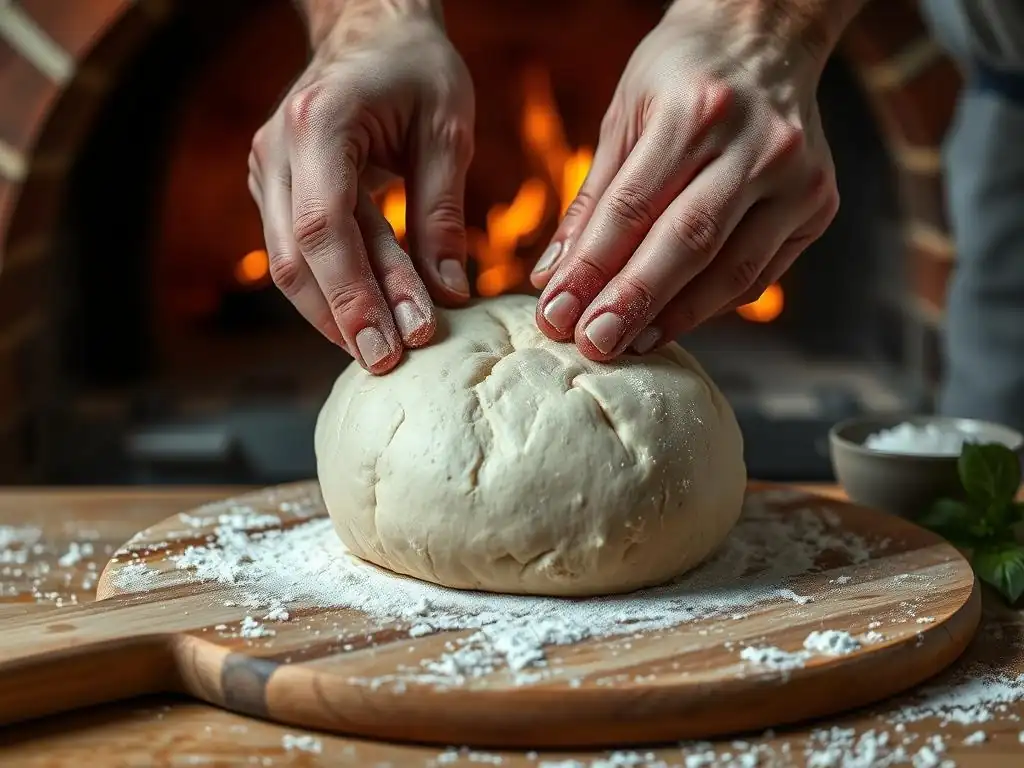
Once your Neapolitan dough is perfectly proofed, handling it gently is key to preserving the air bubbles developed during fermentation. Flour your work surface lightly with semolina or more 00 flour. Take a dough ball and place it in the flour, coating both sides. Start by pressing down in the center with your fingertips, pushing the air towards the edges to create the cornicione (rim). Avoid pressing the rim itself. Once you have a small disk with a defined rim, gently stretch the dough.
There are several stretching techniques. The classic method involves lifting the dough and letting gravity stretch it while rotating it between your hands, like steering a wheel. Another common method is placing the dough on your knuckles and letting its weight stretch it. The goal is to achieve a pizza roughly 10-12 inches in diameter, thin in the center (almost translucent) but with that puffy, airy rim. Avoid using a rolling pin, as this pushes out the precious air bubbles. If the dough resists stretching, let it rest for 5-10 minutes (autolyse principle) before trying again.
Troubleshooting: Air Bubbles, Burning, and Soggy Crust
Baking Neapolitan pizza in a wood-fired oven presents unique challenges and rewards. Achieving those beautiful, large air bubbles and leopard spots requires extremely high heat, typically 800-950°F (425-510°C). If your crust isn't puffing up, it might be under-proofed, too cold, or you might have handled it too roughly during stretching. Ensure your oven dome and floor are fully heated. Conversely, if your crust is burning too quickly on the bottom but raw on top, the oven floor might be hotter than the dome. Rotate the pizza frequently with a peel (every 15-30 seconds) to ensure even cooking.
Soggy crust is often caused by too many wet toppings or baking at too low a temperature. For Neapolitan pizza, toppings are minimal and added sparingly. Ensure your tomato sauce is reduced and your mozzarella is drained properly. Baking at a lower temperature doesn't cook the crust fast enough to set it before the moisture from the toppings penetrates.
In a wood-fired oven, the pizza cooks in 60-90 seconds. If using a home oven (which won't reach these temperatures), preheat your oven and a pizza stone or steel to its maximum temperature (usually 500-550°F or 260-290°C) for at least an hour. This high heat transfer from the stone/steel helps crisp the bottom crust, similar to the intense heat in a wood-fired oven.
Beyond Neapolitan: Other Dough Options for Your Pizza
New York Style: Thin, Crispy, and Foldable
New York-style pizza dough offers a fantastic alternative to the airy Neapolitan. It typically uses a slightly lower hydration (around 60-62%) and often includes a small amount of oil (1-2% of flour weight) and sometimes sugar, which contribute to a crispier texture and browning. The flour used is usually a bread flour with a higher protein content (12-14%) than 00 flour, providing more structure and chewiness. The dough undergoes a longer fermentation, often 1-3 days in the refrigerator, which develops flavor and makes it easier to stretch into large, thin rounds.
Stretching New York dough involves working it into a much larger diameter (16-18 inches or more) while maintaining an even, thin thickness across the base, leaving only a small, relatively flat rim. Baking is done at a slightly lower temperature than Neapolitan, typically 500-550°F (260-290°C), often directly on the oven rack or a pizza stone/steel.
The result is a crust that's firm enough to hold its shape but pliable enough to fold, with a satisfying crispness on the bottom. Achieving this specific texture is different from getting a perfect sourdough crust, which focuses more on open crumb structure and tangy flavor, but both rely on careful fermentation.
Detroit Style: Thick, Airy, and Cheesy Edges
Detroit-style pizza is a unique and delicious departure, featuring a thick, rectangular crust with a distinct texture. The dough is often a higher hydration dough (around 70-75%) made with bread flour. The key element is the pan – a rectangular steel or aluminum pan with deep sides, traditionally automotive parts trays. These pans are heavily greased with butter or oil (or a mix) before the dough is pressed in, creating that signature crispy, almost fried bottom and edges. The dough is typically proofed directly in the pan, allowing it to rise and fill the corners.
Cheese, traditionally brick cheese but often a mix including mozzarella and cheddar, is layered first, extending all the way to the edges of the pan. As it bakes at around 450-500°F (230-260°C), the cheese melts and caramelizes against the hot, greased pan walls, forming a delicious, crispy, cheesy crust known as frico. Sauce is often applied in stripes after the cheese is added or even after baking. The resulting crust is incredibly light and airy on the inside due to the high hydration and pan-proofing, providing a delightful contrast to the crispy exterior and cheesy edges.
Gluten-Free Pizza Dough: A Recipe for All
Creating a delicious gluten-free pizza dough requires a different approach than traditional wheat-based recipes, but it's entirely possible to achieve a satisfying crust. Instead of wheat flour, a blend of gluten-free flours is used, often including rice flour, sorghum flour, tapioca starch, and potato starch, sometimes with binders like xanthan gum or psyllium husk to provide structure that gluten would normally offer. Hydration levels can vary significantly depending on the flour blend used, but often range from 70-90% or even higher, as gluten-free flours absorb less water and the binders need moisture to activate.
Many gluten-free pizza dough recipes benefit from a period of rest or proofing, allowing the flours to hydrate fully and developing some structure. Some recipes mimic traditional yeast doughs with a proofing step, while others might be more like a thick batter or dough that's pressed into shape.
Baking temperatures vary but often benefit from high heat on a preheated stone or steel to help crisp the bottom, counteracting potential gumminess. While the texture won't be identical to a perfect sourdough crust made with wheat, a well-formulated gluten-free recipe can yield a tasty, crispy, and enjoyable pizza base for those with dietary restrictions.
Tips for a Crispy and Chewy Crust Every Time
The Secret: High Heat and Proper Hydration
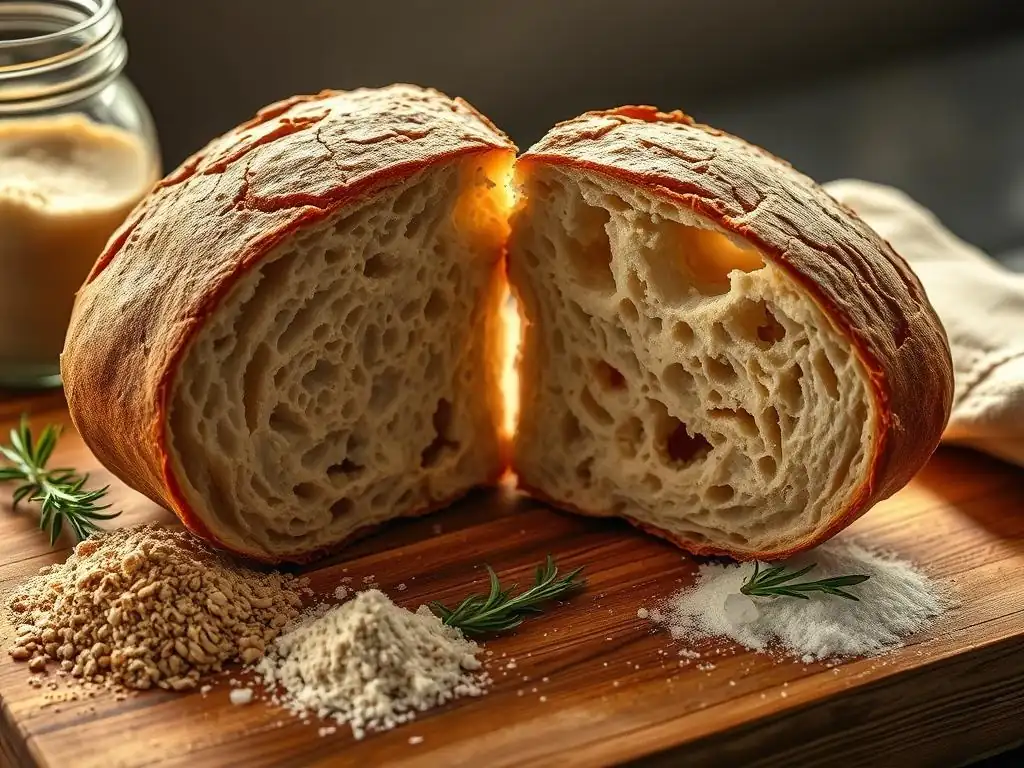
Achieving that desirable balance of crispy exterior and chewy interior hinges primarily on two factors: high baking temperature and appropriate dough hydration. High heat, ideally 500°F (260°C) and above, is crucial. It causes the water in the dough to rapidly turn to steam, creating air pockets and causing the crust to puff up quickly before the structure sets. This rapid cooking also helps crisp the exterior before the interior dries out completely, preserving chewiness. Baking on a preheated pizza stone or steel maximizes this effect by providing intense heat transfer to the bottom of the crust.
Proper hydration is equally vital. A dough with sufficient water content (typically 60-70% or higher for a chewier crust) will have more moisture to convert to steam during baking, leading to a lighter, airier crumb structure with larger bubbles. While lower hydration doughs can be easier to handle and result in a crisper crust overall, they may lack the desirable chewiness. Finding the right hydration level for your chosen flour and baking method is key. This balance of high heat and hydration is also fundamental to getting a perfect sourdough crust with its characteristic open crumb and crispy shell.
Preventing Soggy Crust: Dough Thickness and Topping Control
A soggy pizza crust is a common woe, but it's largely preventable with careful technique. One major culprit is a crust that's too thin in the center, especially if you're using a lot of wet toppings. Ensure that when stretching your dough, you leave the center slightly thicker than paper-thin, providing enough structure to support the toppings and withstand their moisture during baking. For styles like Neapolitan, the center should be thin, which is why topping control is so important for that style.
Controlling moisture from toppings is paramount. Use well-drained mozzarella (fresh mozzarella should be patted dry or even pre-baked briefly). Reduce your tomato sauce to a thicker consistency so it doesn't release excessive liquid. Avoid overloading the pizza with toppings, particularly those high in water content like certain vegetables. Distribute toppings evenly rather than piling them in the center. Baking at a sufficiently high temperature helps the crust set quickly, creating a barrier against moisture penetration before the toppings have time to make it soggy.
Achieving Golden Brown: Oven Temperature and Baking Time
The beautiful golden brown color and desirable char on a pizza crust are results of the Maillard reaction and caramelization, which require sufficient heat and time. Baking at a high temperature, as discussed, initiates these processes rapidly. For a Neapolitan pizza baked at 850°F+, this happens in 60-90 seconds. For a home oven at 500-550°F, it might take 8-15 minutes depending on the oven, the dough thickness, and the pizza stone/steel. The key is to bake until the crust is visibly golden brown and has developed dark brown spots (char) in places, especially on the rim.
If your crust isn't browning, your oven temperature might be too low, or you might not be baking it long enough. Ensure your oven is fully preheated, including the pizza stone or steel, which can take up to an hour.
If the top is browning faster than the bottom, try moving the pizza lower in the oven or using a pizza screen for the first half of the bake to protect the bottom, then sliding it onto the stone to finish. Conversely, if the bottom is burning but the top is pale, your baking surface is too hot relative to the oven's ambient temperature; try lowering the rack or slightly reducing the preheat time for the stone/steel.
Neapolitan Dough Tips: A Summary
Key Takeaways: Fermentation and Handling
Mastering Neapolitan dough boils down to respecting the process, particularly fermentation and gentle handling. Fermentation is where flavor and texture develop. A long, slow cold fermentation (24-72+ hours) is highly recommended for superior taste and easier handling compared to quick doughs. Use a small amount of yeast relative to the fermentation time. Monitor the dough's activity – it should become light, airy, and slightly bubbly. Don't rush it; temperature plays a big role, so adjust fermentation time accordingly.
Handling the dough gently after fermentation is crucial. Avoid kneading or re-working it excessively. Flour your surface and hands lightly and stretch the dough by pushing air to the edges, then gently shaping it without deflating the rim. Imagine preserving the delicate network of bubbles within. If the dough is tearing or resisting, it might be too cold or hasn't rested enough after handling; let it relax for a few minutes. Proper handling ensures that the airy structure built during fermentation translates into a beautiful, puffy cornicione when baked at high heat.
Experimenting: Different Flours and Proofing Times
While 00 flour is traditional for Neapolitan, experimenting with different flours can yield interesting results, although they won't be strictly "authentic" Neapolitan. Mixing a small percentage of bread flour (5-10%) can add a touch more chewiness. Some bakers experiment with heritage wheat varieties for unique flavors. Similarly, while commercial yeast is standard, achieving a perfect sourdough crust for a pizza base offers a delightful tang and complex flavor profile through wild yeast fermentation. This requires feeding and maintaining a starter, but the resulting crust can be incredibly rewarding, offering a chewier texture and distinct taste compared to yeast dough.
Experimenting with proofing times and temperatures is also key. A standard approach is bulk fermentation at room temperature followed by balling and a second proof (either room temperature or cold). Try varying the cold fermentation time – 24 hours, 48 hours, 72 hours – to see how the flavor and dough handling change. A longer cold ferment generally improves flavor and makes the dough more extensible. Keep detailed notes on your hydration, flour type, yeast amount, and fermentation schedule to replicate successful results and learn from less successful ones.
Perfect Neapolitan Pizza Dough Recipe
Detailed Recipe: Ingredients and Instructions
Here is a reliable recipe for Neapolitan-style pizza dough using a cold fermentation method for enhanced flavor. This recipe makes approximately four 250g dough balls, enough for four 10-12 inch pizzas.
Ingredients:
- 500 grams Italian Tipo 00 Flour (like Caputo Pizzeria)
- 325 grams cool Water (approx. 65% hydration)
- 15 grams fine Sea Salt (3% of flour weight)
- 0.5 grams Active Dry Yeast (approx. 0.1% of flour weight, for long cold ferment) - Note: Adjust yeast amount based on desired fermentation time and temperature.
Instructions:
- In a large bowl, whisk together the flour and salt.
- In a separate small bowl or cup, dissolve the yeast in the cool water.
- Pour the yeast water into the bowl with the flour mixture.
- Mix with a spoon or your hand until a shaggy dough forms and no dry flour remains.
- Turn the dough out onto a lightly floured surface. Knead for 10-15 minutes until the dough is smooth, elastic, and passes the windowpane test.
- Form the dough into a ball. Place it in a lightly oiled bowl, cover tightly with plastic wrap, and let it rest at room temperature for 2-3 hours. This is the bulk fermentation. The dough should increase slightly in size.
- Gently turn the dough out onto a lightly floured surface. Divide the dough into four equal portions (approx. 210-220g each after some loss during handling).
- Shape each portion into a tight ball. The technique involves folding the edges underneath the dough until you have a smooth surface on top and a tight seam underneath.
- Place the dough balls into individual containers or a proofing box, ensuring they have space to expand. Lightly oil the containers or dough balls if needed to prevent sticking.
- Cover the containers tightly and place them in the refrigerator for a cold fermentation of 24 to 72 hours (or even up to 5 days). This slow fermentation develops flavor.
- About 2-3 hours before you plan to bake, remove the dough balls from the refrigerator and let them sit at room temperature (covered) to warm up. They should become soft, pliable, and slightly puffed.
Visual Aid: Dough Shaping and Baking Examples
While I cannot provide actual images, imagine the process visually. Picture a smooth, elastic dough ball resting, then being gently pressed from the center outwards, the air being coaxed towards the rim. Visualize the dough being lifted onto knuckles, stretching under its own weight, becoming a thin disc with a distinct, pillowy edge.
For baking, envision a searing hot oven interior. See the stretched dough, topped minimally with bright red sauce and white mozzarella, being slid onto a blazing hot stone or steel.
Picture the edges of the crust immediately beginning to bubble and puff dramatically, the white dough transforming into golden brown with scattered dark spots. Imagine the pizza being rotated quickly with a peel as the edges crisp and char, the cheese melting and bubbling, all happening within a mere minute or two in a true Neapolitan oven, or perhaps 8-15 minutes in a very hot home oven, resulting in a beautiful, rustic pizza.
Storage and Handling of Pizza Dough
Keeping Dough Fresh: Cold Fermentation
Cold fermentation is not just for flavor development; it's also an excellent method for storing pizza dough and keeping it fresh for several days. After the initial bulk fermentation and balling, placing the dough in the refrigerator significantly slows down yeast activity. This allows you to prepare dough in advance and have it ready for use over a period of 1 to several days. Dough stored in the refrigerator will continue to ferment slowly, developing more complex flavors and becoming easier to digest.
Ensure the dough is stored in airtight containers or proofing boxes to prevent it from drying out or forming a skin. Plastic wrap pressed directly onto the surface of the dough ball before covering the container can add extra protection. Refrigerated dough will still expand, albeit slowly, so ensure containers are large enough. Dough can typically be kept in the refrigerator for 3 to 5 days, sometimes longer depending on the initial yeast amount and temperature. Always let cold dough warm up at room temperature for 2-3 hours before stretching to make it pliable and easier to work with.
Working with Frozen Dough: Thawing Techniques
Freezing pizza dough is a convenient way to preserve it for longer periods, typically up to 1-2 months. After balling the dough, lightly oil each ball and wrap it tightly in plastic wrap, ensuring no air pockets. Then, place the wrapped balls in a freezer-safe bag or container. Freezing stops the fermentation process.
When you're ready to use frozen dough, the thawing process is crucial to maintaining its quality. The best method is a slow thaw in the refrigerator. Transfer the frozen dough balls (still wrapped) to the refrigerator and let them thaw slowly for about 12-24 hours.
Once thawed, unwrap the dough and place it in a lightly oiled container, covering it. Let it sit at room temperature for 2-3 hours to become fully pliable and proof slightly before stretching and baking. Avoid thawing at room temperature for extended periods or microwaving, as this can negatively impact the dough's texture and structure.
Elevate Your Pizza: The Power of a Well-Made Crust
From Simple to Gourmet: Crust Impact
The quality of your pizza crust has a transformative effect, elevating even the simplest toppings from ordinary to gourmet. A perfectly crafted crust provides a delightful textural contrast – the initial crispness yielding to an airy, tender interior. Its flavor, whether the subtle sweetness of a short ferment or the complex tang of a long cold ferment (or a perfect sourdough crust!
), complements and enhances the toppings rather than merely supporting them. Imagine a classic Margherita; the magic isn't just the tomatoes, mozzarella, and basil, but how they interact with a light, slightly chewy crust kissed by high heat.
A poorly made crust, conversely, can sink a pizza regardless of topping quality. A dense, tough, or soggy base creates a less enjoyable eating experience. Investing time and effort into understanding and mastering dough techniques is arguably the most impactful step you can take to improve your homemade pizza. It's the difference between a casual snack and a culinary creation worthy of sharing and savoring.
Now that you're equipped with tips and techniques for crafting the perfect pizza base, it's time to get baking! Experiment with different styles – try your hand at a classic Neapolitan, a foldable New York slice, or a deep-dish Detroit square. Perhaps you're even perfecting your sourdough crust for a unique pizza experience.
Don't be discouraged by imperfections; every bake is a learning opportunity. Pay attention to how the dough feels, how it stretches, and how it behaves in your oven. What's your favorite pizza style to make at home? Share your successes, your learning moments, and your beautiful pizza creations with our community! Let's inspire each other to reach pizza perfection, one delicious crust at a time.
Frequently Asked Questions
How do I achieve a crispy sourdough crust?
Achieving a crispy crust requires high oven temperature and sufficient steam during the initial baking phase. Using a Dutch oven helps trap steam and create the desired environment.
What kind of flour is best for a perfect sourdough crust?
For a strong and chewy crust, use bread flour with a high protein content. This allows for better gluten development, resulting in a crisper and more structured crust.
What role does hydration play in sourdough crust development?
Higher hydration levels contribute to a more open crumb and a crispier crust. The extra moisture creates more steam during baking, enhancing the crust's texture.
Can I improve my sourdough crust by adjusting my scoring technique?
Yes, scoring allows the dough to expand properly in the oven. A well-executed score promotes even expansion and prevents bursting, leading to a better crust.
What are some tips for maintaining a crispy sourdough crust after baking?
Allow the bread to cool completely on a wire rack. Avoid storing it in airtight containers immediately, as this can trap moisture and soften the crust.
Final Reflection: The Transformative Power of Crust
The perfect sourdough crust isn't just about aesthetics; it's a testament to patience, precision, and the profound connection between craft and creation. The journey from flour and water to a beautifully blistered, deeply flavorful crust is a microcosm of the larger human experience: a process demanding dedication, yet rewarding beyond measure. This exploration into sourdough crusts highlights the importance of understanding the fundamentals – hydration, fermentation, and baking technique – to achieve truly exceptional results.
The pursuit of the perfect crust transcends mere culinary ambition; it's a reflection of our desire for mastery and the satisfaction derived from creating something beautiful and delicious. The subtle nuances of texture, the complex interplay of flavors, the sheer artistry involved – these are all elements that resonate deeply. As the renowned baker, Chad Robertson, once said: Bread baking is a journey of discovery, a continuous learning process, and the crust is the ultimate reward for that journey.
This sentiment perfectly encapsulates the spirit of this article and the enduring appeal of sourdough.
Now, consider your own baking journey. What elements of this exploration resonate most with you? Perhaps it's the meticulous attention to detail, the anticipation of the oven's heat, or the sheer joy of sharing your creation. Whatever it may be, I encourage you to embrace the process, experiment with different techniques, and most importantly, savor the journey. The perfect sourdough crust awaits, not just as a culinary achievement, but as a testament to your own dedication and passion.
Unleash Your Inner Baker: Craft the Perfect Crust!
Thanks for taking the time to explore the world of crusts with us! You've now gained the knowledge to elevate your baking game. Ready to put your new skills to the test?
- Bake your dream crust today! Grab your ingredients and try out one of the recipes mentioned – you'll be amazed by the difference a perfect crust makes.
- Share your baking triumphs (or challenges!) with us in the comments below. Let's build a community of crust-obsessed bakers!
- Consider experimenting with different flours or fats to discover your perfect crust recipe. What unique flavor combinations will you create?
Ready to share your masterpiece (or ask for advice)? Let's talk crust!