
Perfecting Your Sourdough Crumb: Understanding Open vs. Even Holes

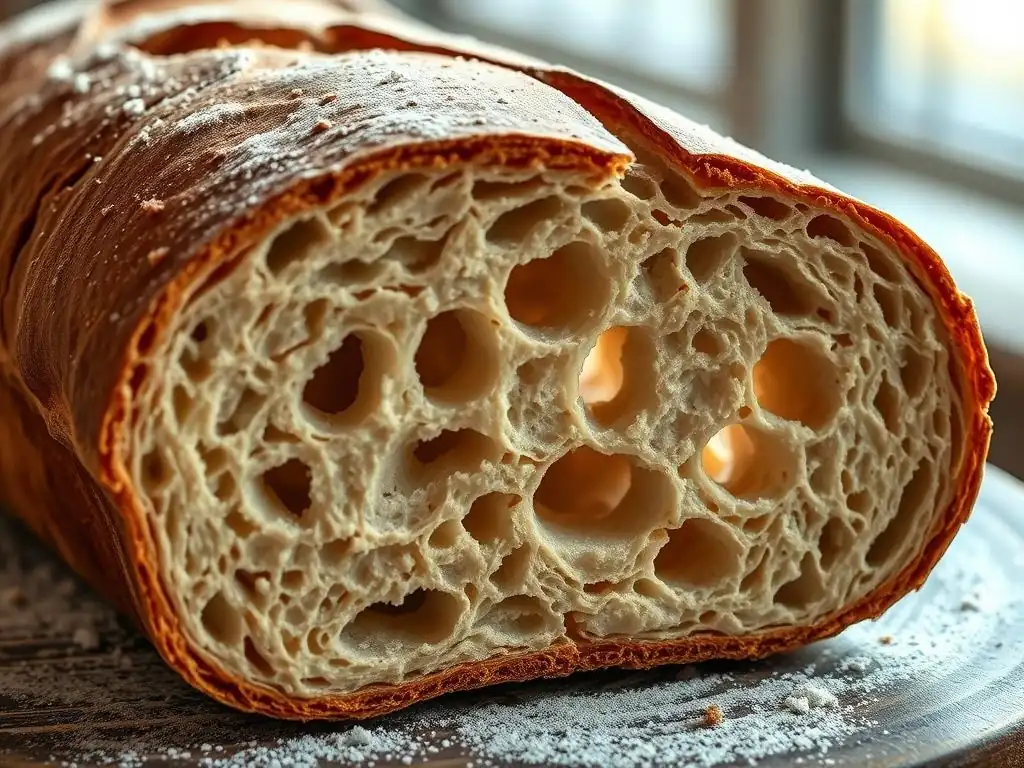
Welcome to BakeWithEase, your partner in creating delicious baked goods! Ever wondered what secrets lie within the perfect sourdough loaf? This week, we're diving deep into the captivating world of sourdough crumb open holes. Discover the factors that influence their formation, learn how to achieve that coveted airy texture, and understand the crucial differences between desirable open holes and an uneven crumb. Ready to unlock the secrets to sourdough success? Let's get baking!
- Introduction to Sourdough Crumb Structure
- Understanding the Sourdough Crumb: Open Holes vs. Even Distribution
- Factors Influencing Sourdough Crumb Openness
- Troubleshooting Sourdough Crumb Issues
- Achieving Your Desired Sourdough Crumb: Techniques and Tips
- Open Crumb vs. Even Crumb: Which is Right for You?
- Advanced Sourdough Techniques for Crumb Perfection
- Conclusion: Embracing the Art of Sourdough Crumb
- Frequently Asked Questions
- Final Reflection: The Journey to the Perfect Sourdough Crumb
- Unleash Your Inner Baker: Craft the Perfect Sourdough Crumb!
Introduction to Sourdough Crumb Structure
The heart of any great sourdough loaf lies not just in its tangy flavor or crispy crust, but also in its internal structure – the crumb. The sourdough crumb tells a story about the fermentation, hydration, and handling of the dough. Whether you're aiming for dramatic, large holes or a more uniform, even distribution of air pockets, understanding how to influence the crumb is a crucial step in perfecting your baking skills. Mastering the sourdough crumb open holes or achieving that perfectly consistent texture is a rewarding journey for any baker.
Achieving a specific sourdough crumb structure is a skill that develops with practice and a deep understanding of the sourdough process. It involves manipulating variables like hydration, gluten development, fermentation time, and shaping techniques. This article will guide you through the nuances of the sourdough crumb, exploring the differences between open and even structures, the factors that create them, and how you can intentionally steer your baking towards your desired result. Let's dive into the fascinating world beneath the crust.
Understanding the Sourdough Crumb: Open Holes vs. Even Distribution
The internal texture of a sourdough loaf, known as the crumb, is one of its most defining characteristics. It's what you see when you slice into the bread and reveals much about the baking process. The two primary types of sourdough crumb structures bakers often discuss are the open crumb, characterized by large, irregular holes, and the even crumb, where the air pockets are smaller and more uniformly distributed throughout the loaf. Both have their place and appeal, depending on the desired use and aesthetic.
Understanding these structures is fundamental to controlling your bake. An open sourdough crumb open holes are often sought after for artisan loaves, suggesting a well-fermented, high-hydration dough, while an even crumb is preferred for sandwich bread, providing a consistent texture for slicing and spreading. Neither is inherently "better" than the other; the ideal structure depends entirely on the baker's intent and the bread's purpose.
Defining the Ideal Sourdough Crumb
The "ideal" sourdough crumb is subjective and depends on the baker's goals. For many artisan bakers and enthusiasts, the ideal involves a relatively open structure with a good distribution of various-sized holes, indicating proper fermentation and handling. This allows the bread to feel light and airy, despite its often chewy texture. A truly ideal sourdough crumb open holes will be surrounded by a well-gelatinized, slightly glossy cell wall, signifying excellent gluten development and moisture retention.
Conversely, for someone making sourdough for sandwiches or toast, an ideal crumb might be more even and regular. This provides stability for slicing and ensures that spreads or toppings don't fall through large gaps. An ideal even crumb will still be light and airy, not dense or gummy, with consistently sized air pockets throughout the loaf. The key is consistency and achieving the structure that best suits the bread's intended use, whether that's dramatic sourdough crumb open holes or a uniform texture.
What is an Open Crumb in Sourdough?
An open crumb in sourdough is characterized by large, irregular air pockets interspersed with smaller ones, often creating a visually striking pattern. This structure typically results from a combination of high dough hydration, strong gluten development, proper fermentation, and gentle handling during shaping. The large bubbles form as gases produced during fermentation expand significantly during baking, finding minimal resistance due to the flexible, well-developed gluten network.
Achieving a beautiful sourdough crumb open holes requires careful attention at every stage. It's not just about one factor; it's the synergy of multiple techniques. For instance, a dough hydrated at 80% or more, combined with a long, slow fermentation and minimal degassing during shaping, is much more likely to produce an open structure than a lower hydration dough handled vigorously. The large voids in the crumb are a testament to the dough's strength and extensibility, allowing the fermentation gases to push the dough outwards without collapsing.
An even crumb in sourdough features air pockets that are relatively uniform in size and distributed consistently throughout the loaf. This structure is often associated with lower hydration doughs, slightly shorter fermentation times, or more vigorous shaping techniques that redistribute gases more evenly. While it lacks the dramatic visual appeal of large sourdough crumb open holes, an even crumb provides excellent structural integrity, making the bread perfect for everyday uses like sandwiches or toast.
Creating an even crumb is often more straightforward for beginner bakers as it is less prone to the pitfalls that can lead to a gummy or dense loaf when attempting an open crumb. Techniques like degassing the dough during shaping or opting for a lower hydration level (e.g., 65-70%) naturally lead to a more uniform distribution of bubbles. The resulting loaf is stable, slices cleanly, and provides a consistent texture in every bite, proving that an even crumb is just as desirable and functional in its own right.
Factors Influencing Sourdough Crumb Openness
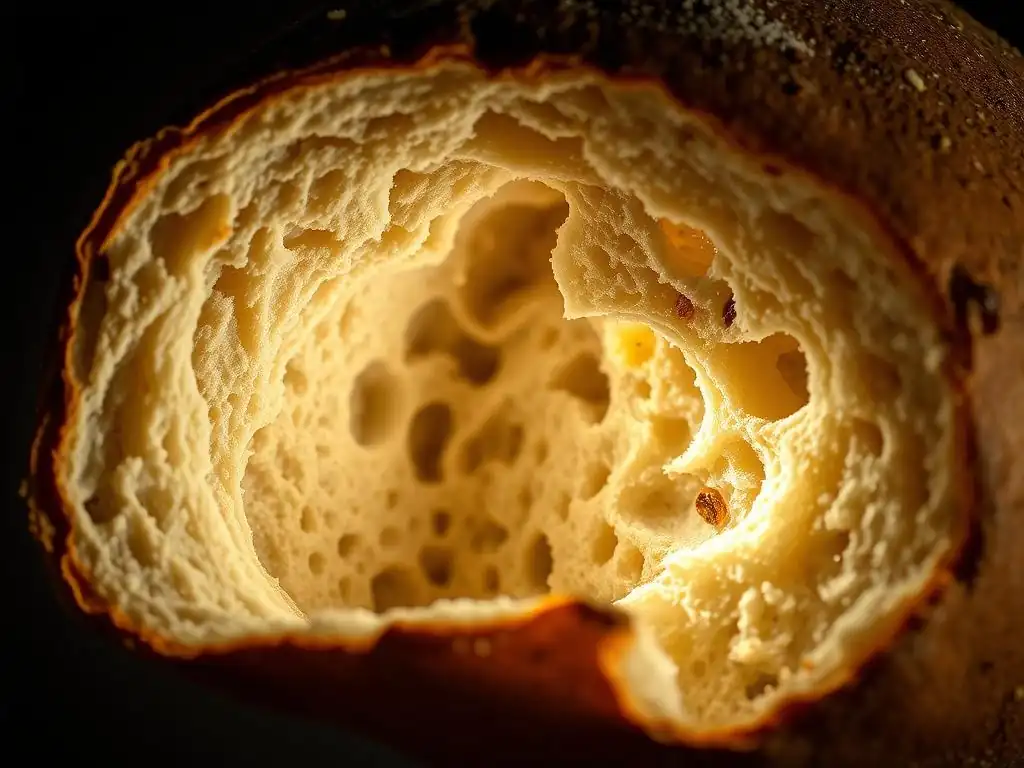
The structure of your sourdough crumb is the sum of many parts, each playing a critical role. From the amount of water in your dough to how you shape the final loaf, every step influences whether you end up with an open, airy structure or a more uniform, even crumb. Understanding these factors allows you to intentionally manipulate your process to achieve your desired sourdough crumb open holes or even texture.
Key factors include the dough's hydration level, the extent of gluten development, the duration and temperature of fermentation, and the specific shaping techniques employed. By adjusting these variables, bakers can exert significant control over the final crumb structure. For example, increasing hydration or extending fermentation can encourage larger holes, while reducing hydration or using firmer shaping can lead to a more even distribution of air pockets.
Hydration Levels and Their Impact on Sourdough Crumb
Hydration, the ratio of water to flour in your dough, is one of the most significant factors determining the potential for an open crumb. Higher hydration levels result in a wetter, stickier dough that is more challenging to handle but allows for greater expansion during fermentation and baking. This increased expandability, when combined with sufficient gluten strength, facilitates the formation of larger air pockets, leading to those sought-after sourdough crumb open holes.
Conversely, lower hydration doughs (typically below 70%) are easier to work with and produce a more structured dough. The reduced amount of water limits the dough's extensibility, causing the fermentation gases to be trapped in smaller, more numerous pockets. This leads to a tighter, more even crumb structure, which is excellent for loaves intended for slicing or where a consistent texture is preferred over dramatic voids.
High Hydration Sourdough: Achieving Larger Holes
Working with high hydration sourdough (often 75% hydration or more) is a common path to achieving larger, more dramatic holes in the crumb. The abundance of water makes the dough very extensible, allowing the CO2 produced by the yeast to expand significantly during the final proof and oven spring. This requires a strong gluten network to support the structure without collapsing. Techniques like stretch and folds or coil folds are essential for developing this strength in a wet dough.
For instance, an 80% hydration dough might be stretched and folded every 30 minutes for the first two hours of bulk fermentation. This gentle handling builds gluten while preserving the gas bubbles. The resulting dough is wobbly and alive, indicating its potential for significant expansion. Baking a high hydration dough correctly, often in a Dutch oven or with plenty of steam, helps achieve maximum oven spring and sets the delicate, open structure before it can deflate.
Low Hydration Sourdough: Promoting a Tighter Crumb
Lower hydration sourdough doughs, typically in the 60-70% range, are excellent for bakers seeking a more controlled, even crumb structure. With less water, the dough is firmer and easier to handle, making shaping simpler and less likely to damage the developing structure. The reduced extensibility means that while gas is still produced during fermentation, it is contained within smaller, more uniformly distributed pockets.
A 65% hydration dough, for example, might be kneaded traditionally or using a stand mixer, developing a strong, pliable gluten network. During bulk fermentation, the dough will rise predictably, and shaping can be more assertive without risking collapse. The final loaf will have a consistent, dense-but-not-heavy crumb that is ideal for various applications, from basic toast to sturdy sandwich slices. While you won't see dramatic sourdough crumb open holes, you'll get reliability and a pleasant chew.
Gluten Development: Key to Sourdough Texture
Gluten development is paramount to controlling your sourdough crumb. Gluten, formed when proteins in flour (glutenin and gliadin) combine with water and are worked, creates a strong, elastic network that traps the gases produced during fermentation. Without sufficient gluten strength, the dough cannot hold its structure as the gases expand, resulting in a dense, heavy loaf rather than one with a beautiful sourdough crumb open holes or an even texture.
Developing gluten involves techniques like kneading, stretching, and folding the dough. The goal is to align the gluten strands into a robust network capable of supporting the dough's weight and allowing it to expand significantly. Different techniques are suited to different hydration levels, but the principle remains the same: build strength and elasticity so the dough can rise high and maintain its internal structure during baking.
The Importance of Autolyse in Sourdough Baking
Autolyse is a simple yet powerful technique involving mixing just the flour and water for a period (typically 20-60 minutes) before adding the starter and salt. During this rest period, enzymes in the flour begin to break down proteins, and the flour absorbs water fully. This process starts the gluten development process without mechanical work, making the dough more extensible and easier to handle later.
Implementing an autolyse can significantly improve the texture and structure of your sourdough crumb. For instance, autolysing a dough for 30 minutes can make subsequent kneading or folding much more effective, leading to a stronger, more pliable dough. This enhanced gluten development is critical for achieving an open crumb, as the dough needs to be both strong and extensible to support large air pockets. It's a simple step that can make a noticeable difference in the final sourdough crumb open holes.
Kneading Techniques for Optimal Gluten Strength
Various kneading techniques can be used to develop gluten in sourdough. Traditional kneading on a counter works well for lower hydration doughs. For higher hydration doughs, gentler methods like stretch and folds or coil folds are preferred as they develop strength without degassing the dough too much. Stretch and folds involve gently stretching a portion of the dough up and folding it back over the rest, repeating around the dough. Coil folds are similar but involve lifting the dough from the center and letting the edges fold underneath.
Performing a series of stretch and folds or coil folds during the initial bulk fermentation period (e.g., 4-6 folds every 30-45 minutes) builds significant gluten strength in wet doughs. This creates the necessary framework to support the large bubbles that form an open crumb. For example, a baker aiming for sourdough crumb open holes in an 80% hydration loaf might perform 4 sets of coil folds during the first two hours of bulk fermentation, resulting in a dough that is visibly stronger and holds its shape better.
Fermentation: The Heart of Sourdough Crumb Structure
Fermentation is arguably the most critical stage for developing the sourdough crumb. It's during fermentation that the sourdough starter's yeasts produce CO2 gas, creating the air pockets, and bacteria produce organic acids, developing flavor and conditioning the gluten. Proper fermentation timing and temperature are essential for achieving the desired crumb structure, whether that's an open or an even crumb.
Insufficient fermentation (under-proofing) leads to a dense, heavy crumb with few, small, irregular holes. Over-fermentation (over-proofing) can cause the gluten structure to break down, resulting in a weak dough that collapses in the oven, producing a dense crumb or large, chaotic tunnels rather than a well-structured sourdough crumb open holes. Finding the 'sweet spot' is key.
Bulk Fermentation: Timing and Temperature Considerations
Bulk fermentation, the first rise after mixing, is where the majority of the dough's structure and gas production occurs. The duration and temperature of bulk fermentation significantly influence the crumb. Warmer temperatures (e.g., 75-80°F or 24-27°C) speed up fermentation, while cooler temperatures (e.g., 70-74°F or 21-23°C) slow it down, allowing for longer flavor development and potentially a more complex crumb structure.
A typical bulk fermentation might last anywhere from 4 to 12 hours, depending on temperature and starter activity. For instance, at 75°F, bulk fermentation might take 5-6 hours until the dough has increased in volume by 50-75%. Observing the dough's activity – bubbling, doming, and developing strength through folds – is more reliable than strictly following a time guideline. Proper bulk fermentation builds the foundation for a successful sourdough crumb open holes or an even texture.
Proofing: Controlling the Final Rise for Desired Crumb
Proofing, the final rise after shaping, is the last chance to influence the crumb structure before baking. It's typically done at cooler temperatures (often in the refrigerator for 8-16 hours) to slow down fermentation and develop flavor. The duration of proofing affects the size and distribution of the air pockets. A longer, colder proof tends to produce a more predictable expansion and can contribute to a more open structure if the bulk fermentation was on point.
Over-proofing during this stage can be detrimental, leading to a dough that spreads rather than springs in the oven and a dense crumb. Under-proofing results in a dough that tears during oven spring, creating large, irregular blowouts and potentially a tighter crumb than desired. Learning to judge when the dough is perfectly proofed – often by its increased volume and slight jiggle – is crucial for achieving the desired sourdough crumb open holes or even texture.
Shaping Techniques and Crumb Formation
How you shape your sourdough loaf has a direct impact on the internal crumb structure. Shaping creates tension on the surface of the dough, providing the structure that helps the loaf hold its shape and expand upwards during baking. Different shaping methods can either preserve existing gas bubbles or redistribute them, influencing whether you get an open or an even crumb.
Gentle shaping techniques that minimize degassing tend to promote an open crumb, while more firm or aggressive shaping methods can lead to a more even distribution of air pockets. The goal is always to create surface tension without tearing the dough or completely deflating it.
Gentle Shaping for Open Crumb
To encourage a sourdough crumb open holes, shaping should be as gentle as possible, focusing on creating surface tension without pressing out the precious gas bubbles formed during fermentation. Techniques like stitching or minimal folding are often employed. The idea is to cup the dough and use the surface tension to gently coax it into shape, rather than aggressively pushing or folding it.
For example, after pre-shaping and resting, a dough destined for an open crumb might be gently folded from the sides towards the center a couple of times, then rolled or pulled towards the baker to create tension. The key is minimal handling. This preserves the large air pockets created during bulk fermentation, allowing them to expand further in the oven and contribute to a dramatic sourdough crumb open holes.
Tight Shaping for Even Crumb
If an even crumb is your goal, shaping can be slightly more firm, helping to redistribute the gas bubbles more uniformly throughout the dough. While you still want to create surface tension, a bit more handling is acceptable, and can even be beneficial, in breaking up larger voids. Techniques like more vigorous folding or rolling can help achieve this.
For instance, when shaping for an even crumb, a baker might fold the dough multiple times from different directions, pressing gently to encourage degassing, before creating a tight boule or batard. This process helps to break up any large, irregular bubbles, resulting in a more consistent pattern of smaller holes throughout the final loaf. The aim is a well-structured loaf with a uniform internal texture, not dramatic sourdough crumb open holes.
Troubleshooting Sourdough Crumb Issues
Even experienced bakers occasionally encounter issues with their sourdough crumb. Understanding the common problems and their root causes is essential for improvement. Whether your crumb is too dense, gummy, or lacks the desired openness, identifying the culprit allows you to adjust your process for future bakes.
Common issues include dense crumb, lack of open holes, large tunnels, and gummy texture. These problems can often be traced back to errors in starter activity, hydration, gluten development, or fermentation timing and temperature.
Why is My Sourdough Crumb Too Dense?
A dense sourdough crumb is a frustrating outcome, often indicating that the dough did not rise sufficiently during fermentation or baking. The most common reasons for density include an inactive starter, under-proofing (insufficient bulk fermentation or final proof), weak gluten development, or insufficient oven spring. If your starter isn't active and bubbly, it won't produce enough gas to lighten the dough.
Similarly, if the dough hasn't fermented long enough, it hasn't developed enough gas or strength to expand properly in the oven. Weak gluten means the structure collapses. Baking without sufficient heat or steam can also limit oven spring, contributing to density. For example, a loaf baked at too low a temperature might set before it has a chance to expand fully, resulting in a tight, dense crumb instead of a light sourdough crumb open holes.
Why Doesn't My Sourdough Have Open Holes?
Lack of open holes, resulting in a relatively tight crumb, can stem from several factors, even if the loaf isn't necessarily dense. This often happens when the dough's potential for expansion isn't fully realized. Possible causes include insufficient hydration (the dough is too stiff), weak gluten development (the dough isn't extensible enough), insufficient fermentation (not enough gas produced), over-fermentation (gluten structure weakened), or overly rough handling/shaping that degasses the dough too much.
If you're aiming for sourdough crumb open holes but consistently get a tighter crumb, consider increasing your hydration slightly (e.g., from 70% to 75%) in your next bake. Also, evaluate your fermentation process – is your starter vigorous? Is your bulk fermentation long enough? Are you handling the dough gently during shaping? For example, pressing down hard during pre-shaping can expel gases needed for those large voids.
Common Mistakes Leading to an Undesirable Crumb
Several common errors can lead to an undesirable sourdough crumb, whether it's too dense, gummy, or just not what you expected. Using an inactive or weak starter is fundamental – if the leavening isn't strong, the dough won't rise. Incorrect fermentation timing is another major issue; under-proofing leads to density, while over-proofing can cause collapse or large, irregular tunnels.
Poor gluten development results in a weak structure that cannot support the rise, often leading to a gummy or dense interior. Incorrect hydration for the flour type or desired outcome can also cause problems; too little water limits openness, too much can be unmanageable and lead to density if the gluten isn't strong enough. Finally, improper shaping or baking (like insufficient steam or oven temperature) can hinder oven spring and affect the final crumb structure, preventing the formation of beautiful sourdough crumb open holes.
Achieving Your Desired Sourdough Crumb: Techniques and Tips
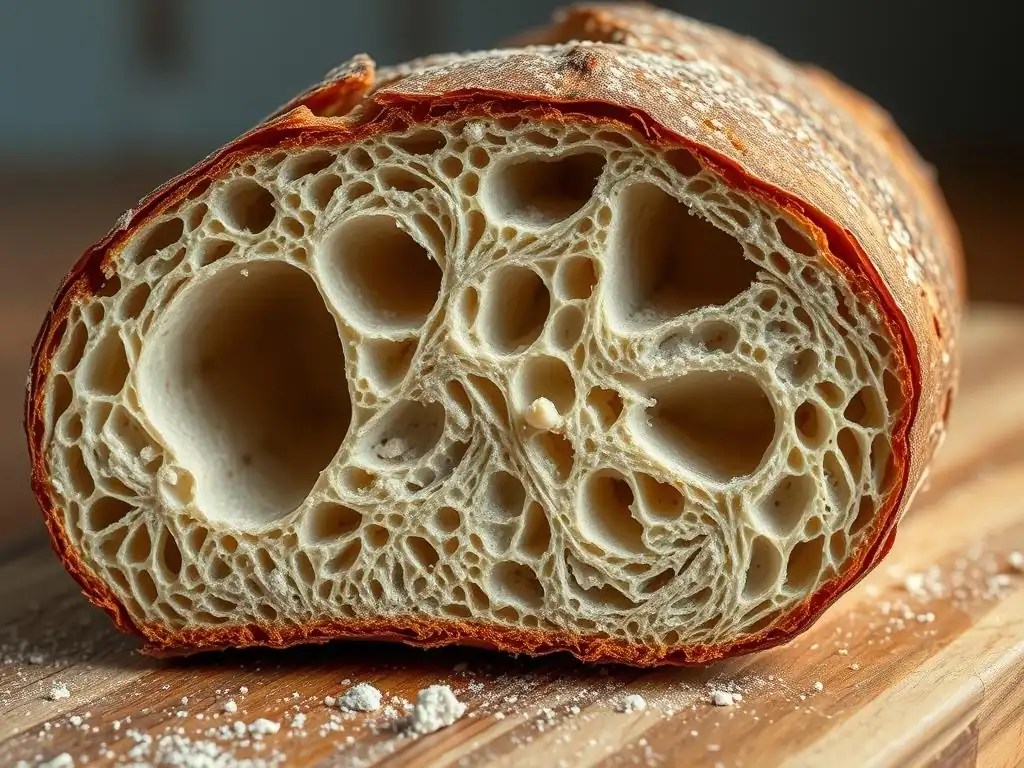
Once you understand the factors influencing the sourdough crumb, you can intentionally adjust your techniques to achieve your desired result, whether that's a dramatic open crumb or a consistent, even texture. It's about controlling the variables and observing how your dough responds.
Experimentation is key. Small adjustments to hydration, fermentation time, or shaping can significantly alter the final crumb structure. Keep notes on your bakes – what hydration did you use? How long was bulk fermentation and proofing? What techniques did you use? This helps you learn and refine your process.
Recipe Adjustments for Crumb Control
Modifying your base sourdough recipe is a direct way to influence the crumb. As discussed, adjusting the hydration level is perhaps the most impactful change. Increasing hydration (e.g., adding an extra 20-30g of water per 500g flour) will lean towards a more open crumb, assuming strong gluten development. Decreasing hydration will promote a tighter, more even crumb.
Beyond hydration, consider the flour type. Using a significant percentage of strong bread flour with high protein content (like 13% protein) will build a more robust gluten network capable of supporting larger holes than using all-purpose flour (around 10-11% protein). Adding a small amount of whole wheat or rye flour (e.g., 10-20%) can add flavor and nutrition but might slightly tighten the crumb compared to 100% white bread flour, as the bran and germ can interfere with gluten development.
Mastering Temperature Control for Optimal Fermentation
Controlling the temperature throughout the fermentation process is crucial for consistent results and achieving the desired crumb. Warmer temperatures speed up fermentation, while cooler temperatures slow it down. Knowing how temperature affects timing allows you to plan your bake and control the rate of gas production and gluten conditioning.
For instance, if you want a faster bulk fermentation to fit your schedule, fermenting at 78°F (26°C) might take 4-5 hours. If you prefer a slower fermentation for more flavor development and potentially a more controlled rise leading to sourdough crumb open holes, fermenting at 72°F (22°C) might take 6-8 hours or even longer. Similarly, proofing in the refrigerator at 38°F (3°C) for 12-16 hours slows yeast activity dramatically, allowing enzymes to break down starches into sugars, enhancing flavor and contributing to a better crust and crumb structure upon baking.
Experimenting with Different Flour Types for Crumb Variation
The type of flour you use significantly impacts the dough's ability to develop gluten and, consequently, the final crumb structure. High-protein bread flour is excellent for developing a strong network capable of supporting a very open crumb with large sourdough crumb open holes. All-purpose flour will yield a softer crumb, typically more even.
Incorporating different flours like whole wheat, rye, or spelt introduces different protein structures and also the presence of bran and germ. Whole wheat flour, for example, absorbs more water but the bran particles can cut the gluten strands, potentially resulting in a slightly tighter crumb compared to white flour at the same hydration. Experimenting with blends – for instance, 90% strong bread flour and 10% whole wheat – can offer a balance of flavor and structure, influencing the distribution and size of air pockets in your sourdough crumb.
Open Crumb vs. Even Crumb: Which is Right for You?
Deciding whether to aim for an open or an even sourdough crumb ultimately comes down to personal preference and the intended use of the bread. Neither is universally superior; they simply offer different characteristics and benefits. Understanding these differences helps you choose the approach that best suits your baking goals and lifestyle.
Consider what you value most in a loaf of bread – is it the dramatic visual appeal and light texture of large holes, or the reliability and practicality of a uniform, consistent crumb? Your answer will guide your technique choices.
Considering Your Baking Goals and Preferences
Think about why you bake sourdough. Are you chasing the 'artisan' look often associated with large sourdough crumb open holes? Do you enjoy the challenge of working with high hydration doughs? Or do you prioritize ease of handling and consistent results for everyday use? Your personal goals should drive your crumb preference.
If you love the challenge and visual reward, perfecting the open crumb might be your focus. This involves mastering high hydration, gentle handling, and precise fermentation. If you need reliable sandwich bread that slices cleanly and holds toppings, an even crumb is likely your preference. This might involve slightly lower hydration and more assertive shaping. There's no wrong answer, just the one that makes you happy as a baker.
Pairing Sourdough Crumb Styles with Different Uses
The intended use of your sourdough loaf is a practical consideration when deciding on the crumb structure. An open crumb, with its large voids, is fantastic for dipping in olive oil or serving alongside soups, where the large holes can soak up liquids. It also makes a beautiful presentation for charcuterie boards. However, slicing it for sandwiches can be tricky, and butter or spreads can fall through the holes.
An even crumb, on the other hand, is the workhorse of sandwich bread. Its uniform texture provides stability for slicing and spreading butter, jam, or sandwich fillings. It's also excellent for toast, providing a consistent crunch. While it may lack the dramatic visual of sourdough crumb open holes, its practicality makes it ideal for daily consumption. Consider how you plan to eat the bread when choosing which crumb structure to aim for.
Advanced Sourdough Techniques for Crumb Perfection
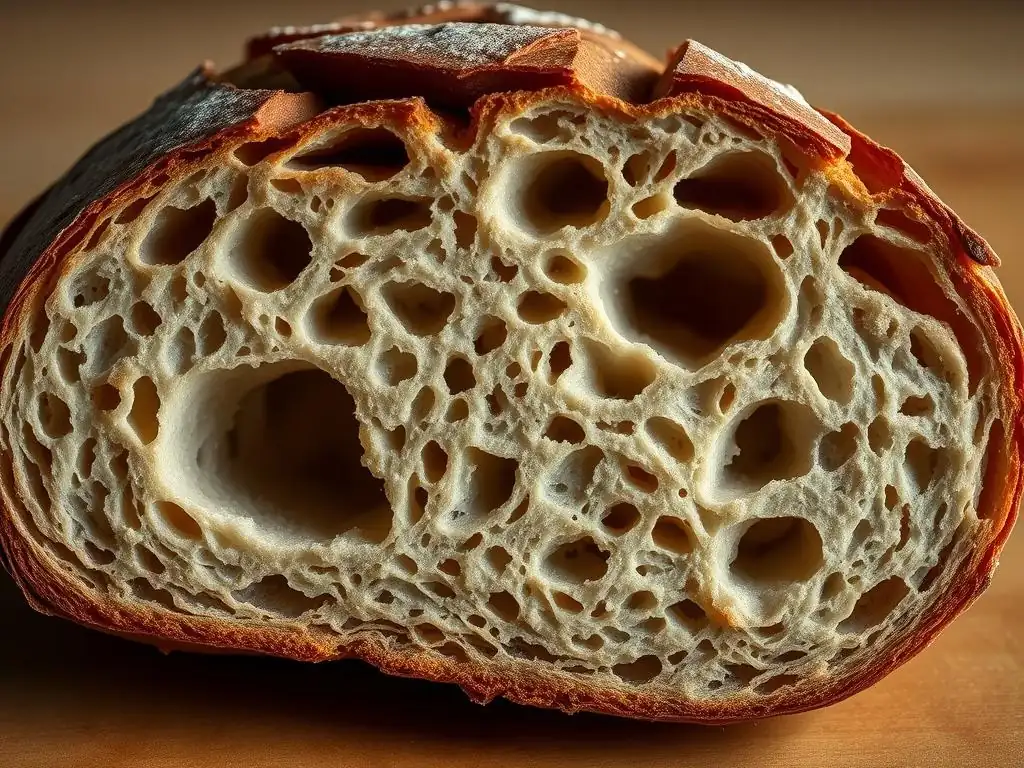
For bakers looking to push the boundaries and refine their sourdough crumb even further, several advanced techniques can make a significant difference. These methods often require a deeper understanding of dough behavior but can yield impressive results in terms of both flavor and crumb structure.
Exploring pre-ferments, optimizing scoring, and controlling steam during baking are all advanced steps that contribute to achieving truly exceptional sourdough crumb open holes or a perfectly consistent even texture.
Using Pre-Ferments to Enhance Flavor and Crumb
While a standard sourdough recipe uses only the sourdough starter as the leavening agent, incorporating additional pre-ferments like a levain build (a specific mix of flour, water, and starter built hours before mixing the main dough) or a poolish (equal parts flour and water fermented with a tiny amount of starter) can enhance both flavor and crumb. A levain build, often used in artisan sourdough, ensures the starter is at peak activity when it's incorporated into the main dough, contributing to a strong rise and potentially a more open crumb.
For example, building a levain with a 1:2:2 ratio (1 part starter, 2 parts water, 2 parts flour) 4-6 hours before mixing the dough ensures a vigorous culture. This active levain provides a powerful leavening force, helping the dough achieve significant oven spring and contributing to larger, more numerous sourdough crumb open holes. Pre-ferments also add layers of complex flavor through extended fermentation of a portion of the flour.
Exploring Different Scoring Patterns for Crumb Expansion
Scoring the surface of your loaf just before baking serves a critical purpose: it allows the dough to expand in a controlled manner during oven spring. Without scoring, the crust would set quickly, and the expanding gases would likely find the weakest point to burst through, resulting in an uncontrolled blowout. Different scoring patterns can influence how the loaf expands and thus impact the final crumb structure, particularly towards the top of the loaf.
A single, deep score along the length of a batard allows for maximum expansion in one direction, often contributing to a more open crumb along that score. Multiple shallow scores or a complex pattern like an ear or decorative cuts can distribute the expansion more evenly, potentially leading to a slightly less dramatic but still well-structured crumb. Experimenting with razor blade angle and depth (typically about 1/2 inch deep) can help direct the oven spring and influence the sourdough crumb open holes near the surface.
The Role of Steam in Achieving a Great Sourdough Crust and Crumb
Steam is absolutely essential for achieving a great sourdough crust and allowing for maximum oven spring, which in turn impacts the crumb. When the loaf is first placed in a hot oven, the presence of steam keeps the surface of the dough moist and pliable. This prevents the crust from setting too early, allowing the dough to expand fully before the crust hardens.
Baking in a Dutch oven is a popular method for trapping steam around the loaf, creating the ideal environment for oven spring. Alternatively, you can achieve steam by placing a tray of hot water or ice cubes in the bottom of your oven. This moist environment allows the dough to expand significantly, leading to a lighter loaf with a more open structure and well-developed sourdough crumb open holes, while also contributing to a thin, crispy crust.
Conclusion: Embracing the Art of Sourdough Crumb
Mastering the sourdough crumb is a journey of learning, experimentation, and patience. Whether you aspire to bake loaves with dramatic sourdough crumb open holes or prefer a reliable, even texture, understanding the interplay between hydration, gluten, fermentation, and shaping is key. Each bake offers an opportunity to refine your technique and get closer to your ideal loaf.
Embrace the process, pay attention to your dough, and don't be discouraged by less-than-perfect results. Every loaf teaches you something new. With practice and a focus on controlling the variables discussed, you'll be well on your way to consistently achieving the sourdough crumb you desire, elevating your baking from good to truly great.
Frequently Asked Questions
What does "crumb" refer to in sourdough baking?
The "crumb" refers to the internal texture of your sourdough loaf, including the size and distribution of the holes inside. It's a key indicator of the baking process.
What are "open holes" in the context of sourdough?
"Open holes" or an "open crumb" describes a sourdough with large, irregular air pockets inside. Many bakers strive for this texture as a sign of a successful bake.
Why is achieving an open crumb in sourdough considered desirable?
While personal preference varies, an open crumb is often seen as a sign of good fermentation, proper hydration, and skilled technique. It can also improve the bread's texture.
What factors contribute to achieving an open sourdough crumb?
Key factors include high hydration levels, strong gluten development, proper fermentation, and gentle handling of the dough.
What if my sourdough has very few or very small holes?
A dense crumb with small holes can indicate under-fermentation, insufficient gluten development, or over-handling of the dough. It can also be due to lower hydration.
Final Reflection: The Journey to the Perfect Sourdough Crumb
The quest for the ideal sourdough crumb—with its airy open holes or its tight, even texture—is more than just baking; it's a reflection of our relationship with process, patience, and the living organism that is sourdough starter. The subtle nuances in crumb structure, as explored throughout this article, directly impact the overall eating experience, transforming a simple loaf into a culinary masterpiece. Understanding the factors that contribute to open versus even crumb structures empowers bakers to achieve their desired results, consistently.
The pursuit of the perfect crumb has captivated bakers for generations, a testament to the enduring allure of this ancient craft. The journey itself, filled with experimentation and the occasional failed loaf, is as rewarding as the final product. It's a process of learning, adapting, and ultimately, connecting with the natural rhythms of fermentation. As renowned baker Chad Robertson eloquently states, Bread baking is a conversation between you and the dough.
This conversation, reflected in the final crumb, is a unique and deeply personal experience.
Now, consider your own sourdough journey. What have you learned about your starter's personality? What adjustments to your technique have yielded the most dramatic improvements in your crumb structure? Don't be afraid to experiment, to embrace the imperfections, and to learn from each loaf you bake. The path to the perfect crumb is a continuous process of refinement, a testament to your dedication and passion for the art of sourdough baking. Embrace the journey, and may your next loaf be your best yet.
Unleash Your Inner Baker: Craft the Perfect Sourdough Crumb!
Thanks for diving into the world of sourdough with us! We hope you gained valuable insights into the fascinating relationship between open and even crumb structures. Ready to put your newfound knowledge into practice?
- Bake a test loaf: Experiment with different hydration levels and fermentation times to see how they impact your crumb. Note your observations to refine your technique!
- Share your results: Post a picture of your crumb on social media using #BakeWithEaseCrumb and inspire others.
- Join the BakeWithEase community forum to discuss techniques and get feedback on your experiments.
What unique techniques will you try to perfect your sourdough crumb?