
The Art of Cookie Sculpting Before Decoration


Welcome to BakeWithEase, where the sweet science of baking meets achievable artistry! Are you ready to transform ordinary cookies into extraordinary edible creations? This week, we're diving deep into the fascinating world of cookie sculpting techniques. Discover how to mold and shape your dough before baking, adding incredible depth and detail that will elevate your decorating game. Intrigued? Let's unlock the secrets to stunning cookie art!
- The Art of Cookie Sculpting Before Decoration: A BakeWithEase Tutorial
- Introduction to Cookie Sculpting Techniques for Advanced Baking
- Essential Tools and Ingredients for Cookie Sculpting
- Mastering Fundamental Cookie Sculpting Techniques
- Step-by-Step Cookie Sculpting Tutorial: Creating a Rose Cookie
- Troubleshooting Common Cookie Sculpting Problems
- Preparing Your Sculpted Cookies for Decoration
- Advanced Cookie Sculpting Projects: Inspiration and Ideas
- Conclusion: Unleash Your Creativity with Cookie Sculpting
- Frequently Asked Questions
- Final Reflection: Shaping More Than Just Dough
- Unleash Your Inner Cookie Artist!
Cookie decorating often focuses solely on the icing and final touches, but the foundation of a truly impressive cookie masterpiece begins much earlier: with sculpting the dough itself. Sculpting allows you to create intricate shapes, textures, and even three-dimensional elements that are impossible to achieve with just cutters and icing. It transforms a flat cookie canvas into a dynamic piece of edible art, adding depth and realism that captivates viewers and elevates your baking skills. Mastering these cookie sculpting techniques is a crucial step for anyone looking to move beyond basic decorating and explore advanced cookie art.
Beyond mere aesthetics, pre-decoration sculpting opens up a world of creative possibilities. Imagine cookies shaped not just like circles or squares, but as miniature animals, intricate flowers, or even tiny architectural features. This level of detail is achieved by manipulating the dough before it's baked and hardened.
By sculpting the dough while it's pliable, you can carve, mold, and build forms that hold their shape through the baking process, providing a robust structure for subsequent decoration with royal icing, fondant, or edible paints. This tutorial will guide you through the essential cookie sculpting techniques to bring your most ambitious cookie visions to life.
Welcome to BakeWithEase, your trusted resource for conquering baking challenges and unleashing your creative potential in the kitchen. This comprehensive guide is designed to walk you through the fascinating world of cookie sculpting. We'll cover everything from selecting the right dough and tools to executing fundamental and advanced sculpting methods, all while maintaining our signature friendly and educational approach. Whether you're aiming to create delicate floral cookies, character designs, or complex multi-layered structures, understanding these pre-baking sculpting techniques is paramount.
Our goal is to empower you with the knowledge and skills needed to confidently sculpt your cookies. We'll delve into practical tips for dough handling, preventing common issues like cracking or distortion during baking, and preparing your sculpted pieces for flawless decoration. By following this cookie sculpting techniques tutorial, you'll learn how to transform simple cookie dough into stunning, sculptural forms, setting the stage for truly exceptional cookie art that will impress everyone.
Choosing the right cookie dough is fundamental for successful sculpting. A dough that spreads excessively during baking will quickly obliterate any intricate details you painstakingly sculpted. The ideal dough for cookie sculpting is one that holds its shape well, has a fine, even texture, and is not overly sticky or crumbly. Shortbread and gingerbread doughs are excellent candidates because of their relatively low moisture content and high butter-to-flour ratio, which contributes to minimal spread. A classic sugar cookie recipe can also work, provided it's specifically formulated for cut-outs and doesn't contain leavening agents that cause significant expansion.
When preparing your dough, ensure it's chilled thoroughly before you begin sculpting. Cold dough is firmer and much easier to handle and shape without becoming sticky or losing definition. Rolling the dough to a consistent thickness, typically around 1/4 inch (about 6mm), provides a good base for both cutting out shapes and sculpting details. Avoid overworking the dough, as this can develop gluten, leading to tough cookies and increased shrinkage or distortion during baking. Proper dough preparation is the first critical step in this cookie sculpting techniques tutorial.
Sculpting Tool Essentials: From Knives to Modeling Tools
Just as a sculptor needs chisels and spatulas, a cookie artist requires a specific set of tools for dough manipulation. Basic tools you likely already own include a sharp paring knife or craft knife (designated solely for food use) for cutting and carving, and perhaps toothpicks or skewers for fine detail work. However, specialized sculpting tools designed for clay or fondant are incredibly useful. Sets often include tools with various tips like balls, points, chisels, and blades, made from materials like plastic, silicone, or metal. These allow for precise shaping, smoothing, texturizing, and carving.
For more complex shapes or adding texture, consider investing in silicone-tipped tools, which are great for blending and smoothing without sticking, and modeling tools with different sized ball ends for creating indentations or curved surfaces. Small brushes (clean, food-safe ones) can be used with a tiny bit of water or edible glue to help smooth seams or attach small pieces. Having a variety of tools available, from sharp blades for cutting to soft silicone tips for smoothing, will significantly enhance your ability to execute intricate cookie sculpting techniques.
While a well-chilled dough can often be pressed together and smoothed to create joins, sometimes you need a little help to attach separate sculpted pieces or repair small cracks before baking. Traditional gum paste glue, made from tylose powder and water, is an effective edible adhesive often used in cake decorating. It can be used sparingly to "glue" pieces of cookie dough together, though it's best applied to slightly chilled dough.
Another simple and readily available alternative is a tiny dab of water applied with a fine brush. Water helps to dissolve the surface starch and sugar in the dough, creating a sticky surface that adheres well when pressed together. For stronger bonds on larger pieces, a mixture of a small amount of flour and water can create a paste, but use this sparingly as it can affect the texture.
Ensure any adhesive is applied minimally and smoothed into the join to avoid visible lines or changes in texture after baking. Experimenting with these adhesives is part of mastering advanced cookie sculpting techniques.
Shaping Basic Forms: Circles, Squares, and Triangles
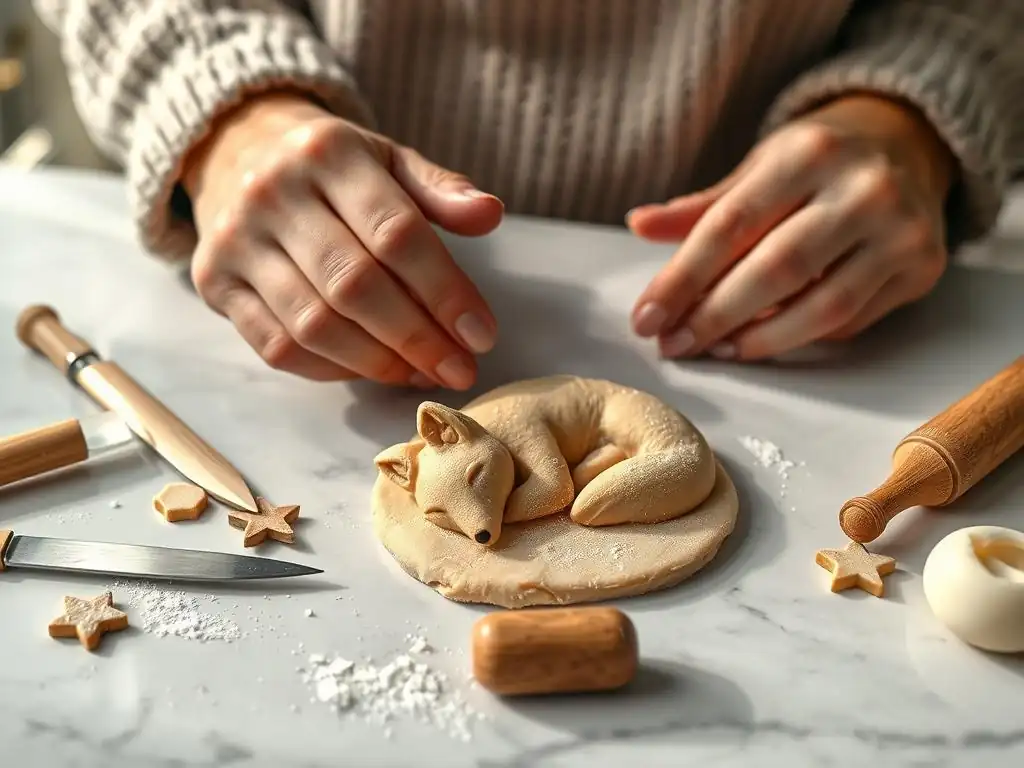
Before tackling complex designs, it's essential to master the basics of shaping dough beyond simple cookie cutters. Starting with a rolled sheet of chilled dough, you can use knives or sculpting tools to cut out basic geometric shapes. The key here is precision. Use rulers or templates if needed to ensure straight lines and accurate angles. Once cut, you can begin to refine these shapes. For example, a simple square can be transformed into a cube by cutting and joining pieces, or its edges can be beveled or rounded using sculpting tools.
Practice creating clean edges and smooth surfaces on these basic forms. Learn to handle the dough without distorting the shape. This involves using gentle but firm pressure and supporting the dough as you work. Cutting and shaping basic forms like circles, squares, and triangles lays the groundwork for more complex creations, allowing you to become comfortable with the feel and responsiveness of your chosen dough under your tools. This foundational practice is a critical step in any cookie sculpting techniques tutorial.
Moving beyond cutting and simple shaping, advanced cookie sculpting techniques involve manipulating the dough's plasticity. Bending and stretching chilled dough allows you to create curves, waves, and dynamic forms. For instance, to create a curved element like a handle for a basket cookie or a flowing ribbon, cut a strip of dough and gently curve it over a form (like a rolled piece of foil or a curved object) before baking. The dough needs to be pliable but cold enough to hold the curve without collapsing.
Stretching can be used to thin out specific areas or create tapered shapes. For example, to sculpt a delicate petal, you might start with a small ball or disc of dough and gently stretch and flatten one edge using your fingers or a sculpting tool. This requires a dough with good elasticity that doesn't tear easily. Practice these manipulations on scrap dough to understand how much your specific recipe can be bent or stretched before it becomes unmanageable or loses its structure.
Adding texture and fine details brings your cookie sculptures to life. Scoring involves using a sharp tool to carve lines or patterns into the dough surface. This can be used to create wood grain, fabric folds, hair, or even architectural details like bricks or tiles. Varying the depth and spacing of your scores will create different effects. For instance, deep, widely spaced lines might represent wood, while fine, close lines could depict hair.
Imprinting uses objects to press patterns onto the dough surface. This can be done with textured mats, stamps, or even everyday objects like forks, combs, or lace. For example, pressing a small, round object repeatedly can create a cobblestone effect, or using a veining tool can add realistic lines to leaves or petals. When scoring or imprinting, work on chilled dough to ensure the details hold their shape. Apply even pressure to create consistent patterns. These texturizing methods are vital for adding realism and depth to your cookie sculpting techniques.
Planning Your Design: Sketching and Template Creation
Before you even touch the dough, the first step in sculpting a rose cookie is planning. Start by sketching your rose design on paper. Decide on the size and the style – will it be a tight bud or a fully bloomed rose? Consider how many layers of petals you'll need and their approximate shapes and sizes. This initial sketch serves as your blueprint. For consistency, especially if making multiple roses, consider creating simple paper templates for your base shape and different sized petals.
Using templates helps ensure uniformity in your components, which is crucial for assembling a balanced rose. For instance, you might have a small circular template for the center base, and several oval or heart-shaped templates in graduating sizes for the petals. Laying these out with your sketch helps visualize the final assembly and the number of pieces required. This planning phase is essential for executing this specific cookie sculpting techniques tutorial effectively.
Sculpting the Base: Forming the Rose Center
Begin with well-chilled dough. Roll out a small portion to about 1/4 inch thickness. Using a small circular cutter or your template and a knife, cut out a disc for the base. This disc will be the foundation upon which you build your rose. Take a tiny piece of dough and roll it into a cone shape; this will be the very center of your rose bud. Place this cone upright in the center of your base disc.
Next, take a small piece of dough, flatten it slightly, and wrap it around the cone, overlapping the edge slightly. This forms the first, tightest petal layer. Ensure the base of the petal is firmly attached to the disc. You can use a tiny dab of water if needed to help it adhere. Smooth the join at the base with a sculpting tool or your finger. This forms the core structure for your sculpted rose.
Adding Details: Sculpting Petals and Leaves
Now, you'll start adding the outer petals. Take slightly larger pieces of dough for each subsequent petal. Roll or flatten them into thin, somewhat oval or heart shapes. Use a ball tool or your finger to gently cup the edges, giving them a natural, curved look. Attach these petals around the central bud, overlapping them and varying their angles slightly to mimic a real rose. Start with smaller petals near the center and gradually use larger ones as you work outwards.
For leaves, cut out simple leaf shapes from rolled dough. Use a veining tool or the back of a knife to press vein patterns into the surface. You can attach leaves to the base disc alongside the rose or sculpt them separately. Ensure all pieces are firmly attached to the base disc or each other, smoothing joins where necessary. Pay attention to the flow and overlap of petals to create a realistic appearance. This detailed work is key to successful cookie sculpting techniques.
Baking sculpted cookies requires careful attention to prevent all your hard work from being undone by spread or distortion. Once your rose cookie is fully sculpted on the base disc, transfer it carefully to a baking sheet lined with parchment paper. If the dough has warmed significantly during sculpting, chill the entire baking sheet with the sculpted cookies in the refrigerator for at least 15-30 minutes before baking. This re-chilling step is crucial for helping the shapes hold during the heat of the oven.
Bake the cookies at a slightly lower temperature than you might for flat cookies, perhaps around 325°F (160°C) or 350°F (175°C), depending on your oven and dough recipe. Keep a close eye on them. Baking time will vary based on the size and thickness of your sculpture, but it might range from 10 to 20 minutes or more. The cookies are done when the edges are lightly golden and the centers appear set. Avoid over-baking, which can cause delicate details to become brittle. Proper baking is the final step in this rose cookie sculpting techniques tutorial.

Preventing Cracking During Baking
One of the most frustrating issues in cookie sculpting is cracks appearing during baking, especially on curved or joined pieces. Cracking often happens because the dough is too dry, overworked, or expands unevenly. Ensure your dough recipe has adequate fat and moisture. If your dough feels dry, you might try adding a tiny bit more butter or liquid (like milk or egg yolk) when mixing, ensuring it's still firm enough to sculpt.
Working with dough that is consistently cold helps prevent cracks caused by uneven expansion. If working on a complex piece, sculpt in stages, re-chilling the dough periodically. For areas where multiple pieces join or where there are tight curves, use a tiny amount of water or edible glue along the seam before baking to help fuse the dough. If a crack appears during sculpting, you can often smooth it out with a damp finger or sculpting tool before baking. Post-baking cracks can sometimes be filled with icing or edible glue before decorating.
Fixing Misshapen Sculptures
Despite careful sculpting, sometimes cookies can slightly misshape during handling or baking. If a piece is slightly distorted after cutting but before baking, you can often gently reshape it with your fingers or tools while the dough is still cold and pliable. Use flat tools or bench scrapers to help maintain straight edges on geometric shapes.
If a sculpture slightly distorts during baking (often due to uneven heat or dough spread), you have limited options post-bake, but minor adjustments are sometimes possible immediately after removing the cookies from the oven while they are still warm and slightly soft. For example, if an edge bowed outwards, you can gently push it back into place with a flat spatula or knife. Any significant misshaping usually requires starting over with that piece. Learning from these instances helps refine your cookie sculpting techniques for future projects.
Achieving Smooth Surfaces for Decoration
A smooth, even surface is crucial for applying royal icing or fondant cleanly. Uneven textures or tool marks from sculpting can show through the final decoration. During the sculpting process, frequently use smoothing tools, silicone shapers, or even a clean fingertip (slightly dusted with cornstarch if the dough is sticky) to buff the surface of your sculpted pieces. For flat areas, a small roller or the side of a flat tool can help.
After baking and cooling, if there are still minor imperfections, you can gently sand the surface using a fine-grit edible sanding sugar or even a very fine grater designed for food. Alternatively, a technique called "damp brushing" involves lightly brushing the surface with a clean brush dipped in a tiny amount of clear alcohol (like vodka) or water. This slightly dissolves the surface sugar, which can then be smoothed with the brush. Allow the cookie to dry completely before decorating. These finishing touches are part of mastering advanced cookie sculpting techniques.
Cooling and Hardening Techniques
Proper cooling is just as important as proper baking for sculpted cookies. Once removed from the oven, allow the cookies to set on the baking sheet for a few minutes before attempting to move them. Sculpted cookies can be fragile when hot. Carefully transfer them to a wire cooling rack to cool completely. Ensure they are placed on the rack in a way that supports any delicate sculpted elements, preventing them from bending or breaking as they cool and firm up.
Allow the cookies to cool completely and harden for several hours, or even overnight, before attempting any decoration. This allows the internal structure to fully set and the moisture content to stabilize. Rushing this step can lead to breakage or difficulty in applying icing smoothly. For particularly delicate pieces, some bakers recommend a second, very low-temperature "drying" bake (e.g., 200°F / 90°C) for an hour or two after initial cooling to further harden the cookie, especially if they are thick or intended for stacking.
Smoothing Imperfections: Sanding and Damp Brush Techniques
Even with careful sculpting and baking, minor bumps, ridges, or rough spots might remain on your cookie surface. These small imperfections can be smoothed out before decoration. One method is gentle sanding using fine edible sanding sugar as an abrasive, rubbed over the surface with a finger or soft cloth. This works well for general smoothing.
For more precise smoothing or to eliminate tool marks, the damp brush technique mentioned earlier is effective. Dip a small, clean, food-safe brush in a tiny amount of clear alcohol (which evaporates quickly) or water. Lightly brush the surface of the cookie, just enough to slightly dissolve the top layer of sugar and dough. Then, use the brush or a sculpting tool to smooth the softened surface. Be careful not to use too much liquid, as this can make the cookie soggy or dissolve details. Let the cookie dry thoroughly afterwards.
Creating a Perfect Canvas for Royal Icing and More
Once your sculpted cookies are fully cooled, hardened, and any imperfections have been smoothed, they are ready for decoration. The sculpted form provides the three-dimensional base, and your careful preparation ensures a pristine surface. For royal icing, a smooth surface allows for clean lines, flood fill, and detailed piping without bumps or ridges showing through.
If using fondant, a smooth base ensures the fondant lays flat and adheres well. For hand-painting with edible colors, a clean, smooth cookie surface is essential for vibrant colors and fine brushstrokes. Think of the sculpted cookie as a pre-primed canvas ready for your edible paints and icing. Investing time in these preparation steps is crucial for achieving professional-looking results with your cookie sculpting techniques.
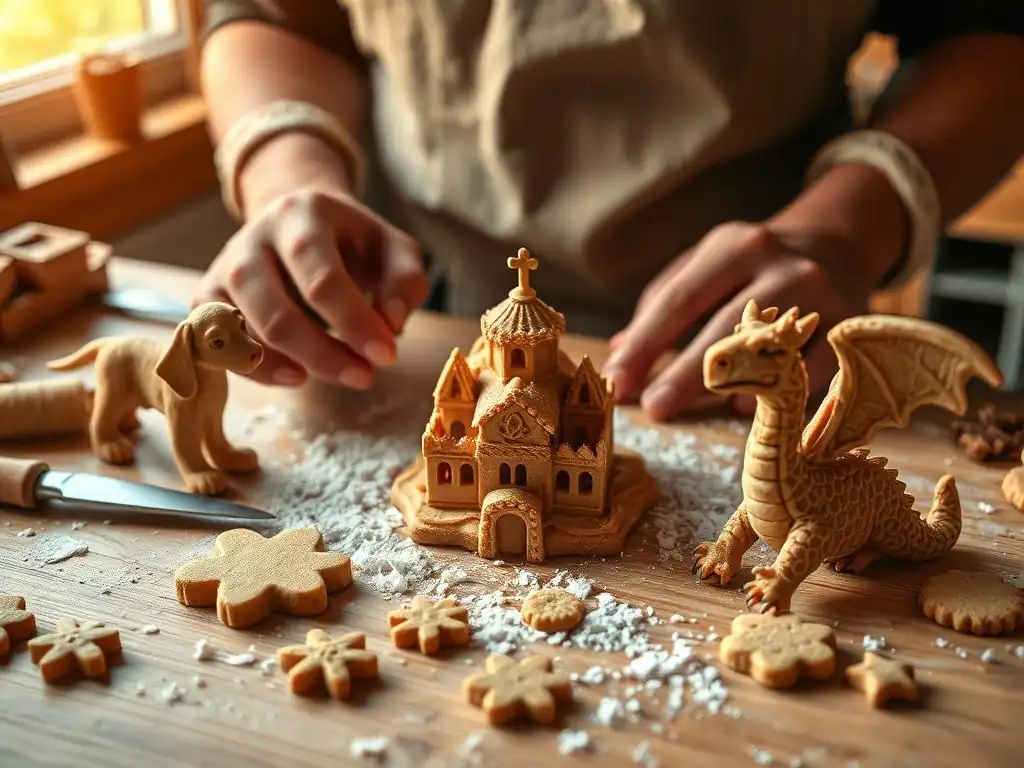
Sculpting Animals: Sculpting a Miniature Elephant
Taking cookie sculpting to the next level often involves creating recognizable objects or characters. Sculpting animals is a popular advanced project. Let's consider sculpting a miniature elephant. You would start with a base shape for the body, perhaps an oval. Then, sculpt separate pieces for the legs, trunk, ears, and tail. Roll four thick cylinders for legs and attach them to the body base, ensuring they can support the body's weight.
The trunk would be a tapered cylinder, curved into a realistic pose, attached securely to the head area (which might be part of the body base or a separate sculpted sphere). Large, flattened oval shapes could form the ears, attached to the sides of the head. Use sculpting tools to add details like wrinkles on the trunk, toenails, or texture on the skin. This project requires careful planning, precise attachment using edible glue or water, and likely re-chilling stages to keep the dough firm while you work on different parts.
Another exciting advanced project is creating miniature landscapes directly on the surface of a large cookie. Imagine a cookie depicting a rolling hill with a tiny house, trees, and perhaps a fence. You would start with a large, flat base cookie shape (like a large circle or rectangle). While the dough is still raw and on the baking sheet, you can begin building up the landscape.
Use small pieces of dough to create hills, pressing them onto the base and smoothing the edges. Sculpt tiny houses, trees (perhaps cones with textured surfaces for leaves), fences (thin strips of dough), or rocks (irregular shapes). Attach these elements securely to the base cookie. You can use sculpting tools to add texture like grass (scoring fine lines), dirt (pressing irregular patterns), or stone walls. This project blends relief sculpting with adding separate 3D elements.
True 3D cookie sculptures involve building upwards, creating structures that stand tall rather than just having relief on a flat surface. Think of a multi-story building, a teacup, or a complex character. These projects often require baking multiple sculpted pieces separately and then assembling them after baking using strong edible adhesive like royal icing or melted chocolate.
For example, sculpting a teacup might involve sculpting the cup body and handle separately, baking them, and then 'gluing' the handle onto the baked cup. A multi-story building would involve sculpting and baking each floor separately, perhaps with sculpted details like windows and doors, and then stacking and attaching them. These projects test your sculpting skills, planning ability (ensuring pieces fit together), and assembly techniques. Mastering these advanced cookie sculpting techniques allows for truly impressive edible constructions.
Cookie art is a constantly evolving field, and cookie sculpting techniques are at the forefront of this innovation. As bakers become more adventurous, the boundaries of what's possible with edible dough are continually pushed. We see incredible realism in sculpted characters, intricate architectural models, and dynamic scenes brought to life on a cookie base. The availability of new tools, techniques borrowed from other art forms (like pottery or sculpting), and a willingness to experiment are driving this creativity.
The future lies in combining these advanced sculpting methods with cutting-edge decorating techniques, such as airbrushing, edible printing, and innovative icing applications, to create truly multi-medium edible art. As you gain confidence in sculpting, don't be afraid to try new dough recipes, adapt tools from other crafts (ensuring they are food-safe), and invent your own methods for shaping and texturizing. Your journey in mastering cookie sculpting techniques is just beginning, and the possibilities are endless.
BakeWithEase: Your Partner in Mastering Advanced Baking Skills
At BakeWithEase, we are passionate about helping you explore every facet of the baking world, from simple recipes to advanced techniques like cookie sculpting. We believe that with the right guidance, tools, and a little practice, anyone can create stunning edible art. This cookie sculpting techniques tutorial is just one resource among many designed to help you expand your skills and confidence in the kitchen.
We encourage you to revisit this guide, practice the techniques, and experiment with your own designs. Share your creations and challenges with our community. Whether you're perfecting a sculpted rose or attempting your first 3D cookie structure, BakeWithEase is here to support your baking journey. Keep experimenting, keep creating, and most importantly, keep baking with ease and joy!
Frequently Asked Questions
Cookie sculpting refers to modifying the shape of a cookie before baking. It's important because it creates a 3D base for more impressive and detailed decorations.
You'll need a sharp paring knife, cookie cutters in various shapes, a rolling pin, and optionally, sculpting tools like ball tools or modeling tools.
Not all cookie doughs are suitable. You'll want a dough that holds its shape well during baking, like a shortbread or sugar cookie dough specifically designed for cut-out cookies.
Chilling the dough thoroughly before cutting and baking is crucial. Also, avoid overmixing the dough, as this can develop gluten and lead to excessive spreading.
BakeWithEase.com offers a variety of tutorials on cookie sculpting, including more advanced techniques, tips on using different tools, and inspiration for complex cookie designs.
Final Reflection: Shaping More Than Just Dough
The meticulous art of cookie sculpting, far from being a mere confectionery skill, reflects a deeper human desire for creative expression and the transformative power of patience. In a world increasingly dominated by instant gratification, the deliberate process of shaping cookie dough into intricate forms offers a powerful antidote, a mindful practice that connects us to both the tangible and the imaginative. This careful preparation before decoration is the very foundation upon which truly stunning cookie art is built.
The influence of this seemingly simple craft extends beyond the kitchen table. It speaks to a broader cultural shift towards handmade artistry and the appreciation of slow, intentional processes. The satisfaction derived from transforming a simple disc of dough into a three-dimensional masterpiece is deeply personal and profoundly rewarding. As the renowned sculptor Auguste Rodin once said, It is by the hand that the heart speaks.
This sentiment perfectly encapsulates the emotional connection forged through the act of cookie sculpting, a connection that transcends the final decorated product.
Now, consider your own creative potential. What intricate forms are waiting to be coaxed from the pliable dough of your own imagination? Don't be afraid to experiment, to embrace imperfections, and to find joy in the journey. The techniques outlined in this tutorial are merely a starting point; your unique vision and dedication will ultimately determine the beauty and artistry of your creations. Embrace the process, nurture your creativity, and discover the transformative power of shaping more than just dough.
Thanks for diving into the world of cookie sculpting! We hope you gained valuable insights into creating the perfect base for your decorated masterpieces. Now it's time to put your new skills to the test!
- Sculpt your dream cookie: Grab your dough and try out one of the techniques we discussed. Don't be afraid to experiment!
- Share your creations: Show us your sculpted cookies on social media using #BakeWithEaseSculpts – we'd love to see your artistic flair!
- Explore advanced techniques: Dive deeper into cookie sculpting by researching different dough recipes and tools.
What unique sculpting technique are you most excited to try next?