
Unlock the Secrets of Flawless Flooding for Perfect Cookie Surfaces

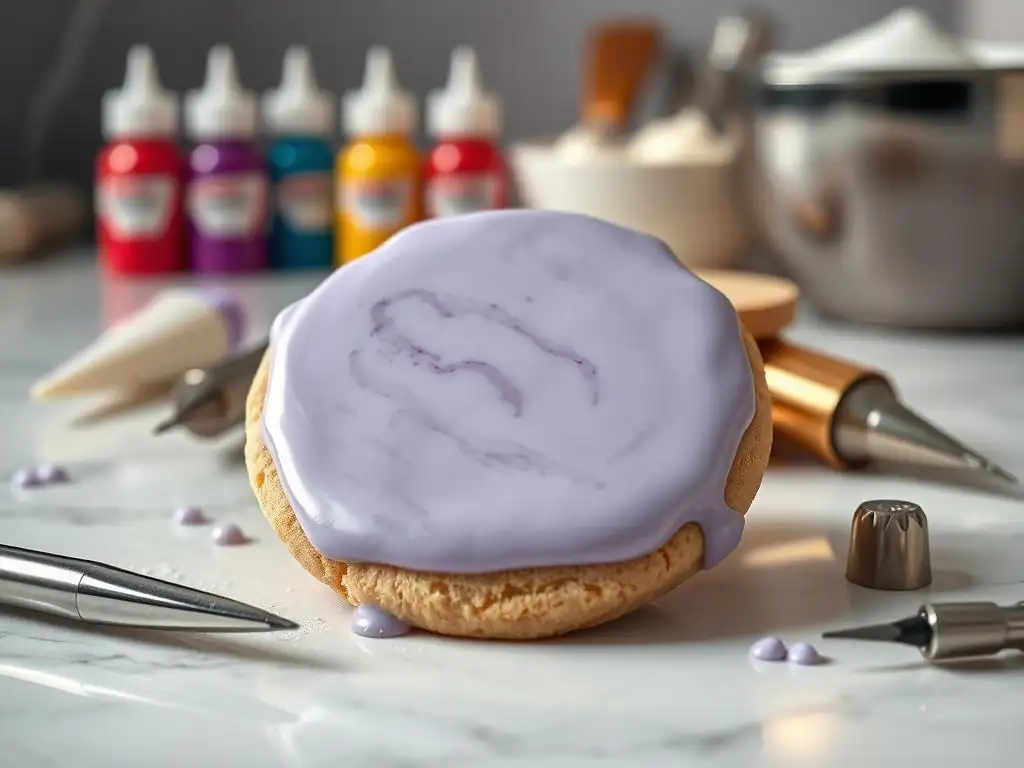
Welcome to BakeWithEase, your haven for baking bliss! Ever dreamed of achieving those mesmerizing, perfectly smooth cookie surfaces you see online? Dive into our latest guide and unlock the secrets of flawless cookie flooding techniques. Discover the tips and tricks that will transform your cookies from simply delicious to absolutely stunning, leaving everyone wondering how you did it. Ready to elevate your cookie decorating game? Let's get started!
- Mastering Cookie Decorating: Achieving Smooth Royal Icing
- Introduction to Royal Icing for Cookie Decorating
- Preparing for Success: Essential Steps
- Royal Icing Techniques: A Step-by-Step Guide
- Troubleshooting Common Problems
- Advanced Techniques: Taking Your Skills to the Next Level
- Storage and Preservation
- Conclusion: Mastering Royal Icing
- Frequently Asked Questions
- Final Reflection: The Enduring Allure of the Perfectly Flooded Cookie
- Unleash Your Inner Cookie Artist: Master the Flood!
Mastering royal icing techniques is the gateway to transforming simple baked goods into stunning edible artwork. Royal icing provides a smooth, hard finish that serves as the perfect canvas for intricate designs, delicate lines, and vibrant colors. Whether you're aiming for professional-looking cookies for a special event like a wedding or birthday, or simply want to impress friends and family, learning how to work effectively with royal icing is essential. It allows for precision and detail that other icings simply cannot offer, opening up a world of creative possibilities limited only by your imagination.
Beyond just aesthetics, proficiency in royal icing, particularly flawless cookie flooding techniques, ensures durability. Once dried, royal icing forms a protective shell that helps preserve the cookie underneath and makes them stackable and transportable without smudging the design. This is crucial for anyone selling decorated cookies or preparing them in advance for parties. Achieving that smooth, even base is the foundational step for almost all advanced decorating methods, making it a core skill to develop for anyone serious about cookie art.
A perfectly smooth, level base layer of royal icing is paramount for executing detailed cookie designs effectively. Think of it like preparing a canvas for a painting; a bumpy or uneven surface will inevitably show through the final artwork, detracting from its quality. When you have a flawless cookie flooding layer, subsequent details piped on top – fine lines, intricate patterns, or even edible paint – sit beautifully and clearly defined. Any dips, craters, or unevenness in the flooded base will distort these details, making them appear messy or unprofessional.
Furthermore, many popular advanced techniques, such as wet-on-wet designs (like marbling or adding dots that sink into the base), rely entirely on the flooded layer being wet and perfectly smooth when the detail is applied. If the base isn't level or starts to set unevenly, these techniques simply won't work as intended, resulting in jagged lines or distorted patterns instead of fluid, seamless artwork. Therefore, dedicating time to mastering flawless cookie flooding techniques is not just about achieving a pretty base, but about enabling the execution of more complex and impressive decorative elements on your cookies.
Preparing for Success: Essential Steps

The journey to flawless cookie flooding begins long before you mix your icing – it starts with baking the perfect cookie base. A flat, even cookie is crucial because any bumps, domes, or uneven edges will make it incredibly difficult to achieve a smooth, level surface with royal icing. Start with a reliable cut-out cookie recipe that holds its shape well when baked.
Chilling your dough thoroughly, ideally for at least 30-60 minutes, helps prevent excessive spreading in the oven. Rolling your dough to a consistent thickness, typically around 1/4 inch (about 6mm), ensures even baking and a sturdy base.
When baking, use parchment paper or silicone mats on your baking sheets to prevent sticking and promote even heat distribution. Avoid overbaking, as this can cause cookies to dome or brown unevenly.
Baking at the correct temperature and rotating your baking sheets halfway through the baking time (e.g., 8-12 minutes at 350°F or 175°C depending on size and thickness) helps achieve uniformly flat cookies. If you notice slight doming after baking, you can gently press the tops of the warm cookies with a flat object like a spatula or another baking sheet immediately after they come out of the oven to flatten them slightly, creating a better surface for your flawless cookie flooding techniques.
Royal Icing Preparation: The Foundation
The quality and consistency of your royal icing are fundamental to achieving flawless cookie flooding. Royal icing is typically made from powdered sugar, meringue powder (or egg whites), and liquid (usually water, sometimes milk or lemon juice). The powdered sugar provides the bulk and sweetness, the meringue powder acts as a stabilizer and drying agent, and the liquid adjusts the consistency.
Mixing it properly is key: start by whisking the meringue powder and liquid until frothy, then gradually add the sifted powdered sugar on low speed using a stand mixer or hand mixer. Avoid high speeds, as this can incorporate too much air, leading to excessive bubbles later. Mix until smooth and glossy.
Once the basic icing is mixed, you'll need to adjust its consistency for different purposes – typically outlining and flooding. This is done by adding small amounts of liquid (for flooding) or powdered sugar (for outlining) until the desired flow is achieved. Getting the consistency just right is one of the most critical steps in mastering flawless cookie flooding techniques. Too thick, and it won't flow smoothly; too thin, and it will run off the cookie. Practice and observation are key to recognizing the correct consistencies.
Achieving the Ideal Consistency for Outlining and Flooding
Achieving the correct consistency for outlining and flooding is perhaps the most challenging, yet crucial, aspect of using royal icing. For outlining, you want a consistency that is thick enough to hold its shape and act as a dam, preventing the thinner flooding icing from running off the edge of the cookie. This is often described as toothpaste-like or having a stiff peak that curls over slightly. When you lift your spatula, the icing should break cleanly.
For flooding, you need a thinner consistency that flows smoothly to fill the outlined area and settles into a level surface. A common test is the "10-second rule." Drop a spoonful of icing back into the bowl; if the line disappears back into the surface in approximately 8-12 seconds, it's a good flooding consistency. If it takes longer, it's too thick; if it's faster, it's too thin and needs more powdered sugar. Adjusting the consistency gradually, adding liquid or sugar just a teaspoon or tablespoon at a time, is essential to perfect flawless cookie flooding techniques.
Royal Icing Recipe: A Detailed Guide
Here is a common structure for a reliable royal icing recipe, focusing on proportions that yield a good base for adjusting consistency:
Basic Royal Icing Recipe (Approximate)

*   4 cups (about 450g) sifted powdered sugar
*   3 tablespoons meringue powder
*   1/2 cup (about 120ml) lukewarm water (or more, divided)
*   Optional: 1/2 teaspoon vanilla extract or other flavoring

Instructions:

1.  In a large bowl, whisk together the meringue powder and 1/2 cup of water until frothy.
2.  Gradually add the sifted powdered sugar to the meringue mixture on low speed using a mixer.
3.  Mix until all the sugar is incorporated and the icing is smooth and glossy. This will be a very thick consistency.
4.  To achieve outlining consistency, you may not need to add much more liquid, perhaps just a teaspoon or two until it pipes smoothly but holds a defined line.
5.  To achieve flooding consistency, gradually add additional water, one teaspoon at a time, mixing after each addition, until the icing reaches the desired flow (using the 8-12 second rule).
6.  If coloring, add gel food coloring sparingly and mix thoroughly.
7.  Keep unused icing covered tightly with plastic wrap pressed directly onto the surface to prevent it from crusting.
This recipe provides a starting point. The exact amount of liquid needed will vary based on humidity and the specific brand of meringue powder and powdered sugar used. Always adjust consistency slowly to achieve the perfect flow for your flawless cookie flooding techniques.
Essential Tools and Equipment
Having the right tools can significantly improve your flawless cookie flooding techniques. While you can start with minimal equipment, certain tools make the process easier and yield better results. Basic necessities include bowls for mixing and separating colors, spatulas, and a way to apply the icing, like piping bags or squeeze bottles.
Beyond the basics, consider investing in gel food coloring for vibrant, concentrated color without adding excessive liquid. Squeeze bottles are often preferred by beginners for flooding large areas due to ease of grip and control, while piping bags offer more versatility for both outlining and flooding, especially with various tips. A scribe tool or toothpick is indispensable for spreading icing into corners and popping air bubbles, a critical step for achieving a smooth finish.
Piping Bags vs. Bottles: Choosing the Right Tool
The choice between piping bags and squeeze bottles for royal icing often comes down to personal preference and the task at hand. Piping bags, used with or without tips, offer excellent control for creating fine outlines and can be used for flooding by simply cutting a slightly larger opening in the tip of the bag. They are versatile and easy to fill, especially for multiple colors or small batches. You can easily change tips for different line thicknesses.
Squeeze bottles, on the other hand, are often favored for flooding larger areas. They are easy to hold and squeeze, allowing for a steady flow of icing. They are also simple to refill and clean. However, they offer less precision for outlining compared to piping bags with fine tips. Many decorators use a combination: piping bags for outlining with a small round tip (like a PME Supatube #1 or #2) and squeeze bottles filled with thinner icing for the flooding step, optimizing their flawless cookie flooding techniques.
Turntables, Scribe Tools, and Dehydrators: Helpful Accessories
Several accessories can significantly enhance your flawless cookie flooding techniques. A cookie turntable allows you to easily rotate the cookie as you outline or flood, making it easier to maintain a consistent line and fill areas smoothly without awkward hand positions. This is particularly helpful for circular or complex shapes.
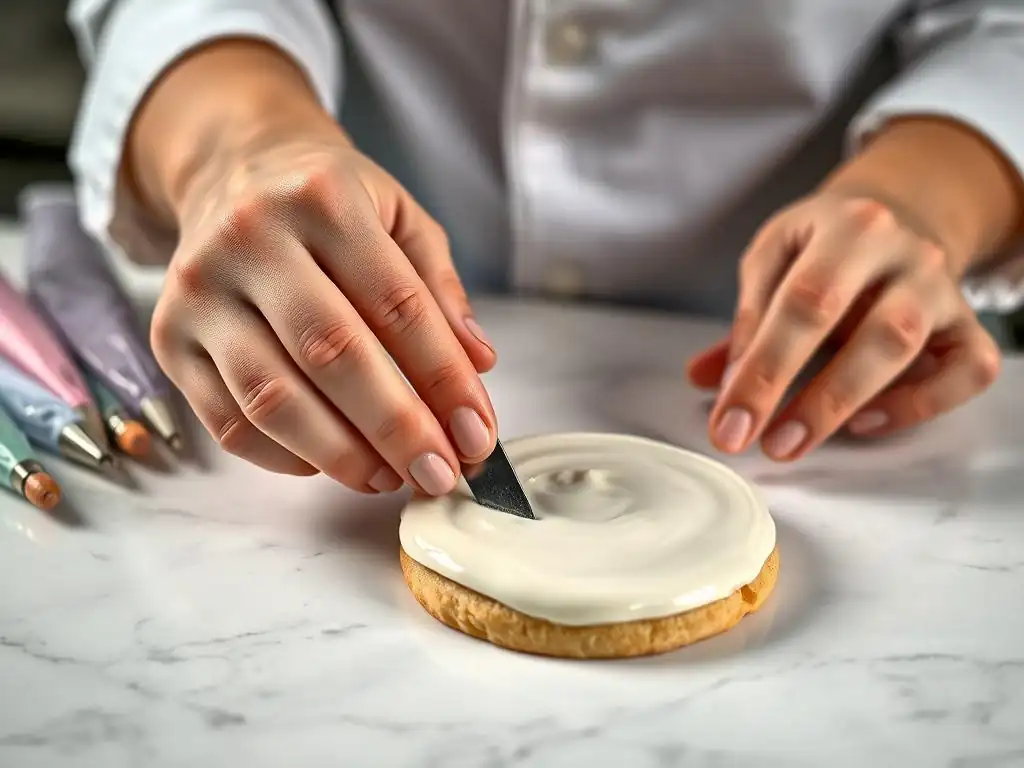
A scribe tool, or even a simple toothpick or needle tool, is absolutely essential. It's used to gently guide the flooding icing into tight corners, spread it evenly across the surface, and most importantly, to seek out and pop tiny air bubbles that rise to the surface after flooding. Popping these bubbles immediately is crucial for preventing craters and ensuring a smooth finish.
Finally, a food dehydrator (set to a very low temperature, around 90-100°F or 32-38°C) or even a simple fan can significantly speed up the drying process, promoting a smoother, shinier finish and reducing the chance of color bleeding. While not strictly necessary, these tools can elevate your results and make achieving flawless cookie flooding much more manageable.
Royal Icing Techniques: A Step-by-Step Guide
The first step in the royal icing process, after your cookie is baked and cooled, is creating an outline or border using royal icing at outlining consistency. This border acts as a dam to contain the thinner flooding icing within the desired area of the cookie. Load your piping bag or bottle with outlining consistency icing. Hold the bag/bottle at a 45-degree angle just above the surface of the cookie, letting the icing fall onto the cookie rather than pushing the tip into the surface.
Apply steady, even pressure as you pipe the outline, following the edge of the cookie shape or the lines of your design. Try to pipe in continuous lines where possible, lifting the bag/bottle only at corners or where lines meet. The goal is a neat, consistent line that completely encloses the area you intend to flood. A well-executed outline is the first critical step towards flawless cookie flooding, ensuring your flood icing stays exactly where you want it.
Once your outline is complete and has crusted over slightly (this takes just a few minutes), it's time for the flooding step. Fill a piping bag or squeeze bottle with royal icing at flooding consistency (the 8-12 second rule consistency). Start by piping the flooding icing just inside the outline you created, working your way inwards. Don't pipe directly onto the outline itself, as this can cause it to spread or lose its shape.
Fill the area completely with icing, making sure to get into all the corners and edges, using your scribe tool to gently guide the icing if needed. Don't overfill, but ensure there is enough icing to create a slightly raised surface. Once the area is filled, gently shake the cookie from side to side or tap it lightly on your work surface.
This helps the icing settle and become level. Immediately after tapping, use your scribe tool to gently swirl through the icing surface to pop any visible air bubbles that have risen. This tapping and popping step is essential for achieving flawless cookie flooding techniques.
Preventing Air Bubbles and Achieving a Level Surface
Preventing air bubbles and achieving a perfectly level surface are key challenges in flawless cookie flooding. Air bubbles often get incorporated during the mixing process or when filling piping bags/bottles. Using low speed when mixing icing and tapping your filled bags/bottles can help minimize them. After flooding, the primary method for dealing with bubbles is tapping the cookie gently on the counter and then using a scribe tool or toothpick to immediately pop any bubbles that surface. Scan the entire surface carefully for even the tiniest pinprick bubbles.
Achieving a level surface involves ensuring the flooding icing consistency is correct and applying enough icing to fill the area without overflowing. After flooding and tapping, the icing should naturally settle into a smooth plane. If you notice low spots, you can quickly add a tiny bit more icing before it starts to skin over. Tapping and gently nudging the icing with your scribe tool helps the icing flow and settle evenly, contributing significantly to flawless cookie flooding techniques.
Step 3: Drying and Setting: Ensuring a Perfect Finish
After successfully flooding your cookie, the final crucial step is allowing the royal icing to dry and set completely. This process involves the water in the icing evaporating, leaving behind a hard, smooth shell. Proper drying is essential to prevent smudging, cracking, and color bleeding, ensuring the flawless cookie flooding you achieved remains intact.
Place your flooded cookies on a flat surface, ideally on parchment paper or silicone mats, in an area with good air circulation. Avoid stacking them until they are completely dry and hard. The drying time can vary significantly based on the thickness of the icing layer and, most importantly, the environmental conditions like humidity and temperature.
Drying Time and Environmental Factors
The drying time for royal icing can range from a few hours to overnight, or even longer in very humid conditions. A thin layer might crust over in 30-60 minutes, but the underlying icing can take 6-12 hours or more to dry hard all the way through. High humidity is the enemy of quick royal icing drying, as it slows down evaporation considerably. A cookie that might dry in 6 hours in a dry climate could take 24 hours or more in a humid one.
To speed up the process and promote a smoother, shinier finish less prone to cracking, many decorators use a fan or a food dehydrator set on its lowest temperature setting (around 90-100°F / 32-38°C). Drying in a dehydrator can reduce the time to 1-4 hours, depending on thickness. Placing cookies in a room with a dehumidifier also helps. Ensuring the icing is fully dry before adding second layers of icing or packaging is vital for preserving your flawless cookie flooding and preventing issues like color transfer.
Troubleshooting Common Problems
Addressing Air Bubbles and Craters
Even with careful preparation, air bubbles and subsequent craters can sometimes appear in your flooded surface, marring your flawless cookie flooding. Air bubbles typically rise to the surface shortly after flooding. The best defense is proactive: tap your cookie gently on the counter after flooding and use a scribe tool or toothpick to immediately pop any bubbles you see. Swirling the scribe tool through the wet icing also helps release trapped air.
If you notice a small crater forming as the icing dries, you might be able to fix it if the icing is still wet underneath. Gently add a tiny drop of flooding consistency icing to the center of the crater and use a scribe tool to coax it to spread and fill the void. If the icing is already partially dried, attempting to fix it might make it worse.
Sometimes, the only solution is to carefully scrape off the affected area (if possible without damaging the outline) or accept the imperfection. Using icing that isn't overmixed and is the correct consistency also helps minimize bubble formation.
Preventing Color Bleeding
Color bleeding occurs when the moisture from one layer of icing seeps into another, causing colors to blur or run. This is particularly common when placing dark colors directly onto lighter colors or when the base layer isn't completely dry. To prevent this, always use high-quality gel food coloring, which is more concentrated and requires less liquid than traditional liquid food coloring. Add color gradually until you achieve the desired shade.
Crucially, ensure your base flood layer is completely dry before piping or flooding with a contrasting color on top. While the surface may feel dry to the touch after an hour, the interior might still be wet. Allowing cookies to dry for 8-12 hours or using a dehydrator significantly reduces the risk of bleeding. If you must layer colors quickly, use a fan or dehydrator to speed the drying of each layer. Preventing color bleeding is key to maintaining the crisp lines and vibrant appearance of your flawless cookie flooding techniques.
Fixing Uneven Surfaces and Icing Cracking
Uneven surfaces in flooded royal icing usually result from inconsistent application of the icing, insufficient tapping/shaking to help it settle, or using icing that is slightly too thick for flooding. If you notice low spots immediately after flooding and tapping, you can add a little more icing and tap again before it skins over. Once it starts to dry, it's very difficult to fix an uneven surface without redoing the flood layer. Ensuring your cookie base is flat also helps prevent unevenness.
Icing cracking, particularly hairline cracks, can happen if the icing dries too quickly on the surface while the layer underneath is still wet and contracting as it dries. Using a fan or dehydrator on a low setting can help the icing dry more evenly throughout the layer, reducing the likelihood of cracking.
Cracking can also occur if the icing is applied too thinly over a large area or if the cookie is bent or handled roughly before the icing is fully set. Using the correct flooding consistency and allowing adequate, controlled drying time are the best preventative measures for preserving your flawless cookie flooding.
Advanced Techniques: Taking Your Skills to the Next Level
Wet-on-Wet Designs: Creating Intricate Patterns
Once you've mastered flawless cookie flooding techniques, you can move on to exciting advanced methods like wet-on-wet designs. This technique involves applying lines, dots, or swirls of wet royal icing onto a freshly flooded, still-wet base layer of a different color. Because both layers are wet, the applied icing sinks slightly into the base, creating a smooth, seamless design when dry, with no raised lines.
Common wet-on-wet patterns include simple dots pulled through to make hearts, lines drawn through contrasting stripes to create marbling or feathering effects, and concentric circles pulled outwards or inwards to form spiderwebs or bullseyes. The key to successful wet-on-wet is working quickly before the base layer starts to skin over and ensuring both the base flood and the applied design icing are at the correct flooding consistency. This method is a fantastic way to add intricate, smooth patterns that complement your flawless cookie flooding.
Marbling and Feathering Techniques
Marbling and feathering are specific types of wet-on-wet techniques that create beautiful, organic patterns. For marbling, flood the cookie with your base color. While it's still wet, pipe lines or dots of one or more contrasting colors onto the wet base. Then, using a scribe tool or toothpick, swirl through the colors randomly to create a marbled effect.
Feathering is similar but more structured. Flood the cookie with your base color. While wet, pipe parallel lines of a contrasting color (or multiple colors) across the base. Then, drag a scribe tool perpendicularly through the lines, alternating direction with each pass (e.g., drag up, then down, then up). This pulls the colors into a feathered or chevron pattern. Both marbling and feathering rely entirely on the smooth, wet surface provided by flawless cookie flooding, showcasing the beauty of seamless color integration.
Adding Texture and Dimension
Beyond smooth flooding and wet-on-wet, advanced decorators use royal icing to add texture and dimension to cookies. This is typically done after the base flood layer is completely dry. Techniques include piping details using thicker icing consistency (like outlining consistency or slightly thicker) to create raised lines, dots, swirls, or patterns. Using different piping tips can create various textures, such as stars, shells, or ruffles.
Other ways to add dimension include creating royal icing transfers (piping designs onto parchment paper, drying them, and then adhering them to the cookie), using stencils with thicker icing, or applying sprinkles, edible glitter, or sanding sugar to wet royal icing details. These dimensional elements stand out against the smooth background provided by your flawless cookie flooding, adding visual interest and complexity to your cookie designs.
Storage and Preservation
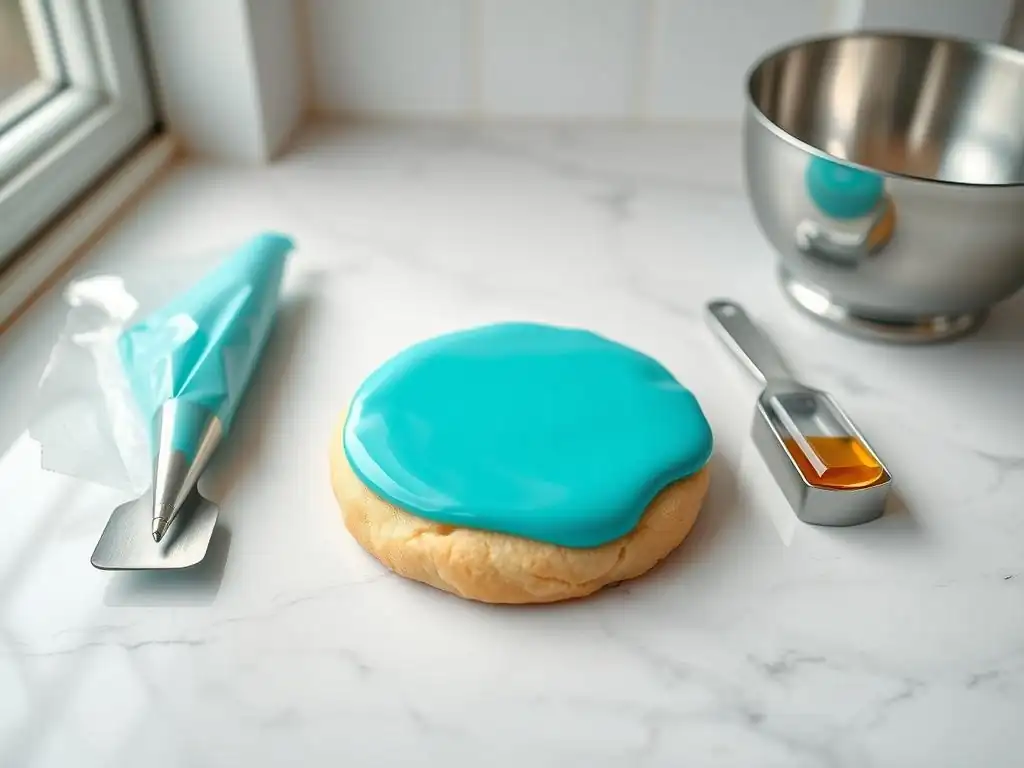
Once your beautifully decorated cookies featuring flawless cookie flooding are completely dry and set (this can take 12-24 hours depending on humidity and icing thickness), proper storage is essential to maintain their freshness and protect the delicate artwork. Store royal-iced cookies in an airtight container at room temperature. Avoid refrigerating or freezing them, as condensation can form on the icing when they are brought back to room temperature, potentially causing colors to bleed or the icing to become sticky.
Arrange the cookies in a single layer if possible. If you need to stack them, place a layer of parchment paper or wax paper between each layer of cookies to prevent them from sticking together or damaging the icing. Ensure the container is truly airtight to prevent the cookies from becoming stale. Stored correctly, royal-iced cookies can stay fresh and beautiful for several weeks.
Extending Shelf Life
Royal icing acts as a seal on the cookie, which helps to extend its shelf life compared to an undecorated cookie or one with a softer icing. When stored properly in an airtight container at room temperature, cookies decorated with flawless cookie flooding can typically remain fresh for 2-3 weeks. The cookie itself will likely lose some softness over time, but the icing will preserve the flavor and prevent it from going stale quickly.
For longer storage, while refrigeration/freezing is generally not recommended after decorating due to condensation risk, some people freeze undecorated cookies and then thaw and decorate them. If you must store decorated cookies longer than a few weeks, ensure they are completely dry, wrap them individually in food-safe cellophane bags, and then place them carefully in an airtight container. While this might allow storage for a month or two, the quality of the cookie may decline, but the flawless cookie flooding design should remain intact if condensation is avoided.
Conclusion: Mastering Royal Icing
The Importance of Practice and Patience
Mastering royal icing and achieving truly flawless cookie flooding techniques is a skill that develops over time with consistent practice and a healthy dose of patience. Your first attempts might not be perfect – you may encounter bubbles, uneven surfaces, or issues with consistency. This is a normal part of the learning process. Don't get discouraged by imperfections; instead, view each cookie as an opportunity to learn and improve.
Experiment with different icing consistencies, practice your outlining control, and refine your flooding and tapping techniques. Pay attention to how environmental factors like humidity affect your icing. With each batch of cookies, you'll gain a better understanding of how royal icing behaves and how to manipulate it to achieve the smooth, beautiful results you desire. The journey to flawless cookie flooding is rewarding, and the stunning edible art you'll be able to create is well worth the effort. Keep baking, keep practicing, and enjoy the process!
Frequently Asked Questions
Cookie flooding is a decorating technique that uses thinned royal icing to create a smooth, even surface on cookies. It's important because it provides a beautiful canvas for further decorating and adds a professional touch.
Royal icing is the most popular choice for cookie flooding. It dries hard and smooth, making it ideal for creating crisp, clean lines and vibrant colors.
How do I achieve the correct consistency for flooding icing?
The ideal consistency is often referred to as "15-second icing". This means when you lift a spoonful of icing and let it fall back into the bowl, the line created should disappear in about 15 seconds. Adjust with water, adding a tiny amount at a time.
Over-mixing the icing can incorporate too much air, leading to bubbles. Also, using icing that is too thick or too thin will result in uneven surfaces and potential "craters" or flooding outside the desired area.
Gently tap the flooded cookie on the counter a few times to release any trapped air. You can also use a toothpick or scribe tool to pop any surface bubbles immediately after flooding.
The pursuit of the flawlessly flooded cookie isn't just a baking trend; it's a testament to our desire for precision and artistry in the simplest of pleasures. The techniques explored in this article – from mastering the consistency of your icing to achieving that coveted, even surface – are more than just steps in a recipe; they represent a dedication to craft and a celebration of the small details that elevate the ordinary to the extraordinary.
The impact of a perfectly flooded cookie extends far beyond the immediate satisfaction of a beautiful bake. It speaks to a deeper human need for creativity and control, a desire to transform simple ingredients into something visually stunning and undeniably delicious. This pursuit resonates across cultures and generations, reflecting our innate appreciation for beauty and the satisfaction derived from mastering a skill. The details are not the details. They make the design.
– Charles Eames. This quote perfectly encapsulates the essence of flawless cookie flooding – the seemingly insignificant details are what ultimately define the final masterpiece.
Now, consider your own baking journey. What aspects of cookie flooding have you found most challenging? What small adjustments have yielded the biggest improvements? I encourage you to embrace the process, to experiment with different techniques, and to find joy in the journey of perfecting your own unique style. Don't be afraid to fail; each attempt brings you closer to mastering the art of the flawlessly flooded cookie, and ultimately, to a deeper understanding of your own creative potential. The perfectly flooded cookie awaits – go forth and create!
Thanks for diving into the world of perfectly flooded cookies! We hope you now feel confident in creating stunning, professional-looking treats. Ready to put your new skills to the test?
- Craft your masterpiece: Try flooding a batch of cookies using your favorite colors and designs. Experiment with different consistencies for unique textures!
- Share your creations: Post a picture of your flooded cookie creations on social media and tag us—we'd love to see your results! Use #BakeWithEaseFlood for a chance to be featured.
- Explore new techniques: Dive deeper into cookie decorating by researching different icing techniques and experimenting with various piping tips.
What unique flavor and design combination will you create next? Let us know in the comments!