
Use Edible Clay for Detailed 3D Cookie Elements

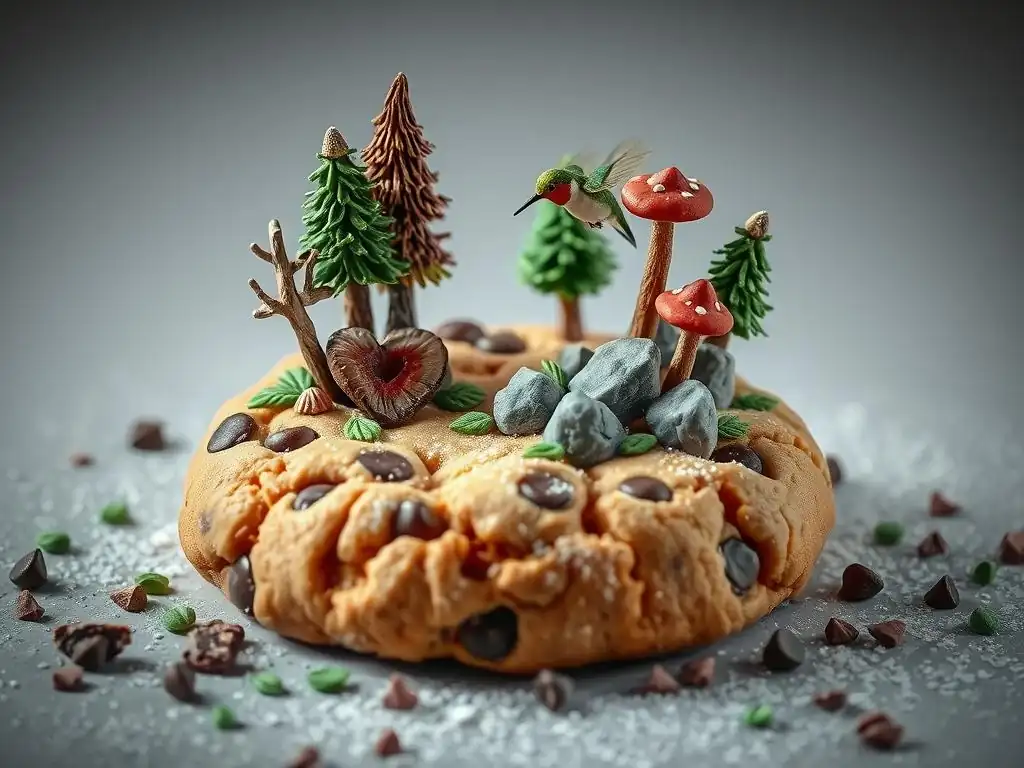
Welcome to BakeWithEase, your secret ingredient to baking bliss! Ever imagined turning your cookies into miniature masterpieces? Dive into the surprisingly simple world of edible clay 3D cookie art and unlock a new dimension of creativity. But what exactly is edible clay, and how can you use it to transform your baking? Read on to discover the secrets and start sculpting your sweetest dreams!
- BakeWithEase: Mastering Edible Clay 3D Cookie Art
- Choosing the Right Edible Clay for Your Cookie Project
- Preparing Your Edible Clay for Cookie Art
- Creating 3D Cookie Elements with Edible Clay: A Step-by-Step Guide
- Attaching Edible Clay Decorations to Your Cookies
- Edible Clay 3D Cookie Art Project Ideas: Inspiration and Techniques
- Tips and Tricks for Perfecting Your Edible Clay 3D Cookie Art
- Troubleshooting Common Edible Clay Problems
- Displaying and Storing Your Edible Clay 3D Cookie Art
- Conclusion: Unleash Your Creativity with Edible Clay 3D Cookie Art
-
Frequently Asked Questions
- What exactly is edible clay in the context of cookie decorating?
- How does edible clay differ from royal icing for cookie decorating?
- What are the key ingredients needed to make edible clay for 3D cookie art?
- Is edible clay safe to consume, and does it taste good?
- Can I color edible clay, and if so, what type of food coloring is best?
- Final Reflection: Sculpting Sweet Dreams with Edible Clay
- Unleash Your Inner Cookie Artist!
Edible clay, in the context of cookie decorating, refers to a pliable, food-safe sculpting medium used to create intricate, three-dimensional elements on baked goods. Unlike traditional cookie dough or even stiffer mediums like royal icing, edible clay possesses a unique blend of flexibility and firmness that allows for detailed modeling and shaping. It's typically made from a combination of powdered sugar, a binder like CMC (carboxy methyl cellulose) powder or gum tragacanth, and a liquid such as water or glucose syrup. This composition gives it a dough-like consistency that can be rolled, sculpted, and molded into various forms.
Using edible clay for 3D cookie elements unlocks a new level of artistic expression. While royal icing is fantastic for flooding and intricate piping, it's limited in its ability to hold complex three-dimensional shapes without significant support or layering. Edible clay, however, can be formed into freestanding figures, delicate petals, or sharp geometric shapes that retain their structure once dry.
This makes it the ideal medium for creating realistic flowers, detailed characters, or elaborate architectural features that truly pop off the surface of your cookies, elevating simple baked goods into stunning pieces of edible art. The ability to pre-make and dry these elements also offers significant time-saving advantages compared to building up shapes with icing.
The world of cookie decorating has seen a significant evolution, moving beyond flat designs to embrace dimension and depth. This shift towards 3D cookie art has been largely facilitated by the accessibility and versatility of mediums like edible clay. Social media platforms have showcased incredible examples of cookies adorned with lifelike figures, intricate floral arrangements, and detailed scenes, inspiring bakers of all levels to explore these advanced techniques. The demand for visually striking and personalized treats for special occasions like birthdays, weddings, and holidays has also fueled the popularity of 3D designs.
Edible clay plays a pivotal role in this trend because it provides the structural integrity needed for complex 3D creations. Before edible clay became widely used, achieving significant dimension often involved techniques like layering fondant or using molds with less pliable materials, which could be challenging for fine details.
Edible clay, with its ability to be rolled thin yet hold sharp edges, sculpted with small tools, and dried to a firm finish, offers unparalleled control for creating everything from tiny buttons on a character's jacket to delicate veins on an edible leaf. This has made sophisticated edible clay 3D cookie art accessible to more home bakers and professional decorators alike, pushing the boundaries of what's possible on a cookie canvas.
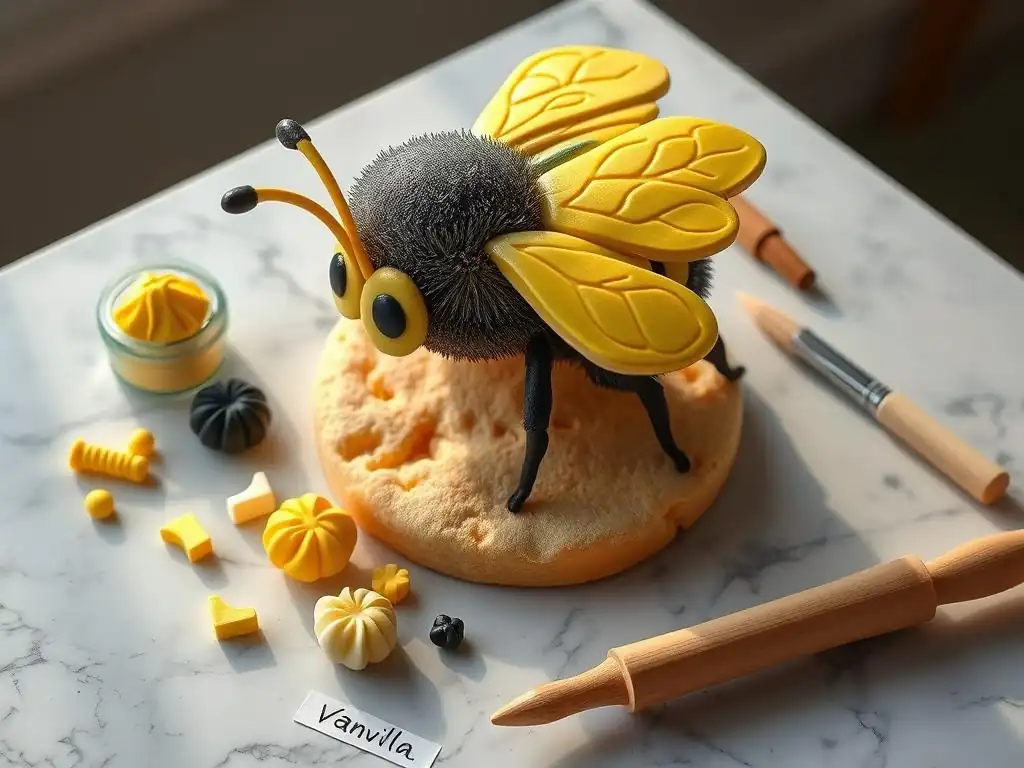
When venturing into edible clay 3D cookie art, you'll find several types of pliable mediums that can be used. The most common are homemade edible clay (often sugar-based with CMC), commercial gum paste, and modeling chocolate. Homemade sugar-based edible clay is highly customizable and can be made relatively inexpensively.
It's excellent for sculpting and holds detail well, drying to a firm finish, though it can be slightly more prone to cracking if not mixed or handled correctly. A typical recipe might involve roughly 4 cups of powdered sugar to 1-2 tablespoons of CMC powder and a few tablespoons of water or liquid glucose.
Gum paste is a commercial product specifically designed for creating durable, intricate decorations like sugar flowers. It's similar to edible clay but often contains egg white or gelatin in addition to sugar and gums, giving it superior elasticity and strength. Gum paste dries very hard and brittle, making it perfect for delicate, structural elements that need to hold their shape precisely, such as thin petals or sharp points.
Modeling chocolate, made from chocolate and corn syrup, offers a different texture – it's softer, more pliable when warm, and sets firm but not hard like gum paste. It's delicious and easy to work with using hands or tools, but it can be sensitive to temperature and doesn't dry as rigidly as gum paste or CMC-based clay, making it better suited for slightly softer, more rounded 3D elements or covering cookies.
Ingredients for Homemade Edible Clay: The BakeWithEase Guide
Crafting your own edible clay allows you to control the texture and ingredients precisely, which is a fantastic skill for edible clay 3D cookie art. The core ingredients typically include a large quantity of finely sifted powdered sugar, a small amount of a gum powder like CMC (carboxy methyl cellulose) or gum tragacanth, and a liquid binder, often water, glucose syrup, or corn syrup.
The powdered sugar provides the bulk and sweetness, while the gum powder acts as a stabilizer, giving the mixture elasticity and allowing it to dry firm. The liquid binder helps bring everything together into a workable dough consistency.
A popular and reliable formula for homemade edible clay involves combining about 4 cups (approximately 450-500 grams) of sifted powdered sugar with 1 to 1.5 tablespoons of CMC powder. These dry ingredients are whisked together thoroughly. Then, you gradually add about 1/4 cup (roughly 60ml) of water or a mixture of water and light corn syrup (like 3 parts water to 1 part corn syrup), kneading until a smooth, pliable dough forms.
The exact amount of liquid needed can vary based on humidity and the specific type of powdered sugar, so it's best to add it a tablespoon at a time until the desired consistency is reached – it should be like a soft playdough, not sticky but easy to shape. This mixture is cost-effective and performs wonderfully for detailed sculpting.
For bakers who prefer convenience or require the specific properties of professionally formulated products, several types of store-bought edible mediums work well for edible clay 3D cookie art. Gum paste is a widely available option found in most cake decorating supply stores. Brands specializing in cake and cookie decorating often produce high-quality gum paste that is exceptionally elastic and dries quickly and very hard, making it ideal for creating delicate, structural elements like intricate flowers or sharp points on figures. Look for gum pastes specifically marketed for sugar flowers or sculpting.
Another excellent store-bought choice is modeling paste or sculpting paste. These products are often a blend of gum paste and fondant, designed to be more pliable than straight gum paste but firmer than fondant. They offer a good balance of workability and structural integrity, drying firm enough to hold complex shapes but not as brittle as pure gum paste.
Brands like Renshaw, Satin Ice, or Squires Kitchen produce modeling pastes suitable for creating detailed 3D cookie elements. While these can be more expensive than homemade options, they offer consistent results and save preparation time, allowing you to jump straight into sculpting your edible clay 3D cookie art.
Kneading and Conditioning Edible Clay for Optimal Texture
Properly preparing your edible clay is crucial for successful edible clay 3D cookie art. Whether homemade or store-bought, the clay needs to be kneaded and conditioned to achieve the right texture. Begin by taking a piece of clay and kneading it with your hands, much like you would bread dough.
The warmth from your hands helps to soften the clay and activate the gum binders, making it more pliable and less prone to cracking. Knead until the clay is smooth, flexible, and free of any lumps or stiffness. This usually takes about 5 to 10 minutes, depending on the type of clay and its initial consistency.
If the clay feels too firm or breaks easily, it might be slightly dry. You can condition it by kneading in a tiny amount of vegetable shortening or a few drops of clear alcohol like vodka. Be very sparing, as adding too much can make the clay greasy or sticky.
Conversely, if the clay is too soft or sticky, knead in a small amount of additional sifted powdered sugar or cornstarch until it reaches a workable consistency. The goal is a smooth, non-sticky dough that stretches without tearing and holds its shape when molded – this optimal texture is key for sculpting fine details in your edible clay 3D cookie art.
Coloring Edible Clay: Achieving Vibrant and Subtle Hues
Coloring your edible clay opens up a world of possibilities for edible clay 3D cookie art. The best type of coloring for edible clay is gel or paste food coloring, as they are highly concentrated and won't add excess liquid that could alter the clay's consistency. Liquid food coloring is generally not recommended for this reason.
To color the clay, take a small amount of gel color on a toothpick and knead it into a piece of the clay. Start with a tiny amount and gradually add more until you achieve the desired shade. For vibrant colors, you'll need to add more coloring and knead thoroughly to ensure the color is evenly distributed without streaks.
For subtle or pastel hues, use just a tiny dot of color. You can also achieve interesting effects by marbling two or more colors together without fully blending them. Remember that edible clay can darken slightly as it dries, so keep this in mind when mixing colors.
If you need a large quantity of colored clay, it's often easiest to color the entire batch at once rather than trying to match shades later. Wear gloves if you want to avoid staining your hands! Kneading the color in completely is essential for a professional finish on your edible clay 3D cookie art elements.
Storing Edible Clay Properly to Prevent Drying
Proper storage is vital to keep your edible clay in prime condition for future edible clay 3D cookie art projects. Edible clay, particularly those containing gum powders, can dry out quickly when exposed to air, becoming hard and unusable for sculpting. The best way to store edible clay is to wrap it very tightly in plastic wrap, ensuring no air pockets are trapped against the surface of the clay. Double-wrapping provides extra protection.
Once wrapped, place the plastic-wrapped clay inside an airtight container or a zip-top bag. Squeeze out as much air as possible before sealing the container or bag. Store the clay at room temperature in a cool, dry place away from direct sunlight.
If you live in a very warm or humid climate, or if your clay contains ingredients like egg white (common in some gum pastes), you might consider refrigerating it. Before using refrigerated clay, allow it to come to room temperature and knead it thoroughly to restore its pliability. Stored this way, homemade edible clay can last for several weeks, while commercial gum pastes and modeling pastes often have a longer shelf life, sometimes up to several months, depending on the product and storage conditions.
To create detailed edible clay 3D cookie art, having the right tools makes a significant difference. While you can start with basic items, a few specialized tools will greatly enhance your ability to sculpt intricate shapes. Essential hand tools include a small rolling pin specifically for edible mediums, a sharp craft knife or scalpel (used only for food), and a variety of small ball tools or modeling tools with different sized ends. Ball tools are excellent for cupping petals or creating indentations, while pointed tools are useful for scoring lines or adding texture.
Other helpful tools include silicone molds designed for sugar craft (like flower molds, leaf molds, or small figure molds), which allow for quick creation of consistent shapes. Texture mats can add patterns to flat pieces of clay. A non-stick surface, like a silicone mat or a surface dusted lightly with cornstarch, is crucial to prevent the clay from sticking while you work.
A small brush and a tiny pot of water or clear alcohol are needed for attaching pieces together. For very fine details, toothpicks, tweezers, and even specialized sugar shapers come in handy. Having a dedicated set of tools for your edible clay 3D cookie art ensures cleanliness and precision.
Basic Techniques for Shaping Edible Clay: Rolling, Cutting, and Molding
Mastering basic techniques is the foundation for creating beautiful edible clay 3D cookie art. Rolling is the first step for many elements. Roll the conditioned clay on a non-stick surface using a small rolling pin. The thickness will depend on what you are making; thin pieces (around 1mm) are good for delicate petals or drapery, while thicker pieces (2-3mm) are better for structural elements or bases. Ensure even thickness across the sheet of clay.
Cutting involves using cutters or a knife to shape the rolled clay. Cookie cutters can be used for simple shapes, but for more complex or unique forms, a sharp craft knife or scalpel is essential for precision cutting. Always cut on a protective surface that won't be damaged. Molding uses hands or silicone molds to form shapes.
For hand molding, start with a small ball of clay and gently shape it using your fingers and modeling tools. For silicone molds, press a piece of clay firmly into the mold, ensuring it fills all the cavities, then carefully demold it. These basic techniques – rolling, cutting, and molding – can be combined and refined to create a vast array of edible clay 3D cookie art elements.
Once you've mastered the basics, you can explore advanced techniques to bring your edible clay 3D cookie art to life with intricate details. Adding texture can transform a simple shape into something realistic or visually interesting. Use texture mats to press patterns onto rolled clay before cutting. For organic textures like wood grain or fabric folds, use modeling tools or even household items like crumpled foil or fabric scraps (ensure they are clean and food-safe, perhaps dedicated for this use). Veining tools or actual leaf veiners can add realistic lines to petals and leaves.
Creating fine details requires patience and precision. Use pointed tools, toothpicks, or specialized sculpting tools to carve lines, indentations, or small features like eyes or mouths on character pieces. Layering thin pieces of clay can build dimension – for example, stacking cut circles of decreasing size to create a layered flower. For delicate elements like fingers or antennae, roll tiny, thin ropes of clay and shape them carefully. Practicing these techniques on scrap pieces of clay before working on your final elements will help build confidence and skill in crafting stunning edible clay 3D cookie art.
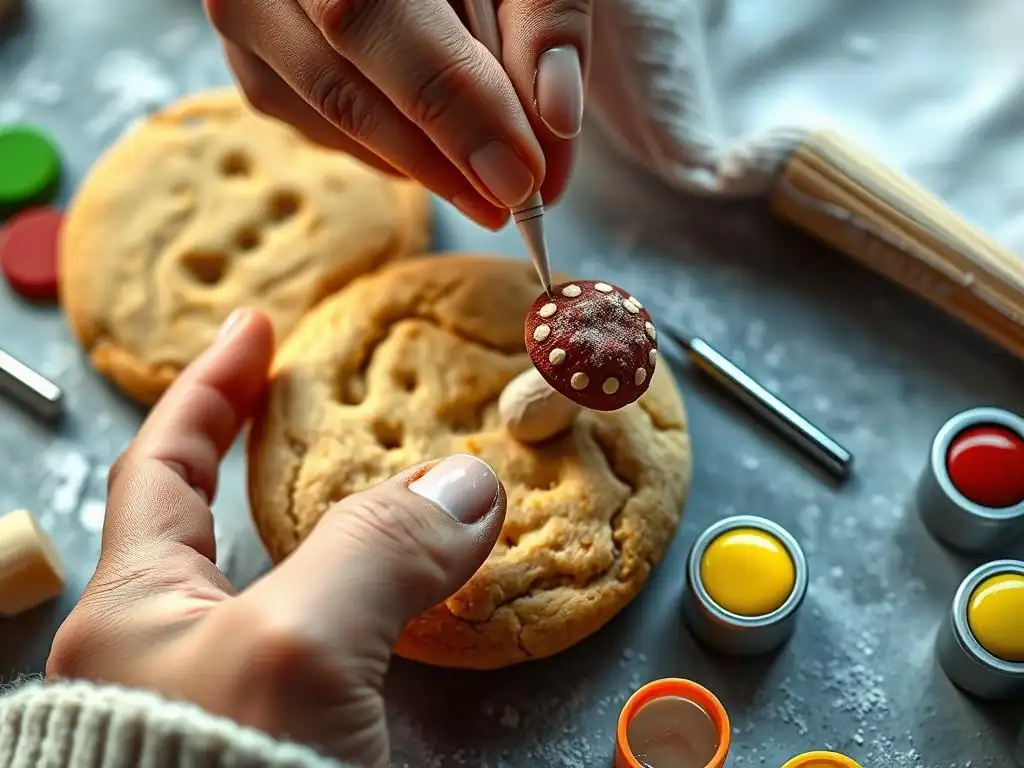
Successfully attaching your dried or semi-dried edible clay decorations to your baked cookies is a critical step in completing your edible clay 3D cookie art. The key is to use just enough adhesive to create a strong bond without causing the clay or cookie to become soggy or the adhesive to squeeze out unattractively. Ensure both the cookie surface and the back of the edible clay piece are dry and clean before application. Any residual grease or crumbs can prevent proper adhesion.
For small, lightweight pieces, a tiny dab of water or clear alcohol (like vodka or gin) brushed onto the back of the clay piece is often sufficient. The liquid slightly dissolves the sugar in the clay, creating a sticky surface that bonds to the cookie as it dries. For larger or heavier elements, a stronger adhesive is needed.
Royal icing, melted chocolate, or even a thick sugar syrup work well. Apply the adhesive to the back of the clay piece or the spot on the cookie where it will be placed, then gently press the clay piece onto the cookie, holding it in place for a few seconds to allow the bond to start forming. Avoid wiggling the piece once it's in place.
Using Royal Icing as Adhesive for 3D Edible Clay Elements
Royal icing is an excellent and versatile adhesive for attaching edible clay 3D cookie art elements, particularly for medium to large pieces or those that need extra security. Its strong setting properties ensure decorations stay firmly in place once dry. Use a stiff consistency royal icing – similar to piping consistency, not flooding consistency. This prevents the icing from spreading too much and provides a solid structure for the clay piece to adhere to.
Apply a small amount of the stiff royal icing to the back of your edible clay decoration using a piping bag with a small round tip or a toothpick. Alternatively, you can apply a dot of icing directly onto the cookie where the decoration will sit. Gently press the edible clay piece onto the icing, applying even pressure.
For elements that might slide, like standing figures, you may need to prop them up using small objects (like spice jars or small boxes) while the icing dries. Allow the royal icing to dry completely, which can take anywhere from 30 minutes for tiny dots to several hours for larger applications, depending on humidity. Once dry, the edible clay element will be securely attached to your edible clay 3D cookie art masterpiece.
Troubleshooting: Preventing Edible Clay Decorations from Falling Off
It can be frustrating when your carefully crafted edible clay 3D cookie art elements don't stay attached. Several factors can cause decorations to fall off. One common issue is using too little or too much adhesive. Too little won't create a strong enough bond, while too much can cause the clay or cookie to become unstable or the adhesive to take too long to dry, allowing the piece to shift or fall. Ensure you use the appropriate amount of adhesive for the size and weight of the decoration.
Another problem is not allowing sufficient drying time for the adhesive, especially royal icing. If the cookies are moved or handled before the icing is fully set, the bond can break. Allow cookies with attached edible clay elements to sit undisturbed on a flat surface until the adhesive is completely dry and firm.
High humidity can also hinder drying and weaken the bond. If working in a humid environment, consider using an adhesive like melted chocolate which sets as it cools, rather than relying solely on air drying. Finally, ensure the surfaces being joined are flat and make good contact; uneven surfaces can prevent a secure attachment for your edible clay 3D cookie art.
Creating realistic edible clay flowers is a popular and rewarding application of edible clay 3D cookie art. Edible clay, especially gum paste or a firm homemade variety, is perfect for this because it can be rolled incredibly thin, allowing you to create delicate, translucent petals.
Techniques involve cutting out multiple petal shapes (often using specialized cutters or freehand with a knife), thinning the edges with a ball tool or veining tool, and then shaping them. For a rose, you might start by rolling a small cone for the center, then wrap individual petals around it, overlapping slightly and cupping them outward.
For flowers like daisies or sunflowers, petals are typically attached around a central disc. Leaves can be cut using leaf cutters and veined using a veiner tool or the back of a knife for a realistic texture. You can add color by kneading it into the clay before shaping, or by dusting finished, dried flowers with edible petal dusts for subtle shading and depth.
Allowing petals and leaves to dry on curved surfaces (like in a flower former tray or even an egg carton) gives them natural shape. These detailed floral elements truly transform a simple cookie into a stunning piece of edible clay 3D cookie art.
Edible clay is fantastic for bringing characters to life on your cookies, allowing for detailed sculpting that's difficult with other mediums. Whether you're creating animals, cartoon characters, or people, edible clay 3D cookie art makes it possible to add dimension and personality. Start with basic shapes like spheres, cones, and cylinders for body parts, then refine them using modeling tools. For example, rolling a ball for a head, a larger oval for a body, and smaller ropes for limbs.
Details like facial features, clothing folds, or fur texture can be added by pressing, carving, or layering small pieces of clay. Use tiny balls of white and black clay for eyes, or sculpt noses and ears separately and attach them. Tools like toothpicks or pointed modeling tools are great for adding tiny details like smiles or eyelashes. For consistency, especially if making multiple character cookies, consider making templates or using small molds for repetitive elements. Sculpting characters in edible clay allows for expressions and details that make each piece of edible clay 3D cookie art unique and engaging.
Edible clay isn't just for realistic or character-based designs; it's also a powerful medium for creating modern, geometric, or abstract edible clay 3D cookie art. Clean lines, sharp angles, and layered shapes can add a contemporary feel to your cookies. Techniques might involve rolling clay to an even thickness and using sharp knives or geometric cutters to create precise shapes like cubes, pyramids, or abstract forms.
Layering different colored pieces of clay can create striking patterns and depth. For example, cutting out identical geometric shapes in varying sizes and stacking them, or creating a mosaic effect with small, precisely cut tiles of different colors. You can also explore abstract sculpting, molding freeform shapes that create interesting textures and forms on the cookie surface. Using tools to create repeating patterns or textures on the clay surface before attaching it can add another layer of complexity. This approach to edible clay 3D cookie art allows for experimentation with form, color, and texture, resulting in uniquely artistic cookies.
Preventing Cracking and Crumbling in Edible Clay Decorations
One common challenge in edible clay 3D cookie art is preventing decorations from cracking or crumbling, especially as they dry. This often happens if the clay is too dry to begin with, overworked, or dries too quickly. To prevent this, ensure your edible clay is properly conditioned and pliable before you start sculpting. Knead it thoroughly until it's smooth and flexible. If using homemade clay, check the liquid ratio; too little liquid can result in a crumbly mixture.
During sculpting, if the clay starts to feel dry or stiff, knead in a tiny amount of vegetable shortening or a few drops of clear alcohol to restore moisture. Avoid excessive handling, as the warmth of your hands can sometimes dry out the surface while leaving the inside soft, leading to uneven drying and cracks.
Allow finished pieces to dry slowly and evenly at room temperature, away from direct heat sources or drafts. For very delicate pieces, you can cover them loosely with plastic wrap while they dry to slow down the process and minimize cracking, ensuring your edible clay 3D cookie art remains intact.
Achieving a smooth, professional finish on your edible clay 3D cookie art elements elevates their appearance significantly. The key starts with using well-conditioned, smooth clay free of lumps. When rolling or shaping, use smooth tools like a clean rolling pin or ball tools. If you are hand-shaping, try to minimize fingerprints by lightly dusting your hands or tools with cornstarch or using gloves.
Once a piece is sculpted, you can smooth the surface further. For small pieces, you can gently rub them with your finger lightly dusted in cornstarch. For larger or more intricate pieces, use a smooth modeling tool or even a piece of smooth fondant smoother to gently buff the surface. Another technique is to lightly steam the finished, dried piece.
Holding the piece briefly over steam (from a kettle, for instance) will slightly melt the surface sugar, creating a very smooth, polished look. Be very careful not to hold it too long, as it can lose its shape or become sticky. A smooth finish is often the mark of expertly crafted edible clay 3D cookie art.
Sealing Edible Clay for a Professional Look and Longer Shelf Life
Sealing your finished edible clay 3D cookie art decorations can enhance their appearance and potentially extend their shelf life slightly by protecting them from moisture and dust. One common method for adding a subtle sheen and sealing the surface is light steaming, as mentioned for smoothing. This provides a slight gloss and helps fuse any tiny surface cracks, giving a professional finish.
Another option is to use an edible glaze or varnish specifically designed for sugar craft. These glazes are typically clear and can be brushed onto the dried edible clay pieces to provide a glossy or matte finish, depending on the product. Edible glazes also offer a layer of protection. Alternatively, for a matte finish, you can lightly dust the dried pieces with cornstarch or a mixture of cornstarch and powdered sugar using a soft brush.
This helps absorb any surface moisture and gives a velvety look. While sealing can offer benefits, ensure the product is food-safe and suitable for your edible clay 3D cookie art. Note that even sealed, edible clay decorations are best consumed within the typical shelf life of the cookie they are attached to.
Troubleshooting Common Edible Clay Problems
Edible Clay is Too Sticky: Solutions and Prevention
Dealing with overly sticky edible clay is a common issue when working on edible clay 3D cookie art, often caused by too much liquid, high humidity, or insufficient powdered sugar/gum powder. If your clay is sticky, the simplest solution is to knead in more finely sifted powdered sugar or cornstarch, a little at a time, until the stickiness disappears and the clay becomes pliable but non-sticky. For small amounts, cornstarch is often preferred as it doesn't add sweetness.
To prevent stickiness, always measure ingredients carefully when making homemade clay. If the recipe calls for a range of liquid, start with the lower amount and add more only if necessary. When working in humid conditions, you may need slightly more dry ingredients than usual. Keep your work surface lightly dusted with cornstarch or use a non-stick mat. Avoid adding too much water when coloring or attaching pieces. Properly stored clay in an airtight container is also less likely to become sticky from ambient moisture, ensuring your edible clay 3D cookie art process goes smoothly.
Edible Clay is Too Dry: Hydration Techniques
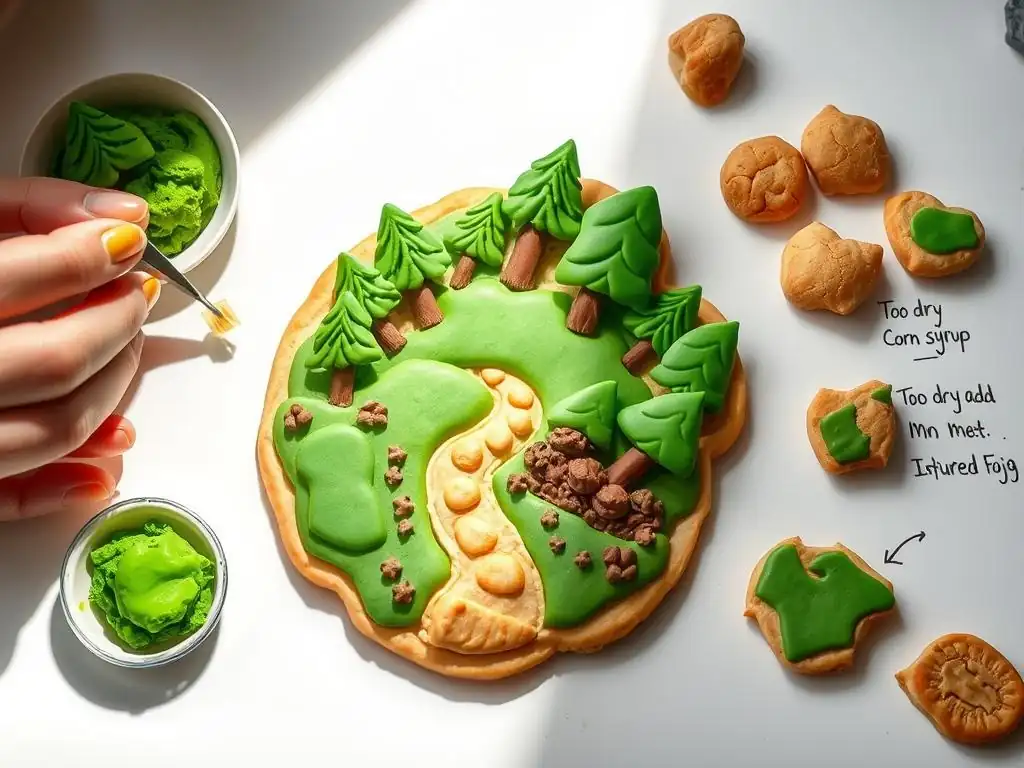
Conversely, edible clay can become too dry, making it stiff, crumbly, and difficult to sculpt without cracking – a significant hurdle for detailed edible clay 3D cookie art. Dryness is often due to improper storage, too little liquid in the original mix, or working the clay for too long without rehydrating it. If your clay is too dry, knead in a very small amount of liquid. Water works, but adding a tiny bit of vegetable shortening or clear alcohol (like vodka) is often better as it hydrates without making the clay sticky.
Take a small piece of the dry clay, flatten it slightly, add a tiny drop of shortening or alcohol to the center, fold the clay over it, and begin kneading. Repeat with minuscule amounts until the clay becomes pliable again. It's crucial to add liquid in tiny increments, as adding too much at once can quickly turn dry clay into a sticky mess. For very dry clay, you might need to break it into smaller pieces and work them individually. Properly rehydrating your clay ensures it's workable for intricate edible clay 3D cookie art designs.
Edible Clay is Discoloring: Understanding and Addressing the Issue
Discoloration can occasionally affect edible clay, impacting the visual appeal of your edible clay 3D cookie art. This can manifest as streaks, fading, or unwanted color changes. One common cause is using improper coloring agents, like liquid food coloring which can sometimes separate or react with the clay ingredients. Always use high-quality gel or paste food colors designed for sugar craft.
Another source of discoloration can be contamination from tools or surfaces that weren't thoroughly cleaned between colors or projects. Ensure your hands, tools, and work surface are spotless before working with different colors, especially white or light-colored clay. Exposure to light, particularly direct sunlight, can cause some food colors to fade over time.
Store colored clay and finished decorations away from direct light. If working with deep red or black colors, be aware that they can sometimes bleed slightly onto lighter colors if the pieces are in direct contact, especially in humid conditions. While minor discoloration can sometimes be fixed by kneading in fresh clay or re-coloring the surface, prevention through clean practices and proper storage is the best approach for perfect edible clay 3D cookie art.
Once your edible clay 3D cookie art is complete and the decorations are firmly attached and dry, proper handling and storage are essential to preserve their beauty and freshness. Handle decorated cookies gently, supporting the base to avoid putting pressure on the delicate 3D elements. Avoid stacking cookies directly on top of each other, as this will damage the edible clay decorations.
Store decorated cookies in a single layer in an airtight container. If you need to store multiple layers in the same container, use parchment paper or wax paper between the layers to prevent contact and damage. Keep the container in a cool, dry place, away from direct sunlight or heat, which can cause colors to fade or clay to soften.
High humidity is the enemy of edible clay, potentially causing it to become sticky or lose its shape, so avoid storing cookies in humid environments like near a sink or oven. Stored correctly, cookies with edible clay 3D cookie art can remain fresh for about 1-2 weeks, though the edible clay itself, once dry, can last much longer structurally.
Packaging edible clay 3D cookie art for gifts or sale requires careful consideration to protect the delicate decorations. The primary goal is to prevent the cookies from shifting or being crushed during transport. Individual packaging is often the safest option.
Use clear cellophane bags or small boxes that are just slightly larger than the cookie. Place the cookie inside the bag or box gently. For extra protection, you can place the cookie on a piece of cardboard cut to size, or use shredded paper or tissue paper as cushioning around the cookie within a box, being careful not to snag the decorations.
If packaging multiple cookies in a box, use dividers or place each cookie in its own smaller bag or compartment within the box. Ensure there is no empty space that would allow the cookies to move around. Consider using small adhesive dots or a tiny amount of royal icing to lightly secure the cookie to the bottom of the box or cardboard insert if the design allows, preventing it from sliding. Label your packaging clearly. Thoughtful packaging ensures your stunning edible clay 3D cookie art arrives at its destination looking just as beautiful as when it was made.
Embarking on the journey of edible clay 3D cookie art is a fantastic way to push your baking and decorating skills to new heights. Edible clay provides an unparalleled medium for sculpting intricate details, creating realistic textures, and building multi-dimensional elements that transform flat cookies into captivating works of art. From delicate sugar flowers to playful characters and modern geometric forms, the possibilities are limited only by your imagination.
With the right tools, understanding of basic techniques like kneading, shaping, and attaching, and armed with troubleshooting knowledge, you can confidently create stunning edible clay 3D cookie art. Remember to practice patience, start with simpler designs, and gradually work your way up to more complex creations. Proper storage and careful handling will ensure your beautiful pieces are preserved. So gather your ingredients, choose your colors, and get ready to sculpt some edible magic – your cookies (and your audience!) will thank you!
Frequently Asked Questions
Edible clay is a pliable, moldable substance made from ingredients like powdered sugar, cornstarch, and gelatin, used to create detailed 3D elements on cookies. It's not actual clay.
Unlike royal icing, edible clay is designed to be sculpted and hold its shape. Royal icing is primarily used for flooding and outlining cookies, offering a smoother, flatter finish.
Common ingredients include powdered sugar, cornstarch, gelatin (or a vegan alternative), shortening, and a liquid like corn syrup or water. Precise ratios are crucial for the right consistency.
Is edible clay safe to consume, and does it taste good?
Yes, edible clay is generally safe as it's made from food-grade ingredients. The taste is often described as sweet and slightly doughy, but it's more about the aesthetics than the flavor.
Can I color edible clay, and if so, what type of food coloring is best?
Yes, edible clay can be colored using gel food coloring. Gel colors are preferred because they are concentrated and won't significantly alter the clay's consistency.
Final Reflection: Sculpting Sweet Dreams with Edible Clay
The art of creating intricate 3D cookie elements using edible clay is not just a trend; it's a testament to the enduring power of creativity and the delicious intersection of art and culinary skill. This detailed exploration of edible clay techniques has revealed a world of possibilities, pushing the boundaries of what's considered possible in cookie decoration. From delicate flowers to miniature figurines, the potential for artistic expression is truly limitless.
The impact of edible clay on the culinary and artistic landscape is undeniable. It's fostered a vibrant community of bakers and artists who share their creations and inspire each other online, blurring the lines between hobby and profession. The best things in life are the simple things, and the simplest things are often the most beautiful.
This quote perfectly encapsulates the beauty and elegance achievable with this surprisingly versatile medium, transforming ordinary cookies into edible masterpieces. The meticulous detail and personalized touch offered by edible clay elevate the simple act of baking into a truly meaningful experience.
Now, it's your turn. Consider the possibilities: what intricate designs will you bring to life? Don't be afraid to experiment, to push your creative boundaries, and to discover the joy of transforming simple ingredients into stunning works of edible art. The world of edible clay 3D cookie art awaits – let your imagination be your guide.
Thanks for exploring the world of edible clay cookie decorating! You've just learned how to add incredible detail and dimension to your baking. Now it's time to put your new skills to the test.
- Craft your masterpiece: Start with a simple design—maybe a tiny flower or a whimsical animal—and let your creativity flow! This is your chance to experiment with different colors and techniques.
- Share your creation: Show off your edible clay artistry on social media! Use #BakeWithEaseEdibleClay and inspire others.
- Explore advanced techniques: Dive deeper into the world of edible clay by searching for tutorials on more complex sculpting methods. Consider trying different types of clay for unique textures and effects.
Ready to transform your cookies from ordinary to extraordinary? What unique design will you create first?