
The BakeWithEase Guide: Simple Beginner Recipes for Bars & Brownies

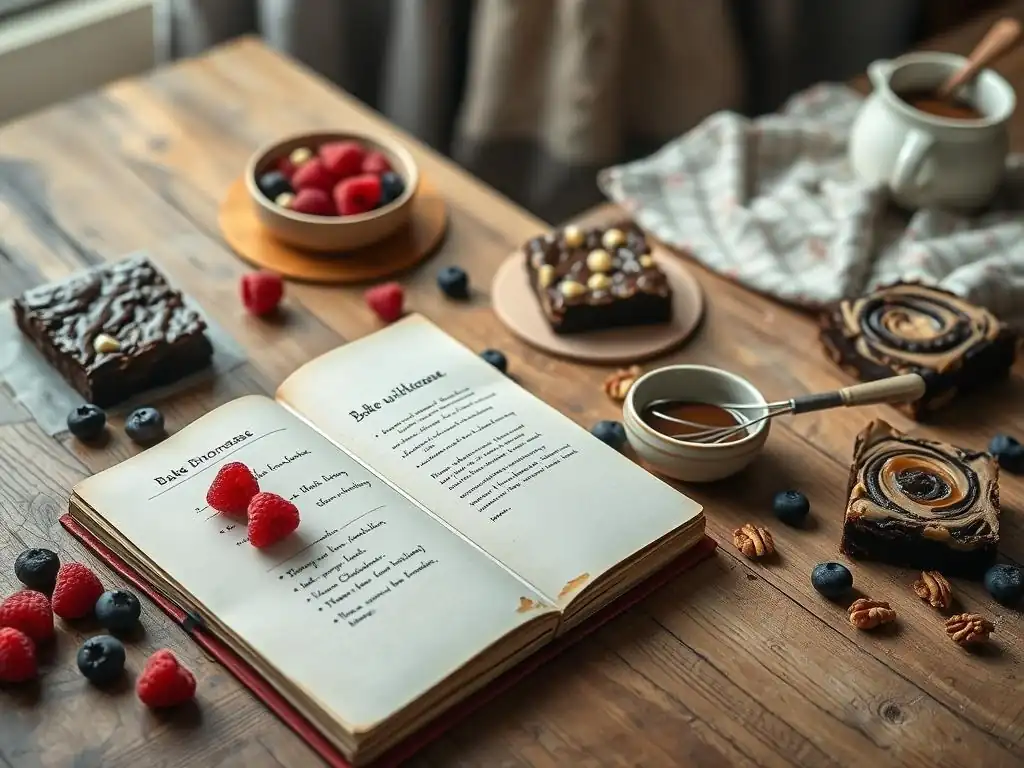
Welcome to BakeWithEase, your kitchen companion for unlocking the joy of baking! Ever dreamt of perfectly fudgy brownies without the fuss? You're in the right place. We're diving headfirst into easy beginner brownie recipes that will have you creating decadent treats in no time. Get ready to discover the secrets to baking success and transform simple ingredients into irresistible delights – your baking adventure starts now!
- BakeWithEase Presents: Your Guide to Easy Brownies and Bars
- Why Brownies and Bars are Perfect for Beginner Bakers
- Easy Beginner Brownie Recipes: Step-by-Step Guide
- Simple Bar Recipes for Baking Beginners
- Troubleshooting Common Baking Issues with Brownies and Bars
- Beyond the Basics: Easy Variations and Add-Ins for Brownies and Bars
- Storing Your Brownies and Bars for Optimal Freshness
- Enjoy Your Homemade Brownies and Bars from BakeWithEase!
-
Frequently Asked Questions
- What makes a brownie recipe "easy" for beginners on BakeWithEase?
- Where can I find the specific "easy beginner brownie recipes" mentioned in the article?
- What if I don't have all the ingredients listed in an easy brownie recipe?
- What kind of baking equipment do I need for most of these beginner brownie recipes?
- How can I ensure my brownies turn out perfectly using these BakeWithEase recipes?
- Final Reflection: The Sweetness of Simple Beginnings
- Unleash Your Inner Baker: Bake Delicious Treats Today!
BakeWithEase Presents: Your Guide to Easy Brownies and Bars
Welcome to BakeWithEase! If you're just starting your baking journey, you've picked the perfect place to begin: the wonderful world of brownies and bars. These delightful treats are incredibly forgiving, require minimal fuss, and deliver maximum deliciousness, making them ideal for anyone taking their first steps in the kitchen. Forget complicated techniques and long lists of obscure ingredients – we're here to show you just how simple and rewarding baking can be, starting with some truly easy beginner brownie recipes and simple bar variations.
Brownies and bars offer a fantastic foundation for new bakers. They typically involve straightforward mixing methods, often requiring just one bowl, and they bake up in a single pan, simplifying both the process and the cleanup. Whether you crave the deep, chocolatey richness of a fudgy brownie or the sweet and satisfying chew of a classic bar, these recipes are designed to build your confidence and deliver results you'll be proud to share. Get ready to discover how simple it is to create bakery-worthy treats right in your own home!
Why Brownies and Bars are Perfect for Beginner Bakers
Simple Ingredients for Delicious Results
One of the biggest hurdles for new bakers can be gathering a long list of specialized ingredients. Thankfully, many easy beginner brownie recipes and bar recipes rely on pantry staples you likely already have on hand. Think flour, sugar, eggs, butter, cocoa powder, and perhaps some chocolate chips. These are readily available ingredients that don't require a special trip to a gourmet store, making the decision to bake on a whim much easier.
Using simple, common ingredients also helps beginners understand the basic building blocks of baking. You'll learn how flour provides structure, sugar adds sweetness and tenderness, eggs bind everything together, and butter contributes richness and moisture. Mastering these fundamental interactions with easy recipes sets you up for success as you explore more complex baked goods in the future. It's all about building confidence with accessible components.
Minimal Equipment Needed for Baking Success
Another reason brownies and bars are perfect for beginners is the minimal equipment required. You don't need stand mixers, pastry bags, or multiple specialized pans. Most recipes can be mixed by hand with just a whisk or a spoon and a couple of mixing bowls. The primary tool you'll need is a standard baking pan, typically an 8x8 or 9x13 inch square or rectangular pan.
This simplicity in equipment means less initial investment and less clutter in your kitchen. It makes the baking process feel less daunting and more approachable. You can achieve fantastic results with just measuring cups and spoons, a mixing bowl, a spatula or spoon, and a baking pan – proof that you don't need a professional setup to create wonderful homemade treats.
Quick and Easy Baking: Perfect for Busy Schedules
Brownies and bars are renowned for their relatively short baking time and overall speed from start to finish. Many recipes can be mixed up in as little as 10-15 minutes, with baking times often falling between 20 and 35 minutes. This means you can go from craving a homemade treat to enjoying warm brownies or bars in under an hour, not including cooling time.
This efficiency is ideal for busy schedules or spontaneous baking urges. It allows beginners to experience the satisfaction of baking without committing hours to a single project. The quick turnaround provides almost immediate feedback on your efforts, making it easier to learn and adjust for future baking adventures. It's baking gratification that fits into modern life.
Easy Beginner Brownie Recipes: Step-by-Step Guide
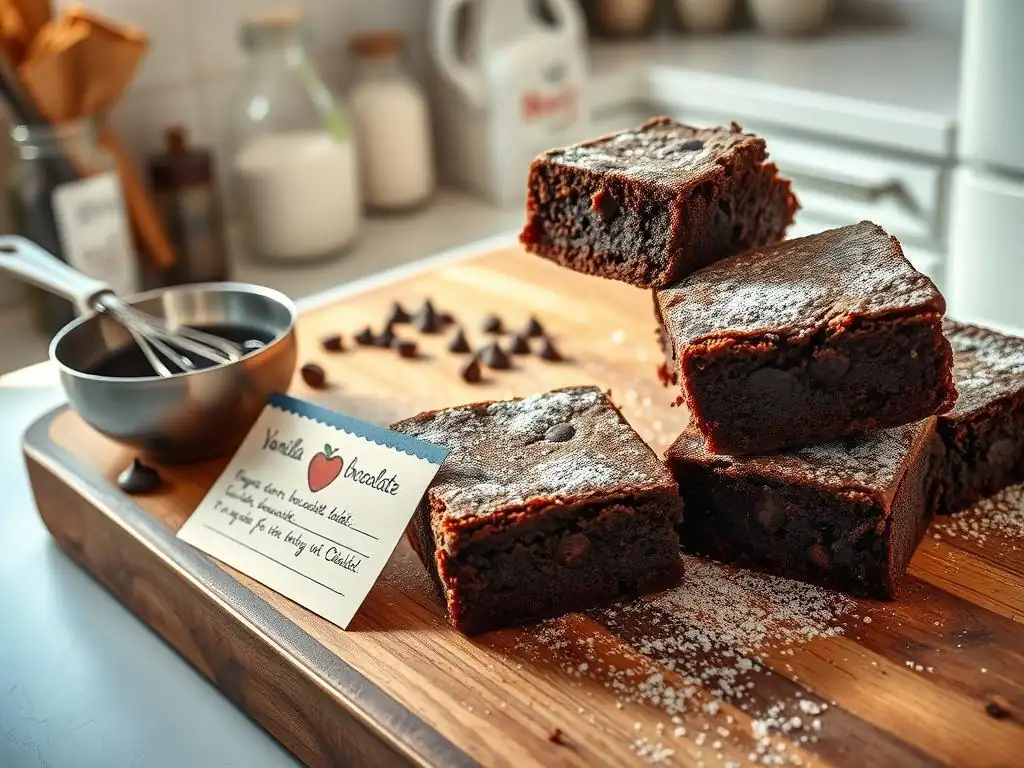
Classic Fudgy Brownies: A Beginner's Delight
Fudgy brownies are a quintessential treat, and making them from scratch is surprisingly simple for beginners. The key to their dense, moist texture lies in a higher fat-to-flour ratio and often using melted chocolate or a significant amount of cocoa powder. This recipe focuses on straightforward steps and common ingredients to achieve that perfect fudgy bite.
This type of easy beginner brownie recipe often starts by melting butter and chocolate together, creating a rich base. Wet ingredients like eggs and sugar are then incorporated, followed by dry ingredients like flour and cocoa powder. The simple mixing method minimizes the risk of overdeveloping the gluten in the flour, which can lead to tougher brownies. The result is a decadent, moist brownie that proves baking doesn't have to be complicated to be utterly delicious.
Ingredients for Fudgy Brownies
*   1/2 cup (1 stick) unsalted butter
*   4 ounces unsweetened or semi-sweet chocolate, chopped (or 1/2 cup cocoa powder + 2 tablespoons butter/oil)
*   1 cup granulated sugar
*   2 large eggs
*   1 teaspoon vanilla extract
*   1/2 cup all-purpose flour
*   1/4 teaspoon baking powder (optional, for slight lift)
*   1/4 teaspoon salt
Step-by-Step Instructions for Perfect Fudgy Brownies
- Preheat your oven to 350°F (175°C). Grease and flour or line an 8x8 inch baking pan with parchment paper, leaving an overhang on the sides. This makes lifting the baked brownies out much easier.
- In a medium saucepan or microwave-safe bowl, melt the butter and chopped chocolate (or butter/oil if using cocoa powder) over low heat or in the microwave in 30-second intervals, stirring until smooth. Remove from heat.
- Whisk the sugar into the melted chocolate mixture until combined.
- Add the eggs one at a time, whisking well after each addition until fully incorporated and the mixture is glossy. Stir in the vanilla extract.
- In a separate small bowl, whisk together the flour, baking powder (if using), and salt.
- Add the dry ingredients to the wet ingredients and stir gently with a spatula or wooden spoon until just combined. Do not overmix. A few streaks of flour are okay.
- Pour the batter into the prepared pan and spread evenly.
- Bake for 25-30 minutes, or until a toothpick inserted into the center comes out with moist crumbs attached (not wet batter). The edges should look set.
- Let the brownies cool completely in the pan on a wire rack before cutting. This is crucial for fudgy brownies to set properly.
Tips for Achieving the Perfect Fudgy Texture
Achieving that coveted dense, fudgy texture is surprisingly simple with the right approach. One key tip is to avoid overmixing the batter once the flour is added. Overmixing develops gluten, which can lead to a more cake-like, less fudgy result. Stir just until the dry ingredients are incorporated. Another crucial step is the cooling process. Fudgy brownies need time to set as they cool; cutting into them too soon will result in a gooey mess rather than clean, fudgy squares. Allow them to cool completely, ideally for at least 2-3 hours, before slicing.
Using the right amount of fat and sugar relative to flour is also vital for fudginess. Recipes labeled as "fudgy" typically have less flour and leavening (like baking powder or soda) than cakey brownies. Checking for doneness correctly is also important; look for moist crumbs on a toothpick, not a completely clean one, which indicates over-baking. Aim for that sweet spot where the center is just set.
Easy Chewy Brownies: A Simple Variation
Chewy brownies offer a delightful texture contrast to their fudgy cousins, providing a satisfying bite that springs back slightly. This texture is often achieved by using a higher proportion of brown sugar, which contains molasses and adds moisture and chewiness, and sometimes by melting the butter completely rather than just softening it. This variation is just as easy for beginners as the fudgy version, simply requiring a slight tweak in ingredients and method.
Making easy chewy brownies involves similar steps to fudgy ones but focuses on developing that specific texture. The use of brown sugar contributes to both flavor and chewiness. Some recipes might also involve a slightly different mixing technique, like beating the eggs and sugar longer to incorporate more air initially, which can contribute to the final texture. It's a simple twist on the classic that yields a wonderfully satisfying result perfect for anyone trying easy beginner brownie recipes.
Ingredients for Chewy Brownies
*   1/2 cup (1 stick) unsalted butter, melted
*   1 cup granulated sugar
*   1/2 cup packed light brown sugar
*   2 large eggs
*   1 teaspoon vanilla extract
*   1/2 cup all-purpose flour
*   1/3 cup unsweetened cocoa powder
*   1/4 teaspoon salt
*   1/4 teaspoon baking soda (optional, for slight rise/chew)
Baking Chewy Brownies: Key Steps and Techniques
- Preheat oven to 350°F (175°C). Prepare an 8x8 inch pan as described for fudgy brownies.
- In a medium bowl, whisk together the melted butter, granulated sugar, and brown sugar until well combined.
- Add the eggs one at a time, whisking vigorously for about 1 minute after each addition until the mixture is thick and pale. Stir in the vanilla. This extra whisking helps develop the chewy texture.
- In a separate small bowl, whisk together the flour, cocoa powder, salt, and baking soda (if using).
- Add the dry ingredients to the wet ingredients and stir gently with a spatula or wooden spoon until just combined. Do not overmix.
- Pour the batter into the prepared pan and spread evenly.
- Bake for 20-25 minutes, or until a toothpick inserted into the center comes out with moist crumbs attached. Be careful not to overbake, as this will result in dry brownies.
- Let the brownies cool in the pan on a wire rack before cutting. Cooling helps the texture set.
Variations: Adding Nuts, Chocolate Chips, or Swirls
Once you've mastered the basic easy beginner brownie recipes, you can easily add simple variations to customize your batch. A classic addition is chocolate chips; stir in about 3/4 cup of semi-sweet, milk, or dark chocolate chips with the dry ingredients before adding them to the wet. This adds extra pockets of melted chocolatey goodness.
Nuts like walnuts or pecans also pair wonderfully with brownies, adding crunch and flavor. Fold in about 1/2 cup of chopped nuts at the same time you add the chocolate chips. For a simple swirl, reserve a few tablespoons of the batter, mix it with a tablespoon of peanut butter or melted caramel, and swirl it into the top of the main batter in the pan using a knife or skewer before baking. These simple additions elevate your easy beginner brownie recipes without adding significant complexity.
One-Bowl Brownie Recipe: Quick and Easy Cleanup
For the ultimate in simplicity and minimal cleanup, a one-bowl brownie recipe is a beginner's best friend. This method streamlines the process by mixing both wet and dry ingredients in a single bowl, cutting down on dishes significantly. It's a straightforward approach that proves you don't need multiple bowls and complicated steps to achieve delicious, homemade brownies.
This type of easy beginner brownie recipe is perfect for those days when you want a quick treat without the fuss. The key is often adding ingredients in a specific order to ensure everything mixes properly. While perhaps slightly less precise than separating wet and dry ingredients initially, the convenience is unparalleled, making it a go-to for busy bakers or anyone prioritizing speed and easy cleanup.
Streamlined Ingredient List for One-Bowl Brownies
*   1/2 cup (1 stick) unsalted butter, melted
*   1 cup granulated sugar
*   2 large eggs
*   1 teaspoon vanilla extract
*   1/2 cup all-purpose flour
*   1/3 cup unsweetened cocoa powder
*   1/4 teaspoon salt
*   1/4 teaspoon baking powder
*   Optional: 1/2 cup chocolate chips
One-Bowl Mixing Method: Step-by-Step Instructions
- Preheat oven to 350°F (175°C). Prepare an 8x8 inch pan.
- In a medium mixing bowl, melt the butter. You can do this in the microwave or by pouring hot melted butter from a saucepan.
- Add the sugar to the melted butter and whisk until combined.
- Whisk in the eggs one at a time, beating well after each addition, followed by the vanilla extract.
- Add the flour, cocoa powder, salt, and baking powder directly into the same bowl.
- Using a spatula or wooden spoon, stir gently until just combined and no dry streaks remain. Be careful not to overmix. If adding chocolate chips, stir them in now.
- Pour the batter into the prepared pan and spread evenly.
- Bake for 20-25 minutes, or until a toothpick inserted into the center comes out with moist crumbs.
- Let the brownies cool completely in the pan before cutting.
Customizing Your One-Bowl Brownies: Flavor Options
Just because it's a simple one-bowl method doesn't mean you can't add flavor! This easy beginner brownie recipe base is perfect for customization. Besides the classic chocolate chips, consider adding a teaspoon of espresso powder to the dry ingredients before mixing for a deeper chocolate flavor. Swirl in a few tablespoons of raspberry jam or a dollop of cream cheese mixed with a little sugar for a simple marbled effect.
You can also experiment with extracts; try adding 1/2 teaspoon of peppermint extract along with the vanilla for a minty twist, or almond extract for a nutty undertone. The key is to add these flavorings at the same stage as the vanilla extract or with the dry ingredients, depending on whether they are liquid or powder. These small additions can transform your easy first brownie recipe into something uniquely yours.
Simple Bar Recipes for Baking Beginners
Moving beyond brownies, cookie bars are another fantastic option for beginner bakers. They offer the familiar, comforting taste of chocolate chip cookies but eliminate the need for scooping individual dough portions, making the process much faster and simpler. Baking them in a single pan results in a thick, soft, and chewy bar that's always a hit.
This easy bar recipe is essentially a giant chocolate chip cookie baked in a pan. The ingredients are standard cookie components: butter, sugar, eggs, flour, chocolate chips, and leavening. The method involves creaming butter and sugar, adding eggs and vanilla, then incorporating dry ingredients and chocolate chips. It's a straightforward process that minimizes potential pitfalls and guarantees a delicious outcome, perfect for your first foray into bar baking.
Ingredients for Chocolate Chip Cookie Bars
*   1/2 cup (1 stick) unsalted butter, softened
*   1/2 cup granulated sugar
*   1/2 cup packed light brown sugar
*   1 large egg
*   1 teaspoon vanilla extract
*   1 1/4 cups all-purpose flour
*   1/2 teaspoon baking soda
*   1/4 teaspoon salt
*   1 cup chocolate chips (milk, semi-sweet, or dark)
Baking the Perfect Chocolate Chip Cookie Bar
- Preheat oven to 375°F (190°C). Grease and flour or line an 8x8 inch baking pan with parchment paper.
- In a large bowl, cream together the softened butter, granulated sugar, and brown sugar with an electric mixer or a wooden spoon until light and fluffy, about 2-3 minutes.
- Beat in the egg and vanilla extract until well combined.
- In a separate small bowl, whisk together the flour, baking soda, and salt.
- Gradually add the dry ingredients to the wet ingredients, mixing on low speed or stirring with a spoon until just combined.
- Stir in the chocolate chips.
- Press the dough evenly into the prepared pan.
- Bake for 20-25 minutes, or until the edges are golden brown and the center looks set but still slightly soft.
- Let the bars cool completely in the pan on a wire rack before cutting into squares.
Tips for Avoiding Over-Baking
Over-baking is the most common culprit behind dry or hard cookie bars. Since they are baked in a single layer, they bake relatively quickly. Start checking for doneness around the 20-minute mark. You want the edges to be golden brown, but the center should still look slightly soft or just set. Remember that they will continue to cook slightly from the residual heat of the pan after they are removed from the oven.
Another tip is to use a timer and trust the visual cues. When in doubt, it's better to under-bake slightly than over-bake. A toothpick inserted into the center might not come out perfectly clean; you want it to have moist crumbs attached, similar to fudgy brownies. Letting them cool completely in the pan is also crucial for setting the texture and preventing them from being too gooey to cut.
Easy Lemon Bars: A Tart and Sweet Treat
If you prefer something bright and tangy, easy lemon bars are a delightful beginner-friendly option. They consist of a simple shortbread crust topped with a sweet and tart lemon filling. The contrast of the buttery crust and the smooth, zesty filling is incredibly satisfying and requires minimal baking expertise.
Making lemon bars involves two main steps: preparing the crust and preparing the filling. Both are straightforward and don't involve complex techniques. The crust is typically a simple mix-and-press dough, while the filling is often just a whisking together of sugar, eggs, lemon juice, and flour. This simplicity makes it an excellent recipe for beginners looking to explore fruit-based desserts baked in bar form.
Ingredients for Zesty Lemon Bars
*   **For the Crust:**
    *   1 cup all-purpose flour
    *   1/4 cup powdered sugar
    *   1/2 cup (1 stick) cold unsalted butter, cut into small cubes
*   **For the Filling:**
    *   1 1/2 cups granulated sugar
    *   1/4 cup all-purpose flour
    *   4 large eggs
    *   1/2 cup fresh lemon juice (from about 3-4 lemons)
    *   1 teaspoon lemon zest (optional, for extra flavor)
*   Powdered sugar, for dusting (optional)
Preparing the Lemon Bar Filling: A Simple Guide
Preparing the lemon filling is arguably the easiest part of this easy bar recipe. In a medium bowl, simply whisk together the granulated sugar and 1/4 cup of all-purpose flour. This step helps prevent the flour from clumping when added to the wet ingredients and ensures a smooth filling.
Next, whisk in the eggs one at a time until fully incorporated. Then, add the fresh lemon juice and optional lemon zest. Whisk until the mixture is smooth and well combined. The mixture will be quite liquidy at this stage, which is perfectly normal. That's all there is to it – the filling is ready to be poured over the partially baked crust.
Baking and Cooling Lemon Bars for the Best Flavor
- Preheat oven to 350°F (175°C). Prepare an 8x8 inch pan by lining it with parchment paper, leaving overhang.
- Make the Crust: In a medium bowl, combine the flour and powdered sugar. Cut in the cold butter using a pastry blender, fork, or your fingertips until the mixture resembles coarse crumbs.
- Press the crumb mixture firmly and evenly into the bottom of the prepared pan.
- Bake the crust for 15-20 minutes, or until lightly golden around the edges.
- While the crust is baking, prepare the filling as described above.
- Once the crust is partially baked, pour the lemon filling evenly over the hot crust.
- Return the pan to the oven and bake for an additional 20-25 minutes, or until the center is set and no longer jiggly. The top may look slightly opaque or matte.
- Remove from oven and let cool completely in the pan on a wire rack. This is essential for the filling to set properly. Once cool, refrigerate for at least 2 hours before cutting.
- Lift the cooled bars out of the pan using the parchment overhang and cut into squares. Dust with powdered sugar just before serving, if desired.
Peanut Butter Bars: A Beginner-Friendly Recipe
For peanut butter lovers, these simple peanut butter bars offer a wonderfully chewy texture and rich, nutty flavor. They are incredibly easy to make, often following a similar method to cookie bars but incorporating peanut butter into the dough. This recipe is forgiving and doesn't require any special techniques, making it perfect for beginners.
Peanut butter bars typically use common ingredients like butter, sugar, eggs, flour, and, of course, peanut butter. The mixture comes together quickly and bakes into a soft, dense bar that's irresistibly good. Whether you prefer smooth or crunchy peanut butter, this easy bar recipe is a fantastic way to enjoy a classic flavor combination in a simple, convenient format.
Ingredients for Peanut Butter Bars
*   1/2 cup (1 stick) unsalted butter, softened
*   1/2 cup granulated sugar
*   1/2 cup packed light brown sugar
*   1/2 cup peanut butter (creamy or crunchy)
*   1 large egg
*   1 teaspoon vanilla extract
*   1 1/4 cups all-purpose flour
*   1/2 teaspoon baking soda
*   1/4 teaspoon salt
Mixing and Baking Peanut Butter Bars
- Preheat oven to 375°F (190°C). Prepare an 8x8 inch pan with parchment paper.
- In a large bowl, cream together the softened butter, granulated sugar, and brown sugar until light and fluffy.
- Beat in the peanut butter until well combined and smooth.
- Add the egg and vanilla extract, mixing until fully incorporated.
- In a separate small bowl, whisk together the flour, baking soda, and salt.
- Gradually add the dry ingredients to the wet ingredients, mixing on low speed or stirring until just combined. The dough will be thick.
- Press the dough evenly into the prepared pan. You can use the bottom of a glass or your fingers.
- Bake for 20-25 minutes, or until the edges are lightly golden and the center appears set.
- Let the bars cool completely in the pan on a wire rack before cutting.
Topping Ideas for Peanut Butter Bars
While delicious on their own, peanut butter bars are also excellent with simple toppings. A classic choice is a melted chocolate drizzle; melt about 1/2 cup of chocolate chips (with a teaspoon of oil or butter if needed for smoothness) and drizzle it back and forth over the cooled bars. You can also sprinkle on additional chocolate chips, chopped peanuts, or even a sprinkle of flaky sea salt before the chocolate sets.
For an extra layer of richness, you could make a simple peanut butter glaze by whisking together powdered sugar, a couple of tablespoons of peanut butter, and a little milk or cream until smooth and pourable. Drizzle this over the cooled bars. These simple additions add visual appeal and extra flavor without making the recipe significantly more complex, keeping it perfect for beginners.
Troubleshooting Common Baking Issues with Brownies and Bars
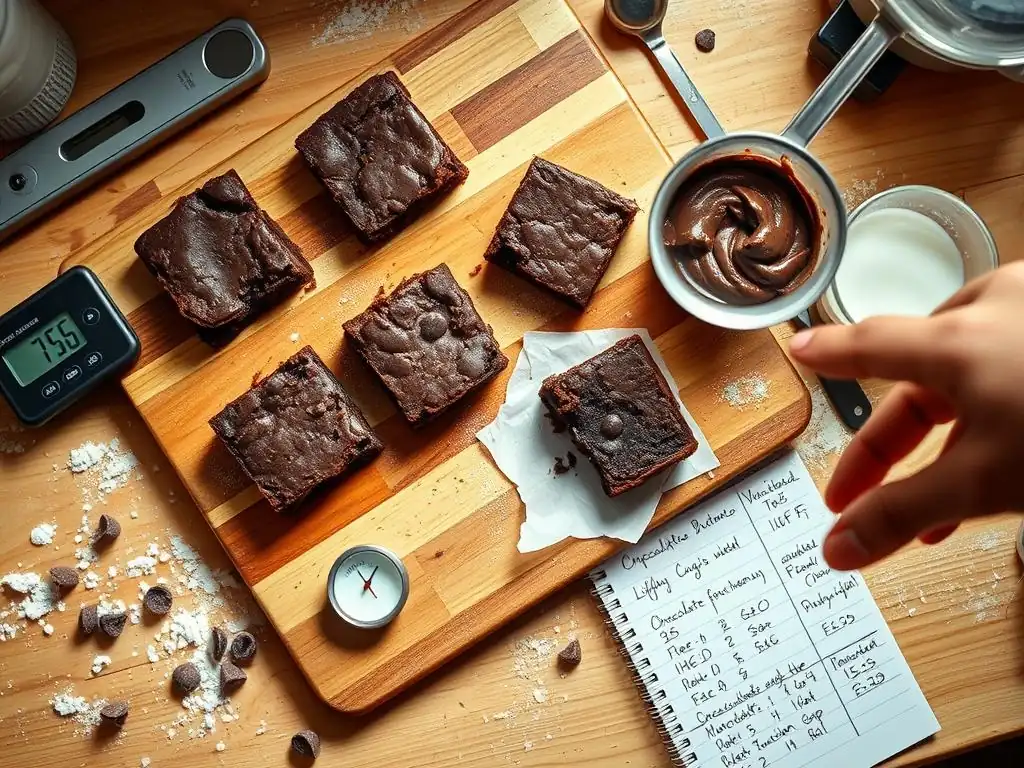
Even with easy beginner brownie recipes and simple bar recipes, you might encounter a few common issues. Learning how to identify and fix these problems is part of the baking process and builds your skills. Don't be discouraged if your first batch isn't absolutely perfect; every bake is a learning opportunity!
Understanding the basic science behind baking helps. For example, the ratio of wet to dry ingredients, the amount of leavening, and the baking temperature and time all play crucial roles in the final texture. By recognizing common problems like dryness or crumbling, you can adjust your technique or ingredients slightly for future bakes, leading to consistent success with your easy beginner brownie recipes and bars.
Why are my Brownies Dry?
Dry brownies are often the result of over-baking. When brownies bake too long, too much moisture evaporates, leaving them dense and crumbly rather than moist and fudgy or chewy. The target temperature for doneness is crucial; you want the internal temperature to reach around 200-210°F (93-99°C) for fudgy brownies, but visually checking for moist crumbs on a toothpick is a more common beginner method. If the toothpick comes out completely clean, they are likely overdone.
Using too much flour or not enough fat (butter, oil, or chocolate) can also contribute to dryness. Ensure you measure your flour accurately, ideally by weight (1 cup of all-purpose flour is roughly 120-130 grams), or by spooning it lightly into a measuring cup and leveling it off, rather than scooping directly from the bag, which can compact it. Stick to the recipe's specified amounts of fat.
Why are my Bars Crumbly?
Crumbly bars, whether cookie bars or lemon bars, can also be a symptom of over-baking. Just like brownies, when bars bake too long, they lose moisture and structure, becoming brittle and falling apart when cut. Pay close attention to the baking time and visual cues provided in the recipe, checking for doneness at the lower end of the suggested time range.
For cookie bars, not enough binder (like butter or egg) relative to the dry ingredients can also cause crumbling. Ensure your measurements are accurate. For lemon bars, a crumbly crust might indicate you didn't press the dough firmly enough into the pan before baking, or the butter wasn't properly incorporated into the flour mixture. A crumbly filling usually means it wasn't cooked quite long enough to set properly, though this is less common with standard easy beginner lemon bar recipes.
How to Avoid Over-Baking Brownies and Bars
Avoiding over-baking is perhaps the most important skill for achieving perfect brownies and bars, especially with easy beginner brownie recipes. Always preheat your oven fully before putting your pan in; an oven thermometer can help verify accuracy. Use the baking time in the recipe as a guide, but start checking for doneness a few minutes early.
Visual cues are key: look for edges that are set and perhaps lightly golden, while the center still looks slightly moist or just barely set. The toothpick test is useful, but interpret it correctly – you want moist crumbs, not wet batter or a completely clean stick. Remember that the baked goods will continue to cook slightly from residual heat after being removed from the oven, so pulling them out when they are just done is ideal.
Tips for Cutting Perfect Brownie and Bar Squares
Cutting clean squares can be tricky, especially with gooey brownies or soft bars. The most important tip is patience: always let your brownies and bars cool completely in the pan before attempting to cut them. For fudgy brownies and lemon bars, chilling them in the refrigerator for an hour or two after they've cooled to room temperature makes them much easier to cut cleanly.
Use a sharp knife. For the cleanest cuts, wipe the knife blade clean with a damp cloth or paper towel after each cut. This removes sticky residue that can drag through the next cut. If using a parchment paper sling, lift the cooled (and potentially chilled) slab out of the pan and place it on a cutting board before slicing. For an 8x8 inch pan, cutting into 4 rows by 4 rows yields 16 squares, a common size.
Beyond the Basics: Easy Variations and Add-Ins for Brownies and Bars
Once you're comfortable with easy beginner brownie recipes and simple bar bases, you can easily elevate them with simple variations and add-ins. These require minimal extra effort but can significantly change the flavor and texture, allowing you to customize your treats and impress your friends and family.
Experimenting with different mix-ins is a fantastic way to make baking more fun and discover new favorite combinations. These additions don't typically require altering the core baking time or temperature by much, keeping the process beginner-friendly. It's about taking your successful easy first brownie recipe or bar and giving it a personal twist.
Adding Nuts and Chocolate Chips to Brownies and Bars
Adding nuts or chocolate chips is one of the easiest ways to enhance your easy beginner brownie recipes and bar recipes. For most standard recipes using an 8x8 inch pan, incorporating about 1/2 to 1 cup of add-ins works well without overwhelming the batter. Chop larger nuts like walnuts or pecans into smaller pieces for even distribution.
Stir these add-ins into the batter at the very end of the mixing process, typically when you're adding the dry ingredients or just after they are incorporated. Be careful not to overmix once they are added. Chocolate chips can be semi-sweet, milk, dark, white, or even flavored chips like peanut butter or butterscotch. Nuts can be walnuts, pecans, almonds, or macadamia nuts.
Swirling Flavors: Peanut Butter, Caramel, and More
Creating swirls of flavor adds a beautiful visual element and delicious taste dimension with minimal effort. This technique works particularly well with easy beginner brownie recipes. After pouring the main brownie batter into the prepared pan, drop spoonfuls of your swirling ingredient over the top.
Melted peanut butter, softened cream cheese (mixed with a little sugar and maybe an egg yolk), dulce de leche, or caramel sauce are great options. Use a knife or skewer to gently swirl the added ingredient through the brownie batter. Don't over-swirl, or the colors/flavors will blend completely; aim for distinct streaks or pockets. About 1/4 to 1/2 cup of the swirling ingredient is usually sufficient for an 8x8 inch pan.
Creating Brownie and Bar Layers: A Simple Technique
Layering different doughs or batters in a single pan creates multi-textured bars that are surprisingly simple for beginners. A classic example is a base layer of cookie dough topped with a layer of brownie batter. This combines two easy beginner baking concepts into one delicious bar.
To create layers, simply prepare both the cookie dough and brownie batter according to your chosen easy beginner brownie recipes and bar recipes. Press the cookie dough evenly into the bottom of the prepared pan. Then, carefully pour and spread the brownie batter over the cookie dough layer. Bake as directed for the thicker layered bar, which might take a few minutes longer than baking each layer individually (check for doneness in the center of the top layer). You can also do a brownie base with a cookie dough topping, or even layer different types of cookie dough.
Storing Your Brownies and Bars for Optimal Freshness
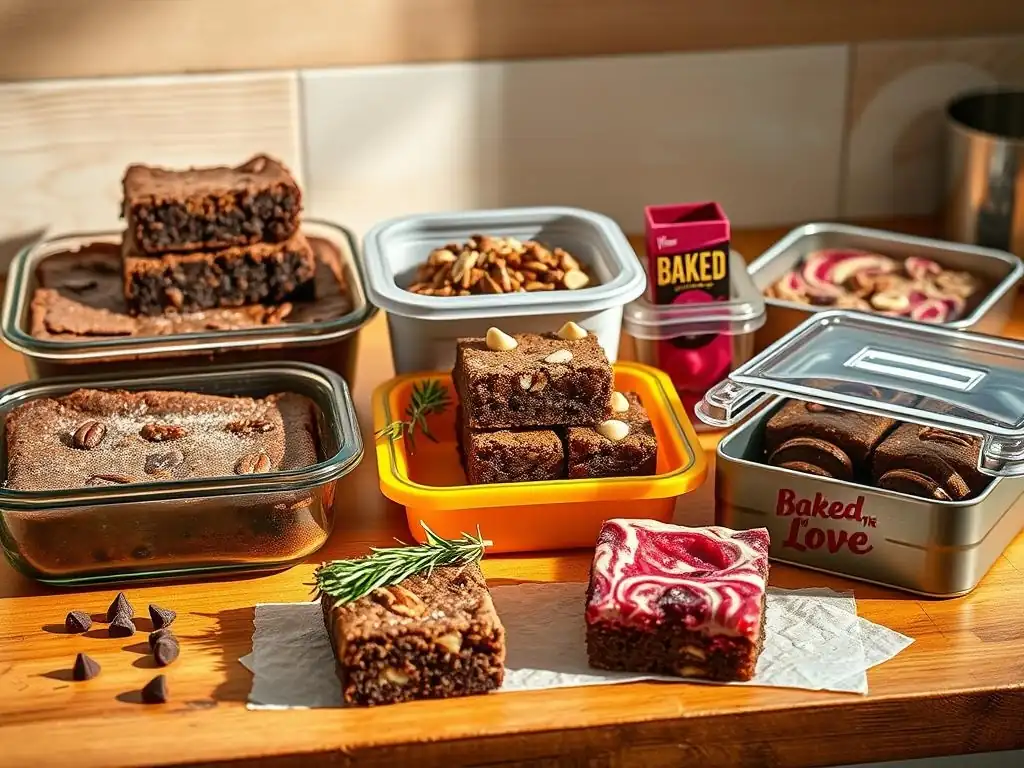
Proper storage is key to keeping your easy beginner brownie recipes and bars tasting their best for as long as possible. Whether you plan to enjoy them over a few days or save some for later, a few simple techniques can help maintain their moisture, texture, and flavor.
Different types of bars might have slightly different storage needs, especially those with moist fillings like lemon bars. However, the general principles of airtight storage apply to most baked goods to prevent them from drying out or becoming stale.
Best Practices for Storing Brownies
To keep your easy beginner brownie recipes moist and fresh, store them in an airtight container at room temperature. A plastic container with a tight-fitting lid or a tin with a secure cover works well. Avoid refrigerating fudgy brownies unless they contain a perishable filling or frosting, as refrigeration can sometimes alter their texture, making them seem drier.
Properly stored at room temperature, brownies typically stay fresh for 3-4 days. If you stack them in the container, you can place a piece of parchment or wax paper between the layers to prevent them from sticking together.
How to Keep Bars Fresh and Moist
Most cookie bars and solid bars (like peanut butter bars) can also be stored in an airtight container at room temperature for 3-4 days. The principles are the same as for brownies: protect them from air exposure to prevent drying out.
For bars with moist or perishable fillings, like lemon bars or cream cheese swirl brownies, refrigeration is necessary. Store them in an airtight container in the refrigerator for up to a week. The colder temperature will help the filling set and stay safe to eat. Allow refrigerated bars to sit at room temperature for 15-20 minutes before serving for optimal texture and flavor.
Freezing Brownies and Bars for Later Enjoyment
One of the best ways to handle a large batch of easy beginner brownie recipes or bars is to freeze them for later. Most brownies and bars freeze exceptionally well. Ensure they are completely cooled first.
Cut the brownies or bars into individual squares. Wrap each square tightly in plastic wrap, then place the wrapped squares in a freezer-safe airtight container or freezer bag. This double layer of protection helps prevent freezer burn. Label the container with the date. Frozen brownies and bars can be stored for up to 2-3 months. To thaw, simply place the desired number of squares in an airtight container at room temperature for a few hours.
Enjoy Your Homemade Brownies and Bars from BakeWithEase!
You've done it! You've successfully tackled some easy beginner brownie recipes and simple bar recipes from BakeWithEase. Whether you made classic fudgy brownies, chewy chocolate chip cookie bars, zesty lemon bars, or nutty peanut butter bars, you've created delicious homemade treats with minimal fuss. Baking doesn't have to be intimidating, and these simple recipes are proof that anyone can enjoy the rewarding process of creating something wonderful in the kitchen.
Keep practicing, try variations, and don't be afraid to experiment. These easy first brownie recipes and bars are just the beginning of your baking adventure. Share your creations with friends and family, or simply enjoy them yourself with a cup of coffee or a glass of milk. From all of us at BakeWithEase, happy baking, and enjoy every single bite of your fantastic homemade brownies and bars!
Frequently Asked Questions
What makes a brownie recipe "easy" for beginners on BakeWithEase?
Our "easy" brownie recipes focus on minimal ingredients, straightforward instructions, and common baking equipment. We also provide visuals for each step.
Where can I find the specific "easy beginner brownie recipes" mentioned in the article?
The recipes are located on the BakeWithEase website, specifically within the "Bars & Brownies" section. Look for recipes marked as "beginner-friendly".
What if I don't have all the ingredients listed in an easy brownie recipe?
BakeWithEase often suggests substitutions for common baking ingredients. Check the "Tips & Tricks" section of the recipe for alternatives, or browse the website for ingredient guides.
What kind of baking equipment do I need for most of these beginner brownie recipes?
Most recipes require only basic equipment like mixing bowls, measuring cups and spoons, a baking pan, and an oven. Some may need an electric mixer, but hand mixing is usually an option.
How can I ensure my brownies turn out perfectly using these BakeWithEase recipes?
Pay close attention to baking times and oven temperature. Also, ensure your ingredients are fresh, and follow our step-by-step instructions carefully, especially when it comes to mixing techniques.
Final Reflection: The Sweetness of Simple Beginnings
The accessibility of baking, once perceived as a daunting task, is now within everyone's reach. This guide has demonstrated that creating delicious bars and brownies doesn't require years of experience or a professional kitchen. The simple recipes presented here empower beginners to confidently explore the joy of baking, fostering a sense of accomplishment and delicious rewards.
The impact of accessible baking extends far beyond the individual kitchen. It fosters connection, creating opportunities for shared experiences and the passing down of culinary traditions. Baking, in its simplicity, becomes a powerful tool for self-expression and creativity. The best things in life are simple,
a sentiment that perfectly encapsulates the essence of this guide and the joy found in creating something delicious from basic ingredients.
Now, it's your turn. Don't let the fear of failure hold you back from exploring the world of baking. Choose a recipe, gather your ingredients, and embrace the process. The satisfaction of creating something beautiful and delicious with your own hands is a reward far greater than any store-bought treat. Let the aroma of warm brownies fill your kitchen, and share the sweetness with those you love. Your baking journey begins now.
Unleash Your Inner Baker: Bake Delicious Treats Today!
Thanks for joining us on this baking adventure! We hope you've discovered the joy of creating simple yet delicious bars and brownies. Ready to take your baking skills to the next level?
- Dive into our recipe collection: Find even more amazing bar and brownie recipes on BakeWithEase.com. Explore new flavor combinations and techniques!
- Share your creations: Post a photo of your baked goods on social media using #BakeWithEase and inspire others!
- Challenge yourself: Try adapting one of the recipes with your own favorite ingredients. What unique flavor will you create?
What surprising ingredient will you add to your next batch of brownies? Let us know in the comments!