
HandPainting on Cookies: Your Guide to Edible Artistry

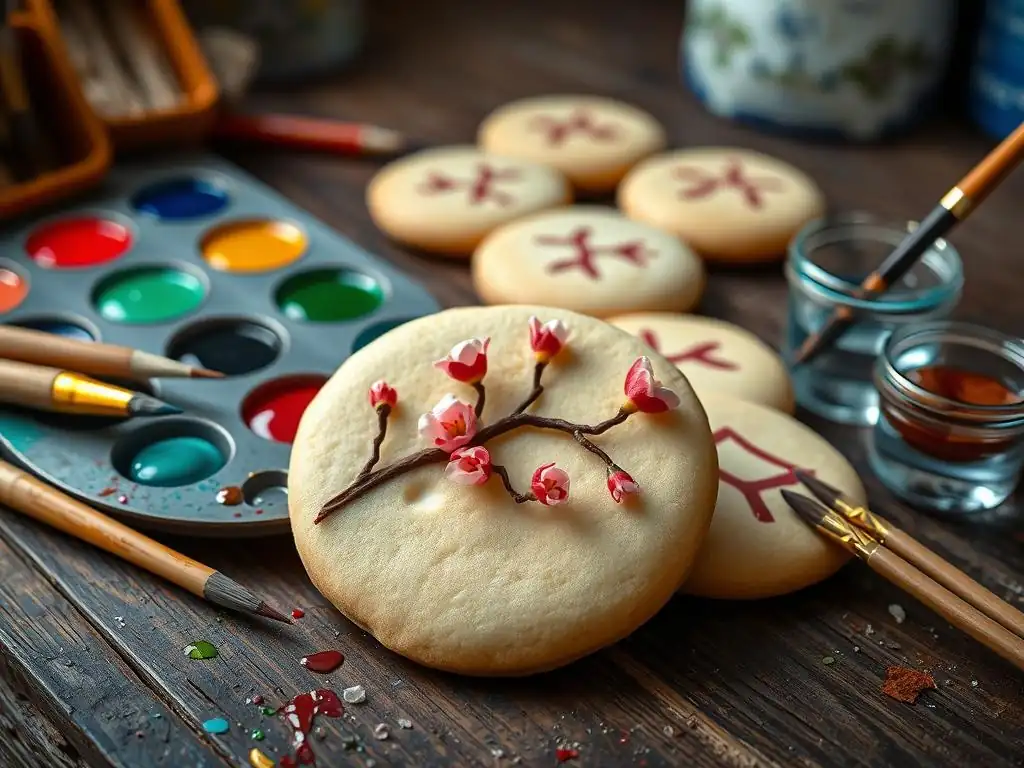
Welcome to BakeWithEase, your haven for all things baking! Ever dreamed of transforming ordinary cookies into miniature masterpieces? In this guide, we're diving into the captivating world of edible cookie painting, revealing secrets and techniques that will unlock your inner artist. Get ready to explore the sweet possibilities and turn your baking into a truly unique expression! Curious to see how it's done? Let's begin!
- Hand-Painted Cookies: A Comprehensive Guide
- Introduction to Hand-Painted Cookies
- Essential Supplies for Hand-Painted Cookies
- Preparing Your Cookies and Royal Icing for Painting
- Hand-Painting Techniques: A Step-by-Step Tutorial
- Hand-Painting Tutorial: Creating a Floral Design
- Tips and Tricks for Stunning Hand-Painted Cookies
- Troubleshooting Common Hand-Painting Problems
- Inspiration and Ideas for Hand-Painted Cookies
- Mastering Hand-Painting: Practice and Experimentation
- Conclusion: Creating Beautiful Hand-Painted Cookies
-
Frequently Asked Questions
- What exactly is edible cookie painting, and what makes it different from regular cookie decorating?
- What kind of "paints" are used for edible cookie painting, and where can I find them?
- Is edible cookie painting suitable for beginners, or does it require advanced baking skills?
- What type of cookies are best suited for hand painting, and why?
- How long does the edible paint typically take to dry on the cookies, and how should they be stored afterward?
- Final Reflection: The Enduring Sweetness of Hand-Painted Cookies
- Unleash Your Inner Cookie Artist!
Hand-painting on cookies is a delightful way to transform simple baked goods into intricate works of art. This edible art form allows you to express your creativity using techniques similar to traditional painting, but with edible mediums like food coloring and dusts. Imagine turning a plain sugar cookie into a miniature canvas depicting a vibrant floral scene, a beloved cartoon character, or even a detailed portrait.
It's a rewarding process that adds a personal touch to any celebration or gift, making each cookie a unique masterpiece. Whether you're a seasoned baker or new to cookie decorating, this edible cookie painting tutorial will guide you through the steps to create stunning painted treats.
Embarking on the journey of painting on cookies opens up a world of possibilities beyond basic icing techniques. You can achieve fine details, subtle shading, and rich textures that are difficult with piping alone. This method is particularly popular for custom orders for birthdays, weddings, or corporate events, where specific themes or logos need to be accurately represented. Learning the fundamentals of edible cookie painting equips you with skills to tackle complex designs, turning your cookies from delicious snacks into memorable, edible keepsakes. It's a skill that combines the precision of baking with the flair of artistic expression.
Choosing to hand-paint cookies offers unparalleled artistic freedom compared to other decorating methods. While techniques like flooding and piping create beautiful results, painting allows for a level of detail and nuance that is simply unmatched. You can blend colors seamlessly, create gradients, and add highlights and shadows that give your designs depth and realism. This makes hand-painting ideal for intricate illustrations, delicate patterns, and capturing specific imagery with precision. It elevates the humble cookie from a simple treat to a piece of edible art that is almost too beautiful to eat.
Beyond the aesthetic appeal, hand-painted cookies offer a unique personal touch. Gifting a box of hand-painted cookies shows a significant level of effort and care, making them incredibly special for the recipient. For small businesses, offering hand-painted cookies can be a niche market with higher perceived value, allowing for premium pricing.
For example, a set of a dozen custom-painted cookies might sell for $60-$100 or more, depending on the complexity, compared to $30-$50 for simply iced cookies. The ability to create highly personalized designs, from specific characters to intricate patterns matching event themes, makes them a popular choice for bespoke orders.
The foundation of great hand-painted cookies is a sturdy, flat cookie that serves as your canvas. A classic sugar cookie recipe is often the preferred choice due to its smooth surface and ability to hold its shape well during baking. A reliable recipe typically includes about 3 cups of all-purpose flour, 1 cup of unsalted butter, 1 cup of granulated sugar, 1 large egg, 1 teaspoon of vanilla extract, and ½ teaspoon of baking powder.
The key is to use cold butter and not overwork the dough, which helps prevent spreading in the oven, ensuring your cut shapes remain defined and flat. Rolling the dough to an even thickness, usually about 1/4 inch, is crucial for consistent baking and a smooth painting surface.
When selecting a recipe for your edible cookie painting tutorial project, look for one specifically designed for cut-out cookies. These recipes are formulated to minimize spread. After cutting shapes, chilling the dough for at least 15-30 minutes before baking is a critical step that further prevents distortion.
Baking at a moderate temperature, around 350°F (175°C), until the edges are lightly golden but the center is still pale ensures the cookies are fully cooked but not overly browned, which could show through the icing and paint. A flat, even surface is paramount for successful painting, so avoid recipes that result in domed or cracked cookies.
Royal Icing for Painting: Achieving the Perfect Consistency
Royal icing is the standard medium for creating the smooth, hard surface needed for painting. It's typically made from powdered sugar, meringue powder or egg whites, and water. The consistency is key; for a smooth base coat, you'll need a "flood" consistency, which is thinner than piping consistency but thick enough to hold a border.
A good flood consistency will level out on its own within 10-15 seconds after a line is drawn through it. Too thick, and it won't level smoothly; too thin, and it will run off the cookie. Achieving this precise consistency often requires adding water very gradually, often just a drop or two at a time, and stirring until the desired flow is reached.
After flooding the cookie with royal icing, it must dry completely before painting can begin. This can take anywhere from 6 to 24 hours, depending on humidity levels. A hard, dry surface is essential; painting on wet or semi-dry icing can cause colors to bleed or the icing to indent. Some bakers use a dehydrator on a low setting (around 100°F or 38°C) for a few hours to speed up the drying process and achieve a perfectly smooth, hard shell. This creates the ideal canvas for your edible cookie painting tutorial techniques.
Edible Paints and Colors: A Guide
The colors you use for hand-painting cookies must, of course, be edible. The most common forms are gel food coloring, edible dusts (mixed with liquid), and edible markers. Each type offers different properties suitable for various techniques and desired effects. Understanding the characteristics of each will help you choose the right medium for your edible cookie painting tutorial project.
Gel Food Coloring: Intense Colors
Gel food colorings are highly concentrated and vibrant, making them excellent for creating intense, opaque colors or for thinning down with a liquid medium (like vodka or clear extract) to create a watercolor effect. A tiny drop of gel color goes a long way. When mixed with a liquid, they are perfect for broad strokes, washes, and base layers. Using a clear alcohol like vodka is often preferred because it evaporates quickly, minimizing the risk of moisture issues on the royal icing surface. However, water or clear vanilla extract can also be used, though they take longer to dry.
Dusts and Lusters: Adding Shimmer
Edible dusts, such as petal dusts, luster dusts, and sparkle dusts, provide a different range of effects. Petal dusts are matte and often used for realistic floral painting and shading. Luster dusts contain mica particles that add a shimmery or metallic finish, perfect for elegant details or highlighting.
Sparkle dusts offer a glittery effect. These dusts are typically applied dry with a brush for soft shading or mixed with a liquid (again, often vodka or clear extract) to create a paintable metallic or shimmery paint. A ratio of approximately 1 part dust to 1-2 parts liquid is a good starting point, but adjust as needed to achieve the desired consistency.
Edible Markers: Fine Details
Edible markers are like regular pens but filled with edible ink. They are fantastic for outlining, drawing fine lines, adding small details, or writing text directly onto the dry royal icing. They are particularly useful for beginners in an edible cookie painting tutorial as they offer more control than a brush for very small elements. However, they can sometimes smudge on certain icing surfaces or if the surface is not completely dry. It's best to use them on a fully set, dry royal icing base.
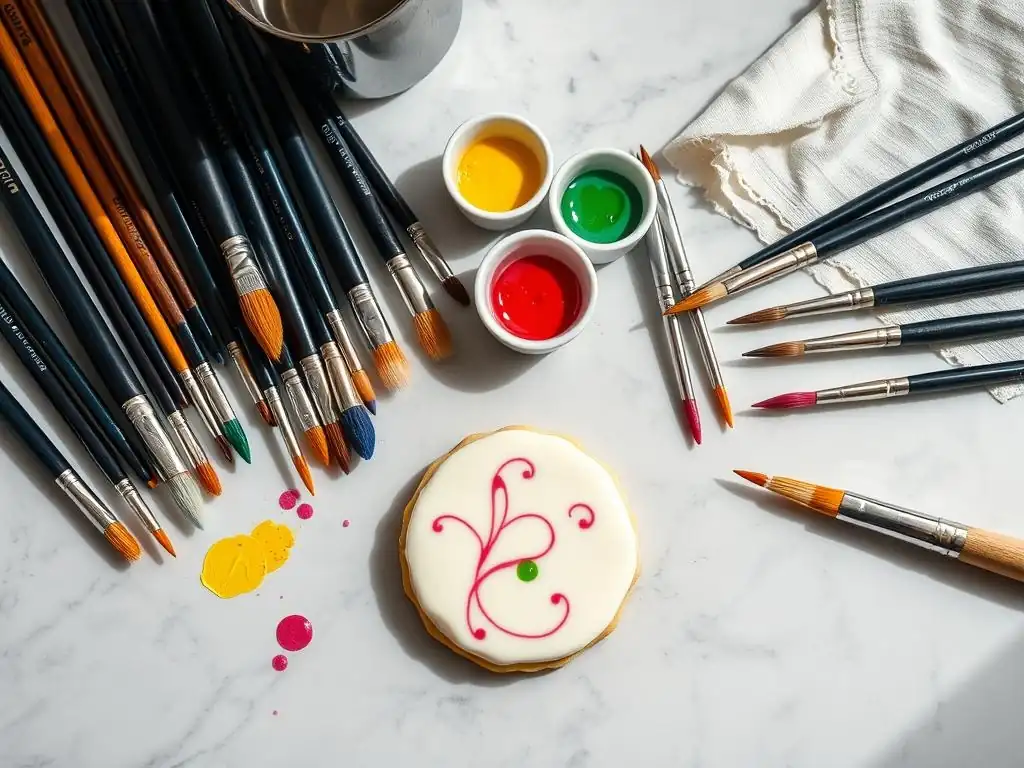
Just like traditional painting, having a variety of brush sizes and types is essential for hand-painting cookies. You'll need small, fine-tipped brushes (like a 000 or 0 size) for intricate details, outlining, and delicate work. Larger, flat brushes (like a size 4 or 6 flat or round) are useful for applying base colors, washes, and broader strokes. A small, stiff brush might be helpful for dry brushing techniques with dusts. It's important to use brushes specifically designated for food use to avoid contamination. Synthetic bristles are often preferred as they hold their shape well and are easy to clean.
Having a range of brushes dedicated solely to your edible cookie painting tutorial projects ensures you have the right tool for every task. A typical starter set might include a fine point brush for details, a small round brush for general painting, and a small flat brush for washes. Keeping your brushes clean and dry after each use is crucial for their longevity and performance. Rinse them thoroughly in clean water or alcohol after using edible paints.
Palette and Mixing Tools: Color Organization
A palette is indispensable for mixing and organizing your edible paints. You can use a dedicated food-safe paint palette, a small ceramic plate, or even just pieces of parchment paper or plastic wrap taped down. The key is to have a clean, non-porous surface to mix your colors. When working with gel colors and liquid, place a small drop of color on the palette and add the liquid gradually, mixing with a small brush or toothpick until you reach the desired paint consistency.
Using a palette allows you to pre-mix colors, ensuring consistency throughout your edible cookie painting tutorial project. You can create custom shades by blending different gel colors. For example, mixing red and blue gel colors can create various shades of purple. Using separate wells or sections on your palette for different colors prevents cross-contamination and helps keep your workspace organized as you paint.
Other Helpful Tools: Scriber Tool, Turntable
Several other tools can make your hand-painting process smoother. A scriber tool (or a toothpick) is invaluable for popping any tiny air bubbles that appear when flooding the royal icing, helping to ensure a perfectly smooth canvas. It can also be used to gently guide the flood icing into corners or tight spaces.
A rotating turntable or cookie spinner is incredibly helpful for turning the cookie as you paint, allowing you to access all sides and angles comfortably without touching or smudging the wet paint. This is especially useful when working on detailed designs or when following a specific edible cookie painting tutorial that involves rotating the piece frequently. Tweezers can also be handy for placing small edible decorations or removing any stray dust particles from the icing surface before painting.
Creating the ideal canvas for your edible art starts with baking. Unevenly baked cookies can lead to issues like cracking or an inconsistent surface texture. To ensure even baking, first, make sure your dough is rolled out to a consistent thickness, typically ¼ inch (about 6mm). Use a rolling pin with guides or spacers if necessary. Second, ensure your oven is preheated correctly and consider using an oven thermometer to verify the temperature. Ovens can sometimes run hotter or cooler than the dial indicates.
Placing cut cookie shapes on parchment paper or a silicone baking mat on a flat baking sheet also promotes even heat distribution. Avoid overcrowding the baking sheet; leave about 1-2 inches between cookies to allow air circulation. If baking multiple trays, rotate them halfway through the baking time.
Bake until the edges are lightly golden, but the centers are still pale – this ensures the cookie is cooked through but remains relatively soft and doesn't get too dark, which could affect the final painted colors. Letting the cookies cool completely on the baking sheet for a few minutes before transferring them to a wire rack is also important to prevent breakage and maintain their flat shape.
Achieving a Smooth Royal Icing Base Coat
A smooth, flawless royal icing base coat is crucial for successful hand-painting. Any bumps, craters, or unevenness in the icing will be visible through the paint. Start by outlining your cookie shape with a slightly thicker consistency of royal icing (often called "piping" or "outline" consistency). This creates a dam to hold the thinner "flood" consistency icing within the shape. Once the outline is complete, immediately fill the area with your flood consistency icing. Work relatively quickly so the outline doesn't dry too much before flooding.
Use a scriber tool or toothpick to gently spread the flood icing to the edges, ensuring it meets the outline without going over. Also, use the scriber tool to pop any air bubbles that rise to the surface. Gently shaking or tapping the cookie can help the icing settle and become smooth. Aim for a consistent layer of icing across the entire surface. Achieving this smooth base is a fundamental step in any edible cookie painting tutorial.
Drying Time and Preparation
Once flooded, the royal icing needs to dry completely and harden before you can start painting. This is perhaps the most critical and time-consuming step. Depending on humidity and temperature, this can take anywhere from 6 to 24 hours at room temperature. In humid conditions, it might take even longer. The icing should be hard to the touch with no soft spots or tackiness.
To speed up drying and ensure a hard, smooth surface, consider using a fan (directed away from the cookies to avoid blowing dust onto them) or a food dehydrator set to a low temperature (around 90-100°F or 32-38°C) for 2-4 hours. Proper drying prevents colors from bleeding into the base layer and provides a firm surface that won't dent under the pressure of your brush. Ensure the cookies are fully cooled before icing, as residual heat can cause issues. This careful preparation sets the stage for a successful edible cookie painting tutorial experience.
Hand-Painting Techniques: A Step-by-Step Tutorial
Basic Painting Techniques: Wet-on-Wet, Dry Brushing, Layering
Several fundamental techniques form the basis of edible cookie painting. Wet-on-wet involves applying wet paint onto a still-wet layer of paint or icing to create blended or marbleized effects. This technique requires speed as you must work before the initial layer dries. Dry brushing involves using a brush with very little paint (often dusts applied dry) to create soft, subtle shading or textured effects.
Dip the brush into the color, tap off most of the excess, and apply with light strokes. Layering involves applying thin washes of color, allowing each layer to dry before applying the next. This technique is excellent for building depth, creating gradients, and achieving vibrant, layered looks, similar to watercolor painting.
Mastering these basic techniques is key to advancing your skills in any edible cookie painting tutorial. For instance, layering is essential for realistic effects, allowing you to build up color intensity gradually. Dry brushing is perfect for adding blush to cheeks on character cookies or subtle shading on floral elements. Wet-on-wet is less common for detailed painting but can be used for background effects or simple blended designs. Practice each technique on scrap cookies or even paper towels to get a feel for how the edible paints behave.
Advanced Painting Techniques: Shading, Highlighting, Detailing
Once comfortable with the basics, you can explore more advanced techniques like shading, highlighting, and fine detailing. Shading involves using darker shades of color to create shadows and give objects dimension. This is typically done by applying a slightly darker wash or dry brushing a darker dust into areas where shadows would naturally fall. Highlighting uses lighter shades or white paint to add bright spots, making objects appear more three-dimensional and catch the light. This is often done with a fine brush, adding small touches of light to specific areas.
Fine detailing is where your small brushes come into play, allowing you to add intricate lines, patterns, or tiny elements that bring your design to life. This could include painting individual strands of hair, the veins on a leaf, or the intricate patterns on fabric. Precision and a steady hand are crucial here.
For example, painting a realistic rose might involve layering washes of pink, using petal dust for shading, and then using fine detail work with white paint for highlights on the edges of the petals. These advanced techniques truly elevate edible cookie painting to a higher art form.
Using Stencils for Precision
Stencils are fantastic tools for achieving precision and repeating patterns easily in your edible cookie painting tutorial projects. They can be used in several ways. You can place a stencil over your dry royal icing and airbrush over it with edible airbrush colors for a crisp design.
Alternatively, you can use a stencil as a guide for painting. Place the stencil on the cookie and use a brush with a relatively dry paint consistency (gel color mixed with minimal liquid or dry dusts) to dab or brush the color through the stencil openings. This method works well for geometric patterns, text, or repeating motifs.
When using stencils for painting, secure the stencil firmly against the cookie surface to prevent paint from bleeding underneath. You can hold it in place or use magnets if working on a magnetic surface. Apply the paint using an up-and-down dabbing motion rather than brushing, which can push paint under the stencil edges. Carefully lift the stencil straight up immediately after applying the color. Stencils are particularly useful for adding backgrounds or repeating elements quickly and accurately.
Projecting Images for Complex Designs
For highly complex or realistic designs, such as portraits or intricate illustrations, projecting an image onto your cookie canvas can be incredibly helpful. Small, portable pico projectors are available that can connect to your phone or computer. You can display your design directly onto the dry royal icing surface. Then, using a fine edible marker or a very fine brush with thinned edible paint, you can trace the projected lines onto the cookie.
Once the basic outline is traced, remove the projector and use the lines as a guide for your painting. This technique is invaluable for ensuring accuracy in complex compositions and is a staple in professional edible cookie painting tutorial guides for detailed work. It saves significant time compared to trying to freehand an elaborate design and helps maintain proportions and perspective accurately.
Hand-Painting Tutorial: Creating a Floral Design
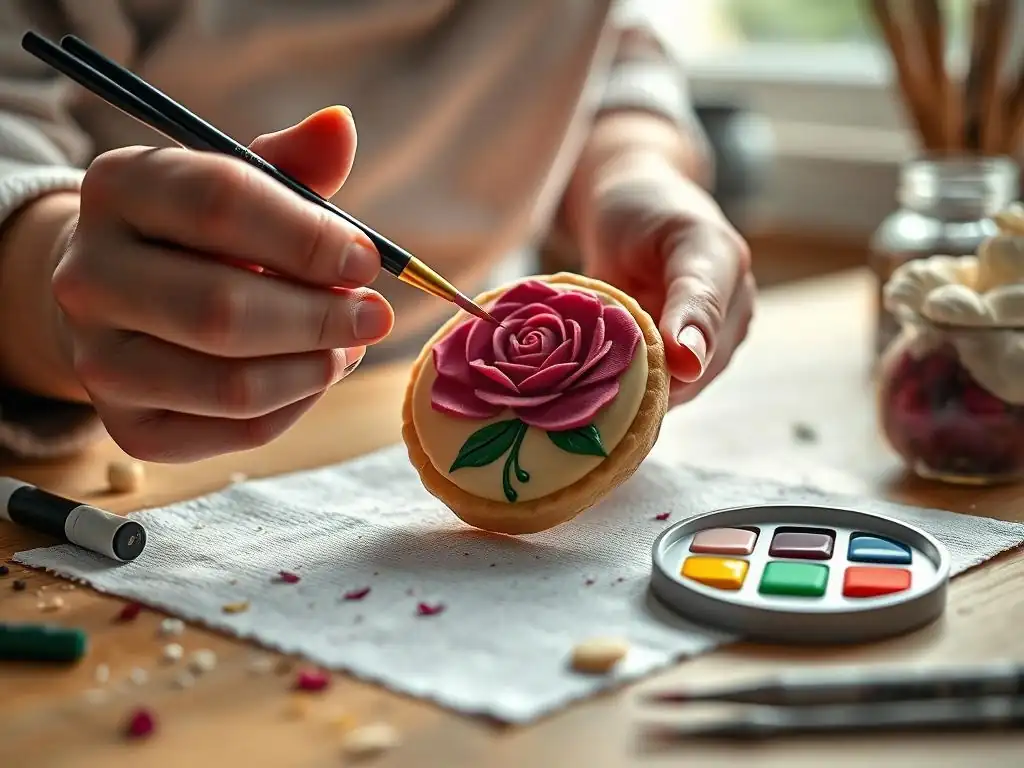
Step 1: Sketching Your Design
Before picking up your brush, it's helpful to sketch your floral design. You can do this on paper first to plan your composition and colors. For a simple design directly on the cookie, use an edible marker with a fine tip in a light color (like yellow or light gray) that will be easily covered by paint.
Lightly sketch the basic shapes and placement of your flowers, leaves, and stems onto the dry royal icing surface. Don't press too hard, just create faint lines to guide your painting. If using a projector, project your floral design onto the cookie and lightly trace the main outlines with an edible marker.
For instance, you might sketch a large central rose with a few smaller buds around it, adding some flowing leaves to fill the space. Planning your layout ensures the design fits the cookie shape and creates a balanced composition. This initial sketch serves as your blueprint for the entire edible cookie painting tutorial project.
Step 2: Applying the Base Colors
Once your sketch is in place, it's time to apply the base colors. Mix your edible gel colors with a clear liquid (like vodka) to a watercolor-like consistency. Start by applying a thin wash of the dominant colors for each element – for example, a light pink or red for the roses and a light green for the leaves and stems. Don't worry about details or shading yet; focus on laying down the basic color areas within your sketch lines. Use a medium-sized brush for larger areas.
Apply the paint in thin, even layers. If you need a more opaque color, apply a second layer after the first layer has dried completely. This layering technique is crucial for building color intensity without oversaturating the royal icing. For our floral design, apply the base color for all petals, then move to the leaves and stems, ensuring each area has a foundational color. This step establishes the basic color palette for your edible cookie painting tutorial.
Step 3: Adding Details and Shading
With the base colors dry, begin adding details and shading. Mix slightly darker shades of your base colors or use complementary colors mixed with a bit of black or brown gel color (used sparingly!). Using a smaller brush, apply these darker shades to areas that would naturally be in shadow, such as the base of petals, under leaves, or where elements overlap. Think about a light source and how it would hit your flowers.
For the rose petals, you might apply a darker pink or a touch of burgundy at the base of each petal to create depth. For leaves, add darker green along the veins or edges. Use a light touch and build up the shading gradually. You can also use dry petal dusts applied with a small, dry brush for soft shading effects, particularly effective for creating a realistic, velvety texture on petals. This stage adds dimension and realism to your edible cookie painting tutorial project.
Step 4: Highlighting and Finishing Touches
The final step is adding highlights and finishing touches to make your design pop. Use a very light color, such as white edible paint (white gel color mixed with liquid) or a pale version of your base color, and a fine brush. Apply small dabs or thin lines of this lighter color to areas where light would hit the hardest – the tips of petals, the edges of leaves, or along stems. These highlights catch the light and make the design appear more three-dimensional.
You can also use luster dusts mixed with liquid for metallic or shimmery highlights on specific elements, like dewdrops on petals or a subtle shimmer on the edge of a leaf. Use a fine brush to add any final, tiny details, such as dots, lines, or intricate patterns. Step back and look at your cookie to ensure the shading and highlights balance the composition. These finishing touches bring your edible cookie painting tutorial design to life.
Preventing Color Bleeding
Color bleeding is a common frustration in edible cookie painting. It occurs when wet paint seeps into the dry royal icing base or when colors on the cookie bleed into each other. The primary way to prevent this is ensuring your royal icing base is completely dry and hard before you start painting. As mentioned earlier, this can take 6-24 hours, or can be sped up with a dehydrator.
When painting, use as little liquid as possible to mix your colors while still allowing them to flow smoothly. Excess liquid is the main culprit for bleeding. Allow each layer of paint to dry fully before applying the next layer, especially when painting adjacent colors. If painting a dark color next to a light color, paint the lighter color first, let it dry, then paint the darker color. Using alcohol (like vodka) as your mixing medium helps because it evaporates quickly, reducing moisture on the icing surface.
Achieving Smooth Transitions
Creating smooth color transitions, like gradients or soft blends, requires practice and specific techniques. Layering thin washes of color is an effective method. Start with the lightest shade and apply thin layers, gradually adding darker shades and blending them where they meet while the paint is still slightly wet.
Another technique is wet blending: apply two colors next to each other while they are still wet and gently blend the seam with a clean, slightly damp brush. For soft shading, especially with dusts, use a dry brush with minimal product and build up the color gradually with light, circular motions. Practice on a spare iced cookie to get a feel for how your specific paints and brushes blend.
Fixing Mistakes and Imperfections
Even experienced decorators make mistakes. Fortunately, imperfections in edible cookie painting can often be fixed. For small errors, like a misplaced line or a tiny smudge, you can sometimes gently lift the wet paint using a clean, slightly damp brush or a toothpick. If the paint has dried, you might be able to carefully scrape away a small area using a sharp craft knife (used only for this purpose!) or cover it with opaque white paint once it's dry and repaint the area.
For larger mistakes, or if the royal icing base was damaged, you might need to scrape off the affected area of icing and re-flood it, allowing it to dry completely before attempting to paint again. While frustrating, being able to fix mistakes saves time and materials and is a valuable skill in any edible cookie painting tutorial.
Storing and Displaying Your Edible Art
Proper storage is essential to preserve the beauty of your hand-painted cookies. Once the paint is completely dry (this can take several hours depending on the paint consistency and layers), store the cookies in an airtight container at room temperature. Avoid refrigeration, as condensation can damage the royal icing and painted design. Place layers of parchment paper between cookies to prevent sticking and smudging.
For display, ensure the cookies are kept away from direct sunlight, which can cause the colors to fade over time. Displaying them on platters or in clear boxes can showcase your edible art. If packaging individually, use food-safe bags or boxes that protect the delicate painted surface. Treat them gently, as rough handling can chip the royal icing or paint.
Troubleshooting Common Hand-Painting Problems
Royal Icing Issues: Cracking, Pitting, Bubbles
Problems with the royal icing base can significantly impact your painting. Cracking often occurs if the icing dries too quickly on the surface while the layer underneath is still wet, or if the cookie flexes after icing. Using a dehydrator on a low setting can help the icing dry more evenly from bottom to top, reducing cracks. Pitting or tiny holes in the icing usually indicate that air bubbles weren to properly removed during flooding. Use a scriber tool or toothpick to pop bubbles as soon as the icing is applied.
Bubbles can also be incorporated when mixing the icing; mix on a lower speed after the initial ingredients are combined to minimize air incorporation. If bubbles appear after flooding, gently tap the cookie on the counter or use a scriber tool to coax them out and pop them. A smooth, bubble-free surface is non-negotiable for detailed painting.
Paint Problems: Streaking, Fading, Separating
Paint issues can also arise. Streaking often happens if the paint consistency is too thick, the brush strokes are uneven, or the icing surface isn't completely smooth. Ensure your paint is mixed to a smooth, flowing consistency and use even brush strokes. Fading can occur if colors are exposed to direct sunlight or if using low-quality food colorings. Use reputable brands of gel colors or dusts and store painted cookies away from light.
Separating paint (where the liquid separates from the color pigment) indicates that the paint hasn't been mixed well or that the liquid medium is incompatible. Remix thoroughly on your palette before painting. If using dusts with liquid, they may need frequent remixing as you work. Using the right ratio of liquid to color is also key to preventing these issues.
Design Challenges: Composition, Color Balance
Sometimes the challenge isn't technical but artistic. Composition issues occur when the elements of your design aren't well-arranged on the cookie, making it look unbalanced or cluttered. Planning your design with a sketch beforehand can help. Consider the cookie shape and how your design fits within it.
Color balance is another artistic challenge. Using too many clashing colors or not having enough contrast can make the design look muddy or overwhelming. Referencing color theory can be helpful. Use a limited palette or select colors that complement each other. Ensure there is enough contrast between elements so they don't blend together visually. Sometimes, stepping away from the cookie for a few minutes and returning with fresh eyes can help identify these artistic issues.
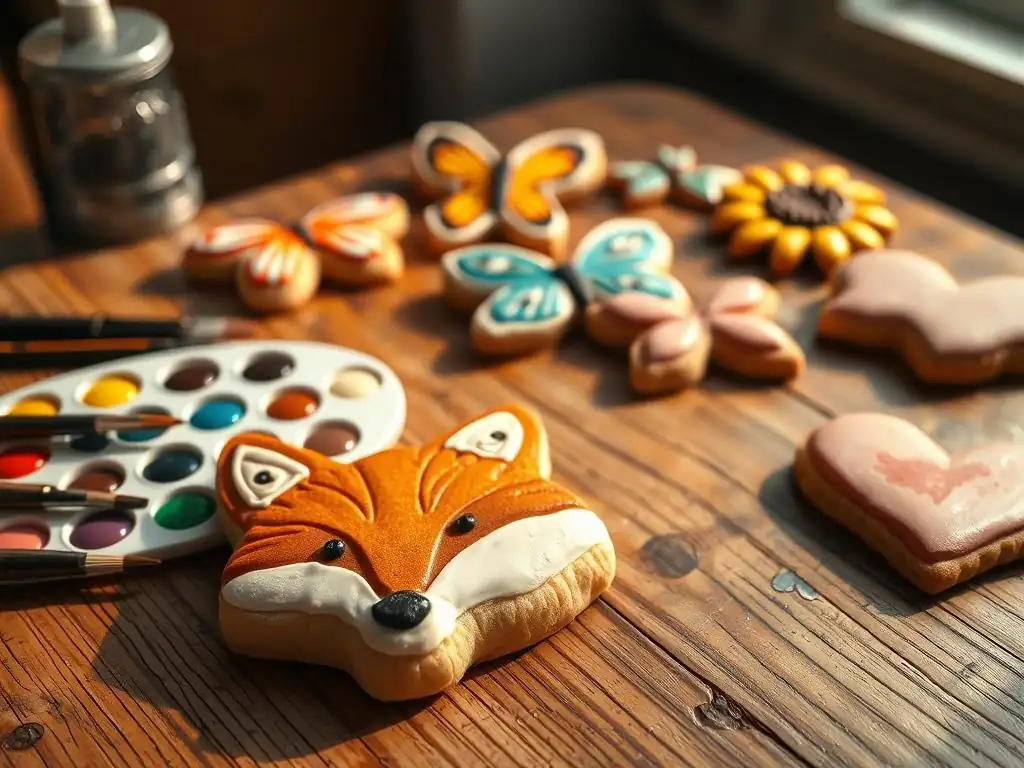
Exploring Different Painting Styles: Watercolor, Realism
Hand-painting on cookies allows you to explore various artistic styles. A popular approach is the watercolor effect, achieved by thinning gel colors significantly with liquid and applying them in translucent washes. This creates soft, blended, and ethereal designs, perfect for delicate florals or abstract patterns.
For a more challenging but rewarding style, try realism. This involves focusing on accurate shading, highlighting, and fine details to make your edible art look as lifelike as possible. This style is often used for portraits, realistic animals, or botanical illustrations. Achieving realism requires patience, careful observation, and building up layers of color gradually. Exploring different styles expands your repertoire as you master this edible cookie painting tutorial.
Hand-painted cookies are perfect for themed events. For holidays, you can paint intricate snowflakes, festive scenes, or detailed ornaments for Christmas, spooky characters for Halloween, or detailed eggs and bunnies for Easter. Birthdays offer endless possibilities, from painting favorite cartoon characters and superheroes to personalized portraits or hobbies.
Weddings are another popular occasion for hand-painted cookies. Consider painting intricate lace patterns, floral motifs matching the wedding bouquet, or even miniature portraits of the bride and groom. Custom-painted cookies can serve as unique favors or additions to a dessert table. The ability to personalize designs makes hand-painted cookies ideal for virtually any theme or celebration.
Resources for Edible Art Inspiration: Online Communities
Finding inspiration is easy with the abundance of online resources available for edible art. Platforms like Instagram, Pinterest, and Facebook groups dedicated to cookie decorating and edible art are filled with stunning examples from talented artists worldwide. Searching terms like "hand-painted cookies," "edible painting," or "cookie art" will yield countless ideas.
YouTube offers numerous edible cookie painting tutorial videos showcasing techniques and step-by-step guides for specific designs. Websites and blogs focused on baking and cookie decorating, like BakeWithEase.com, also provide recipes, tips, and inspiration. Engaging with online communities allows you to see what others are creating, ask questions, and share your own edible art journey.
Mastering Hand-Painting: Practice and Experimentation
The Importance of Practice
Like any skill, mastering edible cookie painting requires practice. Your first attempts may not be perfect, and that's completely normal. Start with simple designs and gradually work your way up to more complex ones. Practice basic techniques like blending, shading, and line work on scrap cookies or even paper before attempting them on your final pieces. Dedicating even just 15-30 minutes a few times a week to practicing different brush strokes or color mixes will make a significant difference over time.
Think of each cookie as an opportunity to learn. Analyze what worked well and what didn't. Did the paint consistency need adjustment? Were the brush strokes too heavy? Identify areas for improvement and focus on them in your next practice session. Consistent practice is the most effective way to improve your precision, control, and overall artistic skill in edible cookie painting.
Experimenting with Techniques and Colors
Don't be afraid to experiment! Try different brands of food coloring and dusts to see how they perform. Experiment with different mixing mediums – water, vodka, lemon extract – and observe the drying times and effects. Try combining techniques, like using dry brushing for shading over a layered base color.
Play with color palettes you haven't used before. Try painting monochromatic designs using different shades of the same color, or challenge yourself with a vibrant, multi-colored piece. Experimenting helps you discover what works best for you and allows you to develop your unique style in edible cookie painting. Keep a small notebook to jot down notes on consistencies, drying times, and color mixes that you like.
Sharing your hand-painted cookies is a rewarding part of the process. Give them as gifts, bring them to parties, or share photos of your creations online. Receiving feedback from others can be encouraging and provide fresh perspectives. Online platforms are great for showcasing your work and connecting with fellow cookie enthusiasts.
Sharing your edible cookie painting tutorial journey, including your successes and challenges, can also inspire others. Don't be shy about showing your progress, even if you're still learning. The cookie decorating community is generally supportive and appreciative of the effort and artistry involved in hand-painting.
Frequently Asked Questions
Edible cookie painting involves using food-safe paints and brushes to create designs directly on baked cookies. Unlike traditional decorating with icing, it's a more artistic and detailed approach focusing on painting techniques.
Edible paints can be made from mixtures like gel food coloring and extracts (like lemon or vodka) or purchased pre-made. You can find them at baking supply stores or online retailers that specialize in cake decorating.
While advanced skills aren't necessary, patience and a steady hand are helpful. BakeWithEase offers beginner-friendly tutorials, making it accessible to bakers of all skill levels.
Cookies with a smooth, matte surface, such as sugar cookies baked without browning, are ideal. The smooth surface provides a better "canvas" for the paint to adhere to and prevents bleeding.
Drying time varies, but typically a few hours or overnight is best. Store the completely dried cookies in an airtight container at room temperature to prevent them from becoming stale or the paint from running.
The art of hand-painting cookies isn't just a fleeting trend; it's a vibrant expression of creativity that continues to blossom in kitchens worldwide. More than just a delicious treat, these meticulously decorated cookies are miniature canvases, showcasing the artist's skill and adding a personal touch to any occasion. The accessibility of this craft, coupled with its endless possibilities for personalization, ensures its continued popularity.
The impact of this simple act of edible artistry extends far beyond the plate. It fosters a connection between the creator and recipient, a silent conversation whispered through carefully chosen colors and designs. It's a tangible expression of care and thoughtfulness, a sentiment often lost in our increasingly digital world. The best things in life are homemade,
a sentiment perfectly encapsulates the heart of hand-painted cookie artistry. This simple act of creation brings joy not only to the recipient but also to the artist, fostering a sense of accomplishment and mindful engagement.
Now, I invite you to pick up a brush, some edible paints, and a batch of freshly baked cookies. Don't be afraid to experiment, to let your creativity flow, and to discover the unique joy that comes from transforming a simple cookie into a miniature masterpiece. Let your hand-painted cookies be a testament to your creativity, a sweet expression of your personal style, and a delicious gift to share with those you cherish. The possibilities are as endless as your imagination.
Thanks for joining us on this delicious journey into hand-painted cookie artistry! You've learned valuable techniques and discovered the joy of transforming simple cookies into edible masterpieces. Now it's time to put your new skills to the test.
- Dive into your next cookie creation: Grab your supplies and try painting a design you've always dreamt of! Even a simple attempt will feel rewarding.
- Share your creations: Show us your painted cookies on social media using #BakeWithEasePaintedCookies – we’d love to see your unique style!
- Experiment with new colors and techniques: Don't be afraid to try something unexpected! What exciting flavor combinations and artistic approaches will you explore next?
What's your next edible masterpiece going to be? Let's hear your ideas in the comments below!