
Advanced Holiday Cookie Decorating Techniques to Impress

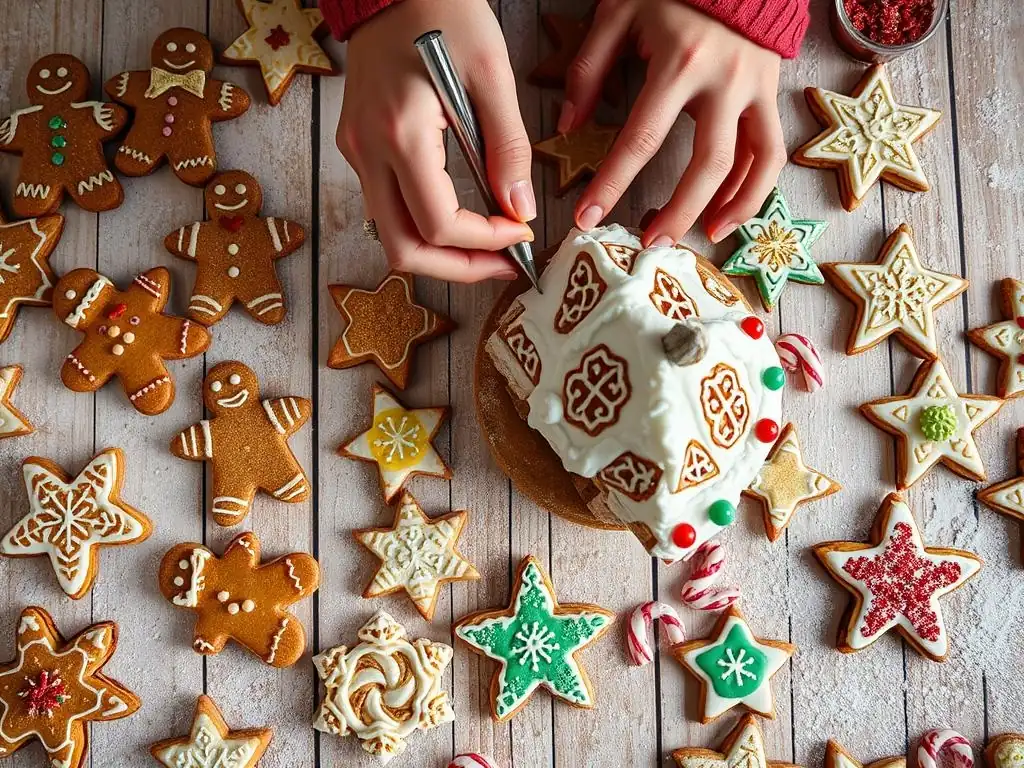
Welcome to BakeWithEase, your kitchen companion for all things baking!
Ready to elevate your holiday treats from simple to stunning? This season, ditch the basic sprinkles and dive into advanced holiday cookie decorating tips that will transform your creations into edible masterpieces. Discover secrets to achieving professional-looking designs and techniques that will leave everyone wondering where you learned such impressive skills. Intrigued? Let's get baking!
- Level Up Your Holiday Baking: Mastering Advanced Cookie Decorating
- Preparing for Advanced Holiday Cookie Decoration: Setting the Stage
-
Mastering Advanced Holiday Cookie Decorating Techniques
- The Art of Wet-on-Wet Decorating: Creating Seamless Designs
- Piping Intricate Details: Lines, Scrolls, and Floral Designs
- Stenciling on Cookies: Adding Sophisticated Holiday Patterns
- Airbrushing Techniques for Holiday Cookies: Adding Depth and Dimension
- Using Edible Markers for Fine Details and Personalization
- Elevating Your Holiday Cookie Designs: Beyond Basic Techniques
- Holiday Cookie Decorating Inspiration: Stunning Design Ideas
- Troubleshooting Common Holiday Cookie Decorating Problems
- Storing Your Decorated Holiday Cookies: Keeping Them Fresh and Beautiful
- Conclusion: Unleash Your Creativity with Advanced Holiday Cookie Decorating
-
Frequently Asked Questions
- What are some advanced techniques for decorating holiday cookies?
- How can I achieve a professional-looking finish on my holiday cookies?
- What tools are essential for advanced holiday cookie decorating?
- Where can I find inspiration for unique holiday cookie designs?
- How do I prevent my holiday cookies from spreading while baking?
- Final Reflection: The Sweet Art of Holiday Connection
- Unleash Your Inner Cookie Artist!
The holiday season is a time for warmth, joy, and, of course, delicious baked goods! While simple sprinkles and a dollop of frosting are lovely, taking your holiday cookie decorating to the next level can transform your treats into edible works of art. Whether you're aiming to create stunning gifts, impress guests at a holiday gathering, or simply enjoy a rewarding creative process, mastering advanced techniques is key. This guide offers detailed holiday cookie decorating tips and methods to elevate your baking skills and produce truly spectacular results this festive season.
Moving beyond basic flooding and simple piping requires understanding materials, practicing precision, and embracing new tools and techniques. Advanced holiday cookie decorating tips often involve layering, intricate details, and creating texture and dimension. It's a journey that builds upon foundational skills, allowing you to express your creativity in exciting new ways. Get ready to delve into the world of royal icing artistry, stenciling, airbrushing, and even constructing 3D cookie masterpieces, turning your kitchen into a festive decorating studio.
Before you dive into intricate designs, proper preparation is crucial. Just like an artist prepares their canvas, you need to ensure your cookies and decorating materials are ready. This foundational step is often overlooked but is vital for achieving professional-looking results with advanced holiday cookie decorating tips. Taking the time to bake the perfect cookie and prepare your icing correctly will save you frustration down the line and make the decorating process much smoother and more enjoyable.
Setting up your workspace is also part of the preparation. Clear a dedicated area, gather all your tools and ingredients, and ensure good lighting. Having everything within reach minimizes interruptions and helps maintain focus, especially when working on detailed designs that require precision. Consider using a non-slip mat to keep your decorating surface stable. Thinking ahead about the colors you'll need and mixing them beforehand can also streamline the process, allowing you to move seamlessly from one technique to the next.
The foundation of any beautifully decorated cookie is a perfectly baked one. For advanced decorating techniques, you need a cookie that holds its shape during baking, has a smooth, flat surface, and is sturdy enough to handle various decorating methods without breaking. Sugar cookies and gingerbread cookies are classic choices because they typically spread minimally and provide a stable base.
A standard cutout sugar cookie recipe using about a 1:1 ratio of butter to sugar, plus flour and eggs, often works well. Chilling your dough thoroughly (for at least 30-60 minutes) before rolling and cutting helps prevent excessive spreading in the oven, ensuring your cookie shapes remain crisp and defined.
Baking temperature and time are also critical. Baking at a slightly lower temperature (around 325-350°F or 160-175°C) for a longer time can help cookies bake evenly without browning too much, preserving a light surface that's ideal for vibrant icing colors. Aim for cookies that are baked through but still have a light color.
After baking, let them cool completely on a wire rack before even thinking about decorating. Any residual heat can melt or affect the icing. Ensure the surfaces are as flat as possible; sometimes gently pressing down on warm cookies with a flat object like a spatula can help level them if they've puffed up unevenly.
Royal Icing Perfection: Achieving the Ideal Consistency for Detailed Decorating
Royal icing is the go-to medium for advanced cookie decorating due to its ability to dry hard and smooth, providing a clean surface for layering and fine details. Achieving the perfect consistency is paramount. Too thick, and it's hard to pipe smoothly; too thin, and it will run off the cookie or bleed colors.
A basic royal icing recipe typically involves powdered sugar, meringue powder (or egg whites), and water. Meringue powder provides stability and helps the icing dry hard and food-safe. A good starting ratio might be 4 cups of powdered sugar to 3 tablespoons of meringue powder, adding water gradually.
You'll need different consistencies for different techniques. A "piping" or "outline" consistency is like toothpaste – it holds a firm line when piped. A "flood" or "fill" consistency is thinner, like honey or thick syrup – it spreads to fill an outlined area smoothly.
You can test flood consistency by drawing a line through a bowl of icing with a spoon; if the line disappears within 5-10 seconds, it's about right. For very fine details or writing, you might need an even thicker piping consistency. Mastering these different consistencies through practice is one of the most important holiday cookie decorating tips you can learn.
Stepping into advanced holiday cookie decorating tips requires a few more specialized tools than basic frosting. Piping bags (disposable or reusable) and a variety of piping tips are fundamental. You'll want small round tips (like PME 0, 1, 1.5, 2) for fine details and outlining, and larger tips (like Wilton #2 or #3) for flooding. Couplers are useful for easily changing tips without changing bags. Scribe tools or toothpicks are indispensable for manipulating wet icing, popping air bubbles, and nudging icing into corners.
Beyond piping essentials, consider investing in an airbrush kit designed for food use if you want to add gradients or soft shading. Stencils and stencil holders open up possibilities for repeating patterns. Edible markers allow for fine line work and personalization.
Small offset spatulas are great for spreading icing or lifting delicate cookies. Having a good set of food gel colors is also vital, as gel colors provide vibrant hues without adding excess liquid to your icing, helping maintain consistency. For 3D work, you might need strong royal icing and perhaps some structural supports like dowels (ensure they are food-safe or covered).
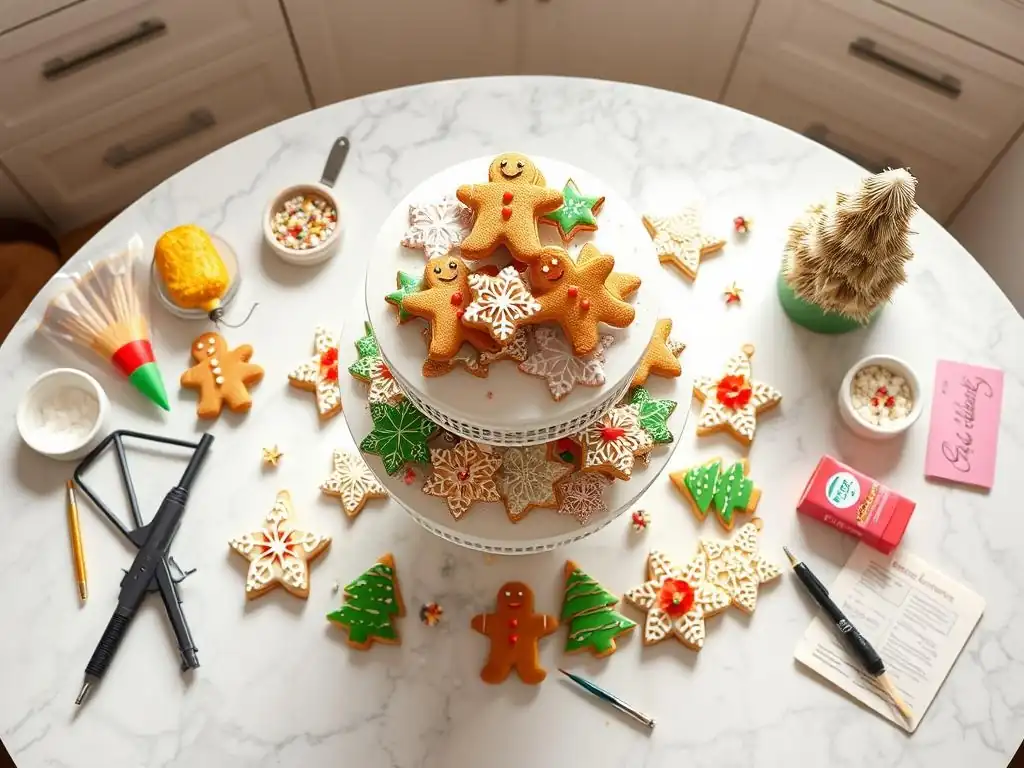
Once your canvas is ready and your tools are at hand, you can begin exploring the techniques that define advanced cookie decoration. These methods often require patience and practice but yield stunning results that are far beyond simple iced cookies. Each technique offers unique possibilities for creating intricate patterns, textures, and visual effects, adding depth and artistry to your holiday treats.
Focusing on one technique at a time initially can help you build confidence before combining them. For instance, practice wet-on-wet designs until you're comfortable with the timing, then move on to piping details. As you gain proficiency, you'll find it easier to integrate multiple techniques on a single cookie, creating complex and captivating designs that truly impress.
The Art of Wet-on-Wet Decorating: Creating Seamless Designs
Wet-on-wet decorating is a royal icing technique where you apply wet icing onto a base layer of wet icing. Because both layers are still wet, the colors spread and merge slightly, creating a smooth, seamless finish without raised lines. This technique is perfect for patterns like marbling, polka dots, swirls, and even simple floral motifs or feathered effects. The timing is crucial: you need to apply the design colors before the base layer begins to crust over, which usually happens within a few minutes depending on humidity and icing consistency.
To execute this, first flood your cookie with your base color using flood consistency icing. While it's still wet and glossy, immediately pipe or drop your design colors onto the wet base. Then, use a scribe tool or toothpick to gently pull through the wet colors, creating your desired pattern.
For example, to make hearts, drop dots of a contrasting color onto a wet base, then pull a scribe tool through the center of each dot. The speed at which you pull the tool and the consistency of your icing will affect the final look. Practice on parchment paper first to get a feel for the timing and movement.
Achieving Smooth Blends and Intricate Patterns with Wet-on-Wet
The key to smooth blends in wet-on-wet is using flood consistency icing for both the base and the design colors. The consistency should be thin enough to merge but thick enough to hold some definition before blending completely. For marbling, flood the base, then pipe lines or swirls of contrasting colors onto the wet base.
Quickly pull a scribe tool through the lines in one direction, then perhaps perpendicular to the first direction to create a marbled effect. For polka dots, simply drop dots onto the wet base; they will sink slightly and become flush with the surface as they dry.
Creating intricate patterns like cobwebs or feathered designs involves specific movements with the scribe tool. For a cobweb, flood a circle base, pipe concentric circles of a contrasting color onto the wet circle, then pull a scribe tool from the center outwards through the circles. For feathering, pipe parallel lines onto the wet base, then pull a scribe tool perpendicular to the lines, alternating direction for each pull. These techniques allow for beautiful, integrated designs that look sophisticated but are relatively quick once you get the hang of the timing.
Holiday Cookie Decorating Ideas Using the Wet-on-Wet Technique
Wet-on-wet is perfect for creating festive patterns like snowflakes, argyle, or even simple holiday lights. Imagine flooding a cookie white and dropping blue dots, then pulling a scribe tool to create a snowflake pattern. Or flood a cookie red and pipe green and white lines across it, then pull the scribe tool to create a tartan or argyle effect. For a more abstract look, flood a cookie with a dark color like navy or black, then drop or swirl white and silver onto it for a starry night sky effect.
Another popular wet-on-wet application for holiday cookie decorating tips is creating seamless backgrounds for characters or scenes. You could flood a cookie with a soft blue for a winter sky, then use wet-on-wet white to create soft, blended clouds. Or flood a cookie green and use darker green swirls for a festive wreath base. The possibilities are vast, limited only by your imagination and comfort with the technique's timing.
Piping Intricate Details: Lines, Scrolls, and Floral Designs
Once your base layer of royal icing is completely dry (this can take 6-12 hours or even overnight, depending on humidity), you can add piped details on top using a thicker, piping consistency icing. This is where small round tips truly shine, allowing you to create sharp lines, delicate scrolls, elegant borders, and intricate floral elements. Precision and control over pressure and movement are key to achieving clean, professional-looking piped details.
Start by practicing basic lines and dots on parchment paper. Hold the piping bag at a 45-degree angle, apply steady pressure, and lift the tip slightly away from the surface as the icing flows out. Guide the flow rather than dragging the tip. For dots, simply touch the tip to the surface, apply pressure until the dot is the desired size, and then stop pressure and lift straight up quickly. Mastering consistent pressure is vital for uniform lines and dots, which are the building blocks for more complex designs.
Mastering Piping Pressure for Delicate Holiday Cookie Designs
Consistent piping pressure is perhaps the most challenging aspect of piping intricate details. Too much pressure results in thick, uncontrolled lines; too little results in broken or uneven lines. The goal is to maintain just enough steady pressure to allow the icing to flow smoothly and evenly from the tip. Practice holding the bag comfortably and applying pressure from the top, using your dominant hand to squeeze and your other hand to guide the tip.
For very fine tips (like PME 0 or 1), even slight variations in pressure are noticeable. Work slowly and deliberately. If your hand shakes, try resting it on your other hand or the table for stability. Practice piping straight lines, curves, and squiggles repeatedly on parchment paper until you can produce consistent thickness. This focused practice, even for just 10-15 minutes a day, will significantly improve the quality of your piped holiday cookie decorating tips and designs.
Working with Multiple Colors in Piping: Creating Dimension and Visual Interest
Piping with multiple colors adds depth, contrast, and visual appeal to your holiday cookie decorating tips. You can achieve this by preparing separate piping bags for each color you plan to use for details. For example, on a white snowflake cookie, you might pipe fine blue lines for intricate ice patterns and add silver dots for sparkle. Or on a gingerbread man, pipe white icing for buttons and red for a scarf.
Using multiple colors allows you to layer details. Pipe the furthest background details first, let them crust slightly (5-10 minutes), then pipe the next layer of details. This helps prevent colors from bleeding into each other and creates a subtle dimensional effect. For instance, pipe branches of a wreath in green, let them set, then pipe red berries on top. The contrast in color and slight elevation of the berries adds visual interest.
Stenciling is a fantastic way to add intricate, repeatable patterns to your cookies quickly and cleanly. It's particularly useful for creating delicate lace patterns, geometric designs, or festive motifs like snowflakes, stars, or holiday greetings. You can stencil directly onto a dry royal icing surface using royal icing, edible dusts, or even airbrush colors. For best results, your cookie surface should be completely dry and very smooth.
You can purchase food-safe stencils specifically designed for cookies or cakes. Stencils come in various materials, from thin plastic sheets to thicker acrylic. A stencil holder or magnetic frame can be helpful to keep the stencil firmly in place over the cookie while you apply your medium. Ensure the stencil is clean and completely dry before use.
Choosing the Right Stencils for Holiday Cookie Decorating
When choosing stencils for holiday cookie decorating tips, consider the size and complexity of the pattern in relation to your cookie size. Large, bold patterns work well on bigger cookies, while intricate lace designs require a smooth surface and potentially a finer application method. Stencils with small, delicate details might be harder to work with if using thick royal icing, but excellent for airbrushing or dusts.
Look for stencils made from durable, food-safe materials. Acrylic stencils are often thicker and easier to handle than thin plastic sheets. Consider patterns that align with classic holiday themes – snowflakes, poinsettias, reindeer, or even simple geometric patterns like stripes or dots that you can layer. Having a few versatile background stencils (like argyle or damask) and some specific holiday motif stencils gives you a good range of options.
Applying Stencil Designs for a Professional Finish
Applying stencils requires a steady hand and the right technique for your chosen medium.
- Using Royal Icing: Place the stencil flat against the dry cookie surface. Hold it firmly or use a stencil holder. Apply a small amount of medium-consistency royal icing just above the stencil opening. Using a small offset spatula or scraper, spread the icing thinly and evenly across the stencil, ensuring all openings are filled. Scrape off any excess icing, then carefully lift the stencil straight up immediately.
- Using Edible Dusts: Place the stencil. Dip a dry brush (a fluffy food-safe brush works well) into edible lustre dust or petal dust. Tap off excess. Gently brush or pounce the dust over the stencil openings onto the dry icing surface. Lift the stencil carefully.
- Using Airbrush Colors: Place the stencil. Hold the airbrush about 4-6 inches away. Lightly spray edible airbrush color over the stencil openings in thin, even coats until the desired intensity is reached. Lift the stencil carefully.
For all methods, practice on a spare cookie or parchment paper first. Clean your stencil immediately after each use, especially when using royal icing, to prevent drying and clogging.
Airbrushing allows you to apply thin, even layers of edible color, creating smooth gradients, soft shading, and realistic dimension that are difficult to achieve with brushing or stenciling alone. It's an excellent tool for adding backgrounds, highlights, shadows, and overall depth to your holiday cookie decorating tips. While it requires an initial investment in equipment, it opens up a new level of artistic possibility.
An airbrush kit for cookies typically includes an air compressor, an airbrush gun, and food-safe airbrush colors. The compressor provides a steady stream of air, which atomizes the liquid color in the airbrush gun, allowing it to be sprayed onto the surface. Practice is essential to control the flow of color and air pressure. Start with simple solid colors and gradients before attempting more complex techniques.
Selecting the Right Airbrush and Colors for Cookie Decorating
When choosing an airbrush kit for cookie decorating, look for one specifically marketed for food use. A small, portable compressor is usually sufficient for home use. The airbrush gun itself can be single-action (air and color flow are controlled by one trigger) or dual-action (trigger controls both air and color flow independently, offering more control). A dual-action airbrush provides greater flexibility for detailed work and shading.
Edible airbrush colors are specially formulated liquids designed to pass through the airbrush gun without clogging. They come in a wide range of vibrant hues. It's often best to use colors specifically designed for airbrushing rather than trying to dilute gel colors yourself, as improper dilution can clog the gun. Start with a basic set of primary colors (red, blue, yellow) plus black, white, and perhaps gold or silver for festive effects, and learn to mix custom shades.
Creating Realistic Shadows and Highlights with Airbrushing
Airbrushing is superb for adding realistic shadows and highlights, giving your cookie designs a sense of depth and realism. To create a shadow, use a slightly darker shade of the base color or a very diluted black or grey. Hold the airbrush at an angle and lightly spray along the edge or under an element (like a piped leaf or a 3D element) where a shadow would naturally fall. Use thin layers and build up the color gradually.
For highlights, use a lighter shade or white. Spray lightly on the areas where light would hit, such as the top edge of a detail or the center of a rounded shape. You can also use edible lustre dust applied with a brush after airbrushing for more intense highlights. Practice observing how light interacts with objects to understand where to place shadows and highlights for the most convincing effect. This technique can transform a flat design into something truly dimensional, adding significant polish to your holiday cookie decorating tips.
Using Edible Markers for Fine Details and Personalization
Edible markers are like food-safe pens, allowing you to draw, write, and add very fine details directly onto a dry royal icing surface. They are excellent for adding small features like eyes, mouths, stitches, text, or outlining elements that are too delicate for piping. They are also perfect for personalizing cookies with names or dates. Ensure your royal icing is completely dry and hard before using edible markers, as they can smudge or damage wet or soft icing.
Edible markers come in various tip sizes, from fine points for intricate lines to brush tips for broader strokes or filling in small areas. They are available in a wide array of colors. Store them properly (often tip down) and cap them tightly when not in use to prevent drying out. Test the marker on a piece of parchment paper or a spare cookie corner before drawing on your final piece to ensure the color flow is smooth and the tip is clean.
Choosing Food-Safe Markers for Holiday Cookie Decorations
It is absolutely essential to use only food-safe markers specifically designed for decorating food. Do not use regular markers, even if they are labeled non-toxic, as they are not intended for consumption. Look for markers clearly labeled as "edible markers" or "food-grade markers" from reputable cake and cookie decorating supply companies.
Edible markers use food coloring ink. Some brands have more vibrant colors or smoother ink flow than others. Consider purchasing a set with a variety of colors and tip sizes to give you flexibility. Fine-tip markers are best for intricate work and writing, while brush-tip markers are useful for coloring in small areas or creating thicker lines.
Adding Personalized Messages and Intricate Designs
Edible markers are ideal for adding personalized touches to your holiday cookie decorating tips. You can write names on stocking-shaped cookies, add "Merry Christmas" or "Happy Holidays" to plaque cookies, or draw small, delicate patterns like snowflakes or stars that would be challenging with icing.
For intricate designs, you can even use a projector to trace a design onto the dry icing with a fine-tip marker, or gently etch the design onto the surface first and then trace with the marker. Practice your writing or drawing on paper before attempting it on the cookie. The key is to use a light touch and avoid pressing too hard, which can damage the icing surface. Edible markers dry quickly, so work steadily but without rushing.

Once you've mastered the foundational advanced techniques, you can explore ways to add even more complexity, texture, and sparkle to your holiday cookie decorating tips. These methods involve building upon flat designs to create three-dimensional elements, adding shimmer, or incorporating other edible mediums like fondant.
These techniques can be combined with piping, stenciling, and airbrushing to create truly unique and impressive cookies. They often require a bit more time and patience but the results can be breathtaking, turning simple cookies into miniature sculptures or dazzling edible jewels.
Adding 3D elements literally makes your cookies pop! This can range from simple piped details that stand up off the surface to constructing multi-layered cookie structures or adding sculptural elements made from icing or fondant. Creating dimension adds visual interest and makes your cookies feel more substantial and artistic.
One way to add 3D texture is by piping thick royal icing in patterns like swirls, dots, or basketweave, allowing it to dry completely. Another method is to pipe a design, let it crust slightly, and then pipe over it again to build height. For more significant 3D elements, you might pipe shapes onto parchment paper, let them dry completely, and then attach them to the cookie surface.
Constructing Cookie Structures
For truly advanced 3D holiday cookie decorating tips, you can construct small structures using baked cookie pieces. Think miniature gingerbread houses on a cookie base, small fences, or standing trees. This requires baking specific cookie shapes that fit together. Using a sturdy cookie recipe (like gingerbread that holds its shape well) is crucial.
You'll need templates for your cookie pieces, ensuring they fit together accurately. Bake the pieces and let them cool completely. Then, use very thick, strong royal icing (often called "construction consistency") as glue to assemble the pieces. Pipe the icing along the edges to be joined and hold them together until the icing sets enough to support the weight (this can take several minutes per joint). Allow the assembled structure to dry completely (several hours or overnight) before decorating the surfaces.
Using Royal Icing as Glue for 3D Cookie Elements
Thick royal icing is an excellent edible adhesive for attaching dried royal icing transfers, cookie pieces, candies, or other edible decorations to your cookie surface. The key is using a very thick consistency – thicker than piping consistency, almost like peanut butter. This ensures it sets quickly and creates a strong bond.
Pipe a small amount of this thick icing onto the back of the element you want to attach. Press the element gently onto the cookie surface in the desired position. Hold it in place for a few seconds until it feels stable. For heavier elements or structures, you might need to use props (like small bowls or cans) to support the pieces while the icing dries completely, which can take several hours. Ensure the cookie surface you're attaching to is also completely dry.
Adding Lustre Dust and Edible Glitter for a Festive Sparkle
Nothing says "holiday" like sparkle! Edible lustre dusts and glitters are perfect for adding shimmer, shine, and a touch of magic to your holiday cookie decorating tips. Lustre dusts are fine powders that create a pearlescent or metallic sheen, while edible glitters provide actual sparkle and texture.
These products are applied after the royal icing has completely dried. You can brush dry dust onto the surface for a subtle shimmer, mix it with a clear alcohol (like vodka or lemon extract, which evaporates quickly) or clear edible spirits (like edible glaze or clear vanilla extract) to create a paint for a more intense metallic effect, or simply sprinkle glitter onto wet icing or icing dots for adhesion.
Choosing the Right Lustre Dust and Glitter for Holiday Cookies
Ensure you are using products specifically labeled as edible lustre dust, petal dust, or glitter. Craft glitters are not food safe. Edible glitters are typically made from gum arabic, maltodextrin, or other food-grade ingredients and are regulated for consumption.
Lustre dusts come in many colors, including gold, silver, pearl, and various metallic and iridescent shades. Petal dusts are matte and used for coloring, but some have a slight shimmer. For cookies, lustre dusts provide the most noticeable shine. Edible glitters come in different particle sizes; fine glitters give a subtle shimmer, while larger flakes provide more obvious sparkle. Consider the effect you want – a subtle sheen on a snowflake, or full-on sparkle on a Christmas ornament cookie.
Applying Lustre Dust and Glitter for a Subtle or Bold Effect
For a subtle shimmer using lustre dust, dip a soft, dry food-safe brush into the dust, tap off the excess, and gently brush it over the completely dry royal icing surface. The dust will adhere to the slightly porous surface, leaving a soft sheen. This works beautifully on white or light-colored icing.
For a bolder, painted metallic effect, mix a small amount of lustre dust with a few drops of clear alcohol or edible spirit to create a paint-like consistency. Use a fine brush to paint this mixture onto specific areas of your dry cookie. The liquid evaporates, leaving the concentrated dust behind. For glitter, you can sprinkle it directly onto wet royal icing areas (like dots or a flooded section before it dries), or use a little edible glue or clear piping gel to adhere it to dry icing.
Incorporating Edible Images and Fondant Accents
Edible images and fondant offer alternative ways to add detail, color, and smooth surfaces to your holiday cookie decorating tips, sometimes with less effort than intricate piping. Edible images are printed pictures on edible paper (like wafer paper or frosting sheets) using food-safe ink. Fondant is a pliable sugar paste that can be rolled, cut, and shaped.
Using edible images allows you to place complex pictures, logos, or photographs directly onto a cookie. Fondant provides a smooth, matte surface that is different from royal icing and can be used to create simple shapes, cutouts, or sculpted accents.
Printing and Applying Edible Images to Holiday Cookies
Edible images are printed using special printers with edible ink cartridges onto edible paper. You can purchase custom-printed images or buy edible paper and ink to print your own if you have the necessary equipment. Frosting sheets (made from sugar) are usually thicker and produce more vibrant colors than wafer paper (made from potato starch and water).
To apply an edible image to a cookie, you typically need a thin layer of wet royal icing, piping gel, or edible glue on the cookie surface. Apply the edible image smoothly, gently pressing it down to remove any air bubbles. For frosting sheets, peel off the plastic backing before applying. Wafer paper can be slightly transparent; applying it over white icing helps colors show up better. Trim the edible image to fit your cookie shape before applying.
Creating Simple Fondant Accents for Added Detail
Fondant can be rolled out like pie dough and cut into shapes using cookie cutters or a knife. It provides a smooth, uniform color and texture. For holiday cookie decorating tips, you could cut out simple shapes like stars, circles, or even miniature gingerbread men from colored fondant and attach them to your royal-iced cookies using a tiny bit of water or edible glue.
You can also emboss fondant with patterns or use molds to create small decorative elements like leaves, berries, or bows. While fondant doesn't dry as hard as royal icing, it becomes firm enough to handle. It offers a different aesthetic – softer and more matte compared to the often glossy finish of royal icing. Knead the fondant until pliable, roll it to about 1/8 inch thickness, cut your shapes, and attach.
With advanced techniques at your disposal, the possibilities for holiday cookie decorating tips are virtually endless. Drawing inspiration from classic holiday themes, winter scenery, or even modern art can help spark your creativity. Here are a few ideas to get you started, showcasing how combining techniques can lead to spectacular results.
Think about the overall theme or feeling you want to evoke – elegant and sophisticated, whimsical and fun, or perhaps traditional and cozy. Planning your designs in advance can help you select the right colors, techniques, and tools needed for your batch of holiday cookies.
For an elegant look, focus on refined color palettes like metallics (gold, silver, bronze), deep jewel tones (emerald, sapphire, ruby), or classic white and ivory with touches of shimmer. Techniques like stenciling delicate lace patterns onto a pearlized background, piping intricate filigree designs with fine tips, or using subtle airbrush shading to add depth to snowflakes or ornaments work beautifully.
Consider geometric patterns stenciled in metallic dust, or hand-piped details resembling embroidery or fine china patterns. Use lustre dust paints to add metallic accents to piped elements like leaves or scrolls. Royal icing transfers of small, intricate shapes like crowns or monograms can also add a touch of sophistication. A limited color palette and precise execution are key to an elegant aesthetic.
A winter wonderland theme allows for playful designs inspired by snow, ice, arctic animals, and cozy winter scenes. Think polar bears, penguins, snowy trees, ice skates, and lots of snowflakes. Techniques like wet-on-wet for snowy backgrounds or swirling ice effects, airbrushing for soft, snowy gradients, and piping fluffy royal icing for snow drifts or fur are perfect.
Use white and various shades of blue and silver. Edible glitter can be used liberally to mimic sparkling snow or ice. Pipe whimsical details like tiny scarves on gingerbread men or add painted edible images of winter scenes. Stencil snowflake patterns, or use edible markers to draw intricate snowflake details on a blue background. Task lists for creating a set of winter wonderland cookies might include:
- [ ] Bake and cool sugar cookies (shapes: snowflakes, trees, circles, gingerbread men).
- [ ] Prepare white, light blue, and silver royal icing (various consistencies).
- [ ] Flood base layers (white for snow, light blue for sky).
- [ ] Use wet-on-wet for snowflake patterns or swirly ice effects.
- [ ] Airbrush soft blue gradients on sky cookies.
- [ ] Pipe fluffy snow drifts along the bottom of tree or gingerbread man cookies.
- [ ] Pipe intricate snowflake details on dry white cookies using fine tips.
- [ ] Add edible glitter to wet snow areas or dot with edible glue.
- [ ] Use edible markers for small details like eyes or buttons.
To make your cookies truly unique, think outside the traditional holiday box. Consider themes like celestial holidays (stars, moons, galaxies), specific holiday movies or characters, or even incorporating non-traditional color schemes like bright neons or pastels mixed with metallics.
Combine techniques in unexpected ways. Could you airbrush a galaxy background and then pipe intricate celestial constellations? Could you use stencils to create a modern geometric pattern and then add 3D royal icing elements on top? Experiment with painting techniques using edible colors or incorporating edible moss or sugar crystals for texture. Don't be afraid to mix styles – maybe a rustic gingerbread texture with elegant piped details, or a smooth royal iced surface with bold, graphic airbrushed elements. Creativity is key!

Even with advanced techniques, you might encounter common issues. Knowing how to troubleshoot problems like bleeding colors, air bubbles, or shaky lines is part of the process of mastering advanced holiday cookie decorating tips. Patience and understanding the cause of the problem will help you fix it or prevent it from happening again.
Keep a few spare cookies or pieces of parchment paper handy for testing or practicing fixes. Sometimes, the best solution is to scrape off the wet icing and start that section over. Don't get discouraged; every experienced cookie decorator has faced these challenges!
Preventing Royal Icing Bleed: Tips and Tricks
Color bleed occurs when colors, especially dark or vibrant ones, seep into adjacent colors or the base icing layer. This often happens if the underlying icing layer isn't completely dry, if the icing consistency is too thin, or if there's too much liquid coloring used. High humidity can also exacerbate bleeding.
To prevent bleed, ensure each layer of royal icing is completely dry before adding adjacent or layered colors. This can take 6-12 hours, sometimes longer in humid conditions. Use gel or powder food colors instead of liquid colors, as they are more concentrated and add less moisture. If using very dark colors (like deep red or black), consider using a "no-bleed red" or "no-bleed black" formula, or try coloring your icing a day in advance – sometimes colors stabilize over time. Avoid placing cookies in airtight containers until they are fully dry, as condensation can cause colors to bleed.
Dealing with Air Bubbles in Royal Icing
Air bubbles are tiny pockets of air trapped in the royal icing. When these bubbles pop on the cookie surface, they leave unsightly craters. They often occur when mixing the icing too vigorously or when the icing has been sitting for a while.
To minimize air bubbles, mix your royal icing on a low speed if using a stand mixer after the ingredients are combined. Once mixed, cover the bowl with plastic wrap pressed directly onto the surface of the icing to prevent a crust from forming, and let it sit for 10-15 minutes before coloring and using – this allows some bubbles to rise.
After putting icing into piping bags, gently massage the bag to bring bubbles to the top, then snip off the very tip to release them. When flooding a cookie, use a scribe tool or toothpick to gently swirl the icing and coax bubbles to the surface, then pop them.
Achieving Sharp Lines and Clean Details
Shaky lines, inconsistent thickness, or blurred details can detract from the polished look of advanced holiday cookie decorating tips. This is often a matter of piping technique, icing consistency, and practice.
Ensure your piping consistency is correct – thick enough to hold a line but not so thick that it's difficult to pipe smoothly. Use the correct tip size for the detail you want to achieve; a tip that's too large will make fine lines impossible. Practice piping on parchment paper to build muscle memory and control over pressure and movement.
When piping lines, lift the tip slightly away from the surface and let the icing fall into place, guiding the flow. For sharp corners or end points, stop pressure and quickly flick the tip away. Ensure the cookie surface is clean and dry before piping details on top.
After spending hours perfecting your advanced holiday cookie decorating tips, proper storage is essential to keep them fresh, prevent breakage, and protect your intricate designs. Storing them incorrectly can lead to smudging, cracking, or the cookies becoming stale.
Allow your decorated cookies to dry completely before stacking or storing them in layers. Royal icing typically needs 12-24 hours to dry rock hard, depending on thickness and humidity. Once fully dry, they are quite durable, but still require careful handling.
Proper Storage Techniques for Maintaining Decoration Integrity
Store completely dry royal-iced cookies in airtight containers at room temperature. Layer them gently between sheets of parchment paper or wax paper to prevent them from sticking to each other or the decorations from being scratched. Avoid storing them in the refrigerator, as condensation can form and damage the royal icing.
Cookies stored this way can stay fresh for 2-3 weeks, though they are best enjoyed within the first week or two. If you need to store them for longer, you can freeze fully decorated and dried cookies. Place them in a single layer in an airtight container, or wrap stacks securely in plastic wrap and then place in a container, again with parchment between layers. Thaw frozen cookies in their container at room temperature to prevent condensation.
Beautifully decorated holiday cookie decorating tips make wonderful gifts. Packaging them thoughtfully protects your work and enhances the presentation. Once cookies are completely dry, you can package them individually or in small groups.
Individual cellophane bags tied with festive ribbon are simple and effective, showcasing each cookie. For gifting multiple cookies, use decorative boxes or tins, layering cookies carefully with parchment or tissue paper in between. For cookies with delicate 3D elements, consider packaging them individually in small boxes with some cushioning material (like shredded paper or tissue) to prevent movement. Ensure the packaging is sturdy enough to protect the cookies during transport. Adding a small tag explaining the flavors or wishing happy holidays adds a personal touch.
Mastering advanced holiday cookie decorating tips is a rewarding process that transforms simple cookies into stunning edible art. From achieving the perfect royal icing consistency and utilizing specialized tools to executing techniques like wet-on-wet, intricate piping, stenciling, and airbrushing, each step builds your skill and confidence. Adding dimension with 3D elements, sparkle with lustre dust, or detail with edible markers and fondant further elevates your creations.
While these techniques require practice and patience, the joy of creating beautiful, delicious cookies to share during the holiday season is immense. Don't be afraid to experiment, combine techniques, and develop your own unique style. With these advanced holiday cookie decorating tips, you're well-equipped to impress everyone on your holiday list and make this festive season truly spectacular, one cookie at a time.
Frequently Asked Questions
Advanced techniques include using royal icing transfers to create intricate designs, employing airbrushing for subtle color gradients, and mastering the art of wet-on-wet icing.
Focus on creating a smooth, consistent base layer of icing, using high-quality ingredients for vibrant colors, and practicing your piping techniques regularly.
Key tools include piping bags and tips of various sizes, a scribe tool for smoothing icing, and an airbrush system with food-safe colors for more intricate designs.
Look to social media platforms like Pinterest and Instagram, baking blogs (including BakeWithEase, of course!), and cookie decorating books for creative ideas and tutorials.
Chilling the dough before cutting out the shapes is crucial. Also, ensure your oven is at the correct temperature and avoid overmixing the dough.
Final Reflection: The Sweet Art of Holiday Connection
The intricate artistry of holiday cookie decorating isn't just about creating visually stunning treats; it's about fostering connection and celebrating the spirit of the season. These advanced techniques, explored throughout this article, offer a pathway to elevate your holiday baking from simple enjoyment to a meaningful expression of creativity and care. The meticulous detail, the careful blending of colors, and the thoughtful design choices all contribute to a final product that transcends mere confectionery.
The enduring appeal of holiday baking lies in its ability to bring people together. The act of creating these beautiful cookies, whether individually or as a family activity, fosters a sense of shared accomplishment and joy. The best things in life are the people we love, the places we've been, and the memories we've made along the way.
This quote perfectly encapsulates the spirit of holiday baking; it's not just about the cookies themselves, but the memories and connections they create. The techniques shared here are tools to enhance that experience, allowing you to craft truly memorable treats that reflect your personal touch and the warmth of the season.
This holiday season, I encourage you to go beyond the simple sprinkles and embrace the artistry within. Try one of the advanced techniques discussed, experiment with new flavors and designs, and most importantly, share your creations with those you cherish. Let the sweet scent of baking fill your home, and let the beauty of your cookies be a testament to the love and care you put into them. The joy you experience in the process, and the joy you share with others, will be the sweetest reward of all.
Thanks for taking the time to explore these advanced holiday cookie decorating techniques! We hope you've found inspiration to elevate your baking this season. Ready to put your new skills to the test?
- Master a new decorating technique: Choose one of the techniques discussed (like royal icing flooding or creating intricate piping designs) and practice it on a batch of cookies. See what incredible results you can achieve!
- Share your creations: Post photos of your beautifully decorated cookies on social media using #BakeWithEaseHoliday. Let's inspire each other!
- Challenge a friend to a cookie decorating duel: Invite a friend (or family member) to try out these techniques and see who can create the most stunning cookies. Friendly competition makes learning even more fun!
What unique design will you create that truly showcases your newfound cookie decorating expertise?