
Effectively Use Edible Glitter and Dusts for Sparkle

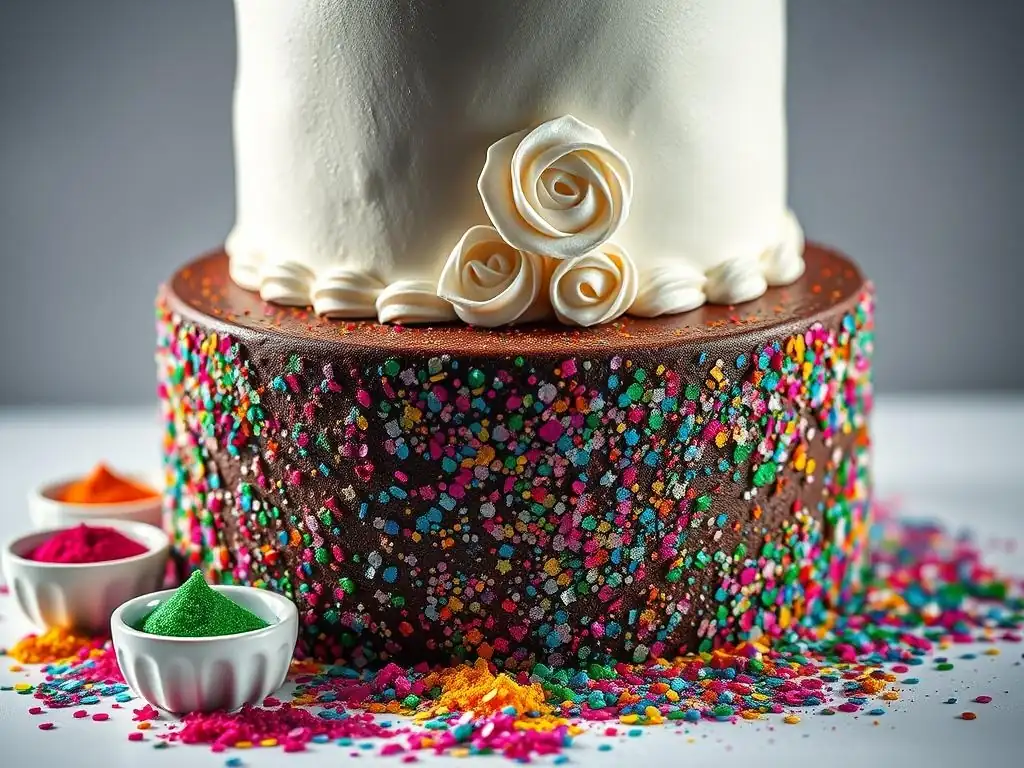
Welcome to BakeWithEase, your guide to unlocking baking brilliance! Ever wondered how to achieve that dazzling, professional look on your cakes? This time, we're diving into the shimmering world of edible glitter cake decorating, revealing the secrets to using these delightful dusts and glitters effectively. Prepare to elevate your pastry creations from simple to spectacular! Intrigued? Read on to discover everything you need to know.
- Effectively Use Edible Glitter and Dusts for Sparkle: A BakeWithEase Guide
- Introduction to Edible Glitter and Dusts for Cake Decorating
- Choosing the Right Edible Glitter and Dust for Your Project
- Essential Tools and Supplies for Applying Edible Glitter and Dusts
- Step-by-Step Guide: Applying Edible Glitter and Dusts to Cookies and Cakes
- Creative Cake Decorating Ideas with Edible Glitter and Dusts
- Troubleshooting Common Issues with Edible Glitter and Dusts
- Creative Cake Decorating Ideas with Edible Glitter and Dusts
- Troubleshooting Common Issues with Edible Glitter and Dusts
- Edible Glitter Cake Decorating: Safety and Best Practices
- Advanced Techniques: Mastering Edible Glitter and Dust Effects
- Conclusion: Elevating Your Baking with Edible Glitter and Dusts
-
Frequently Asked Questions
- What is the difference between edible glitter and edible dust?
- How do I apply edible glitter to a cake without making a mess?
- Are all glitters and dusts labeled "edible" safe to consume?
- Can I mix edible glitter into my cake batter or frosting?
- How do I store edible glitter and dust to maintain their quality?
- Final Reflection: The Enduring Sparkle of Edible Glitter
- Unleash Your Inner Sparkle: Get Baking!
Effectively Use Edible Glitter and Dusts for Sparkle: A BakeWithEase Guide
Introduction to Edible Glitter and Dusts for Cake Decorating
What are Edible Glitters and Dusts? A Beginner's Guide
Edible glitters and dusts are special decorative products designed specifically for use on food items like cakes, cookies, cupcakes, and pastries. Unlike craft glitter, which is made from plastic or metal and is not safe for consumption, edible versions are formulated from food-grade ingredients such as sugar, maltodextrin, cornstarch, and food-safe colorants. These ingredients are processed into very fine particles or flakes that catch and reflect light, adding a touch of sparkle and glamour to your baked creations. They come in a dazzling array of colors and finishes, from subtle shimmer to intense metallic shine.
Understanding the composition is key to safe and effective use in edible glitter cake decorating. For instance, many edible glitters are made with a base of gum arabic or maltodextrin, which allows them to adhere well to moist surfaces and dissolve easily in the mouth. Edible dusts, on the other hand, are typically finer powders, often made from food-grade mica-based pearlescent pigments or concentrated food coloring, intended for brushing onto surfaces to create color and shimmer effects. Knowing the basic makeup helps determine the best application method and desired visual outcome for your baking projects.
Why Use Edible Glitter and Dusts on Baked Goods?
Using edible glitter and dusts elevates baked goods from simple treats to show-stopping centerpieces. They provide an easy and effective way to add visual interest, luxury, and a festive touch that is difficult to achieve with traditional icings and sprinkles alone. Whether you're aiming for a delicate shimmer on a wedding cake, bold sparkle on birthday cupcakes, or realistic depth on sugar cookie flowers, these decorative elements offer immense creative potential. They are particularly popular for holiday baking, special occasions, and themed parties where a bit of extra sparkle is desired.
Beyond aesthetics, edible glitters and dusts can transform the perceived value of your baked goods. A simple cookie dusted with pearl dust can look significantly more sophisticated than a plain one. In the realm of edible glitter cake decorating, a touch of sparkle can turn a standard tiered cake into a dazzling focal point. For example, a bakery might charge an estimated 15-25% more for custom cakes featuring intricate edible glitter or dust applications compared to those without, reflecting the enhanced visual appeal and specialized technique involved. They offer a relatively low-cost way to achieve high-impact decoration.
Edible Glitter Cake Decorating: Adding Shimmer to Your Creations
Edible glitter cake decorating is a popular and versatile technique that allows bakers of all levels to infuse sparkle and shine into their projects. From covering entire tiers in shimmering splendor to adding subtle accents on buttercream swirls or fondant details, the possibilities are nearly endless. This technique is particularly effective for celebratory cakes like birthdays, anniversaries, and New Year's Eve parties, where a festive atmosphere is desired.
Applying edible glitter to cakes can be done in multiple ways, depending on the type of glitter and the desired effect. Fine glitters can be dusted on with a brush or shaker, providing a uniform shimmer, while larger flakes offer more dramatic, scattered sparkle. Combining different colors and sizes can create unique textures and effects, such as a starry night sky on a galaxy cake or glittering scales on a fantasy creature cake. Mastering edible glitter cake decorating opens up a new dimension in your baking artistry.
Choosing the Right Edible Glitter and Dust for Your Project
Identifying Food-Grade Edible Glitter vs. Non-Toxic Decorative Glitter
It is absolutely crucial to distinguish between food-grade edible glitter and non-toxic decorative glitter, sometimes labeled as "non-toxic" or "for decorative use only." While non-toxic glitter might not be immediately harmful if accidentally ingested in tiny amounts, it is not processed or regulated for consumption and can contain ingredients that are not meant to be eaten. Food-grade edible glitter, on the other hand, is manufactured under strict food safety standards using ingredients deemed safe by regulatory bodies like the FDA in the United States or EFSA in Europe.
Always check the labeling carefully. Look for clear indications like "edible," "food-grade," or "for consumption." The ingredients list should primarily contain items like sugar, maltodextrin, cornstarch, gum arabic, mica-based pearlescent pigments (specifically approved for food), and food colorings. If a product is labeled only "non-toxic" or "for decorative purposes," assume it is not safe to eat and should only be used on decorations that will be removed from the food before serving, such as display pieces or elements on a cake board that won't be consumed. Prioritizing genuine edible glitter is paramount for safe cake decorating.
Exploring Different Types of Edible Dusts: Luster, Pearl, and Petal Dusts
Edible dusts come in several varieties, each offering a distinct finish and application method. Luster dusts are typically the most common, providing a metallic or pearlescent sheen. They are often used dry with a brush to add shimmer to fondant, gum paste flowers, or chocolate, or mixed with a clear extract (like vodka or lemon extract) to create edible paint for bolder metallic effects. A small jar (approx. 3-5 grams) of luster dust can often cover several dozen small decorations or add significant shimmer to a medium-sized cake.
Pearl dusts are finer than luster dusts and provide a softer, shimmery, non-metallic finish, resembling a pearly or iridescent glow. They are excellent for adding a subtle highlight to edible flowers, dusting cookies for a gentle sparkle, or mixing into clear glazes. Petal dusts are highly concentrated, matte (non-shimmering) powders primarily used for coloring edible flowers and creating realistic shading and depth.
While not shimmery themselves, they are often paired with luster or pearl dusts to add dimension and highlight specific areas, creating incredibly lifelike sugar art. Understanding these types helps you choose the right dust for your specific edible glitter cake decorating needs.
Selecting the Perfect Color and Finish for Your Edible Glitter Cake Decorations
Choosing the right color and finish of edible glitter or dust is essential for achieving the desired aesthetic for your baked goods. Consider the overall theme and color palette of your cake or cookies. For elegant designs like wedding cakes, subtle pearl dusts or clear iridescent glitters add a touch of sophistication without being overpowering. For fun, vibrant creations like birthday cakes or cupcakes, bold colors and larger glitter flakes can create a festive and playful look.
Think about the surface you'll be applying the glitter or dust to. Lighter glitters show up best on darker backgrounds, while darker, metallic dusts can pop on lighter surfaces. The finish – whether it's a fine shimmer, bold sparkle, or intense metallic – should complement the style of your decoration. For realistic sugar flowers, petal dusts for color and shading, combined with a touch of pearl or luster dust on the edges, create depth and realism. When planning your edible glitter cake decorating project, visualizing the final look will guide your selection process.
Essential Tools and Supplies for Applying Edible Glitter and Dusts
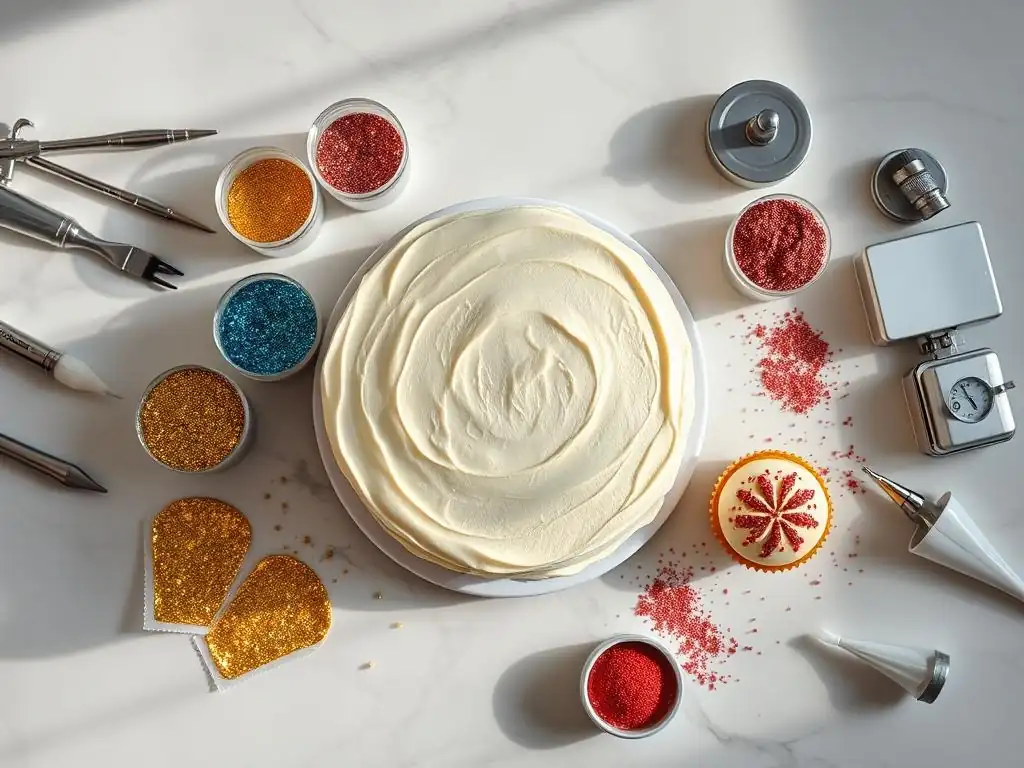
Recommended Brushes for Precise Dust Application
Applying edible dusts requires the right tools for precision and even coverage. Soft, food-safe brushes are indispensable. Small, fine-tipped brushes (like artist brushes specifically designated for food use) are perfect for detailed work, such as highlighting veins on edible leaves or adding shimmer to small fondant pieces. Larger, fluffier brushes (like blush brushes or dedicated dusting brushes) are ideal for covering larger areas with a uniform layer of dust or glitter, such as dusting an entire cake tier.
Using separate brushes for different colors is highly recommended to prevent color contamination. You might need a variety of brush shapes and sizes: a flat brush for broad strokes, a round brush for detailed dusting, and a fan brush for a light, scattered application of glitter. Ensure the brushes are clean and dry before use. Dedicate a set of brushes solely for food decoration to avoid any residue from other materials. Proper tools significantly improve the outcome of your edible glitter cake decorating efforts.
Using Stencils for Edible Glitter Cake Designs
Stencils are fantastic tools for creating intricate and repeatable designs with edible glitter and dusts on cakes and cookies. They allow you to transfer patterns, messages, or images onto your baked goods with relative ease. Simply place the stencil firmly against the surface of your cake (which should ideally be smooth and firm, like fondant or chilled buttercream) or cookie.
Once the stencil is in place, you can apply edible dust or fine glitter over the openings using a soft brush, gently tapping or swirling to fill the design. For sharper lines, use a slightly damp brush with dust mixed into a paint. Carefully lift the stencil straight up to reveal the design. Stencils are particularly useful for creating patterned borders, geometric shapes, or detailed images in edible glitter cake decorating, ensuring consistency across multiple items.
Safe Handling and Storage of Edible Glitter and Dusts
Proper handling and storage are crucial for maintaining the quality and safety of your edible glitters and dusts. Always handle them in a clean, dry environment. Avoid introducing moisture into the containers, as this can cause clumping or spoilage. Use clean, dry tools for application. Wash your hands thoroughly before handling these products.
Store edible glitters and dusts in their original, airtight containers in a cool, dry place, away from direct sunlight and humidity. Proper storage helps preserve their color, texture, and shelf life. While they often have a long shelf life due to their dry nature, checking expiration dates (if provided) is a good practice. Keeping them sealed also prevents contamination from other ingredients or airborne particles. Safe storage ensures your edible glitter cake decorating supplies are ready and safe to use whenever inspiration strikes.
Preparing Your Baked Goods for Edible Glitter Application
Proper preparation of your baked goods is the first step to successful edible glitter application. For cookies, ensure they are completely cooled after baking. If applying glitter to royal icing, wait until the icing is slightly tacky for the glitter to adhere, or apply immediately after flooding for a more embedded look. For fondant-covered cakes or cookies, the surface should be smooth and firm. A light mist of edible adhesive spray or clear alcohol (like vodka) can help glitter adhere to dry surfaces.
For buttercream cakes, glitter application is best done when the buttercream has crusted slightly or is chilled firm. You can gently press glitter onto the surface or use a dry brush to dust it on. Ensure your surface is free of crumbs or excess flour, as these will interfere with even glitter distribution. A well-prepared surface is key to achieving a professional look in your edible glitter cake decorating.
Achieving uniform edible glitter coverage on cookies can be done through several techniques. One simple method is the "shake and bake" approach: place the cookie in a container with edible glitter, close the lid, and gently shake to coat. This works well for covering the entire cookie surface. For royal iced cookies, apply glitter while the icing is still wet or slightly tacky.
Alternatively, you can use a fine-mesh sieve or shaker to dust glitter evenly over the cookie. For specific areas, use a small, dry brush to apply the glitter precisely where desired. To make glitter stick to dry areas, paint the area with a thin layer of edible glue or clear extract before dusting. For instance, to cover 2 dozen sugar cookies with a light dusting of fine glitter, you might use approximately 2-3 grams of product, applied with a shaker for speed and consistency. These techniques ensure your edible glitter cake decorating extends beautifully to smaller treats like cookies.
Applying Edible Dusts to Cakes: Creating Realistic Floral Effects
Applying edible dusts to cakes, especially for realistic floral effects on gum paste or fondant flowers, requires layering and blending. Start with a base color using petal dust applied dry with a soft brush, focusing on the deeper parts of the petals or leaves. Build up color gradually, adding darker shades in the crevices and lighter shades on the edges.
To add shimmer and realism, lightly dust the tips or centers of the petals with pearl or luster dust using a smaller brush. For veins on leaves, use a fine brush with a slightly darker dust. For example, creating a realistic red rose might involve dusting the base of the petals with a dark red petal dust, blending outwards with a lighter red, then adding a touch of green dust at the base, and finally highlighting the edges with a subtle red luster dust. This layered approach is fundamental to detailed edible glitter cake decorating involving dusts.
How to Fix Mistakes When Decorating with Edible Glitter and Dusts
Mistakes happen, but they are often fixable when working with edible glitter and dusts. If you apply too much dust in one area, you can sometimes gently brush away the excess with a clean, dry brush. For dusts applied wet (as paint), if the mistake is small and the paint is still wet, you might be able to gently blot it with a clean paper towel. If it has dried, you may need to carefully scrape off the affected area on fondant or gum paste and re-apply a thin layer before dusting again.
For misplaced glitter, if on a firm surface like fondant, you can often use a clean, dry brush or a small piece of clean modeling clay or fondant to gently lift and dab away stray particles. On buttercream, it's trickier; sometimes, carefully scraping off the affected buttercream and smoothing it over is the best option. Practice and patience are key, and minor imperfections can often be blended into the overall design, especially in edible glitter cake decorating where sparkle can distract from small flaws.
Creative Cake Decorating Ideas with Edible Glitter and Dusts
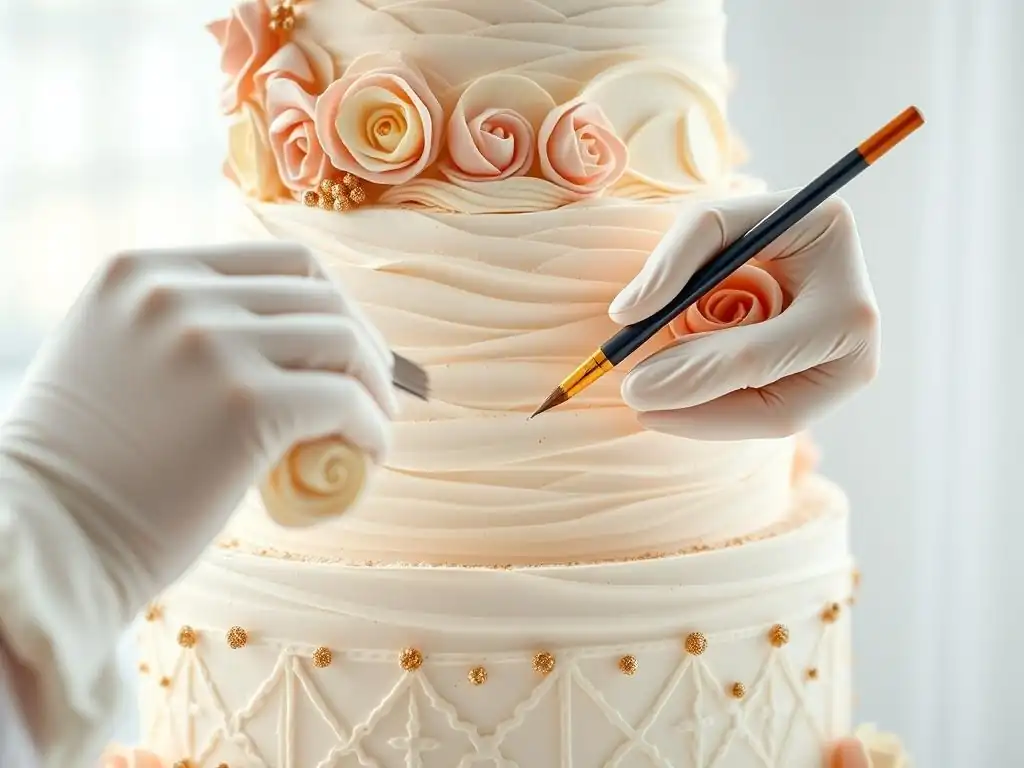
Galaxy Cakes: Achieving a Cosmic Effect with Edible Glitters
Galaxy cakes are a stunning example of how edible glitters and dusts can create dramatic visual effects. Typically, these cakes feature a base of dark blue, purple, and black buttercream or fondant, blended to resemble nebulae. Edible glitters, particularly white, silver, and iridescent varieties, are then used to create stars and cosmic sparkle.
To achieve the starry effect, fine white edible glitter can be mixed with a clear extract and flicked onto the cake surface using a stiff brush. Larger, iridescent glitter flakes can be strategically placed to represent brighter stars or distant galaxies. Luster dusts in shades of blue, purple, and pink can be dry-brushed onto the darker base colors to add depth and shimmering clouds.
A single 8-inch galaxy cake might use a combination of 3-4 different colors and types of edible glitter and dusts to achieve its layered, cosmic look. This is a prime example of innovative edible glitter cake decorating.
Adding Shimmer to Cake Pops with Edible Dusts
Cake pops offer a small canvas perfect for adding pops of edible glitter and dusts. After dipping cake pops in chocolate or candy melts and allowing them to set, you can easily add shimmer. While the coating is still slightly tacky (but not wet), a light dusting of pearl or luster dust using a soft brush will adhere beautifully, giving the pops a subtle glow.
For more targeted shimmer, mix luster dust with a clear extract to create an edible paint and brush it onto specific areas, like decorative elements or patterns. You can also roll the freshly dipped cake pop in fine edible glitter before the coating fully sets for an all-over sparkle. A batch of 20-30 cake pops might require only 1-2 grams of edible dust for a light shimmer, making it a cost-effective way to add sparkle. Edible glitter cake decorating techniques scale down wonderfully for these bite-sized treats.
Enhancing Fondant Decorations with Edible Glitter and Lustre Dust
Fondant is an excellent medium for edible glitter and lustre dust application due to its smooth, firm surface. Once fondant pieces are shaped and dried slightly, they are ready for enhancement. Lustre dusts are perfect for adding a metallic sheen to fondant elements like edible chains, gears, or jewelry details on a cake. Mix the dust with a clear extract to paint these details for an intense metallic finish.
For fondant cutouts or embossed patterns, dry-brushing pearl or luster dust over the raised areas highlights the texture and adds shimmer. Edible glitter can be adhered to fondant using a tiny amount of edible glue or clear extract, allowing for precise placement of sparkle on specific parts of a design, such as the wings of a fondant butterfly or the trim on a fondant bow. This technique is essential for detailed edible glitter cake decorating on intricate fondant elements.
Troubleshooting Common Issues with Edible Glitter and Dusts
Preventing Edible Glitter from Bleeding or Fading
Preventing edible glitter from bleeding or fading is key to maintaining the integrity of your decorations. Bleeding occurs when moisture from the cake or icing dissolves the color in the glitter, causing it to spread. To avoid this, apply glitter to surfaces that are dry or only slightly moist, like crusted buttercream, firm ganache, or fondant. If applying to royal icing, ensure the icing has set sufficiently. Using glitters specifically designed for moisture resistance can also help.
Fading can happen due to exposure to light or humidity over time. Storing decorated items in a cool, dry place away from direct sunlight can mitigate fading. Using high-quality, food-grade glitters from reputable suppliers also ensures better color stability. For edible glitter cake decorating projects that need to last, consider applying glitter as close to the serving time as possible, especially on very moist surfaces.
Achieving a Smooth Finish with Edible Dusts: Avoiding Streaks
Streaks in edible dust application typically result from uneven application or using too much pressure. To achieve a smooth, even finish, use a very soft, fluffy brush and apply the dust in light, circular motions or gentle strokes, building up the color or shimmer gradually. Avoid pressing down hard, as this can create brush marks.
If dry dusting isn't giving a smooth enough finish, consider mixing the dust with a small amount of clear extract (like vodka, which evaporates quickly) to create a thin paint. Apply this mixture with a clean brush in smooth, even strokes. For large areas on cakes, using an airbrush with dust mixed into a suitable carrier liquid can provide the most seamless finish. Practice on a spare piece of fondant or cookie to perfect your technique before applying to your main edible glitter cake decorating project.
Ensuring Edible Glitter Adheres Properly to Your Baked Goods
Proper adhesion is crucial so your edible glitter doesn't fall off. The best adhesion occurs on surfaces that are slightly tacky or have a medium-firm texture. For buttercream, apply glitter once the surface has crusted. For fondant or gum paste, a light mist of edible adhesive spray, a thin brush of edible glue, or a touch of clear extract provides the necessary tackiness.
For cookies with royal icing, apply glitter while the icing is still wet or just as it starts to set. If the surface is too dry, the glitter won't stick well. If it's too wet, fine glitter might sink in and lose its sparkle, or colors might bleed. Experimenting with the tackiness level of your icing or coating is helpful. Using a shaker or sieve allows for even distribution, and then gently pressing the glitter onto the surface can improve adherence for your edible glitter cake decorating.
Creative Cake Decorating Ideas with Edible Glitter and Dusts
Galaxy Cakes: Achieving a Cosmic Effect with Edible Glitters
Galaxy cakes are a stunning example of how edible glitters and dusts can create dramatic visual effects. Typically, these cakes feature a base of dark blue, purple, and black buttercream or fondant, blended to resemble nebulae. Edible glitters, particularly white, silver, and iridescent varieties, are then used to create stars and cosmic sparkle.
To achieve the starry effect, fine white edible glitter can be mixed with a clear extract and flicked onto the cake surface using a stiff brush. Larger, iridescent glitter flakes can be strategically placed to represent brighter stars or distant galaxies. Luster dusts in shades of blue, purple, and pink can be dry-brushed onto the darker base colors to add depth and shimmering clouds.
A single 8-inch galaxy cake might use a combination of 3-4 different colors and types of edible glitter and dusts to achieve its layered, cosmic look. This is a prime example of innovative edible glitter cake decorating.
Adding Shimmer to Cake Pops with Edible Dusts
Cake pops offer a small canvas perfect for adding pops of edible glitter and dusts. After dipping cake pops in chocolate or candy melts and allowing them to set, you can easily add shimmer. While the coating is still slightly tacky (but not wet), a light dusting of pearl or luster dust using a soft brush will adhere beautifully, giving the pops a subtle glow.
For more targeted shimmer, mix luster dust with a clear extract to create an edible paint and brush it onto specific areas, like decorative elements or patterns. You can also roll the freshly dipped cake pop in fine edible glitter before the coating fully sets for an all-over sparkle. A batch of 20-30 cake pops might require only 1-2 grams of edible dust for a light shimmer, making it a cost-effective way to add sparkle. Edible glitter cake decorating techniques scale down wonderfully for these bite-sized treats.
Enhancing Fondant Decorations with Edible Glitter and Lustre Dust
Fondant is an excellent medium for edible glitter and lustre dust application due to its smooth, firm surface. Once fondant pieces are shaped and dried slightly, they are ready for enhancement. Lustre dusts are perfect for adding a metallic sheen to fondant elements like edible chains, gears, or jewelry details on a cake. Mix the dust with a clear extract to paint these details for an intense metallic finish.
For fondant cutouts or embossed patterns, dry-brushing pearl or luster dust over the raised areas highlights the texture and adds shimmer. Edible glitter can be adhered to fondant using a tiny amount of edible glue or clear extract, allowing for precise placement of sparkle on specific parts of a design, such as the wings of a fondant butterfly or the trim on a fondant bow. This technique is essential for detailed edible glitter cake decorating on intricate fondant elements.
Troubleshooting Common Issues with Edible Glitter and Dusts
Preventing Edible Glitter from Bleeding or Fading
Preventing edible glitter from bleeding or fading is key to maintaining the integrity of your decorations. Bleeding occurs when moisture from the cake or icing dissolves the color in the glitter, causing it to spread. To avoid this, apply glitter to surfaces that are dry or only slightly moist, like crusted buttercream, firm ganache, or fondant. If applying to royal icing, ensure the icing has set sufficiently. Using glitters specifically designed for moisture resistance can also help.
Fading can happen due to exposure to light or humidity over time. Storing decorated items in a cool, dry place away from direct sunlight can mitigate fading. Using high-quality, food-grade glitters from reputable suppliers also ensures better color stability. For edible glitter cake decorating projects that need to last, consider applying glitter as close to the serving time as possible, especially on very moist surfaces.
Achieving a Smooth Finish with Edible Dusts: Avoiding Streaks
Streaks in edible dust application typically result from uneven application or using too much pressure. To achieve a smooth, even finish, use a very soft, fluffy brush and apply the dust in light, circular motions or gentle strokes, building up the color or shimmer gradually. Avoid pressing down hard, as this can create brush marks.
If dry dusting isn't giving a smooth enough finish, consider mixing the dust with a small amount of clear extract (like vodka, which evaporates quickly) to create a thin paint. Apply this mixture with a clean brush in smooth, even strokes. For large areas on cakes, using an airbrush with dust mixed into a suitable carrier liquid can provide the most seamless finish. Practice on a spare piece of fondant or cookie to perfect your technique before applying to your main edible glitter cake decorating project.
Ensuring Edible Glitter Adheres Properly to Your Baked Goods
Proper adhesion is crucial so your edible glitter doesn't fall off. The best adhesion occurs on surfaces that are slightly tacky or have a medium-firm texture. For buttercream, apply glitter once the surface has crusted. For fondant or gum paste, a light mist of edible adhesive spray, a thin brush of edible glue, or a touch of clear extract provides the necessary tackiness.
For cookies with royal icing, apply glitter while the icing is still wet or just as it starts to set. If the surface is too dry, the glitter won't stick well. If it's too wet, fine glitter might sink in and lose its sparkle, or colors might bleed. Experimenting with the tackiness level of your icing or coating is helpful. Using a shaker or sieve allows for even distribution, and then gently pressing the glitter onto the surface can improve adherence for your edible glitter cake decorating.
Edible Glitter Cake Decorating: Safety and Best Practices
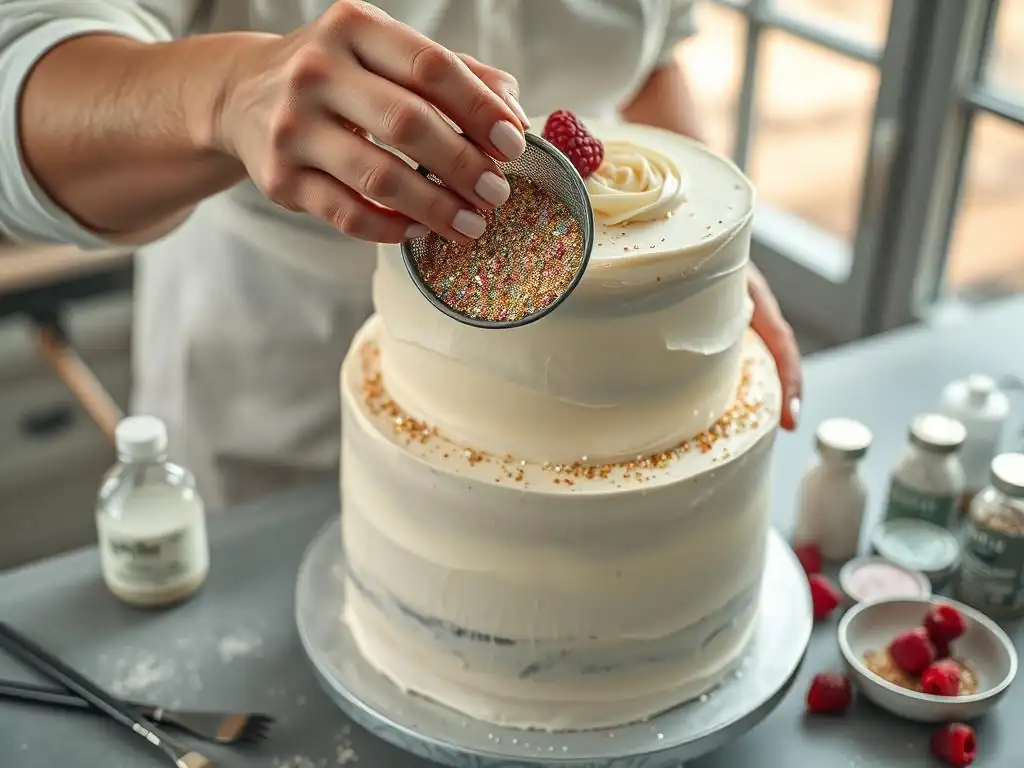
Understanding FDA Regulations for Edible Glitter
In the United States, the Food and Drug Administration (FDA) regulates color additives used in food, including those found in edible glitters and dusts. The FDA maintains a list of approved color additives and specifies how they can be used. For edible glitters, common approved ingredients include mica-based pearlescent pigments (made from mica, titanium dioxide, and iron oxides), FD&C colors, and sometimes carmine or other naturally derived colorants. These pigments are approved for use in specific food categories and at certain levels.
It's important to note that some products marketed as "non-toxic" or "for decorative use only" use pigments or materials that are not approved for consumption, even if they are not acutely poisonous. Always ensure the product you purchase is labeled as "edible" and ideally lists ingredients that comply with FDA regulations for direct food contact and consumption. This is a non-negotiable aspect of safe edible glitter cake decorating.
Avoiding Allergens and Sensitivities When Using Edible Glitters and Dusts
While the base ingredients of many edible glitters and dusts are simple (like sugar or cornstarch), it's crucial to be aware of potential allergens or sensitivities, especially when baking for others. Some colorants, though FDA-approved, can cause sensitivities in certain individuals. Ingredients like cornstarch or maltodextrin might be an issue for those with specific intolerances.
Always check the ingredient list provided by the manufacturer. If you are baking for someone with allergies (e.g., gluten, soy, nuts, specific food colorings), verify that the edible glitter or dust is free from those contaminants. Some suppliers offer certified allergen-free products. For example, certain red dusts might contain carmine, which is derived from insects and is not suitable for vegans or those with specific sensitivities. Being diligent about ingredients is vital for responsible edible glitter cake decorating.
Tips for Safe Consumption of Edible Glitter-Decorated Treats
While edible glitters and dusts are made from food-safe ingredients, they are primarily for decoration and consumed in very small quantities as part of the overall treat. They don't add flavor or significant nutritional value. The FDA considers them color additives, which are safe when used according to regulations.
Advise those consuming your glitter-decorated treats that the sparkle is edible but is mostly a visual element. For items heavily coated in glitter, like some novelty items, the texture might be slightly different. Encourage moderation, as with any decorative element. Ensure children consuming treats with larger glitter flakes are supervised. By using certified edible products and applying them appropriately, you can ensure your sparkling creations are not only beautiful but also safe to enjoy as part of your edible glitter cake decorating efforts.
Advanced Techniques: Mastering Edible Glitter and Dust Effects
Creating Ombre Effects with Edible Dusts
Ombre effects, where colors gradually blend into one another, are achievable with edible dusts and add sophistication to cakes and cookies. This technique works best on a smooth surface like fondant or firm buttercream. Start with your darkest dust color at the base of the area you want to ombre and apply it with a soft brush, using light, circular motions.
Gradually switch to lighter shades of dust, overlapping slightly with the previous color, and blend upwards or outwards. Use a clean blending brush to soften the transitions between colors. For example, to create a pink ombre effect on a cake tier, you might start with a vibrant pink dust at the bottom, blend into a medium pink, then a light pink, and finish with white pearl dust at the top, creating a seamless gradient of sparkle and color. This layering and blending is an advanced edible glitter cake decorating skill.
Airbrushing with Edible Glitter and Dusts
Airbrushing offers a fast and efficient way to apply edible dusts and certain types of fine edible glitter over large areas or through stencils, achieving a smooth, even finish that is difficult to replicate with brushes alone. You'll need a food-grade airbrush system and a suitable carrier liquid, often clear extract (like vodka) or a specially formulated airbrush cleaner/reducer.
Fine edible dusts (like luster or pearl dust) can be mixed with the carrier liquid to create an edible paint suitable for airbrushing. Some ultra-fine glitters are also formulated for airbrush use. Test the consistency on a paper towel first. Hold the airbrush a few inches from the surface and apply the color in light, even passes, building up the intensity gradually. Airbrushing is excellent for backgrounds, gradients, and applying shimmer over textured surfaces in edible glitter cake decorating.
Combining Different Types of Edible Glitters and Dusts for Unique Textures
Combining different types of edible glitters and dusts unlocks a vast range of creative possibilities, allowing you to create unique textures and multi-dimensional effects. For instance, layering a matte petal dust base with a shimmer of pearl dust on top adds depth to edible flowers. Applying a metallic luster dust base and then scattering larger iridescent glitter flakes creates a dynamic, reflective surface.
Consider using a fine glitter for overall sparkle on a cake tier and then applying a contrasting color of chunky glitter selectively for highlight areas. Mixing different colors or finishes of dusts can create custom shades with unique shimmers. For example, mixing gold luster dust with brown petal dust could create an antique gold effect. Experimenting with combinations on a test surface will help you discover new and exciting ways to enhance your edible glitter cake decorating.
Conclusion: Elevating Your Baking with Edible Glitter and Dusts
Edible glitters and dusts are transformative tools in the world of baking and cake decorating. They offer an unparalleled ability to add sparkle, shimmer, color, and dimension to your creations, turning simple baked goods into dazzling works of art. From subtle pearl dust highlights on delicate cookies to full-coverage glitter on celebratory cakes, the techniques are varied and accessible to bakers of all skill levels.
By understanding the different types of edible glitters and dusts, choosing the right tools, practicing application techniques, and prioritizing safety through proper handling and selection of food-grade products, you can effectively use these sparkling elements. Edible glitter cake decorating, cookie embellishing, and pastry enhancing become exciting avenues for creativity, allowing you to impress friends, family, or customers with visually stunning and safe-to-eat treats. So go ahead, add some sparkle to your next baking project and watch your creations shine!
Frequently Asked Questions
What is the difference between edible glitter and edible dust?
Edible glitter is typically larger, reflecting light for a sparkly effect, while edible dust is finer, providing a subtle shimmer or color to your cake. Both are used to enhance the visual appeal of your baked goods.
How do I apply edible glitter to a cake without making a mess?
For minimal mess, use a dry brush to lightly dust the glitter onto your cake. You can also use a sieve or shaker for even distribution. Consider applying over a tray to catch any excess glitter.
Are all glitters and dusts labeled "edible" safe to consume?
No, it's crucial to only use products specifically labeled as "edible glitter" or "edible dust". Industrial glitters and some craft glitters are toxic and not meant for consumption. Always check the ingredients and certifications.
Can I mix edible glitter into my cake batter or frosting?
Mixing edible glitter into batter or frosting may dull its sparkle during baking or mixing. It's generally best to apply it after baking or as a final decoration on frosting.
How do I store edible glitter and dust to maintain their quality?
Store edible glitter and dust in a cool, dry place, away from direct sunlight and moisture, in an airtight container. This will prevent clumping and preserve their shimmer and color.
Final Reflection: The Enduring Sparkle of Edible Glitter
The art of cake decorating has evolved, but the desire for dazzling displays remains as strong as ever. Edible glitter, once a novelty, has become an indispensable tool for bakers seeking to elevate their creations from delicious to breathtaking. Its versatility, from subtle shimmer to vibrant bursts of color, continues to inspire creativity and delight customers.
The impact of edible glitter extends beyond mere aesthetics; it reflects a broader cultural shift towards personalization and visual storytelling in food. We're no longer just consuming sustenance; we're experiencing edible art. This trend, fueled by social media and the rise of home baking as a creative outlet, underscores the importance of quality ingredients and the power of visual appeal. The best things in life are sweet,
and edible glitter adds a touch of magic to that sweetness.
Consider the possibilities. Think about how you can use this knowledge to add your own unique sparkle to your next baking project. Will you create a subtly shimmering buttercream rose, or a galaxy cake bursting with cosmic color? The choice is yours. Embrace the artistry, experiment with different techniques, and let your creativity shine – quite literally – with the help of edible glitter. Let your cakes tell a story, and let the sparkle be your signature.
Unleash Your Inner Sparkle: Get Baking!
Thanks for taking the time to explore the magical world of edible glitter and dusts! We hope you've discovered new ways to add a touch of shimmering magic to your creations. Ready to put your newfound knowledge into practice?
- Create your masterpiece! Try adding edible glitter to your next cake, cookies, or cupcakes. Let your imagination run wild! This is the heart of what you've learned today.
- Share your sparkle! Post a picture of your glittering creation on social media and tag us – we'd love to see your sparkling masterpieces!
- Experiment with different techniques: Explore different application methods – from simple dusting to intricate piping designs – to elevate your baking game.
What incredible glittering creation will you bake first?