
Create an Easy Mirror Glaze Birthday Cake (Yes, You Can!)

Welcome to BakeWithEase, where we believe everyone can create stunning desserts! Ever dreamt of a flawless, glossy finish on your birthday cake? You're in the right place. This isn't just another recipe; it's your gateway to mastering the easy mirror glaze birthday cake. Intrigued? Keep reading to unlock the secrets and transform your next celebration cake!
- Decadent Chocolate Mirror Glaze Birthday Cake: A Step-by-Step Guide
- Bake a Show-Stopping Chocolate Mirror Glaze Birthday Cake: A Detailed Guide
- What is Mirror Glaze and Why Bake a Chocolate Mirror Glaze Cake?
- Essential Ingredients for Your Decadent Chocolate Mirror Glaze Birthday Cake
- Equipment You'll Need for a Smooth Mirror Glaze Finish
- Step-by-Step: Baking the Chocolate Cake for Your Mirror Glaze
- Step-by-Step: Making the Chocolate Mirror Glaze
- Assembling and Frosting Your Birthday Cake for the Glaze
- Applying the Mirror Glaze: The Art of the Pour
- Decorating Your Chocolate Mirror Glaze Birthday Cake: Adding Elegant Touches
- Tips for Success: Mastering the Art of Chocolate Mirror Glaze Cake Baking
- Variations and Flavor Combinations for Your Chocolate Mirror Glaze Cake
- Enjoy Your Stunning Homemade Chocolate Mirror Glaze Birthday Cake!
-
Frequently Asked Questions
- What exactly is a mirror glaze, and why is it so popular?
- Is a mirror glaze birthday cake difficult to make, even for a beginner baker?
- What kind of cake works best under a mirror glaze?
- What ingredients do I absolutely need to make an easy mirror glaze?
- How long does a mirror glaze birthday cake last, and how should I store it?
- Final Reflection: The Sweet Success of Effortless Elegance
- Unleash Your Inner Cake Artist!
Decadent Chocolate Mirror Glaze Birthday Cake: A Step-by-Step Guide
Bake a Show-Stopping Chocolate Mirror Glaze Birthday Cake: A Detailed Guide
Making an easy mirror glaze birthday cake might seem like a challenge reserved for professional patisseries, but with the right guidance and attention to detail, it's absolutely achievable in your own kitchen. This article will walk you through crafting a beautiful and delicious chocolate cake adorned with a stunning, glossy mirror glaze. Forget complex techniques; we'll focus on a straightforward approach that yields impressive results, perfect for celebrating a special birthday or just impressing your friends and family.
Creating a beautiful mirror glaze cake is not just about the visual appeal; it's also about combining textures and flavors. The rich, moist chocolate cake provides a perfect contrast to the smooth, sweet, and slightly firm glaze. This guide simplifies the process, breaking down each stage into manageable steps, from baking the perfect chocolate layers to achieving that coveted reflective surface. By the end, you'll have the confidence to tackle this project and present a truly memorable easy mirror glaze birthday cake.
What is Mirror Glaze and Why Bake a Chocolate Mirror Glaze Cake?
Understanding the Allure of Mirror Glaze
Mirror glaze, also known as glacage miroir, is a type of glossy coating used in professional patisserie to give cakes and pastries a highly reflective, glass-like finish. It's typically made from a mixture of sugar, water, glucose syrup, condensed milk, white chocolate or cocoa powder, and gelatin. The gelatin is crucial as it provides the structure needed for the glaze to set into a smooth, firm layer that adheres cleanly to the cake. The high sugar content, particularly from glucose syrup, contributes significantly to the glaze's characteristic shine.
The magic of mirror glaze lies in its ability to transform a simple cake into a work of art. When applied correctly at the ideal temperature, it flows smoothly over the chilled cake, creating a seamless, vibrant surface that literally reflects its surroundings. This technique is a hallmark of modern French pastry and is often used for mousse cakes or entremets, but it works beautifully over a traditional iced cake as well, adding a touch of sophistication and elegance to any birthday celebration. The visual impact is undeniable, making the cake the centerpiece of any dessert table.
Why This Recipe is Perfect for Achieving a Professional-Looking Finish at Home
This recipe is specifically designed to make crafting an easy mirror glaze birthday cake accessible for home bakers. We focus on a robust chocolate cake recipe that is forgiving and moist, providing a stable base for the glaze. The mirror glaze formula used here is relatively standard but includes detailed temperature guidance, which is the most critical factor for success. By providing precise temperatures for cooking and pouring the glaze, we minimize the guesswork and increase your chances of achieving that smooth, reflective finish on your first try.
Furthermore, this guide breaks down the process into clear, sequential steps, from preparing your ingredients to the final pouring technique. We address common pitfalls, such as dealing with air bubbles in the glaze or ensuring proper cake chilling, which are essential for a flawless result. Unlike some complex recipes that require specialized equipment or advanced techniques, this approach utilizes standard kitchen tools (with maybe one or two key additions like a digital thermometer) and focuses on mastering the fundamentals of cake preparation and glaze application, making it truly possible to create a stunning chocolate mirror glaze cake at home.
Essential Ingredients for Your Decadent Chocolate Mirror Glaze Birthday Cake
Cake Ingredients: Building a Rich Chocolate Cake
A great mirror glaze starts with a great cake. For a rich chocolate base suitable for an easy mirror glaze birthday cake, you'll need standard baking ingredients. This typically includes about 2 cups (around 250g) of all-purpose flour, 1 ¾ cups (about 350g) of granulated sugar, and ¾ cup (about 65g) of unsweetened cocoa powder.
Leavening is provided by baking soda and baking powder, perhaps 1 ½ teaspoons of each, reacting with liquids like milk or buttermilk (around 1 cup, or 240ml) and eggs (usually 2 large). Adding moisture and richness comes from vegetable oil (½ cup, or 120ml) and often hot water or coffee (1 cup, or 240ml), which blooms the cocoa powder and intensifies the chocolate flavor. A teaspoon of vanilla extract rounds out the flavor profile.
Using high-quality cocoa powder, such as Dutch-processed cocoa, can significantly impact the depth of flavor in your chocolate cake layers. Dutch-processed cocoa has a milder, less acidic flavor and a darker color compared to natural cocoa. For a standard 8-inch two-layer cake, these approximate quantities should yield moist, tender layers that are sturdy enough to handle the chilling and glazing process required for a mirror glaze finish. Ensuring all ingredients are at room temperature before mixing is a small but effective step towards achieving a consistent batter and a well-structured cake.
Mirror Glaze Ingredients: Creating a Deep, Glossy Chocolate Glaze
The magic of the mirror glaze comes from a specific combination of ingredients that create its unique texture and shine. You'll typically need about 1 ½ tablespoons (around 15-20g) of gelatin powder, bloomed in cold water (around 60-80ml). The liquid base usually consists of granulated sugar (around 1 cup, or 200g), glucose syrup (around ½ cup, or 150-200g), and water (around ½ cup, or 120ml). Glucose syrup is particularly important as it prevents crystallization and contributes significantly to the glaze's elasticity and high shine.
To give the glaze its chocolate flavor and opacity, you'll incorporate sweetened condensed milk (about ½ cup, or 120ml) and chocolate – for a deep chocolate color and flavor, around 7 ounces (about 200g) of chopped dark chocolate or chocolate chips are standard. The quality of the chocolate will affect the final taste, so opt for a good baking chocolate if possible.
White chocolate can also be used as a base for colored glazes, but for a chocolate mirror glaze cake, dark chocolate is key. These ingredients, when heated and combined correctly, form the stable, glossy mixture needed to pour over your chilled easy mirror glaze birthday cake.
Chocolate Ganache Ingredients: A Luxurious Filling
A rich chocolate ganache serves as both a delicious filling and the essential crumb coat layer for your easy mirror glaze birthday cake. Ganache is incredibly simple, requiring just two main ingredients: chocolate and heavy cream. For a pourable or spreadable ganache suitable for filling and crumb coating, a common ratio is equal parts chocolate and cream by weight. This means for every 8 ounces (about 225g) of chopped chocolate, you would use about 8 ounces (about 240ml) of heavy cream (with a minimum of 30% milk fat).
The type of chocolate used will influence the ganache's flavor and consistency. Dark chocolate (50-70% cocoa solids) creates a rich, slightly bitter ganache. Milk chocolate results in a sweeter, softer ganache, and white chocolate yields the sweetest and softest. For this chocolate mirror glaze cake, using dark chocolate for the ganache provides a lovely contrast to the sweet glaze.
Simply heat the cream until it just simmers, then pour it over the finely chopped chocolate. Let it sit for a few minutes to allow the chocolate to melt, then whisk or stir gently until smooth and emulsified. Once cooled to a spreadable consistency, it's perfect for filling and preparing your cake for the mirror glaze.
Equipment You'll Need for a Smooth Mirror Glaze Finish
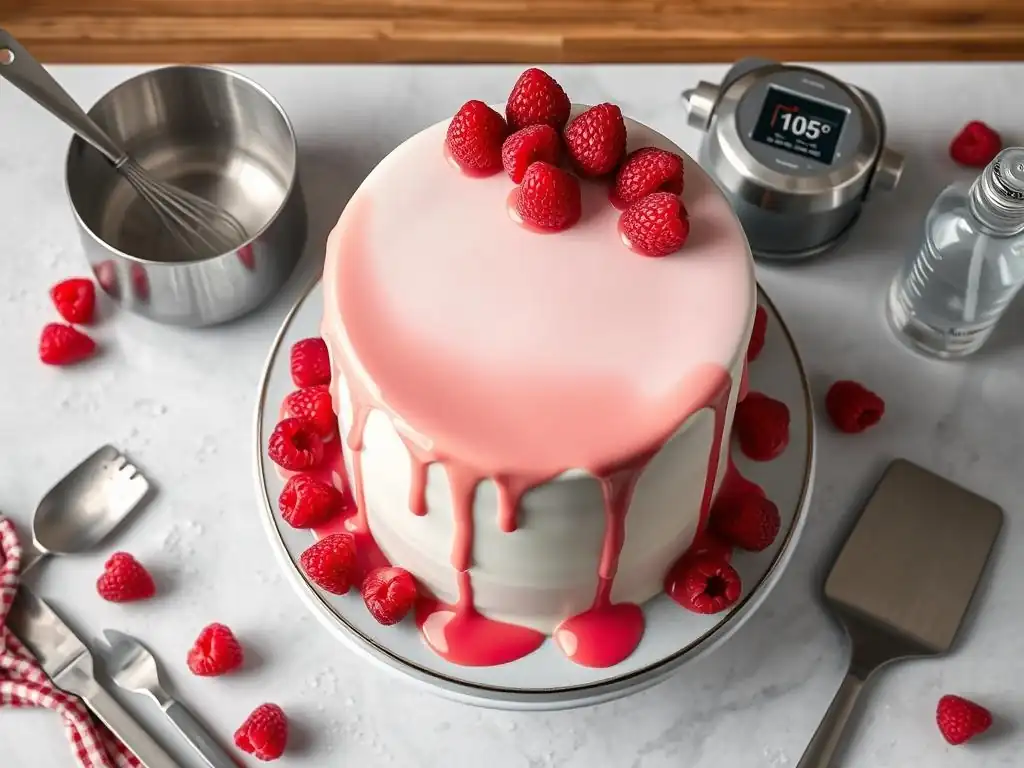
Essential Baking Tools for Cake Preparation
Having the right tools makes the cake baking process much smoother and helps ensure your layers are consistent and ready for assembly. You'll need standard baking equipment like mixing bowls (at least one large one for the batter), measuring cups and spoons for accurate ingredient portions, and a whisk or electric mixer (stand mixer or hand mixer) for combining ingredients thoroughly.
Cake pans are essential – two 8-inch round pans are typical for a layer cake, but you could use others depending on your desired size. Lining the bottoms with parchment paper and greasing the sides ensures the cakes release cleanly.
Other helpful tools for cake prep include a kitchen scale for more precise ingredient measurements, especially for the ganache and glaze, where ratios are important. A fine-mesh sieve is useful for sifting dry ingredients like flour and cocoa powder, which helps prevent lumps and aerates the mixture. Once the cakes are baked, a cooling rack is crucial for allowing them to cool completely before leveling and frosting. Using these basic tools effectively sets the stage for a successful easy mirror glaze birthday cake.
Key Tools for Creating and Applying the Mirror Glaze
Achieving that perfect mirror finish requires a few specific tools that are highly recommended, if not essential. A digital thermometer is arguably the most critical piece of equipment for mirror glaze. The glaze must be heated to a specific temperature (around 103°C or 217°F) and, more importantly, cooled to a precise pouring temperature (typically between 30°C and 35°C, or 86°F to 95°F). Pouring outside this narrow range will result in a glaze that is either too thick (not smooth) or too thin (runs off the cake, not opaque).
Another invaluable tool is an immersion blender (also called a stick blender). After combining the hot liquid mixture with the chocolate and condensed milk, an immersion blender is used to emulsify the glaze into a perfectly smooth, homogeneous mixture. It's important to keep the head of the blender submerged and blend without lifting to avoid incorporating air bubbles, which can mar the final finish.
You will also need a wire rack set over a tray or bowl to catch the excess glaze when pouring. A cake turntable is extremely helpful for rotating the cake smoothly during the pouring process, ensuring even coverage. Finally, an offset spatula can be useful for gently guiding drips or smoothing the very top edge if needed, though minimal touching is best for a true mirror finish on your chocolate mirror glaze cake.
Step-by-Step: Baking the Chocolate Cake for Your Mirror Glaze
Preparing the Chocolate Cake Batter: A Detailed Recipe
Start by preheating your oven to 175°C (350°F) and preparing your cake pans by greasing and flouring them, or lining the bottoms with parchment paper circles. In a large bowl, whisk together the dry ingredients: approximately 250g all-purpose flour, 350g granulated sugar, 65g unsweetened cocoa powder, 1 ½ tsp baking soda, 1 ½ tsp baking powder, and ½ tsp salt.
Ensure these are well combined, breaking up any lumps in the cocoa. In a separate medium bowl, whisk together the wet ingredients: 2 large eggs, 240ml buttermilk (or milk mixed with a tablespoon of vinegar), 120ml vegetable oil, and 1 tsp vanilla extract.
Add the wet ingredients to the dry ingredients and mix on low speed with an electric mixer, or by hand, until just combined. Do not overmix; a few small lumps are acceptable. Carefully pour in 240ml of hot water or hot coffee (coffee enhances chocolate flavor). The batter will be quite thin – this is normal for this type of moist chocolate cake.
Mix gently until smooth. Distribute the batter evenly between your prepared cake pans. For consistent layers, you can weigh the batter in each pan; aiming for approximately 550-600g per 8-inch pan is a good target. This detailed approach helps ensure a uniform structure for your easy mirror glaze birthday cake.
Baking the Cake Layers to Perfection: Time and Temperature Guidelines
Baking time will vary depending on your oven and the size of your pans, but for 8-inch layers at 175°C (350°F), expect them to bake for approximately 30 to 35 minutes. Begin checking for doneness around the 28-minute mark. You can tell the cakes are ready when a wooden skewer or toothpick inserted into the center comes out clean or with just a few moist crumbs attached. The edges of the cake should also start to pull slightly away from the sides of the pan, and the top should spring back gently when lightly pressed.
Avoid opening the oven door too frequently during the initial baking time (the first 20-25 minutes) as this can cause the cakes to sink. If you are baking multiple layers at once, ensure there is adequate space between the pans for even heat circulation. Rotating the pans halfway through the baking time (around 15-18 minutes) can also help promote even baking, especially if your oven has hot spots. Properly baked layers are crucial for building a stable structure that can support the weight of the ganache and the mirror glaze on your chocolate mirror glaze cake.
Cooling and Leveling the Cake Layers: Ensuring a Stable Base
Once the cake layers are baked, remove them from the oven and let them cool in their pans on a wire rack for about 10-15 minutes. This allows the cakes to firm up slightly before being handled. After this initial cooling period, invert the cakes onto the wire rack and carefully remove the pans. Peel off any parchment paper.
Allow the cake layers to cool completely on the wire rack. This step is absolutely critical; attempting to level or frost warm cakes will result in crumbling and a messy outcome. The cakes should cool for at least 2 hours, or ideally until they reach room temperature.
Before assembling your easy mirror glaze birthday cake, the cooled layers will likely have a slight dome on top. To create a flat, stable surface for stacking and glazing, you need to level them. Use a serrated knife or a cake leveler to carefully slice off the dome, making the top surface flat.
Try to remove as little cake as possible while achieving a level surface. A level cake base is essential for ensuring your finished mirror glaze cake stands straight and the glaze flows evenly down the sides. If you baked the cakes ahead of time, wrap them tightly in plastic wrap once completely cooled and they can be stored at room temperature for a day or frozen for longer storage.
Step-by-Step: Making the Chocolate Mirror Glaze
Combining the Mirror Glaze Ingredients: A Precise Guide
The process of making mirror glaze requires careful attention to temperature and technique. First, bloom the gelatin: sprinkle the gelatin powder over the cold water in a small bowl and let it sit for about 5-10 minutes until it swells and becomes a gel-like mass. While the gelatin is blooming, combine the sugar, glucose syrup, and the remaining water in a medium saucepan. Heat this mixture over medium heat, stirring occasionally, until the sugar is completely dissolved.
Bring the sugar syrup to a boil and continue to heat it until it reaches 103°C (217°F) on your digital thermometer. This high temperature is necessary for the glaze to set correctly and achieve its characteristic shine. Once the syrup reaches the target temperature, remove the saucepan from the heat.
Add the bloomed gelatin to the hot syrup and stir until it is completely dissolved. Then, pour this hot liquid mixture over the chopped chocolate and sweetened condensed milk placed in a tall container or a heatproof bowl. This method ensures the heat from the syrup melts the chocolate and warms the condensed milk evenly for your chocolate mirror glaze cake.
Achieving the Right Consistency: Cooking and Cooling the Glaze
After pouring the hot syrup over the chocolate and condensed milk, let the mixture sit undisturbed for a minute or two to allow the residual heat to melt the chocolate. Then, use an immersion blender to emulsify the mixture. Insert the blender head at an angle, ensuring it is fully submerged to avoid incorporating air bubbles.
Blend on low speed, keeping the head at the bottom of the container, moving it around gently until the glaze is completely smooth and homogeneous. This should take about 1-2 minutes. The goal is a perfectly smooth, glossy liquid with no streaks of chocolate or condensed milk.
Once blended, the glaze needs to be cooled to the correct pouring temperature, which is typically between 30°C and 35°C (86°F to 95°F). This is the sweet spot where the glaze is liquid enough to flow smoothly and cover the cake evenly, but cool enough to start setting upon contact with the chilled cake and become opaque rather than transparent.
You can speed up the cooling by placing the container in an ice bath, stirring occasionally with a spatula (again, gently to avoid bubbles), or simply leave it at room temperature, checking the temperature with your digital thermometer every 10-15 minutes. This cooling phase is crucial for a successful pour on your easy mirror glaze birthday cake.
Troubleshooting Common Mirror Glaze Issues: Solutions for a Perfect Texture
Even with careful steps, you might encounter issues with your mirror glaze. One common problem is air bubbles, often caused by over-blending or lifting the immersion blender out of the liquid. To fix this, you can gently tap the container on the counter to bring bubbles to the surface. Alternatively, strain the glaze through a fine-mesh sieve after blending to remove bubbles and any small solid particles. Allowing the glaze to rest for 10-15 minutes after blending also helps bubbles dissipate.
Another issue is incorrect consistency when it's time to pour. If the glaze is too hot (above 35°C), it will be too thin, run off the cake, and might be transparent. If it's too cool (below 30°C), it will be too thick, won't flow smoothly, and you'll see lines or uneven patches. Always check the temperature with your thermometer before pouring.
If it's too cool and thick, gently rewarm it in a warm water bath or microwave for very short bursts (5-10 seconds), stirring between, until it reaches the correct temperature. If it's too hot, continue cooling it, potentially in an ice bath, stirring gently, until it is within the 30-35°C range. Patience and precise temperature control are key to mastering the chocolate mirror glaze for your cake.
Assembling and Frosting Your Birthday Cake for the Glaze
Filling and Stacking the Cake Layers: Using Chocolate Ganache
Once your cake layers are completely cooled and leveled, it's time to assemble your easy mirror glaze birthday cake. Place the first cake layer on your serving plate or a cake board. If using a cake turntable, place the board on it. Spoon or pipe a generous layer of cooled chocolate ganache onto the first layer, spreading it evenly with an offset spatula right up to the edge. If you want a thicker filling, you can build up a dam of ganache around the edge using a piping bag and then fill the center.
Carefully place the second cake layer on top of the first, aligning the edges. Gently press down to secure the layers and distribute the filling evenly. If you have more layers, repeat the process. Ensure the cake is centered and stable. Any excess ganache that squeezes out can be used for the crumb coat. This filled and stacked structure is the foundation upon which your perfect chocolate mirror glaze cake will be built, so taking care here is important for a straight and even final result.
Crumb Coating: The Key to a Flawless Surface
The crumb coat is a thin layer of frosting (in this case, chocolate ganache) applied to the entire exterior of the cake before the final frosting or glaze. Its primary purpose is to trap any loose crumbs, preventing them from showing up in your final, smooth finish. It also helps to fill in any small gaps or imperfections on the cake's surface, creating a perfectly smooth canvas for the mirror glaze. Apply a thin, even layer of the cooled, spreadable ganache all over the top and sides of the stacked cake using an offset spatula.
Don't worry about making this layer perfectly smooth yet; the main goal is coverage and crumb containment. Once the cake is fully covered in a thin layer of ganache, scrape off any excess using a bench scraper or the edge of your offset spatula held perpendicular to the cake. This creates a thin, even layer.
This crumb coat must be firm before proceeding. Place the cake in the refrigerator for at least 30-60 minutes, or until the ganache is firm to the touch. A firm crumb coat is absolutely essential for the mirror glaze to flow smoothly and adhere properly to your mirror glaze cake.
Chilling the Cake: Preparing for Optimal Glaze Adhesion
After applying and chilling the crumb coat, you will need to apply a slightly thicker, final layer of ganache (or buttercream, though ganache is recommended for a sturdier base under mirror glaze) and smooth it as much as possible. This layer provides the final shape and smooth surface that the mirror glaze will flow over. Spend time making this layer as smooth and even as possible using your offset spatula and bench scraper, as any bumps or imperfections here will show through the mirror glaze.
Once this final layer of ganache is applied and smoothed, the cake must be thoroughly chilled before glazing. This is a non-negotiable step for a successful mirror glaze. The cake needs to be very cold, ideally partially frozen, so that the warm glaze sets quickly upon contact.
Place the cake in the refrigerator for a minimum of 4 hours, or preferably in the freezer for 1-2 hours, until the outer layer of ganache is very firm and cold. A cold cake allows the glaze to set rapidly, creating that characteristic smooth, reflective surface on your easy mirror glaze birthday cake.
Applying the Mirror Glaze: The Art of the Pour
Preparing Your Workspace for a Seamless Application
Applying the mirror glaze is the most dramatic step, and proper preparation is key to minimizing mess and achieving a perfect pour. Set up your workspace by placing a wire rack over a large tray, baking sheet, or bowl. This setup will catch the excess glaze that drips off the cake. Ensure the tray or bowl is large enough to collect all the runoff. You can line the tray with plastic wrap or aluminum foil for easier cleanup.
Carefully transfer your thoroughly chilled cake from the refrigerator or freezer onto the wire rack. Make sure the cake is centered on the rack. Have your mirror glaze ready, ensuring it is within the correct pouring temperature range of 30°C to 35°C (86°F to 95°F). Have your digital thermometer handy for a final check just before pouring. Work quickly once the glaze is ready and the cake is positioned. A clean and organized workspace allows you to focus on the pouring technique itself for your chocolate mirror glaze cake.
The Pouring Technique: Achieving Uniform Coverage
With the cake centered on the wire rack and the glaze at the perfect temperature (30-35°C), it's time to pour. Start by pouring the glaze onto the very center of the cake. In a continuous, steady stream, work outwards in a spiral motion, allowing the glaze to flow towards the edges and down the sides. Do not stop pouring until the entire top surface is covered and the glaze starts dripping down the sides. Ensure you cover the sides completely as well.
Do not try to spread the glaze with a spatula once it's poured; the goal is for the glaze to self-level. Allow the excess glaze to drip off the cake and onto the tray below. Let it drip for several minutes until the dripping slows to just occasional drops.
If there are any large drips pooling at the bottom edge of the cake, you can gently swipe them away with an offset spatula held against the bottom edge of the cake board, but be careful not to touch the glazed sides. This pouring technique is crucial for the flawless, smooth finish of your easy mirror glaze birthday cake.
Letting the Glaze Set: Allowing Time for a Perfect Finish
After the glaze has been poured and the initial excess has dripped off, carefully transfer the cake (still on the wire rack or carefully moved to a clean cake board using large spatulas) to the refrigerator to set completely. The chilling process is vital for the glaze to firm up and achieve its characteristic reflective shine. The glaze will continue to set as it cools.
Allow the cake to chill in the refrigerator for at least 30-60 minutes. During this time, the glaze will transition from a liquid state to a soft, gel-like coating. Resist the urge to touch the glaze while it is setting, as this will leave fingerprints and ruin the smooth surface. Once set, you can trim any remaining drips from the bottom edge with a sharp knife dipped in hot water and wiped clean. Your chocolate mirror glaze cake is now ready for decoration or serving.
Decorating Your Chocolate Mirror Glaze Birthday Cake: Adding Elegant Touches
Simple Decoration Ideas: Chocolate Shavings and Edible Gold Leaf
Once your easy mirror glaze birthday cake is set and gleaming, you might want to add some simple decorations to enhance its beauty. One of the easiest and most effective ways to decorate a chocolate mirror glaze cake is with chocolate shavings or curls. You can create these by running a vegetable peeler or a sharp knife along the edge of a block of chocolate (at room temperature or slightly chilled). Dark, milk, or white chocolate shavings can provide a lovely contrast in color and texture. Simply scatter them on top of the cake or around the base.
Another elegant touch is the addition of edible gold leaf or silver leaf. These delicate metallic leaves instantly add a touch of luxury and sophistication. Use tweezers to carefully pick up small pieces of the edible leaf and place them strategically on the surface of the set glaze. The slight tackiness of the glaze will help the leaf adhere. A few well-placed flecks or small squares of edible gold leaf can elevate your chocolate mirror glaze cake from beautiful to truly spectacular with minimal effort.
Advanced Decoration Techniques: Tempering Chocolate for Decorations
For those looking to add more elaborate chocolate decorations, tempering chocolate is a useful skill. Tempering involves melting chocolate, cooling it to a specific temperature, and then gently reheating it to a working temperature. This process stabilizes the chocolate's crystals, resulting in decorations that are shiny, snap cleanly, and don't melt easily at room temperature. While more advanced, tempered chocolate decorations can add stunning architectural or sculptural elements to your mirror glaze cake.
Common tempered chocolate decorations include chocolate shards, swirls, geometric shapes, or even molded figures. You can spread tempered chocolate thinly on parchment paper and cut shapes before it sets, or pipe designs. For example, tempering about 100-150g of dark chocolate (melting to ~45-50°C, cooling to ~28-29°C, reheating to ~31-32°C) allows you to create impressive, stable garnishes. These can be attached to the cake using a dab of melted chocolate or ganache just before serving, adding another layer of professional flair to your easy mirror glaze birthday cake.
Tips for Success: Mastering the Art of Chocolate Mirror Glaze Cake Baking
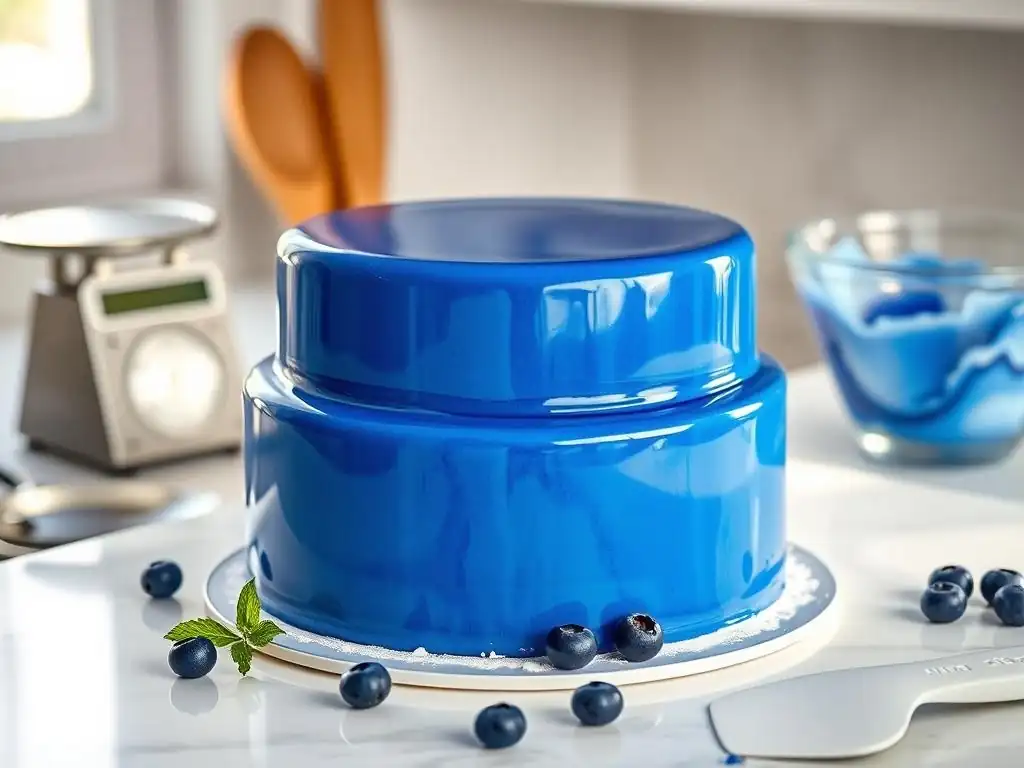
Achieving the Perfect Glaze Consistency
The key to a flawless mirror glaze lies almost entirely in its temperature and consistency when poured. As mentioned, the ideal pouring temperature is typically between 30°C and 35°C (86°F to 95°F). If the glaze is too warm, it will be too thin and won't coat properly, potentially sliding off the cake or being too transparent. If it's too cool, it will be too thick, won't flow smoothly, and you'll end up with visible lines and an uneven surface. Always use a digital thermometer to check the temperature just before pouring.
Beyond temperature, ensuring the glaze is perfectly emulsified with an immersion blender is vital. Blend gently, keeping the head submerged, to avoid incorporating air bubbles. Air bubbles will show up as imperfections on the finished surface. If you do have bubbles, gently tap the container or strain the glaze. Allowing the glaze to rest for 10-15 minutes after blending also helps bubbles rise and dissipate. Patience during the cooling phase and precise temperature control are your best friends for achieving the perfect consistency for your chocolate mirror glaze.
Preventing and Fixing Common Mirror Glaze Problems
Several issues can arise when working with mirror glaze, but most can be prevented or fixed. PROBLEM: Air bubbles on the surface. PREVENTION: Use an immersion blender correctly, keep it submerged. FIX: Strain the glaze, let it rest, or gently pop large bubbles with a pin before pouring. PROBLEM: Glaze is too thin/transparent. PREVENTION: Ensure glaze reaches 103°C (217°F) during cooking and is poured at 30-35°C (86-95°F). FIX: If already poured, there's little fix; reheat glaze gently and repour if possible, but the underlying layer might be affected. PROBLEM: Glaze is too thick/uneven. PREVENTION: Ensure glaze is poured at 30-35°C (86-95°F). FIX: Gently rewarm the glaze to the correct temperature and repour over the chilled cake.
Another common issue is the glaze not adhering well to the cake. This is almost always due to the cake not being cold enough. The cake must be very cold, preferably chilled in the freezer for an hour or two, before glazing. A cold surface helps the warm glaze set instantly upon contact. If the glaze runs off or pools excessively, it indicates either the cake wasn't cold enough or the glaze was too warm. Following the precise temperature guidelines for both the glaze and the cake is paramount for a beautiful easy mirror glaze birthday cake.
Storing Your Mirror Glaze Cake: Maintaining Freshness and Shine
Once your chocolate mirror glaze cake is completed and the glaze is set, proper storage is essential to maintain its freshness and that stunning shine. Mirror glaze cakes are best stored in the refrigerator. Place the cake in an airtight cake carrier or a box to protect it from drying out and absorbing odors from the fridge. The cold environment of the refrigerator helps the glaze maintain its set structure and reflective quality.
When storing, try to avoid placing anything directly on the surface of the glaze, as it is relatively delicate and can be easily marked or smudged. Mirror glaze cakes are generally best enjoyed within 2-3 days of being glazed. While the cake itself might last longer, the glaze can sometimes lose a bit of its pristine shine over time due to condensation or drying out.
For the most impressive presentation, serve the cake chilled directly from the refrigerator. Allowing it to sit at room temperature for 10-15 minutes before slicing can slightly soften the cake layers, but don't leave it out for too long, especially in a warm environment.
Variations and Flavor Combinations for Your Chocolate Mirror Glaze Cake
Adding Coffee Extract to the Cake
A simple but effective variation for your easy mirror glaze birthday cake is to enhance the chocolate flavor in the cake itself by adding coffee. Coffee is known to intensify the taste of chocolate without adding a distinct coffee flavor when used in moderation. You can substitute the hot water in the cake batter recipe with hot brewed coffee, or simply add 1 to 2 teaspoons of instant coffee granules or espresso powder to the dry ingredients.
Alternatively, you can add about 1-2 teaspoons of pure coffee extract along with the other wet ingredients. This provides a concentrated coffee flavor boost to the chocolate. The subtle hint of coffee complements the richness of the chocolate cake beautifully, creating a more complex and decadent flavor profile that pairs wonderfully with the sweet chocolate mirror glaze. This small tweak can elevate a standard chocolate cake into something truly special for a birthday celebration.
Incorporating Raspberry Filling
While chocolate ganache is a classic pairing for a chocolate mirror glaze cake, introducing a fruit element like raspberry can add a delightful burst of tartness that cuts through the richness. A layer of raspberry filling between the cake layers offers a vibrant contrast in both color and flavor. You can use a good quality seedless raspberry jam, warmed slightly to make it spreadable.
For a more homemade touch, you can make a simple raspberry compote by simmering fresh or frozen raspberries with a little sugar and a squeeze of lemon juice until thickened. Cool the compote completely before using it as a filling. When assembling the cake, apply the raspberry filling just like you would the ganache filling, ensuring it is contained within the cake layers. The combination of rich chocolate, smooth glaze, and bright, slightly tangy raspberry creates a sophisticated and incredibly delicious mirror glaze cake experience.
Exploring Different Types of Chocolate for the Glaze
While this guide focuses on a classic dark chocolate mirror glaze, you can experiment with different types of chocolate to alter the flavor and appearance of your glaze. Using milk chocolate instead of dark chocolate in the glaze recipe will result in a sweeter, lighter colored glaze. You might need to adjust the amount of condensed milk slightly as milk chocolate contains more sugar and milk solids than dark chocolate.
For a truly different look, you could create a white chocolate mirror glaze. This requires using white chocolate as the base and typically adding titanium dioxide (a food-grade whitener) for opacity. White chocolate glaze serves as a perfect base for adding food coloring to create vibrant, colorful mirror glazes, offering endless possibilities for customizing your easy mirror glaze birthday cake to match any theme or color scheme. Each type of chocolate will react slightly differently in the glaze, so minor adjustments might be needed, but the core technique remains the same.
Enjoy Your Stunning Homemade Chocolate Mirror Glaze Birthday Cake!
Frequently Asked Questions
What exactly is a mirror glaze, and why is it so popular?
A mirror glaze is a glossy, reflective coating used on cakes, typically mousse cakes or entremets. It's popular because it creates a stunning visual effect and is relatively easy to make with the right recipe and equipment.
Is a mirror glaze birthday cake difficult to make, even for a beginner baker?
While it looks complex, creating an easy mirror glaze birthday cake is achievable for beginners with our step-by-step guide. The key is to follow the instructions carefully and use accurate measurements.
What kind of cake works best under a mirror glaze?
Cakes that are smooth and frozen work best under a mirror glaze. Mousse cakes and cakes with a smooth buttercream frosting are ideal, as the frozen surface helps the glaze set quickly and evenly.
What ingredients do I absolutely need to make an easy mirror glaze?
You'll typically need ingredients like gelatin, sugar, glucose syrup (or corn syrup), white chocolate, and condensed milk. Food coloring is also essential for achieving the desired color and effect.
How long does a mirror glaze birthday cake last, and how should I store it?
A mirror glaze birthday cake can last for several days in the refrigerator. Store it covered to prevent the glaze from drying out or becoming sticky. Thawing frozen cake should be done slowly in the refrigerator for best results.
Final Reflection: The Sweet Success of Effortless Elegance
Creating a stunning mirror glaze birthday cake doesn't have to be a daunting culinary feat; it can be an achievable and joyful experience. This article aimed to demystify the process, proving that anyone, regardless of baking skill level, can achieve a professional-looking, show-stopping cake. The ease of the recipe, coupled with the visual impact of the finished product, makes this a perfect project for both seasoned bakers and enthusiastic beginners.
The enduring appeal of a beautifully decorated cake transcends mere sustenance; it's a symbol of celebration, love, and shared joy. It's a testament to the power of simple ingredients transformed into something extraordinary. A cake is a celebration of life, a symbol of joy, and a delicious way to share happiness.
This sentiment perfectly encapsulates the emotional resonance of baking, and specifically, the rewarding experience of mastering a technique like mirror glazing. The impact of a visually stunning cake extends beyond the immediate moment; it creates lasting memories and a sense of accomplishment for both the baker and the recipient.
Now, I invite you to take this knowledge and create your own masterpiece. Don't be intimidated by the seemingly complex nature of mirror glaze; embrace the challenge and experience the satisfaction of crafting a cake that is both delicious and visually breathtaking. Remember the simple steps, trust the process, and most importantly, have fun! The joy of baking, and the pride in creating something beautiful, are rewards in themselves. So, gather your ingredients, put on your apron, and let the sweet success begin!
Unleash Your Inner Cake Artist!
Thanks for joining us on this delicious journey to mastering the mirror glaze! We hope you gained the confidence to create stunning, professional-looking cakes at home. Now it's time to put your new skills to the test!
- Bake your masterpiece: Grab those ingredients and create your own show-stopping mirror glaze cake. Don't forget to share a photo of your creation with us on social media – we'd love to see it!
- Experiment with flavors: Try adding different extracts or fruit purees to personalize your glaze. What unique twist will you add?
- Inspire others: Share this article with fellow baking enthusiasts who need a little extra encouragement to try something new.
Ready to transform your next birthday celebration into a sweet spectacle? What incredible flavors will you incorporate into your first mirror glaze creation?