
The Visual Stages of Gluten Development in Dough

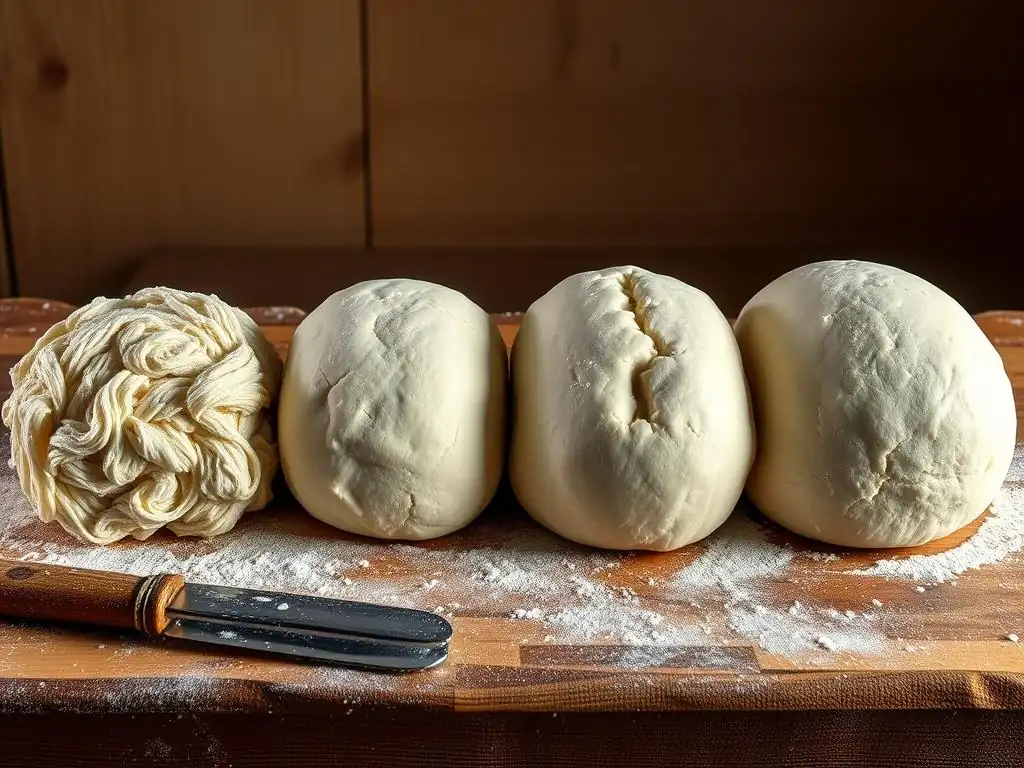
Welcome to BakeWithEase, where unlocking the secrets of perfect baking is, well, a piece of cake! Ever wondered what's really happening inside your dough as you knead? This week, we're diving deep into the fascinating world of gluten development dough stages. Discover the visual cues that separate a good dough from a great dough, and learn how to master this essential baking skill. Ready to see what your dough is trying to tell you? Let's get baking!
- The Visual Stages of Gluten Development in Dough: A Baker's Guide
- Introduction to Gluten Development in Dough for Baking
- Stage 1: Initial Mixing - The Shaggy Dough Stage
- Stage 2: Early Development - The Rough and Sticky Stage
- Stage 3: Intermediate Development - The Smooth and Elastic Stage
- Stage 4: Optimal Development - The Strong and Pliable Stage
- Stage 5: Gluten Breakdown - The Slack and Weak Stage
- Visual Guide Summary: Gluten Development Stages
- Conclusion: Mastering Gluten Development for Better Baking
-
Frequently Asked Questions
- How can I visually identify the different stages of gluten development in dough?
- What role does kneading play in gluten development?
- What happens if I over-knead my dough?
- Are there any alternative methods to kneading for gluten development?
- What type of flour is best for optimal gluten development?
- Final Reflection: Understanding Gluten's Visual Journey
- Unlock Your Dough's Potential: Master Gluten Development!
The Visual Stages of Gluten Development in Dough: A Baker's Guide
Introduction to Gluten Development in Dough for Baking
Understanding Gluten: The Foundation of Bread Structure
Gluten is a complex network of proteins that forms when two proteins found in wheat flour, glutenin and gliadin, come into contact with water. When you mix flour and water, these proteins begin to hydrate. As you knead or mix the dough, you encourage these hydrated proteins to link together, forming long, elastic strands. This developing structure is the gluten network. It's this network that traps gases produced by yeast or other leaveners, allowing bread to rise and giving baked goods their characteristic texture and chewiness. Without sufficient gluten development, bread would be dense and crumbly.
The specific types of glutenin and gliadin in flour, as well as their ratio, determine the strength and elasticity of the gluten network that can be developed. High-protein flours, like bread flour (typically 12-14% protein), contain more of these proteins and are ideal for developing a strong gluten structure needed for chewy breads. Lower-protein flours, such as cake flour (around 7-9% protein), are better suited for tender cakes and pastries where minimal gluten development is desired. Understanding this basic science is the first step in mastering the visual stages of gluten development dough stages.
Why Visual Cues are Crucial for Gluten Assessment
While recipes often provide mixing times, relying solely on a timer isn't always accurate because factors like flour type, hydration level, mixing method, and even ambient temperature affect how quickly gluten develops. Learning to assess the dough's condition by sight and feel is a fundamental skill for any baker aiming for consistent results. The dough goes through distinct visual stages of gluten development, each offering clues about its structural integrity.
Observing the dough's appearance and how it behaves under manipulation tells you much more than a clock ever could. Is it shaggy? Is it smooth? Does it tear easily, or does it stretch without breaking? These visual and tactile signs are direct indicators of the strength and elasticity of the developing gluten network. By recognizing these gluten development dough stages, you can adjust your mixing or kneading time, ensuring you achieve the optimal structure for your specific recipe, whether it's a rustic sourdough or a tender brioche.
Stage 1: Initial Mixing - The Shaggy Dough Stage
Visual Characteristics: Flour and Water Just Combined
Immediately after combining flour and water (and often yeast, salt, and other ingredients), the mixture appears rough, lumpy, and uneven. It looks like disparate clumps of wet flour rather than a cohesive mass. This is the shaggy dough stage. You might still see dry pockets of flour, and the mixture doesn't hold any particular shape; it's just a collection of wet particles. At this point, the ingredients are merely hydrated, and the gluten proteins are just beginning to interact with the water.
The surface is rough and lacks any smoothness or elasticity. If you try to stretch a piece, it will break apart very easily, resembling wet sand or crumbs rather than a connected structure. This visual cue signifies that the gluten development is minimal; the glutenin and gliadin proteins have absorbed water but haven't yet been worked sufficiently to form significant links. This initial stage is brief and transitions quickly as mixing continues.
Gluten Protein Hydration: The Initial Binding Process
At this stage, the primary process occurring is the hydration of the flour proteins, particularly glutenin and gliadin. Water molecules surround and penetrate the protein structures, allowing them to become more mobile and ready to interact. Think of it like the proteins waking up and getting ready to link hands. While some very weak, temporary bonds might start forming, there is no organized network yet.
This initial hydration is crucial because the proteins need to be fully saturated with water to be able to bond effectively and build the gluten network. The more evenly and completely the flour is hydrated, the better the potential for gluten development. This is why ensuring all the dry flour is incorporated into the wet ingredients is the first step before any significant kneading or mixing to develop the gluten structure begins.
Stage 2: Early Development - The Rough and Sticky Stage
Visual Indicators: Clumping and Initial Elasticity
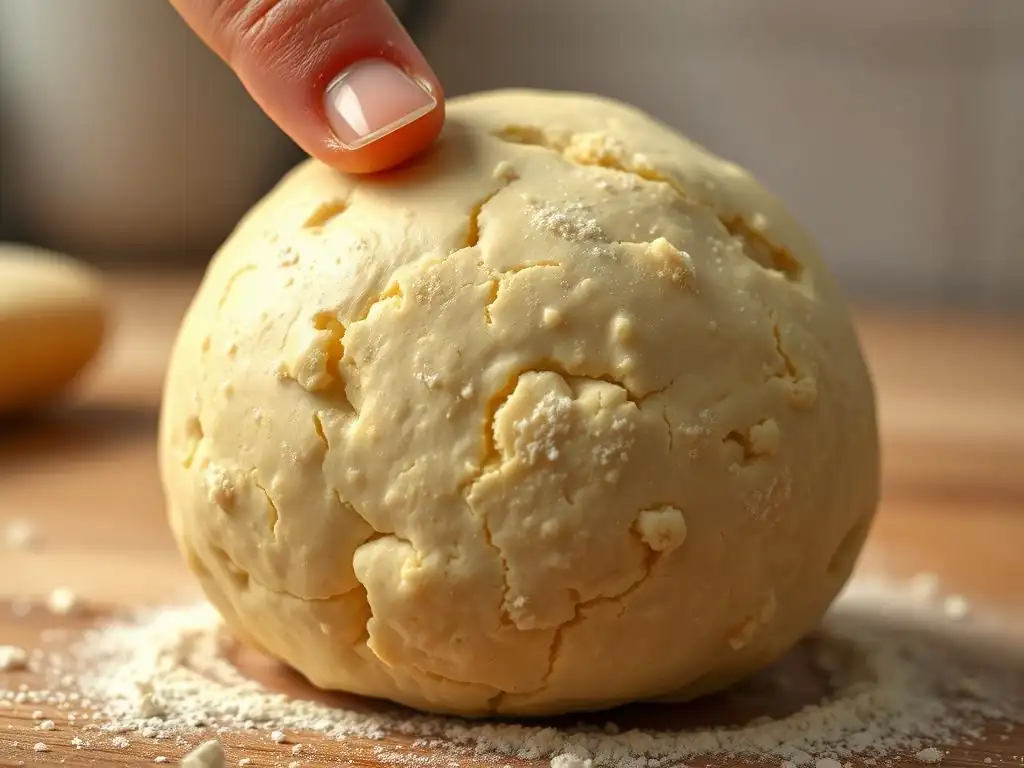
As you continue to mix or knead the shaggy dough, it will start to come together into a more cohesive mass, though it will still look quite rough and uneven on the surface. You'll notice that instead of falling apart completely, the dough begins to stick to itself and the bowl or your hands. It forms larger clumps and starts to show the very first signs of elasticity. If you pull a piece, it might stretch just a little bit before tearing.
The surface is still not smooth; you can often see individual particles or small lumps within the mass. It might look somewhat like cottage cheese or lumpy mashed potatoes depending on the hydration level. This visual stage indicates that the gluten proteins are starting to link together, forming short, irregular chains. The dough is gaining some structure, but it's still weak and easily broken. This is a key step in the gluten development dough stages, moving from mere hydration to initial structural formation.
Dough Feels Tacky: Initial Gluten Strand Formation
Accompanying the rough appearance is a distinct tackiness or stickiness. The dough will cling to surfaces and your fingers. This stickiness is a direct result of the initial gluten strands forming and the dough becoming more cohesive, but without the smooth, strong network that comes later. It's like the network is being built with weak glue – it holds a bit, but it's messy and sticks to everything.
Despite the stickiness, you can feel a slight resistance when you pull the dough, a subtle indication of the nascent gluten structure. This resistance wasn't present in the shaggy stage. The proteins are actively linking, creating a rudimentary framework. This stage is often where bakers transition from initial mixing to more vigorous kneading or mixing to encourage further gluten development.
Benefit of Autolyse: Improved Hydration and Gluten Alignment
An autolyse (pronounced auto-leez) is a technique where you mix just the flour and water from a recipe and let it rest for 20 minutes to several hours before adding the other ingredients (like salt and yeast) and continuing to mix. Visually, the dough often moves from the shaggy stage towards the rough and sticky stage, and sometimes even starts smoothing out slightly during this rest. The benefit is significant: the flour fully hydrates without the presence of salt (which can tighten gluten) or yeast (which starts fermentation).
This period allows the gluten proteins to hydrate completely and begin aligning themselves naturally without mechanical effort. It often leads to a dough that is easier to knead, requires less kneading time overall, and results in a more extensible (stretchy) gluten network. For bakers focusing on the gluten development dough stages, autolyse is a powerful tool to improve the dough's texture and handling properties right from the start.
Stage 3: Intermediate Development - The Smooth and Elastic Stage
Visual Indicators: Smooth Surface, Some Stretch
As kneading or mixing continues past the rough and sticky stage, a noticeable transformation occurs. The dough's surface begins to smooth out significantly. It loses its lumpy, cottage-cheese-like appearance and starts to look more uniform and satiny. While it might still be slightly tacky, it is much less sticky than before and handles more easily.
When you pull or stretch the dough, it resists more strongly and stretches further before tearing. You can usually pull a small piece into a thick membrane, but it will likely break before becoming truly thin and transparent. This visual and tactile change signals that the gluten network is becoming more organized and stronger. The short, irregular protein chains have linked further, forming longer, more robust strands that are starting to align.
The Windowpane Test: Assessing Gluten Strength and Extensibility
The "windowpane test" is a classic method used at this stage and the next to assess the level of gluten development. To perform it, take a small piece of dough (about the size of a golf ball), gently flatten it, and then stretch it slowly and carefully with your fingers, working from the center outwards. The goal is to see if you can stretch it thin enough to see light through the center without it tearing.
At the intermediate stage of gluten development, the dough will likely stretch somewhat but tear before you can create a transparent "window." This indicates that while the gluten network is developing strength and elasticity, it's not yet fully formed or evenly distributed. The windowpane test provides a tangible measure of the dough's readiness to proceed to the next stage of gluten development dough stages.
Kneading Techniques: Developing Strength and Structure
Reaching the smooth and elastic stage requires mechanical action – kneading or mixing. Hand kneading involves folding, pushing, and stretching the dough, physically aligning and strengthening the gluten strands. Machine mixing, using a dough hook, achieves the same result through the rotation and friction within the bowl. The duration and intensity of kneading depend heavily on the dough's hydration level and the type of flour used.
A lower hydration dough (like a bagel dough, perhaps 50-55% hydration) might develop sufficient gluten relatively quickly with vigorous kneading, possibly in 8-10 minutes by hand or 5-7 minutes by machine. A higher hydration dough (like a ciabatta, possibly 75-80% hydration) takes longer to develop structure due to the excess water interfering with protein linking and may require 15-20 minutes or more of machine mixing, often at higher speeds after the initial mix, to reach this smooth stage. The visual cues guide the process far better than a timer.
Stage 4: Optimal Development - The Strong and Pliable Stage
Visual Indicators: Holds Shape, Springs Back Slowly
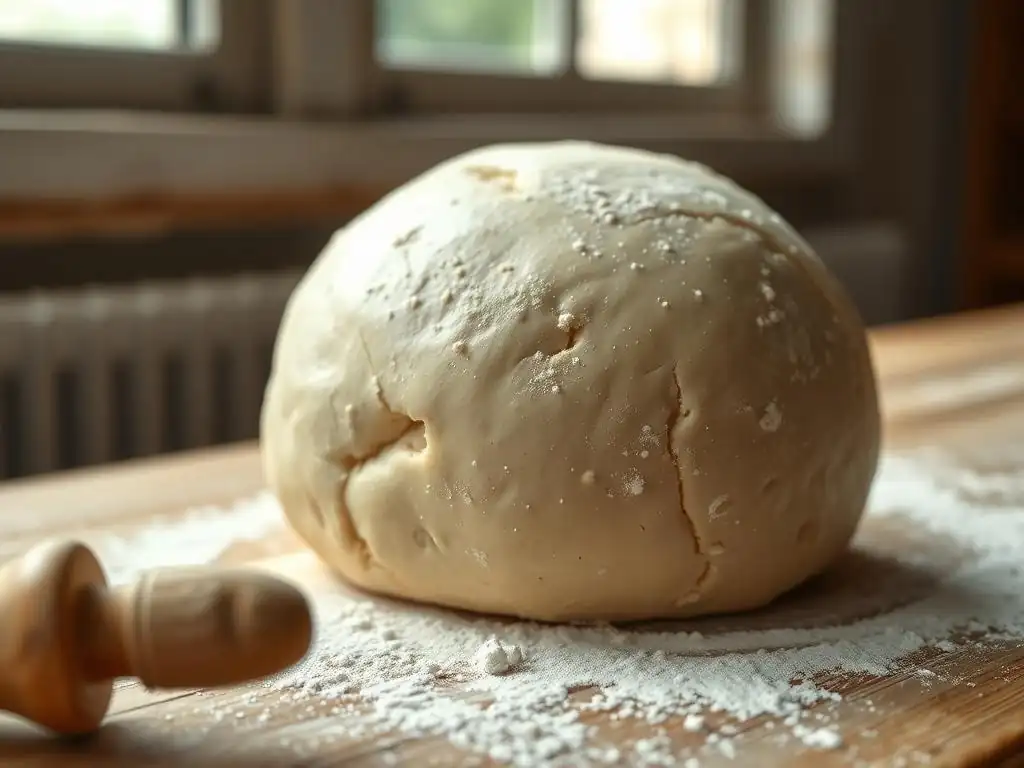
This is the goal for most bread doughs: the optimally developed gluten stage. Visually, the dough looks smooth, satiny, and often slightly puffy or alive. When you gently shape it into a ball, it holds that shape reasonably well, though it will slowly relax and spread slightly over time. The surface might appear almost translucent in spots, especially in higher hydration doughs.
When you poke the dough gently with a finger, the indentation will slowly spring back, but not immediately. This springiness is a key visual and tactile indicator of a well-developed, elastic, and strong gluten network. The gluten strands are now long, well-aligned, and capable of trapping significant amounts of gas, ready for the fermentation and baking processes. Recognizing this stage is critical in mastering the gluten development dough stages.
Dough Springs Back: Sign of a Strong Gluten Network
The spring-back effect when poked is a direct result of the gluten network's elasticity. Think of the gluten strands like tiny rubber bands woven together. When you press into the dough, you're stretching these "rubber bands." A strong, well-formed network has the resilience to return to its original shape. If the dough springs back too quickly and resists stretching, it might be slightly underdeveloped or "tight." If it doesn't spring back much at all and the indentation remains, it could be either underdeveloped or potentially over-kneaded (though over-kneading has other distinct signs).
Achieving this optimal elasticity is crucial for successful rising. During fermentation, yeast produces carbon dioxide gas. The elastic gluten network expands like a balloon to contain this gas, allowing the dough to increase significantly in volume. In the oven, the final rapid rise (oven spring) also relies on the gluten network's ability to stretch and set before collapsing.
Signs of Over-Kneading: Tearing and Loss of Elasticity
While developing gluten is essential, it is possible to over-knead dough, especially in a stand mixer. Over-kneaded dough visually begins to look slack and wet again, losing the smooth, satiny appearance of the optimal stage. It might even start to tear easily during mixing, sometimes climbing up the dough hook in a stringy mess.
If you perform the windowpane test on over-kneaded dough, it will often tear immediately or stretch into a very weak, easily broken membrane, rather than a thin, transparent window. This happens because the mechanical stress has started to break the gluten strands, weakening the network instead of strengthening it. Over-kneaded dough lacks the characteristic springiness; it feels lifeless and slack. Recognizing these signs prevents you from ruining the dough's structure after putting in the work to develop it through the gluten development dough stages.
Stage 5: Gluten Breakdown - The Slack and Weak Stage
Visual Indicators: Loose, Spreading Dough
Beyond the point of optimal development or after prolonged fermentation (over-proofing), the gluten network can begin to break down. Visually, the dough becomes very relaxed, loose, and often spreads out significantly on the counter rather than holding any shape. The surface might appear dull and possibly sticky again, but not with the tackiness of early development; rather, it feels fragile.
If you try to handle the dough, it will feel heavy and dense, lacking the airy quality of well-developed dough. It will tear very easily if you try to stretch it, with no discernible elasticity or resistance. This visual state is a clear indicator that the structural integrity provided by the gluten network has been compromised.
Dough Loses Shape: A Sign of Gluten Degradation
The inability of the dough to hold its shape is a direct consequence of the weakened gluten structure. The long, interconnected strands that provided the framework have been broken down, either by excessive mechanical stress (severe over-kneading) or enzymatic activity during prolonged fermentation (over-proofing). The network is no longer strong enough to support the dough's mass or contain gas.
This stage is undesirable for most bread baking, as the dough will struggle to rise properly and may collapse during shaping or baking. While some recipes for very wet doughs or specific styles might tolerate a slightly slacker dough, a dough that has reached this stage due to breakdown is generally considered past its prime for creating a well-structured loaf.
Impact of Over-Proofing: Weakened Structure and Potential Collapse
Over-proofing occurs when fermented dough is left to rise for too long. While fermentation is essential for flavor and gas production, prolonged activity of enzymes (like proteases, naturally present in flour) can start to break down the gluten proteins. The visual result is dough that looks hugely inflated but also very fragile and potentially starting to sag.
If you poke over-proofed dough, it may deflate dramatically, and the indentation will remain completely, indicating no elastic spring-back. This weakened state, a form of gluten breakdown, means the dough lacks the strength to support itself. When baked, over-proofed loaves often spread out instead of rising upwards, can have a dense crumb, and might even collapse entirely, showcasing the negative outcome of progressing too far through the gluten development dough stages or letting fermentation go unchecked.
Visual Guide Summary: Gluten Development Stages
Quick Reference Chart: Visual Cues and Expected Dough Behavior
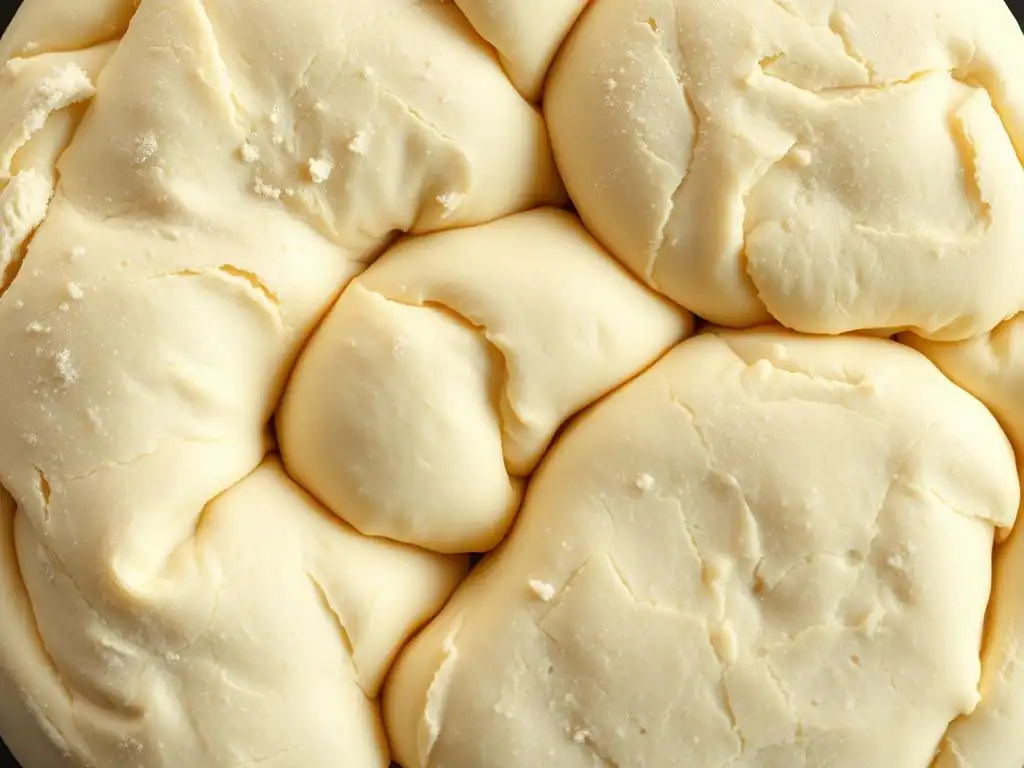
Here's a quick look at the gluten development dough stages and what to expect visually and texturally:
- Stage 1: Shaggy Dough
- Visual: Loose, lumpy, dry patches, no cohesion.
- Feel: Crumbly, falls apart easily.
- Stretch Test: Tears immediately.
- Stage 2: Rough and Sticky
- Visual: Cohesive mass forming, still rough/uneven surface, sticky.
- Feel: Tacky, slight resistance when pulled.
- Stretch Test: Stretches slightly, then tears.
- Stage 3: Intermediate Development
- Visual: Surface smoothing out, less sticky.
- Feel: More elastic, resists stretching.
- Stretch Test: Stretches into a thick membrane, tears before transparent.
- Stage 4: Optimal Development
- Visual: Smooth, satiny, holds shape, slow spring-back when poked.
- Feel: Elastic, pliable, strong but not tight.
- Stretch Test: Stretches into a thin, transparent windowpane.
- Stage 5: Gluten Breakdown
- Visual: Slack, spreads out, dull surface, tears easily during handling.
- Feel: Heavy, lifeless, no elasticity.
- Stretch Test: Tears immediately, no resistance.
Troubleshooting: Addressing Common Dough Issues Based on Appearance
Recognizing the visual cues of the gluten development dough stages allows you to troubleshoot common problems:
- Dough is still Shaggy after initial mix: Ensure all dry ingredients are hydrated. If using a machine, scrape down the sides. Give it a minute or two more mixing.
- Dough is Rough and Sticky but won't smooth out: It likely needs more kneading/mixing time. Stickiness is normal at this stage, but it should progress. Check your hydration level – very high hydration doughs stay stickier longer but will eventually smooth.
- Dough Tears Easily during kneading/stretching: It's likely underdeveloped. Continue kneading. If it feels very tight and resistant and tears, it might be slightly over-kneaded, or the gluten needs to relax (rest it for 10-15 minutes).
- Dough is Slack and Spreading too much: If this happens after kneading, it's likely over-kneaded. If it happens after rising, it's over-proofed. There's little remedy for severe over-kneading, but over-proofed dough can sometimes be salvaged by gently reshaping and baking immediately, though the structure will be compromised.
Tips: Achieving Consistent Gluten Development
- Hydration Matters: Higher hydration doughs develop gluten differently than lower hydration ones. They often require less initial kneading but more time or gentler methods (like stretch and folds) to build strength.
- Use the Right Flour: Choose a flour with appropriate protein content for your desired outcome. Bread flour for chewy loaves, all-purpose for versatile use, cake flour for tenderness.
- Be Patient: Gluten development takes time. Don't rush the process.
- Feel the Dough: Don't just rely on visual cues; the feel of the dough is equally important.
- Consider Autolyse: For many bread doughs, particularly those with higher hydration or whole grains, an autolyse step can significantly improve gluten development and dough handling.
- Temperature: Warmer dough (within reason, e.g., 75-80°F or 24-27°C) develops gluten faster than cold dough.
Conclusion: Mastering Gluten Development for Better Baking
The Importance of Observation and Feel
Becoming proficient at recognizing the visual stages of gluten development dough stages is one of the most valuable skills a bread baker can acquire. It moves you beyond blindly following recipe timings and empowers you to react to the dough's actual condition. By observing how the dough looks, feels, and stretches, you gain the ability to adjust your process on the fly, ensuring optimal structure for every loaf.
Developing this intuition takes practice. Pay close attention to the dough during mixing and kneading. Touch it, stretch it, poke it. Compare its state to the descriptions of each stage. Over time, you'll build a strong sense of what optimally developed dough looks and feels like, regardless of the specific recipe or conditions. This mastery of the gluten development dough stages is key to consistent, high-quality baking results.
Further Reading: Resources for Advanced Gluten Understanding
To deepen your understanding of gluten and its behavior, consider exploring resources that delve into the science of baking. Books focusing on bread science or articles specifically discussing wheat protein structure can provide valuable theoretical background. Investigating different mixing methods, like the "stretch and fold" technique often used for high-hydration doughs, offers practical ways to achieve strong gluten networks with minimal mechanical effort. Understanding how factors like salt, fat, and sugar interact with gluten will further refine your skills.
[Call to Action: Bake a Sourdough Loaf]
Frequently Asked Questions
How can I visually identify the different stages of gluten development in dough?
The stages are typically observed through changes in the dough's texture and appearance. Initially, it's shaggy; then, it becomes smoother and more elastic as gluten develops with kneading. Finally, it becomes strong and slightly tacky, ready for proofing.
What role does kneading play in gluten development?
Kneading is essential for gluten development. It physically aligns the glutenin and gliadin proteins, allowing them to form strong, interconnected gluten strands. This process gives the dough its structure and elasticity.
What happens if I over-knead my dough?
Over-kneading leads to a tight and tough dough. The gluten strands become over-developed and break down, resulting in a less elastic and potentially crumbly final product. The dough may also be difficult to shape.
Are there any alternative methods to kneading for gluten development?
Yes, methods like autolyse (allowing the flour and water to hydrate before kneading) and stretch and folds can aid gluten development. These techniques offer gentler ways to strengthen gluten structure without excessive kneading.
What type of flour is best for optimal gluten development?
Bread flour, with its higher protein content, is generally preferred for achieving strong gluten development. This type of flour contains more glutenin and gliadin, the proteins responsible for gluten formation and structure.
Final Reflection: Understanding Gluten's Visual Journey
The visual cues of gluten development are not merely academic; they are the cornerstone of successful baking. Mastering these stages, from the initial hydration to the final windowpane test, directly translates to the texture and quality of your final product – a perfectly risen loaf, a chewy pizza crust, or delicate pastries. Ignoring these visual clues can lead to disappointing results, highlighting the crucial link between observation and culinary success.
The impact of understanding gluten development extends far beyond the individual baker. It connects us to a centuries-old tradition of bread making, a craft passed down through generations. The subtle shifts in dough consistency, the way the gluten strands align and strengthen, tell a story of transformation – a testament to the power of simple ingredients and careful technique. Bread is the staff of life,
a simple phrase, yet it speaks volumes about the fundamental role of this staple food in human history, and the importance of understanding its creation. This understanding, built upon the visual cues of gluten development, allows us to appreciate the artistry and science behind every loaf.
Now, consider your own baking journey. What have you learned from observing the visual stages of gluten development? How can you apply this knowledge to improve your next bake? Don't just follow recipes blindly; actively engage with your dough, observe its changes, and learn to interpret its visual cues. By doing so, you will not only elevate your baking skills but also deepen your appreciation for the fascinating process of transforming simple flour and water into something truly remarkable.
Unlock Your Dough's Potential: Master Gluten Development!
Thanks for exploring the fascinating world of gluten development with us! You've now gained a deeper understanding of how this protein impacts your baking, leading to superior textures and flavors. Ready to put your new knowledge into practice?
- Bake a test loaf: Choose your favorite bread recipe and pay close attention to the kneading stage, observing the visual cues we discussed. This hands-on approach will solidify your understanding.
- Share your baking journey: Post a picture of your improved loaf on social media and tag us #BakeWithEaseGluten. Let's inspire each other!
- Explore advanced techniques: Dive deeper into gluten development by researching techniques like autolyse or using different flour types. What new baking adventures will you embark on?
What specific change in your kneading technique will you try next time to achieve even better results?