
Beginner's Guide to Baking Fruit Tarts

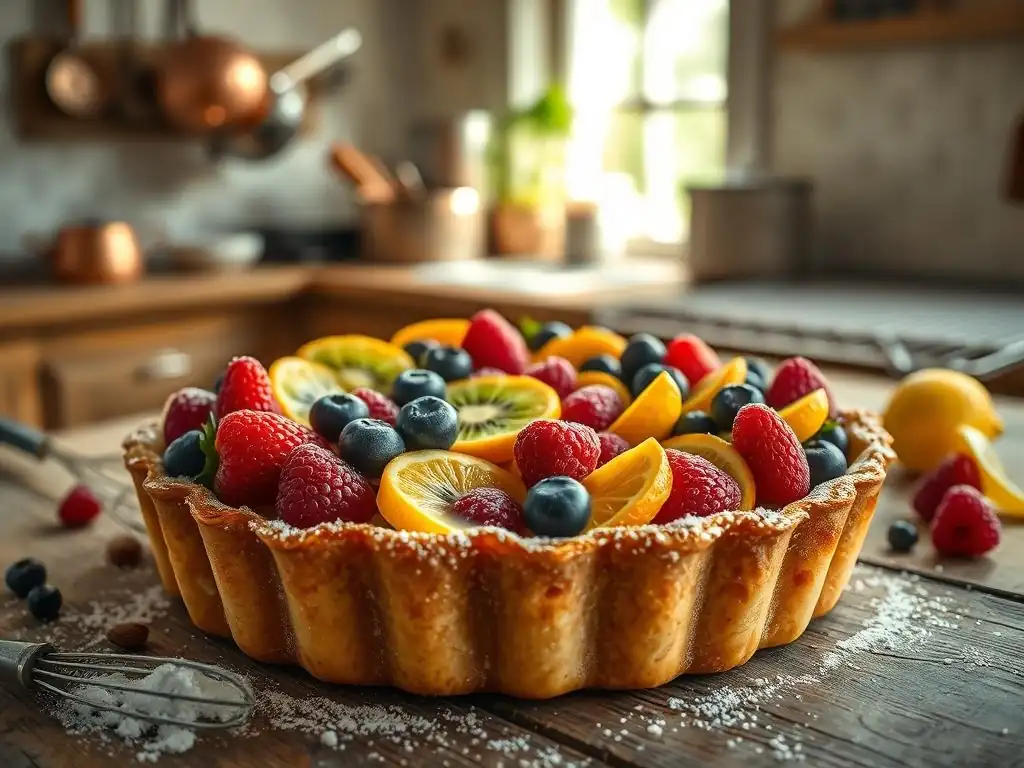
Welcome to BakeWithEase, your kitchen companion on a delicious baking journey! Are you ready to create stunning desserts without the stress? Dive into our world of simple recipes and expert techniques, starting with our guide to crafting an irresistibly easy fruit tart. Discover the secrets to a perfectly crisp crust and vibrant fruit filling – and prepare to impress with your newfound pastry skills. What if we told you that creating a bakery-worthy tart is easier than you think? Let's get baking!
- Beginner's Guide to Classic Apple Tart: An Easy Recipe
- Introduction to Apple Tart: A Delicious and Easy Dessert
- Essential Ingredients for a Simple Apple Tart
- Step-by-Step: Making the Easy Apple Tart Recipe
- Tips and Tricks for Baking the Best Apple Tart
- Storing and Serving Your Homemade Apple Tart
- Troubleshooting Common Apple Tart Baking Problems
- Conclusion: Enjoying Your Easy Apple Tart Creation
- Frequently Asked Questions
- Final Reflection: The Sweetness of Simplicity and the Joy of Creation
- Unleash Your Inner Pastry Chef!
Beginner's Guide to Classic Apple Tart: An Easy Recipe
Introduction to Apple Tart: A Delicious and Easy Dessert
Why Apple Tart Is Perfect for Beginner Bakers
Embarking on your baking journey can feel daunting, but choosing the right starting point makes all the difference. An apple tart, particularly an easy fruit tart recipe like the one we'll explore, is an excellent choice for novices. Unlike intricate layer cakes or delicate pastries, a classic apple tart relies on fundamental techniques that are forgiving and build confidence. Mastering a simple shortcrust pastry and a straightforward apple filling lays a solid foundation for more complex baking projects down the road. It's a dessert that welcomes imperfections and still delivers delicious results.
Furthermore, the ingredients for an easy apple tart recipe are readily available in most kitchens or local grocery stores. You won't need exotic spices or specialized equipment. Basic tools like a mixing bowl, rolling pin, and tart pan are usually sufficient. The process involves clear steps: making the dough, preparing the filling, assembling, and baking. This linearity makes it easy to follow along and understand the purpose of each stage, demystifying the baking process and proving that even impressive-looking desserts can be achievable for beginners.
The Appeal of Homemade Apple Tart: Warm Spices and Simple Techniques
There's an undeniable magic to a homemade apple tart fresh from the oven. The aroma of warm spices like cinnamon and nutmeg wafting through your home is incredibly inviting and comforting. This easy fruit tart recipe captures that essence perfectly, focusing on simple techniques that highlight the natural flavors of the ingredients. The contrast between the crisp, buttery pastry and the soft, spiced apple filling is a classic combination that appeals to almost everyone.
The simplicity of the techniques involved means you don't need years of experience to create something truly special. From cutting cold butter into flour to gently tossing apple slices with sugar and spice, each step is manageable and rewarding.
This easy fruit tart recipe encourages hands-on learning, allowing you to feel the texture of the dough, arrange the apple slices creatively, and witness the transformation in the oven. It's a sensory experience that connects you to the process of making food from scratch, resulting in a dessert that not only tastes amazing but also carries the warmth and care of being homemade.
Essential Ingredients for a Simple Apple Tart
The Perfect Tart Crust: Shortcrust Pastry Ingredients
A great apple tart starts with a flaky, buttery crust. Shortcrust pastry is the ideal choice for an easy fruit tart recipe because it's relatively simple to make and provides a wonderful contrast to the soft filling. The core ingredients are few and basic, typically consisting of flour, cold butter, a pinch of sugar, a touch of salt, and ice water. The key is using cold ingredients and handling the dough minimally to achieve that desired tender and flaky texture.
Understanding the role of each ingredient is crucial for success. Flour provides the structure, cold butter creates flakiness as it melts and creates steam pockets during baking, sugar adds a hint of sweetness and aids browning, and salt enhances the overall flavor. Ice water binds the ingredients together without developing too much gluten, which would result in a tough crust. For an easy fruit tart recipe, getting these proportions right and respecting the temperature of the butter are the most important factors for a beautiful crust.
Flour Selection for a Flaky Tart Crust
For a classic shortcrust pastry perfect for an easy fruit tart recipe, all-purpose flour is typically the go-to choice. Its moderate protein content allows for enough structure to hold the tart's shape without becoming overly tough, provided it's not overworked. Using bleached or unbleached all-purpose flour will yield similar results for a beginner baker. Some recipes might suggest pastry flour for an even more tender crust, but all-purpose is readily available and works wonderfully.
When measuring your flour, it's best to use the spoon-and-level method or a kitchen scale for accuracy. A typical single tart crust recipe might call for around 1 ½ to 2 cups of flour, which weighs approximately 180-240 grams. Packing flour into the measuring cup can result in using too much, leading to a dry, crumbly, or tough dough. Precision in measuring flour is a small step that makes a big difference in the final texture of your easy fruit tart recipe's crust.
Butter: The Key to a Tender and Buttery Crust
Butter is perhaps the most critical ingredient in shortcrust pastry for achieving that signature flaky and tender texture. It needs to be very cold, straight from the refrigerator, and cut into small cubes or pieces. As the pastry bakes, these cold pockets of butter melt, releasing steam that pushes apart layers of dough, creating the desired flakiness. Using soft or melted butter will result in a greasy, dense crust rather than a light, airy one.
A standard recipe for a single tart crust often calls for about ½ cup (or 1 stick) of cold unsalted butter, which is roughly 113 grams. Unsalted butter is preferred as it gives you control over the salt level in the dough. Cutting the butter into small, pea-sized pieces ensures it's evenly distributed throughout the flour mixture. Some bakers even recommend freezing the butter for 10-15 minutes before cutting it in, especially in warm kitchens, to ensure it stays cold throughout the mixing process for your easy fruit tart recipe.
Sugar and Salt: Enhancing the Flavor of Your Tart Dough
While the filling provides most of the sweetness, a small amount of sugar in the tart dough contributes to flavor and helps the crust brown nicely. For a savory tart, sugar might be omitted or reduced significantly, but for an easy fruit tart recipe like apple, a tablespoon or two of granulated sugar adds just the right touch without making the crust overly sweet. This subtle sweetness complements the rich, buttery flavor.
Salt is equally important as a flavor enhancer. Just a pinch, typically around ¼ to ½ teaspoon for a single crust, helps to balance the sweetness and richness. It prevents the crust from tasting bland and brings out the nutty notes of the baked flour and butter. Using kosher or fine sea salt is recommended for even distribution within the dough. Together, sugar and salt elevate the simple ingredients to create a flavorful foundation for your easy fruit tart recipe.
Choosing Your Apple Filling: Crisp and Tart Varieties
The success of an apple tart hinges significantly on the type of apples you choose. Not all apples bake equally well; some turn to mush, while others hold their shape perfectly and offer a pleasant tartness that balances the sweetness of the filling and crust. For an easy fruit tart recipe, selecting the right apples ensures a delicious texture and flavor without requiring complex adjustments to the recipe.
A good apple tart filling requires a mix of texture and flavor. Using apples that hold their shape ensures you have distinct apple slices rather than a uniform puree after baking. Combining slightly tart apples with sweeter ones can add complexity to the flavor profile. Aim for apples that won't release excessive liquid, as this can lead to a soggy bottom crust, a common pitfall for beginners making an easy fruit tart recipe.
Best Apples for a Classic Apple Tart
Several apple varieties are consistently recommended for baking because they retain their structure and offer a good balance of sweetness and acidity. Granny Smith apples are a classic choice, known for their tartness and firmness, which prevents them from turning mushy. They provide a bright counterpoint to the rich pastry and sweet spices in an easy fruit tart recipe.
Other excellent options include Honeycrisp, Fuji, Gala, and Braeburn. Honeycrisp apples are crisp and sweet-tart, holding their shape beautifully. Fuji and Gala are sweeter but still firm enough for baking, often used in combination with tarter varieties. Braeburn apples offer a nice balance of sweet and tart flavors. Using a mix of two or three different types, such as Granny Smith combined with Honeycrisp or Braeburn, can create a more complex and interesting filling for your easy fruit tart recipe.
Preparing Your Apples for the Tart Filling
Proper preparation of the apples is key to a successful filling in your easy fruit tart recipe. This involves peeling, coring, and slicing the apples. The thickness of the slices can affect the baking time and final texture. Slices that are too thick might remain too firm, while slices that are too thin could cook down too much. Aim for slices about ⅛ to ¼ inch thick for consistent cooking.
Once sliced, the apples are typically tossed with sugar, spices, and sometimes a thickener like flour, cornstarch, or tapioca starch. This coating helps to draw out some moisture from the apples before baking and thickens their juices into a lovely sauce. For a standard 9-inch tart, you'll likely need about 6-8 medium apples, which yields roughly 6-7 cups of sliced fruit. Tossing them gently ensures they are evenly coated without breaking the slices.
The Spiced Apple Mixture: Adding Warmth and Flavor
Beyond the apples themselves, the spices and sweeteners you add are crucial for creating that comforting, classic apple tart flavor. This mixture transforms simple baked apples into a rich, aromatic filling that perfectly complements the buttery crust of your easy fruit tart recipe. The balance of sugar and spice can be adjusted slightly to your preference, but the traditional combination is a favorite for a reason.
Typically, the sliced apples are tossed with granulated sugar, brown sugar (for moisture and depth of flavor), and warm spices. The amount of sugar depends on the sweetness of the apples used, but a common starting point for 6-7 cups of apples is around ½ to ¾ cup total sugar. The spices add the signature warmth.
Cinnamon and Nutmeg: A Traditional Choice
Cinnamon is the undisputed star spice in most apple desserts, and it's essential for a classic easy fruit tart recipe. Its warm, sweet, and slightly woody notes pair perfectly with the natural sweetness and tartness of apples. Ground cinnamon is easy to use and distributes evenly throughout the filling. A typical amount for a 9-inch tart filling is 1 to 2 teaspoons, depending on how pronounced you like the cinnamon flavor.
Nutmeg, often used in conjunction with cinnamon, adds another layer of warmth and complexity. Freshly grated nutmeg provides a more vibrant flavor than pre-ground, but either works well for an easy fruit tart recipe. Just a pinch, about ¼ to ½ teaspoon, is usually sufficient, as nutmeg can be quite potent. Some recipes might also include a dash of allspice or ground cloves for added depth, but cinnamon and nutmeg are the fundamental pairing that defines the classic apple tart flavor profile.
Step-by-Step: Making the Easy Apple Tart Recipe
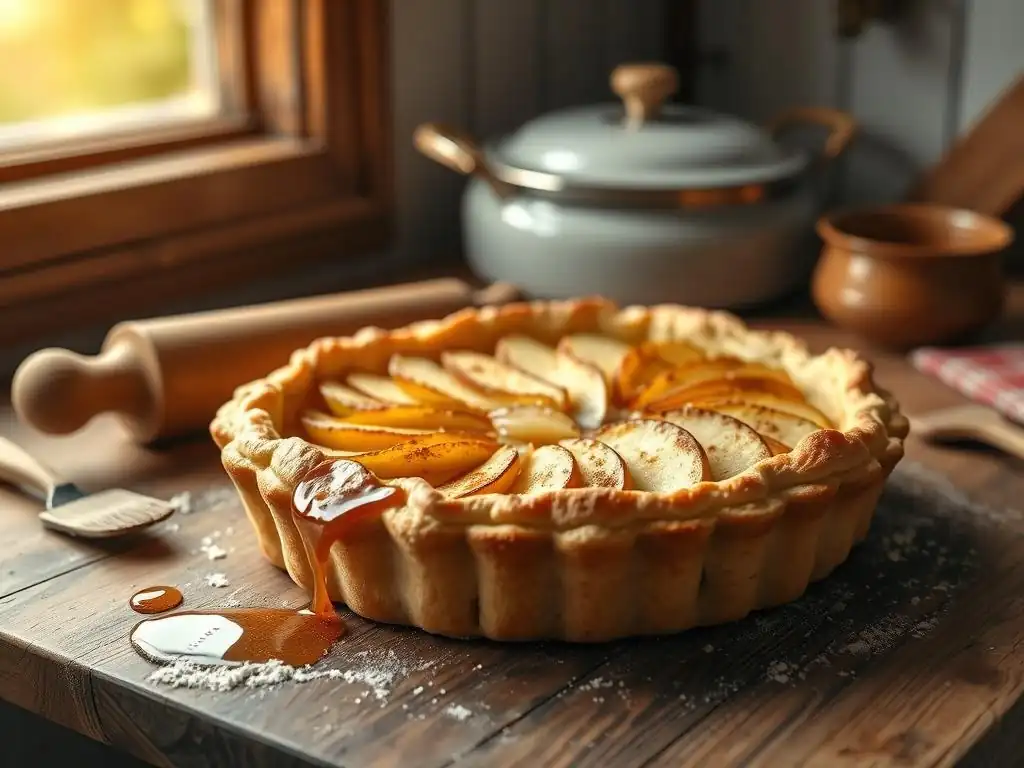
Part 1: Preparing the Shortcrust Pastry
Making the dough for your easy fruit tart recipe is the first crucial step. It's a process that requires speed and a gentle touch to keep the butter cold and prevent gluten development. Don't be intimidated; even if it's not perfectly smooth initially, a chilled dough is usually forgiving. Following these steps carefully will set you up for a successful crust.
The goal in this stage is to combine the dry ingredients, cut in the cold butter until it's distributed in small pieces, and then add just enough ice water to bring the dough together. Overmixing is the enemy of flaky pastry, so work quickly and stop as soon as the dough forms a cohesive mass.
Combining the Dry Ingredients
Start by whisking together the flour, sugar, and salt in a large mixing bowl. This ensures that these dry ingredients are evenly distributed before the butter is added. For a standard 9-inch tart, you might use 1 ½ cups of all-purpose flour, 1-2 tablespoons of granulated sugar, and ¼ teaspoon of salt. Make sure there are no lumps, especially if using fine sugar or salt.
Using a large bowl gives you plenty of room to work when you add the butter. Some bakers sift the flour, but for an easy fruit tart recipe, simply whisking is sufficient. This step is quick but important for the overall consistency and flavor of your tart dough.
Cutting in the Butter: Achieving the Right Texture
This is arguably the most critical step for a flaky crust. Add the cold, cubed butter to the dry ingredients. Use a pastry blender, your fingertips, or a food processor to cut the butter into the flour mixture until it resembles coarse crumbs with some larger, pea-sized pieces of butter still visible. These larger pieces are what create flakiness.
If using your fingertips, work quickly to avoid melting the butter with the heat of your hands. Lift and rub the mixture between your fingers until the desired texture is achieved. In a food processor, pulse the ingredients together in short bursts. The process should take only a minute or two. The mixture should feel sandy but have distinct butter pieces throughout.
Adding Cold Water: Forming the Dough
Now, add ice water to the mixture, usually 1 tablespoon at a time. Sprinkle the water over the flour/butter mixture and gently mix with a fork or your hands until the dough just starts to come together. You'll likely need about 4 to 6 tablespoons of ice water for a single crust, but the exact amount varies depending on the humidity and flour.
The dough should be moist enough to clump together when squeezed but not sticky or wet. Stop adding water as soon as the dough forms a shaggy mass. It doesn't need to be perfectly smooth at this stage.
Chilling the Dough: An Important Step
Gather the shaggy dough together, press it into a disc shape, wrap it tightly in plastic wrap, and refrigerate for at least 30 minutes, preferably 1 hour or even overnight. Chilling allows the gluten to relax (making the dough easier to roll) and firms up the butter (essential for flakiness).
Skipping the chilling step will make the dough sticky and difficult to handle, and your crust won't be as flaky. This rest period is non-negotiable for a good easy fruit tart recipe crust. You can even make the dough a day or two ahead of time.
Part 2: Baking the Tart Crust
Baking the crust before adding the filling, known as blind baking, is a common technique used in easy fruit tart recipes to prevent the dreaded "soggy bottom." This step partially or fully bakes the crust, giving it a head start and ensuring it's crisp all the way through.
The process involves lining the tart pan with the rolled-out dough, adding weights to keep it from shrinking or puffing up, and baking it in a preheated oven.
Rolling Out the Dough: Tips for Even Thickness
Remove the chilled dough from the refrigerator and let it sit at room temperature for 5-10 minutes to soften slightly, making it easier to roll. On a lightly floured surface, roll the dough from the center outwards, rotating it frequently to prevent sticking and ensure an even thickness, about ⅛ inch thick.
Aim for a circle about 2 inches larger than your tart pan to allow for fitting it into the pan and up the sides. If the dough cracks, you can gently press it back together. Don't overwork it; roll only until it's the desired size and thickness.
Transferring the Dough to the Tart Pan
Carefully transfer the rolled-out dough to your tart pan. The easiest way is to gently roll the dough around your rolling pin and then unroll it over the pan. Alternatively, you can fold the dough in half or quarters before transferring. Gently press the dough into the bottom and up the sides of the pan, ensuring it fits snugly into the fluted edges.
Avoid stretching the dough, as this can cause it to shrink significantly during baking. Trim any excess dough hanging over the edges, leaving about a ½ inch overhang, which can be folded down or trimmed precisely after baking. Prick the bottom of the crust all over with a fork (this is called docking) to allow steam to escape and prevent puffing.
Blind Baking: Preventing a Soggy Crust
To blind bake, line the dough-lined tart shell with parchment paper or foil, pressing it gently against the bottom and sides. Fill the lined shell with pie weights, dried beans, or rice. The weights hold the dough in place and prevent it from shrinking or bubbling up.
Bake the crust in a preheated oven, typically around 375°F (190°C), for about 15-20 minutes, or until the edges are set and lightly golden. Remove the weights and parchment/foil, then bake for another 5-10 minutes until the bottom is dry and lightly golden. This partial bake is key for an easy fruit tart recipe.
Cooling the Crust: Ready for Filling
Once the blind-baked crust is ready, remove it from the oven and place it on a wire rack to cool completely before adding the filling. A warm crust can cause the filling to become soggy or affect the texture of the finished tart. Allowing it to cool lets the crust firm up.
While the crust cools, you can prepare your apple filling. Ensure the crust is fully cool to the touch before moving on to the assembly stage of your easy fruit tart recipe. This step is simple but important for the final outcome.
Part 3: Assembling the Apple Tart
With your blind-baked crust cooled and your apple filling prepared, it's time to bring everything together. Assembling the tart is straightforward and where your easy fruit tart recipe really starts to take shape, leading towards a beautiful and delicious dessert.
This stage involves preparing the spiced apple mixture, filling the pre-baked crust, and optionally adding a topping before the final bake. Careful arrangement of the apples can also enhance the visual appeal.
Preparing the Spiced Apple Filling
While the crust cools, peel, core, and slice your chosen apples (about 6-8 medium apples for a 9-inch tart). In a large bowl, gently toss the apple slices with the sugar (e.g., ½ cup granulated, ¼ cup brown), spices (e.g., 1 ½ tsp cinnamon, ¼ tsp nutmeg), and a thickener (e.g., 2 tbsp all-purpose flour or cornstarch).
Let the mixture sit for about 10-15 minutes. The sugar will start to draw out juices from the apples, which will then combine with the thickener to create a lovely sauce during baking. This brief resting period is helpful for managing moisture in your easy fruit tart recipe.
Filling the Tart Crust: Evenly Spreading the Apples
Once the crust is cool, spoon the spiced apple filling into the blind-baked shell. Try to distribute the apples evenly, spreading them out to fill the bottom and build up slightly towards the center, as the apples will cook down during baking.
Ensure the apples are packed relatively snugly, but don't press them down too hard. Pour any accumulated juices from the bottom of the apple bowl over the top of the filling. This liquid will thicken into a sauce as the tart bakes.
Arranging the Apple Slices: Creating a Beautiful Design
While simply spooning the apples in works perfectly well for an easy fruit tart recipe, you can elevate the presentation by arranging the apple slices neatly on top. This is purely for aesthetics, but it makes the final tart look stunning.
You can arrange slices in concentric circles, starting from the outside and working your way in, slightly overlapping each slice. Alternatively, you can create a spiral pattern or even stand the slices upright for a rose-like effect. This step allows for a touch of creativity in your easy fruit tart recipe.
Adding a Crumble Topping (Optional)
For a twist on the classic, you can add a crumble topping instead of a full top crust. This adds a lovely texture contrast. A simple crumble topping is made by combining flour, sugar (often brown sugar), cold butter cut into small pieces, and sometimes oats or nuts.
Sprinkle the crumble mixture evenly over the apple filling. About ¾ cup of flour, ½ cup brown sugar, and ⅓ cup cold butter is a good starting point for a crumb topping for a 9-inch tart. Bake the tart as directed with the filling and topping. This variation makes for an even simpler easy fruit tart recipe as it bypasses rolling out a second crust.
Tips and Tricks for Baking the Best Apple Tart
Avoiding a Soggy Tart Crust: Expert Advice
A soggy bottom crust is one of the most common issues when baking fruit tarts, especially for beginners tackling an easy fruit tart recipe. The primary culprit is excess moisture from the fruit filling. Blind baking the crust (as described in Part 2) is the most effective way to combat this. By partially or fully baking the crust before adding the wet filling, you create a barrier and give the dough a head start in crisping up.
Another technique is to use a thickener like cornstarch, flour, or tapioca starch tossed with the apples. These starches absorb the juices released by the fruit as it bakes, turning them into a thick sauce instead of a watery liquid that seeps into the crust. Using apples that don't release excessive moisture, like Granny Smith or Honeycrisp, also helps. Additionally, ensuring your tart is baked long enough allows the bottom crust to fully cook and become golden brown and crisp.
Achieving a Perfectly Golden-Brown Crust
A visually appealing tart has a beautifully golden-brown crust, indicating it is fully baked and crisp. Several factors contribute to this. Firstly, ensuring your oven temperature is accurate is crucial. Using an oven thermometer is a good idea. Baking at the correct temperature, typically around 375-400°F (190-200°C), allows the crust to brown properly.
Brushing the exposed parts of the crust (like the edges or any lattice work) with an egg wash (egg beaten with a little water or milk) or just milk or cream before baking promotes a lovely golden color and slight sheen. If the edges of your tart are browning too quickly while the rest of the tart bakes, you can loosely cover them with strips of aluminum foil or a pie crust shield. Baking the tart until the filling is bubbling ensures it's cooked through, and the bottom crust has had ample time to brown.
Preventing the Crust from Shrinking During Baking
Crust shrinkage is another common issue. It often happens when the dough is overworked, stretched when being placed in the pan, or not properly chilled before baking. Overworking the dough develops gluten, which contracts when heated, causing shrinkage. Stretching the dough to fit the pan has a similar effect.
To prevent shrinkage in your easy fruit tart recipe, handle the dough minimally. Roll it out gently and transfer it to the pan without pulling or stretching it. Ensure the dough is well-chilled (at least 30 minutes, ideally 1 hour) before rolling and lining the pan. Some bakers also recommend letting the dough-lined tart shell rest in the refrigerator or freezer for another 15-30 minutes before blind baking to further relax the gluten and firm up the butter, minimizing shrinkage.
Choosing the Right Tart Pan: Material and Size Matters
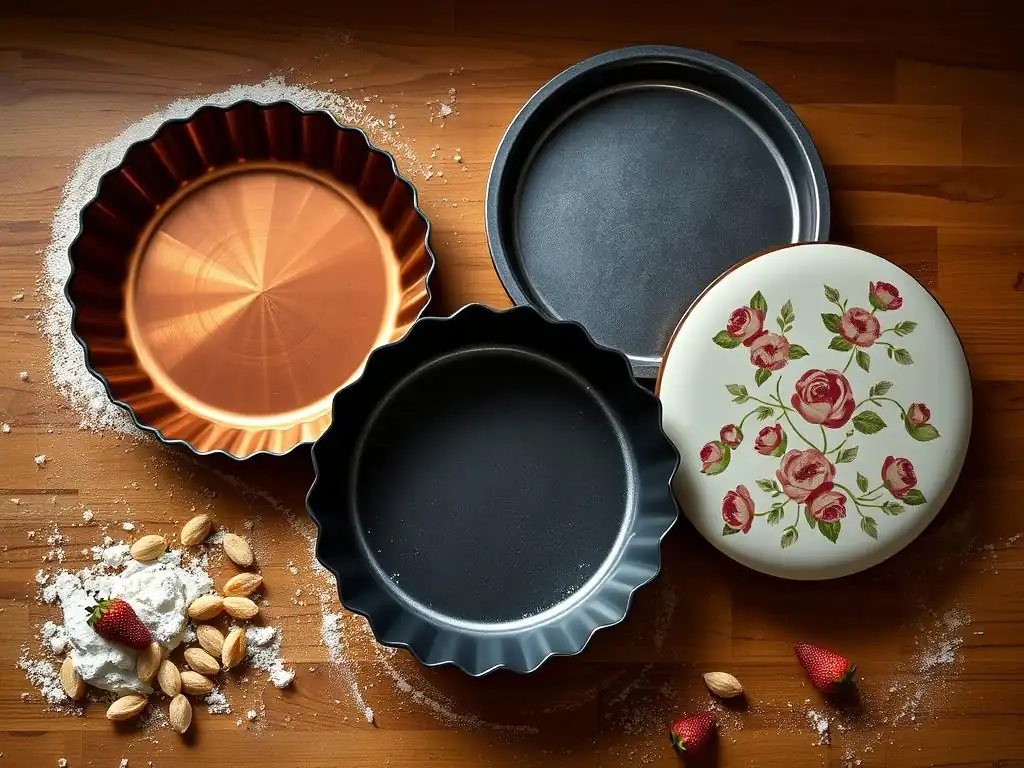
The tart pan you use can impact the baking of your easy fruit tart recipe. Tart pans typically have fluted edges and a removable bottom, which makes serving the tart much easier and results in a professional-looking edge. The most common size for a standard tart is 9 inches in diameter.
Metal tart pans, especially those made of aluminum or steel, are generally preferred as they conduct heat well and promote even browning of the crust. Darker pans can result in faster browning, so you might need to adjust baking time or temperature slightly. Ceramic or glass tart dishes can also be used, but they may not conduct heat as efficiently, potentially requiring a longer baking time to achieve a crisp bottom crust. Using a pan with a removable bottom is highly recommended for easy removal and serving.
Creative Apple Arrangement Ideas for Stunning Presentation
While taste is paramount, the visual appeal of your homemade apple tart adds to the enjoyment. Arranging the apple slices isn't just for show; it can also help ensure even cooking of the filling. For an easy fruit tart recipe, a simple layered approach works well, but if you want to impress, consider these ideas.
- Concentric Circles: Arrange thinly sliced apples in overlapping circles, starting from the outside edge of the tart and working your way inwards. This creates a classic, elegant look.
- Spiral: Similar to circles, but continuously overlap slices in a spiral pattern from the center outwards or vice versa.
- Standing Slices: For a dramatic effect, arrange apple slices standing upright, packed tightly together. This often requires slightly thicker slices and creates a beautiful texture on top, sometimes resembling a rose or fan.
No matter the arrangement, ensure the apples are distributed relatively evenly so the tart bakes consistently.
Storing and Serving Your Homemade Apple Tart
How to Keep Your Apple Tart Fresh
Proper storage ensures your delicious easy fruit tart recipe remains enjoyable for several days. Once the tart has cooled completely to room temperature, cover it loosely with plastic wrap or aluminum foil. Do not cover it while it's still warm, as condensation will form and make the crust soggy.
An apple tart can typically be stored at room temperature for 1-2 days. If you need to store it longer, or if your kitchen is particularly warm or humid, refrigerate the tart. It will last for 3-4 days in the refrigerator. The crust may soften slightly in the fridge. For longer storage, individual slices or the whole tart can be wrapped tightly and frozen for up to 1-2 months. Thaw overnight in the refrigerator and reheat gently before serving.
Serving Suggestions: Pairings and Garnishes
A warm slice of homemade apple tart is delightful on its own, but pairing it with complementary additions elevates the experience. The classic pairing is a scoop of vanilla ice cream, which melts slightly into the warm filling, creating a wonderful contrast of temperatures and textures.
Other popular serving suggestions include a dollop of freshly whipped cream, a drizzle of caramel sauce, or a slice of sharp cheddar cheese (a traditional New England pairing). For a touch of elegance, dust the tart with powdered sugar or garnish the plate with a sprinkle of cinnamon. Serving the tart slightly warm is usually preferred, as it enhances the aroma and softens the apples and spices.
Apple Tart Variations: Experimenting with Flavors
Once you've mastered the basic easy fruit tart recipe, feel free to experiment! The beauty of a simple tart is its versatility. You can easily introduce new flavors or ingredients to create delicious variations.
- Add other fruits: Combine apples with berries (like blueberries or raspberries), pears, or cranberries for different flavor profiles. Adjust sugar based on the tartness of the added fruit.
- Change the spices: While cinnamon and nutmeg are classic, try adding cardamom, ginger, or a hint of black pepper for warmth and complexity.
- Include nuts or oats: Add chopped nuts (like walnuts or pecans) or rolled oats to the apple filling or the optional crumble topping for added texture and flavor.
- Drizzle with caramel: A layer of caramel sauce poured over the apples before baking, or drizzled on top after baking, adds a rich, sweet dimension.
These simple variations allow you to put your own spin on the easy fruit tart recipe and discover new favorite combinations.
Troubleshooting Common Apple Tart Baking Problems
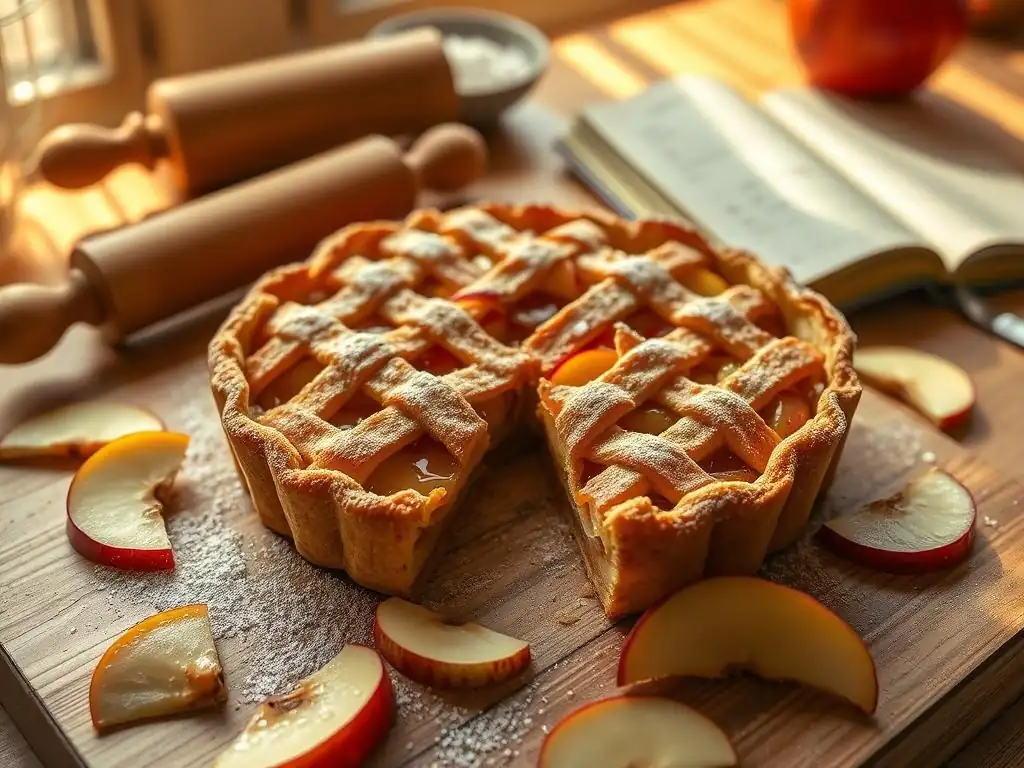
Dealing with a Crumbly Crust
If your tart dough is too crumbly and won't come together, it's usually a sign that it's too dry. This could be due to not adding enough water or inaccurate flour measurement (too much flour).
- Fix: Sprinkle in a little more ice water, about
½to1teaspoon at a time, and gently mix until the dough just holds together when squeezed. Be careful not to add too much, as this can make the dough sticky and tough. If you measured accurately and it's still crumbly, your kitchen might be very dry, requiring slightly more liquid.
Fixing a Cracked Tart Crust
Cracks can appear in the crust when rolling it out or after it's placed in the pan. This often happens if the dough isn't chilled enough, is too dry, or is overworked.
- Fix: Don't worry! Shortcrust pastry is forgiving. You can easily patch cracks using scraps of dough. Simply press the scraps onto the crack and smooth the edges with your fingers. If the crack is large, you can roll out a small piece of dough and press it over the area. Ensure the patch blends smoothly with the rest of the crust before blind baking.
Correcting a Runny Filling
A runny filling means there was too much liquid released from the apples, or not enough thickener was used. This can lead to a soggy bottom crust.
- Fix: Ensure you are using baking apples that don't release excessive moisture. Increase the amount of thickener (flour, cornstarch, or tapioca starch) slightly in your easy fruit tart recipe next time, perhaps by
½to1tablespoon. You can also try pre-cooking the apple filling slightly on the stovetop until some juices thicken before adding it to the tart shell, though this adds a step. If the tart is already baked and runny, there's little to do to fix the texture of the filling, but ensuring the crust is fully baked helps mitigate the sogginess.
What to Do If Your Apple Tart is Too Sweet or Not Sweet Enough
The sweetness of an apple tart depends heavily on the sugar added and the natural sweetness of the apples used. Sometimes, despite following an easy fruit tart recipe, the balance might be off for your taste.
- Fix for Too Sweet: Next time, reduce the amount of sugar in the filling, especially if using naturally sweet apples like Fuji or Gala. You can also increase the amount of tart apples like Granny Smith. Serving with unsweetened whipped cream or plain yogurt can help balance the sweetness in an already baked tart.
- Fix for Not Sweet Enough: Next time, increase the amount of sugar in the filling, particularly if using very tart apples. Ensure you used brown sugar if called for, as it adds depth. For an already baked tart, serve with sweet accompaniments like vanilla ice cream, caramel sauce, or a dusting of powdered sugar.
Conclusion: Enjoying Your Easy Apple Tart Creation
Celebrating the Simplicity and Deliciousness of Homemade Apple Tarts
Congratulations! You've successfully navigated the steps of making an easy fruit tart recipe, specifically a classic apple tart. This journey, from simple ingredients to a golden-brown masterpiece, demonstrates that baking doesn't have to be complicated to be incredibly rewarding. The aroma filling your kitchen and the taste of that first warm slice with its flaky crust and tender, spiced apple filling are the perfect payoff for your efforts.
This easy fruit tart recipe is a testament to the beauty of simple techniques yielding spectacular results. It's a dessert that brings comfort and joy, perfect for sharing with family and friends or savoring all by yourself. Each bite reminds you of the satisfaction of creating something delicious from scratch. Embrace the process, learn from any little hiccups, and take pride in your homemade creation.
Further Baking Adventures: Expanding Your Tart-Making Skills
Mastering this easy fruit tart recipe is just the beginning! The skills you've learned – making shortcrust pastry, preparing fruit fillings, blind baking – are fundamental to countless other tarts and pies. You can now confidently explore variations of apple tart, like adding a lattice top or a crumble topping, or venture into different fruit fillings.
Try making a berry tart, a peach tart, or even savory tarts like quiche, using the same basic pastry techniques. Each new tart will build on your foundational knowledge and help you become a more confident and versatile baker. Keep practicing, keep experimenting, and continue to enjoy the delicious world of tart making!
Frequently Asked Questions
What makes a fruit tart recipe "easy" for beginners?
An easy fruit tart recipe typically focuses on simplified crust preparation, readily available ingredients, and a straightforward filling and arrangement process. It prioritizes clear instructions and avoids complex techniques.
What kind of fruit is best to use in an easy fruit tart recipe?
Fresh, in-season fruits are ideal, but canned or frozen fruits can work in a pinch, especially if you're looking for convenience. Berries, sliced stone fruits (peaches, plums), and kiwi are all great options.
Can I make the fruit tart crust ahead of time?
Yes! Making the crust ahead of time is highly recommended. You can prepare the crust, either baked or unbaked, and store it in the refrigerator for up to 2-3 days or in the freezer for up to a month.
What if I don't have a tart pan? Can I still make an easy fruit tart?
While a tart pan with a removable bottom is ideal, you can use a pie plate. Be sure to grease it well. The edges may not be as perfectly defined, but the taste will still be delicious.
How do I prevent my fruit tart crust from becoming soggy?
Blind baking the crust is crucial! After blind baking, you can brush the inside of the crust with melted chocolate or a thin layer of jam to create a moisture barrier. This will help keep the crust crisp.
Final Reflection: The Sweetness of Simplicity and the Joy of Creation
The art of baking, particularly the seemingly daunting task of creating a fruit tart, is more accessible than many believe. Mastering this delightful dessert isn't about achieving unattainable perfection; it's about embracing the process and finding joy in the simple act of creation. This guide aimed to demystify the process, proving that even beginners can craft beautiful and delicious fruit tarts.
The enduring appeal of baking lies not just in the delicious results, but in the comforting ritual it provides. It's a tangible connection to tradition, a way to share something handmade with loved ones, and a powerful reminder of the simple pleasures in life. As Julia Child wisely said, Find something you're passionate about and keep tremendously interested in it.
For me, that passion is baking, and sharing that passion through this guide has been incredibly rewarding. The positive feedback and shared successes of others attempting these recipes have only strengthened my belief in the power of simple, accessible recipes to bring joy to others.
Now, it's your turn. Don't be intimidated by the seemingly intricate nature of a fruit tart. Take a deep breath, gather your ingredients, and let the process unfold. Embrace the imperfections, celebrate the successes, and most importantly, savor the delicious results. The journey of creating your own fruit tart is as rewarding as the final, beautiful bite. So, roll up your sleeves, gather your ingredients, and discover the sweet satisfaction of baking your own masterpiece.
Unleash Your Inner Pastry Chef!
Thanks for joining us on this delicious journey into the world of fruit tarts! We hope you now feel confident and inspired to create your own stunning (and tasty!) masterpieces. Ready to take the next step?
- Bake your first fruit tart today! Grab your ingredients and follow the recipe – we promise it's easier than you think.
- Share your creation with us! Post a picture of your finished tart on social media using #BakeWithEaseFruitTart and tag @BakeWithEase (fictional social media handle). We'd love to see your baking brilliance.
- Explore our other baking guides for more inspiration! Discover new recipes and techniques to expand your baking skills.
What unique fruit combination will you try in your next fruit tart creation?