
Too Much Yeast? How to Spot and Fix It

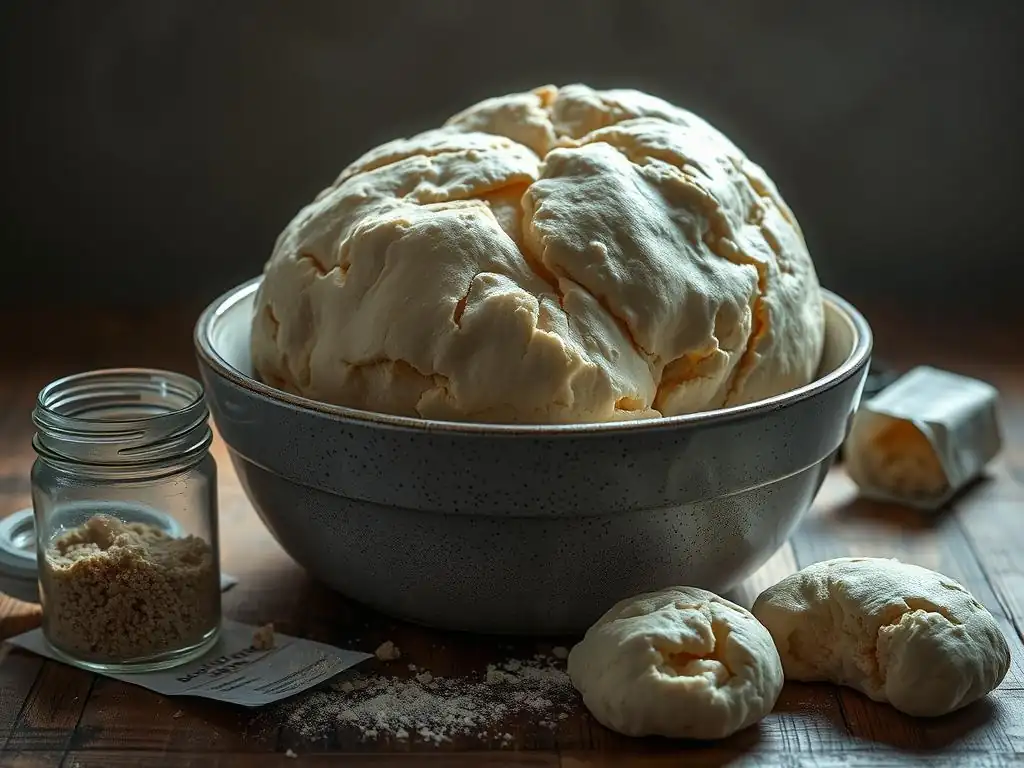
Welcome to BakeWithEase, your companion in the delightful world of baking! Are you facing frustrating results in your bread baking? Perhaps your dough is rising too quickly, collapsing, or tasting overly yeasty? Dive in as we explore the often-overlooked issue of yeast problems in baking. Discover how to identify the signs of too much yeast, learn simple fixes, and unlock the secrets to perfectly balanced and delicious bread every time. Let's get baking!
- Too Much Yeast? How to Spot and Fix It (BakeWithEase)
- Introduction: Understanding Yeast's Role in Bread Baking
- Identifying Yeast Problems in Baking: Recognizing the Signs of Too Much Yeast
- Why Too Much Yeast Happens: Common Causes of Yeast Overactivation
- Fixing Yeast Problems in Bread Baking: Solutions for Over-Yeasting
- Preventing Yeast Overactivation: Best Practices for Successful Baking
- Troubleshooting Specific Bread Types with Yeast Issues
- Yeast Problems in Baking: Advanced Techniques and Tips
- Conclusion: Achieving Baking Success with Proper Yeast Management
- Frequently Asked Questions
- Final Reflection: The Humble Yeast, a Baker's Best Friend and Worst Enemy
- Unlock Your Baking Potential: Mastering Yeast in Your Recipes!
Too Much Yeast? How to Spot and Fix It (BakeWithEase)
Introduction: Understanding Yeast's Role in Bread Baking
Yeast is a living microorganism, a type of fungus, that is absolutely essential for most bread baking. Its primary job is fermentation. When yeast is mixed with flour and water, it consumes the sugars present in the flour (or added sugars) and produces carbon dioxide gas and alcohol as byproducts. It's this release of carbon dioxide gas that creates the air pockets within the dough, causing it to rise and giving bread its characteristic light and airy texture. Without yeast, you'd end up with a dense, flat cracker instead of a loaf of bread.
Beyond just providing lift, yeast also contributes significantly to the flavor and aroma of the final baked product. The alcohol produced during fermentation evaporates during baking, but other complex compounds are formed that deepen the bread's taste profile. The speed and extent of fermentation, which is controlled by the amount of yeast, temperature, and time, directly impact these flavor compounds. Understanding how yeast works is the first step in mastering bread baking and avoiding common yeast problems in baking.
The Importance of Balanced Yeast Levels for Perfect Bread
Achieving the perfect loaf relies heavily on using just the right amount of yeast. Too little yeast means a slow, potentially inadequate rise, resulting in a dense, heavy bread. The dough might struggle to double in size, even after extended proofing times. This imbalance leads to underdeveloped gluten structure and a lack of the desired open crumb.
Conversely, too much yeast can lead to a host of yeast problems in baking. While it might seem like more yeast equals faster, higher rise, it actually creates an uncontrolled fermentation process. A dough with excessive yeast will rise too quickly, potentially collapsing later, and can develop an unpleasant, overly alcoholic or sour flavor. For example, a recipe designed for 1 teaspoon of active dry yeast might call for a 60-minute proofing period. Using 2 teaspoons could cause the dough to be ready in 30 minutes, but the rapid expansion can stress the gluten network and lead to a less desirable outcome in the final bake.
Identifying Yeast Problems in Baking: Recognizing the Signs of Too Much Yeast
Knowing the signs of excessive yeast is crucial for troubleshooting your bread. Yeast problems in baking often manifest in predictable ways, allowing you to catch issues before or after baking. Paying close attention to your dough's behavior during the rising process is key.
Recognizing these symptoms early can save your loaf. A dough that is behaving erratically or not as expected is often signaling an issue with fermentation, frequently related to the amount of yeast used or the conditions it's proofing in. Let's look at the specific indicators that point towards having used too much yeast.
Rapid Dough Rise: A Key Indicator of Excessive Yeast
One of the most immediate signs of too much yeast is an unusually fast rise. Dough that is supposed to double in size over 60-90 minutes might achieve this in half the time or even less. This rapid expansion is due to the sheer volume of carbon dioxide being produced at an accelerated rate by the surplus yeast.
While a quick rise might seem like a good thing, it's actually problematic. The gluten structure in the dough needs time to develop and strengthen enough to support the expanding gas bubbles.
When the rise is too fast, the gluten doesn't have adequate time to build this necessary strength and elasticity, making the dough weak and potentially unable to hold its structure through the later stages of proofing and baking. For instance, if a standard white bread dough is proofing at 75°F (24°C), doubling in 45 minutes instead of the expected 75 minutes strongly suggests yeast problems in baking due to over-yeasting.
Overly Sour or "Yeasty" Taste in Baked Bread
Another common symptom of using too much yeast is an unpleasant taste in the finished bread. This can manifest as an overly sour, alcoholic, or simply too "yeasty" flavor. This off-flavor comes from the accelerated production of fermentation byproducts, including ethanol and organic acids, which occur when yeast ferments sugars too quickly and excessively.
While some acidity is desirable in certain breads (like sourdough, which uses a different fermentation process involving wild yeast and bacteria), the sourness from commercial yeast over-fermentation is often sharp and unpleasant. Imagine a simple sandwich loaf tasting strongly of beer or alcohol – that's a classic sign of yeast problems in baking caused by too much yeast and subsequent over-proofing, where the yeast has consumed too much sugar and produced an excess of these compounds.
Collapsed or Deflated Dough After Proofing
A dough that rises beautifully but then shrinks or completely collapses in on itself, either during handling, scoring, or even just sitting after reaching its peak volume, is likely a victim of over-proofing caused by excessive yeast. The rapid initial rise pushes the gluten network beyond its capacity to stretch and hold the gas.
Once the gluten structure is over-stretched and weakened, it can no longer contain the gas produced by the yeast. The bubbles merge into larger, unstable pockets, and the structure gives way, leading to deflation. Think of blowing a balloon too full – it pops. Dough with too much yeast does something similar; the rapid gas production 'pops' the gluten structure's ability to hold it, resulting in a sad, deflated mass instead of a springy, well-risen loaf. This is a clear indicator of yeast problems in baking stemming from overactive fermentation.
Large, Uneven Air Pockets in the Bread's Crumb
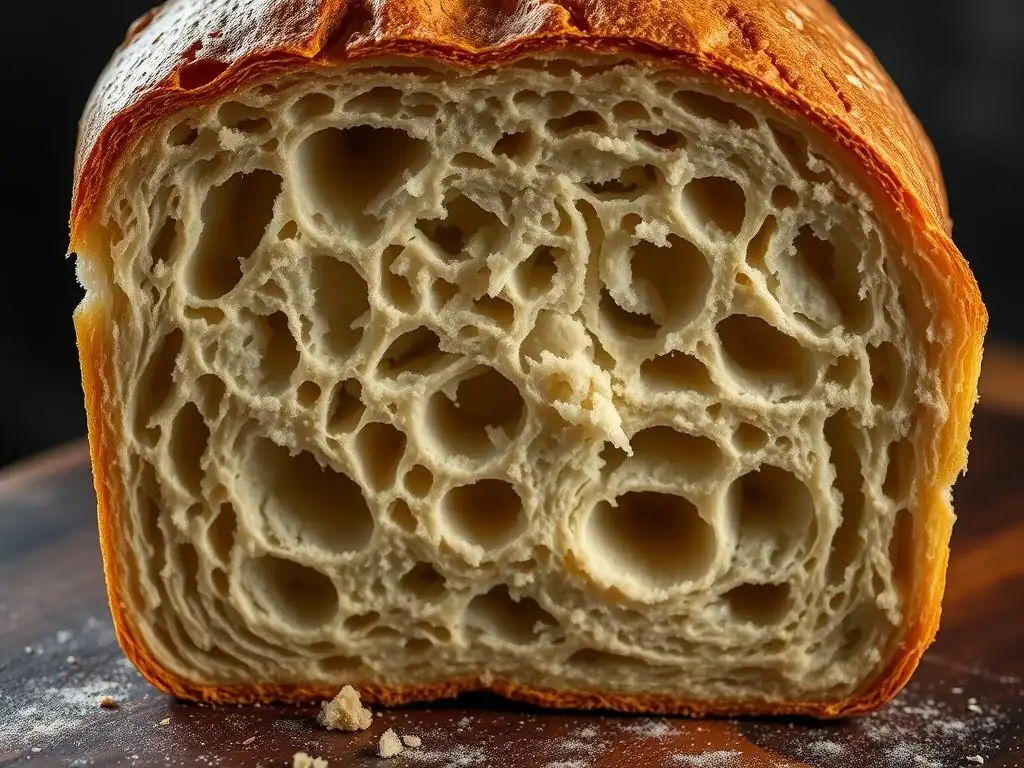
Examining the inside of your baked bread, known as the crumb, can also reveal yeast problems in baking. If you see a crumb structure with very large, irregular holes mixed with dense areas, rather than a relatively even distribution of smaller bubbles, too much yeast might be the culprit.
This uneven structure is a direct result of the rapid, uncontrolled fermentation. The excess yeast creates gas so quickly that it doesn't allow for the formation of a fine, consistent network of bubbles. Instead, some areas get huge gas pockets that stretch the surrounding dough thinly, while other areas remain relatively dense. A classic example is a loaf that looks decent on the outside but, when sliced, reveals cavernous holes near the top or sides and a tighter crumb elsewhere, indicating chaotic gas production from over-yeasting.
Sticky or Unmanageable Dough Texture
Dough with too much yeast can sometimes develop an unusually sticky or difficult-to-handle texture. While hydration levels are the primary factor in dough stickiness, excessive yeast activity can exacerbate this issue. The rapid fermentation process can break down the gluten structure prematurely, making the dough lose its elasticity and become more like a wet, loose mass.
Handling an over-yeasted dough often feels different. It might feel slack, tear easily when stretched, and stick relentlessly to your hands and surfaces, even if it started with a manageable hydration level. This breakdown makes shaping particularly challenging. For instance, a pizza dough recipe that usually results in a smooth, pliable dough might turn into a frustratingly sticky mess if double the amount of yeast is used, highlighting the complex yeast problems in baking that affect dough texture.
Why Too Much Yeast Happens: Common Causes of Yeast Overactivation
Understanding why you ended up with too much yeast is key to preventing future yeast problems in baking. It's not always about adding an incorrect amount; conditions play a huge role. Several factors can lead to yeast becoming overly active or simply having too much presence in your dough.
Identifying the root cause allows you to refine your process. Whether it's a simple measurement error or environmental factors accelerating fermentation, pinpointing the reason helps you adjust your technique for consistent, successful baking outcomes.
Incorrect Yeast Measurement: The Impact of Precision
One of the most straightforward causes of yeast problems in baking is simply measuring incorrectly. Using a tablespoon instead of a teaspoon, or misreading the recipe, can easily add significantly more yeast than intended. Even small errors in measuring yeast can have a large impact because yeast is so potent.
For example, a standard loaf of bread might call for 2.25 teaspoons (or about 7 grams) of active dry yeast. Accidentally adding 2.25 tablespoons (which is three times the amount, roughly 21 grams) will drastically accelerate fermentation and lead to all the issues associated with over-yeasting. Using measuring spoons that aren't standard or simply eyeballing the amount are common pitfalls that lead to inaccurate yeast levels and subsequent dough problems.
Warm Temperatures: Accelerating Yeast Activity Unintentionally
Yeast activity is highly sensitive to temperature. Warmer temperatures significantly speed up fermentation, while colder temperatures slow it down. If your kitchen is particularly warm, or if you are using warmer-than-recommended water to activate your yeast, you can inadvertently cause yeast problems in baking by making the yeast work too fast.
Yeast is most active between 75°F and 95°F (24°C and 35°C). Proofing dough in a warm spot, like near a sunny window or on top of a warm oven, can easily push the dough temperature into this range or even higher, leading to a much faster rise than the recipe anticipates. A recipe designed for a 70°F (21°C) room might call for a 2-hour proof, but at 85°F (29°C), that same dough with the same amount of yeast could be ready in just 60-75 minutes, increasing the likelihood of over-proofing if not watched carefully.
Excessive Proofing Time: Letting Yeast Work Overtime
Even with the correct amount of yeast, leaving the dough to proof for too long will inevitably lead to yeast problems in baking, specifically over-proofing. Yeast continues to produce gas as long as it has food (sugars) and favorable conditions. If you let it go past its optimal point, the dough structure weakens, and fermentation byproducts accumulate excessively.
Recipes provide proofing time estimates, but these are guidelines. The actual time needed depends heavily on temperature, yeast activity, and ingredients. Ignoring visual cues (like the dough doubling in size) and relying solely on the clock often results in over-proofing. For instance, a recipe might say "proof for 1-1.5 hours," but if your kitchen is warm and the dough has clearly doubled and looks puffy and fragile after only 50 minutes, letting it go the full 1.5 hours will almost certainly lead to over-proofing issues.
Using Old or Unreliable Yeast
The age and quality of your yeast also impact its activity. While seemingly counter-intuitive, using yeast that is too active or inconsistent can contribute to yeast problems in baking. New, very fresh yeast, or yeast stored perfectly, might be more potent than the recipe writer anticipated if they tested with slightly older stock.
Conversely, using yeast that is still alive but past its prime might lead to slow or uneven fermentation, making you think you need more yeast next time, creating a cycle of potential over-yeasting. It's best to use yeast within its expiration date and store it properly (usually in the refrigerator or freezer) to ensure consistent activity levels, preventing unexpected surges that lead to over-proofed dough.
Fixing Yeast Problems in Bread Baking: Solutions for Over-Yeasting
If you've identified that your dough has too much yeast or is rising too fast, there are steps you can take to try and salvage it. While prevention is ideal, understanding how to react to yeast problems in baking can save your current batch. The key is often to slow down the yeast activity or mitigate the effects of rapid gas production.
Some fixes are applicable during the proofing stage, while others are techniques to manage dough that has already over-proofed slightly. The best approach depends on how far along the over-yeasting process is.
Adjusting Yeast Quantity in Recipes: Finding the Right Balance
For future bakes, the most direct way to prevent yeast problems in baking due to over-yeasting is to accurately measure and potentially reduce the amount of yeast used. If you consistently experience rapid rises or over-proofing with a specific recipe, try slightly decreasing the yeast amount in your next attempt.
Start with a small reduction, perhaps by 10-15%. For a recipe calling for 2.25 tsp yeast, try using 2 tsp next time. Monitor the dough's behavior – its rise time, texture, and final crumb. Keep notes so you can fine-tune the yeast amount based on your kitchen environment and ingredients. This iterative process helps you find the 'sweet spot' for that specific recipe and your conditions.
Controlling Dough Temperature: Maintaining Optimal Yeast Activity
Temperature is a powerful lever in controlling yeast activity. If your dough is rising too fast because the environment is too warm, moving it to a cooler spot can help slow down fermentation. The ideal proofing temperature range is typically between 70°F and 80°F (21°C and 27°C).
If your kitchen is warmer than this, find a cooler room or even place the dough in the refrigerator for a period. Conversely, if it's too cool, a slightly warmer spot (but not too warm) can help. Using water at the correct temperature when mixing is also vital – aim for the temperature recommended in the recipe, usually lukewarm (around 90-100°F or 32-38°C) for active dry yeast, not hot. Managing temperature is critical for preventing yeast problems in baking.
Shortening Proofing Time: Preventing Over-Proofing
If your dough is rising rapidly due to too much yeast or warm conditions, the simplest fix is to shorten the proofing time. Don't rely solely on the clock; watch the dough itself. When the recipe says "proof for 1-1.5 hours or until doubled," focus on the "until doubled" part.
If the dough doubles in size in 45 minutes instead of 90, it's ready to be shaped or baked (depending on which proofing stage it's in). Proceeding quickly prevents the dough from stretching its gluten network too far and collapsing. Being vigilant and responsive to the dough's visual cues is essential when dealing with potential yeast problems in baking.
Punching Down the Dough: Releasing Excess Gas
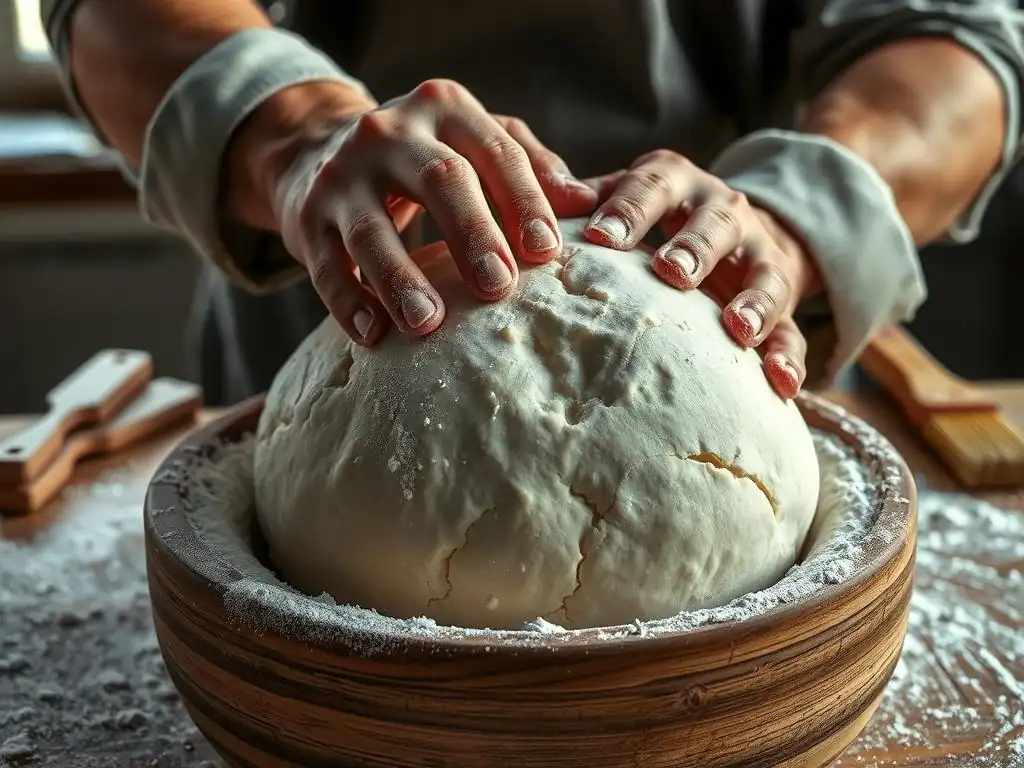
Punching down the dough (also known as degassing) is a standard step in many bread recipes, typically done after the first rise. It serves multiple purposes, including redistributing yeast and sugars, equalizing temperature, and developing gluten, but critically, it releases excess carbon dioxide gas.
If you suspect your dough is rising too quickly due to too much yeast, a gentle punch down can help. This expels a significant amount of the accumulated gas, effectively giving the dough a 'reset' and allowing you to continue proofing for a shorter period or proceed to the next step. While it won't fix the fundamental issue of having too much yeast, it can help manage the symptoms of rapid gas production and prevent immediate collapse, mitigating some yeast problems in baking.
Refrigerating the Dough: Slowing Down Yeast Fermentation
Refrigeration is an excellent way to significantly slow down yeast activity. If your dough is over-yeasting or you need to pause the process, placing the dough in the refrigerator (covered) drops its temperature, dramatically slowing down the rate of fermentation. This technique is often used for slow, cold fermentation to develop flavor, but it's also a rescue strategy.
A dough that's rising too fast can be refrigerated for several hours or even overnight. This buys you time and prevents over-proofing at room temperature. When you're ready to proceed, take the dough out and let it warm up slightly at room temperature (this is called the "bench rest") before shaping or baking. This is a very effective method for managing yeast problems in baking when they occur during the rising phase.
Preventing Yeast Overactivation: Best Practices for Successful Baking
Preventing yeast problems in baking is always easier than fixing them. By adopting careful techniques and understanding how yeast behaves, you can minimize the chances of over-yeasting and achieve consistent, beautiful results every time. It comes down to precision, temperature control, observation, and proper ingredient handling.
Establishing good habits in your baking routine will pay dividends in the quality of your bread. These best practices are fundamental for anyone looking to master bread making and avoid common pitfalls associated with yeast.
Accurately Measure Yeast: Using a Kitchen Scale
The most accurate way to measure yeast, and indeed all baking ingredients, is by weight using a kitchen scale. Volume measurements (teaspoons, tablespoons) can be inconsistent due to how densely the ingredient is packed. A gram is always a gram, ensuring you use the precise amount the recipe intends.
Most recipes for a standard loaf of bread call for around 5-10 grams of yeast. Using a scale to measure this amount ensures you're not adding too much or too little due to variations in scooping technique. For example, 2.25 teaspoons of active dry yeast weighs approximately 7 grams. Measuring 7 grams directly eliminates the guesswork inherent in volume measurements, drastically reducing the chance of yeast problems in baking from mismeasurement.
Monitor Dough Temperature Closely: Employ a Thermometer
Just as important as ingredient measurement is temperature control. Use a thermometer to check the temperature of the water you mix with your yeast and the ambient temperature where your dough is proofing. This helps you predict and control the rate of fermentation.
For activating active dry yeast, water between 105°F and 115°F (40°C and 46°C) is often recommended. For instant yeast mixed directly into flour, the water can be cooler, around 90-100°F (32-38°C). During bulk fermentation and proofing, aim for a consistent temperature, ideally in the 70-80°F (21-27°C) range, unless the recipe specifies cold fermentation. Monitoring temperature is a proactive step against yeast problems in baking.
Observe Dough Volume, Not Just Time: Knowing When It's Ready
Proofing times provided in recipes are estimates. The actual time required for your dough to double in size or reach the desired volume will vary based on yeast activity, dough temperature, ingredients, and even altitude. Always prioritize the visual cues of the dough over the clock.
Learn to recognize when your dough has sufficiently risen. For the first rise (bulk fermentation), it typically doubles in volume. For the second rise (proofing shaped loaves), it might increase by 50-80% and feel light and airy. A good test is the "poke test": gently press a floured finger into the dough; if the indentation springs back slowly, it's usually ready. If it springs back immediately, it needs more time. If it stays indented completely, it's likely over-proofed, a common outcome of yeast problems in baking.
Store Yeast Properly: Ensuring Freshness and Effectiveness
Proper storage is essential to maintain yeast viability and consistent activity. Active dry and instant yeast should be stored in an airtight container in the refrigerator or freezer. This extends their shelf life significantly compared to storing them at room temperature.
Yeast loses potency over time, especially if exposed to air, moisture, or heat. Using yeast that is fresh and stored correctly ensures it will perform as expected, fermenting at a predictable rate. This consistency helps prevent yeast problems in baking, as you can rely on the measured amount producing a consistent level of activity each time you bake.
Troubleshooting Specific Bread Types with Yeast Issues
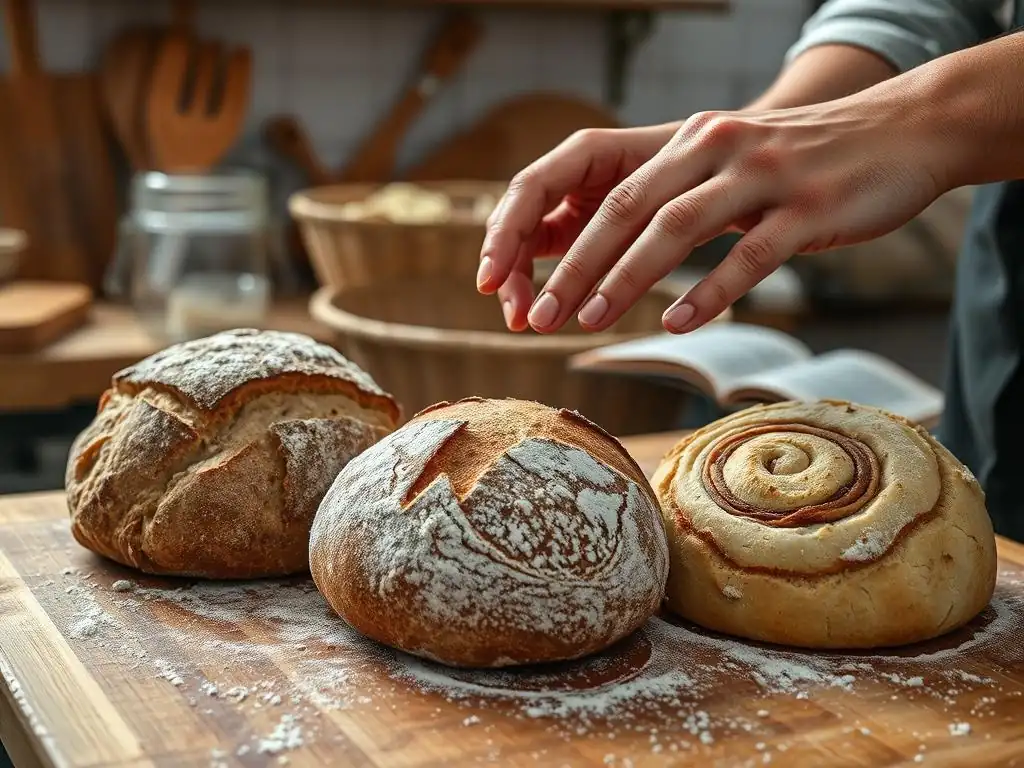
Yeast problems in baking can manifest differently depending on the type of bread you're making. Different hydration levels, ingredient ratios (like sugar or fat), and shaping techniques mean that over-yeasting might present unique challenges for specific loaves. Understanding these nuances helps you tailor your troubleshooting.
Let's look at how excess yeast or over-proofing might affect some popular bread types and specific strategies to address these issues.
Addressing Over-Proofing in Sourdough Bread
While sourdough primarily uses wild yeast and bacteria from a starter, commercial yeast is sometimes added to sourdough recipes for a faster rise or lighter texture. If commercial yeast is used in conjunction with an active starter, or if the starter itself is overly active and the dough is proofed too long, over-proofing can occur.
Signs include a dough that looks very bubbly and fragile, potentially collapsing when handled. To mitigate this, especially if using added commercial yeast, slightly reduce the amount next time. If the starter is the main culprit, try using it when it's slightly younger (before it reaches peak rise and starts to fall) or reduce the amount of starter used. For a dough that is already over-proofed, gently reshape it if possible (though this can degas it significantly) or consider turning it into a flatter bread like focaccia or pizza, where the structure is less critical.
Managing Yeast in Sweet Breads and Enriched Doughs
Sweet breads, brioche, challah, and other enriched doughs containing sugar, milk, eggs, and butter can react differently to yeast. Sugar initially speeds up yeast activity, but in high concentrations, it can actually inhibit it. Fat and eggs can slow down gluten development and rise initially.
Using too much yeast in these doughs can lead to a very rapid, uncontrolled rise once the yeast powers through the initial resistance from the enrichments. This often results in a coarse crumb and the characteristic "yeasty" off-flavor. If you find your enriched doughs are rising too fast and tasting yeasty, ensure you are measuring yeast precisely for the recipe's sugar content and consider slightly reducing the yeast amount if the problem persists, especially if you're baking in a warm environment.
Fixing Over-Proofing in Baguette Dough
Baguette dough is typically lean (just flour, water, salt, and yeast) and relatively high in hydration. Over-proofing in baguettes leads to dough that is very difficult to score cleanly – the cuts tend to spread rather than create an ear – and results in a dense crumb with large, irregular holes instead of the desired open, airy structure with varied hole sizes.
If your baguette dough is over-proofing quickly, check your yeast measurement and proofing temperature. Baguettes often benefit from a slightly cooler, longer fermentation. If the dough is already over-proofed, handling it minimally is key. Try to shape gently and bake immediately. You might not get the perfect ear or crumb, but you can still salvage a decent loaf. Future batches should use less yeast or proof in a cooler environment (like 68-72°F or 20-22°C).
Yeast Problems in Baking: Advanced Techniques and Tips
For bakers looking to refine their craft and gain even greater control over fermentation, several advanced techniques can help manage yeast activity and improve flavor. These methods often involve pre-ferments or manipulating hydration and yeast types to achieve specific results and avoid common yeast problems in baking.
Incorporating these techniques requires a bit more planning but can significantly enhance the quality of your bread, providing more complex flavors and better control over the dough's development.
Using a Starter Culture to Control Yeast Activity
As mentioned with sourdough, using a starter culture (a mix of flour and water containing wild yeast and bacteria) introduces a different fermentation dynamic. While a pure commercial yeast loaf relies on a single type of yeast working quickly, a starter involves a slower, more complex fermentation driven by a community of microorganisms.
Incorporating a portion of active starter into a commercial yeast dough (sometimes called a "hybrid" bread) can allow you to reduce the amount of commercial yeast needed, slowing down the overall fermentation rate and developing more flavor. The lactic and acetic acids produced by the bacteria in the starter also contribute to structure and flavor, helping to manage some potential yeast problems in baking by creating a more stable dough environment.
Adjusting Hydration Levels to Balance Yeast Fermentation
Dough hydration (the ratio of water to flour) affects yeast activity and dough handling. Higher hydration doughs tend to ferment faster because the yeast has easier access to the sugars dissolved in the water. Lower hydration doughs ferment more slowly.
While not a direct fix for too much yeast, understanding hydration's impact allows you to adjust your process. If working with a high-hydration dough that tends towards rapid fermentation and potential yeast problems in baking, ensure your yeast measurement is precise and consider proofing at a slightly cooler temperature. Conversely, a very low hydration dough might benefit from a touch more yeast or a warmer proofing environment if it's rising too slowly.
Using a "Poolish" to Enhance Flavor and Reduce Commercial Yeast
A poolish is a type of pre-ferment made by mixing equal parts flour and water with a very small amount of commercial yeast, left to ferment for several hours (often overnight) at room temperature. This creates a bubbly, active mixture that is then added to the final dough ingredients.
Using a poolish allows you to significantly reduce the amount of yeast in the final mix, often by 50-70% or more compared to a direct mix recipe. The long, slow fermentation of the poolish develops complex flavors, and the reduced amount of yeast in the main dough leads to a slower, more controlled rise. This method is excellent for managing yeast problems in baking by distributing the yeast's work over a longer period and improving the overall flavor and texture of the bread.
Conclusion: Achieving Baking Success with Proper Yeast Management
Mastering bread baking involves understanding and controlling the variables, and yeast is perhaps the most dynamic one. Yeast problems in baking, particularly those stemming from using too much yeast or allowing over-proofing, are common but entirely fixable and preventable with the right knowledge and techniques. By learning to recognize the signs – a rapid rise, off-flavors, collapsing dough, or uneven crumb – you can diagnose issues early.
Implementing practices like accurate measurement, temperature control, attentive observation of the dough's volume rather than just time, and proper yeast storage are fundamental steps to prevent yeast problems in baking. Furthermore, techniques like refrigeration, punching down, or incorporating pre-ferments offer ways to correct issues or enhance control. With practice and attention to detail, you'll find the right balance for your yeast, leading to consistently delicious, perfectly risen loaves every time you bake.
Frequently Asked Questions
How can I tell if I've used too much yeast in my dough?
Signs of using too much yeast include a very rapid rise, an unpleasant sour smell, and a finished product that is too airy or collapses easily.
What happens if my dough rises too quickly due to too much yeast?
A fast rise can lead to a weak gluten structure, resulting in a bread that lacks proper texture and might have large, undesirable air pockets. The flavor can also be negatively impacted.
Can I fix a dough that has too much yeast?
While not always perfect, you can try to slow down the fermentation by refrigerating the dough. You can also add more flour and water to balance the ingredients.
Does the type of yeast I use affect how much is needed?
Yes, different types of yeast have varying strengths. Instant yeast is generally more potent than active dry yeast, so adjust the amount accordingly based on the recipe.
What are the consequences of not correcting a dough with too much yeast?
Ignoring the problem can result in a bread with a poor taste, an unpleasant texture, and a structure that won't hold up well. It may also collapse after baking.
Final Reflection: The Humble Yeast, a Baker's Best Friend and Worst Enemy
The delicate balance of yeast in baking remains a crucial factor in achieving perfect results, yet its unpredictable nature continues to challenge even the most experienced bakers. A seemingly minor imbalance can transform a hopeful loaf into a disappointing disaster, highlighting the importance of understanding yeast's nuances. Mastering yeast management isn't just about technical skill; it's about developing a deep respect for the living organism at the heart of our baking endeavors.
The impact of yeast extends far beyond the kitchen; it's a microcosm of the larger challenges we face in life – the need for precise control, the acceptance of occasional failures, and the persistent pursuit of perfection. The best bread is made with patience.
This simple truth applies not only to baking but to life itself. The process of learning to work with yeast, with its inherent unpredictability, mirrors our own journeys, teaching us resilience, adaptability, and the importance of understanding the subtle forces at play.
Now, consider your own baking experiences. Have you faced the frustration of a dough that refused to rise, or the joy of a perfectly formed loaf? Remember the lessons learned, the adjustments made, and the delicious rewards reaped. Take this knowledge and apply it beyond the kitchen. Embrace the challenges, learn from your mistakes, and never stop experimenting. The journey of mastering yeast, and indeed, any craft, is a lifelong pursuit, filled with both triumphs and setbacks – but the rewards are always worth the effort.
Unlock Your Baking Potential: Mastering Yeast in Your Recipes!
Thanks for diving into the world of yeast with us! We hope you now feel more confident in identifying and troubleshooting those pesky yeast issues. Ready to put your newfound knowledge into practice?
- Bake a perfect loaf: Choose your favorite recipe (or try a new one!) and focus on achieving the ideal yeast rise. Note any changes you make and the results you get. Share your experiences!
- Experiment with different yeast types: Explore the unique characteristics of active dry, instant, or fresh yeast – notice how they affect texture and flavor.
- Share your baking triumphs (and challenges!): Join our community forum and share your baking successes and any lingering questions you have. We're all learning together!
What delicious creation will you bake next, now that you’ve mastered yeast?