
Simple Steps to a Golden Pie Crust

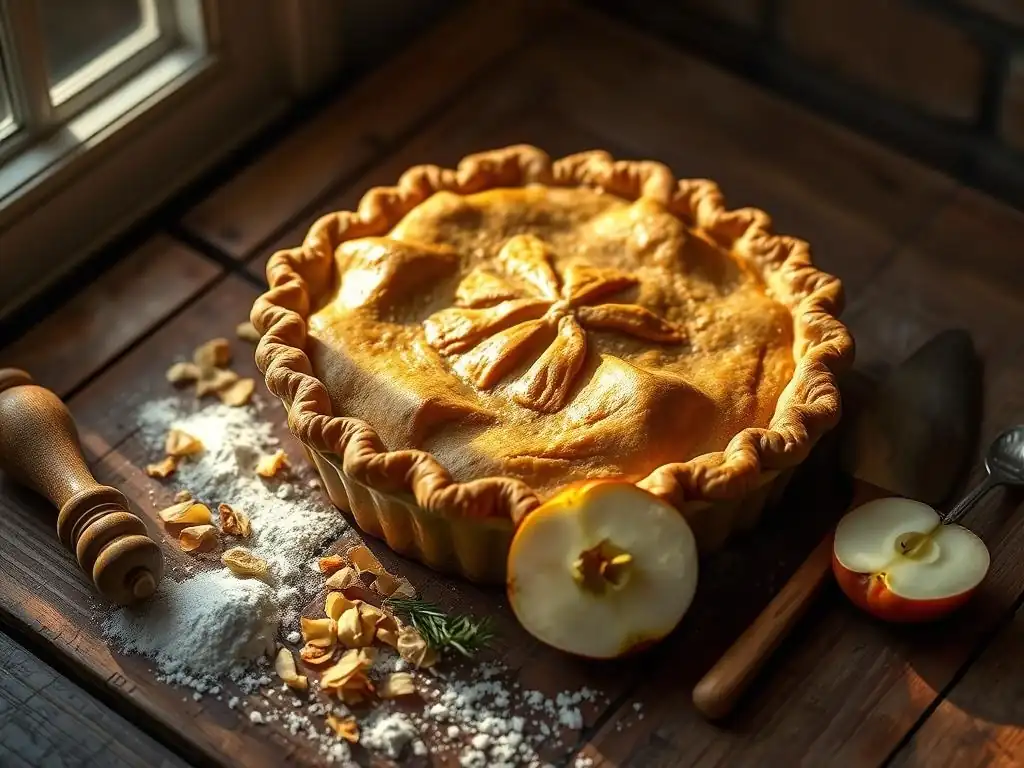
Welcome to BakeWithEase, your trusted guide to unlocking the joys of baking! Are you ready to transform simple ingredients into delectable masterpieces? Dive into our latest article and discover the secrets to perfecting a golden pie crust recipe that will have everyone begging for more. Unlock the secrets to a flaky, golden crust and elevate your baking game today! What's the key to achieving that perfect texture? Let's find out...
- Achieving a Perfect Golden Pie Crust: A Baker's Guide
- Introduction: Mastering the Art of the Golden Pie Crust
- Step 1: Assembling Quality Ingredients for Exceptional Pie Crust
- Step 2: Optimizing the Mixing Process for Flaky Layers
- Step 3: The Importance of Chilling Dough for Tenderness
- Step 4: Mastering the Art of Rolling and Shaping the Dough
- Step 5: Pre-Baking or Blind Baking for a Crisp Base
- Step 6: Baking the Pie to Golden-Brown Perfection
- Step 7: Addressing Common Pie Crust Issues
- Advanced Techniques for Enhancing Crust Color and Flavor
- Conclusion: Savoring Your Perfect Golden Pie Crust
- Frequently Asked Questions
- Final Reflection: The Golden Ratio of Baking and Life
- Unlock Your Inner Pastry Chef!
Achieving a Perfect Golden Pie Crust: A Baker's Guide
Introduction: Mastering the Art of the Golden Pie Crust
Why a Golden Crust Matters: Flavor, Texture, and Visual Appeal
A golden-brown pie crust isn't just about good looks; it's a critical component of a truly delicious pie. When the crust achieves that beautiful hue, it signifies that the Maillard reaction and caramelization have occurred, processes that unlock complex, nutty, and slightly sweet flavors that complement the pie's filling. A pale, underbaked crust often tastes doughy and lacks depth, while a perfectly baked golden crust offers a rich, inviting aroma and taste. It’s the first impression, both visually and on the palate, setting the stage for the entire dessert experience.
Beyond flavor, the golden color is intrinsically linked to texture. A properly baked crust should be flaky and crisp, providing a delightful contrast to the often soft or creamy filling. This desired texture is achieved when moisture evaporates during baking, allowing the layers of fat and flour to set into distinct, brittle sheets.
An underbaked crust remains dense and often soggy, especially at the bottom, failing to provide that essential structural integrity and textural contrast. Achieving that perfect golden color indicates sufficient baking time and temperature to render a crust that holds its shape and shatters beautifully with every bite.
Goal: Consistent, Beautifully Browned Pie Crust
Our mission is to guide you through the process of consistently achieving a beautifully browned, golden pie crust every time you bake. This involves understanding the science behind baking, from ingredient ratios to temperature control and timing. We want to move beyond guesswork, providing clear, actionable steps that demystify the process of perfecting golden pie crust recipe techniques. Whether you're baking a simple apple pie or a delicate quiche, the principles for achieving a stunning crust remain largely the same.
By the end of this guide, you'll have the knowledge and confidence to troubleshoot common issues and ensure your crusts bake evenly to that coveted golden shade. We'll cover everything from selecting the right flour and fat to mastering rolling techniques and understanding oven hot spots. Our aim is to empower you to bake with ease and pride, consistently producing pies that not only taste incredible but also look professionally baked, showcasing that signature golden glow that promises flaky perfection.
Step 1: Assembling Quality Ingredients for Exceptional Pie Crust
The Foundation: Flour, Fat, Water, and Salt
At its core, a pie crust is a simple combination of flour, fat, water, and salt. However, the quality and interaction of these few ingredients are paramount to the final result. Flour provides structure, fat creates flakiness by separating gluten strands, water hydrates the flour to form dough and activates gluten, and salt enhances flavor and helps tenderize the dough. Using high-quality ingredients ensures a better starting point for flavor and texture development. For instance, using fresh, cold butter will yield superior flavor compared to older, less flavorful fats.
The ratio of these ingredients is also critical. A classic ratio often leans heavily on fat, sometimes using equal parts fat to flour by weight, though variations exist depending on desired flakiness and ease of handling. For example, a recipe might call for 250g flour and 200g butter. The water quantity is typically much smaller, just enough to bring the dough together, often between 60-100ml for the same amount of flour, depending on humidity and flour type. Getting these proportions right is the first step in perfecting golden pie crust recipe foundations.
Flour Selection: Considering Protein Content and Gluten Development
The type of flour you choose significantly impacts the crust's tenderness. All-purpose flour is the most common choice due to its moderate protein content (typically 10-12%). This protein forms gluten when hydrated and mixed, providing structure. However, too much gluten development leads to a tough crust. Pastry flour, with a lower protein content (around 8-9%), results in a more tender crust but can be trickier to handle. Bread flour, high in protein (12-14%), is generally not recommended for pie crusts as it promotes excessive gluten formation, leading to toughness.
When selecting flour for perfecting golden pie crust recipe results, consider the desired outcome. For a tender, flaky crust, all-purpose flour is a reliable standard. Sifting the flour before measuring can help ensure accuracy and a lighter texture. The key is to minimize gluten development during mixing, which is why cold ingredients and minimal handling are crucial steps we'll discuss later. Understanding how different flours behave helps you make informed choices for your specific baking needs.
Fat Options: Butter, Lard, Shortening, and Their Impact
The choice of fat is arguably the most important factor in achieving a flaky crust. Cold fat, cut into the flour, creates pockets. As the crust bakes, the fat melts, leaving behind air pockets that expand and create distinct flaky layers. Butter is popular for its superior flavor and ability to create tender, flaky layers due to its water content (around 18-20%). However, butter has a lower melting point, which requires careful temperature management.
Lard, a traditional fat, offers excellent flakiness and a high melting point, making it easier to work with in warm kitchens. It produces a very tender crust, though it lacks the rich flavor of butter. Shortening (vegetable or animal) also has a high melting point and creates very distinct layers, resulting in an exceptionally flaky crust.
It's often used for its ease of handling and consistent results, though it provides less flavor than butter or lard. Many bakers achieve the best of both worlds by using a combination of fats, like butter for flavor and shortening or lard for flakiness and stability, when perfecting golden pie crust recipe techniques. For example, a mix of 50% cold butter cubes and 50% cold vegetable shortening cut into the flour can yield a wonderfully flaky and flavorful crust.
Step 2: Optimizing the Mixing Process for Flaky Layers
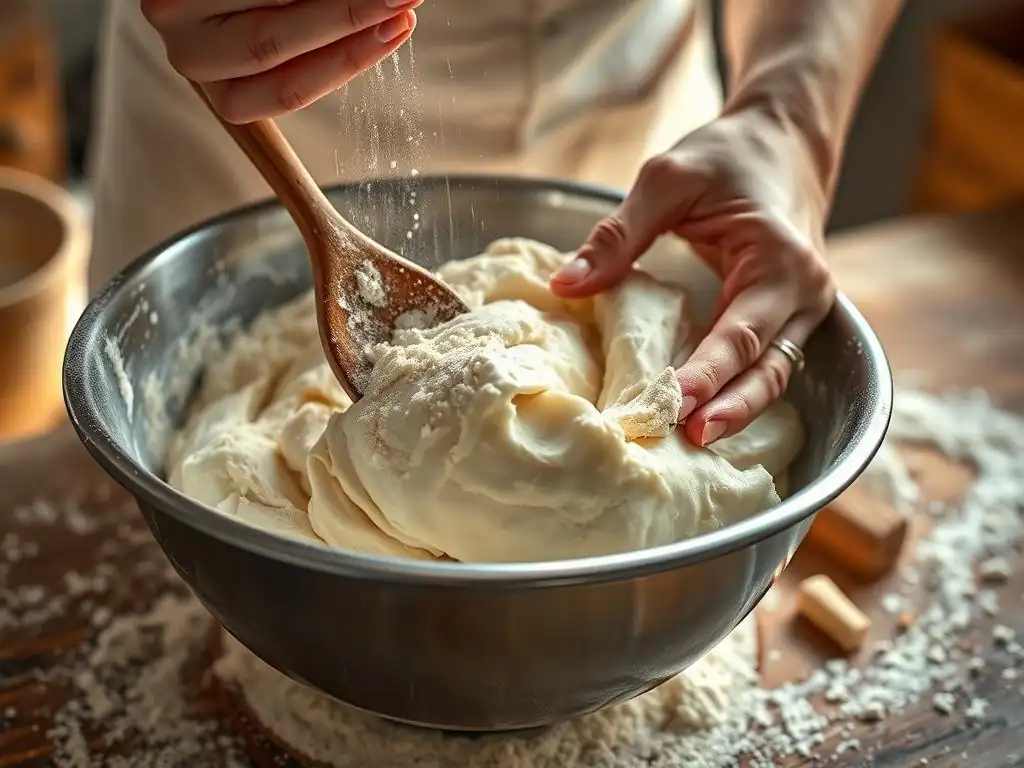
Temperature Control: Ensuring Cold Ingredients
Maintaining cold temperatures throughout the mixing process is paramount for achieving a flaky pie crust. Cold fat (butter, lard, or shortening) is cut into the flour, creating small, distinct pieces. When the dough bakes, these cold fat pieces melt slowly, releasing steam and leaving behind air pockets that become the flaky layers. If the fat is warm, it will melt and be absorbed by the flour before baking, resulting in a more cookie-like, less flaky texture.
Ensure your butter or other fat is very cold, straight from the refrigerator or even briefly in the freezer. The water added should also be ice cold. Some bakers even chill their flour and mixing bowl beforehand, especially in warm environments. Working quickly helps prevent the ingredients from warming up too much from the heat of your hands or the room temperature. This diligent temperature control is a non-negotiable step for perfecting golden pie crust recipe flakiness.
Incorporating Fat: Achieving the Ideal Crumble Size
The method and size of the fat pieces after incorporation are critical. The goal is to cut the cold fat into the flour until it resembles coarse crumbs or small peas. This can be done using a pastry blender, forks, your fingertips, or a food processor. If the fat pieces are too small (like fine sand), you'll get a tender but less flaky crust. If they are too large (walnut-sized chunks), the dough will be difficult to roll and may have large holes after baking.
Using a pastry blender or your fingertips allows you to feel the texture and control the size of the fat pieces. Aim for a mix of sizes, from small pea-sized pieces down to coarse meal. In a food processor, pulse the mixture carefully to avoid over-processing, which can quickly turn the fat into a paste. This 'cutting in' step is where the foundation for those beautiful, distinct layers is built when perfecting golden pie crust recipe texture.
Hydration: Adding Water for Optimal Dough Consistency
Adding the correct amount of ice-cold water is crucial – too little, and the dough will be dry and crumbly; too much, and it will be sticky and tough due to excessive gluten development. Add the water gradually, typically a tablespoon at a time, mixing just until the dough just comes together. The exact amount needed will vary depending on the flour type, humidity, and how much liquid is in your fat (like butter).
The dough should be moist enough to hold together when gently squeezed but not wet or sticky. You should still see some visible pieces of fat throughout the dough. Mixing should be minimal once the water is added; overworking develops gluten, leading to a tough crust. Think of it as coaxing the dry ingredients to form a cohesive mass with as little effort as possible. This delicate balance in hydration is key to perfecting golden pie crust recipe handling and final texture.
Step 3: The Importance of Chilling Dough for Tenderness
Gluten Relaxation: Why Chilling is Essential
After mixing, chilling the dough is a non-negotiable step for several reasons, primarily gluten relaxation. The act of mixing, especially after adding water, develops gluten strands. If you try to roll the dough immediately, it will be elastic, spring back, and be difficult to handle, leading to a tough crust. Chilling allows the gluten strands to relax, making the dough pliable and easy to roll without resistance.
A minimum chill time of 30 minutes is often recommended, but 1-2 hours is ideal. For best results, divide the dough into discs, wrap tightly in plastic wrap, and refrigerate. This shape makes rolling easier later. Chilling also re-solidifies the fat, which is crucial for creating flaky layers during baking. Warm, soft fat would simply smear during rolling.
Optimal Chill Time: Balancing Convenience and Dough Quality
While a quick chill is better than none, allowing the dough to rest in the refrigerator for at least 1 to 2 hours provides significant benefits. This extended period ensures thorough gluten relaxation and firm chilling of the fat. You can even make the dough a day or two in advance; just let it sit at room temperature for 10-15 minutes before rolling if it's too hard.
- Minimum Chill: 30 minutes (if you're in a hurry)
- Recommended Chill: 1-2 hours
- Make Ahead: Up to 2-3 days in the refrigerator, or several months in the freezer (thaw overnight in the fridge).
This resting period is a vital, yet often rushed, step in perfecting golden pie crust recipe success. Patience here pays off in a tender, easy-to-handle dough.
Step 4: Mastering the Art of Rolling and Shaping the Dough
Preparing the Surface: Preventing Sticking and Tearing
A properly prepared surface is essential for rolling pie dough without frustration. You need a clean, dry surface that is lightly floured. Too much flour will make the crust tough, while too little will cause it to stick, leading to tears when you try to lift it. A large pastry mat with measurements can be helpful, or simply a clean countertop.
Use just enough flour to prevent sticking as you roll, adding more sparingly only if needed. Also, lightly flour your rolling pin. If working with a double-crust pie, remember to prepare your surface twice. Keeping the dough cool during rolling is also important; if it becomes too soft, pop it back into the fridge for a few minutes. This careful surface preparation is key to smoothly perfecting golden pie crust recipe rolling.
Rolling Technique: Achieving Uniform Thickness
Rolling dough requires a gentle, even hand. Start from the center of the dough disc and roll outwards, rotating the dough frequently (about a quarter turn after every few rolls) to maintain a round shape and prevent it from sticking in one spot. Apply even pressure to achieve uniform thickness, aiming for about 1/8 inch (around 3mm). Inconsistent thickness will lead to uneven baking, with thin spots burning before thicker areas are cooked through.
Avoid flipping the dough excessively, which can lead to cracking. If the edges crack, you can often pinch them back together. Don't overwork the dough by rolling back and forth repeatedly in the same spot. Smooth, deliberate strokes are best. The goal is a circle large enough to fit your pie plate with an overhang for crimping, typically 12-13 inches (around 30-33 cm) for a standard 9-inch pie plate.
Transferring the Dough: Methods for Avoiding Tears
Transferring the rolled dough from the surface to the pie plate is often where tears happen. There are a couple of reliable methods. One is to gently roll the dough around your rolling pin, then unroll it over the pie plate. Another is to carefully fold the dough in half or quarters, lift it into the plate, and then unfold it.
Whichever method you use, handle the dough gently. Ease it into the bottom and sides of the pie plate without stretching, which can cause the crust to shrink during baking. Press it lightly into the corners. If a tear does occur, don't panic! You can usually patch it with a piece of scrap dough, moistening the edges slightly to help it adhere. Successfully transferring the dough is a crucial step in perfecting golden pie crust recipe presentation.
Step 5: Pre-Baking or Blind Baking for a Crisp Base
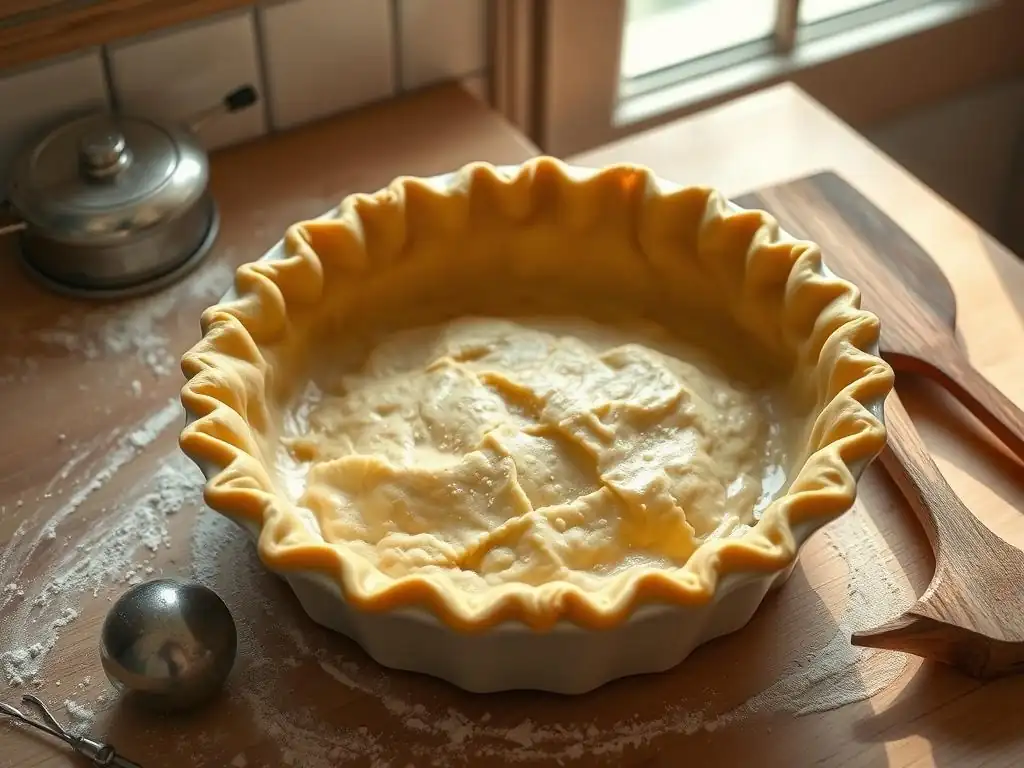
When to Blind Bake: Preventing Soggy Bottoms in Specific Pies
Blind baking, or pre-baking the pie crust before adding the filling, is essential for pies with wet fillings (like quiches, custard pies, or fruit pies with very juicy fruit) or pies with fillings that don't require baking (like cream pies or no-bake cheesecakes). The high moisture content in these fillings can prevent the bottom crust from cooking through, resulting in a dreaded "soggy bottom."
Blind baking sets the bottom crust, creating a barrier against moisture from the filling. For fully baked fillings, you'll typically blind bake the crust until it's lightly golden. For no-bake fillings, you'll bake it until it's fully golden brown and cooked through. Knowing when and how to blind bake is key to perfecting golden pie crust recipe integrity for various fillings.
Preparing for Blind Baking: Using Parchment Paper and Weights
To blind bake successfully, you need to prevent the crust from shrinking and puffing up. After fitting the dough into the pie plate and crimping the edges, prick the bottom generously with a fork (this is called docking) to allow steam to escape. Then, line the crust with parchment paper or foil, pressing it gently into the contours of the pie plate.
Fill the lined crust with pie weights, dried beans, or uncooked rice. These weights hold the parchment/foil in place and prevent the crust from bubbling up. Ensure the weights are distributed evenly across the bottom and slightly up the sides. For a 9-inch pie plate, you'll typically need about 1.5 to 2 pounds (around 700-900g) of weights or beans.
Baking Time and Temperature: Achieving a Lightly Set Crust
Blind baking usually involves baking in a hot oven, typically between 375°F and 400°F (190°C to 200°C). For a partially baked crust (for fillings that will be baked later), bake for about 15-20 minutes with weights until the edges are set and just beginning to turn opaque. Remove the weights and parchment/foil, and bake for another 5-10 minutes until the bottom looks dry and lightly set, but not yet golden.
For a fully baked crust (for no-bake fillings), continue baking after removing the weights for an additional 10-15 minutes, or until the crust is golden brown across the bottom and sides. Keep an eye on the edges, which may brown faster than the center; you might need to shield them (see Step 6). Proper blind baking technique is fundamental for perfecting golden pie crust recipe reliability with moist fillings.
Step 6: Baking the Pie to Golden-Brown Perfection
Oven Temperature: Achieving Even Baking
The correct oven temperature is crucial for achieving that desirable golden-brown color and ensuring the crust bakes evenly both on the edges and the bottom. Most pies bake well between 375°F and 425°F (190°C to 220°C), depending on the filling. A slightly higher initial temperature can help set the crust quickly, promoting flakiness, before potentially reducing the temperature to finish baking the filling.
It's important to know your oven; many home ovens have hot spots and can vary from the set temperature. An oven thermometer is a worthwhile investment to ensure accuracy. Place the pie on a lower rack initially if you struggle with soggy bottoms, or on a middle rack for even heat circulation. Proper temperature management is a key component of perfecting golden pie crust recipe success.
Visual Cues: Identifying the Perfect Golden-Brown Color
Recognizing when your pie crust has reached that perfect golden-brown shade is a matter of observation. The color should be uniform across the visible parts of the crust, a rich, warm brown, not pale yellow or dark brown/black. The edges will naturally brown faster than the center of the top crust (if applicable) or the bottom crust during blind baking.
Look for signs that the crust is cooked through: it should look dry, feel crisp (if you can gently tap it after removing from the oven), and have that appetizing golden hue. If baking a fruit pie, you should also see the filling bubbling in the center, which indicates it's hot enough to thicken and that the bottom crust is likely cooked. Trust your eyes – that beautiful golden color is the most reliable indicator of a perfectly baked crust.
Crust Shields: Protecting Edges from Burning
Pie crust edges, being thinner and more exposed, tend to brown much faster than the rest of the crust or the pie filling. To prevent them from burning while the rest of the pie finishes baking, use a crust shield. These are often silicone rings or aluminum foil strips that cover just the edges of the pie.
Apply the crust shield about halfway through the baking time, or when the edges have reached your desired level of goldenness. Gently place the shield over the edges, ensuring it covers them completely. This allows the rest of the crust and the filling to continue baking until done. Using a crust shield is a simple but effective technique for perfecting golden pie crust recipe appearance and preventing burnt edges. You can buy reusable silicone shields or easily fashion one from aluminum foil.
Step 7: Addressing Common Pie Crust Issues
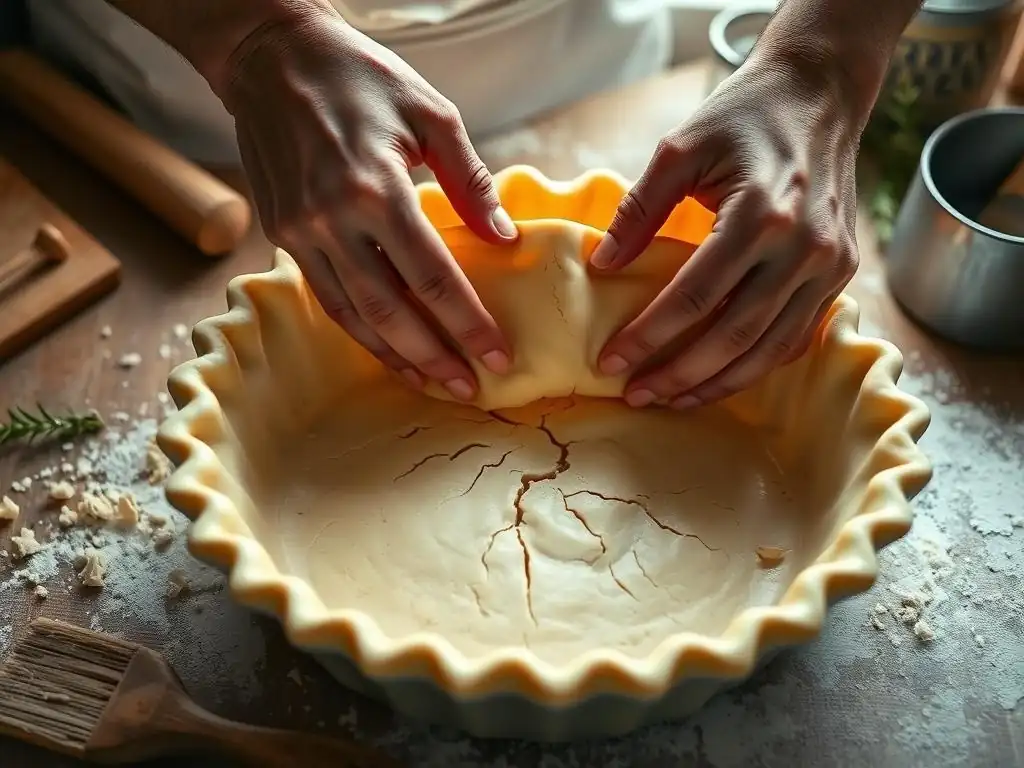
Soggy Crust Solutions: Techniques for a Crisp Bottom
A soggy bottom crust is one of the most common and disappointing pie problems. It occurs when moisture from the filling or steam during baking permeates the bottom crust before it has a chance to set. The primary solution is blind baking (as discussed in Step 5), especially for wet fillings.
Other techniques include ensuring your oven is adequately preheated to a high temperature (like 400°F / 200°C) before placing the pie in, which helps the bottom crust start baking immediately. Placing the pie on a preheated baking sheet or pizza stone can also provide a boost of heat to the bottom. For fruit pies, you can toss the fruit with a thickener like flour, cornstarch, or tapioca before filling, or even reduce the fruit juices slightly beforehand. Finally, ensure the bottom crust isn't rolled too thick, as thicker crusts take longer to bake through.
Tough Crust Solutions: Avoiding Overworking the Dough
A tough crust is usually the result of overworking the dough, which develops too much gluten. Remember, gluten provides structure, but too much makes the crust dense and chewy instead of tender and flaky. To avoid this, handle the dough as little as possible at every stage.
- Mix the ingredients just until they come together.
- Add only enough water for the dough to cohere.
- Do not knead the dough.
- Roll the dough gently and avoid excessive rerolling of scraps.
Chilling the dough is also crucial, as it allows any developed gluten to relax. By being mindful of handling and mixing, you can significantly improve tenderness when perfecting golden pie crust recipe techniques.
Cracked Crust Solutions: Proper Hydration and Handling
Cracked crusts often happen when the dough is too dry or too cold and stiff when rolling. Ensure you've added sufficient, but not excessive, water during mixing. The dough should feel pliable, not crumbly.
If the dough is very cold and hard from the refrigerator, let it sit at room temperature for 10-15 minutes before rolling to make it more manageable. If cracks appear during rolling, you can sometimes gently rub them with a little water and pinch them together, or patch them with a small piece of dough. Rolling the dough between two sheets of plastic wrap or parchment paper can also help prevent sticking and cracking. Patient and gentle handling is key to avoiding tears and cracks when perfecting golden pie crust recipe structure.
Advanced Techniques for Enhancing Crust Color and Flavor
Egg Wash: Achieving Shine and Rich Color
An egg wash is a classic way to give a pie crust a beautiful, glossy finish and a rich golden-brown color. A standard egg wash is made by whisking one egg with a tablespoon of water or milk. Brushing this mixture lightly over the top crust just before baking provides proteins and sugars that brown attractively in the oven.
For a deeper golden color, use an egg yolk mixed with a little cream. For a shinier finish, use an egg white with a little water. Apply the wash evenly with a pastry brush, avoiding drips onto the edges, which can glue them to the pie plate. An egg wash not only enhances the visual appeal but can also add a subtle richness to the crust's flavor, elevating your perfecting golden pie crust recipe.
Milk or Cream Wash: An Alternative for a Different Hue
If you prefer a less glossy finish than an egg wash provides, or simply don't want to use an egg, a milk or cream wash is an excellent alternative. Brushing the crust with milk or cream before baking helps it brown more evenly and achieve a softer, matte golden finish compared to an egg wash.
The milk solids and sugars in milk or cream contribute to the browning process through caramelization. This wash is particularly good for a rustic look. Simply brush whole milk, half-and-half, or heavy cream lightly over the top crust. This method offers a different, often understated, aesthetic while still contributing to the desired golden color when perfecting golden pie crust recipe presentation.
Sugar Coating: Adding Sweetness and Texture
For an extra touch of sweetness and a delightful textural crunch, consider adding a sugar coating to your top crust. After applying a wash (egg, milk, or cream), sprinkle the crust generously with sugar. Coarse sugar like turbinado or sanding sugar works particularly well, as the larger crystals catch the light and provide a noticeable crunch.
This technique is especially effective on fruit pies where the added sweetness complements the filling. The sugar melts slightly and caramelizes as it bakes, enhancing the golden color and creating a beautiful, slightly crackled surface. This simple addition can take your perfecting golden pie crust recipe to the next level in both taste and appearance.
Conclusion: Savoring Your Perfect Golden Pie Crust
Celebration: You've Baked a Beautiful Pie!
Congratulations! You've navigated the steps and achieved that coveted perfect golden pie crust. Take a moment to admire your handiwork – the beautiful color, the flaky edges, the promise of deliciousness within. Baking a pie from scratch, especially mastering the crust, is a rewarding accomplishment.
This golden crust is a testament to your patience, attention to detail, and willingness to learn the nuances of baking. It's the frame that holds your filling and the first layer of texture and flavor your guests will experience. Feel proud of the skills you've applied in perfecting golden pie crust recipe techniques.
Now that you've successfully baked a pie with a stunning golden crust, share your success! Share photos of your beautiful pie with friends and family. Talk about the process and the techniques you learned. Your journey in perfecting golden pie crust recipe skills can inspire others who are just starting or who have struggled with their own crusts.
Baking is a wonderful way to connect and share joy. Your perfectly baked pie, with its gorgeous golden crust, is ready to be enjoyed and shared. Keep practicing, keep experimenting, and keep baking with ease!
Frequently Asked Questions
What is the secret to achieving a consistently golden pie crust?
The key to a perfectly golden crust is using the right ratio of fat to flour and ensuring the crust is blind baked properly, potentially using pie weights. An egg wash before baking is also crucial.
How can I prevent my pie crust from shrinking during baking?
To minimize shrinking, make sure to chill the dough thoroughly before rolling it out and baking. Docking the crust (pricking it with a fork) before blind baking also helps release steam.
What type of fat is best for a flaky and golden pie crust?
A combination of cold butter and shortening often yields the best results. Butter contributes flavor, while shortening provides flakiness and tenderness.
My pie crust is often tough. What am I doing wrong?
Overmixing the dough develops gluten, leading to a tough crust. Mix only until just combined and avoid overworking the dough during rolling and shaping.
Can I freeze pie crust dough for later use?
Yes! Pie crust dough freezes extremely well. Wrap it tightly in plastic wrap and then in foil. Thaw overnight in the refrigerator before rolling out and baking.
Final Reflection: The Golden Ratio of Baking and Life
The pursuit of the perfect golden pie crust is more than just a culinary quest; it's a metaphor for the dedication and precision required to achieve any worthwhile goal. The seemingly simple steps outlined in this article—from chilling the butter to understanding the importance of hydration—translate to a broader principle: attention to detail yields extraordinary results. Mastering the art of the pie crust, therefore, becomes a powerful lesson applicable far beyond the kitchen.
The enduring appeal of a flawlessly golden pie crust lies not just in its visual beauty, but in the comforting tradition it represents. It's a symbol of home, of shared meals, and of the love poured into creating something delicious. The process itself is meditative, a quiet act of creation that connects us to generations past. As Julia Child wisely said, Find something you're passionate about and keep tremendously interested in it.
This passion, this dedication to the craft, is what truly elevates a simple pie crust into something extraordinary.
Now, I invite you to consider your own "golden crust." What is the area of your life where you strive for perfection, where attention to detail can yield remarkable results? Perhaps it's a project at work, a personal relationship, or even a creative endeavor. Remember the lessons learned here—the importance of patience, the power of precise measurement, and the beauty of embracing the process. Take those principles, apply them to your own pursuits, and watch as your own "golden crust" emerges, shining with the light of your dedication and care.
Unlock Your Inner Pastry Chef!
Thanks for joining us on this delicious journey to the perfect pie crust! You've learned some amazing techniques – now it's time to put them into practice. Ready to bake something extraordinary?
- Bake your dream pie! Put your newfound knowledge to the test and create the golden, flaky crust you’ve always envisioned. Share a picture of your masterpiece on social media using #BakeWithEaseGoldenCrust!
- Explore our recipe collection for even more pie-crust inspiration, from classic apple to savory creations.
- Join our BakeWithEase community and share your baking triumphs (and challenges!) in the comments below. Let's learn from each other!
What unique flavor combination will you try with your perfectly golden pie crust?