
French Bread Fantasy: Bake Crusty Loaves in Your Bread Machine

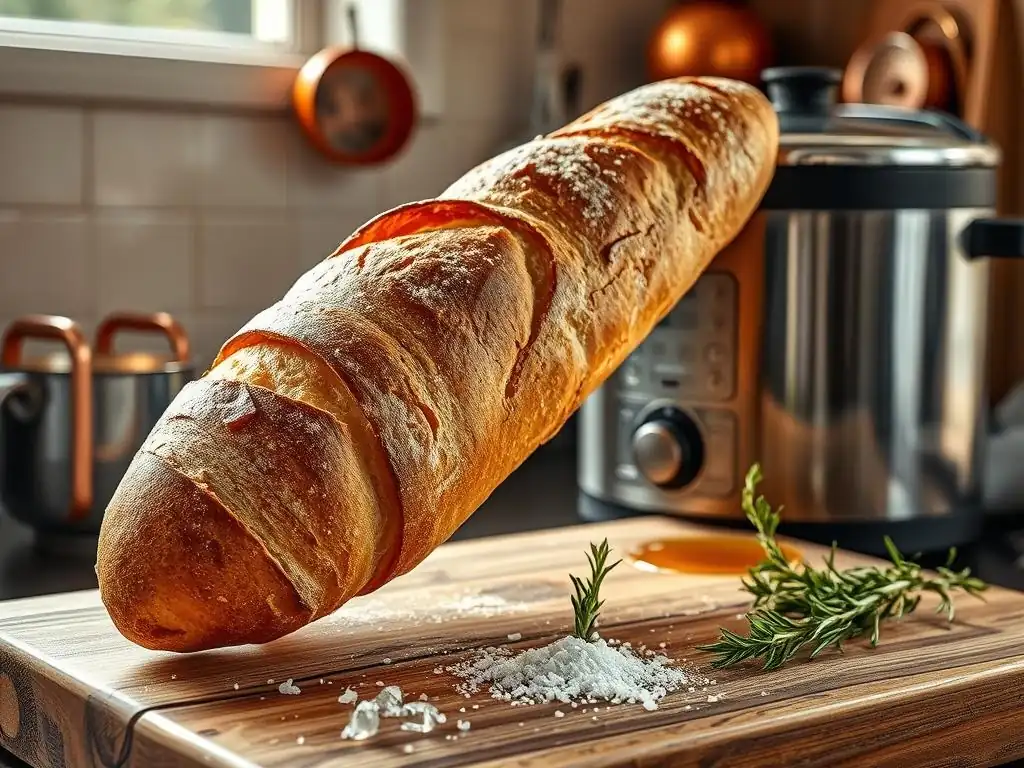
Welcome to BakeWithEase, your haven for effortless baking! Ever dreamt of perfectly crusty French bread, warm from the oven? This time, let's make it easy. Discover the secrets to achieving that bakery-quality flavor and texture right in your own kitchen using your bread machine with our guide to easy bread machine French bread. Intrigued? Let's unlock the art of simple, sensational baking together.
- Introduction to Easy Bread Machine French Bread
- Mastering Easy Bread Machine French Bread: A Step-by-Step Guide
- The Easy Bread Machine French Bread Recipe: A Detailed Walkthrough
- Achieving the Perfect Crust: Tips and Tricks for Bread Machine French Bread
- Troubleshooting Common Issues with Bread Machine French Bread
- Flavor Variations: Adding Your Own Twist to Bread Machine French Bread
- Storing Your Homemade Bread Machine French Bread
- Conclusion: Enjoying Your Easy Bread Machine French Bread
-
Frequently Asked Questions
- How can I make French bread in my bread machine?
- What are the key ingredients for French bread?
- What makes bread machine French bread different from traditional French bread?
- Can I adjust the crust color of my bread machine French bread?
- What if my bread machine doesn't have a dedicated "French bread" setting?
- Final Reflection: The Joy of Effortless French Bread
- Unleash Your Inner Baker Today!
Introduction to Easy Bread Machine French Bread
Making homemade bread can feel like a daunting task, especially when aiming for that perfect, crusty French loaf. Traditionally, French bread requires specific techniques, long fermentation times, and often a steamy oven environment to achieve its signature texture. This can make it seem out of reach for busy home bakers or those new to the craft. However, the convenience of modern kitchen appliances has opened up new possibilities, and achieving delicious, easy bread machine French bread is now well within reach for almost anyone. It's about leveraging technology to simplify a classic.
The appeal of using a bread machine for French bread lies in its automation. These machines handle the kneading and initial rise, two steps that can be time-consuming and require manual effort or specialized equipment. For many home bakers, this significantly lowers the barrier to entry for making artisan-style loaves.
Imagine waking up to the smell of freshly baked bread without spending hours mixing and kneading by hand – that's the promise of easy bread machine French bread. It transforms a potentially complex process into a manageable one, perfect for fitting into a busy schedule while still enjoying the unparalleled taste of homemade.
Why Bake French Bread in a Bread Machine?
Baking French bread in a bread machine offers significant advantages, primarily revolving around convenience and consistency. The machine takes care of the laborious kneading process, which is crucial for developing the gluten structure needed for the airy crumb of French bread. This saves bakers considerable time and physical effort.
A typical bread machine cycle for French bread might range from 3 to 4 hours, much of which is hands-off time while the machine performs the mixing, kneading, and initial fermentation. Comparing this to the multi-day process some traditional French bread recipes require, the time saving is substantial, often reducing active work time from potentially an hour or more spread across days to just a few minutes of ingredient measurement and machine setup.
Furthermore, bread machines provide a controlled environment for dough rising. Temperature and humidity are kept relatively stable within the machine's pan, which can lead to more predictable fermentation results compared to relying on ambient kitchen conditions. This consistency is particularly helpful for recipes like French bread, where proper rising is key to both volume and texture. For bakers seeking reliable results without the need for specialized proofing equipment or constant monitoring, making easy bread machine French bread is a practical and effective solution. It simplifies complex variables, allowing more focus on ingredient quality and enjoying the final product.
Understanding the Characteristics of French Bread
Authentic French bread, often a baguette, is defined by a few key characteristics: a thin, crispy crust, a light and airy interior crumb with irregular holes (open structure), and a simple composition of just four main ingredients: flour, water, salt, and yeast. The magic happens through proper gluten development during kneading, controlled fermentation that builds flavor, and high heat and steam during baking to achieve the signature crust.
The goal when making easy bread machine French bread is to replicate these characteristics as closely as possible within the constraints and capabilities of the machine. While a bread machine might not produce the exact same irregular shape or blistered crust of a hearth-baked baguette, it can yield a loaf with a satisfyingly crisp exterior and a pleasant, open interior.
The crust is arguably the most iconic feature of French bread. It should shatter slightly when sliced and have a golden-brown color. This is typically achieved by baking at high temperatures (often 450°F or higher) in an oven with added steam. The steam keeps the surface of the dough pliable initially, allowing it to expand fully before the crust sets into its brittle form.
The crumb, on the other hand, should be chewy but not dense, with varying sizes of air pockets distributed throughout. This open structure is a result of strong gluten development and adequate fermentation time, allowing gases produced by the yeast to expand. Understanding these elements helps in adapting techniques for making easy bread machine French bread to maximize its potential for crust and crumb quality.
Mastering Easy Bread Machine French Bread: A Step-by-Step Guide
Gathering Your Ingredients for French Bread
The foundation of any great loaf of bread lies in the quality and type of ingredients used. For easy bread machine French bread, keeping the ingredient list simple is key, aligning with the traditional minimalist approach to French bread. You'll need bread flour, water, yeast, and salt. While seemingly basic, the specifics of each ingredient matter.
For instance, the type of water (filtered is often recommended) and its temperature can impact yeast activity. Using fresh yeast is also crucial for optimal rising. Typically, a standard bread machine recipe for a 1.5 or 2-pound loaf might call for around 3 cups of flour, 1 to 1.5 cups of water, 1 to 1.5 teaspoons of salt, and 1.5 to 2 teaspoons of active dry yeast or instant yeast. These proportions are critical for achieving the right dough consistency and flavor profile necessary for delicious easy bread machine French bread.
Beyond the core ingredients, understanding their interaction is vital. Salt, for example, isn't just for flavor; it helps regulate yeast activity and strengthens the gluten structure. Too little salt can lead to overly rapid rising and a bland taste, while too much can inhibit yeast and result in a dense loaf. The hydration level – the ratio of water to flour – is also particularly important for French bread.
French bread dough is typically high in hydration, often ranging from 65% to 75% water by weight relative to flour. This high water content contributes to the open, airy crumb. When preparing to make easy bread machine French bread, measuring ingredients accurately, preferably by weight for flour and water, provides the best chance for success, ensuring the dough has the correct hydration for that desirable texture.
Essential Ingredients for Authentic French Bread Flavor
The authentic flavor of French bread comes from the simple synergy of its four core ingredients, transformed by fermentation and baking. High-quality bread flour provides the protein structure (gluten) necessary to trap the gases produced by yeast, giving the bread its volume and chewiness. The water hydrates the flour, activating the gluten and yeast.
Salt enhances the flavor profile by balancing the sweetness produced during fermentation and also contributes to crust color and texture. Yeast is the leavening agent, consuming sugars and producing carbon dioxide gas, which makes the bread rise. Using good quality ingredients, such as unbleached bread flour with a protein content typically ranging from 12% to 14%, can make a noticeable difference in the final texture and taste of your easy bread machine French bread.
Furthermore, the type of yeast can influence the flavor and speed of fermentation. Instant yeast can be added directly with the dry ingredients, making it convenient for bread machine use. Active dry yeast usually requires proofing in warm water first, though some bread machines handle it successfully without proofing.
Some bakers also experiment with a small amount of sourdough starter or a 'pâte fermentée' (a piece of dough saved from a previous batch) to add a layer of complex, slightly tangy flavor that develops over a longer fermentation period. While the basic easy bread machine French bread recipe uses standard yeast, these additions can elevate the flavor closer to traditional artisan loaves, provided your machine has a suitable cycle or you use its dough cycle for a longer, controlled ferment.
Tips for Selecting Bread Flour
Selecting the right flour is perhaps the most critical factor in achieving the desired texture for easy bread machine French bread. Bread flour is specifically milled to have a higher protein content than all-purpose flour, typically between 12% and 14%. This higher protein level is essential for developing a strong gluten network during kneading.
Gluten is what gives bread dough its elasticity and strength, allowing it to trap the carbon dioxide produced by the yeast and create that desirable open, airy crumb structure characteristic of French bread. Using all-purpose flour (typically 10-12% protein) will still produce bread, but the crumb may be denser and less open, and the crust might not develop as robustly.
When choosing bread flour for your easy bread machine French bread, look for unbleached varieties. Bleaching can slightly weaken the protein, potentially affecting gluten development. Different brands may have slightly different protein levels, so experimentation might be needed to find the one that works best in your specific bread machine and recipe.
Some bakers prefer using European-style bread flours, which can sometimes have even higher protein levels or different milling characteristics that they feel contribute to a better crust or crumb. Ultimately, the goal is a flour that facilitates strong gluten development, which is key to achieving that classic French bread texture, even when using the convenience of a bread machine.
Preparing Your Bread Machine for French Bread Baking
Before adding any ingredients, ensure your bread machine is clean and in good working order. Residue from previous bakes can affect new doughs. Check the kneading paddle(s) are correctly installed in the pan.
For most easy bread machine French bread recipes, ingredients are added in a specific order, usually liquids first, followed by dry ingredients, and finally yeast on top of the flour. This order is important because it prevents the yeast from coming into contact with the salt or liquid prematurely before the cycle begins, which could inhibit its activity. Always consult your bread machine's manual for the recommended ingredient order, as it can vary by model.
Understanding your bread machine's specific cycles and settings is paramount for successful easy bread machine French bread. Most machines have a dedicated "French" cycle or a "Basic" or "White" cycle that can be adapted. The French cycle is specifically designed for lean doughs (like French bread, which contains no added fats or sugars beyond what's naturally in the flour) and typically includes a longer kneading time and a longer, cooler rise period to develop flavor and texture slowly.
If your machine lacks a specific French setting, a Basic or White cycle might work, but the results could differ, potentially yielding a less open crumb or thinner crust due to different timings and temperatures. Familiarizing yourself with your machine's manual and experimenting with cycle options will help you get the best results for your easy bread machine French bread.
Ensuring Proper Bread Machine Functionality
A well-maintained bread machine is crucial for consistent baking results, especially when tackling a recipe like easy bread machine French bread, which relies on precise timing and temperature control. Before each use, ensure the bread pan and kneading paddle are clean and free from any dried dough or residue. Even small amounts of old ingredients can affect the current bake.
Check that the paddle spins freely. Some machines have a small seal around the paddle shaft at the bottom of the pan; ensure this is intact and not leaking, as leaks can cause dough to seize or the machine to malfunction.
Beyond cleanliness, understanding your machine's heating element and thermostat is important, though less directly controllable by the user. Consistent temperature during the rise cycles is key for yeast activity. If you suspect your machine isn't heating properly, this could lead to dough not rising adequately.
Similarly, the motor that drives the kneading paddle needs to be strong enough to handle the relatively stiff dough of French bread. An older or less powerful machine might struggle with kneading, resulting in underdeveloped gluten. While you can't fix internal components easily, being aware of your machine's capabilities and potential limitations helps in troubleshooting issues when making easy bread machine French bread.
Understanding Your Bread Machine's Settings
Navigating your bread machine's settings is key to unlocking its potential for baking easy bread machine French bread. Most machines offer various cycle options, typically selected via a menu button. Look for a "French" cycle first. This cycle is usually optimized for lean doughs, featuring a longer kneading phase for gluten development and often a longer, cooler first rise (bulk fermentation) to enhance flavor. The baking phase on a French cycle might also be adjusted for a crispier crust.
If a dedicated "French" cycle isn't available, you might experiment with the "Basic" or "White" bread cycle. However, be aware that these cycles are often shorter and designed for doughs with more sugar or fat, which can affect the outcome. Some advanced machines allow custom programming, letting you set specific times for preheat, kneading, rise times, punch down, and baking.
If your machine has this feature, you can potentially create a custom cycle specifically tailored for easy bread machine French bread, mimicking the longer, cooler rise of traditional methods. Consult your machine's manual for detailed descriptions of each cycle and their timings.
The Easy Bread Machine French Bread Recipe: A Detailed Walkthrough
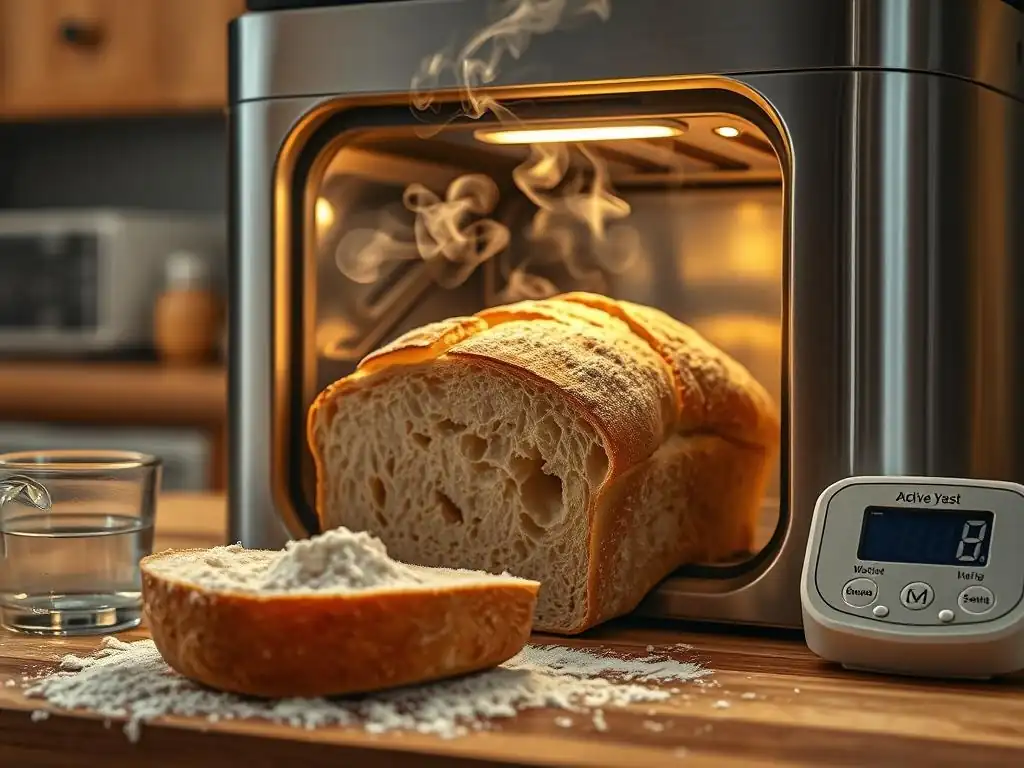
Making easy bread machine French bread is a straightforward process once you understand the steps and your machine's capabilities. This section breaks down the typical process from adding ingredients to enjoying your fresh loaf. Remember that exact quantities and timings can vary slightly depending on your specific bread machine model and the size of loaf it's designed for (e.g., 1 lb, 1.5 lb, 2 lb). Always refer to your bread machine's manual or a recipe specifically designed for your model size, but the general steps outlined here provide a solid framework for success.
The process leverages the bread machine's automated functions for the most labor-intensive parts, making homemade French bread accessible. While the machine handles the mixing, kneading, and initial rise, some techniques like shaping (if desired) and potentially enhancing the crust during baking might require manual intervention outside the machine cycle. The goal is to use the bread machine efficiently to get a high-quality dough base for your easy bread machine French bread.
Step 1: Adding Ingredients to the Bread Machine Pan
Adding ingredients in the correct order is a fundamental step in successful bread machine baking, especially for easy bread machine French bread where the dough is lean. Most manufacturers recommend adding liquids first. This typically includes water, and any liquid sweeteners if your recipe uses them (though traditional French bread is lean and usually doesn't). For a standard 1.5-pound loaf, this might mean adding around 1 to 1.25 cups of lukewarm water (around 80-90°F or 27-32°C). Ensure the water temperature is suitable for yeast activation – too hot can kill the yeast, too cold can slow it down excessively.
After liquids, add the dry ingredients except the yeast. This usually includes the bread flour (around 3 cups for a 1.5-pound loaf), salt (1 to 1.5 teaspoons), and any other dry additions like dough conditioners if you choose to use them. Level the dry ingredients gently to create a small well or indentation in the center of the flour.
This well is where the yeast goes. Adding the yeast last, on top of the flour, helps keep it separated from the liquid and salt until the kneading cycle begins, ensuring optimal activation when the machine starts. This layering technique is a simple but effective way to start your easy bread machine French bread on the right foot.
Step 2: Selecting the Correct Bread Machine Cycle
Choosing the appropriate cycle on your bread machine is critical for achieving the desired texture and rise for easy bread machine French bread. As mentioned earlier, the ideal cycle is usually labeled "French." This cycle is specifically programmed for lean doughs, featuring a longer kneading time to develop the strong gluten network necessary for an open crumb and a longer, slower fermentation period to build complex flavors. A typical French cycle might last anywhere from 3 hours and 30 minutes to 4 hours and 30 minutes, depending on the machine.
If your machine doesn't have a dedicated "French" setting, consult your manual for recommendations on baking lean white bread. The "Basic" or "White" cycle might work, but be aware it could result in a slightly different loaf. Some bakers also use the "Dough" cycle, which completes the mixing, kneading, and first rise (typically 1.5 to 2 hours), allowing you to remove the dough, shape it manually, and bake it in a conventional oven.
This manual shaping step can help achieve a more traditional French bread shape (like a baguette) and allows for better crust development in a hot, steamy oven. Experimentation with your machine's cycles is key to finding the best approach for your perfect easy bread machine French bread.
Step 3: Monitoring the Dough Development
Once the cycle begins, your bread machine will start mixing and then kneading the dough. It's beneficial to monitor the dough during the initial kneading phase (usually the first 10-15 minutes). The dough should form a smooth, elastic ball that cleans the sides of the pan. It should not be excessively sticky or too stiff.
If the dough looks too dry and isn't forming a cohesive ball, you may need to add a tablespoon of water at a time. If it's too wet and sticky, add a tablespoon of bread flour at a time. Make these adjustments only during the kneading cycle, while the machine is working the dough.
Observing the dough during the first rise is also helpful, especially if using a French cycle which has a longer rise. The dough should noticeably increase in volume, often doubling in size by the end of the rise period. Factors like room temperature and the freshness of your yeast can influence the rise.
While the bread machine controls the pan temperature to a degree, extreme ambient temperatures can still have an effect. A healthy rise is crucial for the final texture and volume of your easy bread machine French bread, so visually checking on it (without opening the lid too frequently, which can disrupt the temperature) provides valuable insight into the process.
Step 4: Shaping the Dough (Optional)
While many bread machines bake the loaf directly in the pan, resulting in a standard loaf shape, some bakers prefer to use the "Dough" cycle for easy bread machine French bread. This allows them to remove the dough after the first rise and shape it into traditional forms like baguettes or bâtards (shorter, fatter loaves) before baking in a conventional oven. If you choose this route, lightly flour a clean surface after the dough cycle finishes.
Gently remove the dough from the pan (the paddle might stick; remove it carefully). Avoid overworking the dough at this stage to preserve the airy structure.
Divide the dough if making multiple smaller loaves. For a single baguette, gently form the dough into a rough rectangle, then fold the top edge down towards the center and press to seal. Fold the dough in half lengthwise and seal the seam firmly with the heel of your hand.
Gently roll the dough back and forth from the center outwards, tapering the ends, until you achieve the desired length (typically around 12-15 inches for a standard oven). Place the shaped loaf on parchment paper or a floured couche (linen cloth) for the final rise (proofing), which usually takes 30-60 minutes. This shaping step, while adding manual effort, allows for a more classic presentation of your easy bread machine French bread.
Step 5: Baking Your French Bread Loaf
If you are baking directly in the bread machine on a full cycle (like the "French" cycle), the machine will automatically proceed from the final rise to the baking phase. The baking temperature and duration are pre-programmed for the selected cycle. Bread machine baking typically results in a loaf with a softer crust compared to oven baking, due to the contained environment and different heating elements.
To potentially enhance the crust, some machines allow you to select a crust color setting (light, medium, dark). Choosing 'dark' can result in a slightly crispier exterior, though it still won't replicate the crust achieved with high heat and steam in a conventional oven.
If you used the "Dough" cycle and shaped the loaf manually, you will bake it in a preheated conventional oven. Preheat your oven to a high temperature, typically between 425°F and 475°F (220°C - 245°C). Baking at high heat is crucial for developing a good crust on French bread.
Before placing the loaf in the oven, you can score the top with a sharp knife or lame (a baker's razor) to control expansion and add visual appeal. Baking time will vary depending on the size and shape of the loaf and oven temperature, but typically ranges from 20 to 35 minutes for baguettes or bâtards. The loaf is done when it is golden brown and sounds hollow when tapped on the bottom, with an internal temperature of around 200-210°F (93-99°C).
Step 6: Cooling and Slicing Your Homemade French Bread
Once your easy bread machine French bread has finished baking, whether in the machine or a conventional oven, the cooling process is just as important as the baking itself. Immediately remove the loaf from the bread machine pan (or oven) and place it on a wire cooling rack. Cooling on a rack allows air to circulate around the entire loaf, preventing the bottom crust from becoming soggy from trapped steam. It also allows the internal structure of the bread to set properly.
Resist the urge to slice into the loaf immediately! The internal temperature is still very high, and the steam is still distributing throughout the crumb. Slicing too early can result in a gummy texture. Allow the bread to cool completely, or at least for a minimum of 30-60 minutes, depending on the size of the loaf. As it cools, the crust will continue to crisp up. Once fully cooled, slice your easy bread machine French bread with a serrated knife and enjoy the fruits of your labor!
Achieving the Perfect Crust: Tips and Tricks for Bread Machine French Bread
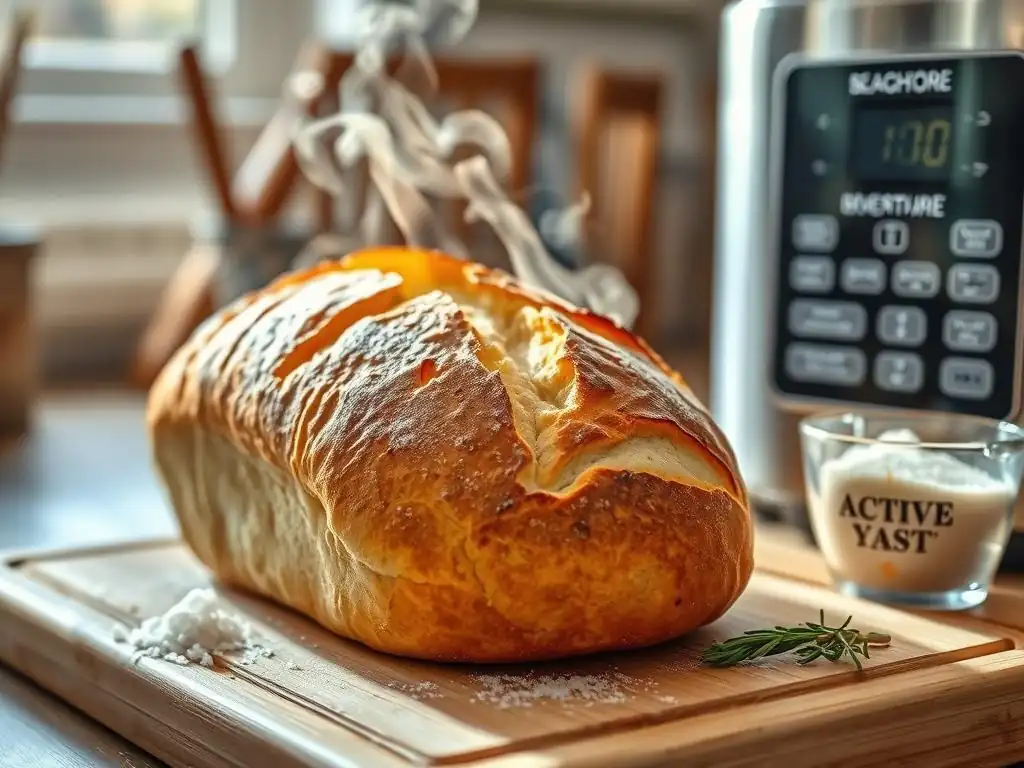
One of the biggest challenges when making easy bread machine French bread is replicating the characteristic thin, crispy crust of traditionally baked loaves. Bread machines typically bake in a humid, enclosed environment, which isn't ideal for crisp crust formation. However, there are techniques you can employ, especially if using the dough cycle and finishing in a conventional oven, to significantly improve the crust quality. Even when baking solely in the machine, understanding the factors that influence crust development can help you optimize the settings and ingredients.
The crust forms as the outer layer of the dough dries out and bakes at high temperature. Sugars in the dough caramelize, contributing to color and flavor, while the Maillard reaction adds complexity. For French bread, the lean dough composition means there are fewer sugars and fats to promote browning, making the baking environment even more critical for crust formation. Implementing strategies to manage hydration and introduce steam can elevate your easy bread machine French bread from good to great.
The Importance of Hydration in French Bread Dough
The hydration level of French bread dough plays a significant role in both the internal crumb structure and the potential for a good crust. French bread dough is typically high in hydration, often 65% to 75% water relative to the flour weight. This high water content makes the dough softer and stickier than standard sandwich bread doughs. While potentially challenging to handle manually, this high hydration contributes to a more open, airy crumb structure with larger, irregular holes, a hallmark of artisan bread.
For easy bread machine French bread, achieving the correct hydration within the machine's capabilities is key. Too little water will result in a dense, tight crumb and potentially a less expansive loaf. Too much water can make the dough too slack for the machine to knead effectively, leading to poor gluten development.
The high water content also affects the crust; as the bread bakes, the moisture in the dough's surface turns to steam, which helps keep the crust pliable initially, allowing the loaf to expand fully before the crust hardens. This initial pliability is essential for allowing the characteristic "oven spring" and contributes to a thinner, crisper crust upon cooling.
Creating Steam for a Crusty Exterior
Steam is the secret weapon for achieving a truly crusty exterior on French bread. In a professional or artisan oven, steam is injected at the beginning of the bake. This steamy environment keeps the surface of the dough moist and elastic during the initial phase of baking, allowing the loaf to achieve maximum volume ("oven spring") before the crust sets.
Once the steam dissipates or is vented, the high heat can then bake the now-expanded crust to a beautiful, crackly finish. Without sufficient steam, the crust forms too early, restricting the loaf's expansion and resulting in a thicker, less crispy crust.
When making easy bread machine French bread, replicating this steamy environment within the machine's enclosed pan is difficult. The machine's baking cycle is designed differently. However, if you are using the "Dough" cycle and baking in a conventional oven, you absolutely should incorporate steam.
This can be done by placing a pan on the bottom rack of your oven while it preheats and carefully pouring hot water into it just as you place the shaped loaf in the oven. Another method is to spray the oven walls generously with water just before closing the door. Maintaining steam for the first 10-15 minutes of baking is usually sufficient to impact the crust development positively.
Bread Machine Steam Techniques
While bread machines are not designed to generate external steam like a conventional oven, there are limited ways to attempt to increase humidity within the pan, though results vary greatly. Some adventurous bakers have tried placing a small, oven-safe dish of water inside the bread machine pan alongside the dough during the baking cycle, ensuring it doesn't interfere with the kneading paddle or heating element. Caution is advised if attempting this, as it is not a standard practice and could potentially damage your machine.
A more practical approach when using a full bake cycle in the machine is to accept the limitations of the bread machine's environment and focus on optimizing other factors like dough hydration and using the 'dark crust' setting if available. For those truly seeking an artisan-quality crust on their easy bread machine French bread, using the dough cycle and baking in a conventional oven with added steam remains the most effective method. This hybrid approach leverages the bread machine for the labor-intensive dough preparation and the oven for the critical crust development phase.
Adjusting the Recipe for Different Bread Machine Sizes
Bread machine recipes, including those for easy bread machine French bread, are typically calibrated for specific loaf sizes, most commonly 1.5-pound or 2-pound machines. The ingredient quantities provided in a recipe must be scaled appropriately for your machine's capacity. Attempting to bake a 2-pound recipe in a 1.5-pound machine can lead to the dough overflowing the pan during the rise, creating a significant mess and potentially damaging the machine. Conversely, baking a 1.5-pound recipe in a 2-pound machine might result in a smaller, less substantial loaf that doesn't fill the pan adequately.
Always check your bread machine's manual for its loaf size capacity and consult recipes specifically written for that size. If you need to adapt a recipe, maintain the correct ratios between ingredients, especially the flour-to-liquid ratio (hydration) and the yeast-to-flour ratio. For example, if scaling a 2-pound recipe down to 1.5 pounds, you'd typically reduce all ingredients by roughly 25%. Using an online scaling calculator or kitchen scale for precise measurements is highly recommended when adjusting recipes for different bread machine sizes to ensure your easy bread machine French bread turns out correctly.
Troubleshooting Common Issues with Bread Machine French Bread
Even with an easy bread machine French bread recipe, things don't always go perfectly on the first try. Bread baking involves many variables, and understanding how to troubleshoot common problems can save you frustration and wasted ingredients. Issues like dough not rising, bread being too dense, or the crust not being quite right are common and often have identifiable causes that can be corrected in subsequent attempts. The key is to observe the process and the outcome to pinpoint the likely culprit.
Many problems stem from ingredient measurements, yeast activity, or environmental factors. Since the bread machine controls much of the process, ingredient accuracy becomes even more critical. Addressing these issues systematically will help you refine your technique and consistently produce delicious easy bread machine French bread.
Dough Not Rising Properly
If your easy bread machine French bread dough doesn't rise adequately during the cycle, the most common culprit is inactive or dead yeast. Yeast is a living organism, and its activity is affected by temperature and age. Ensure your yeast is fresh and hasn't expired.
Store yeast in an airtight container in the refrigerator or freezer to prolong its shelf life. Using water that is too hot (above 130°F or 55°C) will kill the yeast. If you're unsure about your yeast's viability, you can proof it separately in a small amount of warm water (around 100-110°F or 38-43°C) with a pinch of sugar for 5-10 minutes; it should become foamy.
Other factors can also inhibit rising. Too much salt can kill yeast or significantly slow it down, so ensure accurate salt measurement. Adding salt directly on top of the yeast in the bread machine pan can also be problematic if the cycle doesn't start immediately; follow the recommended layering order (liquids, then dry ingredients, then yeast on top). Cold ingredients or a cold kitchen environment (though the machine helps regulate pan temperature) can also slow yeast activity. Using room temperature or slightly warm liquids can help give the yeast a good start for your easy bread machine French bread.
Bread Too Dense or Heavy
A dense or heavy loaf of easy bread machine French bread often indicates insufficient gluten development or inadequate rising. If the dough didn't rise properly (as discussed above), the resulting bread will naturally be dense due to a lack of trapped gas.
However, even with a good rise, the crumb can be heavy if the gluten wasn't properly developed during kneading. This can happen if the dough was too dry, if the kneading cycle was too short (less likely on a dedicated French cycle, but possible on shorter cycles), or if the flour used had insufficient protein content (e.g., using all-purpose instead of bread flour).
Ensure you are using high-protein bread flour and accurate liquid measurements to achieve the correct dough consistency. The dough should be elastic and pass the "windowpane test" after kneading (though this is hard to check inside the machine pan) – meaning a small piece can be stretched thin enough to see light through it without tearing easily.
If your machine seems to struggle with kneading or the dough appears too dry during the initial mixing, adding a little extra water (a tablespoon at a time) during the kneading phase can help improve gluten development and result in a lighter, airier crumb for your easy bread machine French bread.
Crust Too Soft or Hard
The crust of easy bread machine French bread can sometimes be too soft, lacking the desired crispness. This is a common issue with bread machines due to the humid baking environment within the pan. As discussed earlier, achieving a truly crisp crust is challenging in a standard bread machine cycle. Using the 'dark crust' setting if available on your machine can help somewhat by increasing the baking time and temperature slightly, promoting more browning and drying of the surface. Ensuring the loaf cools completely on a wire rack is also crucial, as trapped steam can soften the bottom crust.
Conversely, a crust that is too hard or thick might occur if the dough was too dry (low hydration), leading to a tough exterior that sets too early. It could also happen if the baking temperature was too high for too long without sufficient moisture in the dough.
If you are using the dough cycle and baking in a conventional oven, insufficient steam during the initial bake can also result in a thick, hard crust rather than a thin, crispy one. Adjusting hydration levels in your recipe or refining your oven steaming technique will help address a hard crust on your easy bread machine French bread.
Flavor Variations: Adding Your Own Twist to Bread Machine French Bread
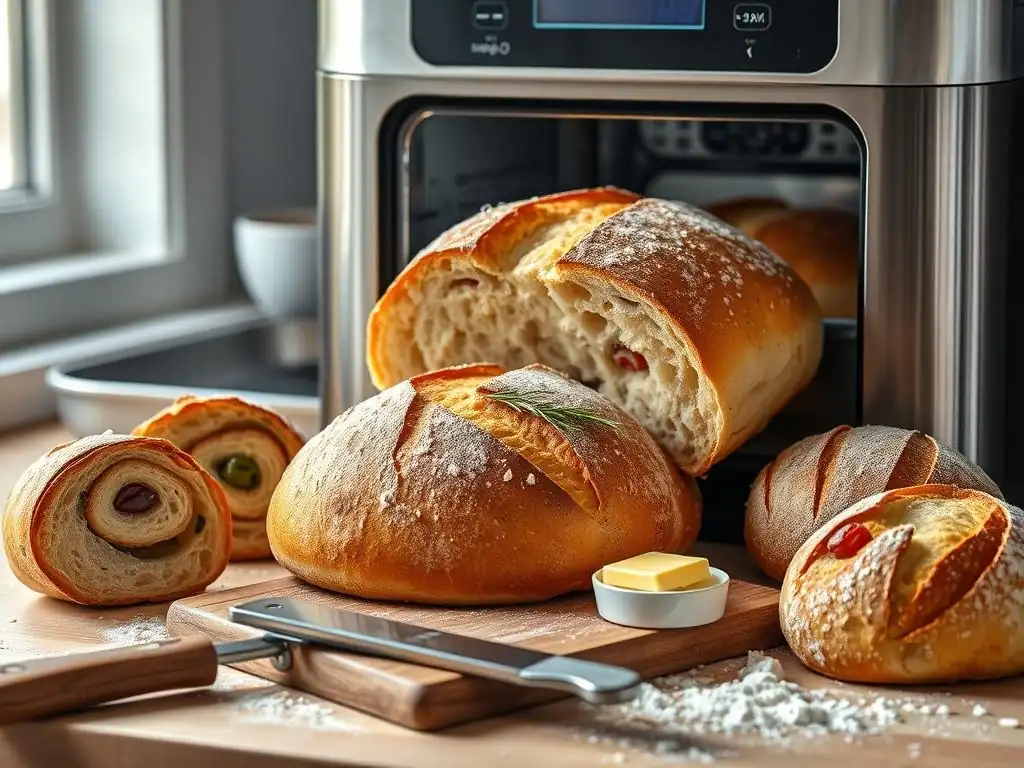
While traditional easy bread machine French bread is made with just four ingredients, there's plenty of room for creative variations to add extra flavor and character. These simple additions can transform a basic loaf into something unique, catering to different tastes and culinary uses. Experimenting with herbs, spices, or even different types of flour can open up a world of possibilities beyond the classic recipe, all while still leveraging the convenience of your bread machine.
Adding flavorings is usually done at the beginning of the cycle, along with the other dry ingredients (or liquids, depending on the ingredient and machine's recommended order). Start with small quantities and adjust in subsequent bakes based on your preference. These variations keep the process of making easy bread machine French bread exciting and allow you to customize your bake.
Incorporating Herbs and Spices
Adding dried herbs or spices is one of the easiest ways to infuse flavor into your easy bread machine French bread. Classic choices include Herbes de Provence, dried rosemary, thyme, or oregano. For a slight kick, a pinch of red pepper flakes can be added. Garlic powder or granulated garlic (not fresh, which can cause issues with yeast activity and moisture) is also a popular addition for a savory loaf. Typically, 1 to 2 teaspoons of dried herbs or spices per 1.5-pound loaf is a good starting point.
Mix the dried herbs or spices in with the flour and salt before adding the yeast in Step 1. This ensures they are evenly distributed throughout the dough during the kneading process. Imagine a loaf of easy bread machine French bread infused with rosemary, perfect for serving with roasted meats, or one with garlic and Italian herbs for dipping in olive oil. These small additions can significantly enhance the taste experience without complicating the bread machine process.
Experimenting with Different Flours
While bread flour is standard for easy bread machine French bread due to its high protein content necessary for structure, you can experiment by substituting a small percentage of the bread flour with other types of flour to add flavor and nutritional value. For example, substituting 10% to 20% of the bread flour with whole wheat flour can add a nutty flavor and increase fiber. Rye flour (in small amounts, as it contains less gluten) can introduce a distinct tang.
Keep in mind that substituting flours, especially those with lower gluten content or higher absorption rates (like whole wheat), will affect the dough's hydration needs and potentially the final texture. You may need to slightly adjust the amount of water. Start with a small substitution (e.g., replacing 1/4 cup of bread flour with another type) to see how it affects the dough and the final loaf before making larger changes. This experimentation allows you to personalize your easy bread machine French bread and explore new flavor dimensions.
Storing Your Homemade Bread Machine French Bread
Once you've successfully baked your delicious easy bread machine French bread, proper storage is key to keeping it fresh and maintaining its desirable crust and crumb texture. French bread is best enjoyed the day it's baked, ideally within a few hours of cooling. However, if you have leftovers or bake ahead, there are ways to store it effectively to minimize staleness.
Unlike softer sandwich loaves, French bread's crust can quickly lose its crispness when exposed to air or stored in airtight containers which trap moisture. Balancing the need to protect the crumb from drying out with preserving the crust's texture is the challenge.
Maintaining Freshness and Texture
For short-term storage (a few hours), simply leaving the loaf on a wire rack uncovered is best for preserving the crust. For overnight storage at room temperature, wrap the completely cooled loaf loosely in a paper bag. This allows some air circulation to help maintain the crust while protecting the interior from drying out too quickly. Avoid plastic bags or airtight containers, as these trap moisture released by the bread, causing the crust to soften and the interior to potentially become gummy.
If you need to store your easy bread machine French bread for more than a day or two at room temperature, wrapping it tightly in plastic wrap or placing it in a sealed plastic bag will keep the interior soft, but you will sacrifice the crispy crust. The crust can often be refreshed by lightly misting the loaf with water and warming it in a hot oven (around 375°F or 190°C) for 5-10 minutes. For longer storage, freezing is the best option.
Freezing French Bread for Later Enjoyment
Freezing is an excellent way to preserve your easy bread machine French bread for weeks or even months, allowing you to enjoy homemade goodness whenever you like. Ensure the loaf is completely cooled before freezing. You can freeze the loaf whole, half, or sliced. Freezing slices makes it convenient to thaw just what you need.
To freeze, wrap the bread tightly in plastic wrap, ensuring no surface is exposed to prevent freezer burn. Then, wrap it again in aluminum foil or place it in a freezer-safe bag. Properly wrapped, French bread can be stored in the freezer for up to 3-4 months.
To thaw a whole or half loaf, remove all wrapping and let it sit at room temperature for several hours, or warm it directly from frozen in a 350°F (175°C) oven for 20-30 minutes until heated through and the crust is refreshed. Slices can be popped directly into a toaster. Freezing is a fantastic way to extend the life of your delicious easy bread machine French bread.
Conclusion: Enjoying Your Easy Bread Machine French Bread
Baking easy bread machine French bread is a rewarding experience that brings the aroma and taste of a classic bakery favorite into your home with minimal effort. By leveraging the convenience of your bread machine for the mixing, kneading, and initial rise, you overcome many of the traditional hurdles associated with French bread making. Whether you bake the loaf entirely in the machine or use the dough cycle to finish it in a conventional oven for an extra-crispy crust, the result is a delicious, homemade loaf that far surpasses store-bought options.
Remember that successful easy bread machine French bread comes from understanding the simple ingredients, following the steps, and perhaps most importantly, getting to know how your specific bread machine performs. Don't be discouraged if your first loaf isn't perfect; baking is a journey of practice and refinement. Each attempt provides valuable insights into how temperature, hydration, and timing affect the final outcome. Embrace the process, experiment with the tips provided, and enjoy the satisfaction of pulling a warm, crusty loaf from your kitchen.
The Satisfaction of Baking Homemade Bread
There's a unique sense of accomplishment that comes from baking bread from scratch. The simple act of combining basic ingredients and transforming them into a fragrant, edible masterpiece is incredibly fulfilling. Making easy bread machine French bread allows you to experience this satisfaction regularly, fitting fresh baking into even a busy lifestyle. The smell that fills your kitchen, the warmth of the loaf in your hands, and the first bite into that crusty exterior and soft interior are simple pleasures that enrich everyday life.
Beyond the sensory rewards, baking homemade bread gives you control over the ingredients, ensuring you're serving wholesome food free from preservatives or additives often found in commercial loaves. This sense of accomplishment and control contributes significantly to the appeal of making easy bread machine French bread part of your regular baking routine. It's a small act of creation that yields tangible, delicious results.
One of the greatest joys of baking is sharing the results with others. A warm loaf of easy bread machine French bread is perfect for sharing – whether it's served with a simple meal, used for delicious sandwiches, or simply enjoyed with butter and good company. The fact that you made it yourself adds a special touch that is always appreciated.
Bring your fresh loaf to a gathering, serve it at your next family dinner, or simply slice it up for a weekend brunch. The simple elegance of homemade French bread makes it a versatile and beloved addition to any table. Sharing your easy bread machine French bread creations is a wonderful way to connect with loved ones and spread the joy of homemade baking. It's a testament to how simple ingredients and a little effort (or in this case, the help of a bread machine!) can bring people together over good food.
Frequently Asked Questions
How can I make French bread in my bread machine?
Bread machines offer a convenient way to bake French bread. Simply follow a recipe designed for bread machines, adding ingredients in the correct order, and selecting the French bread cycle (if available) or a basic cycle.
What are the key ingredients for French bread?
The fundamental ingredients are flour, water, yeast, and salt. High-gluten flour is often recommended for that characteristic chewy texture.
What makes bread machine French bread different from traditional French bread?
Bread machine French bread typically has a softer crust and a more uniform crumb than traditionally baked French bread. This is due to the enclosed baking environment and lack of steam injection.
Can I adjust the crust color of my bread machine French bread?
Yes, most bread machines allow you to select a crust color setting. Experiment to find your preferred level of crust darkness.
What if my bread machine doesn't have a dedicated "French bread" setting?
You can use the basic or rapid bake cycle. Monitor the dough's progress and adjust baking time as needed to avoid over-baking.
Final Reflection: The Joy of Effortless French Bread
The ease of crafting delicious, crusty French bread at home, once a distant dream, is now a readily achievable reality thanks to the humble bread machine. This isn't just about convenience; it's about reclaiming the simple pleasure of freshly baked bread, a sensory experience too often overlooked in our fast-paced lives. The aroma alone is enough to transform a mundane evening into something special.
The impact of readily available, easy-to-make recipes like the ones explored in this article extends beyond the individual kitchen. It fosters a connection to traditional baking methods, allowing us to appreciate the artistry and skill involved, even when utilizing modern technology. This accessibility democratizes the baking experience, making it possible for anyone, regardless of skill level, to enjoy the fruits (or should I say, loaves!) of their labor. The best things in life are simple,
a sentiment perfectly encapsulates the satisfaction derived from a perfectly risen, golden-brown loaf of homemade French bread.
Now, I invite you to consider your own relationship with bread. Do you remember the last time you truly savored the taste and texture of a freshly baked loaf? Perhaps this article has inspired you to try your hand at making your own French bread. Don't be intimidated! Embrace the simplicity, the process, and the incredible reward of creating something delicious and comforting from scratch. The journey from flour to fragrant, crusty perfection is a journey worth taking. So, preheat your oven, gather your ingredients, and let the French bread fantasy begin!
Unleash Your Inner Baker Today!
Thank you for diving into the delicious world of French bread with us! We hope you feel inspired to create those crusty loaves right in your own kitchen. Now it’s time to take your newfound knowledge and put it into action!
Here’s how you can kickstart your bread-baking journey:
- Start your first loaf by gathering your ingredients and setting your bread machine; you’ll be savoring your creation in no time!
- Experiment with flavors – try adding herbs or garlic to elevate your bread to new heights.
- Join our baking community! Share your baking successes and learn from fellow enthusiasts to keep the inspiration flowing.
What unique twist will you add to your next bread-making adventure?