
From Beginner to Pro: Upgrading Your Bread Baking Equipment

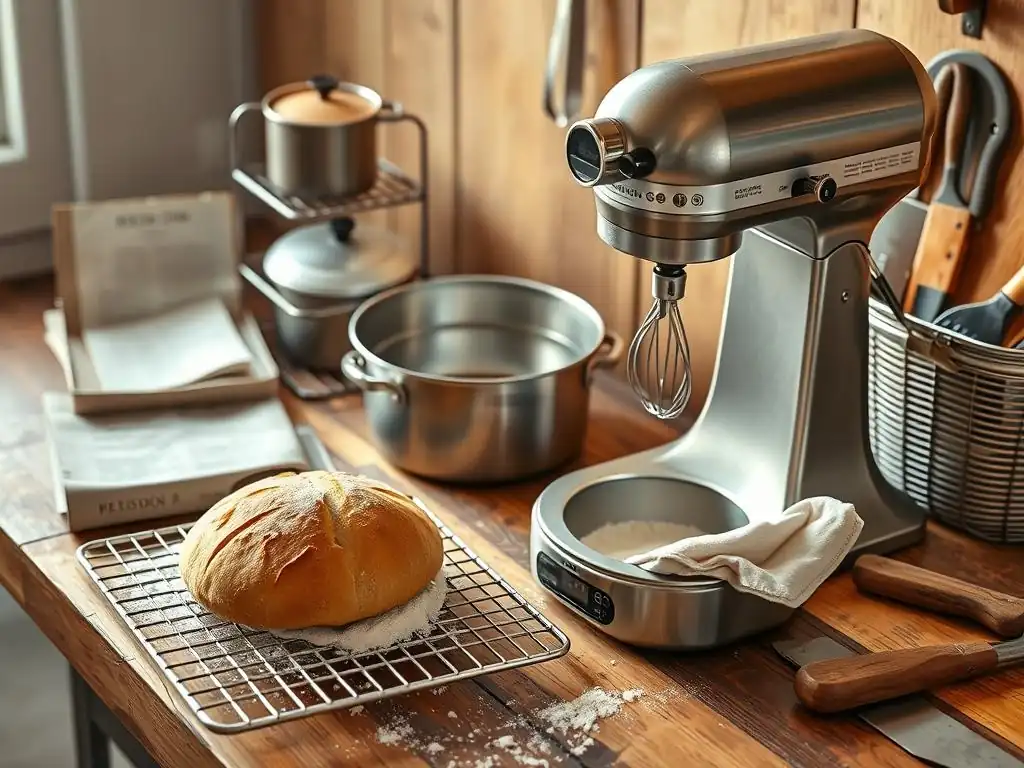
Welcome to BakeWithEase, your trusted guide to the wonderful world of baking! Ready to elevate your bread baking game? You've come to the right place. This week, we're diving deep into the essential tools that can truly transform your loaves. Discover our top picks for the best bread baking equipment, from must-have gadgets to game-changing upgrades, and unlock the secrets to artisan-quality bread right in your own kitchen. Curious which equipment will make the biggest difference? Let's get started!
- Level Up Your Baking: Choosing the Best Bread Baking Equipment
- Stage 1: Essential Bread Baking Starter Kit (Beginner)
- Stage 2: Taking Your Bread Baking to the Next Level (Intermediate)
- Stage 3: Mastering Artisan Bread (Advanced)
- Maintaining Your Bread Baking Equipment for Longevity
- Conclusion: Investing in the Best Bread Baking Equipment for Your Journey
-
Frequently Asked Questions
- What's the most essential piece of equipment for a beginner bread baker?
- When should I consider investing in a Dutch oven for bread baking?
- What are the benefits of using a banneton basket for proofing bread?
- Beyond the basics, what's a worthwhile upgrade for a more experienced baker?
- How important is a good bread knife for achieving clean slices?
- Final Reflection: The Joy of the Perfect Loaf, and the Tools That Get You There
- Unleash Your Inner Baker: Elevate Your Bread-Making Game!
Level Up Your Baking: Choosing the Best Bread Baking Equipment
Why Upgrade Your Bread Baking Tools? From Amateur to Artisan
Embarking on the bread baking journey often starts with minimal equipment – maybe just a bowl, a spoon, and an oven. While you can certainly make decent bread with these basics, upgrading your bread baking tools is key to improving consistency, efficiency, and the quality of your final loaves. Think of it like any craft; having the right instruments makes the process smoother and allows for greater precision and better results.
As you move from simple no-knead recipes to more complex sourdoughs or enriched doughs, the limitations of basic gear become apparent. Upgrading isn't just about accumulating gadgets; it's about acquiring tools that solve common baking challenges, such as achieving a perfectly developed gluten structure, consistent fermentation temperatures, or that coveted crackly crust.
Investing in the best bread baking equipment for your skill level can significantly elevate your results. For instance, a digital scale ensures accuracy far beyond volume measurements, crucial for hydration levels in dough. A specialized dough whisk makes initial mixing less messy and incorporates ingredients more effectively.
Moving to intermediate tools like a stand mixer saves significant time and effort with kneading, especially for larger batches or stiffer doughs. Advanced tools like a bread lame or a proofer offer control and precision that are hard to replicate manually, pushing your loaves from homemade to truly artisanal. Each piece of equipment, when chosen wisely, serves a specific purpose in refining your technique and achieving the results you see from professional bakers.
Identifying Your Bread Baking Needs: A Self-Assessment
Before you start investing in new gear, it's helpful to assess where you are in your bread baking journey and what your goals are. Are you struggling with sticky dough? Do you find kneading by hand exhausting? Is your crust not as crispy as you'd like?
Understanding your current challenges will guide you toward the best bread baking equipment to address those specific issues. Consider the types of bread you enjoy making or want to make. Simple sandwich loaves might require different tools than high-hydration ciabatta or delicate brioche. Your baking frequency is also a factor; someone baking weekly might justify a larger investment than someone baking monthly.
Think about your available space and budget. Some equipment, like stand mixers or proofers, require dedicated counter or storage space. Setting a budget for each stage of your upgrade can help you prioritize. A useful exercise is to make a list of frustrations you encounter during your baking process – messy mixing, inconsistent rise, flat loaves, difficulty handling dough. Then, research which tools are designed to alleviate those specific problems. This targeted approach ensures you're buying equipment that will genuinely improve your experience and results, making your investment in the best bread baking equipment worthwhile.
- [ ] Assess current baking challenges (e.g., kneading, crust, handling sticky dough).
- [ ] Identify types of bread you want to bake.
- [ ] Consider baking frequency.
- [ ] Evaluate available kitchen space and budget.
- [ ] List specific frustrations to match with potential equipment solutions.
Stage 1: Essential Bread Baking Starter Kit (Beginner)
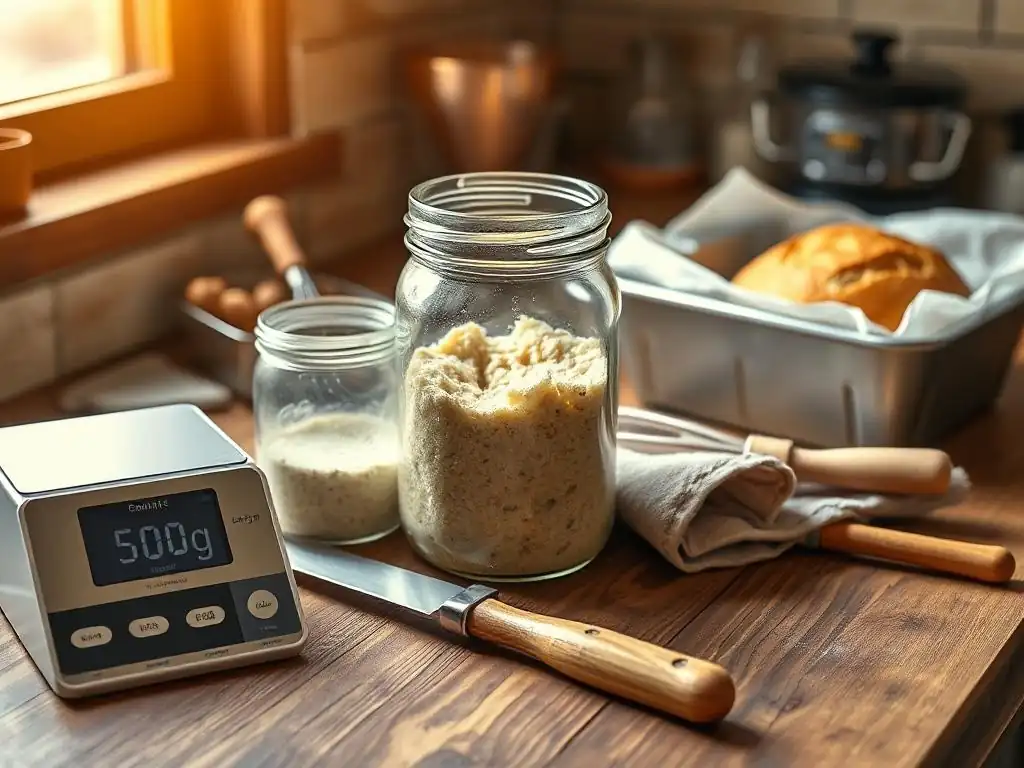
Starting out in bread baking doesn't require a massive investment. The focus here is on fundamental tools that make the process manageable and lay the groundwork for successful loaves. These items are relatively inexpensive but offer significant improvements over using standard kitchenware. They form the core of what many consider the essential bread baking equipment for newcomers.
Dough Whisk: The Gentle Start
The Danish dough whisk might look a bit unusual, but it's a surprisingly effective tool for incorporating dry ingredients into wet ones, especially for wetter doughs. Its unique design cuts through thick batter and dough without overmixing or developing gluten prematurely, which can be a problem with spoons or spatulas. It allows you to bring the dough together quickly and cleanly in the initial mixing phase, reducing mess on your hands and ensuring all flour pockets are hydrated.
-
Why a Dough Whisk is Superior to a Spoon for Beginners
When mixing bread dough, especially high-hydration doughs, a spoon can often feel like it's fighting the resistance of the developing mixture. It tends to push the dough around rather than incorporating ingredients efficiently. A dough whisk, with its open coil design, cuts through the mixture, allowing wet and dry ingredients to combine more easily and with less effort. This results in a more uniform mixture faster, reducing the likelihood of unincorporated flour pockets, which can lead to dense spots in your finished bread. For beginners, this makes the initial, often challenging, mixing stage much more manageable and less frustrating.
-
Budget-Friendly Dough Whisk Options
You don't need to spend a lot to get a good dough whisk. Many affordable options are available, typically ranging from $8 to $20. Look for whisks with sturdy wooden handles and durable stainless steel coils. The coil design is key – ensure it's a continuous loop, usually two or three concentric circles. Simple, well-made models from various kitchenware suppliers or online retailers perform just as well as more expensive versions for basic dough mixing. Prioritizing function over brand name is a great way to build your essential bread baking equipment collection economically.
Digital Kitchen Scale: Precise Measurements for Consistent Results
Baking is often described as a science, and precision is paramount, especially in bread making. Measuring ingredients by volume (cups, spoons) can be highly inaccurate. The weight of flour in a cup can vary by as much as 20-30% depending on how it's scooped and leveled. This variability is a major source of inconsistent results in baking. A digital kitchen scale, measuring in grams, removes this guesswork, ensuring you use the exact amount of each ingredient every time. This consistency is the bedrock of improving your recipes and understanding how ingredient ratios affect your bread.
-
The Importance of Grams in Bread Baking
Using grams provides a universal and precise measurement system. Most professional and serious amateur bread recipes are written using weights, specifically grams, because they are consistent regardless of density or how an ingredient is handled. For example, 100 grams of flour is always 100 grams of flour, whether it's sifted or scooped tightly. This accuracy is critical for hydration levels (the ratio of water to flour), which significantly impacts dough handling, fermentation, and the final texture of the bread. Mastering measurements by weight is arguably the single most important step a beginner can take towards consistent, high-quality bread.
-
Affordable Digital Scales with Tare Function
You don't need a high-end laboratory scale for baking. Reliable digital kitchen scales are widely available for $15 to $30. Look for a scale that measures in grams (g) and ounces (oz), has a capacity of at least 5 kg (about 11 lbs), and, crucially, has a "tare" function.
The tare function allows you to zero out the weight of the bowl or container you're using, so you only measure the ingredients added. This makes it easy to add multiple ingredients to the same bowl, measuring each accurately. Many basic models from brands like Ozeri, Etekcity, or Taylor offer these essential features and are compact for easy storage, making them excellent additions to your essential bread baking equipment.
Dough Scraper: Your Best Friend for Sticky Dough
A simple, inexpensive dough scraper, often called a bench scraper, is an incredibly versatile tool that quickly becomes indispensable. It's essentially a flat metal or plastic blade with a handle. It's perfect for dividing dough cleanly, especially sticky or wet doughs that are difficult to handle by hand. Beyond dividing, it's excellent for scraping dough off your work surface, transferring chopped ingredients, or even smoothing the top of a cake batter. Its straight edge makes it far more effective for these tasks than a spatula or knife.
-
Dividing Dough with Precision
When a recipe calls for dividing dough into equal portions for rolls, baguettes, or multiple small loaves, a dough scraper provides a clean, sharp edge to cut through the mass. This is particularly important for delicate doughs where tearing can damage the gluten structure. Using a scale in conjunction with the dough scraper allows you to divide the dough into precise, equal weights, ensuring consistent size and baking time for each piece. This level of precision elevates your baking from approximate to accurate, a hallmark of the best bread baking equipment.
-
Cleaning Your Work Surface with Ease
Handling sticky dough on a counter or board inevitably leaves residue. A dough scraper is the perfect tool for quickly and efficiently cleaning up. Simply use the straight edge to scrape the dried or wet dough remnants off the surface. A metal scraper is particularly effective on sturdy surfaces like granite, marble, or wood. This makes cleanup much faster and less messy than trying to wipe everything up with a cloth, keeping your workspace tidy throughout the baking process.
Mixing Bowls: Different Sizes for Different Batches
While you likely already have mixing bowls, having a set of different sizes is beneficial for bread baking. You'll need a large bowl for the initial mixing and bulk fermentation (the first rise), ensuring there's plenty of room for the dough to expand, often doubling or tripling in size. Smaller bowls are useful for proofing smaller quantities of dough, preparing ingredients, or housing your starter. The material can influence heat retention, which affects fermentation speed, though for beginners, having a variety of sizes is the main advantage.
-
Glass vs. Stainless Steel Mixing Bowls
Both glass and stainless steel bowls are popular choices for baking. Glass bowls are non-reactive and allow you to visually monitor the dough's rise during fermentation without disturbing it. They are also heavier and more stable on the counter. However, they can break.
Stainless steel bowls are lightweight, durable, and non-reactive. They conduct temperature more readily, which can be an advantage or disadvantage depending on your environment and desired fermentation temperature. Many bakers prefer stainless steel for mixing as they are less prone to sticking and easier to maneuver. Having a mix of both can be ideal for different tasks.
-
Stackable and Space-Saving Options
Kitchen space is often at a premium. Look for mixing bowl sets that are designed to nest or stack neatly inside each other. Brands like Pyrex (glass) or various kitchenware manufacturers (stainless steel) offer sets that range from small prep bowls to large mixing bowls, all designed for compact storage. Investing in a good set of stackable bowls ensures you have the right size for any batch size and keeps your kitchen organized, contributing to an efficient setup for using the best bread baking equipment.
Stage 2: Taking Your Bread Baking to the Next Level (Intermediate)
Once you've mastered the basics and are consistently producing good loaves, you might find yourself wanting to tackle more challenging recipes or simply make the process less labor-intensive. This is where intermediate bread baking equipment comes into play, offering tools that automate tasks like kneading or create specific baking environments for superior crust and crumb.
Stand Mixer: Power and Precision for Kneading
Kneading dough by hand is a foundational skill, but it can be physically demanding, especially for stiff doughs or large quantities. A stand mixer with a dough hook attachment takes the hard work out of kneading, allowing you to achieve optimal gluten development with minimal effort. This is particularly valuable for enriched doughs like brioche or challah, which require extensive kneading to become smooth and elastic. While not strictly necessary for all bread, a stand mixer is a significant upgrade for bakers looking to save time and energy or bake larger batches.
-
Exploring Stand Mixer Attachments for Bread Baking
The primary attachment for bread baking is the dough hook. It's designed to mimic the action of hand kneading, pulling and stretching the dough against the sides of the bowl. Some mixers also come with a paddle attachment, useful for initial mixing of wetter doughs or ingredients before the dough develops structure.
While specialized attachments exist, the dough hook is the workhorse for this stage. Ensure the mixer model you choose has a robust motor capable of handling dense doughs; wattage ratings often give an indication of power, with 300-500 watts being common for home models, though higher is better for frequent bread baking.
-
Comparing Stand Mixer Models: KitchenAid vs. Bosch
Two popular contenders in the home baking market are KitchenAid and Bosch. KitchenAid Artisan models are iconic and versatile, known for their planetary mixing action and wide range of attachments. They perform well for moderate amounts of dough (e-g-, dough for 1-2 loaves).
Bosch mixers, particularly the Bosch Universal Plus, are favored by serious bread bakers for their powerful bottom-drive motor and ability to handle large quantities of stiff dough (e-g-, dough for 4-6 loaves) without straining. While KitchenAid might be more common for general kitchen tasks, Bosch often has the edge for heavy-duty bread work. Investing in one of these is a significant step towards building the best bread baking equipment collection for ambitious bakers.
Proofing Basket (Banneton): Shaping Your Loaves for a Professional Look
Proofing baskets, also known as bannetons or brotforms, are used for the final rise (proofing) of shaped bread dough before baking. They provide structure and support to the dough as it expands, helping it maintain its shape and preventing it from spreading outwards, especially for wetter doughs. The basket also imprints a beautiful spiral pattern on the crust, adding to the rustic, artisanal appearance of the finished loaf. They are typically made from rattan cane or coiled reed.
-
Choosing the Right Size and Shape Banneton
Bannetons come in various sizes and shapes – round (for boules) and oval (for batards) are the most common. Choose a size appropriate for the weight of dough you typically bake. A common size for a standard loaf (around 500g-1000g flour) is a 9- or 10-inch round or a 10- or 12-inch oval. The basket should be large enough to comfortably hold the dough as it doubles in size during proofing. It's also important to consider whether you prefer a smooth crust (using a liner) or the patterned lines (proofing directly in the floured basket).
-
Seasoning and Caring for Your Banneton
New bannetons need to be seasoned to prevent dough from sticking. This is typically done by lightly misting with water and dusting heavily with rice flour, letting it dry, and repeating. Rice flour is preferred over wheat flour as it is less likely to absorb moisture from the dough and stick.
After each use, let the basket dry completely, then brush out any excess flour. Avoid washing them with soap and water unless absolutely necessary, as this removes the seasoning layer. Proper care ensures your banneton remains non-stick and lasts for many years, making it a valuable piece of your best bread baking equipment.
Dutch Oven: The Secret to Crusty Bread
For home bakers aiming for that bakery-quality crust – thick, golden, and crackly – a Dutch oven is often considered a game-changer. It creates a contained environment around the dough during the initial phase of baking, trapping the steam released by the loaf. This steam keeps the surface of the dough moist, allowing it to expand fully before the crust sets. Once the lid is removed, the dry heat finishes the baking, resulting in maximum oven spring and a perfectly crisp crust. This method is particularly effective for lean doughs like sourdough or rustic country loaves.
-
Why a Dutch Oven Creates the Perfect Baking Environment
When bread bakes in an open oven, the initial burst of heat can cause the surface to dry out and set prematurely, restricting the dough's ability to rise (oven spring). The sealed environment of a Dutch oven mimics the steam-injected ovens used in professional bakeries. The trapped steam hydrates the dough surface, keeping it pliable and allowing for maximum expansion before the crust hardens. This leads to a lighter crumb and significantly improved volume and texture, which is why it's often listed among the best bread baking equipment for achieving artisan results at home.
-
Dutch Oven Alternatives: Bread Cloche and Pizza Stone
While a Dutch oven is popular, other tools can achieve similar results. A bread cloche is specifically designed for baking bread; it's usually a ceramic base and dome that works on the same steam-trapping principle. A pizza stone or baking steel combined with a heatproof bowl or tray of water placed in the oven can also create steam, though it's less contained than in a Dutch oven or cloche. For baking multiple loaves simultaneously, using a stone/steel with steam might be more practical than using multiple Dutch ovens, offering flexibility in your bread baking equipment setup.
Baking Stone or Steel: Achieving a Crispy Crust
A baking stone (ceramic or cordierite) or baking steel (steel) is placed in the oven and preheated thoroughly. When dough is placed directly onto the hot surface, it receives a strong, even heat transfer from the bottom. This intense bottom heat contributes significantly to oven spring and helps create a well-developed, crispy bottom crust. Baking steels are generally more efficient at transferring heat and recover temperature faster than stones, making them a favorite for achieving maximum rise and a robust crust.
-
The Science Behind Baking Stones and Steels
Both stones and steels absorb and retain heat from the oven. When the relatively cool dough is placed on the hot surface, there is a rapid transfer of thermal energy into the base of the loaf. This intense heat helps the yeast produce a final burst of carbon dioxide (the initial phase of oven spring) and sets the structure of the base quickly. Baking steels, being denser and more conductive than ceramic stones, transfer heat even more efficiently and at a higher rate, often leading to slightly better oven spring and a crispier bottom crust, especially for high-hydration doughs.
-
Choosing the Right Size and Thickness
Baking stones and steels come in various sizes. Choose one that fits comfortably on your oven rack, leaving an inch or two of space around the edges for air circulation. Common thicknesses for stones are around 1/2 to 3/4 inch, while steels are typically 1/4 or 3/8 inch thick. While thicker materials hold more heat, they also take longer to preheat. A 1/4-inch baking steel or a 1/2-inch baking stone is sufficient for most home baking needs and represents a solid investment in your best bread baking equipment for crust development.
Stage 3: Mastering Artisan Bread (Advanced)
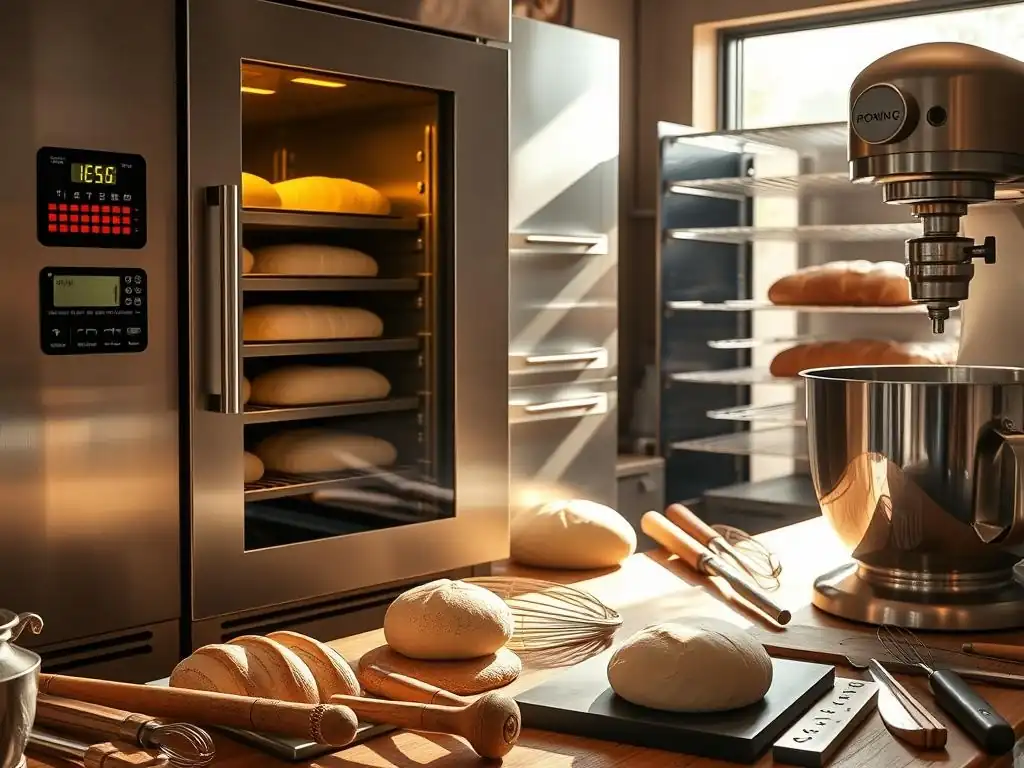
At this stage, you're likely experimenting with complex doughs, long fermentation times, and aiming for truly professional-level results. The equipment here focuses on fine-tuning specific aspects of the process, offering greater control and enabling techniques used by master bakers.
Bread Lame: Scoring for Oven Spring
A bread lame (pronounced "lahm") is a specialized tool used to score or slash the surface of bread dough just before it goes into the oven. This controlled cut serves several crucial purposes. It allows the dough to expand predictably during oven spring, directing the expansion to where you want it rather than having the crust tear randomly. It also creates decorative patterns that become more pronounced as the loaf bakes. Using a sharp blade is essential for a clean cut that opens up beautifully.
-
Understanding Scoring Patterns for Different Breads
Different types of bread and desired aesthetics call for different scoring patterns. A single, deep slash down the length is common for batards (oval loaves) and helps create a prominent "ear" (a crispy lip of crust). A cross or square pattern is often used for boules (round loaves) to allow for even expansion.
Multiple parallel slashes are common for baguettes. The depth and angle of the cut affect how the dough opens up. A lame, which holds a razor blade, provides the sharpest possible edge for these precise cuts, making it a key tool in achieving the best bread baking equipment results for artisan loaves.
-
Safety Tips for Using a Bread Lame
Lames use extremely sharp razor blades. Always handle the lame with care and keep your fingers away from the blade. Store the lame safely with the blade covered or retracted. When scoring, make quick, confident cuts rather than hesitant strokes. If using a double-edged blade, only expose one edge at a time. Proper technique and caution are paramount to avoid accidents while using this essential tool for advanced bread shaping and oven spring.
Proofer: Controlled Fermentation for Consistent Results
Temperature and humidity are critical factors in dough fermentation, significantly impacting the dough's rise and the final flavor profile. While home ovens with a pilot light or a warm spot in the kitchen can work, they often lack precise control. A proofer provides a stable, consistent environment for fermentation, allowing you to proof dough at specific temperatures (e-g-, 75°F to 85°F for bulk fermentation, or lower for longer, cooler proofs). This consistency is invaluable for replicating results and achieving predictable fermentation times, especially when ambient kitchen temperature fluctuates.
-
The Benefits of Temperature and Humidity Control
Controlling temperature allows you to manage the activity of yeast and bacteria in the dough. Warmer temperatures speed up fermentation, while cooler temperatures slow it down, allowing complex flavors to develop. A proofer also helps maintain optimal humidity, preventing the surface of the dough from drying out and forming a skin, which can restrict expansion. This level of control is essential for advanced techniques like precisely timed bulk fermentation or cold proofing, ensuring your dough develops exactly as intended before baking.
-
DIY Proofing Box Options
A dedicated proofer is a significant investment, but there are effective DIY alternatives. A common method is using an oven that can be set to a very low temperature (around 80°F) or simply using the oven light to create warmth. Placing a pan of hot water in the oven with the dough can increase humidity.
Another simple setup involves placing the dough bowl inside a cooler with a container of warm water. While these methods offer some control, they require more monitoring than a dedicated proofer, which maintains precise settings automatically – a true piece of best bread baking equipment for consistent advanced baking.
High-Quality Bread Flour: The Foundation of Exceptional Bread
While not a piece of equipment in the traditional sense, the quality and type of flour you use are fundamental to the success of your bread, especially as you move to advanced techniques. High-quality bread flour, typically with a higher protein content than all-purpose flour, provides the necessary gluten structure to support the rise of artisan loaves, resulting in a better crumb texture and volume. Understanding flour types and their properties is crucial for mastering bread baking.
-
Exploring Different Types of Bread Flour: Bread Flour vs. All-Purpose
Bread flour is milled from hard wheat and generally contains a higher percentage of protein (typically 12-14%) compared to all-purpose flour (around 10-12%). This higher protein content means more gluten development when hydrated and kneaded, leading to a stronger, more elastic dough capable of trapping gases produced during fermentation and baking. While all-purpose flour can work for some simple breads, bread flour is essential for achieving the open, airy crumb and chewy texture characteristic of many artisan loaves, making it a core component of using the best bread baking equipment effectively.
-
Recommendations for High-Protein Bread Flour Brands like King Arthur or Bob's Red Mill
Several brands are widely respected by home bakers for their consistent, high-quality flours. King Arthur Baking Company's Bread Flour is a popular choice, known for its reliable protein content (around 12.7%) and consistent performance. Bob's Red Mill Artisan Bread Flour is another excellent option, often slightly higher in protein. These brands mill their flour to high standards, ensuring consistent absorption rates and gluten development batch after batch. Choosing a reputable brand is as important as choosing the right tools when aiming for exceptional bread.
Pizza Peel: For transferring dough to the oven easily and safely
A pizza peel is a flat shovel-like tool used to slide loaves of bread (or pizzas) into a hot oven, especially onto a preheated baking stone or steel. It allows you to transfer the dough quickly and smoothly, minimizing the time the oven door is open and preserving heat. It also provides a safe way to handle dough that is going onto or coming off a very hot surface. While not strictly mandatory if you use a Dutch oven, it's invaluable for baking directly on a stone or steel.
-
Wood vs. Metal pizza peels: What are the differences?
Wood peels are traditionally made from lightweight wood like pine or bamboo. They are excellent for preparing the dough on (dusting with flour or cornmeal) because the dough is less likely to stick to the porous surface. However, they are thicker and can be slightly harder to maneuver in tight spaces.
Metal peels (usually aluminum or stainless steel) are thinner and lighter, making them easier to slide under dough. They can be more prone to sticking if not adequately floured, but they are easier to clean and more durable against heat and repeated use. Many bakers keep both on hand for different purposes.
-
Folding vs. solid pizza peels: Which is best for you?
Solid pizza peels offer maximum sturdiness and a large, uninterrupted surface. They are generally preferred by experienced bakers for their reliability and ease of use. Folding peels have a hinge that allows the handle to fold, making them easier to store in smaller kitchens. However, the hinge can sometimes make the peel slightly less rigid. If storage is a major concern, a folding peel is a good compromise. For best performance and durability, a solid peel is generally the better choice when considering the best bread baking equipment for oven transfer.
-
Our choice: Epicurean Pizza Peel
While many good peels exist, the Epicurean Pizza Peel stands out for its unique material. Made from a durable wood fiber composite, it combines some of the benefits of both wood and metal. It's thin and lightweight like metal but has a slightly textured surface that helps prevent sticking, similar to wood.
It's also dishwasher safe and heat resistant up to 350°F (though the surface you're sliding dough from isn't usually this hot, it's a durability indicator). Its robustness and ease of use make it a top pick for safely transferring loaves onto a hot stone or steel, rounding out your collection of the best bread baking equipment.
Maintaining Your Bread Baking Equipment for Longevity
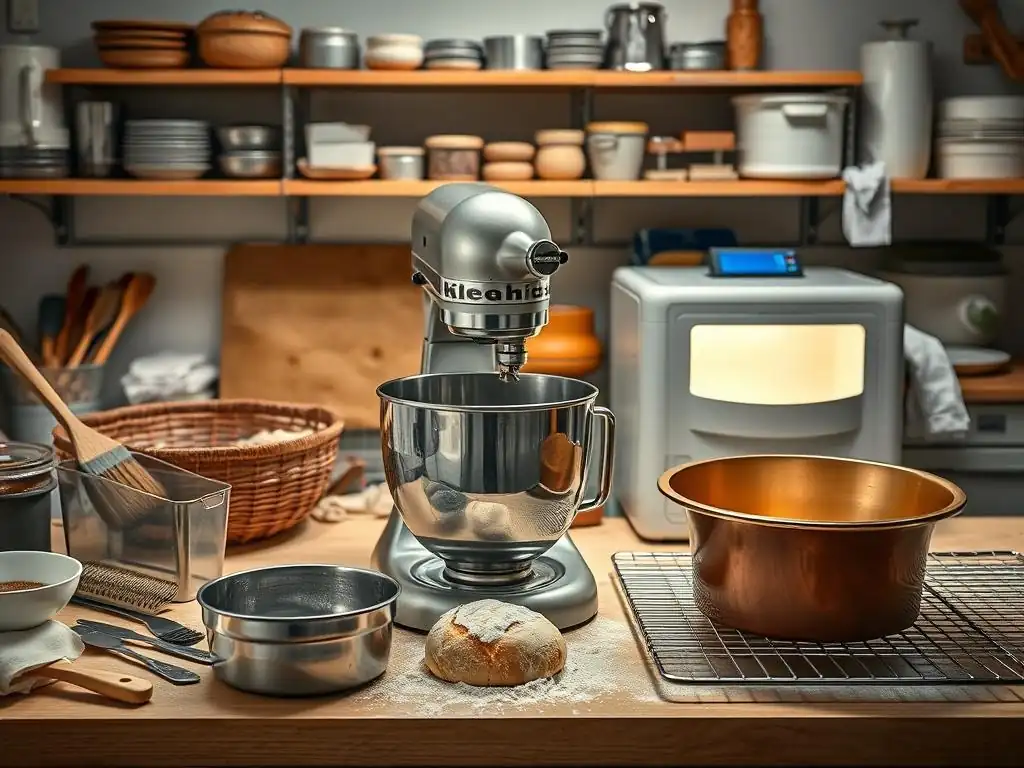
Investing in quality bread baking equipment is only part of the equation; proper care and maintenance are essential to ensure your tools last and perform optimally for years to come. Regular cleaning and correct storage prevent damage, rust, and bacterial growth, keeping your equipment in top shape.
Cleaning and Storing Your Baking Tools
Each piece of equipment requires specific care. Metal tools like dough scrapers, mixing bowls, and pizza peels should be washed with warm, soapy water, rinsed, and dried thoroughly immediately after use to prevent rust. Wooden handles on dough whisks or wooden peels should not be soaked; wipe them clean and dry promptly. Stand mixer attachments should be cleaned according to the manufacturer's instructions; some are dishwasher safe, while others require hand washing. Baking stones and steels should generally not be washed with soap; scrape off any baked-on bits and wipe clean.
Avoid sudden temperature changes, which can crack stones. Store equipment in a dry place. Metal tools should be stored away from excessive moisture. Bannetons need to be completely dry before storing to prevent mold. Proper storage, like stacking bowls or hanging peels, also helps keep your kitchen organized.
Troubleshooting Common Bread Baking Equipment Issues
Common issues include dough sticking to bannetons (usually due to insufficient flouring or seasoning), rusting on metal tools (due to improper drying), or dough climbing up the dough hook on a stand mixer (often indicates the dough is too wet or the batch is too large for the mixer's capacity). For sticky bannetons, ensure you're using rice flour and dusting generously. Re-season if needed. Rust can often be removed with a scrub pad and a little oil, followed by better drying practices.
If dough climbs the hook, try reducing the hydration slightly or decreasing the batch size. Refer to your equipment's manual for specific troubleshooting tips. Regular maintenance, like occasionally oiling metal peels or re-seasoning cast iron, prevents many common problems, ensuring your best bread baking equipment performs reliably.
Conclusion: Investing in the Best Bread Baking Equipment for Your Journey
The journey from beginner baker to artisan bread maker is rewarding, and having the right tools can significantly enhance your experience and results at every stage. Starting with essential bread baking equipment like a digital scale and dough scraper sets a foundation of accuracy and ease. Progressing to intermediate tools like a stand mixer or Dutch oven opens up possibilities for more ambitious recipes and improved crust development. Finally, advanced tools like a lame or proofer offer the precision needed to fine-tune techniques and achieve truly professional-quality loaves.
Recap of Recommended Equipment for Each Stage
- Beginner: Digital Kitchen Scale, Dough Whisk, Dough Scraper, Set of Mixing Bowls. These focus on accurate measurement, efficient initial mixing, and easy dough handling.
- Intermediate: Stand Mixer (with dough hook), Proofing Basket (Banneton), Dutch Oven, Baking Stone or Steel. These tools automate kneading, provide structure for proofing, and create the ideal baking environment for crust development.
- Advanced: Bread Lame, Proofer, High-Quality Bread Flour, Pizza Peel. These allow for precise scoring, controlled fermentation, superior ingredient quality, and safe handling onto hot surfaces.
Future-Proofing Your Bread Baking Setup
As you continue to bake, your needs may evolve. Consider investing in quality pieces that can serve you well across different stages. For instance, a good digital scale is essential from day one and remains so.
A sturdy Dutch oven or baking steel will improve loaves regardless of your skill level. When considering larger purchases like a stand mixer or proofer, think about your long-term baking goals and frequency to choose models that can handle your anticipated volume and complexity. While you don't need all the best bread baking equipment at once, building your collection thoughtfully will support your growth and enjoyment in the wonderful world of bread making.
Frequently Asked Questions
What's the most essential piece of equipment for a beginner bread baker?
A good digital kitchen scale is essential for accurate measurements. This ensures consistent results and helps you avoid common baking errors. It's more important than fancy tools at first.
When should I consider investing in a Dutch oven for bread baking?
You should consider a Dutch oven when you want to achieve a crusty exterior and soft interior in your bread. It traps steam, creating the ideal baking environment.
What are the benefits of using a banneton basket for proofing bread?
Banneton baskets help your dough maintain its shape during the final proofing stage. They also wick away moisture, contributing to a better crust.
Beyond the basics, what's a worthwhile upgrade for a more experienced baker?
Consider a stand mixer for handling large batches of dough or more complex recipes. It saves time and effort, especially with enriched breads.
How important is a good bread knife for achieving clean slices?
A serrated bread knife is crucial for slicing bread without crushing it. A sharp, long blade allows for clean, even slices, preserving the bread's texture.
Final Reflection: The Joy of the Perfect Loaf, and the Tools That Get You There
The pursuit of the perfect loaf is a journey, not a destination, and the right equipment is your trusty steed along the way. Investing in quality bread baking tools isn't just about upgrading your kitchen; it's about upgrading your baking experience, transforming a potentially frustrating process into a consistently rewarding one. The impact of the right tools – from the precise measurements of a digital scale to the even heat distribution of a Dutch oven – is undeniable, leading to consistently superior results.
The evolution of my own bread baking journey mirrors the progression outlined in this article. I remember the early days of inconsistent rises and unevenly baked loaves, a stark contrast to the beautiful, consistently delicious bread I produce now. The best bread is made with love, but the right tools certainly help.
This simple truth underscores the importance of not just the skill, but also the tools that empower us to achieve our baking goals. The impact of accessible, high-quality equipment on home baking is significant, democratizing the art of bread making and allowing more people to experience the joy of creating something truly delicious from scratch.
Now, it's your turn. Consider your own baking journey. What tools are currently serving you well? Where are the gaps? Don't be afraid to invest in yourself and your passion. The satisfaction of crafting a perfect loaf, knowing you've used the best tools to achieve it, is an unparalleled reward. Take the leap, upgrade your equipment, and unlock a new level of baking mastery. The perfect crust awaits.
Unleash Your Inner Baker: Elevate Your Bread-Making Game!
Thanks for joining us on this bread-baking journey! We hope you’ve gained valuable insights into upgrading your equipment and are ready to take your skills to the next level. Now it's time to put that knowledge into action.
- Invest in your dream mixer: Take the plunge and order that stand mixer you’ve been eyeing. You deserve it! Imagine the perfectly kneaded dough...
- Share your baking triumphs (and challenges!): Post a picture of your next loaf on social media and tag us @BakeWithEase – we’d love to see your progress.
- Explore new bread recipes: Don’t be afraid to experiment with different flour types and techniques. What exciting bread will you bake next?
Ready to transform your kitchen into a bread-baking haven? What's the first upgrade you'll be making?