
The Right Measuring Tools: Accuracy in Artisan Bread Making

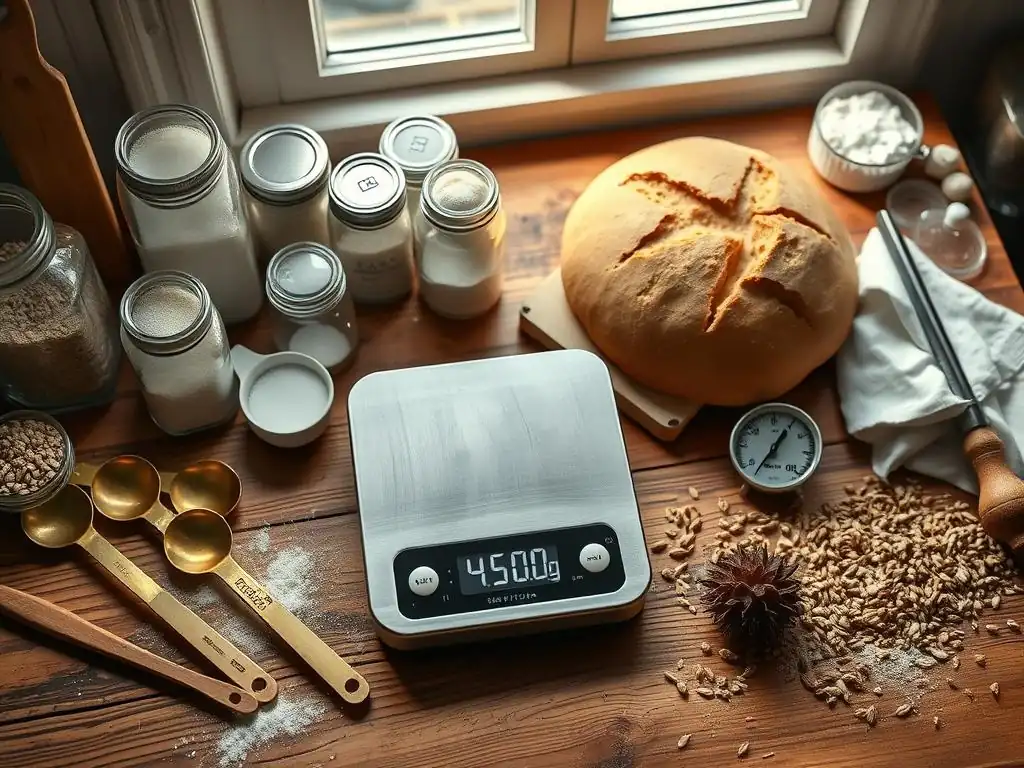
Welcome to BakeWithEase, your trusted guide to the delicious world of baking! Ever wondered if your artisan bread measuring tools are truly up to the task? Precise measurements are crucial for that perfect loaf, and in this guide, we'll explore the essential tools that can elevate your bread-making game. Discover the secrets to achieving consistent results and unlocking the full potential of your recipes. Let's dive in and ensure every bake is a masterpiece!
- Why Accurate Measurement Matters in Artisan Bread Baking
- Essential Artisan Bread Measuring Tools for Consistent Results
- Advanced Measuring Techniques for Artisan Bread Bakers
- Choosing the Right Artisan Bread Measuring Tools for Your Needs
- Where to Buy Your Artisan Bread Measuring Tools
- Conclusion: Elevate Your Artisan Bread Baking with Precise Measurement
-
Frequently Asked Questions
- What are the essential measuring tools for artisan bread making?
- Why is accuracy so important in artisan bread making?
- Can I use volume measurements instead of weight measurements for flour in artisan bread recipes?
- What kind of scale is best for measuring ingredients for artisan bread?
- Where can I find the recommended measuring tools for artisan bread making?
- Final Reflection: The Enduring Craft of Precise Measurement
- Unlock Your Inner Baker: Perfect Loaves Await!
Why Accurate Measurement Matters in Artisan Bread Baking
The Science Behind Artisan Bread: Precision for Perfect Results
Artisan bread baking is often perceived as a mystical art, but at its core, it's a fascinating interplay of science. The transformation of simple ingredients like flour, water, yeast, and salt into a crusty, airy loaf relies on precise chemical and biological reactions. The exact ratios of these components dictate everything from gluten development and fermentation rate to crumb structure and crust color.
For example, a recipe calling for 70% hydration means the water weighs 70% of the flour weight. If you're off by even 5-10 grams of water in a typical 500-gram flour loaf, that can significantly change the dough's consistency, making it either too sticky and hard to handle or too stiff and dense. This scientific foundation underscores why accurate artisan bread measuring tools are not just helpful, but essential for consistent, high-quality results.
Understanding these ratios, often expressed as baker's percentages, allows bakers to control the outcome. The weight of salt, typically around 1.8% to 2.2% of the flour weight, profoundly impacts yeast activity and flavor. Too little salt can lead to overly fast fermentation and a bland loaf, while too much can inhibit yeast and result in a dense crumb.
Similarly, the tiny amount of yeast, perhaps 0.1% to 1% of the flour weight depending on the type and fermentation time, needs to be measured accurately to ensure the dough rises properly without over-fermenting. Using reliable artisan bread measuring tools guarantees that these delicate balances are maintained batch after batch, moving you closer to that perfect open crumb and golden crust every time.
Avoiding Common Baking Errors: The Role of Precise Measurement
Many common frustrations in artisan bread baking, such as inconsistent loaf size, dense interiors, or loaves that spread rather than rise, can often be traced back to inaccurate measurement. Imagine following a recipe meticulously but using volume cups for flour – scooping directly from the bag can pack in significantly more flour than gently spooning it in and leveling, leading to a much lower hydration than intended.
This seemingly small error can result in a stiff dough that's difficult to knead, doesn't develop gluten properly, and yields a heavy, tight-crumbed loaf instead of a light, airy one. Precise measurement with appropriate artisan bread measuring tools eliminates this variability.
Another frequent issue is unpredictable fermentation. Yeast activity is highly sensitive to the amount of yeast used and the water temperature. If you're guessing at yeast quantities or using water that's too hot (killing the yeast) or too cold (slowing it down excessively), your proofing times will be erratic, leading to under-proofed or over-proofed dough.
An under-proofed loaf won't rise well in the oven, resulting in a dense crumb, while an over-proofed loaf might collapse or spread out. Using accurate scales for yeast and a reliable thermometer for water are crucial artisan bread measuring tools that help control these variables, ensuring your dough ferments predictably and reliably every time.
From Novice to Expert: Leveling Up Your Bread with Accurate Tools
While a beginner might find success with approximate measurements for simple recipes, mastering the nuances of artisan bread requires a higher level of control and understanding. Reliable artisan bread measuring tools provide this control, allowing bakers to replicate successful loaves and troubleshoot issues effectively. When a loaf doesn't turn out as expected, if you know your measurements were spot-on, you can look at other variables like mixing time, kneading technique, fermentation temperature, or baking method. Without accurate measurements, it's nearly impossible to pinpoint the source of the problem, making improvement a frustrating guessing game.
For those aspiring to bake a wider variety of artisan breads – from high-hydration ciabatta to rich brioche or complex sourdough – precision becomes paramount. Different bread types require specific hydration levels and ingredient ratios to achieve their characteristic textures and flavors. Using accurate artisan bread measuring tools allows you to confidently tackle these more advanced recipes and even experiment with your own variations, knowing that your foundational measurements are correct. It's the difference between occasionally getting a good loaf and consistently baking excellent bread, transforming your baking journey from hit-or-miss attempts to reliable success.
Essential Artisan Bread Measuring Tools for Consistent Results
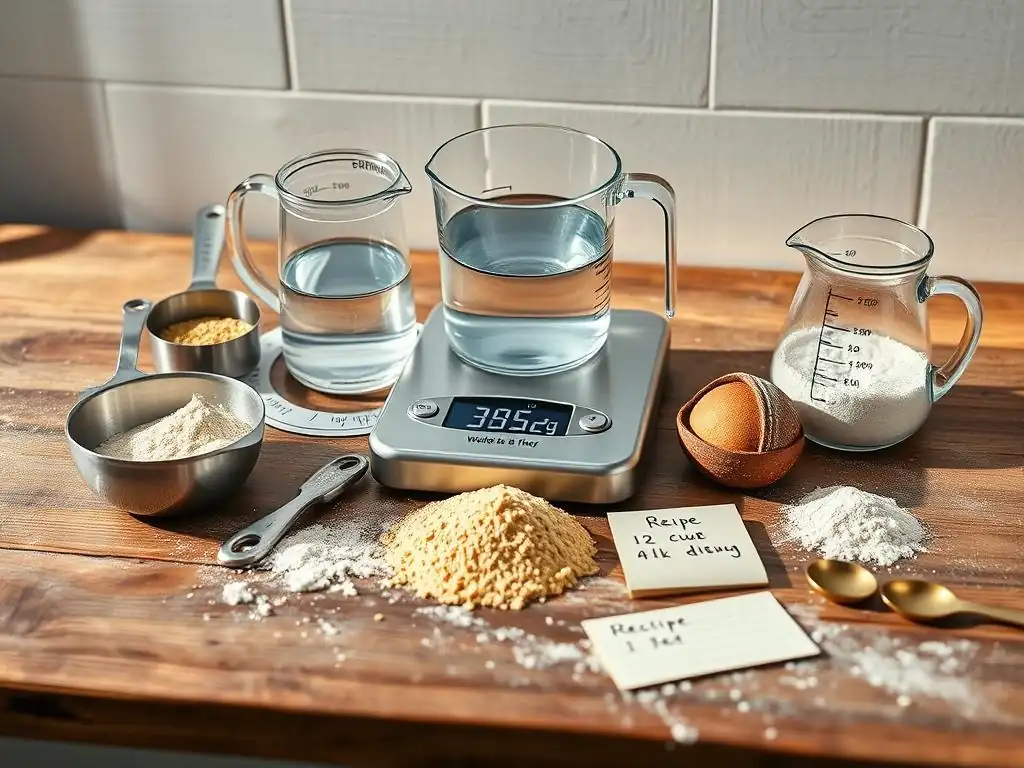
Digital Kitchen Scales: The Cornerstone of Precise Baking
In the world of artisan bread, weight reigns supreme over volume, especially for dry ingredients like flour and salt. Flour density varies significantly depending on how it's stored, the type of grain, and how it's handled – a cup of spooned flour weighs less than a cup that's been scooped and packed. Using a digital kitchen scale eliminates this variability, ensuring you use the exact amount of flour specified in a recipe every single time.
This is critical for maintaining consistent hydration levels, which are fundamental to artisan dough structure and handling. A recipe calling for 500g of flour and 350g of water will always yield a 70% hydration dough when measured by weight, regardless of how fluffy or packed the flour is.
Beyond flour, scales are essential for accurately measuring salt, yeast, and any other solid ingredients like seeds or nuts. Even small amounts of yeast or salt have a significant impact, and measuring them by weight (e.g., 2.5g of instant yeast or 10g of salt) is far more precise than trying to measure tiny volumes.
Investing in a quality digital scale is arguably the single most important step you can take to improve the consistency and quality of your artisan bread. It simplifies scaling recipes up or down using baker's percentages and provides the accuracy needed for reliable results batch after batch.
Features to Look for in a Digital Kitchen Scale for Bread:
High Capacity
Consider a scale that can handle at least 5 kilograms (about 11 pounds). While a standard loaf uses around 500g of flour, you might want to double or triple recipes, or weigh a large mixing bowl with ingredients already added. A higher capacity prevents you from needing to weigh ingredients in multiple batches.
Gram and Ounce Measurements
Artisan bread recipes commonly use grams, which offer finer precision (1 gram vs. 1 ounce is a big difference!). Ensure the scale can easily switch between grams and ounces (and ideally pounds and milliliters) to accommodate different recipe formats. Grams are particularly useful for small quantities of yeast or salt.
Tare Function
This is absolutely essential. The tare function allows you to place a bowl or container on the scale, press the "tare" button to zero out its weight, and then add your ingredient, measuring only the ingredient's weight. This lets you add multiple ingredients to the same bowl sequentially, streamlining the measuring process.
Accuracy to 1 Gram
For artisan bread, accuracy to the nearest gram is sufficient and widely available in home kitchen scales. While scales accurate to 0.1g exist, they are usually lower capacity and less practical for bulk ingredients like flour. Measuring flour, water, and salt to the gram is precise enough for excellent results.
Recommended Digital Scales for Bread Bakers:
While specific brand recommendations change, look for scales from reputable kitchen gadget companies known for durability and accuracy. Many popular models are available online and in kitchen stores, typically costing between $20 and $50. Prioritize the features listed above (capacity, units, tare, accuracy) and read user reviews focusing on consistency and longevity. Some popular options often mentioned include models by OXO, Etekcity, and Ozeri, but always check current reviews for the best value and performance.
Measuring Cups and Spoons: When Volume Measurement is Necessary (and How to Do It Right)
While weight is preferred for major ingredients like flour, water, salt, and yeast in artisan bread baking, measuring cups and spoons still have their place. They are primarily useful for small volumes of liquid flavorings like olive oil or honey, or for spices and inclusions like dried herbs, seeds, or chocolate chips where the exact weight might be less critical or the recipe specifically calls for a volume measurement (e.g., "1 tablespoon of sesame seeds").
For ingredients where density is relatively consistent and the quantity is small, volume measurement can be convenient. However, it's crucial to understand their limitations, especially when measuring dry ingredients commonly measured by weight in artisan baking.
Using measuring cups for flour in artisan bread recipes is generally discouraged due to the variability in density. However, if a recipe insists on volume for a dry ingredient other than flour (like cocoa powder or cornmeal in a specific enriched dough), knowing how to measure accurately by volume is key. For liquids, dry measuring cups are not appropriate; liquid measuring cups with spouts are needed. For small dry quantities or liquids, measuring spoons are standard. The key is to use the correct type of cup for the substance being measured and employ proper techniques to minimize error.
Understanding the Limitations of Volume Measurement in Bread
The primary limitation of volume measurement, particularly for compressible dry ingredients like flour, is inconsistency. The same cup can hold vastly different weights of flour depending on whether it's scooped directly from a bag (compacting it) or spooned lightly into the cup. This means a "cup of flour" can vary by as much as 20-30 grams, leading to significant fluctuations in hydration and recipe outcome. For artisan bread, where hydration percentages are critical (e.g., 65% vs. 75%), this variability is unacceptable for consistent results. Weight measurement using scales provides a fixed, reproducible quantity regardless of handling.
Volume measurement is more reliable for liquids, as they are not compressible. However, even with liquids, using the wrong type of cup or failing to read it correctly can introduce errors. For small quantities of dry ingredients like salt or yeast, measuring spoons offer convenience but are still less precise than weighing tiny amounts on a sensitive scale.
A "teaspoon" of instant yeast can vary slightly based on how full it is, whereas 2.5 grams is always 2.5 grams. For the core ingredients of artisan bread, relying solely on volume measurement makes it difficult to replicate successful bakes or troubleshoot issues accurately.
Dry vs. Liquid Measuring Cups: The Difference Matters
Dry measuring cups are designed to be filled to the brim and leveled off. They typically come in sets of 1/4, 1/3, 1/2, and 1 cup and do not have a spout. Their design facilitates scooping and leveling dry, solid ingredients. Liquid measuring cups, on the other hand, are usually clear, made of glass or plastic, have a spout for easy pouring, and feature measurement markings below the brim.
They often have markings for cups, ounces, and milliliters. The space above the highest marking allows you to fill the cup without spilling when transporting liquids. Using a dry measuring cup for liquid would make it difficult to pour without spilling and impossible to read accurately due to the lack of a proper scale and spout.
Using a liquid measuring cup for dry ingredients like flour is also problematic. The markings are designed for liquids, and leveling off a dry ingredient at the brim would be difficult and messy. Furthermore, the variability in how the dry ingredient settles would still lead to inaccurate volume measurement. Therefore, it's essential to use the correct type of measuring cup for the ingredient you are measuring: dry cups for dry ingredients (when volume is acceptable) and liquid cups for liquids.
Leveling Techniques for Accurate Volume Measurement
When using dry measuring cups for ingredients like flour (if absolutely necessary, though weight is preferred), cocoa powder, or sugar, the proper technique is crucial to ensure a consistent volume. Do not scoop the cup directly into the container, as this compacts the ingredient. Instead, use a spoon to lightly fluff up the ingredient in its container, then gently spoon it into the dry measuring cup until it overflows slightly.
Finally, use the straight edge of a knife or a flat spatula to sweep across the top of the cup, leveling off the excess ingredient back into the container. This "spoon and level" method minimizes compaction and provides a more consistent volume measurement than scooping.
For measuring spoons, fill the spoon until it's slightly mounded, then use the straight edge of a knife to level off the excess. For liquids in measuring spoons, simply fill to the brim, using the spout of the liquid source (like a bottle of oil) to control the flow and avoid overfilling. While these techniques improve volume accuracy, they still do not match the precision of weight measurement for critical artisan bread ingredients like flour, water, salt, and yeast.
Recommended Measuring Cup and Spoon Sets:
Look for sets made from durable materials like stainless steel or sturdy BPA-free plastic. Stainless steel is often preferred for dry cups and spoons as it's non-reactive and long-lasting. For liquid measuring cups, heat-resistant glass is excellent as it can be used for hot liquids and is easy to clean. Ensure the measurement markings are clear and easy to read, and ideally etched or molded into the material rather than just printed, as printing can wear off over time. Sets with a wide range of sizes (from tablespoons/teaspoons up to 1 cup or more) offer versatility.
Liquid Measuring Cups: Mastering the Art of Measuring Water and Other Liquids
Liquid measuring cups are specifically designed for accuracy when measuring fluids like water, milk, oil, or honey. They are typically transparent, allowing you to see the liquid level clearly, and have a spout for easy pouring. The measurement markings are usually printed or etched on the side, often in cups, ounces, and milliliters.
For artisan bread, the most critical liquid to measure accurately is water, as it directly controls the dough's hydration level, which impacts texture, handling, and crumb structure. While weighing water on a digital scale is the most accurate method (1 gram of water ≈ 1 milliliter), using a liquid measuring cup is also acceptable and often preferred for convenience, provided it is used correctly.
Using a liquid measuring cup properly involves more than just filling it to the line. The surface of the liquid in a narrow container forms a slight curve called a meniscus. For water and most baking liquids, this curve dips in the center. Accurate measurement requires reading the bottom of the meniscus at eye level. This simple step, combined with using the correct type of cup, ensures that the volume of liquid added to your dough is consistent with the recipe's specifications, contributing significantly to achieving the desired hydration and ultimately, the quality of your artisan loaf.
Reading Liquid Measuring Cups Correctly: Avoiding Parallax Error
Parallax error occurs when the observer's eye is not level with the measurement marking, causing the liquid level to appear higher or lower than it actually is. To avoid this when using a liquid measuring cup, place the cup on a flat, level surface. Pour the liquid into the cup until it is close to the desired marking.
Then, bend down so your eyes are level with the marking you are aiming for. Carefully add or remove liquid until the bottom of the meniscus (the curve of the liquid surface) aligns perfectly with the desired measurement line. Reading from above or below the line will result in an inaccurate measurement.
For example, if you need 300ml of water for a recipe, place the cup on the counter, fill it to approximately 300ml, then crouch down so your eyes are level with the 300ml mark. Adjust the water until the lowest point of the water's surface sits exactly on the 300ml line. This technique ensures you're adding the precise volume of water needed for your specific hydration target, which is a fundamental aspect of controlling your artisan bread dough.
Using Liquid Measuring Cups for Accuracy in Hydration
Hydration in bread baking is the ratio of water weight to flour weight, expressed as a percentage (e.g., 70% hydration means the water is 70% of the flour weight). While baker's percentage is based on weight, many home recipes still list water in volume (cups or milliliters). Since the density of water is very close to 1 g/ml, measuring water by volume in milliliters using a liquid measuring cup and reading it at eye level provides accuracy comparable to weighing it, especially for home baking quantities. For example, 300ml of water weighs approximately 300g.
If a recipe calls for water by volume (e.g., 1 1/4 cups), use a liquid measuring cup, fill it to the line, and read it at eye level. If a recipe gives water by weight (e.g., 300g), you can either weigh it on your digital scale or measure 300ml using a liquid measuring cup, reading at eye level.
Both methods are significantly more accurate than using a dry measuring cup or guessing. Consistent and accurate water measurement using appropriate artisan bread measuring tools is key to achieving the desired dough consistency – whether it's a slack, wet dough for ciabatta or a firmer dough for a rustic boule.
Recommended Liquid Measuring Cups:
Look for liquid measuring cups made from durable, transparent material like tempered glass or sturdy, clear plastic. Glass is often preferred for its weight and stability, resistance to staining and odors, and ability to handle hot liquids. Pyrex and Anchor Hocking are well-known brands for reliable glass options. For plastic, ensure it is BPA-free and designed for kitchen use. Choose a cup with clear, easy-to-read markings in multiple units (cups, ounces, milliliters) that are durable and won't wash off. Having a set with different sizes (e.g., 1-cup, 2-cup, 4-cup) is helpful for measuring various quantities.
Thermometers: Gauging Water Temperature and Dough Fermentation
Temperature plays a critical role in artisan bread baking, primarily influencing yeast activity and the rate of fermentation. Yeast are living organisms that thrive within a specific temperature range. Using water that is too cold will result in sluggish yeast activity and a very slow, potentially incomplete rise. Conversely, water that is too hot can kill the yeast, preventing the dough from rising at all. A thermometer is an essential artisan bread measuring tool for ensuring your water is at the optimal temperature to activate your yeast and kickstart fermentation reliably.
Beyond initial water temperature, monitoring the dough's temperature throughout fermentation can provide valuable clues about its progress. While not strictly necessary for every bake, experienced bakers sometimes use a thermometer to check the internal temperature of the dough during bulk fermentation or proofing. This helps them gauge how quickly the yeast is working based on the ambient temperature of their kitchen and the dough's mass. Consistent temperature control, guided by accurate measurements from a thermometer, leads to more predictable fermentation times and better control over the final flavor profile of your artisan bread.
Why Water Temperature Affects Yeast Activity
Yeast activity is highly dependent on temperature. Most recipes using active dry yeast recommend water temperatures between 100°F and 110°F (38°C to 43°C) to activate the yeast quickly and effectively. Instant yeast is more forgiving and can often be added directly to dry ingredients, activated by water as cool as 75°F (24°C), but using slightly warmer water (80-90°F or 27-32°C) can still help it get going faster.
If the water is below 70°F (21°C), yeast activity will be very slow, leading to extended proofing times. If the water is above 120°F (49°C), it can start to damage or kill the yeast cells.
Using a thermometer to measure your water temperature before adding yeast ensures you are providing the yeast with the ideal conditions to thrive. This eliminates a major variable in the fermentation process, leading to more consistent rise times and reliable results. It's a simple step that can prevent frustrating issues like a loaf that doesn't rise because the yeast was killed by hot water. This makes a thermometer a crucial piece of your artisan bread measuring tools collection.
Using a Thermometer to Ensure Optimal Dough Temperature
While not as critical as initial water temperature, monitoring the dough's internal temperature during fermentation can be helpful, especially when working in a kitchen with fluctuating temperatures. Some recipes or techniques, particularly those focusing on specific fermentation schedules, might mention target dough temperatures after mixing (often in the 75-80°F or 24-27°C range). Achieving this temperature can be influenced by the temperature of your ingredients, the water temperature, and the friction from mixing.
Using an instant-read thermometer, you can quickly check the dough's temperature. If it's too cold, you might need to place it in a warmer spot to ferment; if too warm, a cooler location might be needed. This allows you to adjust the fermentation environment to keep the process on track according to the recipe's timeline. For sourdough bakers, a thermometer can also help monitor the temperature of the levain or starter, as temperature significantly impacts sourdough culture activity and flavor development. Incorporating a thermometer into your routine provides another layer of control over your artisan bread making process.
Recommended Thermometers for Artisan Bread Making:
An instant-read digital thermometer is the most useful type for bread baking. Look for one that provides readings quickly (within a few seconds) and is accurate within a degree or two. The probe should be thin enough to insert into dough or liquid without causing significant disruption.
While meat thermometers can work, dedicated kitchen or baking thermometers are often more precise and user-friendly for this purpose. Models with a wide temperature range (covering both warm water temperatures and potential oven temperatures if needed for other tasks) are versatile. Many reliable instant-read thermometers are available from kitchenware brands and online retailers, typically costing between $15 and $40.
Advanced Measuring Techniques for Artisan Bread Bakers
Baker's Percentage: The Key to Understanding Bread Recipes
Baker's percentage is a standard notation used in professional and artisan bread baking that expresses each ingredient's weight as a percentage of the total flour weight. The flour weight is always considered 100%. For example, in a recipe with 500g flour, 350g water, 10g salt, and 2.5g yeast:
- Flour: (500g / 500g) * 100% = 100%
- Water: (350g / 500g) * 100% = 70% (This is the hydration level)
- Salt: (10g / 500g) * 100% = 2%
- Yeast: (2.5g / 500g) * 100% = 0.5%
The total baker's percentage is the sum of all ingredient percentages (100% + 70% + 2% + 0.5% = 172.5%). Notice the total is not 100% because the percentages are relative to the flour, not the total dough weight. This system is incredibly powerful because it clearly shows the relationship between ingredients, regardless of the batch size. Understanding baker's percentage is crucial for anyone serious about mastering artisan bread, and it relies entirely on accurate weight measurements provided by your artisan bread measuring tools.
Using baker's percentage allows bakers to easily compare different recipes, understand what makes a ciabatta different from a baguette (often hydration and yeast percentage), and predict how changing an ingredient ratio will affect the final loaf. It moves beyond simply following instructions to truly understanding the composition of the dough. Most professional artisan bread recipes are written using baker's percentage, making it an indispensable tool for learning and adapting techniques. It highlights why precise measurements, particularly by weight using digital scales, are fundamental to this craft.
Using Baker's Percentage to Scale Recipes Up or Down
One of the greatest benefits of baker's percentage is the ease with which you can scale a recipe. If you have a small recipe using 500g of flour (100%) and want to make a larger batch using 1000g of flour, you simply multiply the weight of every other ingredient by the scaling factor (in this case, 2). Original Recipe (500g flour):
- Flour: 500g (100%)
- Water: 350g (70%)
- Salt: 10g (2%)
- Yeast: 2.5g (0.5%)
Scaled Recipe (1000g flour):
- Flour: 1000g (100%)
- Water: 1000g * 0.70 = 700g (70%)
- Salt: 1000g * 0.02 = 20g (2%)
- Yeast: 1000g * 0.005 = 5g (0.5%)
Scaling down works the same way. If you only want to use 250g of flour, you'd multiply each original ingredient weight by 0.5. This ability to scale recipes accurately is invaluable for home bakers who might want to bake just one small loaf or a large batch for a gathering. It ensures that the crucial ratios remain constant, predicting the dough's behavior and the final loaf's characteristics. This process is only possible with accurate weight measurements provided by reliable artisan bread measuring tools, making them indispensable for flexibility in your baking.
Hydration Levels and Their Impact on Dough Consistency
Hydration level, the amount of water relative to flour expressed as a baker's percentage, is perhaps the single most influential factor determining dough consistency and handling characteristics in artisan bread.
- Lower Hydration (around 55-65%): Results in a stiffer, easier-to-handle dough. These are often used for traditional pan loaves or bagels. The crumb tends to be tighter.
- Medium Hydration (around 65-75%): Creates a more pliable, slightly sticky dough that requires more careful handling but can develop a more open crumb. Many rustic boules and batards fall into this range.
- High Hydration (above 75%, sometimes even 90%+): Yields a very wet, sticky dough that is challenging to handle without specific techniques (like stretch and folds). These are used for breads like ciabatta or focaccia and result in a very open, airy crumb.
Accurately measuring water by weight or precisely by volume using a liquid measuring cup (reading at eye level) is crucial for hitting your target hydration. Being off by even a small amount of water can significantly change how the dough feels and behaves, impacting everything from kneading time to shaping and proofing. Understanding and controlling hydration using accurate artisan bread measuring tools is key to achieving the desired texture and structure for different types of artisan bread.
Online Baker's Percentage Calculators
Fortunately, you don't need to do the baker's percentage calculations manually every time. Many free online baker's percentage calculators are available. You simply input your desired total flour weight (or the weight of flour in the recipe you're adapting) and the percentage for each ingredient (water, salt, yeast, etc., based on the recipe).
The calculator will then provide the exact weight needed for each ingredient. This tool is incredibly helpful for converting volume-based recipes to weight, scaling recipes, or creating your own formulas. Using a calculator in conjunction with your accurate artisan bread measuring tools streamlines the process and ensures your ratios are correct.
Choosing the Right Artisan Bread Measuring Tools for Your Needs
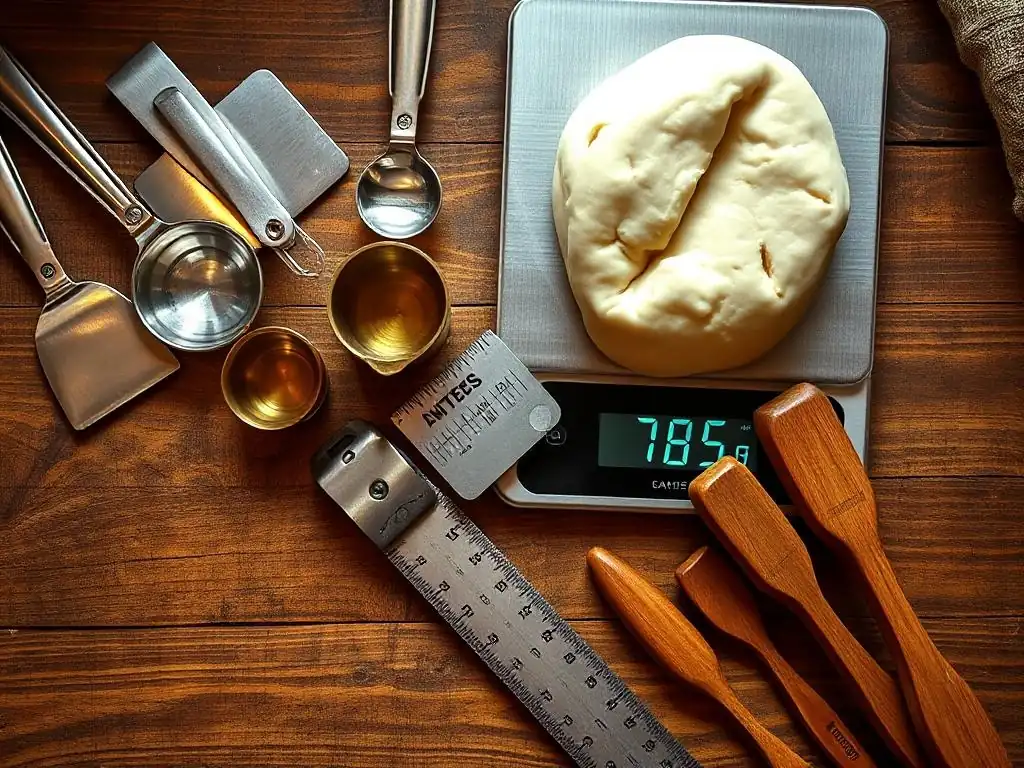
Budget Considerations: Finding Affordable Options Without Sacrificing Accuracy
Building a collection of reliable artisan bread measuring tools doesn't have to break the bank. While high-end scales and thermometers exist, excellent, accurate options are available at very reasonable prices. A good digital kitchen scale with the features mentioned earlier (high capacity, grams/ounces, tare, 1g accuracy) can often be purchased for under $30. Sets of durable stainless steel measuring cups and spoons are also quite affordable, typically ranging from $15 to $30. Similarly, reliable instant-read thermometers can be found for $15 to $40.
Focus on the core requirements for accuracy rather than expensive brand names or unnecessary features. A basic digital scale that consistently measures to the gram is far more valuable than a fancy one with Bluetooth that isn't accurate. Look for products with good reviews regarding consistency and durability within your budget. Investing in a few key, accurate artisan bread measuring tools will provide significantly better results than relying on approximations or less suitable kitchen items.
Space-Saving Solutions: Tools for Small Kitchens
For those with limited kitchen space, finding tools that are compact or serve multiple purposes is key. Many digital kitchen scales are quite slim and can be easily stored on their side or tucked into a drawer. Look for models with a flat profile. Measuring cups and spoons often come with rings to keep them together, and some sets are designed to nest neatly for compact storage.
Consider tools that are versatile. While a dedicated probe thermometer is great, a good instant-read thermometer can also be used for checking roasted meats or tempering chocolate, maximizing its utility. For measuring liquids, a single 4-cup (1-liter) liquid measuring cup might suffice for most needs, taking up less space than a set of multiple sizes. Prioritizing essential artisan bread measuring tools and choosing compact or multi-use versions can help keep your kitchen organized and functional, even in tight spaces.
Durability and Longevity: Investing in Quality Tools That Last
When selecting artisan bread measuring tools, consider the materials and construction. Tools made from durable materials like stainless steel, tempered glass, or sturdy, high-quality plastic are more likely to withstand regular use and maintain their accuracy over time. Cheap plastic measuring cups can warp or crack, and printed markings can wear off, making them unreliable. Scales with flimsy weighing platforms or battery compartments can fail prematurely.
Investing a little more upfront for well-made tools can save you money and frustration in the long run by avoiding the need for frequent replacements. Check reviews specifically for comments on durability and how well the tools hold up over time. Accurate artisan bread measuring tools are an investment in the consistency and quality of your baking, and choosing durable options ensures that investment continues to pay off for years.
Maintaining and Caring for Your Measuring Tools: Ensuring Accuracy Over Time
Proper care and maintenance are crucial for keeping your artisan bread measuring tools accurate and functional.
- Digital Scales: Keep the weighing surface clean and free of debris. Avoid getting the electronic components wet. Store in a safe place where they won't be dropped or have heavy objects placed on them. Check the battery periodically and replace it when low, as low battery can affect accuracy. Some scales have a calibration function – consult the manual if you suspect inaccuracy.
- Measuring Cups and Spoons: Wash thoroughly after each use, especially after measuring sticky ingredients like honey. Store them neatly (e.g., on a ring or nested) to prevent them from getting bent or damaged, which could affect their shape and accuracy.
- Liquid Measuring Cups: Handle glass cups carefully to avoid breakage. Wash thoroughly. Avoid putting plastic cups in the dishwasher if they are not rated for it, as high heat can warp some plastics.
- Thermometers: Clean the probe after each use. Avoid immersing the main body of the thermometer in water unless it is specifically rated as waterproof. Store the probe safely, often with a protective sleeve, to prevent damage. Check the calibration periodically if your thermometer has that function, or compare its reading in ice water (should be 32°F/0°C) or boiling water (should be 212°F/100°C at sea level).
By taking good care of your artisan bread measuring tools, you ensure they remain accurate and reliable, contributing to consistent success in your baking endeavors.
Where to Buy Your Artisan Bread Measuring Tools
Finding the right artisan bread measuring tools is the next step after understanding their importance. You have several options, each with its own advantages.
Online Retailers
Major online marketplaces offer a vast selection of digital scales, measuring cups and spoons, liquid measuring cups, and thermometers from numerous brands. This provides convenience, competitive pricing, and access to a wide range of reviews from other buyers. You can easily compare features, prices, and read feedback on accuracy and durability before making a purchase. Many online retailers also offer fast shipping.
Local Kitchen Supply Stores: Supporting Your Community
Visiting a local kitchen supply store allows you to see and handle the artisan bread measuring tools before buying them. You can assess the quality of materials, the readability of markings on measuring cups, and the feel of a digital scale. Staff at these stores are often knowledgeable and can offer personalized recommendations. Purchasing locally also supports businesses in your community.
Secondhand Options: Finding Deals on Quality Tools (Cautionary Notes)
Exploring secondhand stores, garage sales, or online marketplaces for used kitchen items can sometimes uncover great deals on high-quality artisan bread measuring tools. You might find durable vintage measuring cups or even a functional digital scale at a fraction of the original cost.
However, exercise caution when buying used measuring tools. Accuracy is paramount for artisan bread.
- Scales: It's difficult to verify the accuracy of a used digital scale without testing it against known weights. Check for signs of damage or wear that might affect performance.
- Measuring Cups/Spoons: Visually inspect for warping, dents, or worn-off markings. Ensure sets are complete if specific sizes are needed.
- Thermometers: Accuracy can drift over time. It's challenging to know if a used thermometer is still calibrated correctly without testing it against ice water or boiling water.
While secondhand can be budget-friendly, prioritize accuracy for your core artisan bread measuring tools like scales and thermometers. You might find better value and certainty in purchasing these key items new.
Conclusion: Elevate Your Artisan Bread Baking with Precise Measurement
Mastering the Art of Bread: It All Starts with Accuracy
The journey to baking consistently excellent artisan bread is a rewarding one, filled with learning and delicious results. While technique, patience, and understanding fermentation are vital, it all begins with getting your ingredients right. Precise measurement isn't just a fussy detail; it's the foundation upon which successful artisan bread is built. Using accurate artisan bread measuring tools ensures that the critical ratios of flour, water, salt, and yeast are correct every time, eliminating a major variable and allowing you to focus on developing your skills in mixing, kneading, shaping, and baking.
Investing in the Right Tools: A Worthwhile Investment for Better Bread
Acquiring a few key, accurate artisan bread measuring tools – primarily a reliable digital scale, appropriate measuring cups and spoons, a liquid measuring cup, and a thermometer – is perhaps the most impactful investment you can make in your baking journey. These tools provide the consistency needed to replicate successful recipes, troubleshoot issues effectively, and confidently tackle more advanced techniques and formulas like baker's percentage. They transform baking from a series of hopeful attempts into a controlled, predictable, and enjoyable process. The difference in the quality and consistency of your loaves will speak for itself.
Happy Baking with Ease!
With the right artisan bread measuring tools in hand and an understanding of why precision matters, you are well-equipped to explore the wonderful world of artisan bread baking. Embrace the science, trust your measurements, and enjoy the process of creating beautiful, delicious loaves right in your own kitchen. Happy baking!
Frequently Asked Questions
What are the essential measuring tools for artisan bread making?
The most essential tools include a digital scale for accurate ingredient ratios, measuring cups and spoons for smaller quantities, and a thermometer to monitor water and dough temperature.
Why is accuracy so important in artisan bread making?
Accuracy is crucial because artisan bread relies on precise ratios of ingredients for proper gluten development, fermentation, and ultimately, the final texture and flavor of the bread.
Can I use volume measurements instead of weight measurements for flour in artisan bread recipes?
While possible, it's strongly discouraged. Volume measurements are inconsistent; weight measurements offer much greater accuracy, leading to more predictable and successful results.
What kind of scale is best for measuring ingredients for artisan bread?
A digital kitchen scale with a resolution of 1 gram or less is ideal. Look for one that can measure in both grams and ounces for recipe flexibility.
Where can I find the recommended measuring tools for artisan bread making?
You can find these tools at most kitchen supply stores, online retailers like Amazon, and sometimes even at your local grocery store. Check out BakeWithEase.com for recommendations!
Final Reflection: The Enduring Craft of Precise Measurement
The pursuit of perfect artisan bread hinges not just on skill and passion, but on the unwavering accuracy of our tools. A seemingly small discrepancy in measurement can dramatically alter the final product, transforming a masterpiece into a culinary disappointment. This underscores the critical importance of selecting and utilizing the right measuring tools in the artisan bread-making process.
The impact of precise measurement extends beyond the individual baker, influencing the very fabric of our culinary heritage. Artisan bread-making, a tradition passed down through generations, relies on the consistent application of techniques and, crucially, accurate measurements. The subtle nuances of flour type, hydration levels, and fermentation times are all dictated by the precision of our tools. As we strive for authenticity and quality, we uphold this legacy. The measure of a baker is not in the size of their oven, but in the precision of their hand.
– (A fictional quote to fit the tone)
Consider the tools you use, reader. Are they serving you well? Do they allow you to achieve the level of accuracy you desire? Take this opportunity to evaluate your current equipment and consider investing in tools that will elevate your baking to new heights. The journey towards perfecting your artisan bread is a continuous one, and the right measuring tools are your steadfast companions on that path. Embrace the precision, embrace the craft, and embrace the delicious rewards that await.
Unlock Your Inner Baker: Perfect Loaves Await!
Thanks for taking the time to delve into the world of precise bread making! We hope you now feel equipped to conquer those tricky measurements and create consistently delicious loaves. Ready to put your newfound knowledge into practice?
- Bake a test loaf: Use the techniques you just learned to bake a simple loaf, paying close attention to the measurements and techniques described. Document your results!
- Share your baking journey: Let’s build a community! Share your experiences (and photos!) on our social media pages. We can’t wait to see your creations.
- Consider experimenting with a new flour type: What will you discover about texture and flavor by trying something outside your usual routine?
What surprising ingredient will you experiment with next to elevate your bread-baking game?