
MakeAhead Birthday Cake Ideas to Save Time & Stress

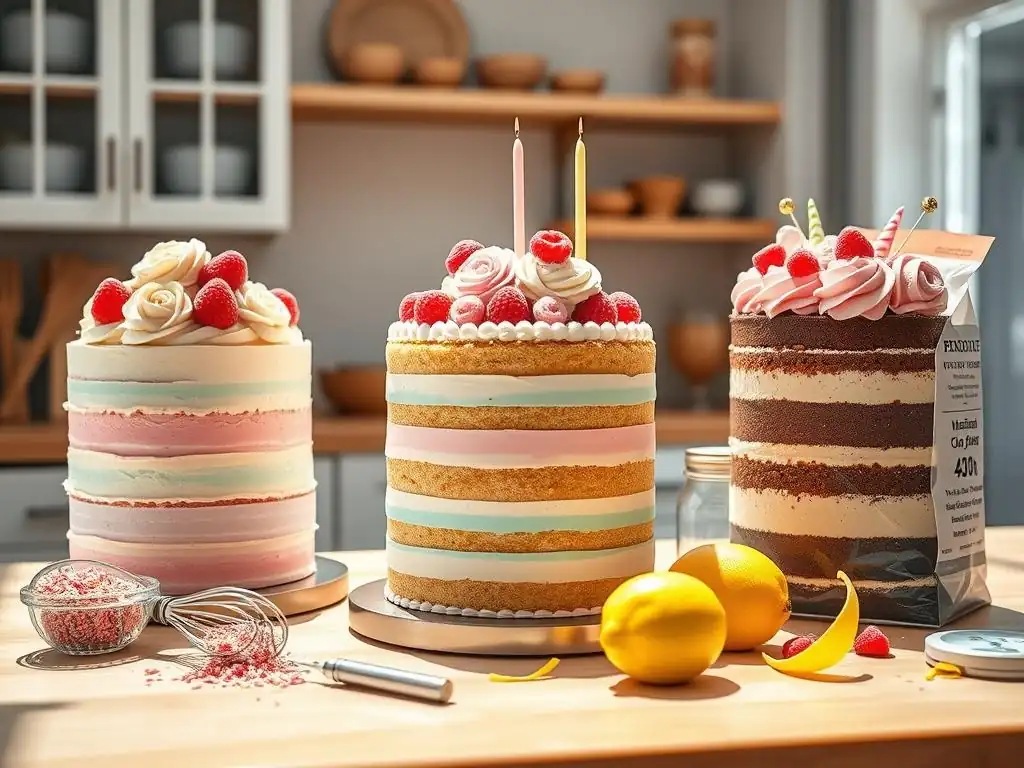
Welcome to BakeWithEase, your trusted guide to effortlessly delicious baking! Ever wished you could magically conjure up a stunning birthday cake without the last-minute stress? You're in the right place. Discover our secrets for an easy makeahead birthday cake that will not only impress your guests but also free up your time. Intrigued? Keep reading to unlock foolproof recipes and time-saving tips that will transform your birthday baking experience.
- BakeWithEase.com Presents: Stress-Free Birthday Cakes
- Why Choose a Make-Ahead Birthday Cake?
- Planning Your Easy Make-Ahead Birthday Cake
- Easy Make-Ahead Birthday Cake Recipes & Ideas
- Make-Ahead Frosting and Filling Options
- Assembling Your Make-Ahead Birthday Cake
- Storing Your Make-Ahead Birthday Cake
- Make-Ahead Birthday Cake Decorating Ideas
- Make-Ahead Birthday Cake Troubleshooting
- Conclusion: Enjoy a Stress-Free Birthday with a Make-Ahead Cake
-
Frequently Asked Questions
- What makes a birthday cake ideal for making ahead?
- How far in advance can I realistically bake a make-ahead birthday cake?
- What are some good frosting options for a make-ahead birthday cake?
- What's the best way to store a make-ahead birthday cake before frosting?
- Can I freeze a frosted make-ahead birthday cake?
- Final Reflection: The Sweet Symphony of Preparation
- Unleash Your Inner Cake Boss: Plan Ahead for a Stress-Free Celebration!
BakeWithEase.com Presents: Stress-Free Birthday Cakes
Planning a birthday celebration should be fun, not fraught with last-minute baking panic. Imagine greeting your guests feeling relaxed, with the perfect birthday cake already waiting. This isn't just a dream! With a little planning and the right techniques, you can create a stunning and delicious easy makeahead birthday cake, shifting the bulk of the work to the days before the big event. This approach significantly reduces stress and allows you to focus on other party details, ensuring the birthday person feels truly celebrated without you feeling overwhelmed.
Making an easy makeahead birthday cake is a smart strategy for busy bakers. It breaks down the complex process of baking, cooling, frosting, and decorating into manageable steps spread out over several days. This allows you to tackle tasks when you have free moments, rather than trying to cram everything into the 24 hours before the party. Whether you're a novice baker or perfecting your craft, mastering the make-ahead method is a game-changer for occasion baking.
Why Choose a Make-Ahead Birthday Cake?
Time-Saving Benefits of Preparing in Advance
Opting for an easy makeahead birthday cake dramatically frees up your time on the actual celebration day. Consider the typical timeline: baking cake layers can take 1-2 hours, cooling requires another 2-3 hours, making frosting might take 30-60 minutes, and then assembly and decorating can easily consume 1-3 hours depending on complexity. Trying to fit all of this into a single day, especially while managing other party preparations like decorating, cooking savory food, or getting ready, is incredibly demanding.
By preparing components in advance – baking layers up to several weeks ahead and freezing them, making frosting or fillings 2-4 days prior and refrigerating, or even completing simple decorations – you can reduce the tasks needed on the day itself to perhaps just 30-60 minutes of final assembly and touch-ups. This allows you to dedicate your valuable time on the birthday morning or afternoon to enjoying the anticipation, setting the scene, or simply relaxing before guests arrive, rather than rushing from oven to mixing bowl. This strategic distribution of effort is the cornerstone of a stress-free baking experience.
Reduce Stress on the Big Day with Pre-Made Cake Elements
The pressure of baking and decorating a perfect cake against a tight deadline can be immense, leading to anxiety and potential mistakes. A make-ahead approach minimizes this stress by allowing you to complete critical steps when you are calm and have ample time. Did a cake layer crack? If you baked it days ago, you have time to bake a replacement without jeopardizing the entire timeline. Is the frosting not the right consistency? You can easily adjust it the day before, rather than panicking an hour before guests arrive.
Having pre-made elements like baked cake layers stored in the freezer (which can last beautifully for 1-2 months when properly wrapped), frosting chilling in the fridge (stable for 3-5 days), and fillings ready to go eliminates major variables on the party day. You're not beholden to the oven or the mixer during those crucial final hours. This sense of preparedness provides peace of mind, ensuring that you can approach the final assembly and decoration with creativity and enjoyment, rather than haste and worry.
Planning Your Easy Make-Ahead Birthday Cake
Choosing the Right Recipe for Make-Ahead Success
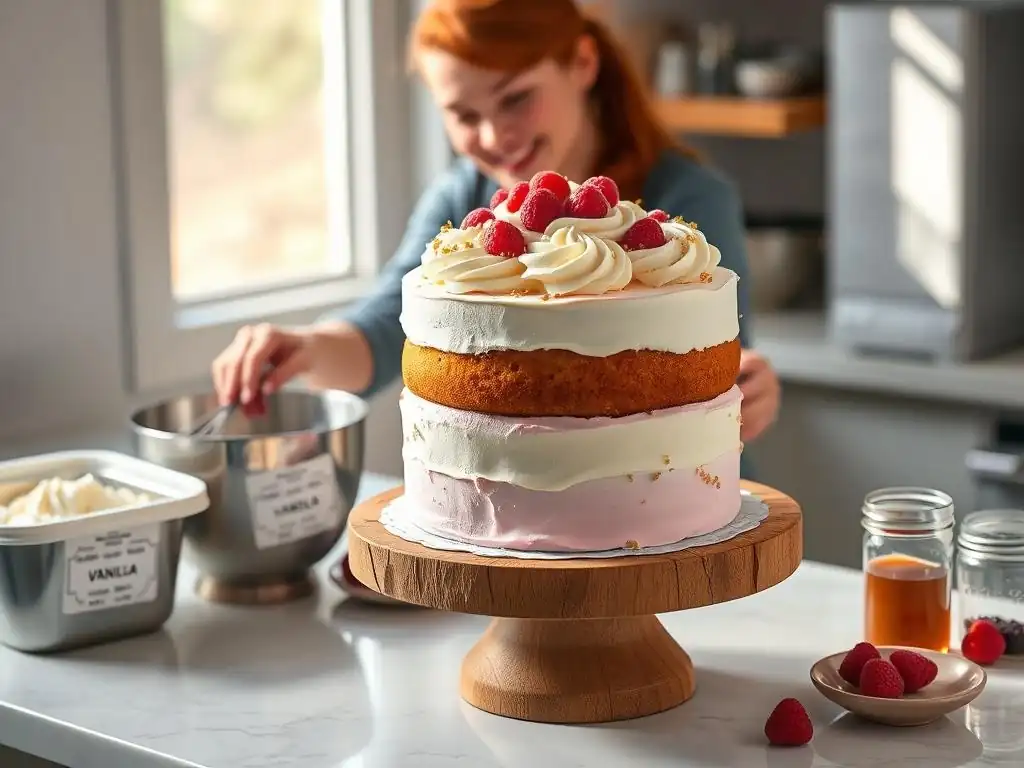
Not all cake recipes are created equal when it comes to making them ahead of time. Generally, denser cakes, like pound cakes, butter cakes, and oil-based cakes, tend to freeze and thaw better than delicate sponge cakes or airy chiffons. Recipes that are naturally moist, perhaps using ingredients like sour cream, yogurt, buttermilk, or oil, are also excellent candidates as they are less likely to dry out during storage. A sturdy structure is key, as layers will be handled multiple times – baked, cooled, wrapped, frozen/refrigerated, thawed, and then assembled.
When selecting a recipe for your easy makeahead birthday cake, look for ones specifically noted as being freezer-friendly or that have a reputation for staying moist. For instance, a classic chocolate fudge cake or a rich red velvet cake often perform exceptionally well. Avoid recipes that rely heavily on delicate meringues or extremely light textures unless you plan to bake those components fresh on the day. Ingredient lists that include fats like butter or oil and moistening agents contribute significantly to the cake's ability to withstand chilling and freezing without compromising texture.
Key Considerations for Flavor and Texture
The goal of an easy makeahead birthday cake is to deliver the same delicious flavor and pleasant texture as a cake baked and assembled on the spot. To achieve this, it's important to consider how flavors develop and textures hold up during storage. Some flavors, like citrus or certain spices, can actually deepen and become more pronounced after a day or two. Others, particularly delicate floral notes, might fade. Rich flavors like chocolate or vanilla tend to remain stable.
Texture is perhaps the most critical factor. Freezing can sometimes affect the crumb structure, potentially making it slightly drier or more crumbly if not done correctly. Using recipes with a slightly tighter crumb or higher fat content helps mitigate this. For fillings and frostings, consider their stability. A custard filling, for example, might separate or become watery after freezing and thawing, while a ganache or a stable buttercream will hold up beautifully. Testing components in advance if you're unsure is a wise step.
Ingredient Selection: Using Stable Ingredients
Choosing ingredients wisely is fundamental to the success of an easy makeahead birthday cake. Ingredients that contribute to moisture and stability are your best friends. For example, using oil instead of or in addition to butter in a cake recipe can help keep it moist longer, as oil is liquid at room temperature. Buttermilk, sour cream, or yogurt add tang and moisture, while also contributing to a tender crumb that holds up well to chilling and freezing.
For fillings and frostings, opt for components known for their stability. Cream cheese frosting, while delicious, is best made just a few days ahead and requires proper refrigeration. Buttercreams made with a higher ratio of butter and sugar, or those stabilized with meringue (like Swiss or Italian buttercream) or even a touch of cornstarch, are excellent make-ahead options.
Rich chocolate ganache sets up beautifully and can be made days in advance. Avoiding fresh fruit fillings that might weep or ferment is generally a good idea unless they are cooked into a stable compote or curd. Using high-quality extracts and flavorings ensures the taste remains vibrant after storage.
Easy Make-Ahead Birthday Cake Recipes & Ideas
Red Velvet Cake: A Make-Ahead Marvel
Red velvet cake is a fantastic choice for an easy makeahead birthday cake due to its naturally moist, oil-based crumb and sturdy structure. The vibrant color also holds up well. The classic pairing with cream cheese frosting, which can be made a few days ahead, makes it a convenient option. Baking the layers 1-2 weeks in advance and freezing them is perfectly feasible, allowing you to tackle the potentially time-consuming baking step when your schedule permits.
The key to a successful make-ahead Red Velvet Cake lies in careful preparation and storage. Ensure your layers are baked evenly and cooled completely before wrapping. Many bakers find that red velvet even benefits from a day or two of chilling after baking, as the flavors meld. When ready to assemble, having the pre-baked layers and prepared frosting waiting simplifies the process immensely, turning a potentially half-day project into a quick assembly job.
Make-Ahead Red Velvet Cake Layers: Freezing and Thawing Tips
To freeze Red Velvet cake layers, first ensure they are completely cooled. Any residual heat will cause condensation and ice crystals, leading to a dry cake. Wrap each cooled layer individually and tightly in plastic wrap. Aim for at least two layers of plastic wrap to prevent freezer burn. Then, wrap the plastic-wrapped layers again in aluminum foil. This double layer of protection is crucial for maintaining freshness for up to 2-3 months.
When ready to use, transfer the foil and plastic-wrapped layers from the freezer to the refrigerator to thaw slowly. This typically takes 6-8 hours or overnight, depending on the size of the layers. Avoid thawing at room temperature, as this can lead to excessive condensation and a gummy texture. Once thawed, unwrap the layers just before you are ready to assemble and frost the cake. The slow thaw in the fridge helps preserve the cake's moist texture.
Prepare Cream Cheese Frosting Days in Advance
Cream cheese frosting, while delicious, is soft and requires chilling. It can be made up to 3-4 days in advance and stored in an airtight container in the refrigerator. When making it ahead, ensure your cream cheese and butter are at the correct temperature (softened but not greasy) for smooth mixing. Beat thoroughly until light and fluffy.
Before using the chilled frosting, take it out of the refrigerator about 30-60 minutes beforehand to allow it to soften slightly. You will likely need to re-whip it with an electric mixer for a few minutes to restore its smooth, spreadable consistency. Add a tablespoon or two of milk or cream if needed to achieve the desired texture, but be careful not to make it too thin. This re-whipping step is vital for a smooth, easy-to-spread frosting on your easy makeahead birthday cake.
Chocolate Cake with Raspberry Filling: Rich and Ready When You Are
A rich chocolate cake is another excellent candidate for an easy makeahead birthday cake. The deep flavor often improves after a day or two, and the crumb, especially in recipes using oil or melted butter and perhaps coffee or buttermilk, stays wonderfully moist. Pairing it with a vibrant raspberry filling adds a lovely contrast in flavor and texture, and a cooked fruit filling like coulis is very stable for making in advance.
The combination of a sturdy chocolate cake base and a pre-made raspberry coulis filling allows for significant preparation ahead of time. You can bake the chocolate layers weeks in advance and freeze them, make the raspberry coulis up to a week ahead and refrigerate it, and prepare your chocolate frosting (like ganache or buttercream) days ahead. On the day of the party, it's simply a matter of assembling these ready-to-go components.
Freezing Chocolate Cake for Optimal Freshness
Similar to Red Velvet, freezing chocolate cake layers is a great way to get ahead. Bake your layers and let them cool completely on a wire rack – this is crucial for preventing moisture issues. Once cool, wrap each layer tightly in plastic wrap, ensuring no surface is exposed to the air. Follow this with a layer of aluminum foil. This double wrapping protects the cake from freezer burn and prevents it from absorbing odors from the freezer.
Properly wrapped chocolate cake layers can be stored in the freezer for up to 2-3 months without significant loss of quality. To thaw, transfer the wrapped layers to the refrigerator overnight. Once thawed, unwrap them and bring them to room temperature for about 30 minutes before assembling. This ensures the butter (if used) in the cake is soft enough for a tender texture and the layers are easy to handle without breaking.
Make-Ahead Raspberry Coulis: The Perfect Filling
Raspberry coulis is a vibrant, flavorful filling that works beautifully with chocolate cake and can be made well in advance. To make it, simply simmer fresh or frozen raspberries with a bit of sugar (perhaps 1/4 cup per cup of berries) and a squeeze of lemon juice until the berries break down and the mixture thickens slightly, about 10-15 minutes. You can strain it through a fine-mesh sieve for a smooth coulis or leave some seeds for texture.
Let the coulis cool completely, then store it in an airtight container in the refrigerator for up to 7 days. It can also be frozen for up to 3 months. If frozen, thaw it in the refrigerator overnight. The coulis thickens as it chills, making it an ideal consistency for spreading between cake layers. Its bright, slightly tart flavor cuts through the richness of the chocolate, making your easy makeahead birthday cake a delicious and balanced treat.
Spice Cake with Brown Butter Frosting: A Flavorful Make-Ahead Option
Spice cake, with its warm, comforting flavors, is another excellent contender for an easy makeahead birthday cake. The spices often deepen and meld beautifully over a day or two, enhancing the overall taste. Combined with a rich brown butter frosting, which can also be prepared in advance, you have a delicious cake that can be mostly completed before the big day. The structure of most spice cakes is sturdy enough to handle chilling and freezing well.
While preparing the batter far in advance isn't recommended due to leavening agents losing potency, baking the layers and making the frosting ahead works perfectly. You can bake the spice cake layers 1-2 weeks beforehand and freeze them, and make the brown butter frosting 3-4 days prior and refrigerate it. This leaves only the final assembly and decoration for the day of the celebration, making it a truly stress-free experience.
Preparing Spice Cake Batter in Advance
Preparing spice cake batter too far in advance (more than a few hours) is generally not advisable. Most cake batters contain baking powder and/or baking soda, which are leavening agents activated when wet. If the batter sits for too long, these agents can lose their effectiveness, resulting in a flat, dense cake. The best approach for a make-ahead spice cake is to bake the layers completely and then store them.
However, you can measure out dry and wet ingredients separately the day before and combine them just before baking. For example, mix all the flour, spices (like cinnamon, nutmeg, cloves – maybe 1-2 tsp total per cup of flour), baking powder, and salt in one bowl. Whisk wet ingredients like eggs, milk, oil, and sugar in another. Store covered at room temperature (dry) and in the fridge (wet). Combine and bake the next morning. This saves a little time but the main make-ahead benefit comes from storing the baked layers.
Make-Ahead Brown Butter Frosting Tips and Tricks
Brown butter frosting is incredibly flavorful and holds up well when made ahead. The key is properly browning the butter – cook it gently in a saucepan until the milk solids at the bottom turn golden brown and the butter smells nutty. This process takes about 5-10 minutes for 1/2 cup of butter. Let the brown butter cool slightly before using it to make your frosting.
Once the brown butter frosting is made (usually by beating brown butter with powdered sugar, milk/cream, and vanilla), store it in an airtight container in the refrigerator for up to 3-4 days. It will firm up considerably as it chills. Before using, let it sit at room temperature for about 30-60 minutes. Then, beat it with an electric mixer for several minutes, adding a splash of milk or cream if needed, until it's smooth and spreadable again. This re-whipping step is essential for achieving the right consistency for frosting your easy makeahead birthday cake.
Coconut Cake with Lime Curd: A Zesty Make-Ahead Delight
For a lighter, zesty option, a coconut cake paired with tangy lime curd and coconut buttercream is a wonderful easy makeahead birthday cake. Coconut cakes, especially those using coconut milk or cream, tend to be very moist and freeze well. Lime curd is a perfect make-ahead component, as its flavor actually intensifies as it sits, and it stores beautifully in the refrigerator for up to two weeks. Coconut buttercream can also be prepared in advance.
The combination of make-ahead friendly components makes this cake ideal for reducing stress. You can bake the coconut cake layers a week or two ahead and freeze them. The lime curd can be made up to two weeks in advance and stored in the fridge. The coconut buttercream can be made 3-4 days ahead and refrigerated. This leaves only the delightful task of assembling and decorating for the day of the party, ensuring a fresh and flavorful cake.
Lime Curd: A Make-Ahead Flavor Booster
Lime curd is an excellent make-ahead filling because its vibrant, tangy flavor benefits from time to meld. It's made by whisking together egg yolks, sugar, lime juice, and sometimes zest over gentle heat until thickened, then whisking in cold butter. This process takes about 15-20 minutes from start to finish.
Once made, strain the warm curd through a fine-mesh sieve for a silky smooth texture. Let it cool completely, then press plastic wrap directly onto the surface to prevent a skin from forming. Store the cooled lime curd in an airtight container in the refrigerator for up to 1-2 weeks. Its bright acidity provides a perfect counterpoint to the sweet coconut cake and frosting, and having it ready days in advance is a significant time-saver for your easy makeahead birthday cake.
Coconut Buttercream: Preparing it in Advance
Coconut buttercream can be made in advance and stored successfully. If using an American-style buttercream (butter, powdered sugar, liquid, flavor), ensure you use full-fat coconut milk or cream for flavor and richness. For a more stable option, consider a Swiss or Italian meringue-based buttercream flavored with coconut extract or cream of coconut, as these tend to hold their structure better.
Prepare your coconut buttercream as usual. Store it in an airtight container in the refrigerator for 3-5 days. Like other buttercreams, it will become quite firm when chilled. Before using, let it come to room temperature for about 60-90 minutes. Then, re-whip it thoroughly with an electric mixer until it is light, fluffy, and easily spreadable. This step is crucial for a smooth finish on your easy makeahead birthday cake.
Make-Ahead Frosting and Filling Options
Swiss Meringue Buttercream: The Make-Ahead Frosting Champion
Swiss Meringue Buttercream (SMBC) is often hailed as a champion among make-ahead frostings. Made from a base of egg whites and sugar heated over a water bath and whipped into a meringue, then butter is gradually added, it results in an incredibly smooth, stable, and less-sweet frosting than American buttercream. Its structure holds up exceptionally well to refrigeration and freezing.
SMBC can be made up to a week in advance and stored in an airtight container in the refrigerator. It can also be frozen for up to 2-3 months. When thawing from frozen, transfer to the fridge overnight, then to room temperature. When ready to use chilled or thawed SMBC, it will be very firm. You must re-whip it thoroughly with an electric mixer (often starting on low, then increasing speed) until it becomes light, fluffy, and spreadable again. This can take 5-10 minutes. Don't skip this step!
American Buttercream: Tips for Stability
American Buttercream, a simple mix of butter, powdered sugar, liquid (milk, cream, water), and flavoring, is quicker to make but can be less stable than meringue-based frostings, especially in warm conditions. However, it can still be successfully made ahead and stored. It's best made 2-3 days in advance for refrigeration.
To store American buttercream, place it in an airtight container in the refrigerator. It will firm up significantly. When ready to use, take it out of the fridge about 30-60 minutes before needed to soften. Re-whip it with an electric mixer for several minutes until smooth and spreadable. If it seems too stiff, add a tiny amount (1/2 to 1 tsp at a time) of milk or cream while beating until the desired consistency is reached. Avoid adding too much liquid at once.
Chocolate Ganache: A Rich and Decadent Make-Ahead Choice
Chocolate ganache, a luxurious blend of chocolate and hot cream, is a superb make-ahead filling or frosting. The ratio of chocolate to cream determines its consistency – more chocolate results in a firmer ganache suitable for frosting, while more cream yields a softer pouring or filling ganache. Its high fat content makes it very stable.
Ganache can be made up to a week in advance and stored in an airtight container in the refrigerator. When chilled, it will be quite firm. To use it as a filling or frosting, you'll need to soften it. For a spreadable consistency, let it sit at room temperature for an hour or two, then beat it with a mixer until lightened and spreadable. For a pourable ganache, gently warm it in a microwave or over a water bath, stirring frequently, until it reaches the desired liquid state. Do not overheat, as this can cause it to seize.
Fruit Compote: Preparing and Storing
Fruit compotes, made by simmering fruit with sugar and sometimes a thickener like cornstarch or pectin, are excellent make-ahead fillings for an easy makeahead birthday cake. Unlike fresh fruit, which can make cakes soggy, cooked compotes are stable and their flavors are concentrated. Berries, cherries, apples, and peaches all make wonderful compotes.
To make a fruit compote, combine sliced or whole fruit with sugar (adjust to fruit sweetness, maybe 1/4 cup per cup of fruit) and cook over medium heat until the fruit softens and the mixture thickens, about 10-20 minutes. A tablespoon of lemon juice brightens the flavor. Let the compote cool completely, then store it in an airtight container in the refrigerator for up to a week. It can also be frozen for several months. Thaw frozen compote in the refrigerator overnight before using.
Assembling Your Make-Ahead Birthday Cake
Layering and Filling: Techniques for a Perfect Finish
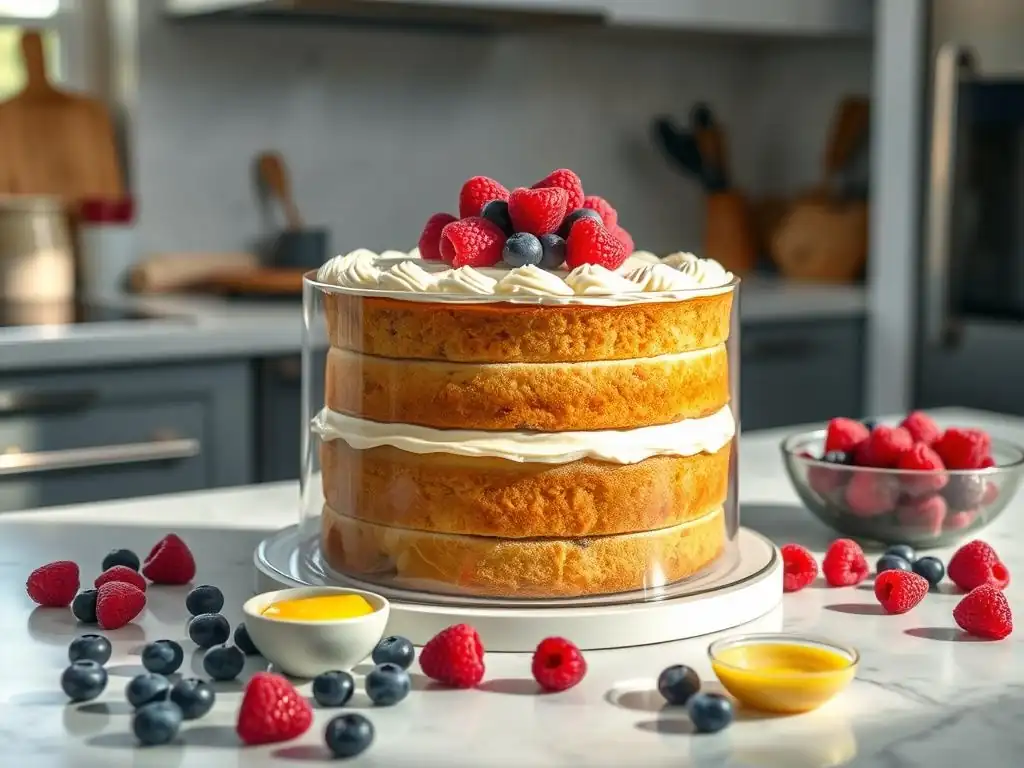
Assembling a make-ahead cake involves bringing together your pre-baked, thawed layers and your pre-made, re-whipped frostings and fillings. Ensure your cake layers are level – you might need to gently trim the tops with a serrated knife. Place the first layer on your serving plate or cake stand. If using a thin filling like coulis or compote, it's wise to pipe a dam of frosting around the edge of the layer before adding the filling to prevent it from oozing out the sides.
Spread your chosen filling evenly within the frosting dam. Place the next cake layer on top, pressing gently to secure. Repeat with remaining layers and fillings. For stability, especially with taller cakes, consider inserting cake dowels or skewers through the center layers before adding the top layer. Chill the assembled, unfrosted cake in the refrigerator for 20-30 minutes to firm up the layers and filling before applying the final coat of frosting. This makes frosting much easier.
Frosting and Decorating: Tips for a Stunning Presentation
Frosting a chilled, assembled cake is significantly easier than frosting one at room temperature, as the layers are firm and less likely to tear or shift. Start with a thin "crumb coat" of frosting applied all over the cake. This layer traps any loose crumbs. Chill the cake again for 15-20 minutes until the crumb coat is firm to the touch.
Once the crumb coat is firm, apply the final layer of frosting, smoothing it with an offset spatula or bench scraper for a clean finish. Now comes the fun part: decorating! Since your cake is already assembled and frosted (or ready for frosting), you have ample time to focus on decoration without rushing. This is where your pre-made decorations or simple piping techniques can shine, adding the perfect finishing touches to your easy makeahead birthday cake.
Storing Your Make-Ahead Birthday Cake
Proper Freezing Techniques for Cake Layers
Proper freezing is key to preserving the quality of your make-ahead cake layers. As mentioned, ensure layers are completely cool. Wrap each layer individually and tightly in plastic wrap, ensuring no part is exposed. Then, wrap again in a layer of heavy-duty aluminum foil or place the plastic-wrapped layers in a freezer-safe zip-top bag, pressing out as much air as possible.
Label each package with the cake type and the date it was frozen. Store the layers flat in the freezer until they are solid, then they can be stacked to save space. Frozen cake layers stored this way will maintain their quality for approximately 2-3 months. Thawing should always be done slowly in the refrigerator to minimize condensation.
Storing Frosted Cakes in the Refrigerator
Once your make-ahead cake is assembled and frosted, it needs proper storage until serving. Cakes with perishable fillings or frostings (like cream cheese, fresh fruit, or custard) must be stored in the refrigerator. Even cakes with stable buttercream benefit from chilling to keep the frosting firm and the layers moist.
For short-term storage (up to 3-4 days), place the frosted cake in a cake carrier or cover it loosely with plastic wrap. If the frosting is firm, you can tent plastic wrap over it so it doesn't touch the surface. For longer storage (up to a week, depending on ingredients), an airtight cake carrier is best. Ensure your refrigerator isn't holding items with strong odors, as the cake can absorb them.
Thawing and Serving: Ensuring Optimal Freshness
If you've frozen an entire frosted cake (some denser cakes and stable buttercreams can be frozen after frosting, though layers-only is often preferred), thaw it in the refrigerator overnight in its wrapping. Once thawed, unwrap it and let it sit at room temperature for 1-2 hours before serving. This allows the cake and frosting to soften to the perfect texture and brings out the full flavor.
For cakes stored in the refrigerator, take them out about 30-60 minutes before serving (for buttercream or ganache frosted cakes) or slightly longer (for cream cheese frosted cakes that need to lose their chill) to reach optimal serving temperature. This ensures the cake is moist and the frosting is soft and pleasant to eat. Cutting a cold cake can be easier, but the flavor and texture are best enjoyed when slightly warmer.
Make-Ahead Birthday Cake Decorating Ideas
Simple Piping Techniques for Beginners
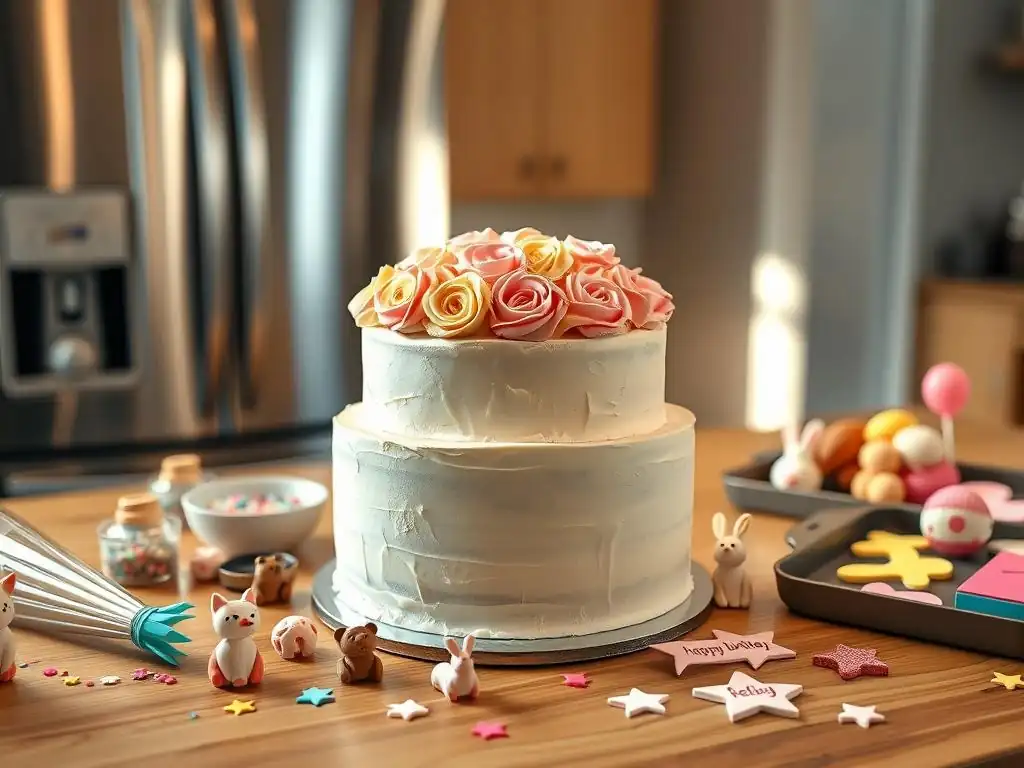
You don't need to be a master decorator to add beautiful touches to your easy makeahead birthday cake. Simple piping techniques can be prepared mentally or even practiced ahead of time. Basic stars, rosettes, or shells piped around the top and bottom edges of the cake using a piping bag fitted with a star tip (like a 1M or 2D) are classic and look impressive. You can practice these on a piece of parchment paper beforehand.
Another easy technique is using a round tip (like an Ateco 805) to pipe simple dots or dollops around the cake. For a rustic look, simply swirl the frosting on top and sides with an offset spatula. These techniques require minimal skill but add a polished, professional finish that makes your make-ahead cake feel special. Having your frosting ready to go means you can take your time and enjoy the decorating process.
Easy Edible Decorations to Prepare in Advance
Many edible decorations can be prepared days or even weeks before the birthday. Chocolate curls or shavings can be made by running a vegetable peeler along a block of chocolate and stored in an airtight container at room temperature. Candied citrus peel adds a sophisticated, flavorful touch and keeps for several weeks in an airtight container.
Simple fondant shapes (cut with cookie cutters) or gum paste flowers can be made ahead and allowed to dry, then stored in a cool, dry place. Even making edible glitter or colored sugar is something you can do when you have spare time. Having these elements ready means that on the day of assembly, decorating is as simple as placing or sprinkling them onto the frosted cake, turning a quick task into a visually appealing result.
Using Sprinkles and Candied Citrus for a Festive Look
Sprinkles are perhaps the ultimate easy makeahead birthday cake decoration. They require absolutely no advance prep beyond purchasing them! You can apply them in countless ways: covering the entire cake, just the sides, creating a border, or sprinkling them over the top. Using a mix of different shapes and colors adds extra festivity.
Candied citrus slices (oranges, lemons, limes) are another fantastic option that looks elegant and tastes wonderful. They can be made days or even weeks ahead by simmering thin citrus slices in sugar syrup until translucent, then drying them. Arranged on top of the cake or around the base, they add a pop of color, shine, and a pleasant chewy texture. Both sprinkles and candied citrus are simple yet effective ways to elevate your make-ahead cake's appearance.
Make-Ahead Birthday Cake Troubleshooting
Preventing Dryness in Make-Ahead Cakes
The most common concern with make-ahead cakes is dryness. This is usually caused by improper wrapping leading to moisture loss or freezer burn, or thawing incorrectly. To prevent dryness, ensure your original recipe is moist to begin with (using oil, buttermilk, etc.). Always let cake layers cool completely before wrapping. Wrap them very tightly in multiple layers of plastic wrap and then foil or a freezer bag to create an airtight seal.
When thawing frozen layers, always do so slowly in the refrigerator. Avoid leaving unwrapped cake layers exposed to the air in the fridge for extended periods, as the cold air is very dry. If you are concerned about a layer being slightly dry upon thawing, a simple syrup soak (equal parts sugar and water boiled, then cooled) brushed onto the layer before frosting can add back moisture.
Addressing Frosting Issues After Thawing
Make-ahead frostings, especially buttercreams, often require attention after being refrigerated or thawed from frozen. They will typically be very firm and may look curdled or separated initially. This is normal! The key is re-whipping. Take the frosting out of the fridge/freezer (after thawing in the fridge) and let it soften at room temperature for 30-90 minutes.
Then, beat the frosting vigorously with an electric mixer. For buttercreams, start on low speed to break it up, then increase to medium-high. It may look worse before it gets better. Keep beating; it should eventually become smooth and fluffy again, typically within 5-10 minutes. For ganache, gentle warming and then beating will restore its texture. If your frosting still seems off, a tiny addition of liquid (for buttercream) or a small amount of freshly whipped cream or melted chocolate (for ganache) while beating can sometimes help.
Each cake type might have specific quirks. Red Velvet layers might show some color bleeding into cream cheese frosting if the cake isn't completely cooled or the frosting is too warm. Ensure both are properly chilled before assembly. Chocolate cakes are generally forgiving but ensure you use a sturdy recipe that can handle handling. If a spice cake layer is crumbly after thawing, handle it gently and consider a simple syrup soak. Coconut cakes can sometimes be delicate; ensure layers are fully baked and cooled before moving.
For fillings like lime curd or compote, if they seem too thin after chilling, you can gently warm them and stir in a slurry of cornstarch and water, then reheat until thickened. If too thick, stir in a little liquid (water, juice, or milk). Always taste your components after storage – if flavors seem muted, a little extra extract or zest can sometimes revive them. The more you practice making components ahead for your easy makeahead birthday cake, the better you'll become at anticipating and fixing potential issues.
Conclusion: Enjoy a Stress-Free Birthday with a Make-Ahead Cake
Creating a beautiful and delicious birthday cake doesn't have to mean spending the entire celebration day in the kitchen. By embracing the concept of an easy makeahead birthday cake, you can distribute the effort over several days, turning a potentially overwhelming task into a series of manageable steps. From baking and freezing layers to preparing frostings and fillings in advance, each component completed ahead of time is a little victory towards a relaxed and enjoyable birthday.
With the right recipes, proper storage techniques, and a bit of planning, your make-ahead cake will taste just as wonderful as if it were baked fresh that morning. The real reward is the peace of mind you'll have on the big day, allowing you to savor the moments, spend time with loved ones, and proudly present a stunning, homemade cake without the stress. So go ahead, pick your favorite recipe, plan your steps, and make this birthday celebration truly stress-free with a delicious make-ahead masterpiece.
Frequently Asked Questions
What makes a birthday cake ideal for making ahead?
An ideal make-ahead birthday cake recipe should be stable and moist enough to last for a few days. Frostings that hold well, like buttercream, and cakes that don't dry out easily are essential.
How far in advance can I realistically bake a make-ahead birthday cake?
Generally, you can bake the cake layers 2-3 days in advance and store them properly wrapped in the freezer for even longer. The frosting can also often be made a day or two ahead and kept refrigerated.
What are some good frosting options for a make-ahead birthday cake?
Buttercream is a great choice, as it keeps well and can be easily smoothed. Cream cheese frosting is also an option, but it requires refrigeration and may not be as stable for decorating.
What's the best way to store a make-ahead birthday cake before frosting?
Wrap the cooled cake layers tightly in plastic wrap and then in foil or place them in an airtight container. This prevents them from drying out and absorbing unwanted odors. You can store them at room temperature for a day or two or in the freezer for longer.
Can I freeze a frosted make-ahead birthday cake?
Yes, you can! Freeze the frosted cake uncovered for an hour or two until the frosting is firm. Then, wrap it tightly in plastic wrap and foil. Thaw it in the refrigerator overnight before serving to avoid condensation and maintain the frosting's integrity.
Final Reflection: The Sweet Symphony of Preparation
The frantic last-minute dash to bake a birthday cake is a thing of the past. This article has explored the liberating power of make-ahead birthday cakes, proving that delicious celebrations don't require eleventh-hour stress. By embracing preparation, we unlock the joy of a perfectly executed birthday, leaving us free to focus on what truly matters: celebrating with loved ones.
The impact of pre-planning extends far beyond the kitchen; it's a reflection of our approach to life itself. The ability to anticipate needs and prepare accordingly fosters a sense of calm and control, qualities increasingly valued in our fast-paced world. As the saying goes, By failing to prepare, you are preparing to fail.
This rings especially true when it comes to the seemingly simple task of baking a birthday cake – a symbol of joy and celebration that shouldn't be marred by unnecessary anxiety.
So, reader, I urge you to embrace the power of preparation. Don't let the pressure of a perfectly baked cake overshadow the genuine connection and joy of a birthday celebration. Try one of the make-ahead recipes outlined in this article, and experience the freedom and satisfaction of a stress-free baking experience. Let the sweet aroma of a perfectly timed cake fill your home, a testament to your thoughtful planning and a symbol of the beautiful celebrations that await.
Unleash Your Inner Cake Boss: Plan Ahead for a Stress-Free Celebration!
Thanks for joining us on this delicious journey into the world of make-ahead birthday cakes! We hope you've discovered some fantastic time-saving ideas to make your next celebration truly special. Now it's time to put your newfound knowledge into action.
- Pick your perfect cake: Browse our extensive recipe library for the ultimate make-ahead masterpiece that suits your taste and skill level. This is your chance to get creative and choose a flavor you've always dreamed of baking!
- Share the joy: Inspire others to plan ahead too! Share this article with your friends and family on social media – let’s spread the word about stress-free baking!
- Leave a comment: Do you have a favorite make-ahead birthday cake trick that wasn't mentioned? Share your wisdom with the BakeWithEase community – let's help each other create unforgettable birthday celebrations!
What incredible cake creation will you be whipping up next?