
Mastering Simple Birthday Cake Decorating Techniques

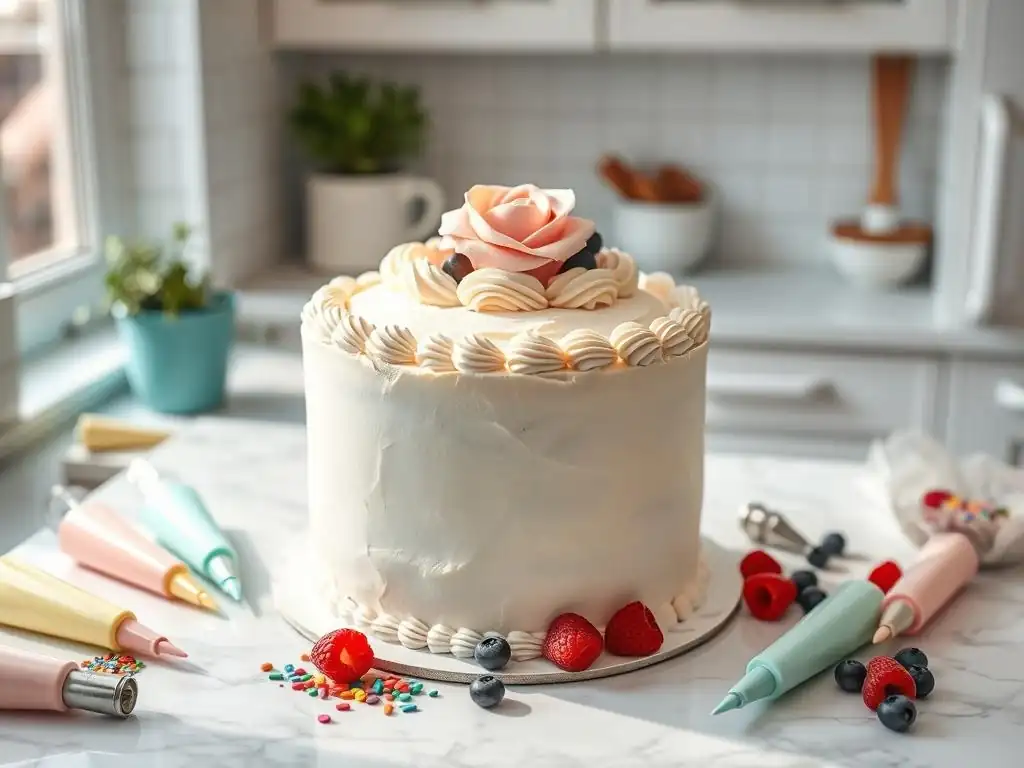
Welcome to BakeWithEase, your trusted guide to the delightful world of baking! Ever dreamed of creating a show-stopping birthday cake without the stress? You're in the right place. Dive into our guide on easy birthday cake decorating and discover simple techniques that will transform your next celebration. Get ready to unlock your inner artist and bake a masterpiece that's as delicious as it is beautiful – keep reading to learn how!
- Introduction to Simple Birthday Cake Decorating
- Essential Tools and Supplies
- Simple Birthday Cake Decorating Techniques: A Step-by-Step Guide
- Fun and Simple Birthday Cake Decorating Ideas
- Creating Homemade Cake Toppers
- Tips and Tricks for Success
- Expanding Your Decorating Skills
- Conclusion: Celebrate with Your Homemade Birthday Cake
- Frequently Asked Questions
- Final Reflection: The Sweet Simplicity of Celebration
- Unleash Your Inner Cake Artist!
Introduction to Simple Birthday Cake Decorating
Your Guide to Stress-Free Cake Decorating
Welcome to BakeWithEase, your friendly corner for turning baking aspirations into delicious realities! We understand that while baking the perfect cake is rewarding, the thought of decorating it can sometimes feel intimidating. That's why we've put together this guide focused on easy birthday cake decorating techniques designed for everyone, regardless of your experience level. Our goal is to show you that creating a beautifully decorated birthday cake doesn't require professional skills or hours of intricate work.
This guide will walk you through essential tools, basic techniques, and creative ideas that simplify the decorating process. We'll focus on approachable methods like smooth frosting, simple piping, and fun additions such as sprinkles and fruit. Imagine the joy of presenting a homemade, beautifully decorated cake that looks fantastic without the stress. Let's demystify cake decorating together and make your next birthday celebration extra special with a cake you decorated yourself using these easy techniques.
Why Simple Cake Decorating Matters
Choosing simple techniques for your birthday cake decoration is about making the process enjoyable and achievable. For many home bakers, time is a limited resource, and complex decorating methods can be time-consuming and frustrating. Focusing on easy birthday cake decorating allows you to create impressive results quickly, leaving more time to enjoy the celebration itself. It's about celebrating the act of baking and decorating without getting bogged down in overly complicated steps.
Moreover, simple decorating techniques often highlight the cake's flavor and texture. A beautifully smooth buttercream finish or a scattering of fresh berries can be just as visually appealing as elaborate fondant work, while also being much more practical for beginners. Embracing simplicity builds confidence; mastering a few basic skills like leveling a cake or applying a smooth crumb coat provides a solid foundation for future baking adventures. It proves that stunning, delicious birthday cakes are well within reach for anyone.
Essential Tools and Supplies
Must-Have Cake Decorating Tools
Having the right tools makes a world of difference when attempting easy birthday cake decorating. You don't need a vast collection of specialized equipment to get started. A few key items can significantly simplify tasks like frosting and smoothing. An offset spatula, for instance, is indispensable for spreading frosting evenly across the top and sides of a cake. A small offset spatula works well for details, while a larger one is great for covering larger surfaces quickly and smoothly.
Another essential tool is a cake leveler or a long serrated knife. These are crucial for trimming the tops of your cake layers so they are flat and stack evenly, preventing a lopsided finished cake. A bench scraper or straight icing spatula is also incredibly useful for achieving those perfectly smooth sides on your buttercream-frosted cake. While not strictly necessary for every simple technique, a set of basic piping bags and a few common tips (like a large round tip, a star tip, and a closed star tip) open up many possibilities for easy borders and swirls.
Cake Decorating Supplies Checklist
Beyond your basic baking ingredients, certain supplies are specific to the decorating phase of making an easy birthday cake. Frosting is, of course, the star of the show. Whether you make your own buttercream, cream cheese frosting, or use a quality store-bought version, ensure you have enough – typically about 2-3 cups for a two-layer 8 or 9-inch cake. Having extra is always better than running out mid-decoration!
Other crucial supplies include items for adding visual appeal. Sprinkles are perhaps the easiest and most fun way to decorate; consider having a variety of colors and shapes on hand, from simple jimmies to nonpareils or confetti sprinkles. Edible glitter or lustre dust can add a touch of sparkle. Fresh fruit like berries or sliced peaches offers a natural, beautiful touch. And don't forget a sturdy cake board or platter to present your finished masterpiece!
Simple Birthday Cake Decorating Techniques: A Step-by-Step Guide
Leveling Your Cake
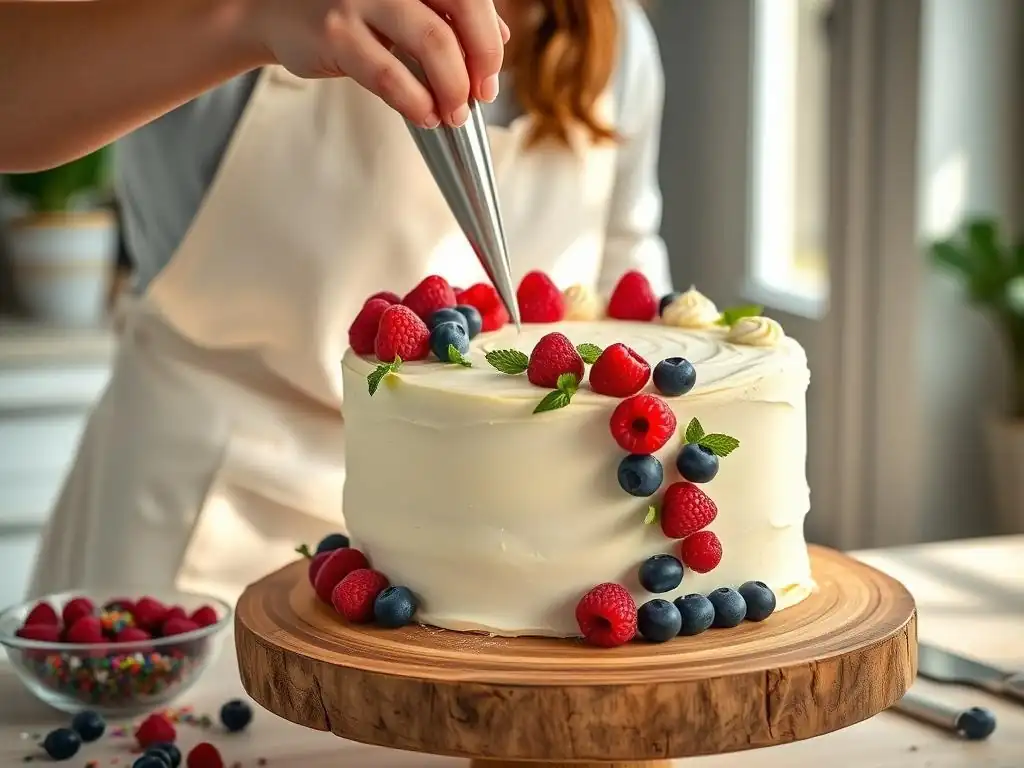
The first step towards a stable and beautifully decorated cake is ensuring your layers are level. Often, cakes bake with a slight dome in the center. Stacking domed layers results in an unstable cake that's difficult to frost smoothly, making easy birthday cake decorating harder than it needs to be. To level your cake, wait until it's completely cooled. Place the cake on a flat surface.
Using a serrated knife or a cake leveler, carefully slice off the domed top, aiming for a flat surface. If using a knife, hold it parallel to the counter and use a gentle sawing motion. A cake leveler, adjustable to different heights, offers a straightforward way to achieve a consistent cut. Don't discard the trimmed cake tops – they make excellent cake pops or baker's snacks! Leveling provides a solid foundation, making subsequent steps like stacking and frosting much simpler.
Crumb Coating: The Foundation for a Perfect Finish
Once your cake layers are level and stacked with a filling, the next crucial step for easy birthday cake decorating is applying a crumb coat. A crumb coat is a very thin layer of frosting applied all over the cake. Its primary purpose is to trap any loose crumbs, preventing them from getting mixed into your final, visible layer of frosting. This ensures a clean, smooth finish.
To apply a crumb coat, use an offset spatula to spread a thin layer of frosting over the entire cake, top and sides. Don't worry about making it perfectly smooth at this stage; the goal is simply to cover the cake surface and seal in crumbs. Once covered, chill the cake in the refrigerator for about 15-30 minutes, or until the crumb coat is firm to the touch. This chilling step is essential as it hardens the crumb coat, creating a stable base for your final layer of frosting.
Mastering Buttercream Frosting Application
Achieve a Smooth Buttercream Surface
Achieving a smooth buttercream surface is a hallmark of professional-looking cakes, and it's surprisingly achievable with easy birthday cake decorating techniques. After your crumb coat is chilled and firm, apply a generous amount of your final frosting. Start by putting a large dollop on top and spreading it outwards, then apply frosting to the sides. Don't be stingy with the frosting at this stage; using enough helps prevent pulling up the crumb coat.
Once the cake is covered, use an offset spatula to smooth the top, working from the center outwards. For the sides, hold a bench scraper or a long straight spatula vertically against the side of the cake (ideally placed on a turntable) and rotate the cake while holding the scraper steady. This technique removes excess frosting and smooths the sides effectively. Scrape off accumulated frosting from your tool frequently for the smoothest results. You can go over areas multiple times until you achieve the desired smoothness.
Simple Buttercream Swirls and Rosettes
If a perfectly smooth finish feels daunting, or you simply prefer a different look for your easy birthday cake decorating, simple buttercream swirls and rosettes are fantastic alternatives. These techniques are forgiving and add beautiful texture. For swirls on top, simply dollop frosting onto the center of the cake and use an offset spatula to gently spread it outwards in a swirling motion, leaving peaks and valleys.
To create rosettes or star swirls using a piping bag, fit a piping bag with a large star tip (like a 1M or 2D). Fill the bag about two-thirds full with frosting. Starting at the edge of the cake top, hold the bag perpendicular to the surface and pipe a swirl of frosting, moving in a circular motion from the center outwards or vice versa.
You can cover the entire top with these swirls or pipe rosettes individually around the edge or in a pattern. Practice on a piece of parchment paper first to get a feel for the pressure needed.
Beginner-Friendly Piping Techniques
How to Use a Piping Bag and Tips
Piping might sound advanced, but it's a fundamental skill for easy birthday cake decorating. Using a piping bag and tips allows you to create defined borders, messages, and decorative elements. First, select your piping tip and place it inside the piping bag, pushing it down so it's snug in the narrow end. If using a coupler, attach the coupler base to the bag first, then screw the tip onto the outside of the bag using the coupler ring.
To fill the bag, fold the top edge down to create a cuff. Use a spatula to scoop frosting into the bag, pushing it towards the tip. Fill the bag no more than two-thirds full to make it easy to handle. Unfold the cuff and twist the top of the bag closed to prevent frosting from squeezing out the wrong end. Hold the twisted end firmly in your dominant hand, using your other hand to guide the tip. Apply steady pressure with your dominant hand to push the frosting through the tip.
Creating Simple Borders and Designs
With a filled piping bag and tips, you can easily add decorative touches to your easy birthday cake. Simple borders around the top and bottom edges of the cake add a polished look and can hide minor imperfections in the frosting. A round tip (like a #12 or #2A) can be used to pipe simple dots or a string border by holding the bag just above the surface and letting the frosting fall naturally as you move along the edge.
Star tips (like a #18 or #21) are perfect for creating star borders or shell borders. For stars, simply hold the tip close to the cake, squeeze firmly, and pull straight up. For a shell border, hold the bag at a slight angle, squeeze to create a base, then decrease pressure as you pull the tip away, letting the frosting trail off into a tail. Practice these basic motions on a piece of parchment paper before applying them to your cake. These simple piping techniques can elevate the look of your cake with minimal effort.
Fun and Simple Birthday Cake Decorating Ideas
Sprinkles: The Ultimate Cake Decorating Shortcut
When it comes to easy birthday cake decorating, nothing beats the sheer joy and simplicity of sprinkles. They are readily available, come in countless colors and shapes, and instantly add a festive touch.
You can cover the entire cake in sprinkles for a vibrant look, or use them more sparingly to decorate the sides, the top edge, or within piped borders. Applying sprinkles to the sides of a frosted cake is simple: hold the cake over a tray or large piece of parchment paper to catch the excess, then gently press sprinkles onto the sides with your hand or an offset spatula.
Consider using different types of sprinkles for varied textures. Jimmies (the rod-shaped ones) offer a classic look, while nonpareils (tiny balls) create a dense, speckled effect. Confetti sprinkles add flat shapes like circles or stars. You can even find themed sprinkles for specific occasions. A simple white buttercream cake can be transformed into a party centerpiece with just a generous application of colorful sprinkles. They truly are a shortcut to a fun, celebratory cake.
Fresh Fruit Arrangements for Beautiful Cakes
For a fresh, elegant, and easy birthday cake decorating approach, consider using fresh fruit. Fruit adds natural color, appealing textures, and delicious flavors without requiring any special decorating skills. Berries like strawberries, raspberries, blueberries, and blackberries are popular choices. You can arrange them in patterns, scatter them randomly across the top, or create a border around the edge.
Sliced fruits such as kiwi, peaches, or citrus segments can also be used. Arrange overlapping slices in a circular pattern on top of the cake for a sophisticated look. To keep cut fruit looking its best, you can brush it lightly with a clear glaze (like melted apricot jam or a simple syrup) to prevent drying and add a subtle sheen. Using fresh fruit is a healthy and beautiful way to decorate, perfect for highlighting the cake itself.
Edible Glitter and Lustre Dust for Sparkle
Adding a touch of sparkle is an easy birthday cake decorating trick that creates a magical effect. Edible glitter and lustre dust are perfect for this. Edible glitter comes in various colors and particle sizes and can be sprinkled directly onto frosted cakes. A little goes a long way to catch the light and add shimmer.
Lustre dusts are finer powders that provide a pearlescent or metallic sheen. They can be applied dry with a soft brush for a subtle shimmer, or mixed with a small amount of clear extract (like vodka or lemon extract, which evaporate quickly) to create an edible paint for brushing onto specific areas or details. These products are specifically designed for food use and are completely safe to consume, adding effortless glamour to your homemade birthday cake.
Simple Chocolate Decorations: Shavings and Drizzles
Chocolate offers simple yet effective ways to decorate an easy birthday cake. Chocolate shavings add texture and a rich flavor accent. To make shavings, use a vegetable peeler or a sharp knife to scrape along the edge of a block of chocolate (either room temperature or slightly chilled). The type of chocolate (milk, dark, white) will affect the color and curl of the shavings. Gently pick up the shavings and sprinkle them over the top or press them onto the sides of a frosted cake.
Chocolate drizzles are another easy technique. Melt chocolate chips or chopped chocolate (use tempering chocolate or add a bit of shortening/oil to regular chocolate for a smoother drizzle) in a microwave-safe bowl or over a double boiler. Let it cool slightly so it's not too hot. Spoon the melted chocolate into a piping bag with a very small round tip, a ziplock bag with a corner snipped off, or simply use a spoon. Drizzle the chocolate randomly or in a pattern over the top edge of the cake, letting it drip down the sides.
Creating Homemade Cake Toppers
DIY Cake Toppers: Templates and Cutouts
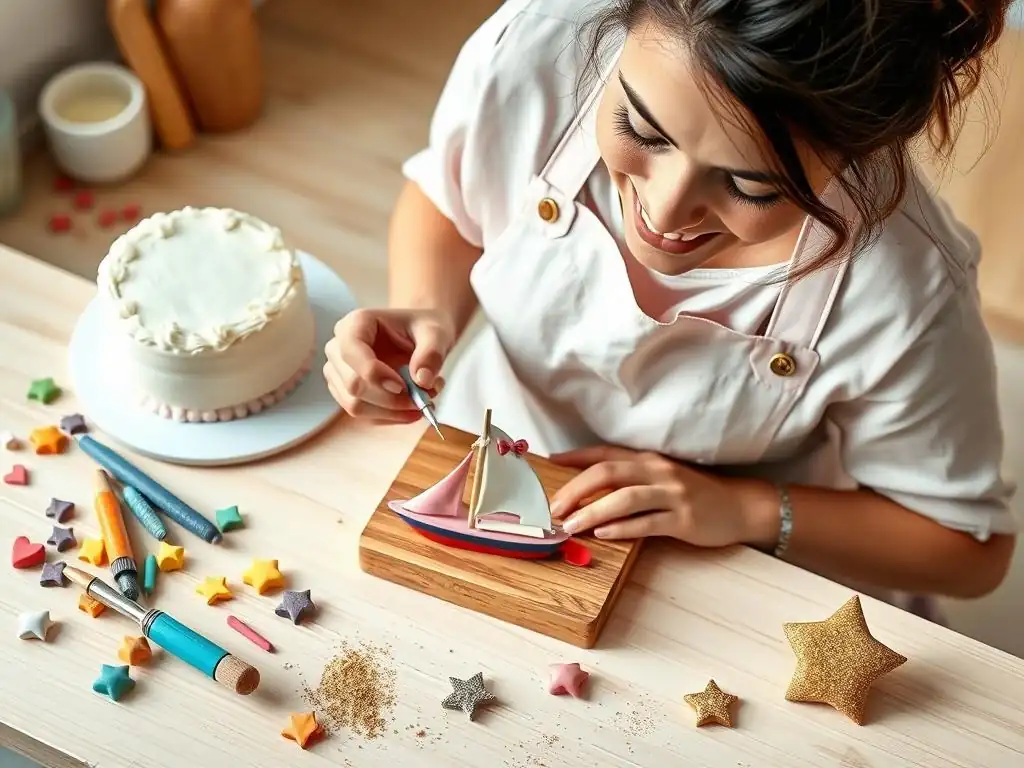
Homemade cake toppers add a personal touch to your easy birthday cake and are surprisingly simple to make. You can create charming toppers using everyday craft supplies. Cardstock is a great material; you can find free templates online for numbers, letters, shapes (like stars or hearts), or even simple character outlines. Print the template onto cardstock, cut it out carefully, and then glue or tape it onto a food-safe stick, like a wooden skewer or paper straw.
Another option is using craft foam or felt for slightly thicker, softer toppers. These materials are easy to cut and come in vibrant colors. For extra sparkle, you can cover cardstock cutouts with glitter using craft glue (ensure the glue is non-toxic, though it won't be touching the cake directly if mounted on a stick). These DIY toppers are inexpensive, customizable, and add a unique flair that store-bought options can't match.
Simple Fondant Decorations
While elaborate fondant work can be complex, using fondant for easy birthday cake decorating focuses on simple shapes and cutouts. You can buy pre-made fondant in various colors, which eliminates the need for making it from scratch. Simply knead a small amount until pliable, then roll it out thinly on a surface dusted with powdered sugar or cornstarch.
Use cookie cutters or a sharp knife to cut out simple shapes like circles, stars, hearts, or letters. These can be attached directly to a buttercream cake (they will stick slightly) or placed on top. You can also roll small balls or ropes of fondant to create simple borders or designs. Keep your fondant covered when not in use to prevent it from drying out. Focusing on basic shapes makes fondant an accessible material for adding clean, defined elements to your cake.
Creating a Personalized Cake Topper
Personalizing a cake topper makes the birthday cake extra special, and it's easy to do with simple materials. The most common personalization is adding the birthday person's name or age. Using the DIY cutout method described above, you can cut out letters for a name or the specific age number from cardstock or fondant. Arrange them on sticks to stand upright on the cake.
Another simple personalization involves printing a photo or a small image onto photo paper or cardstock (ensure it's printed with non-toxic ink if it might touch the cake). Cut out the image and attach it to a stick. You can frame it with a simple border made from cardstock or fondant. These personalized touches are quick to create and show the recipient that the cake was made specifically for them, adding significant sentimental value to your easy birthday cake.
Tips and Tricks for Success
Troubleshooting Common Cake Decorating Issues
Even with easy birthday cake decorating techniques, you might encounter a few common issues. One frequent problem is crumbs getting into your final frosting layer, which is why the crumb coat step is so important! If you skipped it and see crumbs, gently scrape off the affected frosting and apply a fresh layer over that area after firming it slightly in the fridge.
Another issue is tearing the cake while frosting; this often happens if the cake is too warm or too fragile. Ensure your cake is fully cooled, and handle it gently, using plenty of frosting to help the spatula glide.
Air bubbles in frosting can also be frustrating. To minimize bubbles, mix your buttercream on low speed for a few minutes after it's made, or press the frosting against the side of the bowl with a spatula to push air out before applying it. If you see bubbles while frosting, gently pop them with your spatula or a pin and smooth over the spot. Practice helps you anticipate and handle these small hurdles smoothly.
Storing Your Decorated Cake
Proper storage is essential to keep your beautifully decorated easy birthday cake fresh and looking its best. Cakes frosted with buttercream or cream cheese frosting generally need to be refrigerated, especially if they contain dairy or fresh fruit. Place the cake in a cake carrier or loosely cover it with plastic wrap, trying not to touch the frosting directly. Chill it until serving time.
If the cake is decorated with fondant or is a simple pound cake or sponge cake with a glaze (like a simple syrup or powdered sugar glaze), it might be fine at room temperature for a day or two, depending on the ingredients and humidity. However, for safety and freshness, refrigeration is often recommended, especially for cakes with perishable fillings or frostings. Remove the cake from the fridge about 30-60 minutes before serving to allow the frosting to soften slightly and the cake to come to a pleasant eating temperature.
Practice and Skill Development
Like any skill, easy birthday cake decorating improves with practice. Don't expect perfection on your first attempt! Each cake you decorate is a learning opportunity. Try out one or two new techniques on each cake. Maybe focus on getting a smoother crumb coat one time, and then practice piping simple borders on the next.
You can even practice frosting techniques on a cake dummy or a bowl turned upside down, scraping the frosting off and reusing it. This allows you to experiment without using actual cake. As you gain confidence with simple techniques, you might feel inspired to try slightly more complex ones. The key is to enjoy the process and not be afraid to experiment. Every cake you bake and decorate builds your confidence and skills.
Expanding Your Decorating Skills
Exploring Different Frosting Flavors
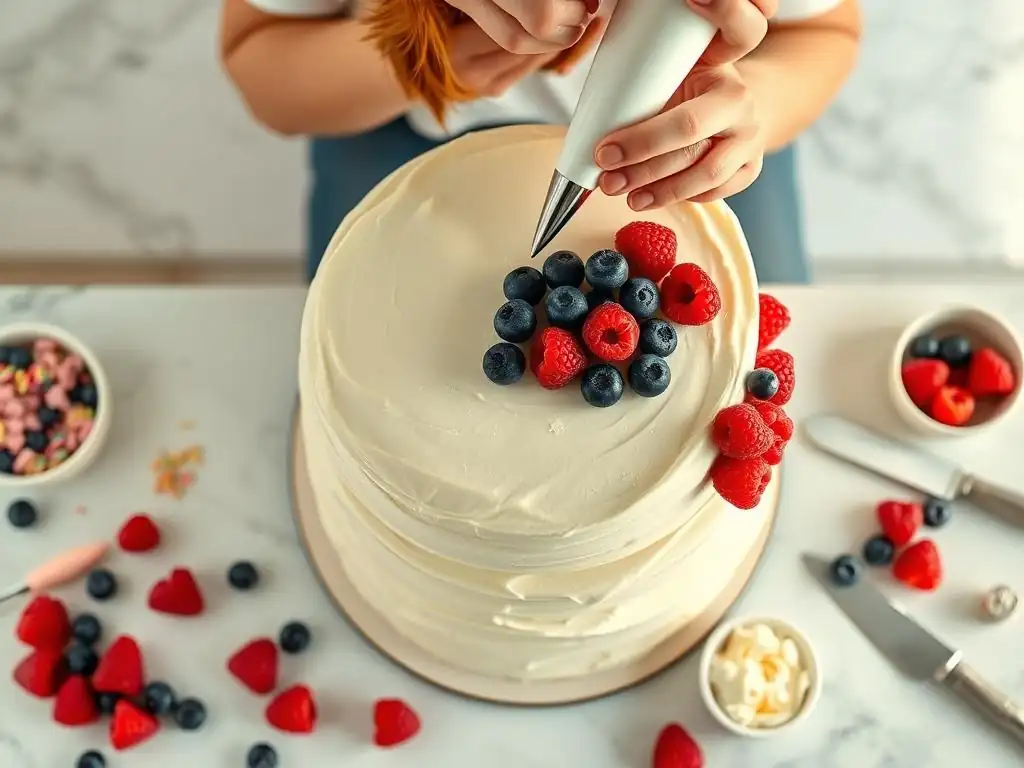
Once you're comfortable with the basic application of buttercream for easy birthday cake decorating, exploring different frosting flavors can add another dimension to your creations. Beyond classic vanilla buttercream, try making chocolate buttercream, which pairs wonderfully with many cake flavors. Cream cheese frosting is tangy and delicious, perfect for red velvet or carrot cakes.
You can also incorporate fruit flavors by adding fruit purées or extracts to your buttercream, or make a lighter whipped cream frosting. Experimenting with flavors allows you to match the frosting perfectly to your cake and the recipient's preferences, making your homemade birthday cake even more special. Each type of frosting might have a slightly different consistency, offering subtle variations in how they spread and pipe, which is part of the fun of learning.
Introduction to Cake Painting Techniques
Adding simple painted details is a surprisingly accessible way to elevate your easy birthday cake decorating. You don't need to be an artist! Edible paints or food coloring mixed with a clear extract (like vodka or lemon extract) can be used to paint simple designs onto a smooth frosting or fondant surface. You can use clean, food-safe paintbrushes specifically designated for food use.
Try painting simple dots, stripes, or freehand shapes. You can also use stencils (discussed next) as a guide for painting within a specific area. Metallic edible paints can add elegant gold or silver accents. This technique allows for more detailed designs than piping alone but can still be kept simple and abstract for beginners. It's a creative way to add color and unique visual elements.
Incorporating Stencils for Cake Decoration
Stencils are a fantastic tool for easy birthday cake decorating, allowing you to transfer patterns and designs onto your cake with minimal effort. Cake stencils are available in various patterns, from geometric shapes to floral designs and even messages. They work best on cakes with a smooth, firm surface, such as those covered in chilled buttercream or fondant.
To use a stencil, hold it firmly against the side or top of the cake. You can then apply frosting, royal icing, or even edible glitter or dust over the stencil using an offset spatula or brush. Carefully lift the stencil straight up to reveal the design. Stencils provide a quick and consistent way to add intricate-looking patterns that would be difficult to freehand, making them a valuable addition to your simple decorating toolkit.
Conclusion: Celebrate with Your Homemade Birthday Cake
Enjoy the Process of Cake Decorating
Decorating a birthday cake, especially when focusing on easy birthday cake decorating techniques, should be a joyful part of the celebration. It's an opportunity to get creative, de-stress, and pour some love into a special treat for someone you care about. Don't let the pursuit of perfection overshadow the fun. Embrace the occasional imperfection as part of the charm of a homemade creation.
Put on some music, gather your tools and supplies, and enjoy the process step-by-step. Involve family members or friends – decorating can be a wonderful group activity! The most rewarding part is not just the finished cake, but the memories made while creating it. Celebrate your effort and creativity, and know that the recipient will appreciate the thought and care you put into their special cake.
Your Partner in Baking Success
At BakeWithEase, we are committed to being your trusted partner on your baking journey. From finding the perfect easy birthday cake recipe to mastering simple decorating techniques, we provide the resources and guidance you need. We believe that anyone can create delicious and beautiful baked goods, and we strive to make the process accessible and enjoyable.
Whether you're baking for a birthday, a holiday, or just because, our website is packed with tips, tutorials, and inspiration to help you succeed. We hope this guide to easy birthday cake decorating has empowered you to tackle your next cake project with confidence. Keep practicing, keep exploring, and most importantly, keep baking with ease!
Frequently Asked Questions
What are some easy techniques for decorating a birthday cake?
Some easy techniques include using pre-made frosting, applying simple piping designs, and adding fresh fruits or sprinkles for a colorful touch.
Can I use store-bought cake for decorating?
Absolutely! Using store-bought cake can save time and still allow for creative decorating. Focus on enhancing it with your own frosting and decorations.
What are some beginner-friendly tools for cake decorating?
Beginner-friendly tools include a offset spatula, piping bags, and decorating tips. These tools help create beautiful designs without requiring advanced skills.
How can I achieve a professional look when decorating cakes?
To achieve a professional look, ensure your cake layers are even, use a crumb coat, and apply smooth layers of frosting. Practice makes perfect!
Are there any quick decorating ideas for last-minute cakes?
Yes! Quick decorating ideas include dusting with powdered sugar, using edible glitter, or simply placing candles and fresh fruit on top for an elegant finish.
Final Reflection: The Sweet Simplicity of Celebration
Mastering even the simplest cake decorating techniques unlocks a world of joy and personal expression, proving that beautiful doesn't always mean complicated. The ease with which we can transform a plain cake into a personalized masterpiece speaks volumes about the power of creativity and the importance of celebrating life's milestones, big or small. This isn't just about frosting; it's about making memories.
The impact of simple, homemade treats on our social landscape is undeniable. From childhood memories of lovingly decorated cakes to the modern trend of personalized baking, the act of creating something beautiful and delicious for loved ones fosters connection and strengthens bonds. The best things in life are the people we love, the places we've been, and the memories we've made along the way.
This quote perfectly encapsulates the enduring power of simple celebrations, enhanced by the personal touch of homemade baking.
Now, consider your own upcoming celebrations. Will you embrace the simplicity and joy of decorating your own cake? Perhaps you'll try one of the techniques discussed, or even let your creativity run wild and invent your own unique design. Remember, the most important ingredient isn't just sugar and flour, but the love and intention you pour into each swirl, each sprinkle, each carefully placed candle. Let your next cake be a testament to the sweet simplicity of celebration.
Unleash Your Inner Cake Artist!
Thanks for joining us on this delicious journey into simple birthday cake decorating! We hope you've gained the confidence to create stunning cakes without the fuss. Ready to put your new skills to the test?
- Bake your masterpiece! Try one of the techniques we discussed today – you'll be amazed at how easy it is to transform a plain cake into a celebration.
- Share your creation! Post a picture of your decorated cake on social media and tag us – we’d love to see your baking brilliance. Use #BakeWithEaseBirthday to connect with fellow bakers.
- Explore our other cake decorating tutorials! Discover more creative ideas and techniques on our website for even more baking inspiration.
So, what flavor will your next masterpiece be?