
Quick Birthday Cake Decorations Using Everyday Sprinkles

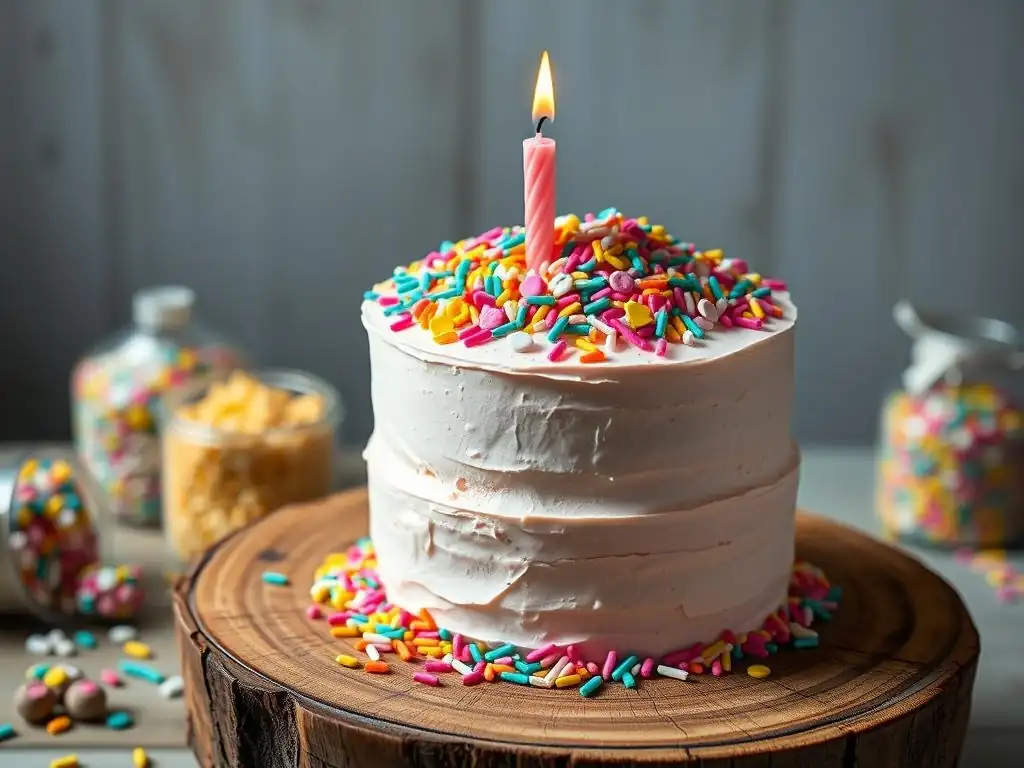
Welcome to BakeWithEase, your trusted companion on your baking journey! Ever dreamt of creating a show-stopping birthday cake without the fuss? Discover how to transform an ordinary cake into a festive masterpiece with our guide to easy sprinkle birthday cake decorations. Get ready to unlock simple techniques and creative ideas to elevate your next celebration – the secret is easier than you think, so let's get started!
- Quick Birthday Cake Decorations Using Everyday Sprinkles: BakeWithEase Guide
- Introduction: Elevate Your Birthday Cake with Simple Sprinkle Decorations
- Understanding Sprinkle Types for Birthday Cake Decorating
- Easy Sprinkle Birthday Cake Decorating Techniques
- Mastering the Sprinkle Application Process
- Creative Ideas for Sprinkle Birthday Cakes
- Troubleshooting Common Sprinkle Decorating Issues
- Storing Your Sprinkle-Decorated Birthday Cake
- Conclusion: Celebrate with Sprinkle-Covered Perfection
- Frequently Asked Questions
- Final Reflection: The Joy of Simple Sprinkle Celebrations
- Unleash Your Inner Cake Artist!
Quick Birthday Cake Decorations Using Everyday Sprinkles: BakeWithEase Guide
Introduction: Elevate Your Birthday Cake with Simple Sprinkle Decorations
BakeWithEase Presents: Effortless Birthday Cake Decorating
Welcome to BakeWithEase, where we believe that decorating a birthday cake doesn't have to be a daunting task! Celebrating a special day calls for a cake that looks as good as it tastes, and we're here to show you how simple and fun that can be. Forget complicated piping techniques or expensive fondant work. With just a few basic tools and some colorful sprinkles, you can transform a plain cake into a festive masterpiece in minutes. Our focus is on making the process accessible and enjoyable for everyone, regardless of your baking or decorating experience level.
This guide will walk you through everything you need to know about using everyday sprinkles to create stunning and easy sprinkle birthday cake designs. We'll cover different types of sprinkles, simple application techniques, creative ideas, and even how to troubleshoot common issues. Whether you're decorating a cake for a child's party, a friend's celebration, or just because, you'll find practical tips and inspiration here. Get ready to unleash your creativity and bake a truly memorable cake with minimal effort and maximum impact.
Why Sprinkles are the Perfect Easy Cake Decoration
Sprinkles are arguably the most versatile and readily available cake decoration out there. They come in a dazzling array of colors, shapes, and sizes, offering endless possibilities for customization. Unlike more advanced decorating mediums, sprinkles require no special skills or equipment to apply. You can simply scatter them, press them into frosting, or arrange them in patterns. This makes them ideal for last-minute decorating needs or for involving kids in the cake-making process.
Beyond their ease of use, sprinkles add wonderful texture and a pop of vibrant color that instantly signals celebration. A simple vanilla cake frosted with buttercream can be transformed into a festive treat just by adding a generous coating of colorful jimmies. They are also relatively inexpensive, making them a budget-friendly option for decorating multiple cakes throughout the year. For an easy sprinkle birthday cake, there's simply no better go-to ingredient.
Understanding Sprinkle Types for Birthday Cake Decorating
Jimmies: A Timeless Sprinkle Option
Jimmies, also known as sprinkles or sugar strands, are perhaps the most iconic type of sprinkle. They are elongated, rod-shaped pieces made primarily from sugar, cornstarch, and vegetable oil. Available in single colors, classic rainbow mixes, and even themed color blends (like red and green for holidays or school colors), jimmies offer a smooth texture and a satisfying crunch. They are excellent for covering large areas of a cake or creating borders.
Due to their shape, jimmies tend to lay flat against frosting, providing even coverage. A standard 8-inch round cake, for example, might require anywhere from 1/2 cup to a full cup of jimmies for a complete side and top coating, depending on how densely you apply them. While generally stable, some brighter colors of jimmies, particularly red and blue, can occasionally bleed slightly into lighter frostings if left in contact for extended periods, especially in humid conditions. Using a crusting buttercream can help minimize this issue.
Nonpareils: Adding Texture and Color
Nonpareils are tiny, spherical sprinkles that resemble little beads. They are known for their dense texture and intense color payoff, often coming in vibrant single colors or striking multi-color mixes. Made from sugar and starch, they are smaller and harder than jimmies, providing a distinct textural contrast to soft frosting. Nonpareils are fantastic for creating intricate patterns, adding sparkle, or providing a fine, granular coating.
Applying nonpareils can be a bit trickier than jimmies due to their size and tendency to roll. A small 4-inch cake might use just a few tablespoons for a delicate edge, while covering an entire 9x13 sheet cake could easily require 1.5 to 2 cups of nonpareils. Their small size means they can get into every nook and cranny of a textured frosting. Some nonpareils, especially older or lower-quality varieties, are more prone to color bleeding than jimmies, so it's wise to test a small amount on your frosting if you're concerned.
Sugar Pearls: For an Elegant Touch
Sugar pearls, also known as cachous or dragées (though true dragées contain silver and are often non-edible), are larger, round sprinkles with a hard, shiny exterior. They come in various sizes, from tiny 2mm beads to impressive 10mm spheres, and are typically found in metallic colors like silver, gold, or bronze, as well as pearlescent white, pink, and blue. Sugar pearls add a touch of sophistication and elegance to any cake design.
These sprinkles are best used as accents rather than for full coverage. You might use just a dozen or two 4mm pearls to outline a design or scatter a few larger 8mm pearls around the base of a cake. For example, decorating the border of an 8-inch cake might use approximately 30-40 small pearls. Their hardness means they can be quite firm to bite into, so consider the age and preferences of the person eating the cake when using larger sizes. They are relatively stable and less prone to color bleeding than jimmies or nonpareils.
Confetti Sprinkles: Fun and Festive Cake Decorations
Confetti sprinkles are flat, disc-shaped sprinkles that resemble tiny pieces of paper confetti. They come in various sizes and colors, including classic rounds, stars, hearts, and other fun shapes. Made from sugar and cornstarch, they lie flat against the cake surface, making them excellent for scattering or arranging in specific patterns. Confetti sprinkles bring a playful and festive vibe to an easy sprinkle birthday cake.
These sprinkles are often used sparingly to add pops of color and shape, though they can also be used for denser coverage. Decorating the top of a 9-inch round cake with a scattered pattern might use about 1/4 to 1/2 cup of confetti sprinkles. Their flat shape makes them less likely to roll off the cake compared to nonpareils. Some confetti sprinkles, particularly those with very intense colors, can be susceptible to moisture and may soften or even melt slightly on very wet frosting, so it's best to apply them closer to serving time if possible.
Easy Sprinkle Birthday Cake Decorating Techniques
The All-Over Sprinkle Coating: A Classic Approach
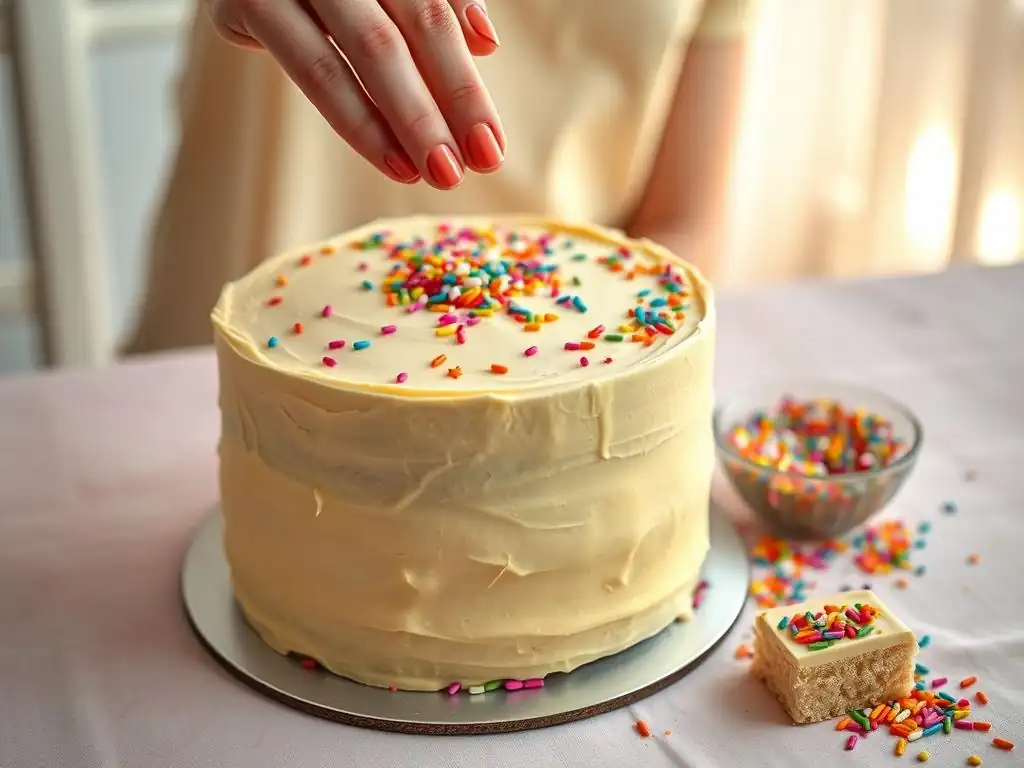
Covering an entire cake in sprinkles is one of the simplest yet most impactful ways to decorate. This technique works best on cakes with a smooth, slightly sticky frosting, such as buttercream or ganache. The goal is to get an even layer of sprinkles adhered to all visible surfaces of the cake – the top, sides, and sometimes even the base edge. This creates a vibrant, textured finish that's instantly celebratory and perfect for an easy sprinkle birthday cake.
To execute this, you'll need a tray or piece of parchment paper larger than your cake to catch excess sprinkles. For the sides, gently press handfuls of sprinkles against the frosted surface, working your way around the cake. For the top, you can either pour sprinkles directly onto the center and spread them gently with an offset spatula or your hand, or hold the cake over the tray and sprinkle from above.
Don't be afraid to be generous; excess sprinkles can be collected and reused. A typical 2-layer 8-inch cake might require 1.5 to 2 cups of sprinkles for full coverage, depending on the sprinkle type (jimmies stick better than nonpareils for sides).
Tips for Achieving Even Coverage with Sprinkles
Achieving an even all-over coating requires a few key steps. First, ensure your frosting is freshly applied and still soft enough for sprinkles to adhere easily. If the frosting has crusted over, you might need to lightly dampen it or apply a very thin second layer. Second, use a deep baking tray or roasting pan to catch falling sprinkles; this makes cleanup easy and allows you to collect and reuse the excess. For the sides, place the cake on a stand or elevated surface above the tray.
When applying sprinkles to the sides, use a gentle pressing motion rather than rubbing, which can smudge the frosting. Cup your hands around small handfuls of sprinkles and press them against the cake, rotating as you go. For the top, pour a generous amount in the center and gently tilt the cake or use a clean, dry offset spatula to spread them towards the edges.
Don't worry about perfection on the first pass; you can always go back and fill in sparse spots by hand or with a small spoon. Chilling the cake slightly before applying sprinkles can also help the frosting firm up just enough to hold the sprinkles without them sinking too much.
Sprinkle Borders and Edges: Adding Definition
Creating borders and edges with sprinkles is a quick way to add definition and a finished look to your birthday cake without covering the entire surface. This technique works well on cakes with both smooth and textured frostings and allows you to use different sprinkle types for contrast. A simple sprinkle border can outline the top edge, the base edge, or even frame specific areas on the cake top. It's a fantastic method for an easy sprinkle birthday cake design that looks polished.
To create a border along the top edge, hold the cake level and carefully pour or spoon sprinkles around the perimeter, letting them cascade slightly over the edge. For a base border, lift the cake slightly or place it on a turntable and gently press sprinkles into the frosting around the bottom edge. You can use a small offset spatula or your finger to help guide and press the sprinkles into place. Different sprinkle types offer different effects; jimmies create a solid band, while nonpareils offer a finer, more granular line.
Creating Clean Lines with Sprinkles
Achieving clean, sharp lines with sprinkles, especially for borders or geometric patterns, requires a bit of precision. One effective method is to use a piece of parchment paper or wax paper as a guide. Lay the paper flat on the cake where you want the edge of your sprinkle line to be, then apply sprinkles right up to the edge of the paper. Once the sprinkles are in place and gently pressed, carefully lift the paper straight up. This works particularly well for straight lines or defining the edge of a section.
Another technique involves piping a line of frosting first and then immediately applying sprinkles to the wet frosting line. This provides a slightly raised base for the sprinkles to adhere to and helps maintain a consistent width for the border. For circular borders, a rotating cake stand is invaluable. Spin the stand slowly while holding a spoon or small cup of sprinkles steady against the frosted edge. Practice makes perfect, but even slightly imperfect lines can add charm to a handmade easy sprinkle birthday cake.
Sprinkle Patterns and Designs: Get Creative!
Moving beyond simple coverage and borders, you can use sprinkles to create fun patterns and designs directly on the cake top or sides. This allows for more personalized and intricate decorations without needing advanced piping skills. Simple patterns like stripes, polka dots, or even more complex shapes can be achieved with a bit of planning and careful application. This is where you can really customize your easy sprinkle birthday cake.
To create patterns, you can either apply sprinkles directly to the frosted surface or use a template. For stripes, you can use a ruler or straight edge to lightly score lines in the frosting as a guide, or use strips of parchment paper to mask off areas. For polka dots, you can simply drop clusters of sprinkles onto the cake. More detailed designs might involve drawing the pattern onto the cake with a toothpick (lightly!) and then filling in the areas with sprinkles using a spoon or even tweezers for precise placement.
Using Templates for Sprinkle Art
Using templates is a fantastic way to create precise and intricate sprinkle designs on your birthday cake. You can buy pre-made stencils designed for cakes, or you can easily make your own by cutting shapes out of parchment paper or thin cardboard. Common templates include stars, hearts, letters, or even simple geometric shapes. Using a template ensures symmetry and clean edges, making your easy sprinkle birthday cake look professionally decorated.
To use a template, place it gently on the surface of your frosted cake. Ensure the template is lying flat against the frosting. Then, carefully fill the open areas of the template with sprinkles. You can spoon the sprinkles in and gently spread them with a clean, dry finger or small brush. Once the area is filled, gently lift the template straight up and away from the cake, being careful not to smudge the design. This technique works best with smaller, more uniform sprinkles like nonpareils or finely chopped jimmies that can fill the shapes easily.
Sprinkle Ombre Effect: A Modern Twist
The ombre effect, a gradual blending of colors, is a popular modern decorating trend that can be beautifully achieved with sprinkles. This technique involves transitioning from one color or shade of sprinkle to another across the surface of the cake, typically from bottom to top or from the center outwards. It creates a visually stunning and sophisticated look that is surprisingly simple to execute, making it a great option for an easy sprinkle birthday cake with a contemporary feel.
To create a vertical ombre on the sides of a cake, divide your sprinkles into sections by color or shade (e.g., dark blue, medium blue, light blue, white). Starting at the bottom, gently press the darkest color sprinkles into the frosting around the base edge. Move up slightly and apply the next lighter shade, overlapping slightly with the darker shade below. Continue layering the shades upwards, pressing each color gently into the frosting, until you reach the top edge with the lightest color. The key is to slightly overlap each color band to create a seamless transition.
Blending Sprinkle Colors Seamlessly
Achieving a seamless ombre effect with sprinkles requires careful application and blending. As you layer the different shades, use a gentle pressing motion to adhere the sprinkles. Pay attention to where the colors meet and try to distribute the sprinkles so that there isn't a harsh line between shades. You can use a clean, dry pastry brush to gently sweep sprinkles upwards or downwards where the colors meet, helping to blur the transition.
Another method for blending is to mix two adjacent colors together in a small bowl before applying them to the transition area. For example, if transitioning from dark blue to medium blue, mix a small amount of dark blue sprinkles with medium blue sprinkles and apply this mix between the two main bands. This creates a gradient of color before moving on to the next shade. This technique requires a bit more time but results in a smoother, more professional-looking ombre effect on your easy sprinkle birthday cake.
Mastering the Sprinkle Application Process
Preparing Your Cake for Sprinkles
Proper cake preparation is crucial for successful sprinkle application. The surface you're applying sprinkles to needs to be just right – sticky enough for the sprinkles to adhere, but not so wet that they sink or cause colors to bleed excessively. The ideal surface is typically a freshly frosted cake using a frosting that crusts slightly, such as American buttercream or a firm ganache. Ensure your frosting is smooth and free of crumbs before you begin.
If your frosting has crusted too much, you can gently mist it with a fine spray of water or apply a very thin, fresh layer of frosting just before applying sprinkles. Aim for a smooth finish on your frosting, especially if you plan on creating patterns or borders, as bumps and imperfections will show through the sprinkle layer. For side application, it helps if the frosting has had a few minutes to set slightly but is still pliable.
Ensuring a Smooth Frosting Surface
A smooth frosting surface is key for many sprinkle techniques, particularly full coverage or detailed patterns. To achieve this, start with a well-chilled cake layers, which makes frosting easier. Apply a crumb coat first – a thin layer of frosting that seals in crumbs – and chill the cake until this layer is firm (about 15-30 minutes in the refrigerator). Then, apply your final layer of frosting generously.
Use an offset spatula or a cake scraper to smooth the frosting around the sides and top. Dip your spatula or scraper in hot water, wipe it dry, and then run it over the frosting for a smoother finish. Repeat as needed. For an ultra-smooth finish, some bakers use the "paper towel method," gently pressing a piece of Viva paper towel (known for its smooth texture) onto a chilled, crusted buttercream surface and smoothing with their hand or a fondant smoother. This level of smoothness ensures your easy sprinkle birthday cake base is perfect for decoration.
Tools and Materials for Sprinkle Application
While you can simply use your hands, having a few basic tools can make applying sprinkles much easier and more precise. A small baking tray or deep dish is essential for catching excess sprinkles. A small spoon or scoop is helpful for pouring sprinkles onto specific areas. For pressing sprinkles into the sides, your hands work well, but you could also use a clean, dry bench scraper or a flat spatula.
For more detailed work, like creating patterns or filling in specific spots, tools like tweezers, a small dry pastry brush, or even a clean makeup brush dedicated to cake decorating can be invaluable. If you're using templates, you'll need the template itself and perhaps a small offset spatula or finger to gently press sprinkles into the cutouts. Having a damp cloth nearby to wipe your hands or tools can also be helpful to prevent sticky messes.
Essential Tools for Precise Sprinkle Placement
For techniques requiring precision, such as creating intricate patterns, writing with sprinkles, or placing sugar pearls, certain tools are particularly helpful. Fine-tipped tweezers are excellent for picking up and placing individual sprinkles or small clusters exactly where you want them. This is especially useful for nonpareils or small confetti shapes.
A small, dry pastry brush can be used to gently sweep away excess sprinkles from areas where they aren't wanted or to nudge sprinkles into place within a design. For filling in stencil cutouts, a small spoon allows for controlled pouring, and then a finger or a small offset spatula can be used to gently spread and press the sprinkles into the stencil. Having a clean, dry surface to pour sprinkles onto (like a small plate) before picking them up with tweezers also makes the process smoother when working on a detailed easy sprinkle birthday cake.
Preventing Sprinkle Run-Off: A Baker's Secret
A common issue when applying sprinkles, especially to the sides of a cake, is having them fall off or not stick properly. This is often due to the frosting being too firm, not sticky enough, or the angle of application. Preventing run-off ensures you get a dense, even coating on your easy sprinkle birthday cake.
Ensure your frosting is at the right consistency – soft enough to be sticky, but not so warm it's melting. If the frosting is too firm, applying a very thin layer of fresh frosting over the crusted surface just before adding sprinkles can help. For side application, place the cake on a surface that allows you to work comfortably, like a cake stand rotated over a tray.
Use a generous amount of sprinkles and gently press them into the sides rather than simply throwing them at the cake. Cupping your hand around the sprinkles as you apply them also helps control their direction.
Keeping Sprinkles in Place
Once sprinkles are applied, you want them to stay put! The primary factor in keeping sprinkles in place is the frosting's adhesion. A slightly sticky, crusting buttercream works wonderfully. Once the sprinkles are applied, chilling the cake for 15-30 minutes in the refrigerator can help the frosting firm up around the sprinkles, essentially "setting" them in place.
Avoid handling the sprinkle-covered areas unnecessarily after application. If transporting the cake, ensure it's placed on a stable surface and handled carefully. For cakes with sprinkles on the sides, using a cake box slightly larger than the cake can help prevent the sides from being brushed against. If using sprinkles prone to bleeding, like certain nonpareils, apply them closer to serving time, or consider using them only on areas with lighter frosting where bleeding will be less noticeable on your easy sprinkle birthday cake.
Creative Ideas for Sprinkle Birthday Cakes
Rainbow Sprinkle Cake: A Colorful Celebration
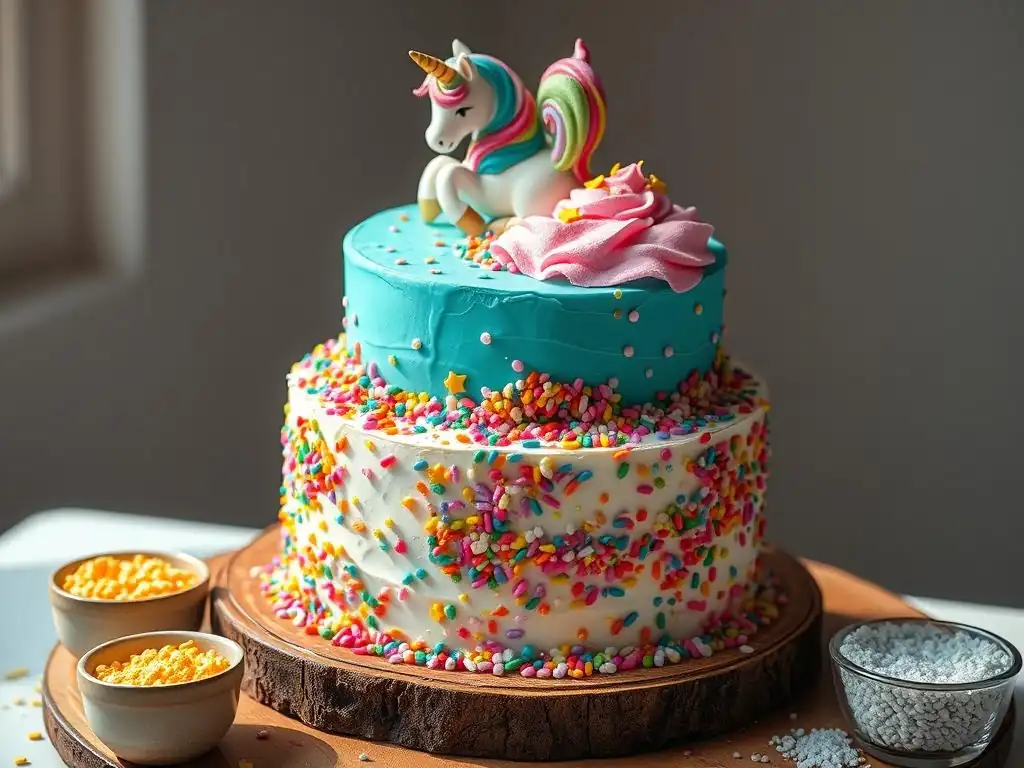
A rainbow sprinkle cake is a classic choice for birthdays and instantly brings a sense of fun and celebration. This typically involves covering the entire cake in a vibrant mix of rainbow jimmies or nonpareils. The effect is simple, cheerful, and appealing to all ages. It's the quintessential easy sprinkle birthday cake.
To make a rainbow sprinkle cake, simply prepare your cake with a smooth layer of white or light-colored frosting (like vanilla buttercream). Then, apply a generous amount of rainbow sprinkles to the top and sides using the all-over coating technique described earlier. Ensure you have enough sprinkles to get dense coverage. You can even add rainbow sprinkles to the cake batter before baking for a fun surprise inside! A standard 2-layer 8-inch cake will likely use 1.5 to 2 cups of rainbow jimmies for full coverage.
Chocolate Sprinkle Cake: A Decadent Delight
For chocolate lovers, a chocolate sprinkle cake offers a rich and indulgent twist on the classic sprinkle design. This can involve using chocolate sprinkles (which are like jimmies but chocolate flavored and colored) or using colorful sprinkles on a chocolate-frosted cake. The combination of deep chocolate and bright sprinkles is visually striking and delicious.
An easy sprinkle birthday cake with a chocolate theme can be achieved by frosting a chocolate cake with chocolate buttercream and then covering it entirely in chocolate jimmies. For a pop of color, use rainbow jimmies or nonpareils on the chocolate frosting – the contrast is beautiful. You could also do a chocolate drip down the sides of a vanilla cake and then add sprinkles around the base or on top. A 9x13 sheet cake frosted with chocolate buttercream might require 2-3 cups of chocolate or rainbow jimmies for full coverage, depending on desired density.
Vanilla Sprinkle Cake: Simple and Elegant
Sometimes, the simplest designs are the most elegant. A vanilla sprinkle cake, typically a vanilla cake frosted with white or pale-colored buttercream and adorned with sprinkles, offers a clean and sophisticated look. This allows the texture and color of the sprinkles to really stand out against the smooth, light backdrop.
An easy sprinkle birthday cake based on vanilla can be as simple as a white cake with vanilla buttercream covered in pearlized white nonpareils for a subtle shimmer, or using gold or silver sugar pearls for a touch of glamour. Alternatively, use a single color of jimmies (like pink, blue, or yellow) for a monochrome effect that is both simple and stylish. A 6-inch round cake frosted with vanilla buttercream could be decorated with a simple border of 1/2 cup of nonpareils for an understated yet festive look.
Construction Themed Sprinkle Cake
Sprinkles are perfect for themed cakes, and a construction theme is a fun and easy sprinkle birthday cake idea. You can use specific colors and types of sprinkles to represent elements found on a construction site. This theme is particularly popular for children's birthdays.
To create a construction themed sprinkle cake, frost the cake with brown or grey frosting to represent dirt or pavement. Then, use black or grey nonpareils or jimmies for asphalt. Yellow or orange jimmies can represent caution cones or safety barriers. Crushed chocolate cookies or graham crackers can stand in for dirt, and strategically placed yellow or orange sprinkles can add pops of color like construction vehicles or signs. For example, covering the top of a rectangular cake with crushed cookies and then adding a "road" made of black jimmies down the center is a simple yet effective design.
Troubleshooting Common Sprinkle Decorating Issues
Uneven Sprinkle Distribution: Causes and Solutions
Achieving perfectly even sprinkle distribution can be tricky, especially when covering the sides of a cake. Common causes of unevenness include not using enough sprinkles, applying them too gently, or having frosting that is too firm in some areas. This can result in patchy spots on your easy sprinkle birthday cake.
To solve uneven distribution, assess the issue. If there are sparse areas, gently press more sprinkles onto those specific spots using your fingers or a small spoon. If the frosting is too firm, you might need to lightly dampen the area or apply a tiny bit of fresh frosting before adding more sprinkles. Ensure you're using a generous amount of sprinkles and pressing them firmly (but gently enough not to damage the frosting) into the cake sides. Working over a tray allows you to easily collect and reapply fallen sprinkles.
Sprinkles Bleeding Color: Prevention Techniques
Color bleeding occurs when the dyes in sprinkles dissolve into the moisture of the frosting, causing streaks or discoloration. This is more common with older sprinkles, certain bright colors (especially red, blue, and black), and on frostings with high moisture content (like whipped cream or some cream cheese frostings). Bleeding can ruin the look of an otherwise perfect easy sprinkle birthday cake.
To prevent color bleeding, use fresh, high-quality sprinkles whenever possible. Some brands use more stable dyes. Use a frosting that crusts well, like American buttercream, as the dry surface is less likely to absorb color. Apply sprinkles closer to the time of serving, especially if you're concerned about humidity or using prone-to-bleed colors. Storing the cake in a cool, dry environment (like the refrigerator) can also help minimize bleeding. Avoid applying sprinkles to very wet or humid frosting surfaces.
Sprinkles Not Sticking: Improving Adhesion
If sprinkles aren't sticking to your cake, the most likely culprit is frosting that is too firm or has crusted too much. Sprinkles need a slightly soft, sticky surface to adhere properly. A cake with frosting that has been chilled for too long before decorating will present this problem.
To improve adhesion, make sure your frosting is freshly applied or has only set for a short period (5-10 minutes for a crusting buttercream). If the frosting is too firm, gently warm it slightly with your hands or a warm offset spatula before applying sprinkles. For sides, firmly but gently press the sprinkles into the frosting.
Don't just drop them onto the surface; the pressing action helps embed them in the frosting. If all else fails, you can apply a very thin "glue" layer of fresh frosting or corn syrup brushed onto the area just before adding sprinkles, though this can make a mess on your easy sprinkle birthday cake.
Storing Your Sprinkle-Decorated Birthday Cake
Maintaining Freshness and Appearance
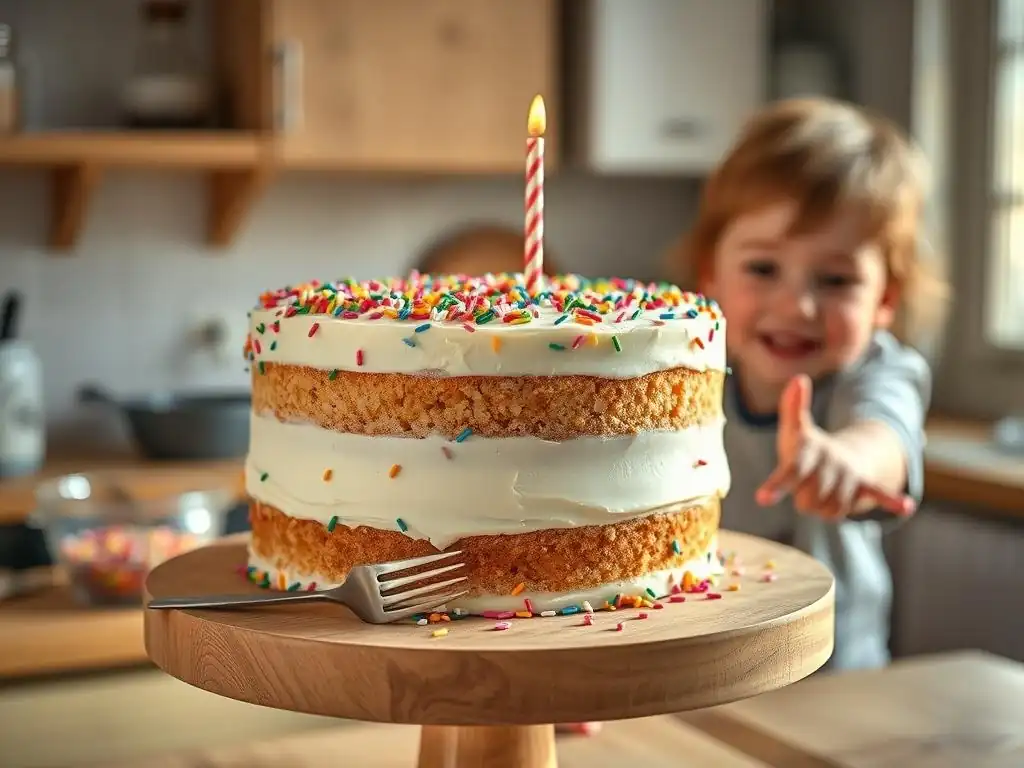
Proper storage is essential to keep your sprinkle-decorated birthday cake looking its best and staying fresh. The primary concerns are preventing the cake from drying out, protecting the frosting and sprinkles from damage, and minimizing the risk of sprinkle color bleeding.
Store the cake in an airtight container or a cake carrier at room temperature if it's a stable frosting like buttercream and will be eaten within 2-3 days. If the frosting or filling requires refrigeration (like cream cheese frosting, fresh fruit fillings, or whipped cream), store the cake in the refrigerator. Ensure the container is large enough that it doesn't touch the sprinkle decorations. If you don't have a large container, you can loosely cover the cake with plastic wrap, using toothpicks inserted into the top to hold the wrap away from the surface decorations.
Preventing Sprinkles from Melting or Fading
Sprinkles, especially sugar pearls and some nonpareils, can be sensitive to moisture and humidity, which can cause them to soften, lose their shape, or even melt slightly. Brightly colored sprinkles are also susceptible to fading if exposed to direct light for extended periods. Protecting your easy sprinkle birthday cake from these elements is key.
If storing the cake in the refrigerator, condensation can be an issue. Place the cake in an airtight container to minimize moisture exposure. Some bakers place a paper towel inside the container to absorb excess moisture. Avoid placing the cake in direct sunlight or under bright lights if it will be on display for a while before serving. If you've used sprinkles prone to melting or bleeding, consider adding them closer to serving time rather than hours or a day in advance. This is particularly important for sprinkles on frostings that tend to weep moisture.
Conclusion: Celebrate with Sprinkle-Covered Perfection
Easy Sprinkle Cake: The Perfect Last-Minute Decoration
As we've explored, decorating a birthday cake with sprinkles is truly one of the easiest and most effective ways to add instant festive flair. Whether you opt for a full sprinkle coating, simple borders, or creative patterns, sprinkles offer a quick path to a beautiful and celebratory dessert. They require minimal skill, are readily available, and come in an endless variety of colors and shapes to suit any theme or preference. For those moments when you need a stunning cake without spending hours on intricate decorations, the easy sprinkle birthday cake is your perfect solution.
From classic rainbow jimmies to elegant sugar pearls, each type of sprinkle brings its own unique texture and visual appeal. Mastering just a few basic application techniques, like the all-over coating or creating simple borders, is enough to transform a plain cake into a showstopper. And with a little creativity, you can use sprinkles to create personalized designs that make the birthday cake truly special. Don't let decorating stress you out; embrace the simplicity and joy that sprinkles bring!
BakeWithEase: Your Partner in Delicious Birthday Cakes
At BakeWithEase, our mission is to empower you to create delicious and beautiful baked goods with confidence and ease. We hope this guide has shown you just how simple and fun decorating an easy sprinkle birthday cake can be. We believe that everyone can bake and decorate, and you don't need to be a professional to create something wonderful for the people you care about.
Whether you're a complete beginner or looking for quick ways to enhance your existing baking skills, BakeWithEase is here to provide you with the tips, techniques, and inspiration you need. From mastering basic cake recipes to adding those final festive touches with simple decorations like sprinkles, we're with you every step of the way. So go ahead, grab your sprinkles, bake that cake, and celebrate with sprinkle-covered perfection made with ease!
Frequently Asked Questions
What are some easy ways to decorate a birthday cake using sprinkles?
There are many ways! You can create a simple sprinkle border, completely cover the top of the cake, or use stencils for sprinkle designs. These methods are all quick and effective.
What type of sprinkles work best for birthday cake decorating?
While any sprinkles can work, jimmies (the long, thin sprinkles) and nonpareils (the tiny round ones) are popular choices. Consider using a mix for more visual interest and varying textures.
Where can I find everyday sprinkles?
Sprinkles are readily available at most grocery stores in the baking aisle. You can also find a wider variety and unique colors at specialty baking shops or online retailers.
How do I prevent sprinkles from falling off the cake?
Applying sprinkles to freshly frosted cake while the frosting is still slightly tacky will help them adhere better. You can also gently press the sprinkles into the frosting for a more secure hold.
Can I use sprinkles to decorate a cake if I'm short on time?
Absolutely! Sprinkles are perfect for last-minute decorations. A simple sprinkle border or a generous scattering on top can transform a plain cake into a festive birthday treat in minutes.
Final Reflection: The Joy of Simple Sprinkle Celebrations
The ease and accessibility of decorating a birthday cake with sprinkles transcends mere aesthetics; it's about creating joyful, personalized celebrations that are within everyone's reach. This article explored the surprisingly vast world of quick and easy sprinkle cake decorating, proving that even with limited time and resources, a truly special cake is possible. The beauty lies not in complexity, but in the simple act of adding a burst of color and personality to a classic treat.
The enduring appeal of sprinkles speaks volumes about our desire for simple pleasures and personalized touches. They represent a playful, nostalgic element that connects generations, reminding us of childhood birthday parties and the pure joy of a sweet treat. A cake is a celebration of life, a symbol of joy and togetherness.
This simple truth is amplified tenfold when we personalize it with a sprinkle of our own creativity, making each cake unique and meaningful.
So, the next time you're faced with a birthday celebration, remember the power of a simple sprinkle. Don't be intimidated by elaborate designs; embrace the ease and joy of creating a beautiful cake with readily available ingredients. Let the vibrant colors and playful textures of sprinkles be your guide, and create a cake that reflects the unique personality of the birthday celebrant – a cake that speaks of love, laughter, and the simple sweetness of life.
Unleash Your Inner Cake Artist!
Thanks for joining us on this sprinkle-filled journey! We hope you've gained some fun and easy ideas to elevate your next birthday cake. Ready to transform your baking?
- Create your masterpiece! Grab those sprinkles and get baking – we know you've got this! Experiment with the techniques we shared and let your creativity shine.
- Share your sprinkle-licious creations with us on social media using #BakeWithEaseBirthday! We can't wait to see your cake artistry.
- Dive deeper into our sprinkle collection – discover even more innovative ways to decorate with our extensive guide (coming soon! ).
What unique sprinkle design will you try first?