
Your Essential Guide to CrystalFree Sugar Confections, Made Easy

Welcome to BakeWithEase, your companion on the journey to baking brilliance! Ever wondered how to achieve that flawlessly smooth, melt-in-your-mouth texture in your favorite treats? Dive into our latest deep dive into baking science and unlock the secrets to CrystalFree sugar confection recipes. Discover the techniques and ingredients that prevent crystallization, ensuring your homemade candies and desserts are always a sweet success. Intrigued? Keep reading to transform your baking and create truly unforgettable delights!
- The Science and Art of Clear Hard Candy
- Introduction to Clear Hard Candy
- Understanding the Science Behind Clear Hard Candy
- Essential Techniques for Clear Hard Candy
- Clear Hard Candy Recipes
- Troubleshooting Issues in Hard Candy
- Advanced Techniques for Hard Candy
- Equipment and Tools for Hard Candy
- Mastering Clear Hard Candy: Tips
- Conclusion: Embrace the Art of Clear Hard Candy
-
Frequently Asked Questions
- What exactly are CrystalFree sugar confections, and why are they desirable?
- What are some common mistakes that lead to sugar crystallization when making confections?
- What key techniques can I use to prevent sugar crystallization in my recipes?
- Are CrystalFree sugar confection recipes more difficult than traditional recipes?
- Can I adapt my existing confection recipes to be CrystalFree?
- Final Reflection: The Sweetness of Simplicity, Crystal-Free
- Unlock Your Inner Confectioner: Crystal-Clear Candies Await!
The Science and Art of Clear Hard Candy
Introduction to Clear Hard Candy
What is Clear Hard Candy? A Scientific Overview
Clear hard candy is a type of sugar confection made primarily from sugar and water, cooked to a very high temperature and then cooled into a solid, often transparent form. At its core, it's a supercooled amorphous solid – meaning its molecules are arranged randomly rather than in a structured crystalline lattice. The magic happens when the sugar syrup is heated far beyond the boiling point of water, concentrating the sugar molecules and reaching a state where, upon cooling, they solidify without forming crystals. This is the foundation for creating smooth, glass-like sugar confections.
Achieving this non-crystalline state is crucial for the characteristic clarity and texture of hard candy. The process involves dissolving granulated sugar in water, bringing it to a boil, and then carefully controlling the temperature as the water evaporates and the sugar concentration increases. As the syrup reaches temperatures typically between 300°F and 310°F (150°C-154°C), known as the "hard crack" stage, the sugar content is extremely high (often over 98%). Cooling this concentrated syrup rapidly prevents the sugar molecules from rearranging into crystals, resulting in the desired hard, brittle, and often crystal-free structure.
Why Clarity Matters in Hard Candy
Clarity is a hallmark of high-quality hard candy, contributing significantly to its visual appeal and perceived quality. A clear, glass-like appearance allows for vibrant colors and suspended elements, like edible glitter or layered effects, to truly shine. For many classic sugar confections, from simple lollipops to intricate sugar art, transparency is not just a bonus but an essential characteristic that elevates the final product from merely sweet to visually stunning. It suggests purity and proper execution of the candy-making process.
Beyond aesthetics, clarity often indicates a smooth texture free from gritty sugar crystals. While a confection might technically be "hard candy," if it's cloudy or opaque due to crystallization, it will likely have an unpleasant, grainy mouthfeel. Mastering the techniques to produce crystal-free sugar confection recipes ensures a smooth, enjoyable eating experience. This is particularly important for simple, unflavored clear hard candies where texture and visual appeal are paramount.
Common Hard Candy Problems: Avoiding Crystallization and Bubbles
Two of the most frustrating issues encountered when making hard candy are crystallization and the formation of air bubbles. Crystallization occurs when sugar molecules, during the cooling process, start to link together and form a structured solid, turning the clear syrup cloudy and gritty. This can happen if there are undissolved sugar crystals present at the start, if the syrup is stirred incorrectly at high temperatures, or if impurities are introduced. Preventing this requires careful technique and understanding of sugar behavior.
Air bubbles, on the other hand, can mar the clarity and smooth appearance of the finished candy. These often result from stirring the syrup vigorously at high temperatures or pouring the hot syrup too quickly or from too high a distance into molds. While some small bubbles might be unavoidable, excessive bubbling detracts from the desired crystal-free, glass-like look. Learning how to handle the hot syrup gently and pour it correctly is key to minimizing bubbles and achieving truly clear sugar confections.
Understanding the Science Behind Clear Hard Candy
The Role of Sugar and Water in Hard Candy
In the creation of clear hard candy, granulated sugar (sucrose) and water are the fundamental building blocks. Initially, sugar is dissolved in water, forming a syrup. This step is crucial, as all sugar crystals must be completely dissolved before the mixture is heated to high temperatures; any undissolved crystals can act as "seeds" for unwanted crystallization later. Water serves as the solvent, allowing the sugar to become a liquid solution that can be cooked and concentrated.
As the sugar-water mixture is heated, the water begins to evaporate. This process concentrates the sugar solution. The higher the temperature, the more water evaporates, and the higher the concentration of sugar becomes relative to the water. This concentration process is essential for reaching the "hard crack" stage, where the sugar content is so high that the syrup will solidify into a brittle solid upon cooling, rather than remaining a viscous liquid or forming large sugar crystals. The precise balance and interaction between sugar and water, dictated by temperature, determine the final texture and clarity of the candy.
How Temperature Affects Sugar Concentration
Temperature is the most critical factor in hard candy making because it directly controls the concentration of sugar in the syrup. As heat is applied, water turns to steam and leaves the mixture, steadily increasing the proportion of sugar. Different temperature ranges correspond to different candy stages, from thread (around 230-235°F / 110-113°C) to firm ball (around 245-250°F / 118-121°C), and finally to the hard crack stage (300-310°F / 150-154°C) necessary for hard candy.
Reaching the hard crack stage means the syrup contains minimal water, typically less than 2%. At this high concentration and temperature, the sugar molecules are mobile but highly concentrated. When the syrup is removed from the heat and cooled, this high sugar concentration prevents the molecules from easily finding each other and arranging into a crystalline structure, especially if techniques to inhibit crystallization are used.
Cooking even a few degrees too low will result in a chewy or soft candy, while cooking too high can burn the sugar, resulting in a bitter taste and dark color, losing the desired clarity. Precise temperature control is non-negotiable for successful crystalfree sugar confection recipes.
Inhibiting Crystallization: Key Techniques for Smooth Hard Candy
Preventing sugar crystallization is paramount for achieving clear, smooth hard candy. One primary technique is to ensure all sugar is dissolved at the beginning of the process. This often involves gently heating the sugar and water while stirring only until the sugar is dissolved, and then stopping agitation. Washing down the sides of the saucepan with a wet pastry brush during the initial heating phase is also crucial to dissolve any sugar crystals splashed onto the sides, preventing them from seeding the syrup.
Another key method involves adding an interfering agent, typically an acid or an invert sugar like corn syrup or glucose syrup. These substances break down some of the sucrose molecules into their components, glucose and fructose. These smaller, differently shaped molecules get in the way of the sucrose molecules trying to link up and form crystals. Adding just a small amount, perhaps 1/4 cup of light corn syrup per 2 cups of sugar, is highly effective in inhibiting crystallization and promoting a smooth, clear texture in your crystal-free sugar confections.
Essential Techniques for Clear Hard Candy
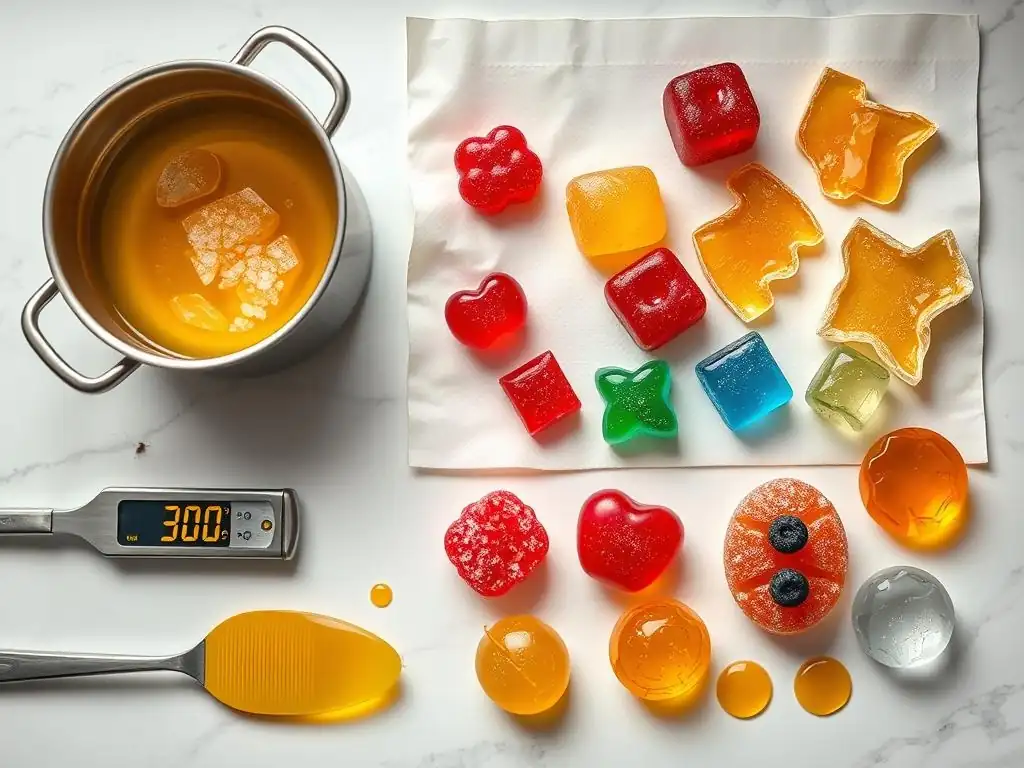
Using Invert Sugar or Corn Syrup to Prevent Crystallization
Adding an interfering agent like light corn syrup is one of the most reliable ways to prevent crystallization in hard candy. Corn syrup is primarily composed of glucose, dextrose, and maltose – sugars that are less likely to crystallize than sucrose. When added to the sugar syrup, it helps break down some of the sucrose into glucose and fructose, creating a mix of different sugar molecules that disrupt the formation of a uniform crystal lattice as the candy cools.
A common ratio used in crystalfree sugar confection recipes is adding about one part corn syrup for every four to five parts of granulated sugar by weight or volume (e.g., 1/2 cup corn syrup for 2 cups sugar). This addition doesn't significantly alter the taste, especially in flavored candies, but it dramatically increases the syrup's resistance to crystallization. This makes the process more forgiving and helps ensure a consistently smooth, clear finish.
Controlling Temperature for Optimal Clarity
Accurate temperature control is non-negotiable for clear hard candy. Using a reliable candy thermometer is essential; don't guess! The target temperature range for hard crack is typically 300°F to 310°F (150°C-154°C). Heating the syrup precisely to this range ensures that nearly all the water has evaporated and the sugar is in a state ready to solidify into an amorphous glass upon cooling.
Overheating the sugar can lead to scorching, resulting in a dark, bitter candy that is far from clear. Underheating, even by a few degrees, will result in a softer, possibly chewy candy that might also be prone to crystallization because there is still too much moisture present. Remove the syrup from the heat immediately once it reaches the desired temperature. Having everything ready – molds prepared, flavorings measured – before the syrup reaches temperature is crucial because the process moves very quickly at the end.
Avoiding Air Bubbles: Proper Stirring and Pouring
To minimize air bubbles and achieve that coveted crystal-free clarity, handle the hot sugar syrup gently. Initially, stir the sugar and water only until the sugar is completely dissolved. Once the syrup begins to boil, stop stirring. Agitating the syrup at high temperatures incorporates air, which will remain trapped as bubbles when the candy cools. If you need to distribute heat, you can gently swirl the pan, but avoid stirring with a spoon or spatula during the boiling phase.
When the syrup reaches the hard crack stage and is removed from the heat, add flavorings and colorings quickly and stir them in gently with minimal strokes. Then, pour the syrup carefully and steadily into your prepared molds or onto a silicone mat. Pouring slowly and from a low height helps prevent further air incorporation. If pouring into multiple small molds, pour each cavity steadily rather than lifting the pouring vessel high between molds. Letting the syrup sit for a minute or two after removing from heat before pouring can also allow some surface bubbles to dissipate.
Clear Hard Candy Recipes
Recipe 1: Classic Clear Hard Candy
This basic recipe is the foundation for many crystal-free sugar confection recipes. It highlights the core techniques needed for clarity and smoothness.
Ingredients for Classic Clear Hard Candy
- 2 cups Granulated Sugar
- 2/3 cup Light Corn Syrup
- 3/4 cup Water
- Optional: 1 tsp Flavoring extract (e.g., vanilla, peppermint, cherry)
- Optional: 1-2 drops Gel food coloring
Step-by-Step Instructions for Hard Candy Success
- Grease your candy molds or prepare a baking sheet with a silicone mat or parchment paper. Have everything ready before you start heating the sugar.
- In a heavy-bottomed saucepan, combine the sugar, corn syrup, and water. Stir over medium heat only until the sugar is completely dissolved. Use a wet pastry brush to wash down any sugar crystals clinging to the sides of the pan.
- Insert a candy thermometer into the syrup, ensuring the tip doesn't touch the bottom of the pan. Increase heat to medium-high and bring the mixture to a boil. Do not stir the syrup while it boils.
- Boil the syrup until it reaches 300-310°F (150-154°C), the hard crack stage. This will take approximately 15-25 minutes, depending on your stovetop and pan.
- Remove the pan from the heat immediately. If using, quickly and gently stir in the flavoring extract and food coloring. Stir only enough to combine.
- Carefully pour the hot syrup into your prepared molds or onto the silicone mat to cool. Avoid scraping the pan.
- Allow the candy to cool completely and harden (about 30-60 minutes) before breaking into pieces or removing from molds.
Tips and Tricks for Perfect Clear Hard Candy
Humidity can be the enemy of clear hard candy. Try to make candy on a dry day if possible, as moisture in the air can cause the finished candy to become sticky. Ensure your equipment is scrupulously clean, as even tiny food particles can initiate crystallization. Using a heavy-bottomed pan helps distribute heat evenly, reducing the risk of scorching parts of the syrup.
When adding flavoring and color, do so after removing the syrup from the heat. High heat can degrade some flavor compounds. Work quickly, as the syrup cools and thickens rapidly once off the heat. If the syrup starts to set in the pan before you've finished pouring, you can very gently warm it over low heat for just a moment, but be cautious not to overheat or stir vigorously. For truly crystal-free results, always double-check that all sugar is dissolved before the boil.
Recipe 2: Flavored Clear Hard Candy
Adding flavor and color turns simple sugar into delightful crystal-free sugar confection recipes. The process is similar to the classic recipe, with key steps for incorporating flavor.
Ingredients for Flavored Clear Hard Candy
- 2 cups Granulated Sugar
- 2/3 cup Light Corn Syrup
- 3/4 cup Water
- 1 to 1 1/2 teaspoons Candy Flavoring Oil (e.g., LorAnn Oils) or 1-2 teaspoons Extract (use extracts cautiously, as water content can affect set)
- Gel or Liquid Food Coloring (optional, use sparingly for clarity)
Flavoring Process: Achieving Vibrant Taste
The best time to add flavorings is after the sugar syrup has reached the hard crack stage and been removed from the heat. This prevents the delicate flavor compounds, especially in extracts or oils, from evaporating or breaking down under high heat. Candy flavoring oils are highly concentrated and work particularly well as they are oil-based and don't introduce extra water into the critical hard crack stage syrup. Start with the lower end of the recommended amount and add more to taste if needed, stirring gently.
For vibrant color without affecting clarity, use gel or liquid food coloring sparingly. Add just a drop or two after removing from heat, along with the flavor. Stir gently and quickly to distribute. Over-stirring at this stage can introduce unwanted air bubbles. The color will deepen slightly as the candy cools. Adding flavor and color quickly is important because the syrup will start to set within minutes of being removed from the heat.
Troubleshooting Common Flavoring Problems
One common issue is weak flavor. This can happen if you add the flavoring too early, if the flavoring isn't concentrated enough (like some standard grocery store extracts which have high alcohol/water content), or if you didn't add quite enough. Using professional-grade candy flavoring oils usually yields the most intense and true-to-life flavors. If using extracts, be aware that the small amount of water/alcohol might slightly affect the final set or stickiness, though typically not enough to ruin a small batch.
Another problem can be uneven color or flavor distribution, usually due to not stirring enough after adding them. However, over-stirring leads to bubbles. The key is a quick, minimal, gentle stir immediately after removing from heat. If you plan to make multiple colors/flavors from one batch, divide the hot syrup into smaller, heat-safe containers before adding flavor and color to each portion, then stir each gently. This allows more control over the mixing process for each specific flavor/color combination.
Recipe 3: Layered Hard Candy
Creating layered hard candy involves making two or more batches of different colors/flavors and pouring them sequentially before the previous layer fully hardens. This technique requires speed and careful timing.
Ingredients and Equipment for Layered Hard Candy
You will need ingredients for at least two batches of the Classic Clear Hard Candy recipe (Recipe 1 or 2), with different colors and flavors. Essential equipment includes:
- Two heavy-bottomed saucepans
- Reliable candy thermometer for each pan (or one you can quickly clean and move)
- Prepared candy molds or a silicone mat with guides (like metal rulers) to define layers
- Measuring cups and spoons
- Heat-resistant spatulas or spoons for gentle stirring
- Oven mitts and heat-resistant surface for hot pans
Layering Technique: Achieving Distinct Layers
The key to distinct layers is pouring the second (and subsequent) layer just as the previous layer is setting but before it is completely hard. This allows the layers to adhere without mixing. Start by preparing and pouring your first layer according to the instructions in Recipe 1 or 2. While the first layer is cooling but still pliable (not fully brittle), begin cooking your second batch of a different color/flavor in a separate pan.
Once the second batch reaches the hard crack stage (300-310°F), remove it from the heat, add its specific flavor and color, stir gently, and immediately pour it carefully over the first layer. If using molds, pour slowly into each cavity on top of the first layer. If using a sheet pour, pour the second color alongside or over the first layer, potentially using guides to maintain straight lines. Work quickly, as both layers will continue to cool. Repeat for any additional layers. The layers will fuse as they cool completely together.
Creative Layered Hard Candy Variations
Beyond simple horizontal layers, you can get creative! Try diagonal layers by tilting your mold or baking sheet slightly while the first layer sets, then leveling it for the second. You can also create swirled layers by pouring two colors simultaneously or pouring one color and then drizzling another over the top before it sets, then using a toothpick or skewer to gently swirl. Another variation is pouring stripes side-by-side onto a silicone mat and then folding the mat slightly as it cools to create a marbled effect.
Consider complementary flavors and colors for your layers – perhaps cherry red and lime green, or blue raspberry and lemon yellow. You can also embed edible glitter or sprinkles between layers for added sparkle, sprinkling them onto a partially set layer before pouring the next. Mastering standard crystalfree sugar confection recipes opens up a world of artistic possibilities with layering.
Troubleshooting Issues in Hard Candy
Identifying Sugar Crystals: What to Look For
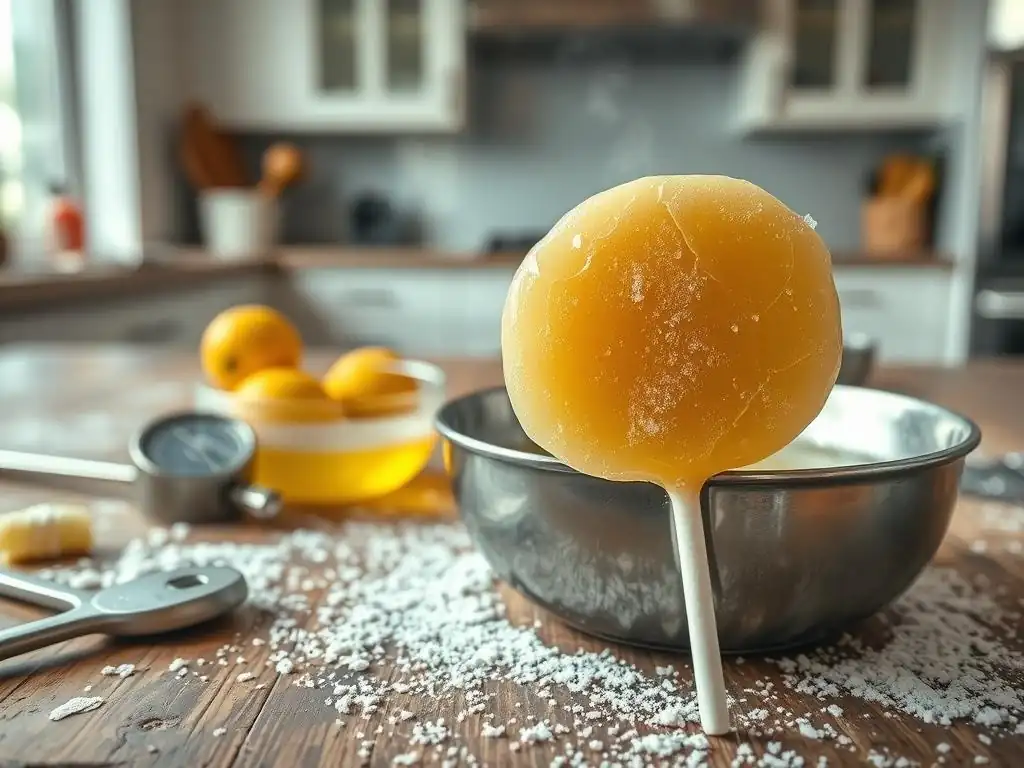
Sugar crystallization is the most common culprit behind cloudy, gritty hard candy. You can often identify it visually. Instead of a clear, glass-like appearance, the candy will look opaque, foggy, or milky. In severe cases, you might even see visible sugar granules or a rough, sandy texture on the surface or throughout the candy. If you break a piece, it won't snap cleanly like glass but might crumble slightly, revealing tiny crystalline structures.
The gritty texture is the tactile confirmation of crystallization. When you eat it, it won't be smooth but will feel like fine sand on your tongue. This happens because the sugar molecules have rearranged themselves from the desired amorphous state into structured crystals. Identifying this problem is the first step in troubleshooting and learning how to prevent it in future batches of your crystal-free sugar confection recipes.
Rescuing Crystallized Hard Candy: Solutions and Remedies
Unfortunately, once hard candy has fully set and crystallized, it's very difficult, if not impossible, to fully "rescue" it back to a perfectly clear, smooth state. The structure has already formed. However, you can sometimes melt it down and attempt to cook it again, but this often results in a slightly darker color and doesn't guarantee a crystal-free outcome unless you are meticulous with preventative steps the second time around.
A more practical "remedy" is to use the failed batch for something else. Crystallized hard candy can sometimes be crushed and used as a crunchy topping for ice cream or desserts, or dissolved in hot liquid to make a simple syrup (though the clarity won't be there). The best approach is prevention: focus on dissolving all sugar initially, washing down the sides of the pan, using an interfering agent like corn syrup, and avoiding stirring at high temperatures to ensure your next batch of crystalfree sugar confection recipes is a success.
Common Mistakes and How to Avoid Them
One frequent mistake is not dissolving all the sugar crystals at the beginning. Always heat gently and stir only until every last crystal is gone before the syrup boils. Washing down the sides of the pan with water is essential here. Another error is stirring the syrup after it starts boiling or reaches high temperatures; resist the urge to stir! Swirl the pan gently if needed.
Using an inaccurate thermometer is a major pitfall. A few degrees off can mean the difference between hard crack and soft ball. Calibrate your thermometer or use a reliable digital one. Not having everything ready before the syrup hits temperature is another common issue; the candy sets quickly, so molds, flavorings, and a safe pouring area must be prepped. Finally, making candy on a humid day significantly increases the risk of stickiness and potential crystallization later; choose a low-humidity day for best results with your clear sugar confections.
Advanced Techniques for Hard Candy
Working with Isomalt for Crystal-Clear Confections
Isomalt is a sugar substitute derived from beet sugar, and it is a favorite among professional confectioners for its ability to create exceptionally clear and stable hard candy and sugar art. Unlike sucrose, isomalt is non-crystallizing by nature, making it much easier to achieve a perfectly clear result without the need for corn syrup or acid. It also absorbs less moisture from the air, leading to finished candies that are less sticky in humid conditions.
Working with isomalt is similar to working with sugar, but it requires higher temperatures, typically reaching 320-340°F (160-171°C) for the hard crack stage. It melts into a very clear liquid and remains clear as it cools. However, isomalt is less sweet than sugar and can have a slight cooling effect in the mouth. It's also significantly more expensive than granulated sugar. Despite these differences, it's an excellent option for advanced candy makers seeking guaranteed crystal-clear sugar confections, especially for intricate pulled or blown sugar work.
Using Different Sugar Substitutes and Their Impact on Clarity
Beyond isomalt, other sugar substitutes like xylitol, erythritol, or maltitol can be used to make hard candy, but their behavior and impact on clarity vary. Many sugar alcohols tend to crystallize more readily than sucrose or isomalt, making it challenging to achieve a truly clear, amorphous solid. Recipes using these substitutes often require specific techniques, potentially higher levels of interfering agents (if compatible), or different cooking temperatures than traditional sugar.
For example, xylitol hard candy can be made, but it's highly prone to crystallization if not handled correctly. Erythritol is even more challenging to get into a non-crystalline state suitable for clear hard candy. Achieving crystal-free sugar confection recipes with these substitutes often requires significant experimentation and may not yield the same level of clarity or stability as sucrose-based candy made with corn syrup or candy made with isomalt. Always research specific recipes and techniques tailored to the substitute you are using.
Adding Ingredients That Can Affect Clarity
While flavorings and small amounts of coloring are common additions, certain ingredients can negatively impact the clarity of hard candy. Opaque ingredients like titanium dioxide (sometimes used for whitening) or powdered sugars/starches will obviously make the candy cloudy. Ingredients with significant water content, if added at the wrong stage, can lower the overall sugar concentration and increase the risk of crystallization or result in a softer candy.
Fats and oils, other than small amounts of flavoring oils, can also interfere with the sugar structure and clarity. For example, adding butter would turn the candy into a toffee or caramel, which is not intended to be clear.
Even certain liquid extracts with high water or alcohol content, if used in large quantities, can cause issues. For maximum clarity in your crystalfree sugar confection recipes, add only necessary flavorings and colors gently and quickly after the syrup is off the heat, and avoid adding any fatty or opaque ingredients unless the recipe specifically calls for them for a different type of confection.
Equipment and Tools for Hard Candy
Essential Pans and Utensils
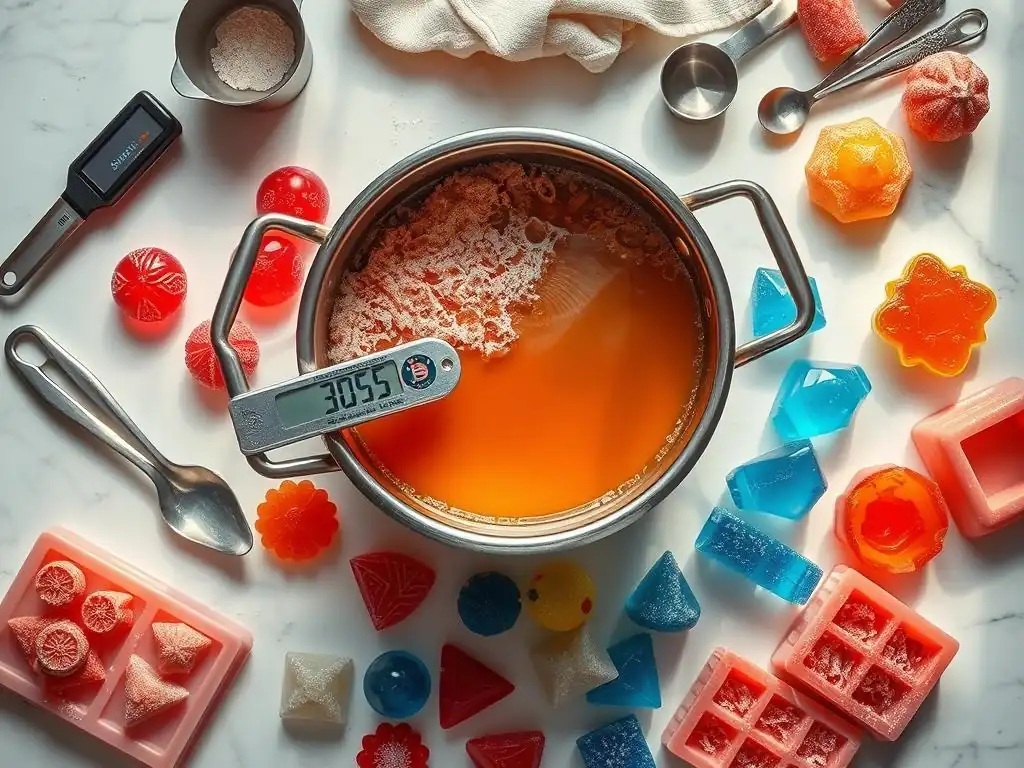
A heavy-bottomed saucepan is crucial for making hard candy. The heavy base distributes heat evenly, preventing hot spots that can scorch the sugar. Stainless steel or copper pans are excellent choices. Avoid thin-bottomed pans, as they increase the risk of burning. The pan should also be large enough to accommodate the bubbling syrup, ideally a 2-quart or 3-quart size for standard recipes, to prevent boil-overs.
Other essential utensils include heat-resistant spatulas or spoons for stirring before boiling and for gently incorporating flavorings after cooking. A wet pastry brush is indispensable for washing down sugar crystals from the sides of the pan during the initial heating phase. You'll also need heat-resistant measuring cups and spoons for accurately measuring ingredients and flavorings. Having everything clean and ready before you start is key to success with crystalfree sugar confection recipes.
Thermometers for Precise Temperature Control
A reliable candy thermometer is arguably the most important tool for successful hard candy making. Candy making relies on precise temperature points, and guessing can lead to failure. There are several types:
- Clip-on Glass Thermometers: These are common and clip to the side of the pan, allowing you to monitor the temperature continuously. Ensure the tip is submerged in the syrup but not touching the bottom.
- Digital Probe Thermometers: These offer fast and accurate readings. Some have alarms that can be set to your target temperature.
- Infrared Thermometers: These measure surface temperature and are less ideal for syrup unless specifically designed for liquids, as they can be affected by steam.
Whichever type you use, ensure it is calibrated periodically by checking its reading in boiling water (should be 212°F / 100°C at sea level, adjusting for altitude). An accurate thermometer is your best friend in achieving the correct hard crack stage for clear sugar confections.
Molds or Silicone Mats for Shaping Hard Candy
Once your sugar syrup reaches the hard crack stage, it needs to be shaped quickly as it cools. You have a few options:
- Silicone Candy Molds: These come in various shapes and sizes and are excellent because the hardened candy is easy to pop out. No greasing is typically required.
- Metal Candy Molds: These may require light greasing with a neutral oil or non-stick spray.
- Silicone Baking Mats: Pouring the hot syrup onto a silicone mat spread on a baking sheet allows you to break the cooled candy into irregular shards, a classic hard candy form.
- Parchment Paper: Similar to a silicone mat, parchment paper on a baking sheet also works, though candy might stick slightly more than to silicone.
Have your chosen molds or mat ready and positioned on a heat-resistant surface before you start cooking the sugar. Speed and preparation are key when working with hot, rapidly setting candy syrup for your crystalfree sugar confection recipes.
Mastering Clear Hard Candy: Tips
Achieving a Smooth and Glossy Finish
A smooth, glossy surface is the final touch on perfectly clear hard candy. This is primarily achieved by preventing crystallization and minimizing bubbles, as discussed earlier. Ensuring all sugar is dissolved, using an interfering agent like corn syrup, avoiding stirring at high temperatures, and pouring gently are the fundamental steps.
Additionally, some candy makers lightly oil their molds or silicone mats, which can contribute to a smoother release and a slightly glossier surface, though this is often debated and depends on the specific mold material. Allowing the candy to cool undisturbed and completely before handling also helps maintain its smooth, shiny surface. Breaking or removing the candy before it's fully set can result in dull or rough edges.
Storing Your Hard Candy Properly
Proper storage is essential to keep your crystal-free hard candy clear, hard, and non-sticky. Hard candy is hygroscopic, meaning it readily absorbs moisture from the air. Humidity will cause the surface to become sticky and eventually lead to cloudiness and a loss of texture.
Store cooled and hardened candy in an airtight container at room temperature. Adding a desiccant packet (like the silica gel packets found in packaging) to the container can help absorb excess moisture. Avoid refrigerating or freezing hard candy, as condensation when it returns to room temperature will cause stickiness. If you're making lollipops or individually wrapped pieces, wrapping them tightly in cellophane or heat-sealable candy wrappers as soon as they are cool is the best defense against humidity.
Experimenting with Flavors and Colors
Once you've mastered the basic crystalfree sugar confection recipes, the fun really begins with experimenting with flavors and colors! Use high-quality candy flavoring oils for intense and accurate tastes. Popular options include fruit flavors (cherry, raspberry, lemon, lime), mints (peppermint, spearmint), and more unique options like root beer, cotton candy, or even spicy flavors like cinnamon or chili.
Pair flavors with complementary colors using gel food coloring. Remember to use color sparingly for maximum clarity. You can also leave the candy uncolored for a pure, glass-like effect. Consider adding edible glitter or sprinkles after pouring but before the candy fully sets for visual appeal. Always add flavor and color after removing the syrup from the heat to preserve their integrity and avoid incorporating too much air.
Conclusion: Embrace the Art of Clear Hard Candy
The Benefits of Mastering Hard Candy
Mastering the art and science of clear hard candy offers numerous rewards. You gain the ability to create beautiful, professional-looking sugar confections right in your own kitchen. The satisfaction of achieving that perfect, crystal-free clarity and smooth texture is immense. Furthermore, hard candy provides a versatile base for endless flavor and color combinations, allowing for great creativity.
Beyond personal enjoyment, homemade hard candy makes wonderful gifts and can even be a starting point for a small home-based business. Understanding the principles behind preventing crystallization and controlling temperature gives you confidence not just with hard candy but with other sugar work as well. It's a fundamental skill in the broader world of sugar confections.
Continuing Your Candy Making Journey
Making clear hard candy is a fantastic step into the deeper world of sugar work. From here, you can explore pulled sugar techniques, blown sugar art, sugar sculpting, or delve into other types of candies like caramels, toffees, fudges, and nougats. Each type of candy involves different sugar stages and techniques, building upon the basic understanding of sugar behavior you've gained.
Keep experimenting with different crystalfree sugar confection recipes, flavors, colors, and molds. Don't be discouraged by initial failures with crystallization or bubbles; they are part of the learning process. With practice, patience, and attention to detail, you'll consistently create stunning, clear, and delicious hard candies. Happy candy making!
Frequently Asked Questions
What exactly are CrystalFree sugar confections, and why are they desirable?
CrystalFree sugar confections are candies and sweets that have a smooth, non-grainy texture. They are desirable because they avoid the undesirable gritty mouthfeel often associated with crystallization, resulting in a superior eating experience.
What are some common mistakes that lead to sugar crystallization when making confections?
Common mistakes include insufficient stirring, the presence of sugar dust or impurities, and premature cooling. These factors can provide nucleation sites for crystal formation, leading to a grainy result.
What key techniques can I use to prevent sugar crystallization in my recipes?
To prevent crystallization, ensure all sugar is dissolved completely, add interfering agents like corn syrup or cream of tartar, and avoid agitating the mixture once it begins to cool. Control of temperature is also absolutely vital.
Are CrystalFree sugar confection recipes more difficult than traditional recipes?
CrystalFree recipes aren't necessarily more difficult, but they require greater precision and attention to detail. Following the recipe closely and understanding the science of sugar crystallization is crucial.
Can I adapt my existing confection recipes to be CrystalFree?
Yes, you can often adapt existing recipes by incorporating interfering agents and carefully controlling the cooking process. Refer to the BakeWithEase guide for specific adaptation techniques and ingredient ratios.
Final Reflection: The Sweetness of Simplicity, Crystal-Free
The pursuit of crystal-free sugar confections isn't just a culinary trend; it's a gateway to unlocking a world of texture and flavor previously unseen in traditional candy making. This guide has explored the science behind crystal formation and provided practical, accessible recipes to help you master this art. The results? Smooth, creamy, and intensely flavorful treats that redefine what's possible with sugar.
The journey into crystal-free confectionery has been a deeply rewarding one, revealing the surprising elegance found in simplicity. It's a testament to the power of understanding fundamental principles – understanding how temperature, ingredients, and technique intertwine to create the perfect confection. This isn't just about avoiding sugar crystals; it's about achieving a level of control and precision that elevates the entire candy-making experience. The best things in life are simple,
a common adage rings especially true here, highlighting the beauty of achieving complex results through mindful process.
Now, it's your turn. Don't be intimidated by the seemingly complex world of crystal-free candy making. Experiment with the recipes provided, adapt them to your own tastes, and most importantly, enjoy the process of creation. The satisfaction of crafting a perfectly smooth, delicious confection, free from the frustration of unwanted crystals, is a reward in itself. Embrace the challenge, and discover the sweet simplicity waiting for you in the world of crystal-free sugar confections.
Unlock Your Inner Confectioner: Crystal-Clear Candies Await!
Thanks for joining us on this delicious journey into the world of crystal-free sugar confections! We hope you've gained the confidence to create stunning, flawlessly smooth treats. Ready to put your newfound knowledge into action?
- Master your first crystal-free recipe: Choose your favorite from the article and dive in! Remember, practice makes perfect.
- Share your sweet creations: Tag us on social media and show off your candy-making skills! We'd love to see what you bake.
- Explore the advanced techniques: Consider experimenting with different sugars and flavors to discover your unique candy style.
What unexpected flavor combination will you create first? Let us know in the comments!