
Bake With Ease: Your GoTo Easy Scone Recipe


Welcome to BakeWithEase, your haven for stress-free baking! Ever dreamt of effortlessly whipping up golden, delicious scones? Unlock the secret to a perfect easy scone recipe for beginners right here. Discover simple techniques and step-by-step instructions that will have you baking like a pro in no time. Intrigued? Let's get started!
- Easy Scone Recipe for Beginners: Bake With Ease Guide
- Step-by-Step Guide to Making Easy Scones for Beginners
- Tips and Tricks to Master This Easy Scone Recipe for Beginners
- Serving and Storing Your Homemade Easy Scones
- Frequently Overlooked Benefits of Baking Easy Scones for Beginners
- Frequently Asked Questions
- Final Reflection: The Simple Joy of Baking, One Scone at a Time
- Unleash Your Inner Baker: Scone Success Awaits!
Easy Scone Recipe for Beginners: Bake With Ease Guide
Why This Easy Scone Recipe is Perfect for Beginner Bakers
Embarking on your baking journey can feel daunting, but starting with the right recipe makes all the difference. This easy scone recipe is specifically designed with the beginner baker in mind, stripping away complexity without sacrificing delicious results. Unlike some traditional methods that require advanced techniques like precisely rubbing in cold butter until it resembles breadcrumbs, this approach simplifies the process. It often involves fewer ingredients and more forgiving steps, ensuring that your first attempt is more likely to result in light, fluffy scones rather than dense, hockey puck-like disappointments.
The beauty of mastering an easy scone recipe early on is the quick win it provides. From mixing bowl to oven, the process is relatively fast, typically taking under 30-40 minutes from start to finish (excluding cooling). This rapid turnaround means you get to see and taste the fruits of your labor quickly, which is incredibly encouraging when you're just starting out. Success with this straightforward bake builds confidence, proving that you can create something wonderful from scratch and motivating you to tackle slightly more complex recipes down the line, solidifying your foundation in beginner baking.
Understanding Basic Scone Ingredients and Their Roles
Every successful scone relies on a handful of key ingredients, each playing a vital role in creating that perfect texture and rise. Flour provides the structure, giving the scone its shape. A leavening agent, typically baking powder (and sometimes baking soda when using buttermilk), is crucial for lift, causing the scones to rise in the oven and become light and airy. Without enough leavening, scones would be flat and heavy. The fat, usually butter, is essential for tenderness and flakiness; when cold butter melts during baking, it creates steam pockets that separate the layers of dough.
The liquid component, commonly milk, cream, or buttermilk, brings the dough together, hydrating the dry ingredients and activating the leavening. The type of liquid can also influence richness and tang. Sugar adds a touch of sweetness and aids in browning, while salt balances the flavors. Understanding these basic roles helps beginners appreciate why specific proportions are used and why ingredients like cold butter are often emphasized – it's all about achieving that characteristic scone texture.
Step-by-Step Guide to Making Easy Scones for Beginners
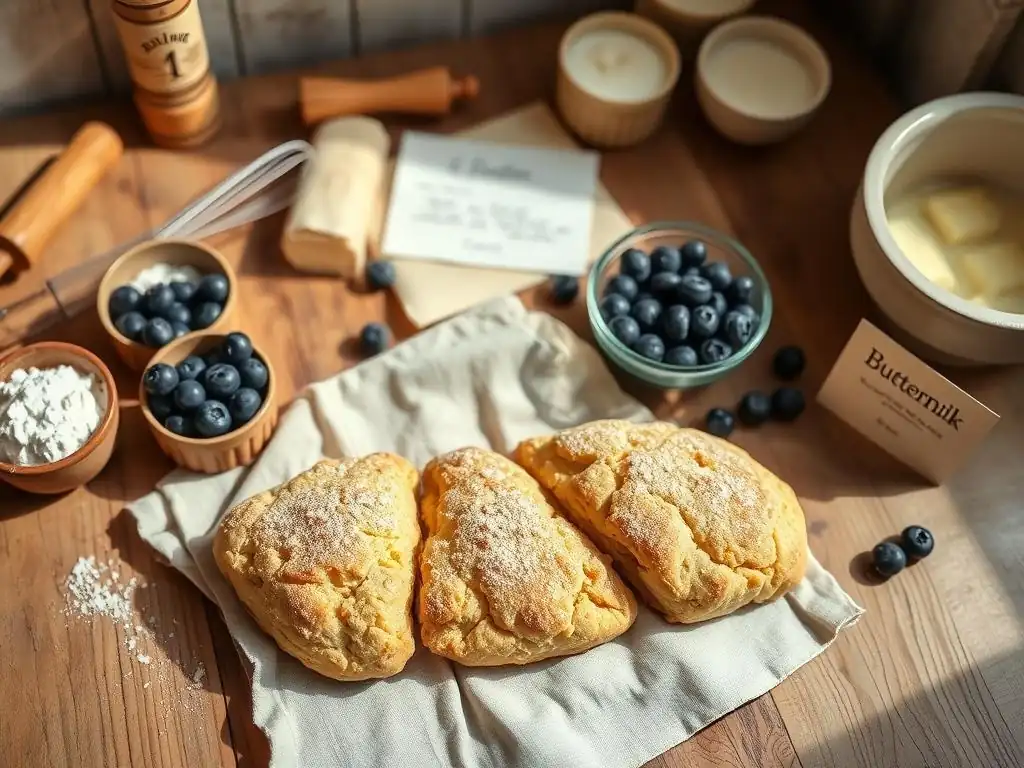
Preparing Your Baking Space and Essential Tools for Scones
Before you even measure your first ingredient, taking a few minutes to prepare your baking space can dramatically simplify the process and prevent last-minute rushes. Clear a clean, flat surface for mixing and shaping the dough. Gather all your ingredients and measure them out before you start mixing – this is called mise en place and is a fundamental practice for beginner bakers. Preheat your oven to the specified temperature (often around 400-425°F or 200-220°C for scones) so it's ready when your dough is. Line a baking sheet with parchment paper to prevent sticking and ensure easy cleanup.
Having the right tools within reach also makes the easy scone recipe flow smoothly. You'll need a large mixing bowl for the dry ingredients and another for wet, or one large bowl if adding wet to dry directly. Measuring cups and spoons are non-negotiable for accuracy. A pastry blender, fork, or even just your fingertips (kept cold!) are needed to incorporate the fat into the flour. A sharp knife or a round cutter (dipped in flour to prevent sticking) is essential for shaping your scones neatly. Don't forget a wire rack for cooling!
How to Mix Ingredients for the Best Easy Scone Dough
Mixing scone dough for beginners is all about gentle handling and not overworking the gluten. Start by whisking together your dry ingredients – flour, sugar, leavening (baking powder/soda), and salt – in a large bowl. This distributes the leavening evenly. Next, cut in your cold fat (butter is classic) using a pastry blender, fork, or your fingers until the mixture resembles coarse crumbs, with some pea-sized pieces still visible. These larger pieces of fat are key to creating flaky layers as they melt during baking.
Finally, add your liquid ingredient(s) to the dry mixture. Pour it in all at once and stir just until the dough comes together. It should be shaggy and slightly sticky, but not wet. Avoid the temptation to keep mixing until it's smooth like bread dough. Overmixing develops gluten, leading to tough scones. The goal is minimal handling; a few dry spots are preferable to a sticky, overworked mess.
Techniques for Shaping and Cutting Scones Easily
Shaping and cutting scones doesn't have to be complicated for beginners. Once your dough is mixed, turn it out onto a lightly floured surface. Gently bring the dough together with your hands – again, minimal handling is key. Pat the dough into a circle or rectangle about 3/4 to 1 inch thick. Avoid rolling it thin, as this prevents a good rise. For an easy approach, simply cut the circle into wedges (like a pizza) using a sharp knife. You can get 6-8 scones from a standard batch this way.
Alternatively, you can use a round biscuit or cookie cutter. Press the cutter straight down firmly without twisting, as twisting seals the edges and can inhibit the rise. Dip the cutter in flour between cuts to prevent sticking. Arrange the cut scones on your prepared baking sheet, leaving a little space between them for even baking. If you have scraps left from using a cutter, gently press them together and cut again, but be aware these may not rise quite as evenly due to the extra handling.
Baking Time and Temperature Tips for Perfect Scones Every Time
Getting the baking time and temperature right is crucial for achieving perfectly risen, golden-brown scones with a tender interior. Most scone recipes call for a relatively hot oven, typically between 400°F and 425°F (200°C to 220°C). This high heat helps activate the leavening quickly, creating a rapid rise before the fat melts completely, contributing to flakiness. Ensure your oven is fully preheated to the correct temperature before placing the scones inside; using an oven thermometer can help verify accuracy.
The baking time for scones usually ranges from 12 to 18 minutes, depending on their size and your oven. Keep a close eye on them after the 10-12 minute mark. You'll know they're done when they are well-risen, the tops are golden brown, and the bottoms also show a nice golden color. If tops are browning too fast, you can loosely tent them with foil. Baking them just right ensures a fully cooked interior without drying them out.
Tips and Tricks to Master This Easy Scone Recipe for Beginners

How to Customize Your Easy Scones with Flavors and Add-ins
One of the joys of baking easy scones is how simple it is to customize them and make them your own. Before adding the liquid to your dry ingredients, you can stir in various flavorings and add-ins. Dried fruits like cranberries, raisins, or currants are classic choices; about 1/2 to 3/4 cup per batch works well. Chocolate chips or white chocolate chunks are also popular. For a brighter flavor, consider adding citrus zest from one lemon or orange.
Spices such as cinnamon, nutmeg, or cardamom can be added to the dry ingredients for warmth. If using fresh herbs (like rosemary for savory scones) or cheese, chop them finely. Be mindful not to add too many wet add-ins (like fresh berries) as they can make the dough too moist and cause the scones to spread. When adding heavier items like chocolate chips, you can toss them with a tablespoon of flour first to help prevent them from sinking to the bottom.
Common Mistakes to Avoid When Baking Scones for Beginners
Even with an easy scone recipe, beginner bakers can encounter a few common pitfalls. The most frequent mistake is overmixing the dough. This develops gluten, resulting in tough, dense scones instead of light, tender ones. Remember to mix only until the ingredients are just combined and the dough is shaggy. Another error is using butter that is too warm or melted; cold butter is essential for creating those flaky layers. If your kitchen is warm, you might even benefit from chilling the cut scones for 10-15 minutes before baking.
Using too much liquid can lead to a sticky, unmanageable dough that spreads excessively during baking. Add the liquid gradually if unsure, and err on the side of a slightly dry dough rather than a wet one. Conversely, not adding enough liquid will result in a crumbly dough that's hard to bring together. Finally, underbaking is a common issue; while you don't want dry scones, ensure they are cooked through to avoid a raw, doughy center.
How to Check Scone Doneness Without a Thermometer
Determining if your easy scones are perfectly baked doesn't strictly require a thermometer, though an internal temperature of around 200°F (93°C) indicates doneness. For beginners, relying on visual cues is a reliable method. Look for the color: the tops and sides should be a lovely golden brown. They shouldn't look pale or raw.
Another key indicator is the texture. Gently touch the side of a scone (be careful, they're hot!). A baked scone will feel firm and hold its shape, whereas an underbaked one will feel soft and possibly collapse slightly. You can also gently lift one scone to check the bottom; it should also be golden brown. When in doubt, slightly longer is often better than underbaking, just be careful not to let them get too dark.
Serving and Storing Your Homemade Easy Scones

Best Practices for Serving Freshly Baked Scones
There's nothing quite like a warm, freshly baked scone straight from the oven. For the best experience, allow your easy scones to cool on a wire rack for just a few minutes until they are comfortable to handle, but still warm. Serving them warm enhances their tender texture and highlights the buttery flavor.
Classic accompaniments elevate the scone experience. In the UK, clotted cream and jam (strawberry or raspberry are popular) are the traditional pairing. For a simpler approach, good quality butter and your favorite jam or preserves are delightful. Lemon curd is also a wonderful option. Provide a selection of toppings and let everyone customize their own perfect bite.
How to Store Easy Scones to Maintain Freshness and Texture
While best enjoyed fresh, you can store your easy scones to savor them later. Allow them to cool completely on a wire rack before storing. Storing warm scones creates condensation, making them soggy. Once cool, place them in an airtight container or a resealable plastic bag. Stored at room temperature, they will remain relatively fresh for about 1-2 days.
For longer storage, scones freeze beautifully. Again, cool them completely. Place them in a single layer on a baking sheet and freeze until solid, then transfer them to a freezer-safe bag or container. They can be frozen for up to 2-3 months. To reheat from frozen, you can warm them in a preheated oven (around 300-325°F or 150-160°C) for about 10-15 minutes until heated through. Room temperature scones can be quickly warmed in a microwave for a few seconds, but the oven or a toaster oven will better preserve their texture.
Frequently Overlooked Benefits of Baking Easy Scones for Beginners
Building Confidence with Simple Baking Recipes Like Easy Scones
Successfully baking an easy scone recipe is a significant confidence booster for anyone new to the kitchen. The process is manageable, the ingredients are common, and the results are typically visible and delicious within a short timeframe. This quick gratification proves that baking from scratch isn't an insurmountable challenge but a rewarding skill. Each successful batch reinforces your ability, making you more willing to try new things and step outside your comfort zone in future baking endeavors.
Starting with an easy scone recipe provides a positive entry point into the world of baking. It demystifies the process, showing that following instructions and understanding basic ingredient interactions can lead to wonderful outcomes. This initial success can spark a genuine interest and passion for baking, encouraging beginners to explore different recipes and techniques, transforming potential apprehension into enthusiastic exploration.
How Baking Easy Scones Can Improve Your Overall Baking Skills
Mastering an easy scone recipe teaches fundamental baking techniques that are transferable to a wide range of other recipes. You learn the importance of accurate measurement, which is critical for consistent results in all baking. You practice incorporating fat into dry ingredients, a skill used in pastries, biscuits, and pie crusts. You also gain experience in gently handling dough, a technique essential for avoiding tough baked goods like cakes, muffins, and other quick breads.
Furthermore, baking scones helps you develop an intuitive understanding of dough consistency and how it should feel. You learn to recognize when dough is mixed just enough and how it should look and feel before baking. You also practice recognizing doneness through visual cues like color and texture, a skill that improves with every bake and is applicable whether you're baking cookies, cakes, or bread. These foundational skills built while making easy scones are stepping stones to becoming a more proficient and versatile baker.
Frequently Asked Questions
What makes this scone recipe "easy" for beginners?
The recipe focuses on simple ingredients and straightforward instructions, minimizing complex techniques that could overwhelm new bakers. We prioritize clear steps and readily available ingredients.
What are the key ingredients in this easy scone recipe?
The essential ingredients include flour, butter, sugar, baking powder, milk (or cream), and a pinch of salt. These are all common baking staples that are easy to find.
Can I customize the recipe with different flavors or additions?
Absolutely! Feel free to add ingredients like dried fruit (raisins, cranberries), chocolate chips, or citrus zest to personalize your scones. Just be mindful of moisture content.
What's the secret to getting light and fluffy scones?
Avoid overmixing the dough! Overmixing develops the gluten, leading to tough scones. Gently combine until just incorporated for a tender and airy texture.
How should I store leftover scones to keep them fresh?
Store cooled scones in an airtight container at room temperature for up to two days. For longer storage, you can freeze the baked scones and reheat them later.
Final Reflection: The Simple Joy of Baking, One Scone at a Time
The ease of baking, once a daunting task for many, is now within everyone's reach. Mastering a simple recipe, like the scone recipe detailed above, unlocks a world of culinary creativity and self-sufficiency. It's more than just baking; it's about empowerment and the satisfaction of creating something delicious from scratch.
The enduring appeal of baking lies not just in the final product, but in the process itself. The rhythmic mixing, the comforting aroma filling the kitchen, the simple act of sharing something homemade – these are experiences that connect us to a richer, more meaningful way of life. Baking is at once child's play and adult joy. And love, of course.
This quote perfectly encapsulates the magic of baking, transforming simple ingredients into moments of shared happiness.
Now, I invite you to take this newfound confidence and apply it to your own kitchen adventures. Don't be afraid to experiment, to adapt the recipe to your own tastes, and most importantly, to enjoy the journey. The next time you feel the urge for a warm, comforting treat, remember the ease and joy of baking your own scones. You might be surprised at what you can create, and the satisfaction it brings.
Unleash Your Inner Baker: Scone Success Awaits!
Thanks for joining us on this delicious journey! We hope you gained some confidence and inspiration for creating amazing scones. Ready to take your baking to the next level?
- Bake your perfect scones today! Use our recipe as a springboard—experiment with different flavors and share your creations with us!
- Share your scone success story on social media using #BakeWithEaseScones. Let's inspire each other!
- Try adapting our simple recipe to create a savory scone variation – what unique ingredients would you use?
What exciting scone flavor will you bake next? Let's hear your ideas in the comments below!