
Beginner's Guide: How to Make Delicious Blondies Easily

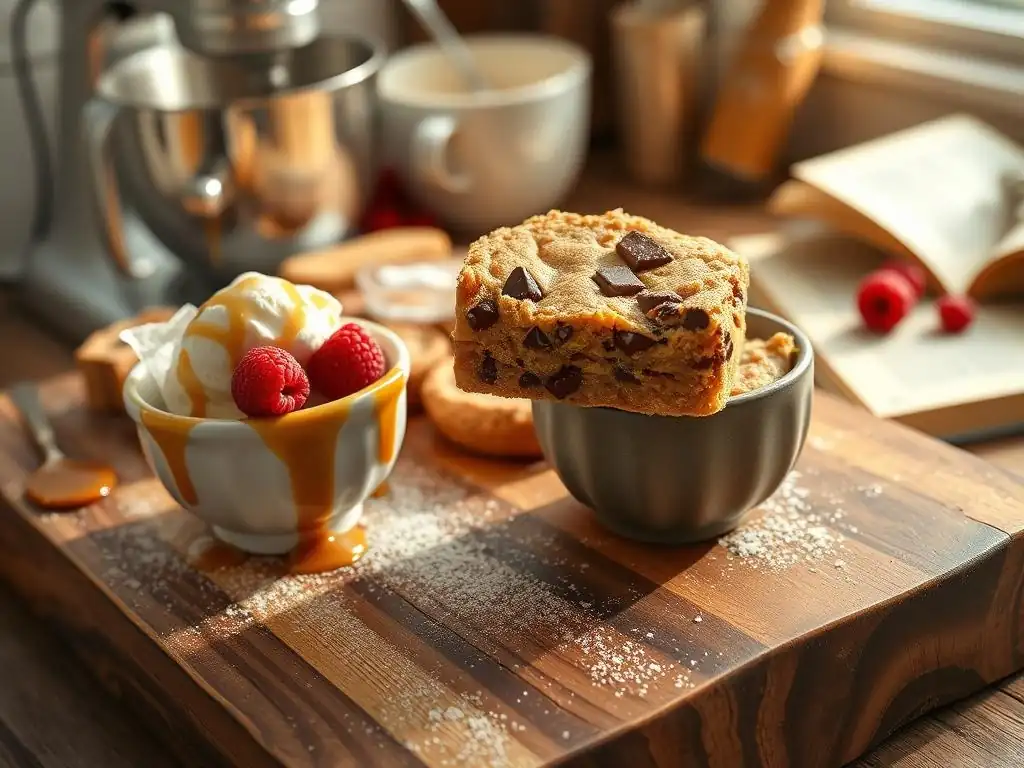
Welcome to BakeWithEase, your haven for unlocking the secrets of the baking world! Are you ready to embark on a delicious journey, starting with a treat so simple, yet so satisfying? Dive into our "Beginner's Guide" and discover just how easy it is to create incredibly delicious blondies, even if you're just starting out. What are you waiting for? Let's get baking!
- BakeWithEase Presents: Easy Blondies for Beginners
- Why Blondies are the Perfect Baking Project for Beginners
- Step-by-Step Guide to Baking the Best Blondies for Beginners
- Variations & Flavor Combinations for Beginner Blondie Recipes
- Troubleshooting Common Blondie Baking Problems for Beginners
- Storing Your Easy Blondies for Maximum Freshness
- Enjoy Your Homemade Easy Blondies!
- Frequently Asked Questions
- Final Reflection: The Sweet Simplicity of Baking Bliss
- Unlock Your Inner Baker: Blondie Bliss Awaits!
BakeWithEase Presents: Easy Blondies for Beginners
Welcome to BakeWithEase, your friendly guide to mastering the art of baking, even if you're just starting out! Today, we're diving into the wonderful world of blondies. If you've ever felt intimidated by baking, these delicious, chewy bars are the perfect place to begin. They require minimal ingredients, simple steps, and deliver maximum flavor payoff. Think of them as the friendly cousin to the brownie, offering a rich, buttery, vanilla-infused experience that's incredibly satisfying to bake and even more delightful to eat.
Making easy blondies for beginners is a fantastic way to build confidence in the kitchen. Unlike some delicate pastries or complex breads, blondies are quite forgiving. They don't require precise proofing times or intricate shaping. Most of the magic happens in a single bowl with just a whisk or a spatula. Plus, the aroma filling your kitchen as they bake is reason enough to give this recipe a try! Get ready to impress yourself and your loved ones with your newfound baking skills, all centered around these delightful bars.
Why Blondies are the Perfect Baking Project for Beginners
Blondies are an excellent starting point for anyone new to baking. Their straightforward nature means fewer steps and less room for error compared to more complex desserts. You don't need fancy equipment or advanced techniques – just basic kitchen tools and common pantry staples. This simplicity makes tackling an easy blondies for beginners recipe a rewarding and stress-free experience, building foundational skills like measuring ingredients accurately and understanding baking times.
Moreover, the versatility of blondies allows beginners to experiment easily. Once you've mastered the basic easy blondies recipe, you can start adding simple mix-ins like chocolate chips, nuts, or even sprinkles without drastically changing the core baking process. This encourages creativity and helps new bakers understand how different ingredients affect texture and flavor, all within the safety net of a resilient recipe. It's a low-pressure way to explore variations and make the recipe your own.
Understanding the Difference Between Blondies and Brownies
While blondies and brownies share a similar bar cookie structure and often a chewy texture, their fundamental difference lies in the presence of cocoa or chocolate. Brownies get their characteristic dark color and intense chocolate flavor from cocoa powder or melted chocolate incorporated into the batter. A classic brownie recipe might use a significant amount of unsweetened cocoa powder, perhaps 1/2 cup or more for a typical 8x8 inch pan, along with melted chocolate, contributing to its rich, fudgy or cakey texture depending on the recipe.
Blondies, on the other hand, omit the cocoa and chocolate from the base batter. Instead, they rely on the flavors of brown sugar, butter, and vanilla to create their signature caramel-like taste and light brown hue. The use of brown sugar is key, as its molasses content provides moisture, chewiness, and that distinct toffee-like note. While they can include chocolate chips or other additions, the base batter remains chocolate-free, resulting in a lighter, often chewier bar compared to a traditional brownie. This difference in core ingredients is what defines these two popular treats.
Simple Ingredients and Equipment Needed for Easy Blondies
One of the reasons easy blondies are perfect for beginners is the simplicity of the ingredients. You'll likely find most of what you need already in your pantry. The core components typically include all-purpose flour, granulated sugar, brown sugar (light or dark), butter, eggs, vanilla extract, baking powder, and salt. Brown sugar is particularly important for achieving that classic chewy texture and rich flavor. Using a mix of granulated and brown sugar, perhaps a ratio of 1:1 or slightly more brown sugar, contributes significantly to the final result, providing moisture and depth of flavor that white sugar alone cannot.
The equipment needed is also minimal and commonly found in most kitchens. You'll need a mixing bowl (medium-sized is usually sufficient), a whisk or rubber spatula for mixing, measuring cups and spoons for accurate ingredient amounts, and a baking pan, most often an 8x8 inch square pan. A small saucepan or microwave-safe bowl might be needed to melt the butter. That's really it! No stand mixers or specialized tools are required, making this an accessible recipe for anyone looking to bake their first batch of delicious bars.
Step-by-Step Guide to Baking the Best Blondies for Beginners
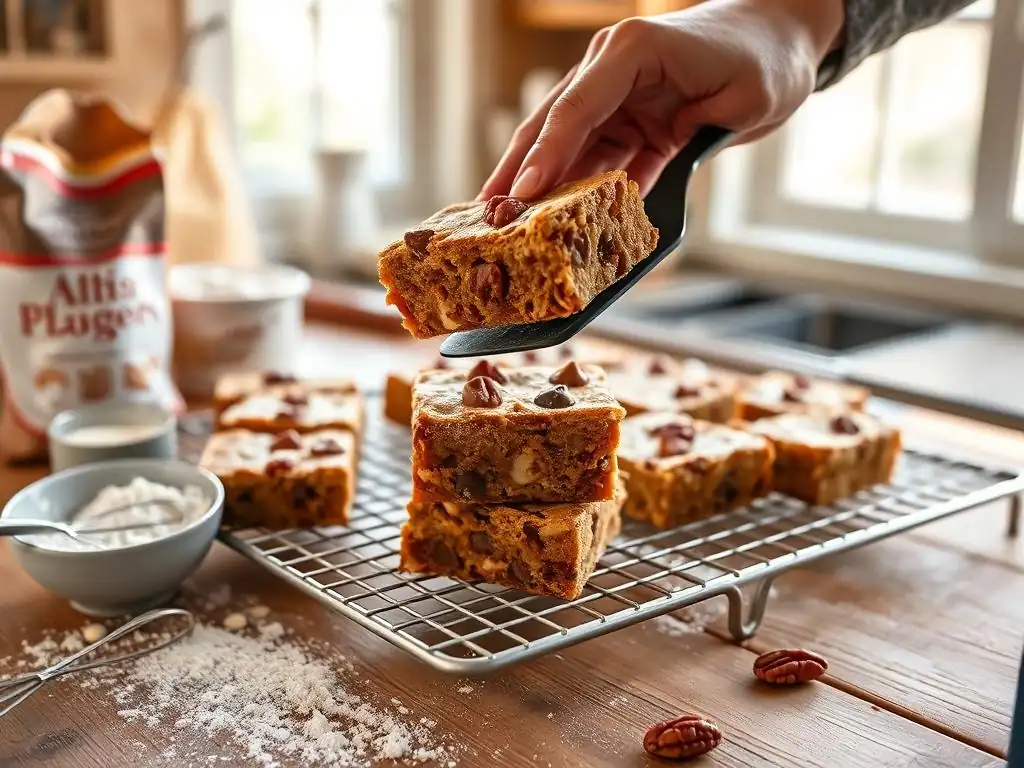
Following a clear, step-by-step process is key to successful baking, especially for beginners. This guide breaks down making easy blondies into manageable steps, ensuring you understand each stage. From gathering your simple ingredients to the final moments of cooling and cutting, we'll walk you through the process. This structured approach removes guesswork and helps build confidence, proving that baking delightful treats like blondies can be straightforward and fun.
By focusing on one step at a time, you can ensure accuracy and attention to detail, which are crucial in baking. Even small errors in measurement or mixing can impact the final texture of your blondies. This guide is designed to be your reliable companion, offering tips and explanations at each stage to help you achieve perfectly baked, chewy, and delicious blondies right from your first attempt. Let's get baking!
Step 1: Gathering Your Ingredients for Easy Blondies
Before you even think about mixing, the very first and most crucial step in baking easy blondies for beginners is to gather and measure all your ingredients. This practice, often called "mise en place" in professional kitchens, meaning "everything in its place," ensures you don't forget anything or have to scramble mid-recipe. It also gives you a chance to double-check quantities.
For a typical 8x8 inch pan of blondies, you might need around 1 ½ cups of flour, 1 cup of brown sugar, ½ cup of granulated sugar, ¾ cup of melted butter, 2 large eggs, 1 teaspoon of vanilla extract, ½ teaspoon of baking powder, and ¼ teaspoon of salt. Having everything ready and measured before you start mixing makes the rest of the process smooth and efficient.
Ensuring your ingredients are at the correct temperature is also important for easy blondies. While the butter is typically melted, the eggs should ideally be at room temperature. Room temperature eggs incorporate more easily into the batter, creating a smoother, more emulsified mixture. To quickly bring eggs to room temperature, you can place them in a bowl of warm (not hot) water for about 5-10 minutes. Having all ingredients ready and prepped before you start mixing significantly reduces the chance of errors and leads to a better final product.
Essential Ingredients List for Easy Blondies
- 1 ½ cups All-Purpose Flour
- 1 cup Packed Light or Dark Brown Sugar
- ½ cup Granulated Sugar
- ¾ cup (1 ½ sticks) Unsalted Butter, melted
- 2 Large Eggs, room temperature
- 1 teaspoon Pure Vanilla Extract
- ½ teaspoon Baking Powder
- ¼ teaspoon Salt
- (Optional) 1 cup Chocolate Chips, nuts, or other mix-ins
Step 2: Preparing Your Baking Pan for No-Fuss Blondies
Proper pan preparation is essential for ensuring your easy blondies don't stick and are easy to remove and cut after baking. The most common method for an 8x8 inch pan is to grease and flour it, or line it with parchment paper. Greasing involves lightly coating the inside of the pan with butter or baking spray. After greasing, you can lightly flour the pan, tapping out any excess. This creates a non-stick barrier. For example, a quick spray with non-stick baking spray containing flour works wonderfully.
Alternatively, and often preferred for even easier removal and cleanup, is lining the pan with parchment paper. Cut a piece of parchment paper large enough to cover the bottom and extend up two opposite sides of the pan, creating "slings" to lift the baked blondies out. You can also use two pieces, one for each direction, to cover the entire bottom and all four sides. Lightly greasing the pan before putting the parchment paper down helps the paper stay in place. This method guarantees your easy blondies will lift out cleanly, making cutting much simpler.
Tips for Lining Your Pan Perfectly
- Use good quality parchment paper; it makes a significant difference.
- Cut the paper to fit the bottom snugly and extend up the sides.
- Lightly grease the pan before adding the parchment to help it stick.
- Press the paper firmly into the corners and along the edges.
- If using two pieces, overlap them slightly in the center.
Step 3: Mixing the Blondie Batter: A Beginner-Friendly Approach
Mixing the batter for easy blondies is surprisingly simple. You'll typically start by combining the melted butter and sugars (brown and granulated) in your mixing bowl. Whisking these together helps dissolve some of the sugar and creates the base for the rich flavor. Continue whisking for about 30 seconds to a minute until the mixture is well combined. Don't worry about overmixing at this stage; the goal is just to get the wet ingredients incorporated.
Next, you'll add the eggs and vanilla extract. Whisk these into the butter-sugar mixture until everything is smooth and emulsified. The mixture might lighten slightly in color. Then, add the dry ingredients: the flour, baking powder, and salt. Switch to a rubber spatula or wooden spoon and mix until just combined. It's important not to overmix once the flour is added, as this can develop the gluten too much, resulting in tough or cakey blondies instead of the desired chewy texture. A few streaks of flour are okay; you'll finish mixing when you add any optional mix-ins.
Achieving the Right Consistency for Your Blondie Batter
The batter for easy blondies should be relatively thick and slightly gooey, similar to a thick cookie dough or a brownie batter. It shouldn't be runny like cake batter. When you lift the spatula, the batter should hold its shape somewhat before slowly flowing back into the bowl. If you are adding mix-ins like chocolate chips (a common addition to easy blondies), fold them in gently using the spatula until they are evenly distributed. This final bit of mixing will usually take care of any remaining dry streaks of flour.
The consistency is largely determined by the ratio of wet to dry ingredients and the temperature of the melted butter. Using warm, but not piping hot, melted butter is ideal. If your batter seems too thin, double-check your measurements, especially of the flour and butter. If it seems too dry or crumbly, you might have over-measured the flour or under-measured the wet ingredients. A good easy blondies batter will spread slightly when poured into the pan but won't be liquid.
Step 4: Baking Your Blondies to Golden Perfection
Baking is where the magic happens, transforming your simple batter into delicious easy blondies. Preheat your oven to the specified temperature, typically around 350°F (175°C). Pour the batter into your prepared 8x8 inch pan, spreading it evenly with a spatula. Place the pan in the center of the preheated oven. Baking time for an 8x8 inch pan usually ranges from 20 to 30 minutes, but this can vary significantly depending on your oven and the exact recipe.
Keep an eye on the blondies as they bake. The edges should start to look set and lightly golden brown, while the center should still look slightly soft or even a little wet. This slightly underbaked center is the secret to achieving that wonderfully chewy texture. Overbaking is the most common mistake that leads to dry or cakey blondies. Trust the process and the visual cues rather than relying solely on a timer.
Determining When Your Blondies are Done
Knowing when your easy blondies are perfectly baked requires a bit of observation. Look for the edges to be set and lightly browned, pulling away slightly from the sides of the pan. The center should appear mostly set but may still look a little glossy or slightly undercooked. A reliable test is to insert a toothpick or wooden skewer into the center of the blondies.
It should come out with moist crumbs attached, but no wet batter. If it comes out completely clean, the blondies are likely overbaked and will be dry. If it comes out with wet batter, they need more time.
Another good indicator is the smell. When they are nearing completion, your kitchen will be filled with a rich, buttery, caramel-vanilla aroma. For an 8x8 inch pan, checking after 20 minutes is a good starting point, then continue baking in 2-3 minute intervals until the toothpick test yields moist crumbs. Don't wait for the entire surface to look dry and fully set; that chewy center is key to great easy blondies.
Step 5: Cooling and Cutting Your Easy Blondies
Once your easy blondies come out of the oven, the temptation is to cut into them immediately. However, resisting this urge is crucial for the best results. Allow the blondies to cool in the pan on a wire rack for at least 15-20 minutes. This cooling period allows the bars to finish setting and firm up. Cutting them too soon will result in a gooey mess that doesn't hold its shape well.
After the initial cooling in the pan, if you used the parchment paper sling method, you can carefully lift the blondies out of the pan and transfer them to the wire rack to cool completely. Cooling completely, which can take 1-2 hours, is essential for achieving clean, neat cuts. Warm blondies tend to crumble or squish when sliced. Patience here will be rewarded with perfectly shaped bars.
Tips for Cleanly Cutting Blondies
- Ensure the blondies are completely cooled before cutting. This is the most important tip.
- Use a sharp knife, preferably a large chef's knife or a serrated knife.
- For the cleanest cuts, wipe the knife blade clean with a damp paper towel between each slice. This prevents sticky residue from building up and dragging through the next cut.
- Cut straight down rather than sawing back and forth.
- Decide on your desired size. For an 8x8 inch pan, cutting 4 rows by 4 rows will yield 16 squares, a common size for easy blondies.
Variations & Flavor Combinations for Beginner Blondie Recipes
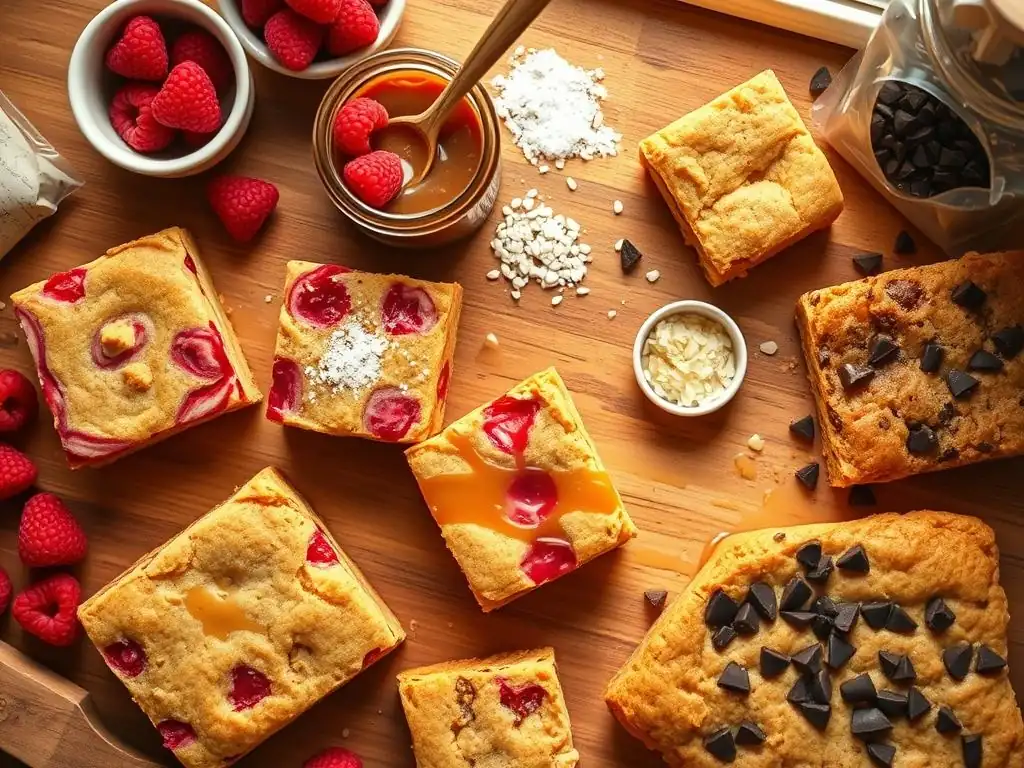
Once you've mastered the basic easy blondies recipe, you can easily start experimenting with different mix-ins and flavor combinations. This is where you can truly personalize your bake and discover new favorites. The simple base batter is very forgiving and pairs well with a wide variety of additions, making it a perfect canvas for beginner bakers to get creative without venturing into overly complex techniques.
Experimenting with variations is a fun way to expand your baking repertoire. You can try adding different types of chips, nuts, dried fruit, or even swirls of jam or caramel. Start simple with one or two additions and see how they affect the texture and taste. This process helps you understand flavor pairings and ingredient interactions in baking, all while making delicious easy blondies.
Adding Chocolate Chips to Your Easy Blondies
Adding chocolate chips is perhaps the most popular and easiest variation for beginner blondies. The rich sweetness of chocolate perfectly complements the buttery, caramel notes of the blondie base. You can use milk chocolate, semi-sweet, dark chocolate, or even white chocolate chips. A standard amount is about 1 cup of chocolate chips folded into the batter just before spreading it into the pan.
When adding chocolate chips, ensure they are evenly distributed throughout the batter so every bite gets some chocolatey goodness. If you're feeling adventurous, you can reserve a small handful of chips to sprinkle on top of the batter before baking; this creates a lovely visual appeal with melted pockets of chocolate on the surface of your easy blondies. The warmth of the baked blondie melts the chocolate just enough to be wonderfully gooey.
Nutty Blondies: Incorporating Nuts for Texture and Flavor
Incorporating nuts is another simple yet effective way to add flavor and a pleasant crunchy texture to your easy blondies. Chopped walnuts or pecans are classic choices and pair beautifully with the brown sugar base. About ½ to 1 cup of chopped nuts is usually sufficient for an 8x8 inch pan.
Toasting the nuts lightly before adding them to the batter can enhance their flavor significantly. You can toast them in a dry skillet over medium heat for a few minutes, stirring frequently, until fragrant, or spread them on a baking sheet and bake at 350°F (175°C) for about 5-10 minutes. Let them cool before folding them into the blondie batter. This extra step adds a layer of complexity to your beginner blondies.
Caramel Swirl Blondies: A Decadent Twist for Beginners
Adding a caramel swirl creates a visually stunning and incredibly decadent version of easy blondies. You can use store-bought caramel sauce or make a simple caramel from scratch if you're feeling ambitious (though for beginners, store-bought is perfectly fine). About ½ cup of thick caramel sauce is usually enough for swirling.
To create the swirl, pour the blondie batter into your prepared pan. Then, dollop spoonfuls of caramel sauce over the top of the batter. Use a knife or skewer to gently swirl the caramel through the batter, being careful not to overmix. You want distinct ribbons of caramel, not a fully incorporated mixture. Bake as directed, and the caramel will become warm and gooey, creating pockets of deliciousness within your easy blondies.
Spiced Blondies: Adding Warmth and Comfort to Your Baking
Adding spices is a simple way to infuse your easy blondies with warmth and comforting flavors, perfect for cooler weather or anytime you crave a cozy treat. Cinnamon, nutmeg, ground ginger, or a pumpkin pie spice blend work wonderfully. Start by adding about ½ teaspoon of cinnamon to the dry ingredients, along with a pinch of nutmeg.
You can adjust the amount of spice to your preference. For example, a blend of ½ teaspoon cinnamon, ¼ teaspoon ginger, and a pinch of nutmeg creates a lovely warm flavor profile. Ensure the spices are well distributed by whisking them into the flour mixture before adding the wet ingredients. This ensures the flavor is even throughout your beginner blondies.
Troubleshooting Common Blondie Baking Problems for Beginners
Even with an easy blondies recipe, sometimes things don't go exactly as planned. Don't be discouraged! Baking is a learning process, and understanding common issues can help you identify what went wrong and how to fix it next time. Most problems with blondies relate to texture, which is often influenced by ingredient ratios, mixing, or baking time.
Identifying the problem is the first step. Was the texture too dry? Too cakey? Did they sink? By recognizing the symptom, you can usually trace it back to a specific step in the process. This troubleshooting section is designed to help beginner bakers understand potential pitfalls and learn how to avoid them, ensuring more successful batches of easy blondies in the future.
Blondies are Too Dry: How to Fix It
If your easy blondies turned out dry and crumbly, the most likely culprit is overbaking. Baking them for too long or at too high a temperature evaporates too much moisture, resulting in a dry texture. For example, baking at 375°F instead of 350°F or leaving them in for 35 minutes instead of 25 minutes can easily lead to dryness.
To avoid this, always check for doneness using the toothpick test (looking for moist crumbs, not a clean toothpick) at the minimum specified baking time. Start checking around the 20-minute mark for an 8x8 inch pan. Next time, try reducing the baking time by a few minutes or lowering your oven temperature slightly if you suspect your oven runs hot. Using accurate measurements of butter and brown sugar (which add moisture) is also key; ensure you are using packed brown sugar.
Blondies are Too Cakey: What Went Wrong?
Blondies are meant to be chewy, not light and airy like a cake. If your easy blondies turned out cakey, it could be due to several factors. Overmixing the batter after adding the flour is a common cause. Excessive mixing develops gluten, which gives structure to cakes but makes bars tough and cakey. For instance, mixing for 2 minutes after adding flour instead of just until combined can lead to this issue.
Another reason could be using too much leavening agent (baking powder or baking soda, though baking powder is more common in blondies). Double-check your measurements for baking powder; even a little extra can make them rise too much and become cakey. Also, ensure you're using packed brown sugar, as its moisture content contributes to chewiness.
Blondies Didn't Rise: Possible Causes and Solutions
While easy blondies don't rise dramatically like a cake, they should have some slight lift and spread. If your blondies are flat and dense, several issues could be at play. One common reason is using expired or inactive baking powder. Baking powder loses its potency over time; you can test its freshness by adding a teaspoon to a small bowl of hot water – it should fizz vigorously.
Another factor could be insufficient mixing of the wet ingredients (butter, sugars, eggs). Properly creaming or whisking these together incorporates air and creates an emulsion that helps with texture and slight lift. Also, ensure your oven temperature is accurate; an oven that is too cool might prevent proper leavening. Double-checking ingredient measurements, especially baking powder, is always a good first step.
Blondies are Burnt on the Edges: Prevention Tips
Burnt edges with an underbaked center are frustrating but preventable. This often indicates uneven oven temperature or that the edges are cooking much faster than the center. For example, if your pan is touching the side of the oven or if your oven's heating element is too close to the bottom or top, it can cause hotspots.
To prevent this, make sure your oven rack is positioned in the center of the oven. If you suspect your oven has hot spots or uneven heating, you can try rotating the pan halfway through the baking time (e.g., at the 10-15 minute mark). Using a lighter-colored metal pan rather than a dark one can also help, as dark pans absorb more heat and can lead to darker edges. If edges still brown too quickly, you can loosely tent the pan with foil for the last part of the baking time.
Storing Your Easy Blondies for Maximum Freshness
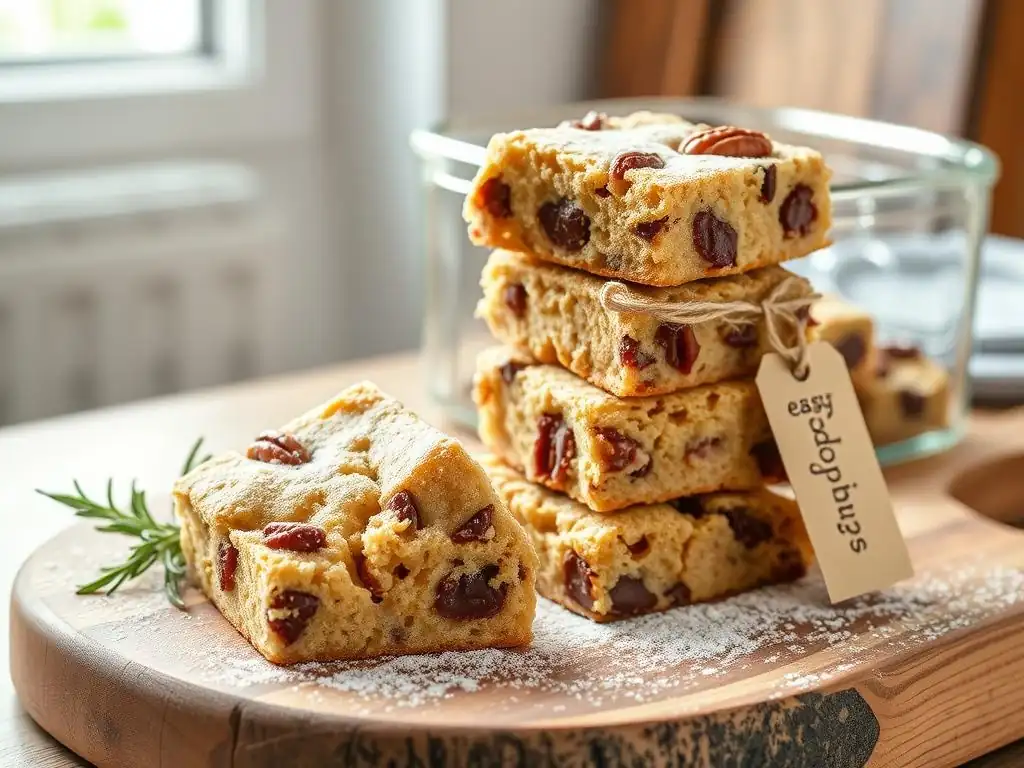
Proper storage is key to keeping your delicious easy blondies fresh and chewy for as long as possible. Whether you plan to eat them within a few days or save some for later, a few simple storage tips will help maintain their texture and flavor. Blondies, like most baked goods, are susceptible to drying out if left exposed to air.
Understanding how to store them correctly ensures that all your effort in making easy blondies results in treats that stay enjoyable. The method you choose will depend on how quickly you plan to consume them. For short-term storage, room temperature is fine, but for longer periods, refrigeration or freezing is recommended.
How to Store Blondies at Room Temperature
For short-term storage, say up to 3-4 days, keeping your easy blondies at room temperature is perfectly acceptable and often preferred for texture, as refrigeration can sometimes make them a bit firm. Once completely cooled, cut the blondies into squares. Store them in an airtight container.
You can stack the squares, but placing a small piece of parchment paper between layers can prevent them from sticking together, especially if they are particularly gooey or contain melted chocolate chips. Keep the container in a cool, dry place away from direct sunlight or heat sources. An airtight container is crucial to prevent them from drying out and losing their chewy texture.
Freezing Blondies for Later Enjoyment
Freezing is an excellent option if you want to store your easy blondies for a longer period, preserving their freshness for up to 2-3 months. Once the blondies are completely cooled and cut into individual squares, wrap each piece tightly in plastic wrap. This individual wrapping helps prevent freezer burn.
After wrapping, place the wrapped blondies in a freezer-safe zip-top bag or an airtight freezer container. Label the container with the date. When you're ready to enjoy a blondie, simply take a piece out of the freezer and let it thaw at room temperature for about 30-60 minutes. They will taste almost as fresh as the day you baked them! Freezing is a great way to make a batch of easy blondies last.
Enjoy Your Homemade Easy Blondies!
You've done it! You've successfully baked a batch of delicious, chewy easy blondies using simple ingredients and techniques. Take a moment to appreciate your accomplishment. Baking, especially for beginners, can sometimes seem daunting, but tackling a recipe like this proves that you can create wonderful treats right in your own kitchen. These homemade blondies are perfect for sharing, enjoying with a glass of milk or a cup of coffee, or simply savoring by yourself.
Baking easy blondies for beginners is more than just following a recipe; it's about experiencing the joy of creating something delicious from scratch. It's about the comforting smells, the satisfaction of seeing the batter transform, and the pleasure of that first bite. We hope this guide has made the process easy and enjoyable for you. Keep baking, keep experimenting, and most importantly, keep enjoying the sweet rewards of your efforts!
We love seeing what our community bakes! If you made these easy blondies using our guide, snap a picture and share it with us. It's inspiring to see how different people interpret the recipe and the variations they try. Sharing your creations also helps other beginners see what's possible and encourages them to start their own baking journey.
Whether you stuck to the classic recipe or added your own twist with chocolate chips, nuts, or caramel, your homemade easy blondies are something to be proud of. Let's celebrate your success and share the joy of baking simple, delicious treats together! Happy baking!
Frequently Asked Questions
What makes these blondies "easy" for beginners?
These blondies are designed for beginners because they use simple ingredients and have a straightforward, no-fuss recipe. The guide also provides step-by-step instructions.
What are the key ingredients I'll need to make these blondies?
You'll primarily need basic baking staples like flour, butter, sugar (brown and white), eggs, vanilla extract, and a leavening agent like baking powder. Some recipes may include chocolate chips or nuts.
What if I don't have brown sugar? Can I still make the blondies?
While brown sugar contributes to the chewy texture and molasses flavor, you can substitute it. Combine white sugar with a small amount of molasses or use lightly packed white sugar.
How do I know when the blondies are done baking?
The blondies are done when the edges are golden brown and a toothpick inserted into the center comes out with moist crumbs attached. Be careful not to overbake them.
Can I customize these blondies with different mix-ins?
Absolutely! Feel free to add chocolate chips, nuts, dried fruit, or even a swirl of peanut butter to personalize your blondies. Experiment and discover your favorite flavor combination.
Final Reflection: The Sweet Simplicity of Baking Bliss
The accessibility of baking, once perceived as a daunting task, is being redefined by simple recipes like these blondies. Mastering the art of baking doesn't require years of experience; it simply requires a willingness to try. This guide aimed to demystify the process, proving that even beginners can create delicious, golden-brown squares of chewy goodness. The ease of the recipe, coupled with the rewarding outcome, makes it a perfect entry point for anyone looking to explore the world of baking.
The joy of baking, for me, lies not just in the final product, but in the process itself. The rhythmic mixing, the comforting aroma filling the kitchen, the anticipation of the first bite – these are the moments that make baking so special. Baking is at once child's play and adult joy. And love, of course.
This quote perfectly encapsulates the experience, highlighting the simple pleasure and profound satisfaction that comes from creating something delicious with your own hands. It's a skill that transcends generations, connecting us to a rich culinary heritage.
Now, it's your turn. Don't be intimidated by the prospect of baking. Grab your ingredients, follow the recipe, and embrace the potential for deliciousness. Let this be your first step into a world of culinary creativity. Remember the feeling of accomplishment you'll experience when you taste your own homemade blondies – a sweet reward for your efforts, and a testament to the power of simple recipes to bring joy to our lives. So, what are you waiting for? Let the baking begin!
Unlock Your Inner Baker: Blondie Bliss Awaits!
Thanks for joining us on this blondie baking adventure! We hope you've discovered the joy of creating these delicious treats. Now it's time to put your newfound skills to the test.
- Bake a batch of blondies today! Use our recipe as a springboard – experiment with different add-ins and share your creations.
- Share your blondie masterpiece on social media using #BakeWithEaseBlondies – let's inspire others!
- Leave a comment below and tell us: What’s your favorite blondie topping or flavor combination?