
Beginner's Guide to Simple Cake Troubleshooting

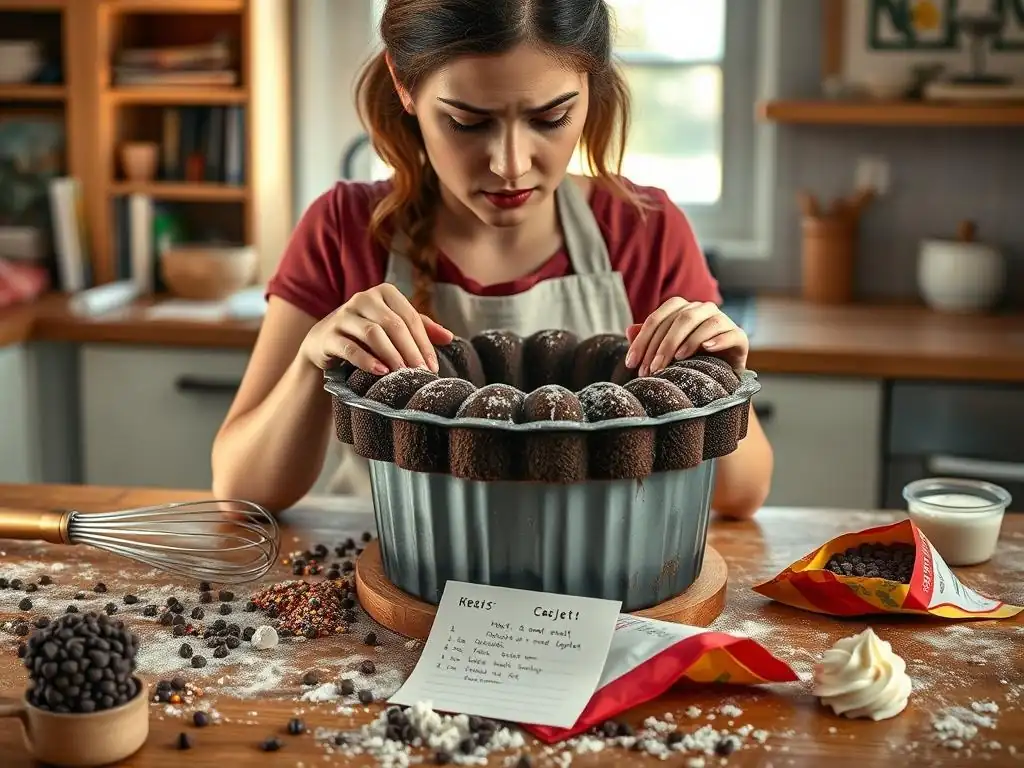
Welcome to BakeWithEase, your baking sanctuary! Ever wondered why your cake sinks in the middle or turns out too dry? Unlock the secrets to baking perfection with our guide to easy cake troubleshooting tips. Discover the common pitfalls and simple fixes that will transform your baking from frustrating to fabulous, one delicious cake at a time. Ready to bake with confidence? Let's get started!
- Beginner's Guide to Cake Troubleshooting for BakeWithEase.com
- Introduction to Cake Troubleshooting
- Identifying Common Cake Baking Problems: A Beginner's Checklist
- Cake Troubleshooting Tips: Solutions for Common Issues
- Advanced Cake Troubleshooting Techniques for Persistent Issues
- Preventing Cake Problems: Best Baking Practices
- Final Thoughts on Cake Troubleshooting
-
Frequently Asked Questions
- What are some common signs that my cake isn't baking properly?
- My cake is dry. What could be the reason, and how can I prevent it?
- Why did my cake sink in the middle after I took it out of the oven?
- How can I prevent my cake from sticking to the pan, even with greasing?
- What should I do if my cake is browning too quickly on top?
- Final Reflection: Baking Bliss Beyond the Blunders
- Unleash Your Inner Baker: Conquer Cake Challenges!
Beginner's Guide to Cake Troubleshooting for BakeWithEase.com
Introduction to Cake Troubleshooting
Welcome to BakeWithEase's Cake Troubleshooting Guide
Welcome, fellow baking enthusiasts, to your essential guide for conquering common cake challenges! At BakeWithEase, we believe that baking should be a joyful and rewarding experience, not a source of frustration. Even the most seasoned bakers encounter hiccups occasionally, and for beginners, understanding why something went wrong is the first step to fixing it.
This guide is designed to equip you with simple, actionable tips to diagnose and solve those pesky cake problems. Think of it as your friendly co-baker, ready to lend a hand when your cake doesn't turn out quite as planned. We're here to help you learn from every bake, turning potential disappointments into learning opportunities and ultimately, delicious successes.
Embarking on your baking journey means sometimes things won't go perfectly the first time. That's completely normal! The good news is that most common cake issues have straightforward explanations and easy fixes.
By learning a few basic easy cake troubleshooting tips, you'll gain the confidence to tackle recipes and understand the science behind baking. This guide covers everything from dry cakes to sunken centers, providing practical advice you can implement right away. Our goal is to demystify the process, helping you build fundamental skills and ensuring that your time in the kitchen is always enjoyable and leads to tasty results.
Why Cake Troubleshooting is Essential for Beginner Bakers
For beginners, understanding how to troubleshoot cakes is more than just fixing a failed bake; it's about building a solid foundation in baking principles. When a cake doesn't rise, or comes out dry, it's often due to a specific interaction of ingredients or a step missed in the process.
Learning to identify these causes helps you understand the why behind baking instructions, making you a more intuitive and successful baker in the long run. Instead of just following a recipe blindly, you start to grasp the function of each ingredient and technique, which is invaluable for adapting recipes or creating your own down the line.
Furthermore, knowing some easy cake troubleshooting tips can save you time, ingredients, and prevent baking fatigue. Imagine spending an hour mixing, baking, and waiting, only for your cake to collapse. It's disheartening! But if you know why it likely happened (perhaps the oven wasn't hot enough, or you opened the door too soon), you can avoid that mistake next time. This knowledge empowers you to approach baking with confidence, knowing that you have the tools to handle common issues. It transforms potential failures into valuable lessons, significantly accelerating your learning curve and making baking a consistently positive experience.
Common Cake Baking Problems and Solutions
Bakers of all levels encounter a similar set of common problems. These often include cakes that are too dry, too dense, sunken in the middle, excessively crumbly, or baked unevenly. While frustrating, these issues are typically linked to fundamental elements like ingredient measurement, mixing techniques, oven temperature, or baking time. For instance, a dry cake might be the result of overbaking or inaccurate flour measurement, while a dense cake could stem from overmixing or improperly creaming butter and sugar. Recognizing these patterns is the first step in effective easy cake troubleshooting.
Fortunately, for every common cake problem, there are usually simple, effective solutions. This guide will walk you through identifying the signs of these issues and provide specific, easy cake troubleshooting tips to address them. We'll cover everything from adjusting ingredient ratios slightly to perfecting your mixing method and understanding your oven's quirks. By focusing on these common pitfalls and their corresponding fixes, you'll quickly build the skills needed to consistently bake delicious, perfectly textured cakes. Let's dive in and turn those baking woes into baking wins!
Identifying Common Cake Baking Problems: A Beginner's Checklist
Understanding the Signs of a Problem Cake
Before you can troubleshoot, you need to recognize that there's a problem. A successful cake typically has a tender crumb, a level or slightly domed top, and is evenly baked with a pleasant aroma. When things go wrong, the signs are usually quite visible and tactile. Is the cake hard and dry when you cut into it?
Does it look like a crater in the center? Is the texture heavy and gummy rather than light and fluffy? These are all indicators that something in the process needs adjusting. Learning to observe these outcomes critically is a crucial part of becoming a better baker.
Developing your observational skills in the kitchen is key to effective easy cake troubleshooting. Pay attention not just to the final result, but also to how the batter looks and feels, how the cake behaves in the oven, and how it cools. For example, if your batter looks curdled, it might affect the final texture.
If the cake rises dramatically and then falls, it points to specific temperature or leavening issues. By being mindful throughout the baking process and carefully examining the finished product, you'll become adept at spotting problems early and understanding their potential root causes, making future troubleshooting much simpler.
Problem: Cake is Dry - Causes and Identification
A dry cake is one of the most common and disappointing outcomes for a baker. You cut a slice, and instead of a moist, tender crumb, you get something that feels like sawdust. The edges might be excessively browned or hard, and the inside lacks that pleasant, slightly damp quality. This often happens when the cake has lost too much moisture during baking. Common culprits include overbaking (leaving the cake in the oven for too long), using too much flour or not enough liquid/fat, incorrect oven temperature (too high), or even using ingredients at the wrong temperature.
Identifying a dry cake is usually straightforward – it feels dry, tastes dry, and might even crumble excessively when cut. For instance, if a recipe calls for baking for 30-35 minutes at 350°F (175°C), and you bake it for 40 minutes, the extra time in the heat will evaporate essential moisture, resulting in dryness.
Similarly, if you accidentally add 1.5 cups of flour instead of 1 cup, the excess dry ingredient will absorb too much liquid, leading to a parched cake. These are classic signs indicating that some easy cake troubleshooting tips related to moisture balance or baking time are needed.
Problem: Cake is Dense or Heavy - Causes and Identification
A dense or heavy cake lacks that desirable light and airy texture. Instead of a delicate crumb, it feels solid, sometimes even gummy or tough. This problem often arises from issues related to aeration and gluten development. Overmixing the batter is a frequent cause; while you need to mix enough to combine ingredients, overmixing develops gluten (especially in recipes using all-purpose flour), leading to a tough, dense texture, much like kneading bread dough. Improperly creaming butter and sugar is another factor – this step is crucial for incorporating air bubbles that help the cake rise and stay light.
Other causes include using expired leavening agents (baking powder or soda), using ingredients that are too cold (like butter straight from the fridge, which won't cream properly), or using too much liquid relative to dry ingredients. For example, if your baking powder is more than 6 months old, it might have lost its potency, resulting in poor lift and a dense cake.
A batter where the butter and sugar weren't creamed until pale and fluffy (which can take 3-5 minutes with a mixer) will lack sufficient air, leading to a heavy result. Recognizing a dense cake by its weight and texture is the first step in applying the right easy cake troubleshooting tips.
Problem: Cake is Too Crumbly - Causes and Identification
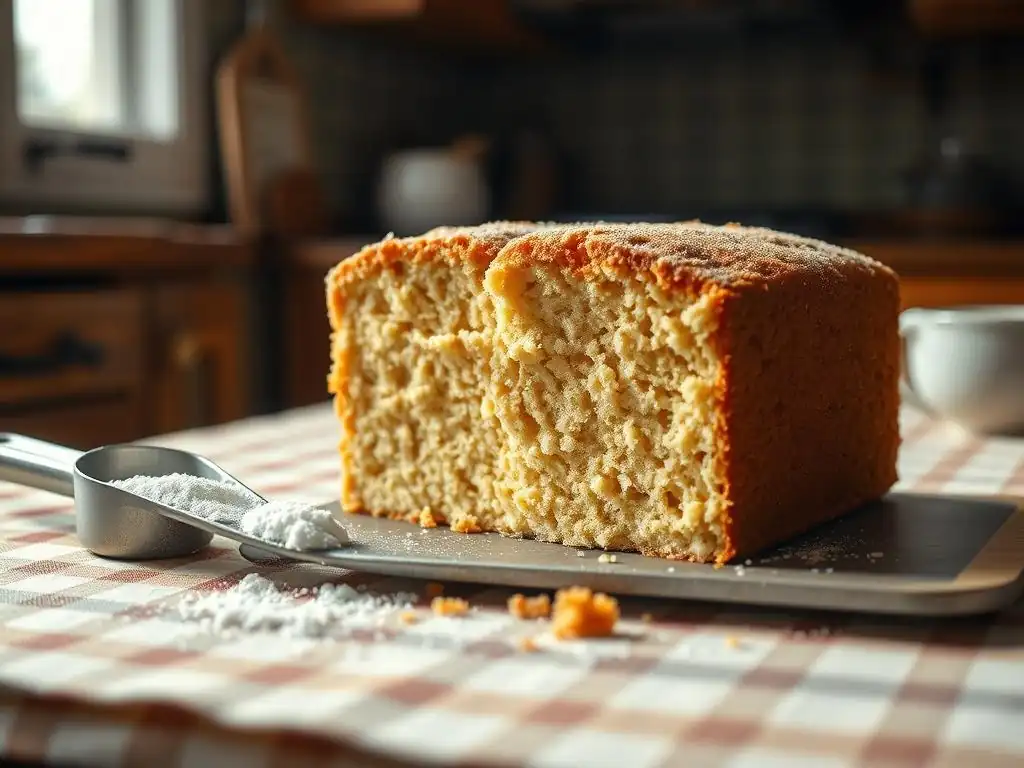
A crumbly cake falls apart easily when sliced or even handled. While a tender crumb is good, excessive crumbliness indicates a lack of structure or moisture. This issue shares some causes with dry cakes, such as overbaking or using too much flour. When a cake bakes for too long, the structure becomes brittle, leading to excessive crumbling. Similarly, an imbalance in ingredients, particularly a deficiency of binding agents like eggs or fat, can result in a cake that doesn't hold together well.
Another potential cause is insufficient mixing, where ingredients like eggs or flour aren't fully incorporated, preventing the batter from forming a cohesive structure. For example, if you don't mix enough after adding eggs, their binding properties aren't fully utilized throughout the batter. Using a type of flour that is too low in protein for the recipe (like cake flour in a recipe designed for all-purpose, without adjustment) can also contribute to crumbliness due to less gluten development providing structure. Identifying a cake that disintegrates easily is a clear sign that these easy cake troubleshooting tips are relevant.
Problem: Cake is Unevenly Baked - Causes and Identification
An unevenly baked cake might have edges that are dark and dry while the center is still wet and underdone, or one side of the cake is significantly higher or more browned than the other. This issue is often related to the oven itself or how the cake is placed within it. Hot spots in the oven, where certain areas are hotter than others, are a common culprit. If your oven temperature is inconsistent, or if the heating element is stronger in one area, it will affect how the cake bakes.
Other factors include placing the cake pan too close to a heating element, overcrowding the oven with multiple pans, or using a dark metal pan without adjusting the temperature (dark pans absorb more heat). For instance, if you place a single cake pan on the very top rack of an oven where the top element is dominant, the top will likely bake and brown much faster than the bottom.
An oven thermometer can help you identify if your oven's internal temperature matches the setting. Recognizing areas of the cake that are over or underdone points towards needing easy cake troubleshooting tips related to oven mechanics and pan placement.
Cake Troubleshooting Tips: Solutions for Common Issues
Troubleshooting Dry Cakes: Simple Fixes
Dry cakes are frustrating, but often fixable with simple adjustments to your technique or ingredients. The core issue is usually a lack of moisture retention or excessive moisture loss during baking. Pay close attention to your measurements, especially flour, and consider slight adjustments to your recipe's liquid or fat content if dryness is a recurring problem. Proper oven temperature is also paramount; if your oven runs hot, it can quickly dry out a cake even if baked for the correct time. Using an oven thermometer is a simple yet effective step in ensuring your oven is calibrated correctly.
Beyond the baking process, how you cool and store your cake significantly impacts its moisture. Cooling a cake too quickly (like placing a hot cake directly into the refrigerator) can cause moisture to evaporate rapidly. Storing a cake uncovered or improperly wrapped allows air to dry it out. Learning these easy cake troubleshooting tips related to post-bake handling is just as important as perfecting the batter and baking process.
Increasing Moisture Content in the Batter [Add applesauce, sour cream, or oil]
One of the most direct easy cake troubleshooting tips for dryness is to boost the moisture in the batter. Ingredients like applesauce, sour cream, yogurt, buttermilk, or extra oil or melted butter can significantly improve a cake's moisture and tenderness. These ingredients add fat and/or liquid without adding excessive structure, resulting in a softer, moister crumb. For instance, in a standard butter-based cake recipe, substituting a few tablespoons of milk with buttermilk or sour cream can add richness and moisture due to their fat and acidity.
You don't need to make drastic changes. Often, adding just a tablespoon or two of a moistening agent is enough. If a recipe consistently yields a dry cake, try adding 2-4 tablespoons of applesauce or a similar amount of sour cream or plain yogurt per standard 8 or 9-inch cake layer. Alternatively, increasing the oil content slightly (say, by 1-2 tablespoons) can also help, as oil coats flour particles and inhibits gluten development, leading to a more tender and moist result. These small additions are easy cake troubleshooting tips that can make a big difference.
Adjusting Baking Time and Temperature for Dry Cakes
Overbaking is arguably the most common cause of dry cakes, as prolonged heat evaporates moisture. The first easy cake troubleshooting tip here is to trust your doneness tests rather than relying solely on the recipe's suggested time. Cakes are typically done when a toothpick inserted into the center comes out clean or with just a few moist crumbs attached (not wet batter). Start checking a few minutes before the minimum time specified in the recipe. For example, if the recipe says 30-35 minutes, check at 28 minutes.
If your oven consistently bakes too hot (verified with an oven thermometer), reducing the temperature by 25°F (about 15°C) can help prevent the cake from drying out before the center is cooked. You might need to bake it for a few extra minutes at the lower temperature, but the slower baking process allows the cake to cook through without the edges and top becoming overly dry. These temperature and time adjustments are critical easy cake troubleshooting tips for achieving a moist final product.
Proper Storage to Prevent Cake Dryness
How you store your cake after it's baked and cooled is crucial for maintaining moisture. A cake left exposed to air will dry out rapidly as moisture evaporates from its surface. The most effective easy cake troubleshooting tip for post-bake dryness is proper wrapping. Once the cake has cooled completely on a wire rack, wrap it tightly in plastic wrap, ensuring there are no gaps where air can enter. For extra protection, you can then place the wrapped cake in an airtight container or cover it with aluminum foil.
For frosted cakes, use a cake dome or an airtight container. If the cake is already cut, press a piece of plastic wrap directly onto the cut surfaces before covering the rest of the cake. Room temperature storage is usually fine for 2-3 days for most cakes. For longer storage, a well-wrapped cake can be refrigerated for up to a week or frozen for several months. Freezing is excellent for preserving moisture; thaw the cake overnight in the refrigerator while still wrapped to allow moisture to redistribute.
Troubleshooting Dense or Heavy Cakes: Achieving a Light and Airy Texture
Achieving a light and airy cake texture is a hallmark of successful baking. Dense cakes often result from issues related to aeration and gluten development. The goal is to incorporate air into the batter and avoid overworking the flour once it's added. Understanding the role of key ingredients and techniques is fundamental to these easy cake troubleshooting tips. Let's look at how precise measurement, proper creaming, and careful mixing play their parts.
These easy cake troubleshooting tips focus on preventing the batter from becoming too heavy or tough before it even gets to the oven. By paying close attention to these initial steps, you build the foundation for a cake that will rise beautifully and have a tender, delicate crumb. It's about respecting the ingredients and the process, allowing them to work together to create that perfect texture.
Importance of Proper Ingredient Measurement for Cake Texture
Accurate ingredient measurement is perhaps the single most important easy cake troubleshooting tip, especially when it comes to preventing dense cakes. Too much flour, for instance, adds excess protein which can lead to more gluten development, resulting in a tough cake. Using too little leavening agent (baking powder or soda) means the cake won't rise sufficiently, leading to a dense structure. Dry ingredients like flour, cocoa powder, and powdered sugar should ideally be measured by weight using a kitchen scale for maximum accuracy.
If measuring by volume (cups), use the 'spoon and level' method for flour: gently spoon flour into the measuring cup until overflowing, then level off the excess with a straight edge. Never scoop flour directly from the bag with the measuring cup, as this compacts the flour and can add significantly more than needed – sometimes 20-30% more! Liquids should be measured in a liquid measuring cup placed on a flat surface at eye level. Proper measurement ensures the delicate balance of wet and dry ingredients, fats, and leavening is correct, which is essential for a light texture.
Creaming Butter and Sugar Correctly: A Step-by-Step Guide
Creaming butter and sugar is a vital step in many cake recipes for incorporating air, which acts as a leavening agent. This process involves beating softened butter with sugar until the mixture becomes pale in color and fluffy in texture. The sharp edges of the sugar crystals cut into the fat, creating tiny air pockets. As the cake bakes, these air pockets expand, helping the cake rise and contributing to a tender crumb. This is a core easy cake troubleshooting tip for achieving lightness.
To cream correctly, use softened butter (it should yield slightly when pressed, but not be greasy or melted). Beat the butter alone for about 30 seconds to break it up, then add the sugar. Beat on medium-high speed for 3 to 5 minutes (or even longer, up to 8 minutes, depending on the amount and mixer), scraping down the sides of the bowl occasionally. The mixture should visibly lighten in color and become airy and increased in volume. If this step is rushed or the butter is too cold, insufficient air will be incorporated, leading to a dense cake.
Avoiding Overmixing the Batter: Preserving Air Bubbles
Once you add the dry ingredients to the wet ingredients (which contain the creamed butter and sugar with their precious air bubbles), the goal is to mix just enough to combine everything. Overmixing at this stage is a primary cause of dense, tough cakes because it develops gluten in the flour. Gluten provides structure, which is great for bread, but too much makes a cake heavy. This easy cake troubleshooting tip is about gentle handling.
Mix on a low speed until just combined – there might still be a few small streaks of flour visible. Often, you can finish mixing by hand with a spatula for the last few seconds to ensure no pockets of dry ingredients remain at the bottom or sides of the bowl.
For recipes using the "reverse creaming" method (where dry ingredients are mixed with fat first), overmixing is less of a concern for gluten development but can still lead to a less tender crumb if done excessively. Generally, once you add the liquid ingredients or eggs in the final stage of reverse creaming, mix only until smooth.
Troubleshooting Sunken Cakes: Preventing Cake Collapses
A cake that rises beautifully in the oven only to sink in the middle as it cools is incredibly frustrating. This cratering effect usually indicates that the cake's structure wasn't fully set when it was removed from the oven or subjected to a sudden change. Understanding the factors that affect cake structure during baking is key to applying these easy cake troubleshooting tips. Let's look at oven temperature, avoiding disturbances, and proper cooling.
Preventing a sunken cake relies on ensuring the cake bakes through evenly and develops a stable internal structure before it leaves the heat. It's about patience and understanding the critical phase of baking when the cake is most vulnerable. These easy cake troubleshooting tips focus on creating the right environment for your cake to set properly.
Correct Oven Temperature and its Impact on Cake Structure
An oven that is too cool is a common culprit for sunken cakes. If the temperature is too low, the cake will rise slowly, and the structure (formed by the setting of proteins and starches) won't solidify properly before the leavening agents lose their power. The cake will continue to rise but eventually collapse on itself because the internal framework isn't strong enough to support the height. Using an oven thermometer to verify your oven's temperature is a crucial easy cake troubleshooting tip. Many home ovens can be off by 25-50°F (about 15-30°C)!
If your oven runs cool, preheating it for longer or adjusting the temperature setting upwards might be necessary. Conversely, if the oven is too hot, the outside of the cake can set too quickly while the inside is still raw and rising. When removed, the undercooked center lacks support and collapses. Ensuring the oven is accurately preheated to the correct temperature before putting the cake in is non-negotiable for preventing sunken cakes.
Avoiding Opening the Oven Door During Baking
Resist the urge to peek! Opening the oven door, especially in the first two-thirds of the baking time, can cause a sudden drop in temperature. This cool blast interrupts the cake's rising process and can cause the delicate, still-setting structure to collapse. The hot air inside the oven is what helps the cake rise and set; letting it escape prematurely is a major cause of sunken centers. This is one of the simplest yet hardest easy cake troubleshooting tips to follow!
As a general rule, avoid opening the oven door for at least the first 20-25 minutes for standard-sized cakes (like 8 or 9-inch rounds). You can usually see the cake rising through the oven door window. Wait until the cake looks mostly set around the edges before even considering opening it to test for doneness. If you must check, do it quickly. Trust your oven and the process; patience is key to preventing collapses.
Proper Cooling Techniques to Prevent Sinking
Even after baking, a cake is still fragile. Removing it from the pan or cooling it improperly can lead to sinking. Cakes need a transition period. Immediately after removing from the oven, most cakes should cool in their pan on a wire rack for about 10-15 minutes. This allows the structure to stabilize slightly outside the intense oven heat but still within the supportive pan. Trying to remove it sooner can cause it to break or sink.
After this initial cooling period in the pan, invert the cake onto a wire rack to cool completely. A wire rack allows air circulation around the entire cake, preventing steam from accumulating on the bottom, which can make it gummy or lead to further sinking. Ensure the cake is fully cooled before frosting or storing. Cooling a cake upside down, especially if it has a slight dome, can also help flatten the top slightly due to gravity, which is a bonus easy cake troubleshooting tip for easier decorating.
Troubleshooting Crumbly Cakes: Binding the Cake Together
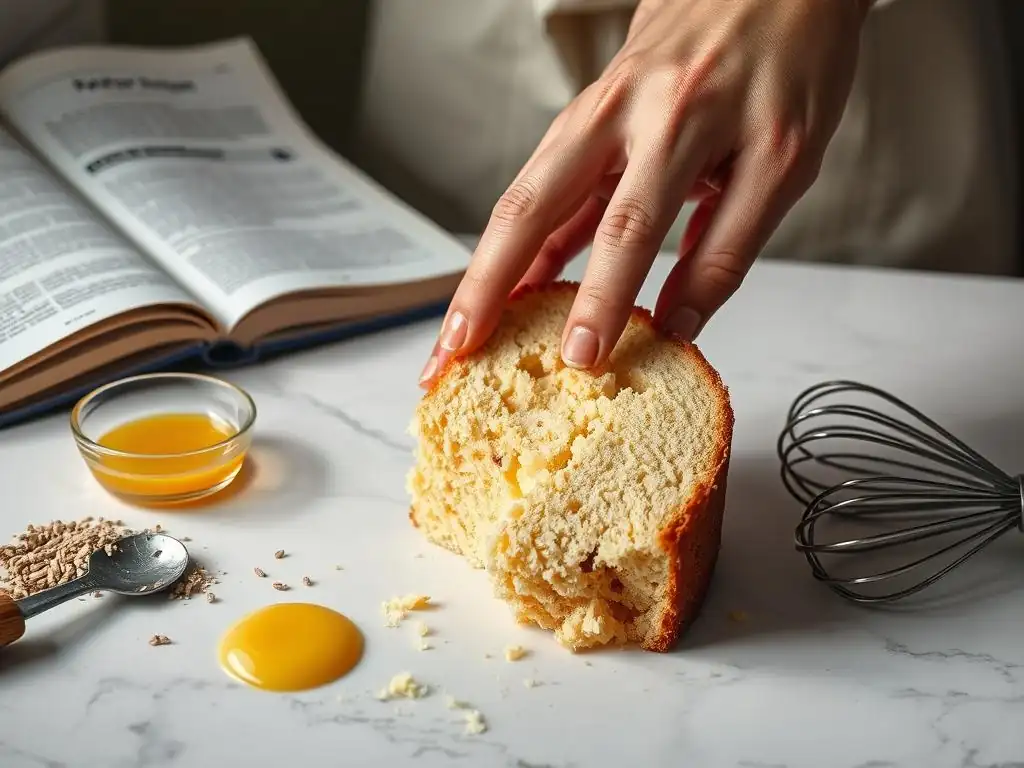
While a tender crumb is desirable, a cake that crumbles excessively when sliced indicates a structural issue – it lacks sufficient binding. This can be due to an imbalance of ingredients, particularly fats and liquids, or insufficient development of structure during mixing and baking. Addressing the binding elements in your batter and ensuring proper baking are key easy cake troubleshooting tips here.
These easy cake troubleshooting tips focus on enhancing the elements that hold the cake together, whether through ingredient adjustments or ensuring the existing ingredients are working effectively. It's about creating a cohesive network within the cake that allows it to be sliced cleanly without disintegrating.
Adding Binding Agents to the Cake Batter [Add an extra egg or a tablespoon of cornstarch]
Eggs are powerful binding agents in baking, thanks to their proteins. If your cake consistently comes out too crumbly, adding an extra egg (especially the yolk, which adds richness and moisture as well as binding) can significantly improve its structure. For a typical 8 or 9-inch cake recipe using 2-3 eggs, try adding one extra large egg. This simple easy cake troubleshooting tip can provide the extra 'glue' needed.
Alternatively, incorporating a small amount of a starch like cornstarch or tapioca starch can also help bind the cake. Starches absorb liquid and contribute to structure as they gelatinize during baking. Adding 1-2 tablespoons of cornstarch per cup of flour in a recipe can help create a more tender yet less crumbly crumb. Ensure you whisk the starch thoroughly with the flour before adding to the wet ingredients.
Using the Right Type of Flour for Cake Baking
The type of flour used impacts gluten development, which affects cake structure. All-purpose flour has a moderate protein content (around 10-12%) and provides a good balance of structure and tenderness for many cakes. Cake flour, with a lower protein content (around 6-8%), results in less gluten and a more tender, delicate crumb, but in some recipes, using only cake flour might lead to excessive crumbliness if the recipe wasn't specifically developed for it or lacks other strong binding agents.
If a recipe calls for all-purpose flour and your cake is crumbly, stick with it. If it calls for cake flour and is crumbly, ensure you are measuring it correctly (it's lighter than all-purpose) and consider if other factors (like overbaking) are contributing. Sometimes, using a blend of all-purpose and cake flour (e.g., 1 cup AP + 1/4 cup cake flour) can provide a good balance of structure and tenderness. Understanding flour types is a useful easy cake troubleshooting tip.
Avoiding Overbaking to Prevent Crumbly Texture
As mentioned with dry cakes, overbaking is a major contributor to crumbliness. When a cake bakes for too long, its internal moisture evaporates, and the structure becomes brittle. This dry, brittle structure breaks apart easily when cut. Checking for doneness accurately and removing the cake promptly when it's ready is a critical easy cake troubleshooting tip.
Use the toothpick test: insert a toothpick into the center. It should come out clean or with a few moist crumbs, but no wet batter. Also, gently press the top of the cake; it should spring back slightly. The edges should be pulling away from the sides of the pan. If the cake looks done on top but feels soft and jiggly in the center, it needs more time, but if it feels firm all over and the edges are very dark, it's likely overbaked.
Troubleshooting Unevenly Baked Cakes: Ensuring Consistent Baking
An unevenly baked cake is frustrating because parts of it are perfect while others are ruined. This issue is almost always related to heat distribution in your oven or pan. Ensuring your oven is calibrated and understanding how pan placement affects baking are key easy cake troubleshooting tips here. Let's explore how to achieve consistent heat exposure for your cake.
These easy cake troubleshooting tips are about controlling the baking environment to ensure heat reaches the cake batter uniformly. Small adjustments to your oven usage and pan handling can make a significant difference in the final, evenly baked result.
Evenly Distributing Batter in the Cake Pan
While it seems simple, how you put the batter into the pan affects how the cake rises and bakes. Uneven batter distribution can lead to one side being thicker than the other, causing it to take longer to bake and potentially resulting in an uneven dome or texture. After pouring the batter into the prepared pan, gently spread it towards the edges, creating a slight well or dip in the center.
As the cake bakes and the center rises more than the edges, starting with a slight dip helps encourage a more level top. Gently tapping the pan on the counter a couple of times also helps to settle the batter and eliminate large air pockets, contributing to a more even crumb. This simple step is an effective easy cake troubleshooting tip for preventing lopsided cakes.
Using Oven Thermometers for Accurate Temperature Readings
Relying solely on your oven's dial or digital display can be misleading, as internal temperatures can vary significantly from the setting. An inexpensive oven thermometer placed inside your oven provides an accurate reading of the actual temperature. This is an indispensable easy cake troubleshooting tip for consistent baking results.
If your oven thermometer shows a consistent discrepancy (e.g., it reads 325°F when set to 350°F), you'll know to adjust your oven setting accordingly (in this case, setting it to 375°F to achieve an actual 350°F). Understanding your oven's true temperature helps prevent issues like sunken centers (oven too cool) or dry edges/uneven baking (oven too hot or with hot spots).
Rotating the Cake During Baking for Uniform Heat Exposure
Even with an accurate oven temperature, many ovens have hot spots. Rotating the cake pan partway through the baking time can help ensure it receives even heat exposure on all sides. This is a simple yet effective easy cake troubleshooting tip, especially if you notice one side of your cakes consistently browning faster than the other.
For most cakes, rotating the pan 180 degrees about two-thirds of the way through the minimum baking time is sufficient. For example, if a cake bakes for 30-35 minutes, rotate it around the 20-25 minute mark. Be quick when you open the oven door to rotate, and avoid doing this too early in the bake when the cake is still setting, as the temperature change could cause it to sink.
Advanced Cake Troubleshooting Techniques for Persistent Issues
When Basic Solutions Don't Work: Investigating Deeper Issues
If you've tried the basic easy cake troubleshooting tips and are still facing persistent issues, it might be time to look at less common factors. Sometimes the problem isn't just technique, but the fundamental understanding of ingredient interactions or environmental factors. This level of troubleshooting involves a deeper dive into baking science and considering variables you might not have thought of before. It's about becoming a baking detective!
Persistent problems could point to issues with your ingredients themselves (age of leavening, freshness of flour), your equipment (a faulty oven element, old pans), or even your environment (high altitude, humidity). Don't get discouraged; think of it as the next level in mastering cake baking. Understanding these advanced concepts helps you adapt recipes and truly control the outcome of your bakes.
Understanding Gluten Development and its Role in Cake Structure
Gluten, formed when proteins in flour (glutenin and gliadin) combine with liquid and are agitated (mixed), provides structure and elasticity. In bread baking, gluten development is desired for a chewy texture. In cake baking, controlled gluten development is key. Too much gluten leads to tough, dense cakes. Too little can lead to crumbly cakes. Recipes are designed to balance gluten development with tenderizing ingredients (fats, sugar) and leavening (air, baking powder/soda, steam) to create a tender crumb.
If your cake is consistently dense, you might be overmixing, using too high-protein flour, or not using enough tenderizing agents. If it's crumbly, you might not be developing enough gluten (e.g., insufficient mixing, using very low-protein flour without compensation) or lacking other binders. Understanding how mixing time, flour type, and the ratio of fat/sugar to flour affect gluten is a more advanced easy cake troubleshooting tip that unlocks deeper control over your cake's texture.
Troubleshooting with Different Types of Cake Pans
The material, color, and size of your cake pan significantly impact how a cake bakes. Different materials conduct heat differently. Shiny aluminum pans reflect heat, leading to slower, more even baking. Dark metal pans absorb heat, resulting in faster baking and darker crusts – this can be a cause of dry edges or uneven baking if not adjusted. Glass or ceramic pans conduct heat slowly and retain it longer, often requiring a lower oven temperature (like reducing by 25°F or 15°C).
If you're using a pan type different from what the recipe likely assumed (usually shiny metal), you might need to adjust baking time or temperature. For instance, if a recipe was written for shiny aluminum and you use a dark pan, your cake might bake faster and risk dryness. Similarly, using a pan size different from the recipe will drastically change baking time and potentially thickness/texture. Always use the pan size specified or find reliable conversion guidelines. This is a nuanced easy cake troubleshooting tip for consistent results across different pans.
Addressing Altitude Adjustments in Cake Recipes
Baking at high altitude (generally considered above 3,000 feet or about 900 meters) presents unique challenges due to lower atmospheric pressure and humidity, and faster evaporation. Leavening agents work more efficiently (sometimes too much), liquids evaporate faster, and sugar concentrations are higher relative to liquid. Cakes baked at high altitude without adjustments often rise too quickly, then collapse (due to insufficient structure setting before the rapid rise), and are dry.
High-altitude easy cake troubleshooting tips often involve reducing leavening agents slightly, increasing liquid, increasing flour slightly, and sometimes increasing baking temperature slightly to help the structure set faster. For example, for every teaspoon of baking powder at sea level, you might reduce it by 1/8 to 1/4 teaspoon at high altitude. Adding an extra tablespoon or two of milk or another liquid per cup of flour can compensate for faster evaporation. Specific adjustments vary depending on the altitude and recipe, and often require some experimentation.
Preventing Cake Problems: Best Baking Practices
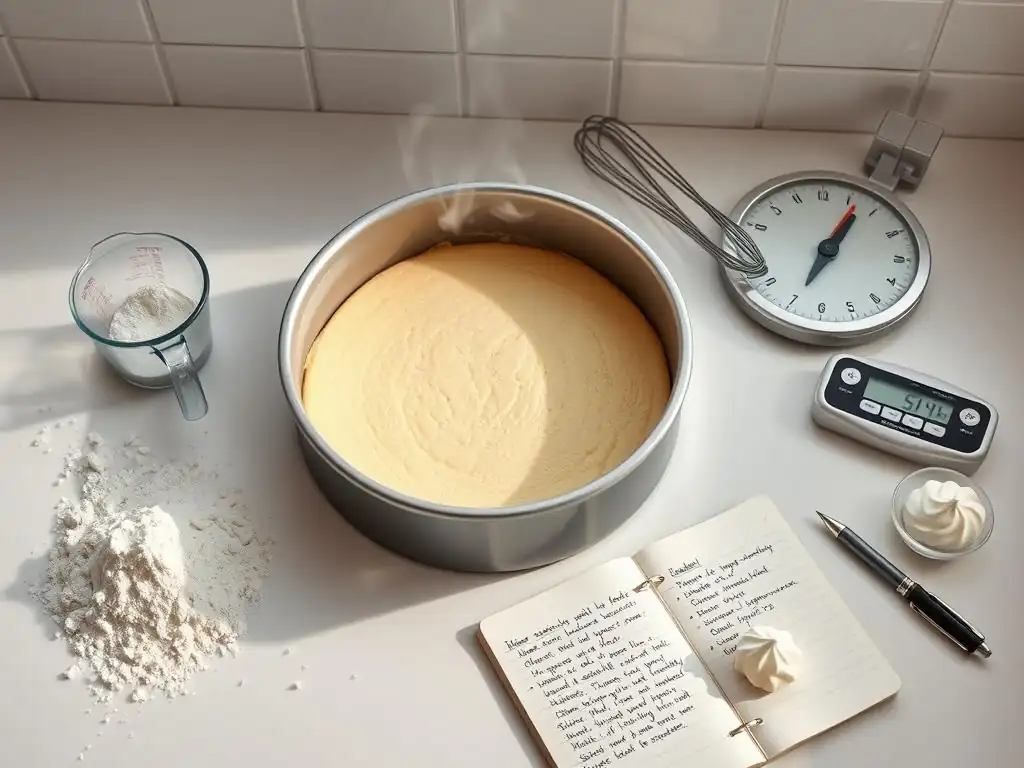
Prevention is always easier than troubleshooting! Many common cake problems can be avoided by simply following best practices in the kitchen. These fundamental techniques aren't complicated; they just require attention to detail and consistency. Mastering these basics is the most effective easy cake troubleshooting tip of all – because it stops the problems before they start!
By incorporating these simple habits into your baking routine, you'll find that your cakes turn out successfully much more often. It's about creating a controlled environment and following steps that are designed for success. Let's look at the essential practices that form the backbone of reliable cake baking.
Essential Baking Tips for Beginners to Avoid Common Mistakes
For beginners, establishing good habits from the start is crucial. Always read the entire recipe before you begin, ensuring you understand the steps and have all ingredients and equipment ready (mise en place). Use ingredients at the temperature specified in the recipe (e.g., softened butter, room temperature eggs), as temperature significantly affects how ingredients combine and react. Preheat your oven fully before putting the cake in; this can take 15-20 minutes or longer.
Avoid making substitutions unless the recipe suggests them or you understand how the substitute will affect the outcome (e.g., swapping oil for butter changes texture). Don't overfill your cake pans; typically, fill them about two-thirds full to allow space for rising. These simple yet critical steps are the foundation of effective easy cake troubleshooting tips because they prevent many issues from occurring in the first place.
Measuring Ingredients Accurately: The Key to Consistent Results
As highlighted earlier regarding dense cakes, accurate measurement is paramount. Baking is a science, and the ratios of ingredients are crucial for the chemical reactions that make a cake rise and set properly. Using the correct method for measuring dry ingredients (spoon and level for volume, or ideally, weight) and liquids (liquid measuring cup at eye level) is non-negotiable for consistent results.
Even small errors in measurement can lead to noticeable differences in the final cake. For example, adding just an extra 1/4 cup of flour to a recipe calling for 1 cup can significantly alter the texture. Using a kitchen scale, even an inexpensive one, provides the most reliable measurement for dry ingredients like flour, sugar, and cocoa powder, eliminating variation due to scooping technique or humidity. Precision in measurement is the ultimate easy cake troubleshooting tip for predictability.
Preparing Cake Pans Correctly to Prevent Sticking
A cake that sticks to the pan is not only frustrating but can ruin the cake's structure and appearance. Proper pan preparation ensures your cake releases cleanly every time. This is a simple easy cake troubleshooting tip that saves a lot of heartache. Most recipes call for greasing and flouring the pan.
To do this effectively, grease the inside of the pan thoroughly with softened butter, shortening, or non-stick baking spray, getting into all corners and up the sides. Then, add a tablespoon or two of flour (or cocoa powder for chocolate cakes) to the greased pan, tilt and rotate the pan to coat the grease evenly with a thin layer of flour, and tap out the excess. For extra security, especially with intricate pans or sticky batters, you can line the bottom with parchment paper after greasing, then grease and flour the parchment and sides.
Understanding the Role of Each Ingredient in Cake Baking
Each ingredient in a cake recipe plays a specific role, and understanding these functions helps you troubleshoot and prevent problems. Flour provides structure through protein (gluten) and starch. Sugar tenderizes, adds sweetness, aids browning, and helps retain moisture. Fats (butter, oil) tenderize by coating flour particles, add moisture and flavor, and help with aeration (especially butter when creamed). Eggs provide structure (protein), richness (yolk), binding, and contribute to leavening.
Liquids (milk, buttermilk, water) hydrate dry ingredients, activate leavening, and control batter consistency. Leavening agents (baking powder, baking soda) create gas (carbon dioxide) that makes the cake rise. Salt enhances flavor and balances sweetness. By knowing what each component does, you can often deduce why a problem occurred. For example, a cake that didn't rise likely has an issue with leavening or insufficient structure to support the rise. This foundational knowledge makes applying easy cake troubleshooting tips much more intuitive.
Final Thoughts on Cake Troubleshooting
Mastering the Art of Cake Baking Through Troubleshooting
Baking is a journey of continuous learning, and troubleshooting is an integral part of that journey. Every "failed" cake is an opportunity to learn something new about the science and art of baking. By understanding the common problems, their causes, and the simple easy cake troubleshooting tips to fix them, you're not just fixing a cake; you're building a deeper understanding of the craft. This knowledge empowers you to adapt, experiment, and grow as a baker.
Don't be afraid to try again! Baking is often about practice and refinement. Keep notes on what worked and what didn't. Did adding an extra tablespoon of milk make your dry cake perfect? Did reducing the baking time solve your crumbly issue? These personal observations combined with the easy cake troubleshooting tips in this guide will accelerate your progress and lead to consistently delicious results.
Building Confidence in Your Baking Skills with BakeWithEase
At BakeWithEase, our mission is to make baking accessible and enjoyable for everyone. Learning easy cake troubleshooting tips is a huge step towards building confidence in your abilities. When you realize you can diagnose a problem and apply a solution, the fear of failure diminishes, and the joy of baking takes center stage. Each successful bake, especially after troubleshooting a previous attempt, is a significant confidence booster.
We hope this guide gives you the tools and encouragement you need to face cake challenges head-on. Remember, every baker, even professionals, has had a cake sink or turn out dry. It's how you learn from it that matters. With these easy cake troubleshooting tips and a little practice, you'll be baking beautiful, delicious cakes with ease in no time!
Resources for Further Learning and Cake Baking Support
This guide covers the most common cake problems and their easy cake troubleshooting tips, but there's always more to learn! Baking science is a vast and fascinating subject. For deeper dives into specific techniques, ingredient functions, or more complex troubleshooting scenarios, explore our other articles on BakeWithEase.com.
We have resources covering everything from ingredient spotlights to technique tutorials and recipes specifically designed for beginners. Don't hesitate to revisit this guide whenever you encounter a new challenge. With practice, patience, and the right easy cake troubleshooting tips, you'll master cake baking and confidently create delicious treats for yourself and others. Happy baking!
Frequently Asked Questions
What are some common signs that my cake isn't baking properly?
Common signs include a sunken center, an uneven top, or a cake sticking to the pan. These indicate problems with temperature, ingredient ratios, or pan preparation.
My cake is dry. What could be the reason, and how can I prevent it?
A dry cake is often caused by overbaking or using too much flour. Try reducing the baking time or measuring your flour carefully, perhaps using a scale.
Why did my cake sink in the middle after I took it out of the oven?
A sunken cake is frequently due to underbaking or opening the oven door too early. Ensure the cake is fully baked before removing it, and avoid temperature fluctuations.
How can I prevent my cake from sticking to the pan, even with greasing?
Use parchment paper lining the bottom of the pan in addition to greasing and flouring. This creates a non-stick barrier for easy release.
What should I do if my cake is browning too quickly on top?
If the top is browning too fast, tent the cake with aluminum foil during baking. This deflects heat and prevents excessive browning while the inside finishes cooking.
Final Reflection: Baking Bliss Beyond the Blunders
The seemingly simple act of baking a cake can reveal surprising complexities, but mastering even basic troubleshooting techniques unlocks a world of delicious possibilities. A perfectly risen, moist, and flavorful cake isn't just a culinary achievement; it's a testament to understanding the subtle science behind baking. This guide aimed to demystify common cake-baking problems, empowering even novice bakers to confidently navigate the occasional mishap.
The journey from a collapsed cake to a triumphant creation is a deeply satisfying one. It's a process that mirrors life itself – learning from mistakes, adapting to challenges, and ultimately finding joy in the outcome. The best way to find yourself is to lose yourself in the service of others.
While this quote isn't directly about baking, it speaks to the transformative power of perseverance and the unexpected rewards that come from embracing the learning process. The impact of mastering even simple baking skills extends beyond the kitchen; it fosters patience, problem-solving skills, and a sense of accomplishment that can be applied to many areas of life.
Now, it's your turn. Don't be afraid to experiment, to embrace the occasional flop, and to learn from each baking experience. The next time you encounter a sunken center or a stubbornly dry crumb, remember the troubleshooting tips outlined in this guide. More importantly, remember the joy of the process, the satisfaction of creating something delicious with your own two hands, and the confidence that comes from knowing you can overcome any baking challenge. Go forth and bake!
Unleash Your Inner Baker: Conquer Cake Challenges!
Thanks for joining us on this baking adventure! We hope you now feel more confident tackling those tricky cake moments. Ready to put your newfound knowledge into practice?
- Bake your perfect cake: Choose your favorite recipe (or try one of our many others!) and get baking. Remember the tips we shared – they're your secret weapon!
- Share your baking triumphs (or even your funny fails!): Tag us on social media – we love seeing your creations!
- Join our baking community: Leave a comment below; share your go-to cake troubleshooting tip! Let's learn from each other.
What's your biggest cake-baking challenge, and how will you tackle it now?