
The Science of Spreading: Beginner Cookie Troubleshooting

Welcome to BakeWithEase, your kitchen companion for all things baking! Ever wondered why your cookies spread too thin? Dive into "The Science of Spreading: Beginner Cookie Troubleshooting" and unlock the secrets to perfectly plump, irresistible treats. Let's conquer those baking woes together - discover how to fix flat cookies and bake with confidence!
- Troubleshooting Common Cookie Problems: A Baker's Guide
- Introduction: Understanding Cookie Spread and Texture
- Diagnosing Cookie Issues: Identifying the Causes
- Troubleshooting Cookie Issues: Practical Solutions
- Advanced Cookie Troubleshooting: Refining Your Baking
- Preventative Measures: Mastering Cookie Baking
- Conclusion: Achieving Cookie Perfection
- Frequently Asked Questions
- Final Reflection: The Sweet Science of Success (and Avoiding Flat Cookies)
- Unleash Your Inner Cookie Master!
Baking cookies is a delightful process, but sometimes the results aren't quite what we envisioned. One of the most common issues beginners face is understanding and controlling cookie spread. We aim for that perfect balance: a cookie that holds its shape but also spreads just enough to create a slightly crisp edge and a soft center. When cookies spread too much, they become thin and often greasy – a frustrating outcome when you're trying to achieve baking perfection. This excessive spread is a frequent cause of flat cookies, a problem many home bakers grapple with.
The texture of a cookie is a complex interplay of ingredients, temperature, and technique. It's not just about taste; it's also about how the cookie feels in your hand and mouth. A cookie's texture can range from chewy and soft to crisp and crumbly, and the degree of spread significantly influences this. Understanding the science behind why cookies spread is the first step in learning how to fix flat cookies and achieve that desired texture every time. It involves delving into how fats melt, sugars caramelize, and leaveners react during the baking process.
Beyond just excessive spread leading to flat cookies, bakers often encounter other issues like cookies that don't spread enough (resulting in thick, cakey pucks), cookies that are too hard, or cookies that brown unevenly. Each problem usually stems from a specific cause related to ingredient ratios, mixing methods, or baking conditions. For instance, a cookie that is too hard might have too much flour or too little fat, while uneven browning can point to hot spots in your oven or the type of baking sheet used.
Learning how to diagnose these common cookie problems is key to becoming a more confident baker. For example, if your chocolate chip cookies consistently turn out flat and greasy, you might suspect issues with your butter, dough temperature, or oven setting. Addressing these specific variables is how you effectively troubleshoot and implement solutions. This guide will walk you through identifying the root causes of common cookie woes, particularly focusing on how to fix flat cookies and achieve that ideal spread.
One of the most significant factors influencing how much your cookies spread is the temperature of the dough before it hits the oven. Cold dough spreads less because the fat (usually butter) is solid. As the cookies bake, the butter slowly melts, allowing the cookie to spread gradually as the structure sets. If you bake dough straight from mixing at room temperature, the butter is already soft, causing it to melt much faster in the oven.
This rapid melting of soft butter provides less structural support as the leaveners activate, leading to quicker, wider spread and often resulting in thinner, flatter cookies. Chilling cookie dough in the refrigerator for at least 30 minutes, or even several hours, allows the butter to firm up significantly. This chilled state helps the cookies maintain their shape longer in the hot oven, promoting a thicker center and controlling the spread, which is a crucial step in preventing flat cookies. Many recipes specifically call for chilling for this very reason.
Pinpointing why your cookies aren't turning out right is like being a detective in your kitchen. You need to examine the evidence: the appearance, texture, and even the taste of the failed batch. Is the cookie too thin and wide? Is it thick and cakey?
Did it burn around the edges before the center was done? Each of these symptoms points towards potential culprits in your recipe or technique. For instance, if your cookies are always super flat, you're likely dealing with an issue related to fat, temperature, or leavening balance, and understanding these factors is essential for figuring out how to fix flat cookies.
The ingredients themselves hold many clues. The type and amount of sugar, the state and type of fat, the way you measure flour, and even the freshness of your leavening agents all play critical roles. Furthermore, external factors like your oven's actual temperature versus what the dial says, or the type of baking sheet you use, can dramatically alter the outcome. Learning to observe these details in your baking process is the first step toward consistent, delicious results.
Sugar does more than just sweeten your cookies; it significantly affects their texture and spread. Granulated sugar contributes to spread because it melts into a liquid during baking, allowing the cookie dough to relax and flatten. It also helps create a crispier texture. Brown sugar, on the other hand, contains molasses, which adds moisture and acidity. This promotes a softer, chewier texture and slightly less spread compared to using only granulated sugar.
The ratio of granulated sugar to brown sugar is often a key determinant of cookie texture. A classic chocolate chip cookie recipe might use a mix, like 1 cup of brown sugar to ½ cup of granulated sugar, to achieve both spread and chewiness. If your cookies are too flat, an excessive amount of granulated sugar relative to other ingredients could be contributing to the problem. Conversely, if they don't spread enough and are too cakey, you might have too little sugar or too much brown sugar.
The Role of Fat: Butter, Shortening, and Spreading
Fat is perhaps the most crucial ingredient when it comes to cookie spread. Butter, which is typically about 80-82% fat and 18-20% water and milk solids, melts completely in the oven at a relatively low temperature (around 90-95°F or 32-35°C). As it melts, the water in the butter turns to steam, which can also contribute to leavening and spread. Using melted butter instead of softened butter will cause cookies to spread significantly more because the fat is already in a liquid state before baking begins.
Shortening, which is 100% fat (often hydrogenated vegetable oil), has a much higher melting point (around 115-120°F or 46-49°C) and contains no water. Because it melts at a higher temperature, it provides structure for longer during baking, resulting in cookies that spread less and are often thicker and cakier than those made with butter. A common issue contributing to flat cookies is using butter that is too soft or even melted when the recipe calls for softened butter. Using a blend of butter and shortening can offer a balance of flavor and controlled spread.
Oven Temperature Accuracy and Its Effect on Baking
Even the most perfectly mixed cookie dough can be ruined by an inaccurate oven temperature. Most ovens are not perfectly calibrated, and the actual temperature inside can vary by as much as 25-50°F (approx. 14-28°C) from the setting on the dial. If your oven is running too hot, cookies will bake and set too quickly, potentially leading to less spread and a thicker, sometimes drier texture, or they might burn on the bottoms and edges before the center is cooked.
Conversely, if your oven is running too cool, it can be a major reason why cookies are flat. A lower temperature means the butter melts slowly, but the structure doesn't set quickly enough. This prolonged melting phase allows the cookies to spread excessively before the ingredients have a chance to solidify, resulting in thin, wide, and often pale cookies. Using an inexpensive oven thermometer is essential to know your oven's true temperature and make necessary adjustments, a critical step for consistent results and preventing flat cookies.
Flour Measurement Techniques and Their Importance
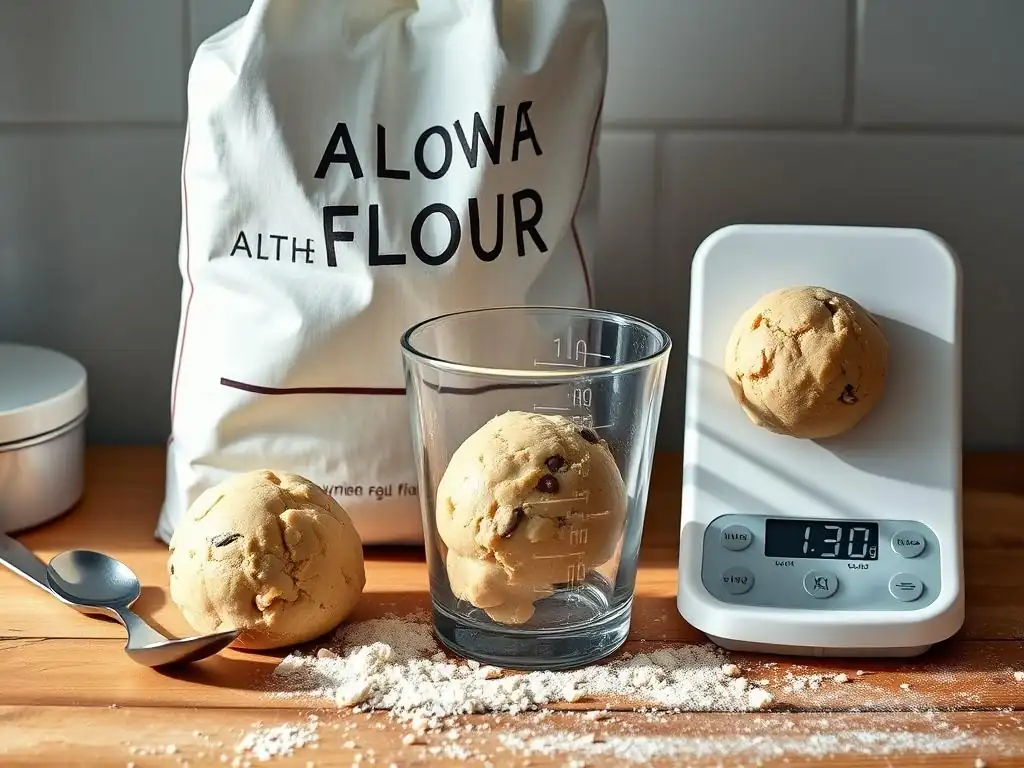
Flour is the primary structural component of most cookies. Too much flour results in a dense, dry, cakey cookie that doesn't spread much. Too little flour leads to a weak structure that collapses and spreads excessively, often resulting in flat, greasy cookies. The way you measure flour is incredibly important because it's easy to add too much accidentally. Scooping flour directly from the bag with your measuring cup can compact it, adding significantly more flour than intended – sometimes up to 20-30% more by weight compared to the proper method.
The recommended method for measuring flour is the "spoon and level" technique: gently spoon the flour into your dry measuring cup until it overflows, then level off the excess with a straight edge (like a knife or spatula) without compacting it. For the most accurate results, however, using a digital kitchen scale to weigh your flour is the gold standard.
A cup of all-purpose flour is typically considered to weigh about 120-130 grams, but this can vary slightly by brand. Precise flour measurement is a fundamental technique for consistent cookie results and a key factor in how to fix flat cookies if excess flour isn't the issue.
Choosing the Right Baking Sheet for Even Baking
The type and color of your baking sheet can also influence how your cookies bake and spread. Shiny, light-colored aluminum baking sheets are ideal for cookies. They reflect heat, which helps prevent the bottoms from browning too quickly and promotes even baking and moderate spread. Using parchment paper or a silicone baking mat (like Silpat) on these sheets further enhances evenness and prevents sticking.
Dark-colored or non-stick baking sheets absorb more heat, which can cause the bottoms of your cookies to brown (or burn) faster than the tops and centers bake. This rapid heat transfer can also sometimes affect spread, potentially leading to cookies that spread less or set too quickly on the bottom while remaining underbaked on top.
An insulated baking sheet, which consists of two layers of metal with an air pocket in between, reduces direct heat transfer to the bottom of the cookie, resulting in less browning on the bottom but sometimes also less overall spread. For preventing flat cookies and achieving even baking, a standard light-colored aluminum sheet is often the best choice.
Now that we've explored some common causes of cookie problems, especially why cookies are flat, let's talk about practical steps you can take to fix them. Troubleshooting involves making small adjustments to your recipe or technique and observing the results. Don't be afraid to experiment a little; that's how you learn what works best with your ingredients and equipment. The goal is to systematically address potential issues based on the symptoms your cookies are exhibiting.
Remember that baking is a science, but it also requires practice and intuition. If your last batch of cookies turned out flat and spread too much, consider which factor might be most likely the culprit – was your butter too soft? Did you scoop the flour? Was your oven running cool? Focusing on one or two potential issues at a time makes troubleshooting more manageable and helps you pinpoint the specific adjustments needed to achieve your desired cookie texture and prevent flat cookies in the future.
Adjusting Sugar Content for Optimal Texture
If your cookies are consistently too flat and crispy, and you suspect sugar is a factor, consider slightly reducing the total amount of sugar or increasing the proportion of brown sugar to granulated sugar. For example, if a recipe calls for equal parts granulated and brown sugar (e.g., 1 cup each), try using ¾ cup granulated and 1 ¼ cups brown sugar in your next batch. This minor adjustment increases moisture and acidity, promoting a chewier texture and slightly less spread.
Conversely, if your cookies are too thick and cakey, and you desire more spread and crispness, you could try slightly increasing the total sugar or increasing the proportion of granulated sugar. Be cautious with large changes, as sugar also affects tenderness and browning. A small adjustment, like adding an extra tablespoon or two of granulated sugar to a standard batch using 1 ½ to 2 cups of sugar total, can sometimes make a noticeable difference in spread and help if your cookies aren't spreading enough.
Chilling cookie dough is one of the most effective ways to control spread and prevent flat cookies. After mixing, shape your dough into balls or logs as desired and place them in the refrigerator. A minimum of 30 minutes is often recommended, but chilling for 1-2 hours, or even up to 2-3 days, can yield even better results. Chilling allows the fat to solidify and the dry ingredients to absorb moisture from the wet ingredients, resulting in a dough that holds its shape better in the hot oven.
When you place chilled dough balls on a baking sheet, they will spread more slowly as the butter gradually melts. This slower spread gives the cookie's structure (provided by flour and eggs) time to set, resulting in a thicker cookie with a slightly less wide diameter. Some bakers even recommend freezing portioned cookie dough balls for 10-15 minutes before baking for maximum control over spread. This simple technique is a powerhouse solution for how to fix flat cookies.
If a recipe consistently yields flat, greasy cookies, the type or amount of fat might be the issue. If the recipe uses only butter and your cookies are too flat, ensure your butter is at the correct temperature (softened, not melted or greasy-soft). If using softened butter still results in excessive spread, consider substituting a portion of the butter with shortening. Shortening's higher melting point will help the cookies hold their shape better in the oven.
For example, if a recipe calls for 1 cup (2 sticks) of butter, you could try using ½ cup butter and ½ cup shortening. This blend offers the flavor benefits of butter while the shortening helps limit spread. This adjustment is particularly useful for recipes that tend towards excessive spread. Experimenting with different fat ratios can help you find the perfect balance for your desired cookie texture, especially when troubleshooting how to fix flat cookies caused by fat issues.
Calibrating Your Oven for Accurate Baking Temperatures

An inaccurate oven temperature can sabotage your baking efforts. The most important step here is to get an oven thermometer. Place it in the center of your oven and preheat the oven to a specific temperature, say 350°F (175°C). Let the oven hold that temperature for at least 15-20 minutes, then check the thermometer. Is it 350°F, or is it 325°F (160°C) or 375°F (190°C)?
If your oven consistently runs hot or cool, you'll need to adjust your baking temperature accordingly. If your oven is 25°F (approx. 14°C) cool, set it to 375°F (190°C) when the recipe calls for 350°F (175°C). If it runs 25°F (approx. 14°C) hot, set it to 325°F (160°C). Baking at the correct temperature is crucial for proper spread, leavening, and browning, and calibrating your oven is a fundamental step in preventing flat cookies and achieving consistent results.
Measuring Flour Accurately for Consistent Results
Inaccurate flour measurement is a very common cause of inconsistent cookie results, including cookies that don't spread enough or, less often, spread too much if significantly under-measured. To ensure accuracy, always use the spoon and level method for dry measuring cups. Gently spoon flour into the cup until it's overflowing, then sweep off the excess with a straight edge. Do not scoop directly from the flour bag, as this compacts the flour and adds too much.
For the best consistency, invest in a digital kitchen scale and measure flour by weight. Many modern recipes provide gram measurements for this reason. For example, instead of "1 ½ cups all-purpose flour," a recipe might specify "180 grams all-purpose flour." Weighing ensures you use the exact amount intended by the recipe developer, eliminating the variability that comes with volume measurements. This precision is key to controlling cookie spread and achieving the desired texture.
Selecting the Best Baking Sheets for Desired Outcomes
If you're struggling with flat cookies or cookies that burn on the bottom, your baking sheet could be part of the problem. For most cookie recipes and to promote even baking and controlled spread, use light-colored, heavy-gauge aluminum baking sheets. Avoid dark-colored or non-stick sheets if possible, as they can cause excessive bottom browning and potentially affect spread differently than intended by the recipe.
Using parchment paper or a silicone baking mat on your baking sheet is highly recommended. These liners prevent sticking, make cleanup easier, and help distribute heat more evenly across the bottom of the cookie, contributing to consistent results. If you only have dark baking sheets and they are contributing to flat cookies or burnt bottoms, try reducing your oven temperature by 25°F (approx. 14°C) and potentially increasing the baking time slightly to compensate.
Once you've mastered the basics of controlling spread by managing temperature, fat, and measurement, you can delve into the more subtle factors that influence cookie texture and structure. Understanding the specific roles of ingredients like eggs and leavening agents, and even how environmental factors like humidity can play a part, will help you refine your baking skills and consistently produce perfect cookies. This is where you move beyond just fixing problems and start optimizing your results.
Even seasoned bakers encounter unexpected issues sometimes. Perhaps a new brand of flour behaves differently, or a change in weather affects the dough. Advanced troubleshooting involves recognizing these nuances and knowing how to adapt. It's about building a deeper understanding of the chemical reactions happening in your oven and learning to anticipate how different variables might impact your final cookie.
Eggs play a dual role in cookie baking: they act as a binder, holding the ingredients together, and they contribute to leavening and structure. The yolk provides fat and richness, contributing to tenderness and a slightly chewy texture. The egg white provides protein, which helps create structure and can make cookies slightly crispier. The number of eggs and whether they are used whole or separated can significantly alter the outcome.
Too little egg can result in a crumbly cookie that doesn't hold its shape well. Too much egg, particularly egg white, can lead to a cookie that is too cakey or tough, lacking the desired spread and tenderness. Large eggs are standard in most recipes (approx. 50-57 grams each in the shell). Using a different size egg without adjusting can impact the wet-to-dry ingredient ratio. If your cookies are too flat and fragile, ensure you are using the correct size and number of eggs specified in the recipe, as they provide essential structure to prevent excessive spread.
Baking Soda vs. Baking Powder: Understanding Leavening Agents
Baking soda and baking powder are chemical leaveners that produce carbon dioxide gas, causing cookies to rise. However, they work differently and affect spread. Baking soda (sodium bicarbonate) requires an acid to activate (like brown sugar, molasses, buttermilk, or cream of tartar). It reacts immediately when combined with acid and liquid, providing lift and also promoting spread by raising the pH of the dough, which weakens the gluten structure. Recipes using only baking soda often result in cookies that spread more and have a chewier texture with crackled tops.
Baking powder is a complete leavener containing both an acid and a base, plus a buffer (like cornstarch). Most baking powders are double-acting, meaning they produce a little gas when mixed with liquid and more gas when heated in the oven. Recipes using baking powder, or a combination of baking soda and powder, tend to produce thicker, puffier, cakey cookies that spread less than those relying solely on baking soda.
An imbalance or incorrect use of leaveners can certainly contribute to issues like flat cookies that spread too much or cookies that don't spread at all. Using expired leaveners can also lead to cookies that don't rise or spread properly.
Adapting Recipes for Different Humidity Levels
Environmental factors like humidity can subtly affect baking outcomes, particularly the moisture content of your dry ingredients, primarily flour. In high humidity environments, flour can absorb more moisture from the air, meaning you might be adding slightly more liquid to your dough than intended by the recipe developer who might have tested it in a drier climate. This extra moisture can lead to cookies that spread more and potentially turn out flatter.
Conversely, in very dry climates, flour can be drier, potentially leading to dough that is too stiff and cookies that don't spread enough. While less impactful than major factors like temperature or measurement, experienced bakers in extreme climates sometimes make minor adjustments, such as adding a tablespoon or two more flour in high humidity or a splash more liquid in very dry conditions, to maintain consistent dough consistency and control spread. Recognizing this subtle influence can be part of mastering how to fix flat cookies in challenging environments.
Chocolate chip cookies are a classic, and also a prime example where spread is a common issue. If your chocolate chip cookies are coming out too flat, review the common causes we've discussed, but pay special attention to these:
- Butter Temperature: Ensure your butter is softened but cool (around 65°F or 18°C), not warm or greasy.
- Chilling: Chocolate chip cookie dough benefits immensely from chilling. At least 30-60 minutes, or even overnight, can make a significant difference in thickness and chewiness.
- Sugar Ratio: Many classic recipes use a higher proportion of brown sugar to granulated sugar specifically to encourage chewiness and control spread. Check your recipe's ratio.
- Flour Measurement: Inaccurate flour measurement is a frequent culprit. Weighing flour is recommended for consistency.
Troubleshooting Flat Chocolate Chip Cookies Checklist:
- [ ] Was butter properly softened (not melted)?
- [ ] Was dough chilled for at least 30 minutes?
- [ ] Is the brown sugar to granulated sugar ratio appropriate?
- [ ] Was flour measured accurately (preferably by weight)?
- [ ] Is the oven temperature accurate?
- [ ] Was a light-colored baking sheet used?
By systematically checking these points, you can usually identify why your chocolate chip cookies are flat and implement the necessary adjustments to achieve that perfect balance of spread and chewiness.
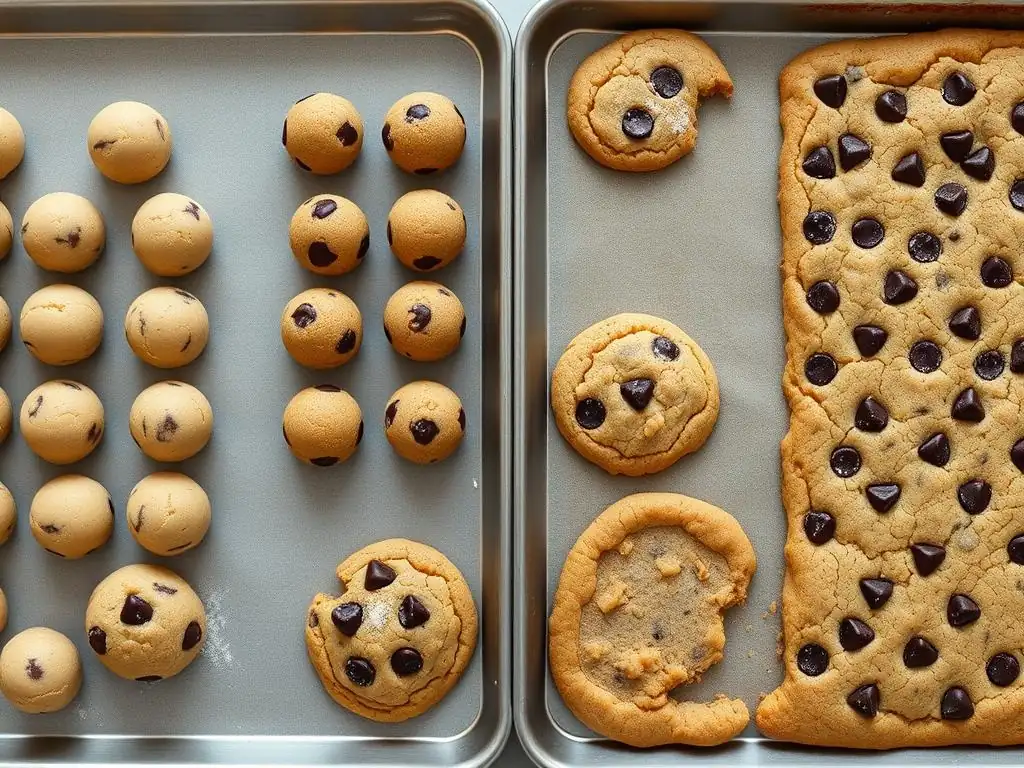
The best way to troubleshoot cookie problems, including learning how to fix flat cookies, is to prevent them from happening in the first place! By adopting good baking practices and paying attention to the fundamentals, you can significantly increase your chances of success with every batch. Consistency in your methods is key to achieving consistent results in your baking. This means developing habits that minimize variability in your ingredients and process.
Think of preventative measures as building a strong foundation for your baking skills. They involve choosing reliable resources, using the right tools, understanding the 'why' behind each step, and creating a consistent baking environment. Implementing these practices will not only help you avoid common pitfalls like excessive spread but also empower you to confidently tackle new recipes and techniques.
Not all recipes are created equal. One of the simplest preventative measures is to start with recipes from trusted sources – reputable cookbooks, established baking blogs, or well-known culinary websites that have been tested thoroughly. These recipes usually have balanced ingredient ratios and clear instructions, making them less likely to produce unexpected results like flat cookies.
Be wary of recipes found on less reliable sites without reviews or details about their testing process. If you encounter a consistent issue with a specific recipe (like it always produces flat cookies), it might be the recipe itself rather than your technique. Don't be afraid to try a different recipe for the same type of cookie and compare the results. Finding a few go-to, reliable base recipes can be a game-changer.
Using a Kitchen Scale for Precise Ingredient Measurement
We've touched on the importance of accurate measurement, especially for flour, but using a kitchen scale for all ingredients (flour, sugar, fat, etc.) is the ultimate preventative measure for consistency. Volume measurements (cups and spoons) can vary significantly depending on how ingredients are packed, humidity, and even the specific set of measuring tools you use.
Weight measurements, on the other hand, are absolute. 100 grams of flour is always 100 grams of flour, regardless of how you scoop it. Many professional bakers and serious home bakers rely solely on weight for this reason. While it requires a small upfront investment in a digital scale, it pays dividends in consistent results and eliminates a major variable that can lead to issues like flat cookies or cookies that don't spread properly.
Understanding the Function of Each Ingredient
Baking isn't just following instructions; it's understanding why you're doing each step and what each ingredient contributes. Knowing that butter contributes spread and flavor, sugar affects spread and texture, flour provides structure, eggs bind and add richness, and leaveners create lift helps you anticipate how changes or errors might affect the outcome.
For instance, if you know baking soda promotes spread, you'll understand why a recipe heavy on baking soda might yield flatter cookies than one using baking powder. This knowledge empowers you to troubleshoot more effectively when things go wrong and even to adapt recipes confidently. Taking the time to learn the basic science behind baking is one of the best investments you can make in your skills.
Best Practices for Even Baking and Consistent Results
Beyond ingredient measurement and temperature, several best practices contribute to consistent, even baking:
- Preheat Thoroughly: Always preheat your oven for at least 15-20 minutes after it signals it's reached temperature to ensure the oven walls and racks are fully heated.
- Don't Crowd the Pan: Leave enough space between cookies (usually 2 inches/5 cm) to allow for proper spread and air circulation.
- Bake One Sheet at a Time: For the most even results, bake one baking sheet of cookies in the center of the oven. Baking multiple sheets can interfere with air flow and temperature distribution.
- Rotate the Pan: If you must bake two sheets at once or suspect your oven has hot spots, rotate the pans halfway through the baking time (top to bottom, front to back).
- Cool Properly: Let cookies cool on the baking sheet for a few minutes before transferring to a wire rack to cool completely. This allows them to set properly and prevents breakage.
Following these simple steps minimizes variables related to the baking environment, helping ensure that your carefully prepared dough bakes as intended and reducing the likelihood of unevenly baked or flat cookies.
Mastering cookie baking is a journey of learning and practice. Encountering issues like flat cookies that spread too much or cookies that don't spread enough is a normal part of the process, especially for beginners. The key is not to be discouraged, but to use these experiences as opportunities to learn and improve. By understanding the science behind how ingredients interact and how temperature and technique influence the final result, you gain the knowledge needed to troubleshoot and prevent common problems.
Remember the core principles: accurate measurement, controlling dough temperature, understanding the role of fat and sugar, and ensuring your oven is baking correctly. These fundamentals are the building blocks of consistent cookie success. With practice, attention to detail, and a willingness to learn from your baking adventures, you'll be well on your way to achieving cookie perfection and confidently knowing how to fix flat cookies (or better yet, prevent them entirely!) every time you bake.
Achieving consistently great cookies boils down to a few fundamental practices that bear repeating. First and foremost is precision in measuring your ingredients; switching to a kitchen scale is arguably the single best step you can take for consistency. Secondly, pay close attention to temperature – both your ingredients (especially butter) and your oven. Cold dough and an accurately calibrated oven are powerful tools for controlling spread and ensuring even baking.
Finally, take the time to understand the basic function of each ingredient and the subtle differences in how they behave. This knowledge empowers you to make informed decisions and adjustments. By focusing on these fundamentals, you build a strong foundation that makes troubleshooting easier and helps you predict outcomes. Baking is a skill that improves with practice, and each batch, whether perfect or imperfect, offers valuable lessons on your path to mastering cookie baking and preventing issues like flat cookies.
Frequently Asked Questions
Cookies can spread excessively due to too much butter, insufficient flour, or warm dough. Ensuring accurate measurements and chilling the dough can help maintain the desired shape.
To prevent flat cookies, consider adjusting the butter temperature (use cold butter), adding a bit more flour, or ensuring your baking powder is fresh. These changes can help achieve the perfect height.
Yes, techniques like chilling the dough before baking and using a silicone baking mat can help maintain the cookie shape. Additionally, using a cookie scoop ensures consistent sizes for even baking.
Baking soda and baking powder are leavening agents that create air pockets in the dough. Using the right amount is crucial; too little can lead to flat cookies, while too much can cause excessive spreading.
If cookies have spread too much, you can try reshaping them while they are still warm. If they are too flat, turn them into cookie crumbs for toppings or mix them into ice cream for a delicious treat!
The quest for the perfect cookie, a seemingly simple pursuit, reveals a fascinating world of scientific principles. From understanding the role of leavening agents to the impact of chilling dough, mastering the art of cookie baking is a journey of precision and experimentation. The seemingly minor issue of flat cookies, as explored in this article, highlights the critical interplay between ingredients, technique, and the resulting deliciousness (or lack thereof! ).
This exploration into the science of baking has not only improved my own cookie-making skills but has also underscored the importance of understanding the fundamental principles behind any culinary endeavor. The seemingly small details, like properly measuring ingredients or ensuring your oven is calibrated correctly, can have a profound impact on the final product. The difference between ordinary and extraordinary is that little extra.
This quote, while often applied to many aspects of life, rings especially true in the delicate art of baking. The pursuit of the perfect cookie, free from the dreaded flatness, is a metaphor for the dedication and attention to detail required to achieve excellence in any field.
So, the next time you find yourself facing a batch of disappointingly flat cookies, remember the lessons learned here. Don't be discouraged! Instead, view it as an opportunity to delve deeper into the science of baking, to experiment with different techniques, and to ultimately achieve that perfect, golden-brown, gloriously chewy cookie. Embrace the challenge, refine your technique, and savor the sweet rewards of your culinary journey. The perfect cookie awaits!
Thanks for joining us on this delicious journey into the science of perfect cookies! We hope you’ve gained valuable insights to help you bake with confidence. Now it's time to put your newfound knowledge to the test!
- Bake a batch of your favorite cookies, applying the tips and tricks you just learned. Document your process and results—you might even discover your own secret ingredient!
- Share your baking triumphs (and even your flour-covered mishaps!) on social media using #BakeWithEase – let’s build a supportive baking community!
- Consider experimenting with a new cookie recipe, using the troubleshooting strategies we explored to navigate any challenges.
Ready to transform your baking game? What unique twist will you add to your next batch of cookies?