
Advanced Techniques for Using Minimal Yeast for Long Fermentation


Welcome to BakeWithEase, your guide to unlocking the secrets of exceptional baking! Are you intrigued by the idea of harnessing the power of long fermentation to create breads with unparalleled flavor and texture? Dive into this article and discover advanced, minimal yeast techniques that will revolutionize your bread baking. Prepare to be amazed at how little yeast can achieve so much – let's explore the art of slow baking together!
- Introduction to Long Fermentation and Minimal Yeast in Pizza Dough
- The Science Behind Long Fermentation with Minimal Yeast
- Optimizing Your Dough for Long Fermentation with Minimal Yeast
- Advanced Techniques for Minimal Yeast Long Fermentation
- Troubleshooting Common Issues in Long Fermentation with Minimal Yeast
- Equipment and Tools for Long Fermentation Pizza Dough
- Long Fermentation Pizza Dough Recipe with Minimal Yeast: A Step-by-Step Guide
- Adapting Long Fermentation Minimal Yeast Techniques for Different Pizza Styles
- Conclusion: Mastering Long Fermentation and Minimal Yeast for Superior Pizza Dough
-
Frequently Asked Questions
- What exactly does "long fermentation minimal yeast" mean in baking?
- Why would someone choose to use long fermentation minimal yeast techniques?
- What are some of the key benefits of using minimal yeast in long fermentation?
- Are there specific types of flour that work best with long fermentation minimal yeast techniques?
- What are some potential challenges or things to watch out for when using these techniques?
- Final Reflection: The Art and Science of Slow Fermentation
- Unleash the Flavor: Master Slow Fermentation!
Introduction to Long Fermentation and Minimal Yeast in Pizza Dough
Mastering pizza dough is a cornerstone of exceptional home baking, and one of the most impactful techniques involves long fermentation using minimal yeast. This approach isn't just a trend; it's a time-tested method that dramatically enhances the flavor, texture, and digestibility of your crust. By allowing the dough to develop slowly over many hours, often in a cool environment, we unlock complex flavors that rapid fermentation simply cannot achieve.
This article will guide you through the advanced techniques for achieving incredible results with minimal yeast and extended fermentation times. We'll delve into the science, explore ingredient choices, and provide practical steps to elevate your pizza game. Whether you're aiming for a light, airy Neapolitan-style crust or a chewy, flavorful New York-style base, understanding and applying these principles is key to unlocking superior dough quality.
Understanding the Benefits of Long Fermentation in Pizza Dough
Long fermentation offers a multitude of benefits that contribute significantly to the quality of your pizza dough. Primarily, it allows for a deeper development of flavor compounds. As yeast and beneficial bacteria slowly work on the sugars and starches in the flour over 12, 24, or even 72 hours, they produce a wider range of aromatic compounds, including organic acids, alcohols, and esters, resulting in a crust with more complexity and depth than one fermented quickly.
Furthermore, extended fermentation time aids in breaking down complex carbohydrates and proteins in the flour. This process makes the dough easier to digest and can reduce the likelihood of that heavy feeling often associated with quickly made doughs. The enzymes present in the flour and produced by microbial activity predigest the gluten and starches, leading to a more open crumb structure and a lighter, airier crust with a satisfying chew and crispness when baked at high temperatures.
Why Use Minimal Yeast in Long Fermentation Pizza Recipes?
Using minimal yeast is intrinsically linked to achieving the benefits of long fermentation. A small amount of yeast, typically ranging from as low as 0.1% to 0.5% relative to the flour weight (using baker's percentages), works much slower than a larger quantity. This slow activity is precisely what enables the extended fermentation period needed for complex flavor development and optimal dough maturation. If you used a standard amount of yeast (e.g., 1-2%) over a long period, the dough would over-proof rapidly, collapsing and developing undesirable flavors.
Employing minimal yeast forces the dough development process to rely more on time and temperature control rather than rapid yeast activity. This slower pace gives enzymes ample opportunity to work on the flour's structure, improving dough handling and extensibility. It also allows for the proliferation of lactic acid bacteria (often naturally present in flour), which contribute beneficial acids that enhance flavor and improve the dough's ability to hold its structure during baking, leading to a better oven spring and crust development.
The Science Behind Long Fermentation with Minimal Yeast
Achieving exceptional pizza dough through long fermentation and minimal yeast relies on understanding the subtle biological and chemical processes occurring within the dough over time. It's a delicate balance involving yeast activity, enzymatic action, and the production of organic acids.
The core principle is that a reduced yeast population, working slowly, allows other natural processes within the dough to play a more significant role. Instead of a rapid burst of carbon dioxide production, you get a gentle, sustained leavening that builds structure and flavor gradually. This slow transformation is where the magic happens, turning simple ingredients into a complex and delicious crust.
The Role of Enzymes in Long Fermentation Pizza Dough
Enzymes, naturally present in flour and produced by yeast and bacteria, are crucial players in long fermentation. Amylase enzymes break down complex starches into simpler sugars, primarily maltose. These sugars then become the food source for the yeast, sustaining their slow activity over the extended fermentation period. Without sufficient sugar availability, the minimal yeast would quickly run out of fuel.
Protease enzymes work on the gluten network, breaking down some of the protein chains. While this might sound counterproductive, a controlled breakdown actually helps relax the dough, making it more extensible and easier to handle after a long rest. It contributes to the dough's ability to stretch thinly without tearing and promotes a tender crust texture. This enzymatic activity is significantly enhanced by the longer contact time provided by minimal yeast fermentation.
How Minimal Yeast Affects Gluten Development in Pizza Dough
Minimal yeast fermentation, coupled with proper hydration and time, significantly impacts gluten development. While vigorous kneading initiates gluten formation, the long rest period allows the gluten network to continue developing and strengthening through a process called autolysis (which we'll discuss further below) and simple hydration. The slow, gentle production of gas by the minimal yeast also helps to stretch and organize the gluten strands over time.
Unlike rapid fermentation where gluten needs to be fully developed upfront through intense kneading to capture quickly produced gas, minimal yeast fermentation allows a more relaxed approach. The extended time gives the gluten network an opportunity to hydrate fully and align itself, resulting in a dough that is both strong enough to hold its structure and elastic enough to stretch easily. This often leads to a dough that is less tough and more manageable than one fermented quickly.
Acetic and Lactic Acid Production in Long Fermentation
One of the key flavor benefits of long fermentation, especially when using minimal yeast and cold temperatures, is the production of organic acids, primarily lactic and acetic acids. Lactic acid is produced by lactic acid bacteria and contributes a milder, slightly tangy flavor often described as creamy or yogurty. Acetic acid, also produced by these bacteria, has a sharper, more vinegary tang.
The ratio of these acids depends heavily on the fermentation temperature. Cooler temperatures, typical of refrigerator fermentation, favor the production of acetic acid, contributing a more pronounced tang. Warmer temperatures favor lactic acid. The presence of these acids not only enhances flavor but also slightly lowers the dough's pH, which can help preserve the dough and contribute to better browning during baking. The long fermentation time with minimal yeast provides the necessary conditions for these beneficial bacteria to proliferate and produce these desirable acids.
Optimizing Your Dough for Long Fermentation with Minimal Yeast
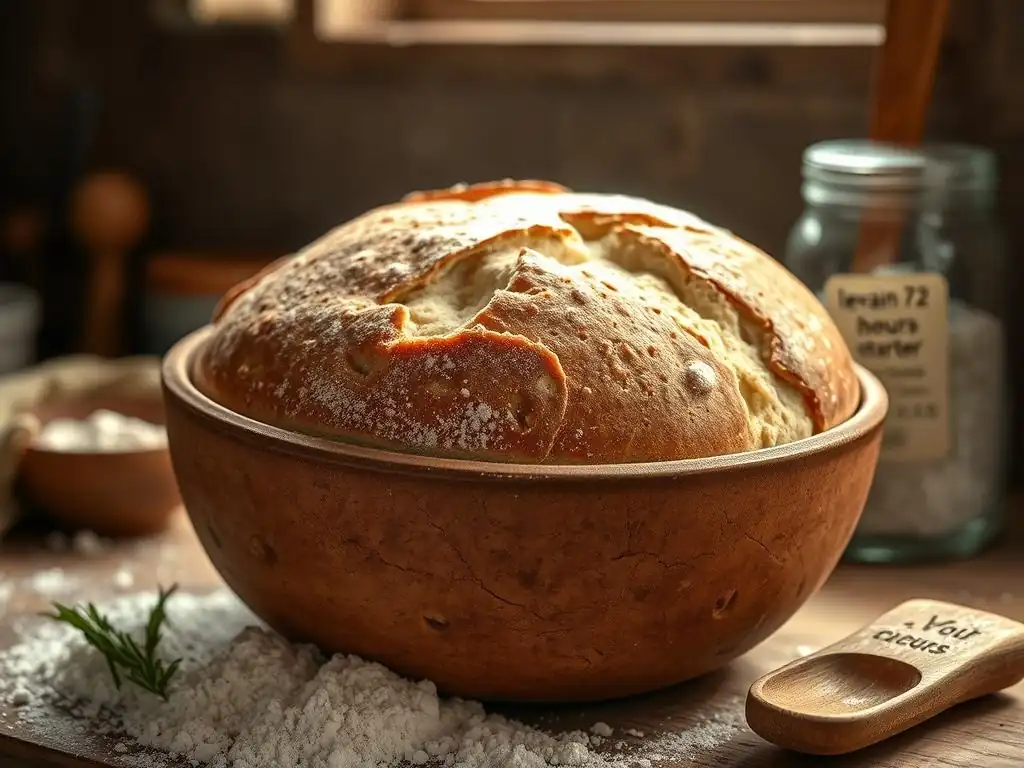
Achieving the best results with long fermentation and minimal yeast requires careful consideration of your ingredients and how you handle them. Each component plays a specific role in the slow development process.
Choosing the right flour, managing water temperature, and understanding salt's function are fundamental steps. These elements interact to influence yeast activity, gluten development, and flavor production over the extended fermentation period. Getting these basics right sets the stage for successful minimal yeast long fermentation techniques.
Choosing the Right Flour for Long Fermentation Pizza Dough
The type of flour you choose is paramount for long fermentation. Flour with a higher protein content, typically labeled as "bread flour" or "high-gluten flour" (often 12-14% protein), is generally preferred. The higher protein means more potential for gluten development, which is essential for creating a strong network capable of trapping the gases produced over many hours. A strong gluten structure is necessary to prevent the dough from collapsing during the long fermentation and proofing stages.
However, the absorption rate of the flour also matters. Different flours absorb water differently, and maintaining proper hydration (often 60-75% or higher relative to flour weight) is crucial for enzyme activity and gluten development during long fermentation. Experimenting with flours from different mills can reveal differences in performance, even within the same protein range. Look for flours that are unbleached and unbromated, as these tend to perform better in long fermentation processes.
High Gluten Flour vs. Lower Gluten Flour for Long Fermentation
- High Gluten Flour: As mentioned, high-gluten flour provides the robust structure needed for extended fermentation. It allows the dough to withstand the long rest without degrading too much, resulting in a dough that is strong yet extensible. This is often the choice for professional pizzerias using 24-72 hour cold fermentation. The higher protein content, often around 13-14%, ensures a resilient gluten network.
- Lower Gluten Flour: While high-gluten flour is common, excellent results can also be achieved with lower gluten flours like Italian Type 00 flour (often 10-12.5% protein), especially for styles like Neapolitan pizza. These flours are typically milled finer and have a different protein structure that develops gluten more easily with less kneading. However, using lower gluten flour for very long fermentation (e.g., 48+ hours) might require slightly lower hydration or careful monitoring to prevent the dough from becoming too relaxed or "soupy." Some bakers find that a blend of flours offers the best balance of strength and tenderness.
Water Temperature and Its Impact on Yeast Activity
Water temperature is a critical factor when using minimal yeast for long fermentation, as it directly influences the initial activity of the small amount of yeast. For doughs destined for many hours of fermentation, especially cold fermentation, using cooler water is often recommended. Water temperatures between 10°C and 18°C ( 50°F and 65°F) can help control the initial fermentation rate, preventing the dough from rising too quickly before it goes into cold storage.
Using warmer water, say 25°C to 30°C ( 77°F to 86°F), would activate the minimal yeast much faster, potentially leading to significant rise before cold retardation can slow it down. This could result in over-proofing issues later. The goal with minimal yeast and long fermentation is a slow, controlled rise, and water temperature is a primary lever for managing this initial phase before the dough is placed in a temperature-controlled environment like a refrigerator.
Salt's Role in Controlling Fermentation Speed
Salt is not just for flavor; it plays a vital role in dough structure and fermentation control. In long fermentation with minimal yeast, salt is particularly important because it helps regulate yeast activity. Salt draws moisture away from the yeast cells, slowing down their metabolic processes and thus slowing gas production.
Typically, salt is used at a rate of 1.8% to 2.5% of the flour weight. Including salt from the beginning or adding it after an initial autolyse period (as discussed below) helps keep the minimal yeast in check. Without salt, even a tiny amount of yeast could become too active too quickly, especially in warmer conditions, disrupting the slow, controlled development that defines this technique. Salt also strengthens the gluten network, contributing to the dough's structure over the long fermentation period.
Advanced Techniques for Minimal Yeast Long Fermentation
Beyond selecting the right ingredients, several specific techniques can be employed to further optimize your minimal yeast long fermentation process. These methods enhance dough hydration, flavor complexity, and overall structure.
Incorporating steps like autolyse or using pre-ferments adds layers of control and sophistication to the dough development. Cold fermentation, or retardation, is perhaps the most widely used technique in this category, leveraging low temperatures to significantly extend fermentation time and improve flavor.
Autolyse: Enhancing Dough Hydration and Gluten Development
Autolyse is a simple yet powerful technique invented by French baking professor Raymond Calvel. It involves mixing just the flour and water from your recipe and letting the mixture rest for a period, typically from 20 minutes to 60 minutes or even longer. Salt and yeast are added after the autolyse period.
During the autolyse rest, the flour hydrates fully without the interference of salt (which tightens gluten) or yeast (which starts fermentation). Enzymes in the flour become active, beginning the breakdown of starches and proteins. This relaxation phase allows the gluten network to start forming on its own, making the subsequent mixing or kneading much easier and more efficient. For minimal yeast long fermentation, autolyse ensures the flour is optimally hydrated before the long rest, promoting better gluten development over time.
Poolish and Biga: Pre-Ferments for Flavor and Structure
Using a pre-ferment is an excellent way to introduce more complex flavors and structure into minimal yeast long fermentation dough, while still keeping the final dough's yeast percentage very low. Pre-ferments are essentially small batches of dough or batter made hours or days in advance using a portion of the recipe's flour, water, and a tiny amount of yeast. They are allowed to ferment and develop flavor before being incorporated into the main dough mix.
The two most common types are poolish and biga. Using a pre-ferment allows the yeast and lactic acid bacteria to work on a smaller amount of flour for a longer period at potentially different temperatures (e.g., room temperature), producing a concentration of flavor compounds that are then distributed throughout the final dough. This boosts flavor complexity significantly compared to a straight dough made with minimal yeast.
Poolish vs. Biga: Which Pre-Ferment is Right for You?
- Poolish: A poolish is a liquid pre-ferment, typically made with equal weights of flour and water (100% hydration) and a very small amount of yeast. It has a batter-like consistency. Poolishes are often fermented at room temperature for
8 to 16 hoursor in the refrigerator for24+ hoursuntil bubbly and slightly collapsed. A poolish contributes a mild, slightly tangy flavor and promotes extensibility in the final dough. It's great for creating a light, open crumb structure. - Biga: A biga is a stiff pre-ferment, typically made with a lower hydration level, often
50% to 65%water relative to flour. It has a dough-like consistency and is usually fermented for12 to 24 hours, often at room temperature for a portion of the time before potentially being refrigerated. A biga contributes a more robust, nutty flavor and adds strength to the final dough's gluten structure. It's excellent for achieving a chewy texture and good oven spring. The choice between poolish and biga depends on the desired flavor profile and texture of the final crust.
Cold Fermentation (Retardation) Techniques
Cold fermentation, or retardation, is arguably the most popular technique for achieving long fermentation with minimal yeast. It involves fermenting the dough in a cold environment, typically a refrigerator set between 3°C and 5°C ( 37°F and 41°F). The cold temperature dramatically slows down yeast activity but allows enzymatic activity and the production of organic acids by lactic acid bacteria to continue slowly over a much longer period.
This slow, cold fermentation process is what allows for extended fermentation times, often ranging from 24 hours to 72 hours or even longer. It results in doughs with superior flavor, improved digestibility, and enhanced handling properties. The cold also firms up the dough, making it easier to shape. Cold fermentation can be applied to the entire dough batch (bulk fermentation) or to individual dough balls (cold proofing).
Bulk Fermentation in the Refrigerator
Bulk fermentation refers to the initial rise of the entire dough batch before it is divided and shaped. For minimal yeast long fermentation, this bulk rise often happens primarily in the refrigerator. After mixing (and potentially an initial short warm rest or autolyse), the entire dough mass is placed in a lightly oiled container, covered, and refrigerated for the desired duration.
During this cold bulk phase, the dough will slowly increase in volume, often doubling or slightly less depending on the temperature and time. This method allows the flavors to develop throughout the entire mass. After cold bulk fermentation, the dough is typically divided, shaped into balls, and then proofed, which might involve a shorter warm proof or further cold proofing as individual balls.
Cold Proofing Individual Pizza Dough Balls
Cold proofing involves shaping the dough into individual balls after bulk fermentation (which could be a shorter room temperature or cold bulk) and then refrigerating the shaped balls. This is a common practice, especially for pizza dough, as it prepares the dough directly for stretching and baking. The individual balls are placed in separate containers or a proofing box and refrigerated.
Cold proofing allows the individual dough balls to develop surface tension and maintain their shape while continuing to develop flavor. The balls become easier to handle and stretch directly from the refrigerator (after a short warm-up period, often 60-90 minutes). Many pizzerias cold proof their dough balls for 24-48 hours or longer, ensuring a consistent supply of perfectly proofed dough ready for service.
Troubleshooting Common Issues in Long Fermentation with Minimal Yeast

Even with careful planning, working with minimal yeast and long fermentation can present challenges. Understanding common issues and how to address them is key to consistent success.
From dough that isn't rising correctly to undesirable flavors or textures, troubleshooting is an essential part of mastering these advanced techniques. Patience and observation are your best tools.
Over-Proofing and Under-Proofing: Identifying and Correcting the Problems
- Under-Proofing: An under-proofed dough feels dense and tight, resists stretching, and might tear easily. When baked, it results in a dense crust with small, uneven holes and potentially a tough chew. The flavor might be bland.
- Correction: This usually means the dough needed more time to ferment. Ensure your refrigerator temperature is not too cold (should be 3-5°C). Allow more time for cold fermentation, or give the dough a longer warm proof after taking it out of the fridge before baking. Check your yeast amount – perhaps slightly too little was used, or the yeast was not active.
- Over-Proofing: An over-proofed dough feels overly soft, sticky, and lacks structure. It might spread out easily when handled and could even collapse. The surface might show large bubbles that pop easily. When baked, it results in a pale crust with little oven spring, potentially a gummy texture, and sometimes an overly acidic or alcoholic smell/taste.
- Correction: This means the dough fermented too long or too warm. Reduce fermentation time, especially if fermenting at room temperature for any period. Ensure your refrigerator is cold enough. Reduce the amount of yeast slightly in future batches. If the dough is only slightly over-proofed, handling it gently and baking quickly at high heat might still yield an acceptable crust. Severely over-proofed dough might need to be repurposed (e.g., flatbread).
Sticky Dough: Causes and Solutions
Sticky dough is a common issue, especially with high-hydration recipes often used in long fermentation. While a slightly sticky dough is often desirable for an open crumb, excessively sticky dough is difficult to handle.
- Causes:
- Too high hydration for the flour used.
- Insufficient gluten development (either lack of mixing/kneading or insufficient rest time).
- Over-fermentation, where the gluten structure starts to break down.
- Flour type – some flours are naturally stickier or absorb less water.
- Solutions:
- Reduce the hydration slightly in the next batch.
- Ensure adequate mixing/kneading time initially, or incorporate an autolyse step.
- Allow sufficient cold fermentation time for gluten to strengthen.
- If over-fermented, try handling gently with wet hands or a bench scraper.
- Ensure accurate measurements, especially water. Using a kitchen scale is crucial.
Flavor Imbalances: Adjusting Fermentation Time and Temperature
Flavor in long fermented dough comes largely from the organic acids produced during fermentation. An imbalance often means the conditions weren't right for optimal acid production or balance.
- Issue: Bland flavor.
- Cause: Not enough fermentation time allowed for flavor development. Yeast activity was too slow.
- Solution: Increase cold fermentation time (e.g., from 24 to 48 hours). Ensure refrigerator temperature is not too close to freezing. Consider adding a pre-ferment (poolish or biga) to boost flavor.
- Issue: Overly sour or vinegary flavor.
- Cause: Fermentation was too long, or primarily happened at colder temperatures favoring acetic acid. Could also indicate slight over-proofing.
- Solution: Reduce fermentation time. If using cold fermentation, consider a shorter cold period followed by a warm proof. Ensure dough isn't consistently exposed to temperatures below 3°C. Reduce yeast slightly in the next batch to slow fermentation further.
Equipment and Tools for Long Fermentation Pizza Dough
Having the right tools can make a significant difference in the consistency and success of your minimal yeast long fermentation process. While not strictly mandatory, certain pieces of equipment help control variables and improve results.
Investing in a few key items can elevate your dough-making from guesswork to precision, ensuring your dough develops optimally over its long rest period.
Dough Containers and Their Importance
Proper dough containers are essential for long fermentation, especially cold fermentation. They need to be airtight or have a tight-fitting lid to prevent the dough from drying out over many hours or days in the refrigerator. They also need to be large enough to accommodate the dough's expansion, even if using minimal yeast.
Clear containers are particularly useful as they allow you to visually monitor the dough's progress without disturbing it. Food-grade plastic or glass containers with tight-fitting lids are ideal. Ensure the container is lightly oiled before adding the dough to prevent sticking. Using individual containers for cold proofing shaped dough balls is also highly recommended for ease of handling and monitoring.
Temperature Control Devices: Ensuring Consistent Fermentation
Precise temperature control is paramount for long fermentation, especially cold retardation. A reliable refrigerator is the primary tool. However, refrigerator temperatures can fluctuate, and different areas within the fridge can vary by a few degrees.
- Consider using a separate refrigerator dedicated to dough if making large batches or if your main fridge's temperature is inconsistent.
- A small digital thermometer placed inside the dough container or near it can help you monitor the actual temperature the dough is experiencing. Aim for a consistent
3°Cto5°C(37°Fto41°F). - For any room temperature fermentation stages (like an initial rest or final proof), a probe thermometer or infrared thermometer can help you monitor the ambient temperature to ensure it aligns with your recipe's specifications. Consistent temperature is key to predictable fermentation speed with minimal yeast.
Baking Stones and Steel: Maximizing Oven Spring
While not directly related to the fermentation process itself, a baking stone or steel is crucial for achieving the best possible crust when baking your long-fermented pizza dough. These surfaces are placed in your oven and preheated at a high temperature for at least 30-60 minutes.
When the pizza is placed on the hot stone or steel, it transfers heat rapidly to the base of the dough. This intense bottom heat causes the dough to spring up quickly (oven spring) and creates a crispy, well-browned crust. A long-fermented dough, with its well-developed gluten and potential for significant gas production during baking, benefits immensely from this high-heat transfer. Steel generally conducts heat faster than stone, leading to a potentially crispier base, while stone may distribute heat more evenly.
Long Fermentation Pizza Dough Recipe with Minimal Yeast: A Step-by-Step Guide
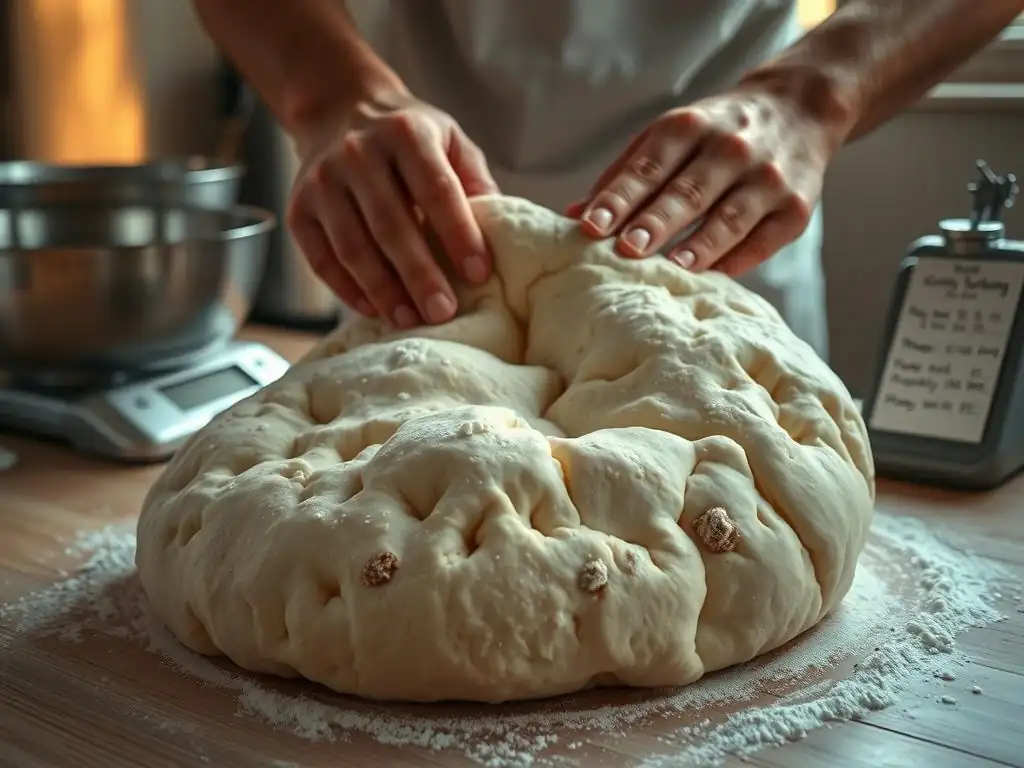
Here is a simple example of a long fermentation minimal yeast pizza dough recipe. This recipe uses a straightforward approach, relying on cold fermentation for flavor development.
This example uses baker's percentages, a common way to express dough formulas, where all ingredients are a percentage of the total flour weight. This makes scaling the recipe easy.
Ingredients List and Ratios
This recipe is for a dough with ~65% hydration, suitable for cold fermentation.
- Bread Flour (12-13% protein):
100%(e.g., 500g) - Water (cool, ~10-15°C):
65%(e.g., 325g) - Fine Sea Salt:
2%(e.g., 10g) - Active Dry Yeast (or Instant Yeast):
0.2%(e.g., 1g)
Note: If using Active Dry Yeast, it's best to "bloom" it first in a small amount of the recipe's water (warm, ~35-40°C) for 5-10 minutes until foamy. Instant yeast can usually be mixed directly with the flour. This recipe assumes Instant Yeast or bloomed Active Dry.
Step-by-Step Instructions for Mixing, Fermenting, and Baking
- Mix: In a large bowl, combine the flour and yeast (if using instant) or bloomed active dry yeast mixture. Add the cool water and salt. Mix with a spoon or your hands until a shaggy dough forms and there are no dry spots of flour.
- Short Rest (Optional Autolyse): Cover the bowl and let the dough rest for
20-30 minutes. This short autolyse helps the flour hydrate. If you didn't add salt initially, add it now and mix it in. - Knead: Turn the dough out onto a lightly floured surface. Knead for
5-10 minutesuntil the dough is relatively smooth and elastic. Alternatively, use a stand mixer with a dough hook for5-7 minuteson low speed. The dough doesn't need to be perfectly smooth yet. - Bulk Fermentation (Cold): Lightly oil a clean bowl or food-grade container large enough for the dough to expand. Place the dough in the container, turning to coat with oil. Cover tightly with a lid or plastic wrap. Place in the refrigerator (
3-5°C) for24 to 72 hours. The dough should slowly double in size over this period. - Divide and Shape: After cold bulk fermentation, turn the dough out onto a lightly floured surface. Gently divide the dough into desired portions (e.g., 2-3 balls for medium pizzas). Gently shape each portion into a tight ball. Avoid degassing the dough completely.
- Cold Proof (Optional): For best results, place each dough ball in its own lightly oiled container or proofing box. Cover tightly and return to the refrigerator for another
12-48 hours. This step further develops flavor and makes the balls easier to handle. - Warm Up: About
60-90 minutesbefore you plan to bake, take the dough balls out of the refrigerator and leave them covered at room temperature. They should relax and become more pliable, easier to stretch. - Preheat Oven & Stone/Steel: Preheat your oven to its highest setting (typically
250-260°Cor500-550°F) with your baking stone or steel inside for at least30-60 minutes. - Shape and Top: On a lightly floured surface or using semolina, gently stretch or press a dough ball from the center outwards, leaving a crust edge. Top with your desired ingredients.
- Bake: Carefully transfer the topped pizza to the preheated stone or steel using a pizza peel. Bake for
6-10 minutes, or until the crust is golden brown and the cheese is melted and bubbly.
Tips for Achieving the Perfect Crust and Flavor
- Use a kitchen scale for accurate ingredient measurements, especially for the minimal yeast amount.
- Don't rush the cold fermentation. The longer rest (up to 72 hours or even more, depending on yeast amount and temperature) yields deeper flavor.
- Handle the dough gently, especially after cold fermentation, to preserve the gas built up inside.
- Practice stretching the dough. It should be pliable after warming up. If it springs back too much, let it rest for 10-15 minutes before trying again.
- Bake at the highest temperature your oven can reach for the best oven spring and charring (if desired).
- Consider using a combination of flours or adding a small percentage of whole wheat flour for added flavor complexity.
- Keep detailed notes on your fermentation times, temperatures, and results to refine your minimal yeast long fermentation techniques.
Adapting Long Fermentation Minimal Yeast Techniques for Different Pizza Styles
The principles of long fermentation with minimal yeast can be adapted to suit various pizza styles, each benefiting from the flavor and texture development this method provides. The key is adjusting hydration, flour choice, and fermentation duration/temperature slightly to match the desired outcome for each specific style.
Applying these long fermentation minimal yeast techniques allows you to achieve authentic flavors and textures, whether you're aiming for the classic Neapolitan char, the sturdy New York slice, or the unique structure of a Detroit-style crust.
Neapolitan Pizza: Long Fermentation Considerations
Authentic Neapolitan pizza dough traditionally uses minimal yeast, water, salt, and only Type 00 flour, undergoing a long fermentation, often 24 hours or more, primarily at room temperature (though modern approaches often incorporate cold fermentation). The high heat of a wood-fired oven ( ~450-500°C or 850-950°F) is crucial for achieving the characteristic soft, airy crust with leopard-spotting char.
For home ovens using minimal yeast long fermentation techniques for Neapolitan-style pizza, focus on:
- Using a high-quality Italian Type 00 flour.
- Hydration typically ranges from
58% to 65%. - A fermentation schedule that includes both room temperature and cold phases (e.g., a few hours at room temp, then 24-48 hours cold, followed by a warm proof).
- Baking on a preheated stone or steel at the highest possible oven temperature (
250°C+/500°F+). The long fermentation provides the extensibility needed for thin stretching and the flavor for a simple crust.
New York Style Pizza: Adapting the Technique
New York style pizza dough is known for its balance of chewiness and crispness, sturdy enough to hold toppings and be folded. Minimal yeast long fermentation techniques are perfectly suited for developing the complex flavor and structure needed for this style.
- Typically uses bread flour (12-13% protein) and slightly higher hydration than Neapolitan, often ranging from
60% to 68%. Some recipes might include a small amount of sugar or olive oil. - A common approach is
24-48 hoursof cold fermentation, which develops flavor and creates a dough that is easy to handle and stretch into larger, thinner crusts. - Baking usually occurs at a slightly lower temperature than Neapolitan (
230-260°C/450-500°F) on a stone or steel, contributing to the characteristic crisp base and chewy edge. The long fermentation ensures a flavorful crust that stands up to generous toppings.
Detroit Style Pizza: Long Fermentation Benefits
Detroit style pizza is baked in rectangular steel pans, resulting in a thick, airy, focaccia-like crust with a crispy, cheesy edge. While it's a thicker dough, minimal yeast long fermentation techniques still offer significant benefits in terms of flavor and texture.
- Often uses bread flour or a blend and relatively high hydration, sometimes up to
70-75%. - Long cold fermentation (
24-72 hours) is excellent for developing a light, open crumb structure and rich flavor, preventing the thick crust from being dense or heavy. - The dough is often pressed into the well-oiled pan and allowed a final proof in the pan before baking. The long fermentation makes the dough pliable and easier to press without tearing. The resulting crust from a long-fermented Detroit dough is exceptionally flavorful and airy.
Conclusion: Mastering Long Fermentation and Minimal Yeast for Superior Pizza Dough
Embracing long fermentation minimal yeast techniques is a transformative step in your pizza-making journey. It moves beyond simply leavening dough to actively developing flavor, improving texture, and enhancing digestibility. By understanding the roles of minimal yeast, time, temperature, and key ingredients, you gain the control needed to produce consistently exceptional pizza crusts.
While it requires patience and planning, the results are undeniable: a crust with depth of flavor, a delightful aroma, a beautiful open crumb, and a satisfying texture. Experiment with different fermentation times, hydration levels, and flour types while applying these advanced techniques. With practice, you'll master the art of using minimal yeast for long fermentation, unlocking the secret to truly superior homemade pizza.
Frequently Asked Questions
What exactly does "long fermentation minimal yeast" mean in baking?
It refers to a baking technique where dough is allowed to rise for an extended period, often several hours or even days, using a very small amount of yeast. This process develops complex flavors and improves the dough's texture.
Why would someone choose to use long fermentation minimal yeast techniques?
This method enhances the flavor profile of baked goods, resulting in a more nuanced and complex taste. It also improves the dough's digestibility and creates a superior texture.
What are some of the key benefits of using minimal yeast in long fermentation?
Using minimal yeast allows for a slower rise, which promotes the development of natural flavors from the flour. It also strengthens the gluten structure, resulting in a chewier and more elastic final product.
Are there specific types of flour that work best with long fermentation minimal yeast techniques?
While many flours can be used, those with a higher protein content, like bread flour, are often preferred. These flours can better withstand the extended fermentation time and develop a stronger gluten network.
What are some potential challenges or things to watch out for when using these techniques?
The long fermentation time requires careful monitoring of temperature and humidity. Over-fermentation can lead to a sour or unpleasant taste, so it's crucial to adjust the amount of yeast and fermentation time based on your environment.
Final Reflection: The Art and Science of Slow Fermentation
The pursuit of nuanced flavor through long fermentation with minimal yeast is not merely a niche technique; it's a fundamental shift in how we approach bread baking. This approach, demanding patience and precision, yields loaves with unparalleled depth and complexity, a testament to the power of slow processes. The results speak for themselves: a richer, more expressive flavor profile simply unattainable through faster methods.
The exploration of minimal yeast long fermentation has profoundly altered my own understanding of baking, moving beyond simple recipes to a deeper appreciation of the symbiotic relationship between yeast, flour, and time. It's a journey of discovery, each loaf a unique expression of this delicate balance. The best bread is made with patience, not haste.
– This unspoken truth underscores the core philosophy of this article and the transformative power of slow fermentation. The subtle shifts in flavor, the intricate development of the crumb, these are the rewards of embracing this mindful approach.
Consider the implications of this technique beyond the kitchen. The patience required mirrors the slow, deliberate processes needed in other aspects of life – in cultivating relationships, in pursuing creative endeavors, in simply appreciating the present moment. You, the baker, hold the power to transform simple ingredients into something extraordinary through the mindful application of time and technique. Embrace the slow fermentation, embrace the journey, and discover the profound rewards waiting within each perfectly risen loaf.
Unleash the Flavor: Master Slow Fermentation!
Thanks for taking the time to explore the art of long fermentation with minimal yeast! You've now unlocked the secrets to deeper flavors and incredible bread texture. Ready to put your new knowledge into practice?
- Start your next sourdough loaf today: Try the techniques you learned, experimenting with different flours and hydration levels. Note your results!
- Share your baking journey: Post a picture of your masterpiece on social media and tag us @BakeWithEase – we'd love to see your results!
- Join our community forum (link not included per instructions) to connect with other bakers and share tips!
What unique flavor profile will you create with your next slow-fermented bake?