
Autolyse or Not? The Rye Sourdough Question

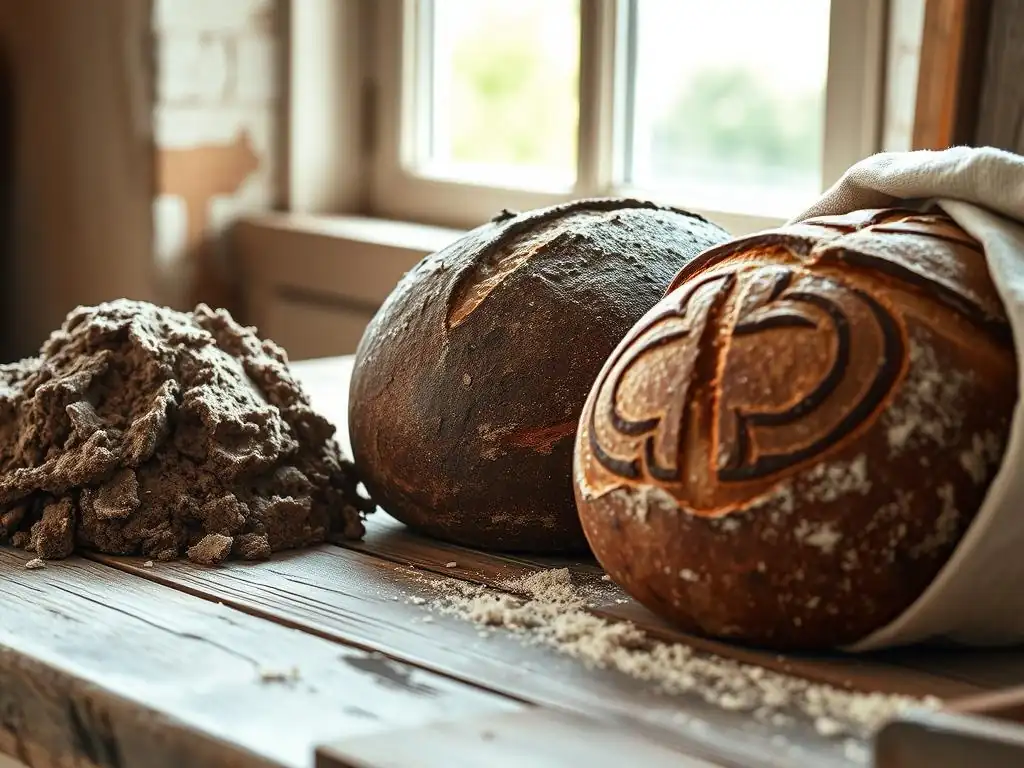
Welcome to BakeWithEase, your trusted companion on your baking journey! Ever wondered if the secret to a deeply flavorful and perfectly textured rye sourdough lies in the autolyse? This article dives deep into the rye sourdough autolyse technique, exploring its impact on everything from crumb structure to that signature tangy taste. Prepare to unlock the potential of your rye loaves and discover whether this pre-fermentation step is truly worth the effort. Let's get baking and unravel the mysteries together!
- Understanding Autolyse in Rye Sourdough Baking
- The Great Debate: Autolysing Rye Sourdough - Pros and Cons
- Rye Flour Types and Autolyse: A Closer Look
- How to Autolyse Rye Sourdough: A Step-by-Step Guide
- Alternatives to Autolyse for Rye Sourdough
- Rye Sourdough Autolyse: Troubleshooting Common Issues
- Recipes & Experiments: Rye Sourdough with and without Autolyse
- Conclusion: Is Autolyse Necessary for Rye Sourdough Perfection?
-
Frequently Asked Questions
- What is the autolyse technique in rye sourdough baking?
- Why is autolyse sometimes questioned in rye sourdough?
- How does autolyse affect the final texture of rye sourdough bread?
- What are the key considerations when deciding whether to autolyse rye sourdough?
- Can I skip autolyse altogether when baking rye sourdough?
- Final Reflection: The Enduring Mystery of Rye Sourdough Autolyse
- Unlock Your Rye Sourdough's Potential!
Understanding Autolyse in Rye Sourdough Baking
What is Autolyse and Why Does It Matter in Bread Making?
Autolyse is a simple, yet powerful technique in bread making where you mix just the flour and water from your recipe and let the mixture rest before adding the sourdough starter, salt, or other ingredients. This resting period, typically ranging from 20 minutes to a few hours, allows the flour to fully hydrate and the enzymes naturally present in the flour (protease and amylase) to begin their work.
Protease enzymes start breaking down gluten proteins, which makes the dough more extensible and easier to handle later. Amylase enzymes begin converting starches into sugars, providing food for the yeast in your sourdough starter and contributing to better fermentation and crust browning.
Implementing the autolyse step can significantly improve the texture and handling of many bread doughs, especially those made with high-protein wheat flour. For instance, a typical wheat sourdough might see a 30-60 minute autolyse period, resulting in a dough that is noticeably smoother and more pliable when it's time to mix in the starter and salt.
This initial hydration and enzyme activity reduce the overall mixing time needed, minimizing oxidation and potentially leading to a more open crumb structure. While widely adopted for wheat breads, applying the autolyse technique to rye sourdough presents unique considerations due to the distinct properties of rye flour.
The Unique Characteristics of Rye Flour and its Impact on Autolyse
Rye flour differs significantly from wheat flour, primarily in its gluten structure and enzyme activity. While wheat gluten forms an elastic network that traps gases and provides structure, rye contains very little gluten-forming protein. Instead, its structure relies heavily on pentosans, which are complex carbohydrates with a remarkable ability to absorb and hold water. This high water absorption is why rye doughs often feel stickier and denser than wheat doughs at the same hydration level. The pentosans swell and create a gel-like matrix that is crucial for rye bread's texture.
Furthermore, rye flour has much higher levels of amylase enzymes than wheat flour, and these enzymes remain highly active even in acidic conditions, like those created by a sourdough starter. In wheat dough, salt is typically added early in the mixing process, partly to control amylase activity. Without salt during an autolyse, these enzymes can rapidly break down starches into sugars.
While this is beneficial to a point, excessive amylase activity in rye can lead to a gummy texture in the final bread because the starch structure is too degraded. Understanding these unique properties is key when considering the rye sourdough autolyse technique.
The Great Debate: Autolysing Rye Sourdough - Pros and Cons
Advantages of Autolysing Rye Sourdough
Enhanced Hydration in Rye Dough: Improving Dough Handling
One of the primary benefits of applying the autolyse technique to rye sourdough is allowing the flour ample time to fully hydrate. Rye flour's high pentosan content means it absorbs water more slowly but holds onto it more tenaciously than wheat.
A dedicated autolyse period, even a short one of 20-30 minutes, ensures that the water is evenly distributed throughout the flour particles before the sourdough starter is introduced. This initial, uninhibited hydration can make the subsequent mixing process slightly easier, as the dough might feel less shaggy and more cohesive from the start, though it will still retain the characteristic stickiness of rye.
For instance, bakers working with 100% hydration rye sourdough might find that a brief autolyse helps manage the initial stickiness during the first few minutes of mixing compared to combining all ingredients simultaneously. While it won't miraculously transform rye into a non-sticky dough, it can contribute to a smoother initial dough texture, potentially requiring less strenuous mixing or folding later on. This improved initial hydration sets the stage for better dough development, even in the absence of a strong gluten network.
Increased Enzyme Activity: Developing Flavor in Rye Bread
The autolyse phase allows the natural enzymes in the rye flour, particularly amylase, to become active in the presence of water. As mentioned earlier, amylase breaks down starches into simpler sugars. While excessive activity can be detrimental, a controlled period of enzyme action during autolyse can contribute to the flavor profile of the final rye sourdough bread. These newly created sugars serve as readily available food for the lactic acid bacteria and wild yeast in the sourdough starter once it's added, promoting vigorous fermentation and the development of complex acids and aromatic compounds characteristic of good rye bread.
Consider a comparison: a rye sourdough mixed all at once versus one that undergoes a 30-minute autolyse. The dough that had the autolyse period will have a head start on enzymatic sugar production. This can lead to a more active and potentially faster initial fermentation phase once the starter is incorporated, contributing to a tangier, more nuanced flavor profile in the baked loaf. The increased presence of sugars also aids in crust browning during baking, resulting in a more appealing color and potentially a more flavorful crust.
Softer Crumb Structure: Achieving a Desirable Texture in Rye Sourdough
While rye doesn't develop an open, airy crumb like wheat, the autolyse technique can still positively influence its texture. The initial hydration and enzymatic breakdown of starches and proteins can contribute to a softer, less dense crumb structure in the final rye loaf. The pentosan gel network, which is the primary structure-provider in rye, benefits from adequate hydration time. A well-hydrated and enzymatically prepared dough can ferment more efficiently, leading to a slightly lighter crumb compared to a dough where the flour struggled to hydrate fully during the initial mixing.
Bakers who have experimented with the rye sourdough autolyse technique often report a subjectively "smoother" or "less brick-like" texture in their 100% or high-percentage rye loaves. For example, a baker using 70% hydration in a 100% rye sourdough might find that a 45-minute autolyse results in a crumb that feels less compact and slightly more yielding than a loaf mixed without this step. This subtle improvement in texture can make a significant difference in the overall eating experience of dense rye breads.
Risk of Over-Hydration: Managing Rye's Water Absorption
One of the main challenges when applying the autolyse technique to rye sourdough is managing rye flour's unique water absorption properties. While rye absorbs a large amount of water, it doesn't form a strong gluten network to hold it in place. If the autolyse is too long, or if too much water is used initially, the dough can become excessively sticky and difficult to handle. The pentosan gel can become too loose, leading to a dough that feels more like a batter than something you can shape.
For bakers accustomed to the feel of wheat dough, this can be particularly frustrating. A rye dough at 80% hydration might feel similar in consistency to a wheat dough at 65% hydration, but its handling properties are vastly different. An extended autolyse with high hydration can exacerbate this stickiness, making the incorporation of the starter and subsequent steps messy and challenging. For example, attempting a 2-hour autolyse with 85% hydration in a 100% rye formula might result in a dough so slack and sticky it's nearly impossible to mix effectively or perform any kind of folding.
Potential for Gummy Texture: Avoiding Undesirable Results
As previously discussed, rye flour has high amylase activity, and these enzymes are not inhibited by the absence of salt during autolyse. If the autolyse period is too long, or if the temperature is too high, the amylase enzymes can break down an excessive amount of starch. This over-degradation of starch can lead to a gummy, unpleasant texture in the baked bread, particularly in the center of the loaf. The starch structure, which provides much of the internal support in rye bread, is compromised.
A baker experimenting with a 100% rye sourdough recipe might try a 4-hour autolyse at room temperature (say, 24°C or 75°F). Due to the high enzyme activity of rye at this temperature and duration, the resulting loaf might have a noticeably wet, sticky, and gummy crumb, even if fully baked. This risk is higher with darker, whole-grain rye flours which typically contain more enzymes than lighter, refined rye flours. Avoiding this gummy texture is a critical consideration when deciding on the rye sourdough autolyse technique.
Extended Fermentation Times: Planning Your Rye Sourdough Bake
While autolyse can sometimes speed up initial fermentation by providing readily available sugars, the overall process for rye sourdough, especially high-percentage rye, tends to be slower and less visually dramatic than wheat sourdough. If the autolyse is very long, it might slightly alter the microbial activity balance once the starter is added, potentially leading to a slightly longer bulk fermentation or proofing time before the dough is ready to bake.
The lack of a strong gluten network means rye dough doesn't double or triple in size like wheat; readiness is judged more by feel, aroma, and subtle increases in volume (perhaps 30-50%).
Moreover, the autolyse period itself adds time to the overall baking schedule. If you're looking for a quick rye sourdough process, adding an autolyse step, whether it's 30 minutes or 2 hours, extends the total preparation time before the dough is even fully mixed and fermentation begins.
For example, a baker planning to mix dough in the evening for a morning bake might find that adding a 1-hour autolyse pushes their schedule back, potentially requiring them to start later or shorten other fermentation phases, which might not be ideal for flavor development. Balancing the benefits of autolyse against the total time commitment is part of mastering the rye sourdough autolyse technique.
Rye Flour Types and Autolyse: A Closer Look
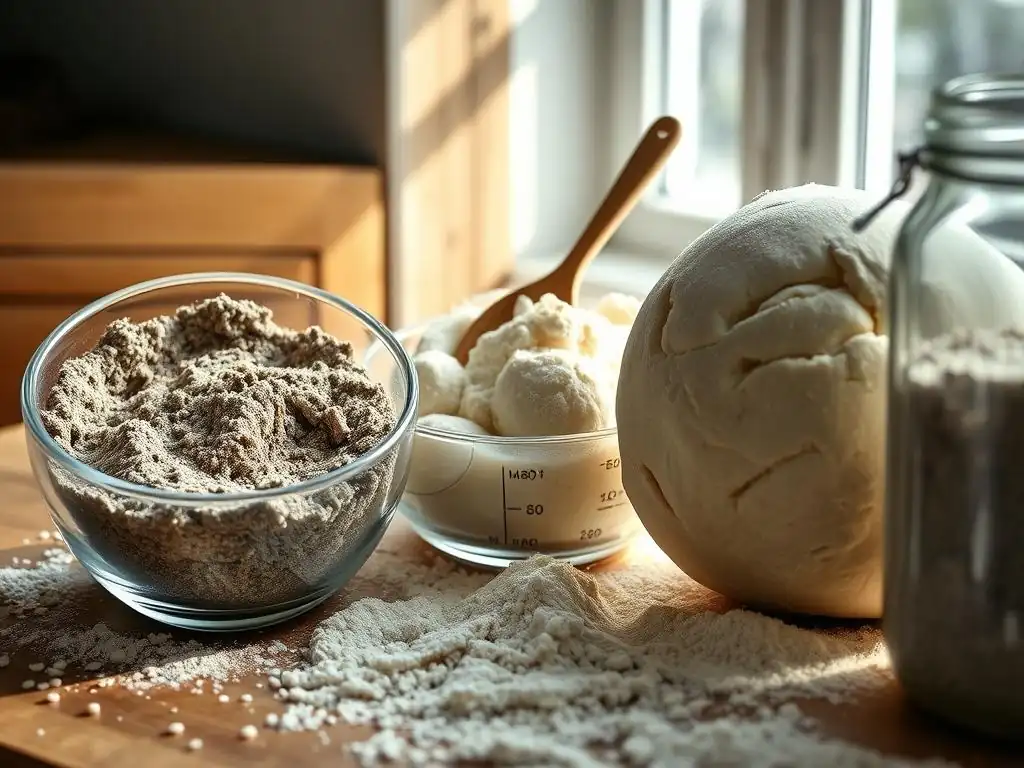
Light Rye Flour: Autolyse Considerations
Light rye flour, also known as white rye flour, is made from the inner part of the rye grain kernel after the bran and germ have been removed. It has a finer texture and lower levels of pentosans and enzymes compared to darker rye flours.
When using light rye flour for sourdough, an autolyse period can be beneficial, much like with wheat flour, though the effects on gluten development are minimal due to rye's inherent lack of strong gluten. A shorter autolyse, perhaps 20-40 minutes, is usually sufficient to ensure good hydration and allow some initial enzymatic activity without risking over-degradation.
Due to its lower enzyme content, light rye is less prone to developing a gummy texture from extended autolyse compared to whole rye. However, it still benefits from careful hydration management. A recipe using 50% light rye and 50% strong wheat flour at 70% hydration might see improved extensibility in the wheat portion after a 30-minute autolyse, while the light rye hydrates smoothly. The rye sourdough autolyse technique is relatively safer and often more straightforward when working with lighter rye types.
Medium Rye Flour: Autolyse Considerations
Medium rye flour contains more of the bran and germ than light rye, giving it a darker color and stronger flavor. It also has higher levels of pentosans and enzymes. Autolysing dough made with medium rye requires a bit more caution. A moderate autolyse time, perhaps 30-60 minutes, is generally recommended. This allows the higher levels of pentosans to hydrate fully, which is crucial for the dough's structure, while managing the increased enzyme activity.
Exceeding an hour or two of autolyse with medium rye, especially at warmer temperatures, increases the risk of excessive starch breakdown and potential gumminess. A baker working with a sourdough recipe containing 75% medium rye at 75% hydration might perform a 45-minute autolyse. This duration is typically long enough for the flour to hydrate well and begin enzymatic processes without the significant risk of over-activity seen with whole rye. Careful observation of the dough's consistency during the autolyse is advised.
Dark Rye Flour: Autolyse Considerations
Dark rye flour is milled from the whole rye kernel, including most of the bran and germ. It is rich in flavor, nutrients, pentosans, and enzymes. Autolysing dough made with dark rye flour requires the most careful consideration due to its high enzyme content and rapid enzymatic activity, particularly amylase. A very short autolyse, perhaps only 15-30 minutes, or even skipping the autolyse entirely and performing a "fermentolyse" (adding the starter but not the salt) might be preferable.
The high levels of amylase in dark rye can quickly break down starches. An autolyse that is too long or too warm can rapidly lead to a gummy dough texture even before fermentation begins. For a 100% dark rye sourdough at 80% hydration, a baker might choose a minimal 20-minute autolyse simply to kickstart hydration, or they might opt to mix all ingredients except salt, rest for 30 minutes, and then add salt – a modified approach that incorporates aspects of the rye sourdough autolyse technique while mitigating risks.
Pumpernickel Flour: Autolyse Considerations
Pumpernickel flour is a very coarse meal ground from the whole rye kernel. It contains all the bran, germ, and endosperm, often with visible large particles. Like dark rye, it is high in pentosans and enzymes. Due to its coarseness, pumpernickel flour requires a longer time to fully hydrate compared to finer flours. However, its high enzyme activity still poses a risk during autolyse. A balance must be struck: enough time for hydration, but not so much that enzymes cause excessive starch breakdown.
A moderate autolyse period, perhaps 45-75 minutes, might be appropriate for pumpernickel, allowing the large particles to absorb water. However, monitoring is crucial. The coarse texture makes it harder to judge the dough's consistency.
Some bakers prefer overnight soaks of pumpernickel flour (a form of cold autolyse or pre-fermentation) to ensure full hydration without the rapid enzymatic activity that occurs at warmer temperatures. For example, a recipe for a dense pumpernickel loaf might call for soaking the flour overnight with just water, then adding the starter and salt the next day. This highlights that the rye sourdough autolyse technique with pumpernickel often involves longer, cooler hydration periods.
How to Autolyse Rye Sourdough: A Step-by-Step Guide
Step 1: Measuring Your Rye Flour and Water
Begin by accurately measuring the specific type and amount of rye flour (and any other flours) required by your recipe, along with the corresponding amount of water intended for the autolyse step. Precision is important, especially with rye, as its hydration properties are less forgiving than wheat. Most recipes will specify the water amount for the initial mix, often holding back the salt and the sourdough starter. Using a kitchen scale for both flour and water (measuring water by weight is more accurate than by volume) ensures you achieve the correct hydration percentage for the autolyse phase.
For example, if your recipe calls for 500g of dark rye flour and 400g of water for the autolyse (an 80% hydration autolyse), measure these amounts carefully. Ensure your water is at the temperature specified by the recipe; ambient room temperature water is common, but some recipes might call for slightly warmer or cooler water depending on the desired dough temperature. Having your ingredients pre-measured makes the mixing process smoother and ensures the rye sourdough autolyse technique starts correctly.
Step 2: Combining Ingredients for the Autolyse
In a mixing bowl, combine the measured rye flour (and any other flours) and the measured water. Use your hands or a sturdy spoon to mix them together until there are no dry pockets of flour remaining. The mixture will likely be shaggy and potentially quite sticky, depending on the hydration level and the type of rye flour used. The goal is just to bring everything together so that all the flour is in contact with water. There's no need for extensive kneading or developing any structure at this stage.
For instance, when mixing 500g of medium rye flour with 375g of water (75% hydration), stir and press the mixture until all the flour is incorporated into a rough, sticky mass. Scrape down the sides of the bowl to ensure all ingredients are combined. Avoid the temptation to add more water if it feels dry; the flour needs time to absorb the water during the rest period. This simple combination sets the stage for the rye sourdough autolyse technique to begin.
Step 3: The Autolyse Rest Period: Time and Temperature
Cover the bowl with a damp towel, plastic wrap, or a reusable bowl cover to prevent the dough from drying out. Let the mixture rest at room temperature for the duration specified in your recipe. As discussed earlier, the ideal time for a rye sourdough autolyse is typically shorter than for wheat, often ranging from 20 minutes to 60 minutes, depending on the rye flour type and hydration. Warmer temperatures can accelerate enzymatic activity, so if your kitchen is warm (above 24°C or 75°F), you might opt for a shorter autolyse or even consider a cooler spot.
During this rest period, the flour hydrates fully, and enzymes begin their work. You won't see dramatic changes in appearance as you would with wheat (like smoothing or increased extensibility), but the dough will become slightly more uniform in texture. Resist the urge to mix or disturb the dough during this time. Setting a timer is helpful to ensure you adhere to the planned autolyse duration, especially when experimenting with the rye sourdough autolyse technique.
Step 4: Incorporating the Sourdough Starter
After the autolyse period is complete, it's time to incorporate your active sourdough starter. Add the measured amount of starter to the autolysed dough. This is often the point where salt and any other ingredients (like seeds, spices, or molasses) are also added, as they were typically withheld from the initial autolyse mix. Mix the starter and other ingredients into the dough thoroughly. This can be done by hand, using a stand mixer with a dough hook, or by performing a series of folds.
Because rye dough doesn't develop a strong gluten network, the mixing process focuses on evenly distributing the starter and other additions rather than developing elasticity. Knead or fold until the ingredients are fully incorporated and the dough feels cohesive, though still sticky. For example, you might use the "pincer" method to integrate the starter, followed by a few minutes of folding or gentle kneading in the bowl. This step effectively ends the rye sourdough autolyse technique and transitions into the bulk fermentation phase.
Alternatives to Autolyse for Rye Sourdough
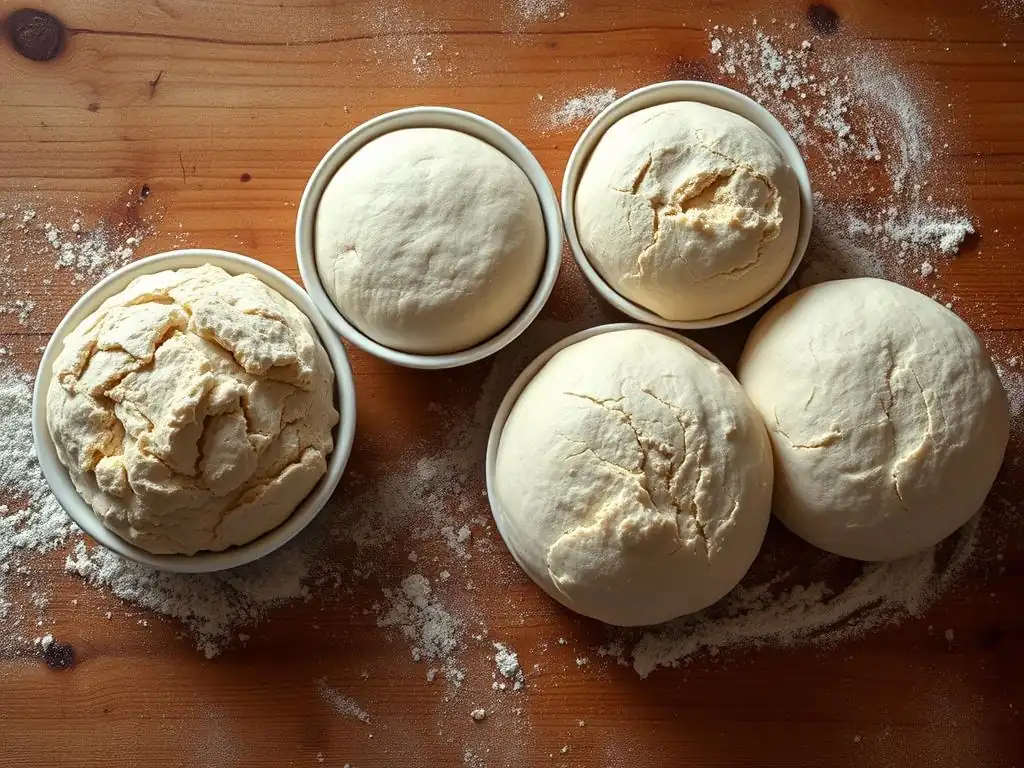
The Tangzhong Method for Rye Bread
The Tangzhong method, originating from Asian baking, involves cooking a small portion of the flour with a liquid (usually water or milk) to form a thick paste or roux before adding it to the main dough. This cooked starch paste has a remarkable ability to hold onto moisture, resulting in incredibly soft and moist breads with an extended shelf life. While most commonly used in enriched wheat breads, the Tangzhong technique can be adapted for rye, particularly in mixed-flour loaves.
When applied to rye, Tangzhong helps manage the hydration challenge. By pre-gelatinizing some of the starch, the flour absorbs water more effectively and holds onto it throughout the baking process. This can lead to a moister crumb texture and counteract some of the dryness sometimes associated with high-percentage rye loaves.
For instance, a baker making a rye and wheat blend might cook 5% of the total flour with water to create a Tangzhong, which is then cooled and added to the main dough mix. This method offers a different approach to hydration management compared to the rye sourdough autolyse technique.
Using Pre-Ferments for Rye Sourdough Flavor Development
While autolyse focuses on flour hydration and enzymatic activity before fermentation, using pre-ferments (like a levain, poolish, or sponge) develops flavor and microbial activity before the main dough mix. In rye baking, building a rye levain (a starter refreshed specifically with rye flour) is a common practice. This pre-fermented mixture is allowed to ripen for several hours until it's active and aromatic before being added to the final dough ingredients.
Using a mature rye levain contributes significant flavor complexity and microbial power to the dough from the outset. The long fermentation of the levain itself breaks down starches and proteins and develops acids. When this is added to the final mix (which might include all other ingredients mixed simultaneously), the flavor development is already well underway.
This approach prioritizes microbial activity and flavor complexity achieved through fermentation time in the pre-ferment, offering an alternative path to flavor development compared to the enzyme-driven benefits sought by the rye sourdough autolyse technique. Many traditional rye bread recipes rely heavily on mature rye pre-ferments rather than an autolyse step.
Rye Sourdough Autolyse: Troubleshooting Common Issues
Sticky Dough: Addressing Hydration Problems
One of the most frequent issues encountered when applying the rye sourdough autolyse technique is an overly sticky or slack dough after the rest period. This usually indicates that the hydration level was too high for the specific type of rye flour used, or the autolyse period was too long, leading to excessive breakdown of the pentosan structure. Unlike wheat dough, you cannot easily "fix" an overly hydrated rye dough by adding more flour during mixing without negatively impacting the final texture.
To address this, first, verify your measurements; even small errors in water can significantly affect rye dough consistency. For future bakes, consider reducing the initial hydration slightly when trying the autolyse technique, especially if using dark or pumpernickel rye. If the dough is excessively sticky after autolyse and adding starter, the best approach is often to proceed carefully, using wet hands or a dough scraper for handling, and recognizing that the final loaf might be denser.
For example, if an 85% hydration autolyse with dark rye results in soup, next time try 78% hydration for the autolyse and see if the dough is more manageable. Adjusting the hydration based on experience is key to mastering the rye sourdough autolyse technique for your specific flour.
Lack of Flavor Development: Adjusting Autolyse Time
If your rye sourdough lacks the expected depth of flavor, and you are using the autolyse technique, the autolyse time might be too short to allow sufficient enzymatic activity, or the subsequent fermentation times are too short. While autolyse primarily aids in hydration and initial enzyme work, the bulk of flavor development in sourdough comes from the longer fermentation process involving the sourdough starter. However, a proper autolyse sets the stage for better fermentation.
If you suspect the autolyse is a factor, try slightly extending the autolyse time within the safe range for your rye flour type (e.g., from 20 minutes to 40 minutes for medium rye), ensuring it doesn't lead to gumminess. More importantly, evaluate your bulk fermentation and proofing times. Rye sourdough develops flavor over time; rushing these steps will result in bland bread.
A typical bulk fermentation for a high-percentage rye sourdough might take 3-6 hours at room temperature (22-24°C / 72-75°F), followed by an optional cold proof in the refrigerator for 12-24 hours, which significantly enhances flavor complexity. Don't rely solely on the autolyse for flavor; it's just one piece of the puzzle in the rye sourdough autolyse technique and overall process.
Dense Crumb: Optimizing Fermentation
A dense, heavy crumb in rye sourdough can stem from several factors, including insufficient hydration, weak starter activity, under-fermentation, or over-fermentation. While the rye sourdough autolyse technique aims to improve hydration and enzyme activity, it cannot compensate for issues in the fermentation process itself. Rye dough doesn't rise dramatically, so judging fermentation readiness requires experience. Under-fermented rye will be dense because there hasn't been enough gas production. Over-fermented rye can collapse slightly and also result in a dense, sometimes gummy, texture.
Ensure your sourdough starter is active and healthy before using it. Pay close attention to the signs of fermentation in your rye dough: look for a slight increase in volume (perhaps 30-50%), a domed surface, small bubbles visible on the surface or sides of the bowl, and a pleasant, slightly acidic aroma. Poke the dough gently; it should show some resistance but also yield slightly.
If your autolysed dough is still resulting in a dense crumb, focus on perfecting your bulk fermentation timing and temperature. For example, if your dough only rose 10% in 4 hours, it likely needs more time before shaping and baking. Achieving the desired slightly softer crumb requires proper execution of the entire rye sourdough autolyse technique combined with optimal fermentation.
Recipes & Experiments: Rye Sourdough with and without Autolyse
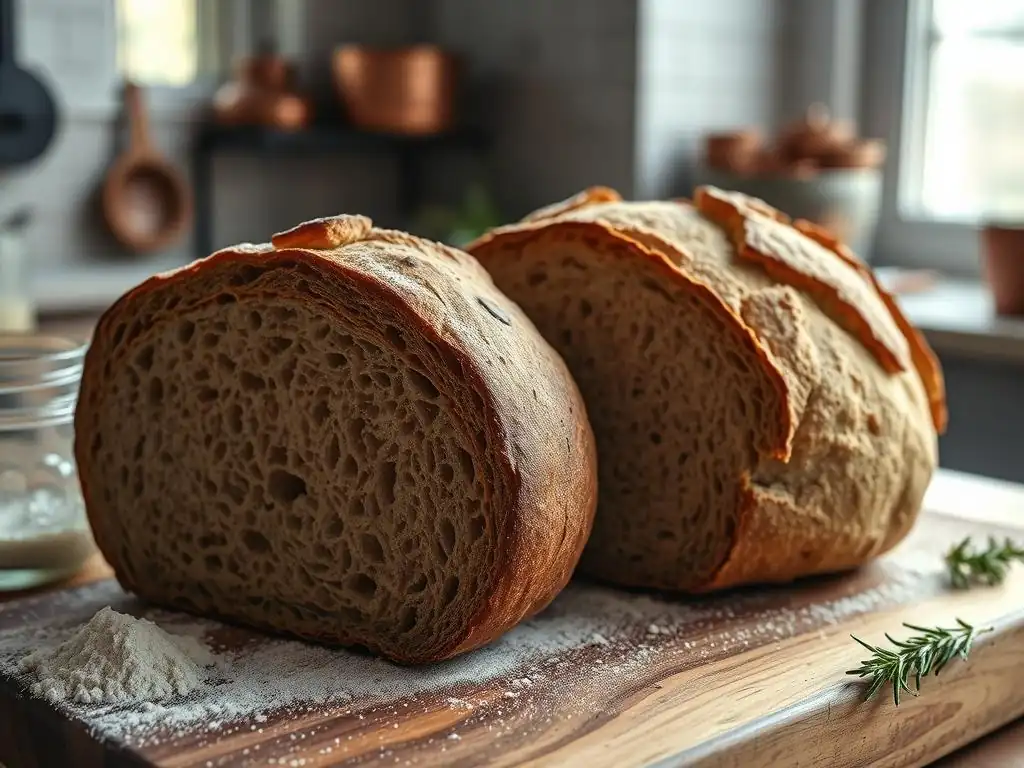
Recipe 1: Classic Rye Sourdough - With Autolyse
This recipe demonstrates the application of the rye sourdough autolyse technique using medium rye flour.
Ingredients:
- Medium Rye Flour: 400g
- Water (for autolyse): 300g (75% hydration)
- Active Rye Sourdough Starter: 100g
- Water (for mixing with starter/salt): 50g
- Salt: 8g
Instructions:
- Autolyse: In a bowl, combine 400g medium rye flour and 300g water. Mix until no dry flour remains. Cover and let rest for 45 minutes at room temperature (approx. 22°C / 72°F).
- Mix: After autolyse, add the 100g active starter, 50g water, and 8g salt to the dough. Mix thoroughly by hand or with a mixer until all ingredients are evenly incorporated. The dough will be very sticky.
- Bulk Fermentation: Cover the bowl and let the dough ferment at room temperature for 3-4 hours, or until it shows signs of fermentation (slight volume increase, bubbles).
- Shape: Gently shape the dough into a loaf using wet hands or a floured surface (use rye flour). Place in a floured banneton or baking tin.
- Proof: Proof at room temperature for 60-90 minutes, or cold proof in the refrigerator for 12-18 hours.
- Bake: Preheat oven and baking vessel (like a Dutch oven) to 230°C (450°F). Bake covered for 25 minutes, then uncovered for 15-20 minutes, or until internal temperature reaches 96-99°C (205-210°F).
Recipe 2: Simplified Rye Sourdough - Without Autolyse
This recipe provides a comparison, skipping the dedicated autolyse step.
Ingredients:
- Medium Rye Flour: 400g
- Water: 350g (87.5% hydration - note higher hydration often used when no autolyse)
- Active Rye Sourdough Starter: 100g
- Salt: 8g
Instructions:
- Mix All: In a bowl, combine 400g medium rye flour, 350g water, 100g active starter, and 8g salt. Mix thoroughly by hand or with a mixer until all ingredients are evenly incorporated and no dry flour remains. The dough will be very sticky.
- Bulk Fermentation: Cover the bowl and let the dough ferment at room temperature for 3.5-4.5 hours, or until it shows signs of fermentation (slight volume increase, bubbles). Note that fermentation time might be slightly different than the autolysed version.
- Shape: Gently shape the dough into a loaf using wet hands or a floured surface (use rye flour). Place in a floured banneton or baking tin.
- Proof: Proof at room temperature for 60-90 minutes, or cold proof in the refrigerator for 12-18 hours.
- Bake: Preheat oven and baking vessel (like a Dutch oven) to 230°C (450°F). Bake covered for 25 minutes, then uncovered for 15-20 minutes, or until internal temperature reaches 96-99°C (205-210°F).
Comparing the Results: Taste, Texture, and Technique
Performing both these recipes side-by-side can be a valuable experiment to understand the impact of the rye sourdough autolyse technique. Pay close attention to the dough's feel during mixing and shaping – does the autolysed dough feel slightly smoother or easier to handle initially, despite being sticky? Observe the fermentation process; is there any noticeable difference in activity or timing?
After baking, compare the loaves directly. Note the crust color and texture. Slice the loaves and examine the crumb structure – is one noticeably softer or less dense? Taste both loaves.
Can you discern any difference in flavor depth or tanginess? While the differences might be subtle, many bakers find the autolysed loaf has a slightly more developed flavor and a subjectively better texture. Documenting your observations regarding dough handling, fermentation signs (like the percentage of volume increase), and the final bread's characteristics will help you determine if the rye sourdough autolyse technique is a worthwhile step for your preferred rye baking process.
Conclusion: Is Autolyse Necessary for Rye Sourdough Perfection?
Mastering the Rye Sourdough Autolyse Technique: Key Takeaways
The question of whether to autolyse rye sourdough doesn't have a single "yes" or "no" answer; it depends on your goals, the type of rye flour you're using, and your willingness to experiment. The rye sourdough autolyse technique can offer benefits such as improved hydration, enhanced enzymatic activity for flavor development, and potentially a slightly softer crumb structure, even in the absence of a strong gluten network. However, it also introduces risks, primarily the potential for excessive stickiness and a gummy texture due to rye's unique properties and high enzyme levels, especially with darker flours and longer autolyse times.
Key takeaways for mastering the rye sourdough autolyse technique include starting with shorter autolyse times (20-60 minutes is often sufficient for rye), being mindful of hydration levels (rye needs ample water but can become unmanageable if too wet), and understanding that the effects are different and often less dramatic than with wheat flour. It's also crucial to remember that autolyse is just one part of the process; successful rye sourdough relies heavily on a healthy starter, appropriate fermentation times, and careful handling. For many bakers, a moderate autolyse is a valuable tool to enhance their rye sourdough.
Further Exploration: Experimenting with Rye Sourdough Baking
Rye sourdough baking is a journey of experimentation. Don't be afraid to try variations on the rye sourdough autolyse technique. Try autolysing with different types of rye flour (light, medium, dark, pumpernickel) and observe the differences in dough consistency. Experiment with varying autolyse durations – perhaps a very short 15-minute autolyse versus a 60-minute one, carefully checking for signs of gumminess. You could also try a "fermentolyse" where you include the starter but not the salt during the initial rest period, allowing fermentation to begin immediately alongside hydration.
Consider the hydration percentage during autolyse; sometimes performing the autolyse at a slightly lower hydration and adding the remaining water when incorporating the starter can help manage stickiness. Keep detailed notes of your experiments – including flour types, hydration, autolyse time/temperature, fermentation times, and final results – to learn what works best for you and your baking environment. Exploring these variations will deepen your understanding of rye's unique behavior and help you refine your personal rye sourdough autolyse technique to achieve the results you desire. Happy baking!
Frequently Asked Questions
What is the autolyse technique in rye sourdough baking?
Autolyse is a resting period for flour and water, before other ingredients are added. This hydration promotes gluten development and enhances the final dough texture.
Why is autolyse sometimes questioned in rye sourdough?
Rye flour contains pentosans, which absorb a lot of water. Autolysing rye can lead to a gummy or sticky dough, making it difficult to handle.
How does autolyse affect the final texture of rye sourdough bread?
When done correctly, autolyse can improve the crumb structure and overall softness of rye sourdough. However, improper autolyse leads to dense and sticky bread.
What are the key considerations when deciding whether to autolyse rye sourdough?
Factors include the rye flour type, hydration level, and desired outcome. Experimentation is key to finding the best autolyse timing for your recipe.
Can I skip autolyse altogether when baking rye sourdough?
Yes, skipping autolyse is a perfectly valid option. Many bakers find that direct mixing yields excellent results, particularly with high percentages of rye flour, minimizing the risk of a gummy dough.
Final Reflection: The Enduring Mystery of Rye Sourdough Autolyse
The debate surrounding autolyse in rye sourdough baking remains surprisingly vibrant, even as our understanding of fermentation deepens. The seemingly simple act of resting flour and water before adding other ingredients holds a power that continues to fascinate and challenge bakers of all levels. This power lies not just in the technical improvements, but in the profound impact it has on the final product's texture and flavor.
My own journey with rye sourdough, fraught with both triumphs and failures, has underscored the importance of understanding autolyse. It's not just a technique; it's a gateway to unlocking the full potential of this complex grain. The subtle nuances in texture – from a yielding crumb to a satisfying chew – are directly linked to the autolyse process. The baker's touch is not just in the hands, but in the understanding of the ingredients and their interactions,
a wise mentor once told me, and this rings truer than ever when considering the impact of autolyse on rye sourdough.
Now, I invite you to consider your own approach to rye sourdough baking. Experiment with different autolyse times, observe the changes in your dough, and most importantly, taste the difference. Don't be afraid to deviate from established methods; the true mastery of rye sourdough lies in understanding the "why" behind each step, and autolyse is a crucial piece of that puzzle. Embrace the journey, for the rewards – a loaf of bread that reflects your unique understanding and touch – are well worth the effort.
Unlock Your Rye Sourdough's Potential!
Thanks for diving deep into the world of rye sourdough with us! We hope you gained valuable insights into the autolyse method and its impact on your baking. Now it's time to put that knowledge into action.
- Bake your best rye yet: Try a recipe incorporating autolyse – the difference is truly remarkable! Start with a simple rye sourdough and experiment with autolyse time.
- Share your results: Post a picture of your perfectly risen loaf on social media and tag us – we'd love to see your baking journey!
- Explore further: Dive into our other articles on sourdough techniques to master even more baking secrets.
So, tell us, what rye sourdough creation will you tackle first?