
Baking Whole Wheat Focaccia: A Simple Recipe

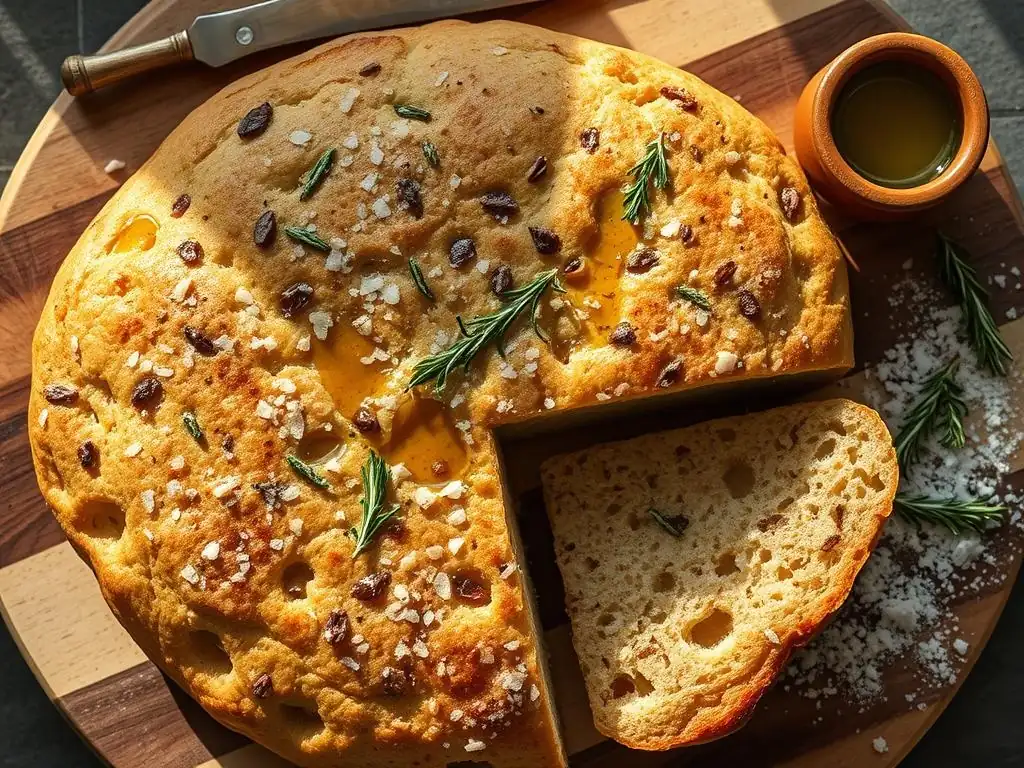
Welcome to BakeWithEase!
Ready to unlock the secrets of artisan bread baking without the fuss? You've landed in the right place! Dive into our latest easy whole wheat focaccia recipe and discover how simple it is to create a flavorful, satisfying loaf at home. But that's just the beginning. Explore our collection of bread baking guides and tips, and get ready to elevate your baking game. What other delicious breads will you conquer next?
- Whole Wheat Rosemary Focaccia: A Recipe for Home Bakers
- Introduction to Baking Whole Wheat Rosemary Focaccia
- The Whole Wheat Rosemary Focaccia Recipe: Ingredients and Equipment
-
Step-by-Step Guide: Baking Your First Whole Wheat Rosemary Focaccia
- Step 1: Preparing the Dough - Mixing and Kneading
- Step 2: First Rise - Achieving the Perfect Dough Volume
- Step 3: Shaping the Focaccia - Preparing for Baking
- Step 4: Second Rise - Enhancing the Focaccia's Lightness
- Step 5: Dimpling and Topping - Adding Flavor and Texture
- Step 6: Baking the Focaccia - Achieving Golden Perfection
- Step 7: Cooling and Serving Your Homemade Focaccia
- Tips and Tricks for Perfect Whole Wheat Rosemary Focaccia
- Troubleshooting Your Whole Wheat Rosemary Focaccia
- Enjoy Your Homemade Whole Wheat Rosemary Focaccia!
- Frequently Asked Questions
- Final Reflection: The Humble Loaf, the Bountiful Reward
- Unleash Your Inner Baker: Craft the Perfect Focaccia!
Whole Wheat Rosemary Focaccia: A Recipe for Home Bakers
Introduction to Baking Whole Wheat Rosemary Focaccia
Why Choose Whole Wheat Rosemary Focaccia? Flavor and Nutrition
Whole wheat rosemary focaccia offers a delightful departure from traditional white flour versions, bringing a richer, nuttier flavor profile to the table. The inclusion of whole wheat flour not only contributes this distinctive taste but also significantly boosts the nutritional value of the bread. Unlike refined white flour, whole wheat flour retains the grain's bran and germ, packing in more fiber, vitamins, and minerals, such as B vitamins, iron, magnesium, and selenium. This makes a slice of whole wheat focaccia a more satisfying and health-conscious choice.
Beyond its nutritional benefits, the combination of robust whole wheat with fragrant rosemary creates a truly aromatic and flavorful bread. The earthy notes of the grain pair beautifully with the piney, slightly peppery essence of fresh rosemary. This simple whole wheat focaccia recipe is not just about baking; it's about creating a sensory experience, from the smell filling your kitchen as it bakes to the first bite of warm, tender bread. It’s a versatile bread, perfect on its own, dipped in olive oil, or served alongside soups and salads.
A Straightforward Approach to Focaccia Baking
Many people might feel intimidated by baking bread, especially using whole wheat flour, which can sometimes be trickier to handle than white. However, this easy whole wheat focaccia recipe is designed with simplicity and success in mind, even for novice bakers. Focaccia is inherently forgiving; its rustic nature means perfect shaping isn't critical, and the generous use of olive oil helps prevent sticking and adds wonderful texture.
The process outlined here breaks down baking whole wheat focaccia into manageable steps, focusing on key techniques like proper mixing, rising, and dimpling. We'll cover everything from activating the yeast to achieving that signature golden-brown crust. By following this straightforward approach, you'll discover that baking delicious, homemade whole wheat rosemary focaccia is well within your reach, proving that healthy and flavorful bread can be easy to make at home.
The Whole Wheat Rosemary Focaccia Recipe: Ingredients and Equipment
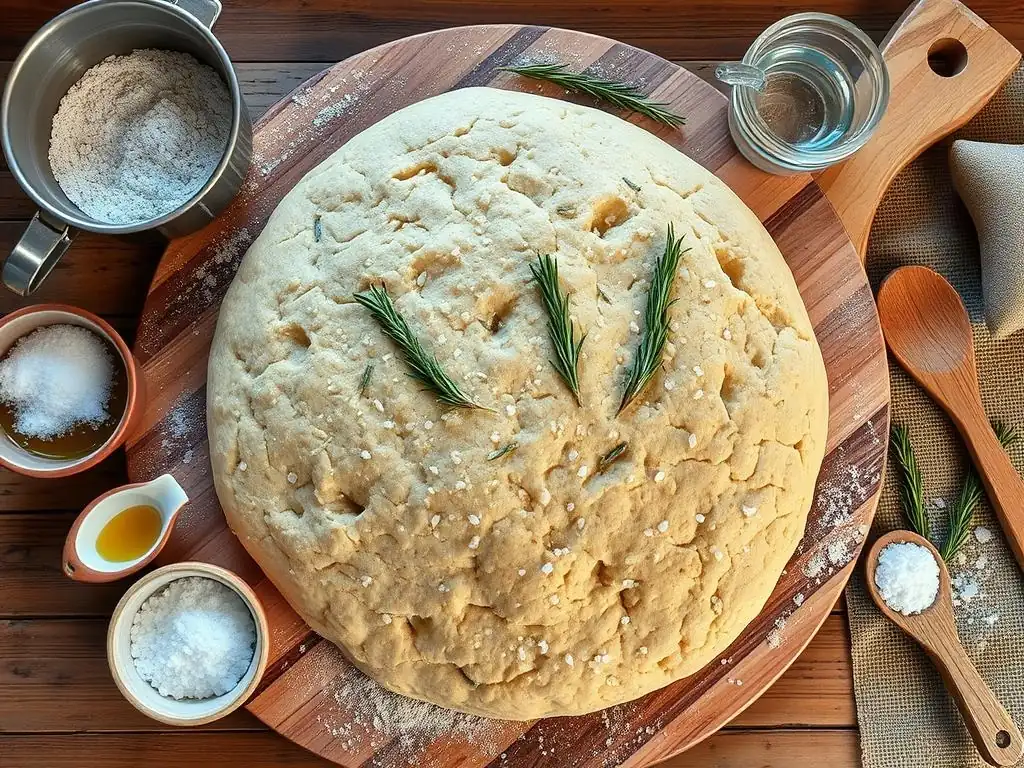
Key Ingredients for Delicious Whole Wheat Rosemary Focaccia
-
Whole Wheat Flour: The Foundation
Using 100% whole wheat flour provides the full nutritional benefits and distinct flavor. For this recipe, you'll need about 3 cups (approximately 360 grams) of good quality whole wheat flour. The exact amount might vary slightly depending on the humidity and how you measure, so it's always good to have a little extra on hand. Remember that whole wheat flour absorbs liquid differently than white flour, often requiring slightly more hydration to achieve a supple dough.
The choice of whole wheat flour impacts the final texture. A finely ground whole wheat flour will produce a lighter crumb than a coarser stone-ground variety. Regardless of the grind, whole wheat flour contributes a pleasant chewiness and a deeper, more complex flavor that complements the savory toppings beautifully.
-
Extra Virgin Olive Oil: Adds Flavor and Moisture
Olive oil is arguably the second most important ingredient in focaccia, playing multiple roles. You'll need a generous amount, perhaps 1/4 cup for the dough and another 1/4 cup or more for coating the pan, topping, and dimpling. Opt for a good quality extra virgin olive oil, as its flavor is prominent in the final bread.
In the dough, olive oil contributes to tenderness and a moist crumb. When used to coat the pan and top the dough before baking, it creates that characteristic crispy bottom crust and helps the top develop a beautiful golden color and crisp edges. The pools of olive oil in the dimples are a signature of focaccia and provide bursts of rich flavor.
-
Active Dry Yeast: For a Light and Airy Texture
Yeast is the leavening agent that makes the focaccia light and airy. For this easy whole wheat focaccia recipe, active dry yeast is typically used. You'll need about 2 and 1/4 teaspoons (one standard packet) of active dry yeast. It's crucial to activate the yeast first in warm water with a pinch of sugar to ensure it's alive and active.
The yeast consumes sugars in the flour and produces carbon dioxide gas, which causes the dough to rise. Proper yeast activity is key to achieving a well-risen focaccia with a pleasant texture. Using water that is too hot can kill the yeast, while water that is too cold will slow its activity significantly. Aim for water around 105-115°F (40-46°C) to wake up the yeast effectively.
-
Rosemary and Sea Salt: The Classic Flavor Combination
Fresh rosemary is the traditional herb for focaccia, providing a wonderful aroma and savory flavor. You'll need about 2-3 tablespoons of fresh rosemary leaves, roughly chopped. Avoid using dried rosemary if possible, as fresh provides a much more vibrant flavor and aroma.
Flaky sea salt, like Maldon or similar, is sprinkled generously over the top just before baking. The large crystals provide bursts of salty flavor and a pleasant crunch. You'll need about 1-2 teaspoons of flaky sea salt, adjusted to your preference. This simple combination of rosemary and sea salt is a hallmark of classic focaccia and pairs perfectly with the whole wheat base.
Essential Equipment for Baking Focaccia at Home
-
Large Mixing Bowl
A large mixing bowl is necessary to contain the dough as you mix and knead it, and especially as it rises. Yeast doughs can double or even triple in volume during the first rise, so you need a bowl large enough to accommodate this expansion. A bowl with a capacity of at least 4-6 quarts is recommended for this recipe's dough volume.
Using a clear glass or plastic bowl can be helpful as it allows you to visually monitor the dough's rise without disturbing it too much. Ensure the bowl is clean and dry before starting. Lightly oiling the bowl before placing the dough in it for the first rise will prevent the dough from sticking as it expands.
-
9x13 Inch Baking Sheet
A standard 9x13 inch (approximately 23x33 cm) baking sheet or rectangular baking pan is the ideal size for this quantity of dough, resulting in a focaccia about 1 to 1.5 inches thick. Using a darker metal pan can result in a crispier bottom crust due to better heat absorption, while a lighter pan might require slightly longer baking time or higher temperature to achieve the same browning.
It's essential to generously oil the baking sheet with olive oil before placing the dough in it. This prevents the dough from sticking and contributes significantly to the crispy, golden bottom crust that is so desirable in focaccia. Don't be shy with the olive oil here; a good 1/4 cup spread across the bottom and sides is not too much.
-
Measuring Cups and Spoons
Accurate measurement is important in baking, even for a forgiving recipe like this easy whole wheat focaccia. You will need standard dry measuring cups for the flour and wet measuring cups for the water and olive oil. A set of measuring spoons is necessary for the yeast, salt, and any sugar used to activate the yeast.
For the most consistent results with flour, it's recommended to weigh it using a kitchen scale (360 grams for 3 cups). If using measuring cups, gently spoon the flour into the cup and level it off with a straight edge rather than scooping directly from the bag, which can compact the flour and result in using too much.
Step-by-Step Guide: Baking Your First Whole Wheat Rosemary Focaccia
Step 1: Preparing the Dough - Mixing and Kneading
Activating the Yeast: Warm Water and Sugar
Begin by activating the active dry yeast. In a small bowl or measuring cup, combine 1 and 3/4 cups (about 415 ml) of warm water, heated to between 105°F and 115°F (40°C-46°C), with a pinch of sugar and the 2 and 1/4 teaspoons of active dry yeast. Stir gently and let it sit for 5-10 minutes.
You should see a foamy layer develop on the surface; this indicates the yeast is alive and ready to work. If it doesn't foam, your water might have been too hot or too cold, or the yeast may be old, and you should start over with fresh yeast.
Combining Ingredients for the Dough
In your large mixing bowl, combine the activated yeast mixture with about 3 cups (360g) of whole wheat flour and 1 teaspoon of salt. Add about 1/4 cup (60ml) of extra virgin olive oil to the bowl. Use a sturdy spoon or a dough whisk to mix the ingredients until they come together into a shaggy, sticky dough.
Whole wheat dough tends to be a bit stickier than white dough due to the bran. Don't worry if it seems very wet at this stage; focaccia dough is typically high in hydration for a light texture.
Kneading for Optimal Texture: 5-7 Minutes
Once the ingredients are roughly combined, turn the dough out onto a lightly floured surface. Knead the dough for 5-7 minutes. Whole wheat dough develops gluten more slowly than white dough, so don't expect it to become completely smooth or elastic like a white bread dough. Focus on incorporating the ingredients and developing some structure.
The dough will still be somewhat sticky, which is desirable for a moist focaccia. If it's too sticky to handle, lightly flour your hands, but avoid adding too much extra flour to the dough itself, as this can make the final focaccia dry. You're aiming for a dough that holds together but is still soft.
Step 2: First Rise - Achieving the Perfect Dough Volume
Creating the Ideal Environment for Rising: Warm, Draft-Free Place
After kneading, shape the dough into a rough ball. Lightly oil your large mixing bowl with a little olive oil. Place the dough in the bowl, turning it to coat all sides with oil. Cover the bowl tightly with plastic wrap or a damp kitchen towel. Find a warm, draft-free place for the dough to rise. An oven with the light on (but the oven off) is an ideal spot, usually providing a temperature around 80-85°F (27-30°C). Alternatively, a warm spot on your kitchen counter away from drafts will work.
Determining When the Dough is Ready: Doubled in Size
Allow the dough to rise for 1 to 1.5 hours. During this time, the yeast will be active, producing gas and causing the dough to expand. The dough is ready for the next step when it has roughly doubled in size.
The exact rising time will depend on the temperature of your environment and the activity of your yeast. If your kitchen is cool, the rise might take longer, potentially up to 2 hours. You can gently poke the dough with your finger; if the indentation remains, it's usually a good sign that the dough has risen sufficiently.
Step 3: Shaping the Focaccia - Preparing for Baking
Gently Deflating the Dough
Once the dough has doubled, gently punch it down to release some of the air. This helps redistribute the yeast and even out the temperature throughout the dough. You don't need to be aggressive; a gentle push down is sufficient. The dough will deflate significantly, which is normal.
Stretching and Shaping on the Baking Sheet
Pour about 1/4 cup (60ml) of olive oil into your 9x13 inch baking sheet, ensuring the bottom and sides are well coated. Transfer the deflated dough to the center of the oiled pan. Begin gently stretching and pressing the dough to fill the pan. Whole wheat dough can be a bit resistant to stretching initially.
If it springs back, let it rest for 5-10 minutes before continuing to stretch. This rest allows the gluten to relax, making the dough more pliable. Continue pressing and stretching until the dough roughly fills the pan. Don't worry if it doesn't reach the corners perfectly; it will continue to relax and spread slightly during the second rise.
Step 4: Second Rise - Enhancing the Focaccia's Lightness
Allowing the Dough to Relax and Rise Again: 30 Minutes
Once the dough is stretched into the baking sheet, cover the pan loosely with plastic wrap or a damp towel. Let the dough rest and rise again in a warm, draft-free place for about 30 minutes. This second rise is shorter than the first and allows the dough to relax fully into the pan shape and develop a bit more airiness before baking.
During this second rise, the dough will puff up slightly and become more relaxed. This stage is crucial for ensuring a tender crumb in your easy whole wheat focaccia. While it won't necessarily double in size again, you should see a noticeable increase in volume and a softer texture.
Step 5: Dimpling and Topping - Adding Flavor and Texture
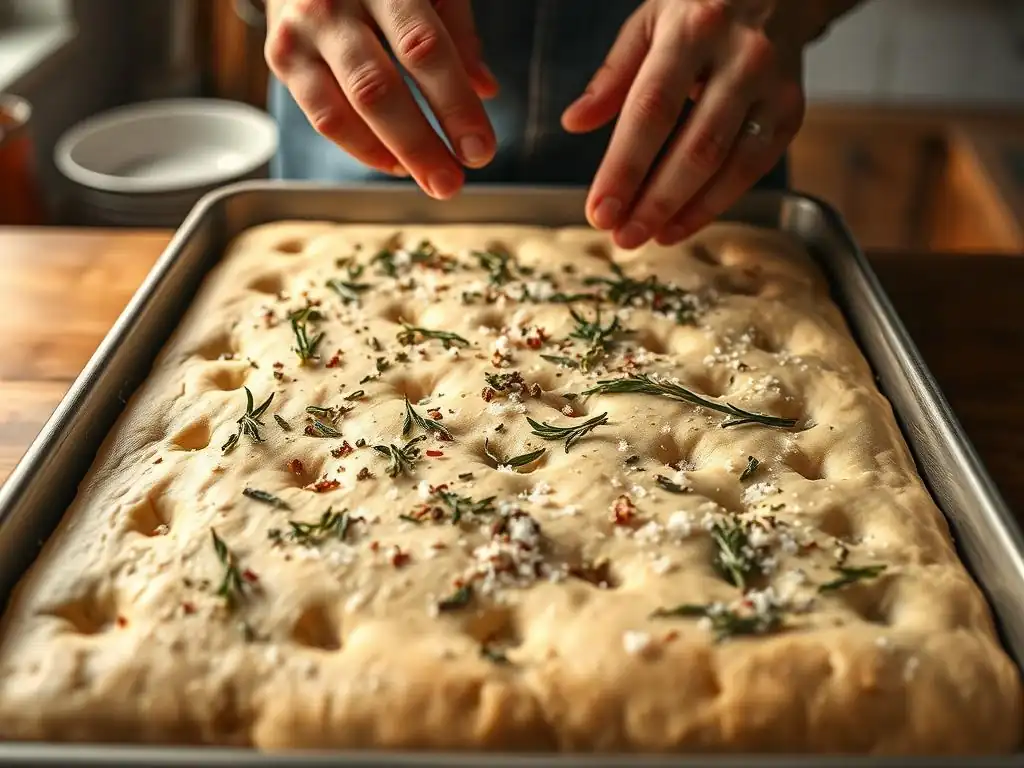
Creating the Signature Focaccia Dimples
This is a fun and characteristic step! Just before baking, generously drizzle the top of the dough with more olive oil (another 2-3 tablespoons). Dip your fingertips in olive oil (to prevent sticking) and press them firmly into the dough, creating deep indentations or "dimples" all over the surface. Try to press all the way down to the bottom of the pan in places. These dimples are where the olive oil, salt, and rosemary will pool and crisp up during baking, adding incredible flavor and texture.
Topping with Rosemary, Sea Salt, and Olive Oil
After creating the dimples, sprinkle the chopped fresh rosemary evenly over the surface of the dough. Then, generously sprinkle the flaky sea salt over the entire focaccia. The salt will dissolve slightly in the olive oil in the dimples, creating pockets of intense flavor. Ensure an even distribution of both the rosemary and salt so that every bite is flavorful. The combination of the fragrant herb, the crunchy salt, and the rich olive oil is what makes this whole wheat rosemary focaccia truly special.
Step 6: Baking the Focaccia - Achieving Golden Perfection
Oven Temperature and Baking Time: 400°F for 20-25 Minutes
Preheat your oven to 400°F (200°C). Place the baking sheet with the prepared focaccia dough on the middle rack of the preheated oven. Bake for 20-25 minutes. The baking time can vary slightly depending on your oven and the thickness of your focaccia. Start checking around the 20-minute mark.
Monitoring for Doneness: Golden Brown
The focaccia is done when the top is golden brown and the bottom crust is crispy and golden. You can carefully lift a corner with a spatula to check the color of the bottom. It should be a deep golden brown, indicating it's cooked through and has a nice crispy base. If the top is browning too quickly but the bottom isn't done, you can loosely tent the top with aluminum foil for the last few minutes of baking. The internal temperature, if you were to check, would be around 200-210°F (93-99°C).
Step 7: Cooling and Serving Your Homemade Focaccia
Allowing the Focaccia to Cool Properly: Wire Rack
Once baked, carefully remove the focaccia from the oven. For the crispiest bottom crust, immediately transfer the focaccia from the baking pan to a wire cooling rack. Allowing it to cool on the rack prevents steam from accumulating on the bottom, which can make it soggy. Let it cool for at least 10-15 minutes before slicing. While it's tempting to cut into it right away, letting it cool slightly improves the texture and makes it easier to slice cleanly.
Serving Suggestions and Pairings: With Soup, Salad, or as a Snack
Your easy whole wheat focaccia is now ready to be enjoyed! It's fantastic served warm, either on its own, dipped in good quality extra virgin olive oil, or alongside balsamic vinegar. It makes a wonderful accompaniment to a hearty soup or a fresh salad.
Consider serving slices with:
*   A bowl of tomato soup
*   Grilled vegetables
*   A simple green salad
*   Used as a base for sandwiches (sliced horizontally)
It's also a perfect snack on its own. The robust flavor of the whole wheat and the aromatic rosemary make it incredibly satisfying. Slice it into squares or rectangles and serve!
Tips and Tricks for Perfect Whole Wheat Rosemary Focaccia
Mastering the Whole Wheat Dough: Hydration is Key
Working with whole wheat flour can feel different from working with white flour because the bran and germ absorb more liquid. This easy whole wheat focaccia recipe calls for a relatively high hydration level (the ratio of water to flour) to ensure a moist and tender crumb. The dough should feel quite wet and sticky, not stiff. If your dough feels dry after mixing, add water a tablespoon at a time until it's shaggy and sticky.
Over-kneading is less of a concern with whole wheat flour, as gluten develops more slowly. However, adding too much flour during kneading is a common pitfall that leads to a dry, dense focaccia. Resist the urge to add excessive flour to make the dough easier to handle. Embrace the stickiness; it's a sign of a well-hydrated dough that will yield a lovely texture. A bench scraper can be helpful for managing sticky dough on your work surface.
Achieving the Perfect Crust: Olive Oil and High Heat
The signature crispy crust of focaccia comes from two main factors: generous amounts of olive oil and high baking heat. Using ample olive oil to coat the pan ensures the bottom crust fries rather than just bakes, resulting in that desirable crunch. Don't skimp on the oil in the pan or drizzled on top before baking.
Baking at a relatively high temperature, like 400°F (200°C), helps the crust brown and crisp up quickly while the interior cooks through. Placing the pan on the middle rack usually provides the best balance for even cooking and browning of both the top and bottom. If you find your bottom crust isn't as crispy as you'd like, try placing the pan on a lower rack for the last 5-10 minutes of baking during your next attempt at this easy whole wheat focaccia recipe.
Flavor Variations: Garlic, Olives, Cherry Tomatoes
While rosemary and sea salt are classic, this easy whole wheat focaccia recipe is incredibly versatile when it comes to toppings. You can customize it with various additions to create different flavor profiles.
- [ ] Add minced garlic to the olive oil drizzle before dimpling.
- [ ] Press pitted olives (like Kalamata or Castelvetrano) into the dimples.
- [ ] Arrange halved cherry tomatoes on top before baking.
- [ ] Sprinkle with other herbs like thyme or oregano.
- [ ] Add grated Parmesan cheese before baking.
Experimenting with different toppings allows you to make this simple whole wheat focaccia recipe your own. Just be mindful that some toppings, like fresh vegetables, can release moisture, which might affect the crust slightly.
Storing Your Focaccia: Airtight Container
Homemade focaccia is best enjoyed fresh, especially on the day it's baked when the crust is at its crispiest. However, if you have leftovers, store them properly to maintain quality.
Once completely cooled, store the focaccia in an airtight container at room temperature. It will keep well for 2-3 days. The crust will soften over time, but the flavor will still be excellent. For longer storage, you can wrap individual slices tightly in plastic wrap and then aluminum foil and freeze them for up to 2-3 months. Reheat frozen slices in a toaster oven or regular oven at 350°F (175°C) until warmed through and the crust crisps up again.
Troubleshooting Your Whole Wheat Rosemary Focaccia

Dough Not Rising? Check Yeast Activity and Temperature
If your dough didn't rise during the first or second rise, the most common culprit is inactive yeast or an incorrect rising temperature. Ensure your active dry yeast was fresh and foamy after being mixed with warm water and sugar in Step 1. If it didn't foam, the yeast was likely dead, and you'll need to start over with a new packet.
Also, verify that your rising environment is warm enough (ideally 75-85°F or 24-30°C) and free from drafts. Cold temperatures significantly slow down yeast activity. If your kitchen is cool, try the oven-with-light-on method or place the bowl on top of a warm appliance like a refrigerator. Patience is also key; sometimes, whole wheat dough just needs a little more time to rise, especially in cooler conditions.
Focaccia Too Dense? Longer Rising Time
A dense focaccia often results from insufficient rising time. If your dough didn't double in size during the first rise or puff up noticeably during the second rise, it won't have the airy structure needed for a light texture. Whole wheat dough can sometimes take longer to rise than white dough.
Ensure you allowed sufficient time for both rises, checking if the dough has achieved the described volume increases. If your rising environment is cool, be prepared for the rises to take longer than the times listed in the recipe. Don't rush the process; waiting for the dough to properly rise is essential for achieving a tender, open crumb in your easy whole wheat focaccia.
Burnt Bottom? Lower Rack or Reduce Baking Time
If the bottom of your focaccia is consistently getting too dark or burnt while the top is perfect, the pan might be too close to the heating element, or your oven temperature might be slightly higher than indicated.
Try placing the baking sheet on a lower rack in the oven for the entire baking time or moving it down halfway through. You can also try reducing the oven temperature by 10-15°F (5-8°C) and baking for a few extra minutes if needed. Ensure you're using enough olive oil in the pan, as this helps distribute heat and prevent sticking, but excessive oil can also sometimes lead to a very dark bottom. Monitoring closely during the last 5-10 minutes of baking is crucial to catch any issues before they become burnt.
Enjoy Your Homemade Whole Wheat Rosemary Focaccia!
Frequently Asked Questions
What makes this whole wheat focaccia recipe "easy"?
This recipe is designed to be easy because it uses simple ingredients and includes step-by-step instructions perfect for beginner bakers. The process is streamlined to avoid complex techniques.
Can I substitute all-purpose flour for the whole wheat flour in this recipe?
While possible, substituting entirely will change the texture and flavor. Using a blend of all-purpose and whole wheat will yield a lighter, more similar result to traditional focaccia.
How can I tell when my focaccia is properly proofed?
The dough should have almost doubled in size and feel light and airy. Gently poke the surface; the indentation should slowly spring back.
What are some topping ideas for this easy whole wheat focaccia?
Popular toppings include rosemary and sea salt, cherry tomatoes and olives, or even caramelized onions. Get creative and use your favorite herbs and vegetables!
How long does this whole wheat focaccia stay fresh?
For best results, enjoy the focaccia within 1-2 days of baking. Store it in an airtight container at room temperature to maintain its texture.
Final Reflection: The Humble Loaf, the Bountiful Reward
The simple act of baking whole wheat focaccia, as detailed in this recipe, transcends mere culinary creation; it's a powerful connection to tradition, a celebration of wholesome ingredients, and a surprisingly accessible path to culinary joy. In a world increasingly dominated by processed foods and fast-paced lifestyles, taking the time to knead dough, to feel the warmth of the oven, and to savor the rustic beauty of a homemade loaf offers a profound counterpoint. This simple recipe, designed for ease of execution, provides a gateway to a more mindful and rewarding approach to food.
The influence of homemade bread, particularly whole wheat varieties, on our cultural landscape is undeniable. From ancient civilizations to modern kitchens, bread has served as a symbol of nourishment, community, and comfort. Bread is the staff of life.
This simple adage speaks volumes about the enduring significance of this staple food. For me, the process of baking focaccia, with its satisfying textures and earthy aroma, is a meditative practice, a moment of calm amidst the chaos of daily life. It's a reminder of the simple pleasures and the tangible rewards of slowing down and engaging with our food on a deeper level.
Now, I invite you to try this recipe. Don't be intimidated by the seemingly complex process; the steps are straightforward, and the result is immensely gratifying. More than just a recipe, this is an invitation to reconnect with the fundamental act of creating something nourishing and delicious with your own hands. Embrace the imperfections, savor the aroma, and share the bounty with those you love. The experience of baking this whole wheat focaccia, and the joy it brings, is a gift you give yourself and others.
Unleash Your Inner Baker: Craft the Perfect Focaccia!
Thanks for joining us on this delicious journey into the world of whole wheat focaccia! We hope you gained valuable tips and inspiration to elevate your baking skills. Now it's time to put your newfound knowledge to the test!
- Bake your own masterpiece: Grab your ingredients and try out the recipe today! See how easy it is to create this beautiful and flavorful bread. Don't forget to experiment with different herbs and toppings to personalize your focaccia.
- Share your creation: Show off your baking prowess on social media! Use #BakeWithEaseFocaccia and tag us – we'd love to see your stunning results.
- Explore new flavor combinations: Think beyond the basics! What exciting herbs, cheeses, or vegetables could you add to your next focaccia? Let your creativity run wild!
Ready to transform your kitchen into a fragrant haven of delicious homemade bread?