
Easy Naan Recipe: Bring Authentic Indian Flavors Home

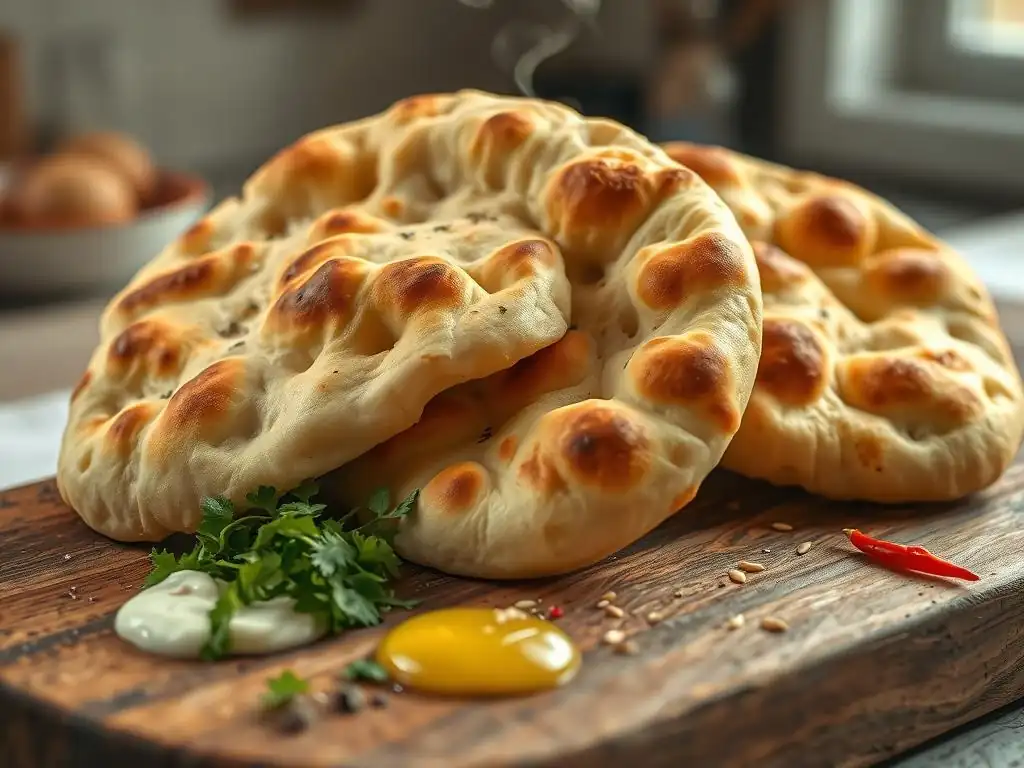
Welcome to BakeWithEase, your guide to unlocking the joys of baking! Ever dreamt of perfectly soft, pillowy naan bread straight from your own oven? You're in the right place. Discover our easy homemade Indian naan recipe and prepare to be amazed at how simple it is to bring authentic flavors into your kitchen. What's the secret to that irresistible texture? Let's dive in and find out...
- Garlic Naan Recipe: Elevate Your Indian Cuisine
- Introduction to Homemade Garlic Naan Bread
- Understanding Naan Bread: Flavored Flatbread
- Garlic Naan Recipe: Step-by-Step Guide
- Tips and Tricks for Perfect Garlic Naan
- Storing and Reheating Your Homemade Garlic Naan
- Conclusion: Enjoying Your Homemade Garlic Naan
- Frequently Asked Questions
- Final Reflection: The Humble Naan and the Power of Shared Meals
- Unleash Your Inner Naan Baker!
Garlic Naan Recipe: Elevate Your Indian Cuisine
Introduction to Homemade Garlic Naan Bread
Discover the Joy of Baking Garlic Naan at Home
Baking your own garlic naan is a truly rewarding experience that brings the authentic taste of Indian cuisine right into your kitchen. Imagine warm, soft, slightly chewy flatbread, infused with fragrant garlic, ready to scoop up your favorite curries and stews. This easy homemade Indian naan recipe demystifies the process, making it accessible even if you're new to bread making. Forget about store-bought options; the aroma and flavor of freshly baked naan are simply unparalleled.
Embarking on this baking journey not only yields delicious results but also connects you with traditional cooking methods. With just a few common ingredients and some simple techniques, you can create a staple bread that complements a wide variety of dishes. This guide provides step-by-step instructions designed for clarity, ensuring your first attempt at making garlic naan is a success.
Why This Garlic Naan Recipe is Perfect for Any Cook
This particular garlic naan recipe is designed with simplicity and reliability in mind, making it ideal for bakers of any skill level. We focus on straightforward steps and readily available ingredients, removing common barriers to trying new recipes. Whether you're a seasoned bread baker or just starting out, you'll find this process manageable and enjoyable.
The recipe accounts for common kitchen equipment, offering flexibility in how you cook your naan – whether you prefer a traditional tawa or a standard oven. We provide clear timing guidelines and visual cues to help you understand each stage of the dough-making and cooking process. This focus on ease and success makes this recipe an excellent starting point for anyone wanting to master delicious homemade Indian naan.
Understanding Naan Bread: Flavored Flatbread

What is Naan? A Culinary Staple
Naan is a leavened, oven-baked flatbread traditionally found in the cuisines of the Indian subcontinent, Central Asia, and the Middle East. Unlike many other flatbreads, naan is typically made with yeast, giving it a softer, puffier texture. It's often cooked in a tandoor, a cylindrical clay oven, which imparts a unique smoky flavor and characteristic bubbly texture.
Historically, naan has been a staple, served alongside main dishes to scoop up gravies and curries. Its versatility makes it a perfect accompaniment to a wide range of foods, from rich meat dishes to simple lentil daals. While tandoors are not common in home kitchens, various methods, including using a hot tawa or a conventional oven, can successfully replicate the essential qualities of this beloved Indian flatbread.
Popular Naan Variations: Garlic, Butter, and Peshwari
While plain naan is delicious on its own, it serves as a fantastic base for a multitude of flavor variations. Garlic naan, the focus of this recipe, is arguably one of the most popular. It involves incorporating minced garlic and often fresh cilantro into or onto the dough before cooking, resulting in an aromatic and flavorful bread that pairs exceptionally well with spicy dishes.
Other beloved variations include Butter Naan, where generous amounts of butter are brushed onto the hot bread as soon as it's cooked, enhancing its richness and softness. Peshwari Naan is a sweeter version, typically filled with a mixture of dried fruits, nuts, and sometimes coconut or paneer, offering a delightful contrast to savory meals. Exploring these variations is part of the joy of mastering homemade naan.
Garlic Naan Recipe: Step-by-Step Guide
Ingredients for Flavorful Garlic Naan
Essential Ingredients: Flour, Garlic, and Herbs
To create this delicious easy homemade Indian naan recipe, you'll need a few key ingredients. The foundation is, of course, all-purpose flour, which provides the structure for the dough. Active dry yeast or instant yeast is crucial for leavening, giving the naan its signature soft and slightly chewy texture. Warm water or milk is needed to activate the yeast and bring the dough together.
For that irresistible garlic flavor, you'll need fresh garlic, minced finely. Plain yogurt or curd is often included to tenderize the dough and add a slight tang. Sugar feeds the yeast, while salt enhances the overall flavor profile. Finally, melted butter or ghee is typically brushed on the cooked naan, and fresh cilantro (coriander leaves) is often mixed with the garlic or sprinkled on top for added freshness.
Ingredient Quantities: Precise Measurements
Getting the measurements right is key to a successful dough. Here are the typical quantities for a batch yielding about 6-8 naan:
- All-purpose flour: 2 ½ to 3 cups (approximately 300-360 grams)
- Active dry yeast: 1 teaspoon (about 3 grams) OR Instant yeast: ¾ teaspoon (about 2.25 grams)
- Warm water or milk (105-115°F / 40-46°C): ¾ cup (180 ml)
- Sugar: 1 teaspoon (4 grams)
- Salt: ½ teaspoon (3 grams)
- Plain yogurt or curd: 2 tablespoons (30 grams)
- Minced fresh garlic: 2-3 cloves (about 6-9 grams), or more to taste
- Melted butter or ghee: 2-3 tablespoons (30-45 grams)
- Fresh cilantro, chopped: 2-3 tablespoons (about 5-8 grams), optional
These quantities provide a balanced dough that is easy to handle and produces wonderfully soft naan. Adjusting flour slightly may be necessary depending on humidity and the specific flour used.
Making the Naan Dough: A Straightforward Process
Activating the Yeast: Warm Water and Sugar
The first step in making this easy homemade Indian naan recipe is activating the yeast. If using active dry yeast, combine the warm water (or milk) and sugar in a small bowl. The liquid should be warm to the touch, but not hot – around 105-115°F (40-46°C) is ideal.
Sprinkle the yeast over the liquid and let it sit for 5-10 minutes. You should see a foamy layer develop on the surface; this indicates that the yeast is alive and active. If no foam appears, your yeast may be expired or the water temperature was incorrect, and you should start again with fresh yeast.
If you are using instant yeast, you can often skip this proofing step and mix it directly with the dry ingredients. However, proofing it first is still a good way to ensure your yeast is viable before committing to the whole batch of dough. The sugar provides food for the yeast, helping it to become active and ready to leaven the dough.
Mixing the Dough: Achieving a Smooth Dough
Once your yeast is activated (or if using instant yeast, combined with dry ingredients), it's time to mix the dough. In a large mixing bowl, combine the flour, salt, and yogurt. If you proofed the active dry yeast, pour in the yeast mixture. If using instant yeast, add the warm water/milk and sugar mixture directly to the dry ingredients along with the yeast. Add the minced garlic and chopped cilantro (if using).
Mix everything together using a wooden spoon or a stand mixer fitted with a dough hook until a shaggy dough forms. At this point, the dough will likely be sticky. Begin incorporating the melted butter or ghee, mixing until it is mostly absorbed. This fat helps tenderize the dough and adds richness.
Kneading the Dough: Developing Gluten
Kneading is essential for developing the gluten in the flour, which gives the naan its structure and signature chewiness. Turn the shaggy dough out onto a lightly floured surface. Knead the dough for about 5-8 minutes by hand. Push the dough away from you with the heels of your hands, fold it back over itself, and repeat. The dough should become smoother and more elastic over time. It might still be slightly sticky, but it should pull away cleanly from the bowl and your hands.
Alternatively, if using a stand mixer, knead with the dough hook on medium speed for 5-7 minutes. The dough should gather around the hook and pull away from the sides of the bowl. Proper kneading is crucial; under-kneaded dough will result in dense, tough naan, while over-kneading is less common but can also negatively affect texture.
First Rise: Allowing the Dough to Double
After kneading, shape the dough into a smooth ball. Lightly grease a clean bowl with a little oil or melted butter. Place the dough ball in the bowl, turning it to coat all sides with the grease. Cover the bowl tightly with plastic wrap or a clean kitchen towel.
Let the dough rise in a warm place, free from drafts, for about 1 to 1.5 hours, or until it has roughly doubled in size. A warm oven (turned off but slightly warm from being on previously, or with just the light on) is an ideal spot. The exact time will depend on the temperature of your kitchen. This first rise allows the yeast to produce carbon dioxide, creating air pockets that contribute to the naan's light texture.
Shaping and Cooking Your Naan
Dividing the Dough: Creating Individual Naan
Once the dough has doubled, gently punch it down to release the air. Turn the dough out onto a lightly floured surface and divide it into equal portions. For the quantities listed, you should aim for 6 to 8 pieces. Using a kitchen scale to weigh the portions (each around 60-80 grams) will ensure uniformly sized naan, leading to consistent cooking times.
Shape each portion into a smooth ball. Cover the dough balls loosely with a clean towel or plastic wrap and let them rest for 5-10 minutes. This resting period helps the gluten relax, making the dough easier to roll out without shrinking back excessively. This is a simple yet crucial step for easy homemade Indian naan.
Rolling the Naan: Achieving the Desired Shape
Now it's time to shape the individual naan. Take one dough ball and place it on a lightly floured surface. Using a rolling pin, roll it out into an oval or teardrop shape, about 6-8 inches long and ¼ inch thick. Traditional naan often has an irregular, rustic shape, so don't worry about making them perfectly uniform.
Avoid rolling the dough too thin, as this can result in crispy rather than soft and chewy naan. Aim for a thickness that will allow the bread to puff up during cooking. As you roll, you can gently stretch the dough with your hands to achieve the desired shape.
Cooking Methods: Tawa and Oven
You have a couple of excellent options for cooking your homemade naan, depending on your kitchen equipment. Both methods aim to cook the naan quickly at high heat to achieve that characteristic puff and slightly charred spots.
Cooking Methods for Naan:

*   **Tawa/Griddle:** Traditional stovetop method using a flat pan.
*   **Oven:** Using a preheated oven, often with a baking stone or steel.
Cooking Naan on a Tawa: Traditional Method
Cooking naan on a tawa (a flat or slightly curved griddle) is a traditional and effective method, especially for achieving soft, pliable naan. Heat a heavy-bottomed tawa or cast-iron skillet over medium-high heat until it is very hot. Do not add any oil at this stage.
Place one rolled-out naan onto the hot, dry tawa. You will see bubbles start to form on the surface within 30-60 seconds. Once bubbles appear all over the surface, flip the naan using tongs. Cook the other side for another 1-2 minutes until it develops golden-brown spots. For extra puffiness and charring, you can then hold the naan directly over a medium gas flame using tongs for a few seconds on each side, or place it briefly under a hot broiler. Be careful not to burn it!
Baking Naan in the Oven: A Convenient Option
Using a hot oven is a convenient way to mimic the high heat of a tandoor and is excellent for making easy homemade Indian naan. Preheat your oven to its highest temperature, typically 475-500°F (245-260°C). If you have a baking stone or steel, place it in the oven while it preheats for at least 30-45 minutes.
Carefully transfer a rolled naan onto the preheated stone/steel using a pizza peel or spatula. If you don't have a stone, you can cook it directly on a hot baking sheet. Bake for 2-4 minutes, or until the naan is puffed up and has golden-brown and slightly charred spots. Watch it closely, as high heat cooks quickly.
Serving and Enjoying Your Homemade Garlic Naan
Delicious Serving Suggestions for Garlic Naan
Freshly cooked garlic naan is best served warm, ideally straight from the tawa or oven. Immediately after cooking, brush the top surface generously with melted butter or ghee. This adds flavor and keeps the naan soft. You can also sprinkle a little extra fresh chopped cilantro or a pinch of kalonji (nigella seeds) on top of the butter for extra visual appeal and flavor.
Serve the naan piled in a basket or on a plate, ready for dipping and scooping. The aroma of warm garlic and butter is incredibly inviting and makes the simple act of serving feel special.
Serving Suggestions: Pairings with Indian Dishes
Garlic naan is a versatile side that pairs wonderfully with a vast array of Indian dishes. It's the perfect accompaniment to rich, creamy curries like Butter Chicken, Chicken Tikka Masala, or Paneer Butter Masala. The soft, slightly chewy texture and savory garlic flavor are ideal for soaking up thick gravies.
It also complements lentil dishes like Daal Makhani or Tarka Daal, providing a substantial bread to balance the lighter texture of the lentils. Don't limit yourself to just curries; garlic naan is also fantastic with grilled meats (kebabs), vegetable dishes, and even as a base for mini pizzas or wraps using Indian fillings. The possibilities for enjoying your easy homemade Indian naan are nearly endless.
Tips and Tricks for Perfect Garlic Naan

Achieving the Right Texture: Soft and Chewy
The key to soft and chewy naan lies in proper dough development and cooking technique. Ensuring the yeast is active, kneading the dough sufficiently to develop gluten, and allowing a full first rise are fundamental steps. The addition of yogurt also contributes significantly to tenderness.
Cooking at high heat for a short duration is crucial. This rapid cooking causes the moisture in the dough to turn to steam, puffing up the naan and creating those desirable air pockets while preventing it from drying out. Overcooking will result in a tough or crispy texture, so keep a close eye on the cooking time, which is usually only a few minutes per side or per naan.
Troubleshooting Common Baking Problems
Troubleshooting: Dough Too Dry, Naan Not Puffy, etc.
Even with an easy homemade Indian naan recipe, issues can sometimes arise. If your dough feels too dry and isn't coming together, add a tiny bit more warm water or milk (a teaspoon at a time) while mixing until it reaches the right consistency – slightly sticky but manageable. If it's too sticky after kneading, add a tablespoon of flour at a time and continue kneading until it's less tacky.
If your naan isn't puffing up during cooking, several factors could be at play:
- Yeast inactivity: Ensure your yeast was active (proofed properly).
- Insufficient rise: The dough may not have risen enough during the first proofing.
- Not hot enough cooking surface: Your tawa or oven wasn't sufficiently preheated. High heat is necessary for the steam to form and puff the bread.
- Dough rolled too thin: Thin dough often becomes crispy rather than puffy.
Practicing the rolling and cooking steps helps you get a feel for the right thickness and temperature.
Flavor Variations: Adding Herbs and Spices
While garlic is the star of this recipe, don't hesitate to experiment with other flavors to customize your homemade naan.
Cilantro Garlic Naan: Adding Freshness
This recipe already includes cilantro with the garlic, which is a classic combination. The fresh, slightly citrusy flavor of cilantro beautifully complements the pungent garlic and the richness of the bread. If you love cilantro, feel free to increase the amount added to the dough or sprinkle extra on top after buttering.
Other popular additions include finely chopped green chilies for a spicy kick, kalonji (nigella seeds) for a subtle oniony flavor and visual appeal, or even finely chopped mint for a refreshing twist. You can mix these into the dough with the garlic and cilantro, or sprinkle them on top before cooking.
Storing and Reheating Your Homemade Garlic Naan
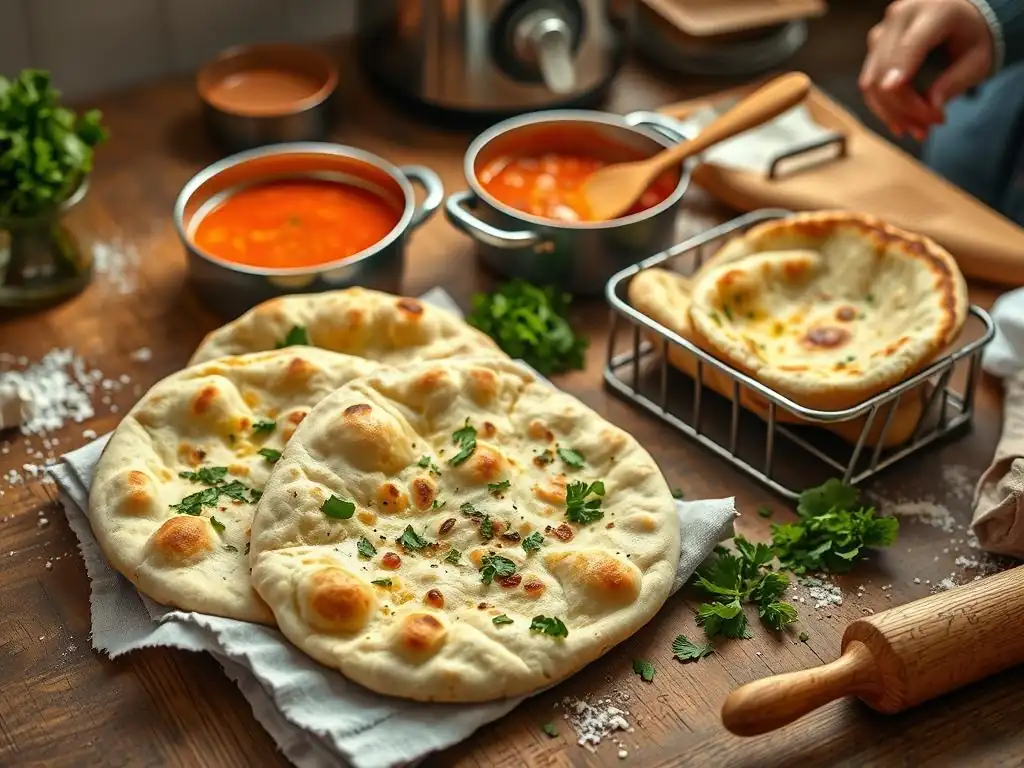
Proper Storage to Maintain Freshness
Homemade naan is always best enjoyed fresh, but if you have leftovers, proper storage will help maintain its quality. Once cooled completely, stack the naan with parchment paper in between each piece to prevent sticking. Store them in an airtight container or a resealable plastic bag.
At room temperature, naan will keep for 1-2 days. For longer storage, you can refrigerate it for up to 4 days or freeze it for up to 2-3 months. Freezing is an excellent option if you make a large batch of this easy homemade Indian naan recipe.
Reheating Naan: Retaining Softness
Reheating naan correctly is key to bringing back its soft, pliable texture. Avoid microwaving for too long, as this can make it tough.
- Oven: Preheat your oven to 350°F (175°C). Sprinkle a little water on the naan or wrap it loosely in foil. Reheat for 5-10 minutes, or until warm and soft.
- Tawa/Skillet: Heat a dry tawa or skillet over medium heat. Place the naan on the hot surface and warm for 1-2 minutes per side, until soft. Covering the tawa with a lid can help trap steam and keep it moist.
- Direct Flame: If you have a gas stove, you can quickly pass the naan over a medium flame using tongs for a few seconds on each side until heated through.
These methods will help your stored naan taste almost as good as fresh.
Conclusion: Enjoying Your Homemade Garlic Naan
Elevate Your Meals with This Simple Naan Recipe
Mastering this easy homemade Indian naan recipe is a fantastic way to enhance your home cooking repertoire. The process is rewarding, and the result – warm, soft, fragrant garlic naan – is infinitely better than store-bought options. It transforms a simple meal into a more authentic and enjoyable culinary experience.
By following these steps, you can confidently bake delicious garlic naan that will impress your family and friends. Whether paired with a rich curry, used as a base for creative toppings, or simply enjoyed on its own with a brush of butter, your homemade naan is sure to become a favorite. Embrace the joy of baking and bring the wonderful flavors of Indian cuisine into your home kitchen today.
Frequently Asked Questions
How easy is the Easy Naan Recipe really?
This recipe is designed for bakers of all levels, featuring simple instructions and readily available ingredients. It provides a step-by-step guide to ensure success.
What kind of oven is best for making naan with this recipe?
While a tandoor oven is traditional, this recipe adapts well to a conventional oven. You can also use a cast iron skillet on the stovetop for a similar effect.
What ingredients are required for this Easy Naan Recipe?
The recipe uses basic pantry staples like flour, yeast, sugar, salt, yogurt, and oil. No specialty ingredients are needed.
Can I make this Easy Naan Recipe vegan or gluten-free?
Substitutions are possible! Use dairy-free yogurt for a vegan version, and a gluten-free flour blend formulated for yeast breads. Results may vary slightly.
How long does it take to make this naan from start to finish?
Expect a total time of about 2-3 hours, including proofing and cooking. The active time is significantly less, around 30-45 minutes.
The aroma of freshly baked naan, warm and slightly charred, is more than just a delicious scent; it's a gateway to connection and cultural understanding. This simple recipe, designed to bring the authentic taste of Indian naan bread into your own kitchen, is a testament to the power of food to bridge divides and foster a sense of belonging. The ease of the recipe itself underscores the accessibility of this culinary tradition, inviting everyone to participate in the joy of creating and sharing a truly special meal.
The impact of food, specifically culturally significant foods like naan, on our social landscape is profound. It's a tangible link to heritage, a vehicle for storytelling, and a catalyst for community building. Food is symbolic of love when words are inadequate.
- Alan D. Wolfelt. This quote perfectly encapsulates the emotional resonance of sharing a meal, particularly one as comforting and flavorful as naan. The simple act of making and sharing this bread transcends mere sustenance; it becomes a ritual, a celebration, a way to connect with loved ones and explore a different culture from the comfort of your own home.
Now, I invite you to consider the possibilities. Don't just bake naan; experience it. Share the process with friends and family, tell stories while the bread bakes, and savor the warmth of the shared meal. Let this recipe be more than just instructions; let it be a springboard for connection, exploration, and a deeper appreciation for the rich tapestry of global cuisines. The journey of flavor begins with a single, perfectly puffed naan. Start baking, and start connecting.
Unleash Your Inner Naan Baker!
Thanks for joining us on this flavorful journey into the world of naan! We hope you’ve picked up some valuable tips and tricks to perfect this delicious bread. Ready to take your baking skills to the next level?
- Bake your own naan tonight! Use the recipe above to create a warm, fluffy, and authentic naan experience. It's easier than you think!
- Share your naan creations! Show us your baking masterpieces on social media using #BakeWithEaseNaan. We can't wait to see them!
- Experiment with different fillings and toppings! What exciting flavors will you add to your homemade naan?
What unique twist will you add to your naan recipe to make it truly your own? Let us know in the comments below!