
How to Feed and Maintain Your Rye Starter


Welcome to BakeWithEase, your guide to unlocking the secrets of the oven!
Ever wondered how to cultivate a robust and flavorful rye starter? Our comprehensive guide, " How to Feed and Maintain Your Rye Starter," dives deep into the art of sourdough, revealing the perfect rye starter feeding schedule to ensure your bread is nothing short of extraordinary. Discover the nuances of rye flour and fermentation, and get ready to bake loaves that will leave everyone wanting more. Let's get baking!
- How to Feed and Maintain Your Rye Starter: A Beginner's Guide
- Understanding Rye Starter for Baking
- Setting Up Your Rye Starter Feeding Schedule
- Step-by-Step Guide: Feeding Your Rye Starter
- Maintaining a Healthy Rye Starter
- Optimizing Your Rye Starter for Baking Rye Bread
- Rye Starter Feeding Schedule: Frequently Asked Questions (FAQ)
- Frequently Asked Questions
- Final Reflection: The Enduring Magic of the Rye Starter
- Unleash Your Inner Baker: Nurture Your Rye Starter!
How to Feed and Maintain Your Rye Starter: A Beginner's Guide
Understanding Rye Starter for Baking
What is a Rye Starter and Why Use One?
A rye starter, often called a levain or mother culture, is a living mixture of rye flour and water that hosts a vibrant community of wild yeasts and bacteria. Unlike commercial yeast, this natural leavening agent provides lift and structure to baked goods through fermentation, producing carbon dioxide gas. Using a rye starter imparts a unique tangy flavor and complex aroma to bread, particularly rye loaves, that is difficult to achieve with commercial yeast alone. It's the foundation for traditional sourdough rye baking.
The appeal of using a rye starter extends beyond flavor. It contributes to a chewier crust and a moister crumb in bread. The fermentation process also helps break down some of the starches and proteins in the flour, which can potentially make the bread easier to digest for some people. Maintaining a healthy, active rye starter is a rewarding part of the baking process, connecting you directly to the ingredients and the science of fermentation.
The Unique Characteristics of Rye Starter
Rye flour has distinct properties that make rye starters behave differently from those made with wheat flour. Rye is rich in enzymes that break down starches quickly, leading to a faster fermentation rate. It also contains a higher proportion of soluble fiber called pentosans, which absorb a lot of water and give rye dough its characteristic stickiness and lower gluten development compared to wheat. This high enzymatic activity and water absorption mean rye starters tend to be very active and bubbly, often rising and falling more rapidly than wheat starters.
Due to these characteristics, a rye starter is often more robust and forgiving than a wheat starter. The rapid fermentation can help outcompete undesirable bacteria or mold. The unique composition of rye also contributes to the distinct sour flavor profile often desired in rye bread. Understanding these characteristics is key to establishing an effective rye starter feeding schedule and recognizing the signs of a healthy, thriving culture.
Setting Up Your Rye Starter Feeding Schedule
Establishing a Consistent Feeding Routine
Consistency is paramount when maintaining a lively rye starter. Establishing a regular rye starter feeding schedule ensures your starter has a steady supply of food (flour) and stays active and predictable. For a starter kept at room temperature, a daily feeding is typically recommended. This involves discarding a portion of the starter and feeding the remainder with fresh rye flour and water. The exact timing can be flexible, but aiming for roughly the same time each day helps the starter develop a consistent rhythm.
For instance, if you feed your starter every morning around 8 AM, it will adapt to this routine. This predictability is vital for knowing when your starter will be at its peak activity, which is the ideal time to use it for baking. Adhering to a consistent rye starter feeding schedule minimizes the risk of the starter becoming too acidic or running out of food, leading to a weakened culture.
The Importance of Regular Feeding for Rye Starter Health
Regular feeding is essentially providing your starter with fresh nutrients and maintaining a balanced environment for the wild yeasts and bacteria. When a starter is fed, the microorganisms consume the sugars in the flour, producing carbon dioxide (which causes the rise) and various acids (which contribute to the flavor and sourness). If a starter isn't fed regularly, it will eventually consume all the available food, become overly acidic, and weaken.
A healthy rye starter, maintained with a consistent rye starter feeding schedule, will show predictable signs of activity: bubbling, rising significantly after feeding, and developing a pleasant, tangy aroma. Irregular feeding can lead to sluggish activity, an overly sharp or alcoholic smell, or even mold growth in extreme cases. Think of it like feeding a pet – regular meals keep them happy and healthy, ready to perform when needed for your baking projects.
Step-by-Step Guide: Feeding Your Rye Starter
Step 1: Preparing for Feeding (1:1:1 Ratio)
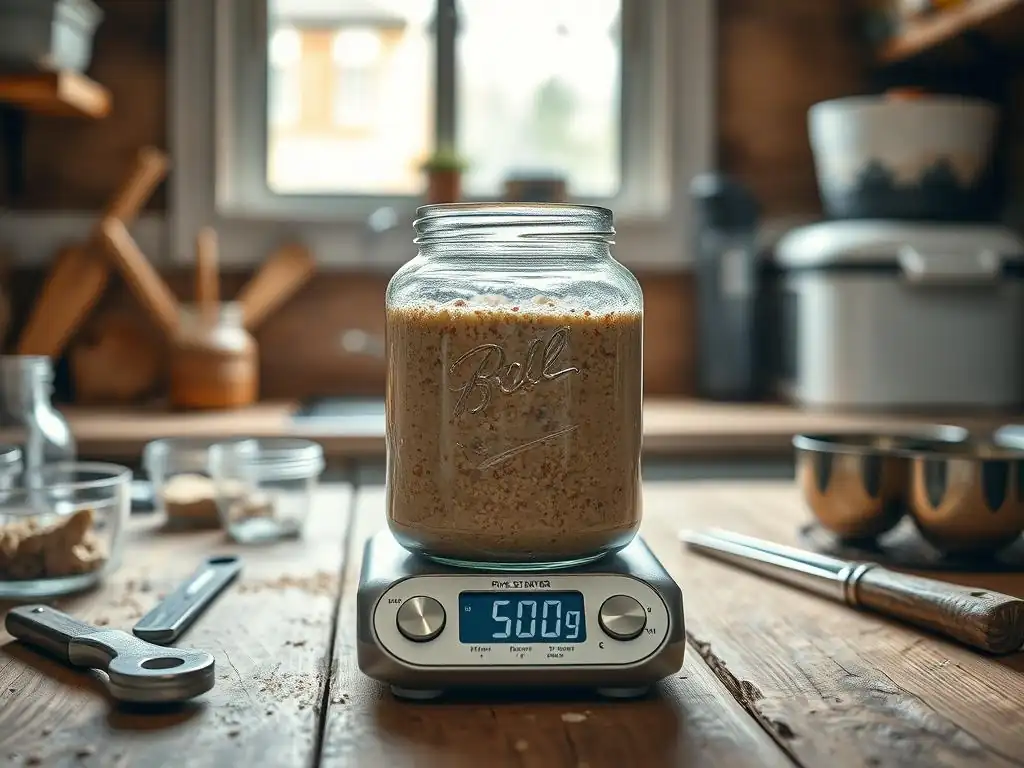
Before you begin feeding your rye starter, gather your supplies: your jar of rye starter, fresh rye flour, clean water (filtered water is often preferred as chlorine in tap water can sometimes inhibit microbial activity), a clean spoon or spatula for mixing, and a clean jar or container if you plan to transfer the starter. A common and effective feeding ratio, especially for starters kept at room temperature and fed daily, is 1:1:1 by weight. This means equal parts starter, fresh flour, and water.
For example, if you want to maintain 100 grams of active starter, you would measure 100 grams of your existing starter, then add 100 grams of fresh rye flour and 100 grams of water. Using a kitchen scale for accuracy is highly recommended, as volume measurements for flour and starter can be imprecise. Having everything ready before you start makes the process smooth and ensures you maintain hygiene, which is crucial for a healthy starter.
Step 2: Mixing the Rye Flour, Water, and Starter
Once you have your measured ingredients, combine the portion of existing starter you wish to keep with the fresh rye flour and water in a clean bowl or directly in the starter's jar. Stir thoroughly until no dry clumps of flour remain and the mixture is smooth and well combined. The consistency should resemble a thick batter or a pourable paste, depending on the hydration level you choose (1:1:1 is 100% hydration, meaning equal weight of flour and water).
Ensure you scrape down the sides of the jar or container to prevent dried-out bits of starter from forming, which can potentially harbor unwanted mold or bacteria. After mixing, mark the level of the fresh starter on the outside of the jar with a rubber band or a marker. This allows you to easily track how much the starter rises after feeding, a key indicator of its activity and health according to your rye starter feeding schedule.
Step 3: Monitoring the Starter's Rise and Activity
After feeding, cover your starter loosely to allow gases to escape but prevent contaminants from entering. A lid placed gently on top or a piece of cloth secured with a rubber band works well. Place the fed starter in a warm spot, ideally between 70-80°F (21-27°C), away from direct sunlight or drafts. Over the next several hours, observe its activity. A healthy, active rye starter will begin to bubble and significantly increase in volume, often doubling or even tripling in size.
The time it takes to reach its peak (maximum height before beginning to fall) varies depending on the temperature, the starter's maturity and health, and the feeding ratio. For a room-temperature starter fed 1:1:1, this peak might occur anywhere from 4 to 12 hours after feeding. Learning to recognize when your starter is at its peak is crucial for timing your baking, as this is when the yeast activity is strongest. Consistent monitoring helps you understand the rhythm of your specific rye starter feeding schedule.
Step 4: Discarding Excess Starter (and What to Do With It)
Before each feeding, you will need to discard a portion of your mature starter. This step is essential for two main reasons: it manages the volume of your starter (preventing it from overflowing its container and becoming an unmanageable amount) and it ensures that the fresh flour and water you add are sufficient to feed the remaining starter robustly. Keeping too much old starter relative to the new food will result in a sluggish, overly acidic culture.
Typically, you'll keep just a small amount (e.g., 50-100 grams) to feed. The discarded starter, often called "discard," is still a valuable ingredient! It can be used in a variety of recipes where you want sourdough flavor but not necessarily leavening, such as pancakes, waffles, crackers, muffins, or even pasta. Do not simply throw it away; explore the many delicious ways to use your rye starter discard as part of your regular rye starter feeding schedule.
Maintaining a Healthy Rye Starter

Ideal Temperature for Rye Starter Fermentation
Temperature plays a significant role in the activity and health of your rye starter. The wild yeasts and bacteria are most active within a certain temperature range. Generally, room temperature between 70°F and 80°F (21°C to 27°C) is considered ideal for daily feeding and maintaining a vigorous starter. In this range, fermentation happens efficiently, leading to predictable rising and peak times, crucial for following a consistent rye starter feeding schedule.
Temperatures below this range will slow down fermentation, making the starter sluggish and potentially leading to a buildup of undesirable bacteria that thrive in cooler conditions. Temperatures significantly above this range can accelerate fermentation too much, potentially leading to an overly acidic starter or even killing off the beneficial microorganisms if it gets too hot (above 90°F or 32°C consistently). Finding a stable spot in your home within the ideal range is key to successful rye starter maintenance.
Troubleshooting Common Rye Starter Problems
Even with a diligent rye starter feeding schedule, you might encounter issues. One common problem is a starter that seems inactive or weak. This can manifest as slow or minimal rise after feeding, or a lack of bubbling. Often, this is due to inconsistent feeding, wrong feeding ratios (too much old starter, not enough new food), or suboptimal temperature. Increasing the feeding frequency, adjusting the ratio (e.g., feeding 1:2:2 or even 1:3:3 for a few cycles), and ensuring a warm environment can help revive a sluggish starter.
Another issue is the appearance of mold or the development of unpleasant odors like acetone (nail polish remover) or strong alcohol. Mold indicates contamination and often means you need to discard the entire starter and begin anew, ensuring all equipment is scrupulously clean. An acetone smell usually means the starter is hungry and has produced excess alcohol; more frequent feeding or a larger feeding ratio can resolve this. A strong alcoholic smell also indicates hunger but is less severe than acetone; simply feeding on schedule should help.
Identifying and Addressing Weak Starter
A weak rye starter is one that doesn't double within a reasonable timeframe (e.g., 4-12 hours at warm room temperature) after being fed according to its rye starter feeding schedule. It might also have very few bubbles, little rise, or separate into layers quickly. The aroma might be faint or overly acidic rather than pleasantly tangy. This often happens if the starter hasn't been fed consistently, if the feeding ratio isn't providing enough new food, or if the ambient temperature is too cool.
To address a weak starter, try increasing the frequency of feeding to twice a day for a few days. Also, adjust the feeding ratio to provide more fresh flour and water relative to the amount of starter you keep. For instance, instead of 1:1:1, try feeding 1 part starter to 2 parts flour and 2 parts water (1:2:2). Ensure the starter is kept in a consistently warm spot, ideally around 75°F (24°C). These steps provide the microorganisms with more frequent and abundant food, encouraging them to become more active.
Dealing with Mold or Unpleasant Odors
Mold is usually visible as fuzzy patches of various colors (white, green, black, pink) on the surface or sides of the starter. Unfortunately, mold spores can permeate the entire culture, even if you only see it in one spot. If you see any sign of mold, it is safest to discard the entire starter and start over. Ensure your jars and utensils are thoroughly cleaned and sanitized before beginning a new starter.
Unpleasant odors, particularly a strong acetone or nail polish remover smell, indicate that the starter has consumed all available food and is producing alcohol as a byproduct. This isn't necessarily dangerous, but it weakens the starter. It's a clear sign you need to feed more frequently or adjust your rye starter feeding schedule to provide more food relative to the starter amount. A strong alcoholic smell also means the starter is hungry but is less critical than acetone. Regular, timely feeding should prevent these issues. A healthy starter should smell pleasantly tangy and slightly yeasty.
Long-Term Rye Starter Storage and Maintenance
Sometimes you need a break from daily feeding or are going away. Refrigeration is the best way to put your rye starter on pause. A cool temperature dramatically slows down the metabolic activity of the yeasts and bacteria. Before refrigerating, ensure your starter is healthy and has been recently fed and allowed to become active for a few hours. Feed it one last time and let it sit at room temperature for 2-3 hours before placing it in the refrigerator.
Stored in the fridge, a rye starter can typically last for 1-3 weeks, sometimes longer, before needing another feeding. The cooler temperature means you don't need a strict rye starter feeding schedule during this period. When you're ready to bake again, you'll need to revive the starter.
Refrigerating Your Rye Starter for Inactive Periods
To refrigerate your rye starter, feed it as usual using your standard rye starter feeding schedule (e.g., 1:1:1 ratio). Let it sit at room temperature for a couple of hours until you see initial signs of activity, like small bubbles forming. Then, place the covered jar in the coldest part of your refrigerator. The cold will significantly slow down fermentation, putting the starter into a dormant state.
When stored in the fridge, the starter will still ferment slowly. Over time, it will consume its food, become acidic, and may develop a layer of dark liquid on top called "hooch." This hooch is normal and can be stirred back in or poured off before feeding. The longer the starter is refrigerated, the longer and more frequent the feedings it will need to fully revive. Aim to feed it at least every 2-3 weeks if storing for extended periods, or simply revive it when you are ready to bake.
Reviving Refrigerated Rye Starter
Reviving a refrigerated rye starter requires patience and a few consecutive feedings at room temperature. Take the starter out of the fridge. Discard most of the starter, leaving only a small amount (e.g., 25-50 grams). Feed this small amount with fresh rye flour and water using your standard feeding ratio (e.g., 1:1:1 or even 1:2:2 initially to give it plenty of food). Mix well and let it sit at room temperature, covered loosely.
Feed the starter every 12-24 hours, discarding most before each feeding, until it becomes consistently active again – showing significant rise and bubbling within 4-12 hours after feeding. This might take anywhere from 1 to 3 days, depending on how long it was stored and how cold your fridge is. Once it's reliably doubling or tripling after feeding, it's ready to be used for baking and can be maintained on your regular rye starter feeding schedule at room temperature or returned to the fridge after a few active feedings.
Optimizing Your Rye Starter for Baking Rye Bread
Recognizing Signs of a Ready-to-Use Rye Starter
Knowing when your rye starter is at its peak readiness is crucial for successful rye bread baking. A starter is typically ready to use when it has significantly increased in volume (often doubled or tripled) since its last feeding and is full of bubbles, both on the surface and throughout the culture. The top might look slightly domed or just beginning to flatten or recede.
A common test is the "float test": drop a small dollop of starter into a glass of water. If it floats, it's active and ready to use. If it sinks, it may not have peaked yet or might be past its peak and starting to deflate. While the float test isn't foolproof, especially with denser rye starters, combining it with visual cues (volume increase, bubbles) and timing based on your established rye starter feeding schedule is the best way to determine readiness.
Adjusting Your Rye Starter Feeding Schedule for Different Recipes
The standard 1:1:1 rye starter feeding schedule is great for maintenance, but you might need to adjust your feeding strategy depending on the specific rye bread recipe you plan to bake. Some recipes call for a "levain build," which means taking a small amount of your mature starter and feeding it with a specific ratio of flour and water (often larger ratios like 1:2:2 or 1:3:3) several hours before mixing the main dough. This ensures you have a large quantity of vigorous starter at its peak when you need it.
Alternatively, if a recipe requires a less sour flavor, you might feed your starter with a larger ratio (e.g., 1:5:5) a few hours before use. This dilutes the acidity. Conversely, for a more pronounced sourness, you might use a starter that has been fed 1:1:1 and is slightly past its peak, as acidity levels increase as the starter matures and begins to fall. Understanding how feeding ratios and timing impact your starter's activity and acidity allows you to fine-tune your rye starter feeding schedule for optimal baking results.
Using Rye Starter in a Simple 100% Rye Bread Recipe
Baking with a 100% rye starter in a 100% rye bread recipe highlights its unique properties. Unlike wheat bread, 100% rye bread relies heavily on the starter for structure, as rye flour has very little gluten. A typical simple recipe might involve combining your active rye starter with more rye flour, water, and salt. Because of rye's stickiness and lack of gluten structure, the dough is often more like a thick batter and requires minimal kneading, if any.
The fermentation time for 100% rye bread can be longer than wheat bread. A common approach is a long, slow fermentation, sometimes including an overnight rest in the refrigerator after shaping. Baking is often done at moderate temperatures. The success of the final loaf – its rise, texture, and flavor – is directly dependent on the health and activity of your rye starter, emphasizing the importance of a consistent rye starter feeding schedule and knowing how to use your starter at its peak.
Rye Starter Feeding Schedule: Frequently Asked Questions (FAQ)

How Often Should I Feed My Rye Starter?
For a rye starter kept at warm room temperature (70-80°F or 21-27°C), a daily feeding is generally recommended to keep it vigorous and predictable. If the temperature is cooler, you might be able to feed it less often (e.g., every 24-48 hours). If storing in the refrigerator, you only need to feed it roughly every 1-3 weeks. A consistent rye starter feeding schedule is key to its health.
What Type of Rye Flour is Best for My Starter?
Dark rye flour or medium rye flour are excellent choices for building and maintaining a rye starter. These flours contain more of the bran and germ compared to light rye flour, providing more nutrients for the wild yeasts and bacteria to feed on, which results in a more active starter. Organic flours are also preferred by many bakers, as they are less likely to contain additives or residues that could inhibit microbial activity.
Can I Use Other Flours in My Rye Starter?
Yes, you can feed a rye starter with other flours, such as all-purpose wheat flour, bread flour, or whole wheat flour. However, to maintain it specifically as a "rye starter" and preserve its unique characteristics and flavor profile, it's best to feed it primarily with rye flour as part of your regular rye starter feeding schedule. Using other flours occasionally for a specific bake (like creating a levain build with wheat flour) is common practice.
What Does an Active Rye Starter Look Like?
An active rye starter, several hours after feeding, will be significantly increased in volume (often doubled or tripled), have numerous bubbles visible on the surface and throughout the culture, and possess a pleasant, tangy, slightly yeasty aroma. It should feel light and airy when stirred. These are the signs that your rye starter feeding schedule is working effectively.
What If My Rye Starter Isn't Doubling in Size?
If your rye starter isn't doubling in size after feeding, it could be due to several factors: the ambient temperature is too cool, it hasn't been fed consistently, the feeding ratio isn't providing enough food relative to the amount of starter, or the starter is young and not yet mature. Try moving it to a warmer spot (75-80°F or 24-27°C), increase feeding frequency to twice a day, or adjust the feeding ratio to 1:2:2 or 1:3:3 for a few cycles to give it more food. Patience is key, especially with new starters.
Frequently Asked Questions
What is a rye starter and why is it important?
A rye starter is a fermented mixture of rye flour and water, teeming with wild yeasts and bacteria. It’s important because it provides the leavening power and distinct flavor for many rye breads.
How often should I feed my rye starter?
For a healthy and active starter, feeding it once or twice a day is generally recommended if kept at room temperature. If refrigerated, you can feed it once a week.
What ratio of rye flour and water should I use when feeding my rye starter?
A common ratio is 1:1:1, meaning one part starter, one part rye flour, and one part water (by weight). This ensures a consistent and predictable feeding schedule.
How do I know if my rye starter is ready to bake with?
A ready starter will have doubled in size after feeding, showing plenty of bubbles. It should also have a slightly tangy aroma, not an overpowering sour smell.
What happens if I miss a feeding of my rye starter?
Missing a feeding occasionally won’t ruin your starter, but prolonged neglect can weaken it. Simply resume the regular feeding schedule and it should recover.
Final Reflection: The Enduring Magic of the Rye Starter
The meticulous process of feeding and maintaining a rye starter, while seemingly simple, is a profound act of connection to the ancient art of bread making. It's a testament to patience, observation, and the enduring power of natural fermentation, a practice relevant today more than ever as we seek sustainable and flavorful food sources. The precise feeding schedule, detailed throughout this article, is not just a set of instructions; it's a key to unlocking a world of artisanal bread baking.
The journey of nurturing a rye starter is a deeply rewarding one, mirroring the cyclical nature of life itself. Each feeding, each observation of its bubbly activity, is a small victory, a tangible reminder of the transformative power of time and care. Bread is the staff of life.
This simple phrase encapsulates the profound connection between our food and our well-being, a connection strengthened by the mindful process of creating a sourdough starter from scratch. The act of feeding a rye starter, therefore, becomes a meditation on this connection, a daily ritual that grounds us in the simple pleasures of creation.
Now, I invite you to consider your own relationship with food, with the processes that bring nourishment to your table. Will you embark on the rewarding journey of cultivating your own rye starter? Will you embrace the slow, deliberate rhythm of its care, and in turn, reap the rewards of truly exceptional bread? The knowledge is here; the journey awaits. Begin your own bread-making adventure today.
Unleash Your Inner Baker: Nurture Your Rye Starter!
Thanks for diving into the world of rye starters! You've now got the knowledge to cultivate a thriving sourdough culture. Ready to put your newfound expertise into practice?
- Give your starter a hearty feeding and document its progress! Observe its activity and note any changes – this is where the magic happens.
- Share your rye starter journey on social media using #BakeWithEaseRye! Connect with other bakers and inspire others to embark on their own sourdough adventures.
- Consider experimenting with different flours to see how it impacts your starter’s activity. Discover what works best for you and your baking style!
What unique flavour will your rye starter bring to your next loaf?