
Get the Best Rise on Your Rye Bread: Tips & Tricks

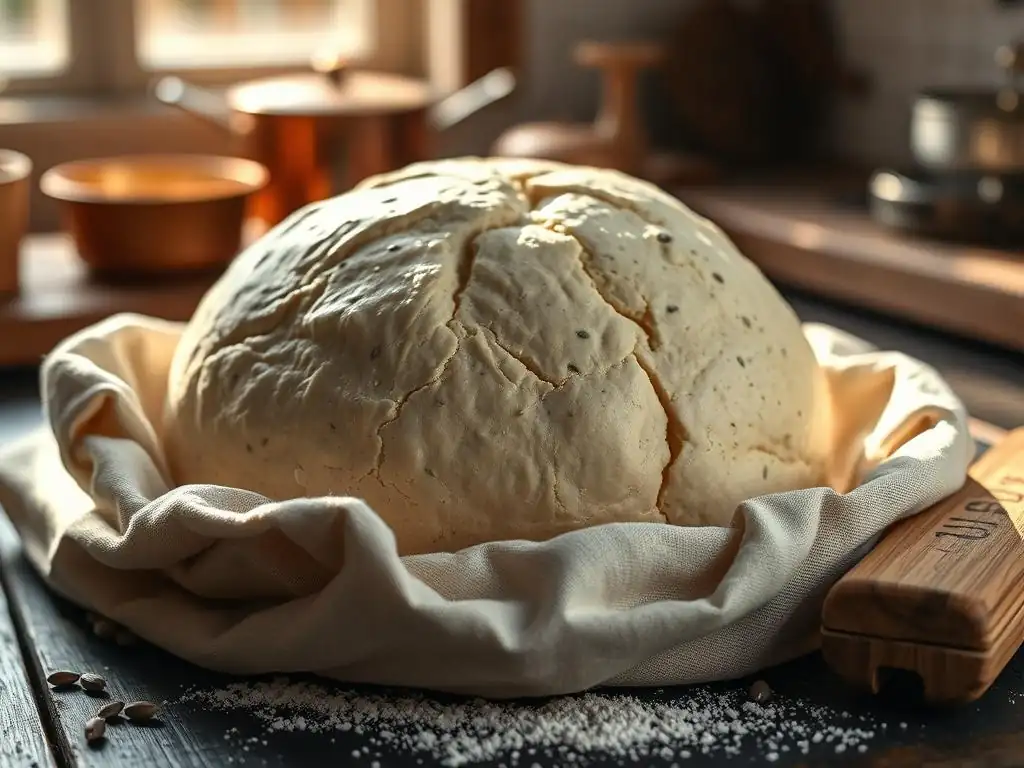
Welcome to BakeWithEase, your trusted guide to baking brilliance! Ever wondered why your rye bread doesn't quite reach its full potential? We're diving deep into the secrets of achieving the perfect rye bread rising time, unlocking a world of flavor and texture you never thought possible. Ready to elevate your bread baking game? Let's get started!
- Introduction: Achieving Optimal Rye Bread Rise
- Understanding Rye Flour and Its Impact on Rising
- Mastering the Rye Bread Rising Time: Key Factors
- Step-by-Step Guide to Maximizing Your Rye Bread's Rise
- Troubleshooting Common Rye Bread Rising Problems
- Advanced Techniques for Enhanced Rye Bread Rise
- Rye Bread Baking Tips for a Perfect Loaf
- Conclusion: Bake With Ease and Enjoy Your Perfectly Risen Rye Bread!
- Frequently Asked Questions
- Final Reflection: The Humble Rise of Rye, and the Rewards of Patience
- Unlock Your Rye Bread Potential!
Introduction: Achieving Optimal Rye Bread Rise
Why Rye Bread Rise is Crucial for Texture and Flavor
Achieving a good rise is perhaps one of the most critical steps in baking delicious rye bread. Unlike wheat flour, rye flour contains less gluten, the protein network that traps gases produced by yeast, allowing dough to expand and create a light, airy texture. A poor rise in rye bread often results in a dense, heavy loaf that can feel gummy or brick-like.
The cellular structure created by proper rising is essential for developing a pleasant crumb texture, which is a hallmark of well-baked bread. Without sufficient expansion during the fermentation process, the final loaf will lack the desirable chewiness and open structure.
Beyond texture, the process of fermentation, which causes the rye bread to rise, significantly impacts its flavor profile. As the yeast and beneficial bacteria (especially in sourdough rye) consume sugars in the flour, they produce a variety of compounds, including organic acids and alcohols. These byproducts contribute to the complex, slightly tangy, and earthy flavors characteristic of authentic rye bread.
The duration and conditions of the rye bread rising time directly influence the extent of this flavor development. An adequate rise ensures that these flavors have enough time to build, resulting in a more nuanced and satisfying taste compared to a loaf that hasn't risen properly.
BakeWithEase' Guide to Perfect Rye Bread: Setting the Stage for Success
Welcome to your comprehensive guide on mastering the art of getting a fantastic rise on your rye bread right here at BakeWithEase. We understand that working with rye can be a bit different than wheat, and achieving that perfect loaf requires attention to specific details, especially regarding the rye bread rising time.
This guide breaks down the science and technique behind a great rise, offering practical tips and insights for bakers of all levels. From understanding the unique properties of rye flour to troubleshooting common issues, we'll cover everything you need to know to avoid dense loaves and bake beautiful, flavorful rye bread consistently.
Throughout this guide, we'll explore the key factors that influence how well your rye bread rises. We'll delve into the importance of dough temperature, the role of different types of yeast or sourdough starter, and how hydration levels can make a significant difference.
We'll also walk you through the stages of rising – the bulk fermentation and the final proof – providing guidance on how to monitor your dough's progress and know when it's ready for the oven. By following these steps and understanding the principles involved, you'll be well on your way to baking rye bread that is light, airy, and bursting with authentic flavor, making your baking experience truly BakeWithEase.
Understanding Rye Flour and Its Impact on Rising
The Unique Properties of Rye Flour: Gluten Content and Water Absorption
Rye flour differs significantly from wheat flour, primarily in its protein composition. While wheat flour contains glutenin and gliadin, which form the elastic gluten network crucial for trapping fermentation gases, rye flour has a much lower proportion of these proteins. Furthermore, the gluten-forming potential of rye proteins is inhibited by pentosans, complex carbohydrates found in abundance in rye. These pentosans are highly water-soluble and can absorb a significant amount of liquid, much more than wheat flour. This high water absorption gives rye dough its characteristic stickiness and density, making it less elastic and extensible than wheat dough.
Because the gluten network is weaker and less developed in rye dough, it struggles to hold onto the carbon dioxide produced by yeast as effectively as wheat dough. This inherent property is why rye bread typically has a denser crumb structure compared to a light, airy wheat loaf. The pentosans, while absorbing water, also contribute to the dough's structure, but they don't provide the same elastic strength as gluten.
Understanding these properties is fundamental to managing the rye bread rising time and expectations. It means that traditional methods for determining when a wheat dough has risen enough (like the poke test yielding a lasting indentation) may behave differently with rye dough, requiring slightly different cues.
Different Types of Rye Flour and Their Effect on Rye Bread Rising Time
The type of rye flour you use will significantly impact the dough's behavior and the resulting rye bread rising time. Different milling processes yield flours with varying amounts of the rye kernel, from the outer bran to the inner endosperm.
These variations affect the protein, fiber, and pentosan content, all of which play a role in water absorption, enzymatic activity, and ultimately, how well and how quickly the dough rises. Choosing the right type of rye flour for your recipe is crucial for managing your expectations regarding the rise and achieving the desired texture and flavor profile for your specific rye bread.
Let's look at how common types of rye flour influence the rising process.
Light Rye Flour: Rise and Characteristics
Light rye flour is milled from the inner endosperm of the rye kernel, similar to white wheat flour. It has most of the bran and germ removed, resulting in a lighter color and flavor. With less bran and germ, light rye flour contains fewer pentosans compared to darker rye flours.
This means it absorbs slightly less water and has a relatively higher potential for developing some structure, although still considerably less than wheat flour. Dough made with light rye flour tends to be less sticky than dough made with whole or dark rye, and it can achieve a slightly better rise than its darker counterparts. The rye bread rising time might be somewhat shorter compared to recipes using higher percentages of dark rye, and the resulting crumb will be less dense and lighter in color.
Despite having fewer pentosans than dark rye, light rye still requires careful handling. Overmixing can still lead to a gummy texture because the limited protein structure is easily damaged. Recipes using a high percentage of light rye often incorporate some wheat flour to improve structure and rise. When using primarily light rye, paying close attention to the dough's consistency and allowing adequate, but not excessive, rye bread rising time is key to achieving a tender crumb without the density associated with whole grain rye.
Dark Rye Flour: Rise and Characteristics
Dark rye flour is milled from the entire rye kernel, including the bran and germ. This gives it a darker color, a stronger, earthier flavor, and a significantly higher fiber and pentosan content. The high level of pentosans in dark rye flour means it absorbs a great deal of water, resulting in a very sticky dough that is less elastic and more challenging to handle than dough made with light rye. The abundance of bran and germ also contributes to enzymatic activity that can break down the dough structure if fermentation is not managed correctly.
Due to the higher pentosan content and weaker protein structure, dough made with dark rye flour typically rises less than dough made with lighter flours. The rye bread rising time for dark rye dough might need to be carefully controlled to prevent over-fermentation, which can lead to a collapsed structure.
Often, recipes using dark rye flour rely on sourdough starters or a combination of yeast and acids (like vinegar or buttermilk) to help manage the enzymatic activity and improve the dough's structure and rise. The resulting bread will be dense, moist, and richly flavored, characteristic of traditional dark rye loaves.
Pumpernickel Flour: Rise and Characteristics
Pumpernickel flour is the coarsest grind of whole rye flour, containing all the bran, germ, and endosperm, often with some cracked or chopped rye berries included. This extremely coarse texture and high proportion of bran and germ give pumpernickel flour its distinctive dark color and intense flavor. Like dark rye flour, pumpernickel flour is very high in pentosans and fiber, absorbing a large amount of water and producing a very sticky, dense dough. The large particles in the flour further disrupt any potential gluten development.
Dough made with pumpernickel flour will exhibit minimal rise compared to other flours. The coarse particles and high pentosan content make it very difficult for the dough to trap gas effectively. Rye bread rising time for pumpernickel dough is often more about flavor development through long, slow fermentation (often using sourdough) than achieving significant volume increase.
Pumpernickel bread is known for its incredibly dense, moist, and hearty texture, which is a direct result of the flour used and the limited rise it achieves. Expect a dense loaf where the rise contributes more to slight aeration and flavor than significant volume.
Mastering the Rye Bread Rising Time: Key Factors
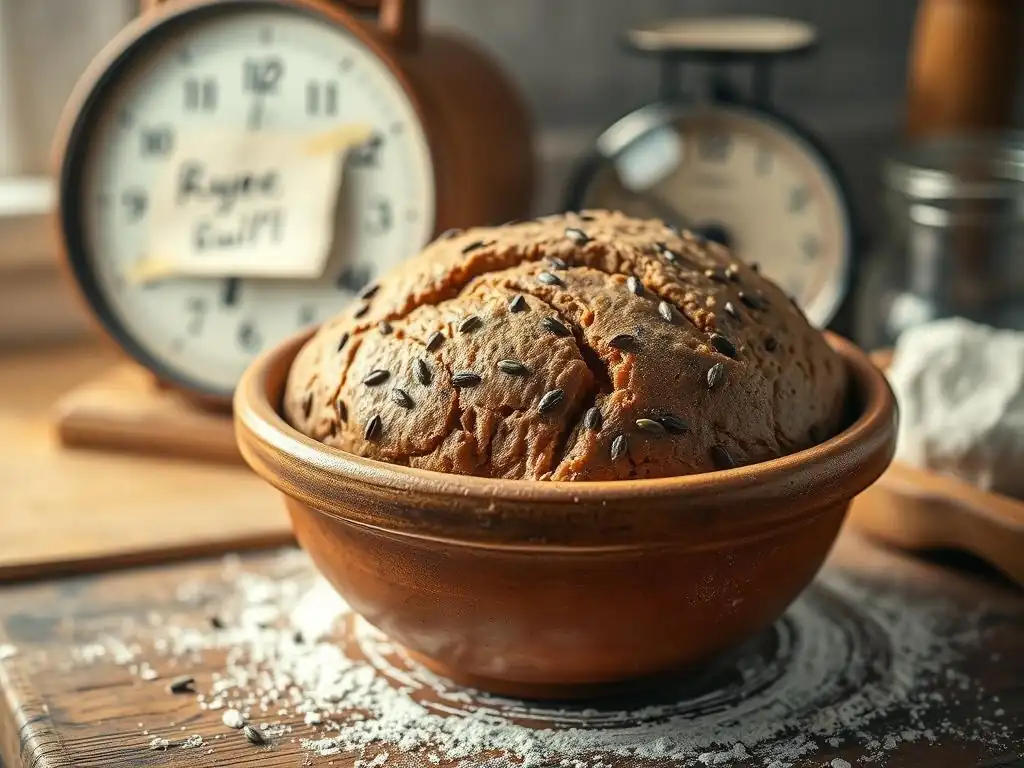
The Ideal Rye Bread Rising Temperature: Creating the Perfect Environment
Temperature plays a critical role in yeast activity and, consequently, the rye bread rising time. Yeast thrives within a specific temperature range, typically between 75°F and 85°F (24°C to 29°C). Within this range, yeast produces carbon dioxide gas efficiently, causing the dough to expand. If the temperature is too cold, yeast activity slows down dramatically, leading to a much longer, sluggish rise. For example, dough left to rise in a cool kitchen (say, 65°F or 18°C) might take twice as long or even longer to reach the same volume as dough proofed in a warmer spot.
Conversely, if the temperature is too hot, yeast can become overly active initially but may then exhaust itself or even die if temperatures get too high (above 130°F or 54°C). High temperatures can also accelerate enzymatic activity in rye flour, potentially breaking down the dough structure too quickly, leading to collapse. Finding a warm, draft-free spot is ideal. This could be a slightly warm oven (turned off, with the light on), a proofing box, or simply a warm corner of your kitchen. Maintaining a consistent temperature throughout the rye bread rising time ensures steady fermentation and a predictable outcome.
Yeast Selection: Choosing the Right Yeast for Your Rye Bread
The type of leavening agent you choose significantly impacts the fermentation process and the rye bread rising time. While commercial yeasts offer speed and predictability, sourdough starters provide complex flavors and unique textural qualities that are highly prized in rye bread. The choice depends on the desired outcome and your baking experience. Each type of leavener has its own characteristics that influence how the dough behaves and how long it needs to ferment.
Understanding the differences between active dry yeast, instant yeast, and sourdough starter is key to managing your rye bread's rise. The hydration method, activation temperature, and overall fermentation pace vary for each. Using the correct amount and ensuring the leavener is active are fundamental steps to guarantee that your rye dough has the necessary power to rise, especially given rye's inherent challenges in gas retention.
Active Dry Yeast for Rye Bread: Usage and Considerations
Active dry yeast is a popular choice for many bakers. It typically comes in granules and requires activation in warm water (around 105-115°F or 40-46°C) before being added to the dough. This process "wakes up" the yeast and allows you to confirm its viability; you should see foam or bubbles forming within 5-10 minutes. Using active dry yeast gives you control over the start of fermentation and is reliable when stored properly.
When using active dry yeast for rye bread, ensure the water temperature is correct for activation. Adding it to water that is too hot can kill the yeast, while water that is too cool may not activate it properly, leading to a very slow or non-existent rise.
Once activated and added to the dough, the rye bread rising time with active dry yeast is generally moderate, often requiring 1 to 2 hours for the first rise and 45 to 90 minutes for the second rise, depending on the recipe and ambient temperature. It provides a steady lift, making it suitable for recipes aiming for a somewhat lighter rye loaf, especially when combined with some wheat flour.
Instant Yeast for Rye Bread: Usage and Considerations
Instant yeast is a more finely granulated yeast that does not require prior activation in water. It can be mixed directly into the dry ingredients before adding liquids. This convenience makes it a favorite for many busy bakers. Instant yeast is also known for being slightly more vigorous and faster-acting than active dry yeast.
Using instant yeast can potentially slightly shorten the rye bread rising time compared to active dry yeast, as fermentation begins immediately upon contact with moisture in the dough. However, the overall duration will still depend heavily on temperature and recipe specifics. Instant yeast is reliable and provides a consistent rise. It's a good option for recipes where you want a predictable fermentation schedule. Ensure it's properly incorporated into the dry ingredients to distribute evenly throughout the dough for a uniform rise.
Sourdough Starter for Rye Bread: Usage and Considerations
Sourdough starters are a living culture of wild yeasts and lactic acid bacteria. They offer a more complex flavor profile, contributing to the characteristic tanginess often associated with traditional rye bread. Using a sourdough starter also introduces beneficial acids that can help tenderize the dough and manage enzymatic activity in rye flour, potentially improving the final texture.
The rye bread rising time with a sourdough starter is typically much longer and more variable than with commercial yeasts. Sourdough fermentation is slower and more sensitive to temperature fluctuations. The strength and activity of your specific starter will also play a significant role.
A strong, active starter can still take 3-6 hours or more for the first rise and 2-4 hours for the second rise, depending on the temperature and the percentage of starter used in the recipe. This longer fermentation time contributes significantly to flavor development. While less predictable in timing than commercial yeast, mastering sourdough rye is incredibly rewarding for the depth of flavor and unique texture it imparts.
Hydration Levels and Their Influence on Rye Bread Rise
Hydration, the ratio of water to flour by weight, is a crucial factor in how rye dough behaves and rises. Rye flour is famously thirsty due to its high pentosan content, capable of absorbing a large amount of water. Recipes for rye bread often call for relatively high hydration levels compared to wheat bread, sometimes exceeding 80% or even 90%. Higher hydration results in a wetter, stickier dough.
While high hydration can make the dough harder to handle, it is essential for allowing the rye flour to fully hydrate and for facilitating yeast activity throughout the dough. Water helps distribute the yeast and sugars, enabling efficient fermentation. A dough that is too dry will be stiff and resistant to expansion, leading to a poor rise.
Conversely, a dough that is too wet might spread out rather than rise upwards, especially given rye's weak structure. Finding the sweet spot in hydration is key; it should be wet enough for fermentation to occur effectively but not so wet that the dough has no structure. The hydration level specified in a recipe is carefully balanced to optimize both the dough's handling characteristics and the potential for a good rye bread rising time.
Step-by-Step Guide to Maximizing Your Rye Bread's Rise
Step 1: Preparing the Dough for Optimal Rise
The journey to a well-risen rye loaf begins even before fermentation starts, with the careful preparation of your dough. Unlike wheat dough, which benefits from extensive kneading to develop a strong gluten network, rye dough requires a different approach due to its lower gluten content. Overworking rye dough can actually damage the limited protein structure and lead to a gummy texture, hindering the rise. Therefore, mixing techniques focus on hydration and gentle development rather than brute force kneading.
Ensuring all ingredients are properly incorporated and the flour is fully hydrated is the primary goal at this stage. Some recipes might call for a preliminary soak (like a soaker or altus using stale rye bread) to ensure maximum hydration of the rye flour, which can improve the dough's structure and moisture retention, positively impacting the rye bread rising time. Pay attention to the specified mixing time and technique in your recipe – often, a few minutes of mixing by hand or machine is sufficient to bring the dough together into a cohesive, albeit sticky, mass.
Mixing Techniques for Rye Bread Dough
Mixing rye dough requires a delicate touch compared to the vigorous kneading often used for wheat bread. The goal is primarily to hydrate the flour and distribute the leavening agent, salt, and other ingredients evenly. For doughs with a high percentage of rye, excessive kneading will not develop gluten and can instead break down the fragile structure provided by the pentosans, resulting in a sticky, unmanageable mess and a dense final product.
Gentle folding or short periods of mixing (3-5 minutes) in a stand mixer on a low speed are often sufficient. The dough will remain sticky and may not clear the sides of the bowl like wheat dough. Using wet hands or a dough scraper can help manage the stickiness.
Some bakers prefer the "no-knead" approach for high-rye doughs, relying on time and hydration to develop structure through autolysis (the resting period after initial mixing) and subsequent gentle folds during the first rise. Whichever technique you use, the aim is to achieve a homogeneous dough without overworking it, setting the stage for a successful rye bread rising time.
Incorporating Ingredients for Enhanced Flavor and Rise
Beyond the basic flour, water, and leavener, other ingredients play a role in both the flavor and the rise of rye bread. Ingredients like salt, caraway seeds, molasses, or other sweeteners not only contribute to the characteristic taste but can also influence the dough's behavior. Salt, for instance, controls yeast activity – too little salt can lead to overly rapid fermentation and potential collapse, while too much salt can inhibit the yeast, slowing down the rise significantly.
Sweeteners like molasses or honey provide additional food for the yeast, potentially boosting initial activity, though this needs to be balanced with the overall fermentation time. Ingredients like buttermilk or yogurt add acidity, which can help manage enzymatic activity in rye and improve the dough's handling and structure, indirectly supporting a better rise. Ensuring all these ingredients are thoroughly and evenly incorporated during the mixing phase is vital for consistent fermentation and a uniform rye bread rising time throughout the loaf.
Step 2: The First Rise: Bulk Fermentation for Rye Bread
The first rise, also known as bulk fermentation, is a crucial period where the dough develops flavor, structure, and volume. During this time, the yeast (or sourdough starter) is actively producing carbon dioxide gas, causing the dough to expand. For rye dough, this stage is particularly important for allowing the complex carbohydrates and proteins to hydrate fully and for the microbial activity to develop the characteristic rye flavors. The duration of this phase is a significant component of the overall rye bread rising time.
Monitoring the dough's progress during bulk fermentation requires observation rather than strict adherence to a clock, as factors like temperature and leavener activity vary. Rye dough typically won't double in size like wheat dough due to its structural limitations. Instead, look for a noticeable increase in volume, perhaps 50-75%, and signs of aeration, such as a slightly domed surface and small bubbles visible on the surface or sides of the container. The dough should feel lighter and more aerated.
Determining the Ideal Length of Bulk Fermentation
Determining the perfect length for the first rise in rye bread is more art than science and depends heavily on the recipe, leavener, and ambient temperature. With commercial yeast, the first rise might take anywhere from 1 to 2.5 hours at a warm room temperature (around 75°F). With a sourdough starter, this time can extend significantly, often ranging from 3 to 6 hours or even longer, especially at cooler temperatures. The goal is to allow sufficient time for gas production and flavor development without letting the dough over-ferment and collapse.
Over-fermentation can lead to a sour, unpleasant taste and a dough that lacks the strength for a good oven spring. Under-fermentation results in a dense, heavy loaf with less developed flavor. Pay attention to the dough's appearance and feel. It should look visibly larger and feel somewhat airy. A good sign is when the dough shows clear signs of activity but still has some tension when gently handled. This indicates it has enough energy left for the second rise and baking. Getting the rye bread rising time right in this first stage is foundational for success.
Tips for Monitoring the Dough's Progress
Monitoring the first rise of rye dough requires keen observation. Since it doesn't typically double, you can't rely solely on volume increase. Instead, look for a significant visual expansion, perhaps 50-75%. Use a clear container or mark the initial level of the dough to help gauge the increase. Watch for signs of fermentation activity: small bubbles may appear on the surface or sides of the dough. The surface might look slightly domed or puffy.
Gently poke the dough with a wet finger (the "poke test"). While not as reliable as with wheat dough, a slight indentation that slowly springs back indicates it's progressing well. If the indentation springs back immediately, it needs more time. If it collapses, it might be over-proofed. Also, note the aroma; a pleasant, slightly fermented smell is good, but a strong, overly sour or alcoholic smell can indicate over-fermentation. Trust your senses and practice to learn the feel and look of properly fermented rye dough during its initial rye bread rising time.
Step 3: Shaping the Dough and the Second Rise (Proofing)
After the bulk fermentation, the dough is shaped into its final form and undergoes the second rise, known as proofing. This stage is critical for the final volume and structure of the loaf. Rye dough, being less elastic and more sticky than wheat dough, requires gentle handling during shaping to avoid degassing the dough and losing the precious carbon dioxide built up during the first rise. Rough handling can deflate the dough, making it difficult to achieve a good final rise.
The shaped loaf is then placed in a proofing basket (banneton), on a baking sheet, or in a loaf pan for its final rest. The goal of proofing is to allow the dough to expand further and develop a delicate, airy structure before baking. The rye bread rising time during proofing is typically shorter than the bulk fermentation but is equally important. Over-proofing is a common issue with rye bread and can lead to a loaf that collapses in the oven or has a dense, gummy texture.
Gentle Shaping Techniques to Preserve Gas
Shaping rye dough requires a light touch. Avoid excessive flour on your work surface, as rye dough doesn't absorb it well and it can create dry pockets. Instead, use wet hands or a lightly oiled surface. The goal is to create tension on the surface of the loaf while minimizing degassing. For freeform loaves, techniques like folding the edges towards the center and then gently rounding or shaping into an oval work well. For loaf pans, simply fold the dough into a log and place it seam-side down.
Remember that rye dough is not as elastic as wheat dough, so it won't hold its shape as rigidly. Don't try to create excessive surface tension through aggressive stretching or pulling. The structure relies more on the dough's inherent density and the support of a proofing basket or pan. Handling the dough minimally and gently ensures that the gas bubbles are preserved, contributing to a better final rise and a more open crumb structure during the subsequent rye bread rising time in the proofing stage.
Proofing Environment for a Strong Second Rise
Creating the right environment for the second rise (proofing) is essential for a successful rye loaf. A warm, humid, and draft-free environment is ideal. Aim for a temperature between 75-85°F (24-29°C). Humidity helps prevent the surface of the dough from drying out and forming a crust, which would restrict expansion during proofing and oven spring.
You can create a humid environment by placing the proofing dough in a plastic bag, under an overturned bowl, or in a dedicated proofing box. Some bakers place the dough in a cold oven with a pan of hot water on the rack below. Ensure the dough is covered loosely so it doesn't stick to the cover as it expands. Maintaining a consistent temperature and humidity throughout the rye bread rising time during proofing ensures steady fermentation and prevents the surface from hindering the final expansion.
Knowing When Your Rye Bread is Properly Proofed
Determining when rye bread is perfectly proofed is crucial. Unlike wheat dough, which often doubles in size and passes the poke test easily, rye dough's indicators are more subtle. It will increase in volume, but likely only by about 50-75% again. The poke test will show an indentation that springs back very slowly or only partially. If it springs back quickly, it's under-proofed. If it collapses, it's over-proofed.
Look for visual cues: the surface should appear smooth and slightly expanded. If proofing in a banneton, the dough should fill the basket nicely but not look like it's spilling over. Gently shaking the banneton should show a slight jiggle. The dough should feel airy and fragile.
It takes practice to recognize the signs of perfectly proofed rye dough. Under-proofing will result in a dense loaf with poor oven spring, while over-proofing will lead to a loaf that collapses in the oven or has a gummy texture. Getting the rye bread rising time right in this final stage is key to a successful bake.
Troubleshooting Common Rye Bread Rising Problems
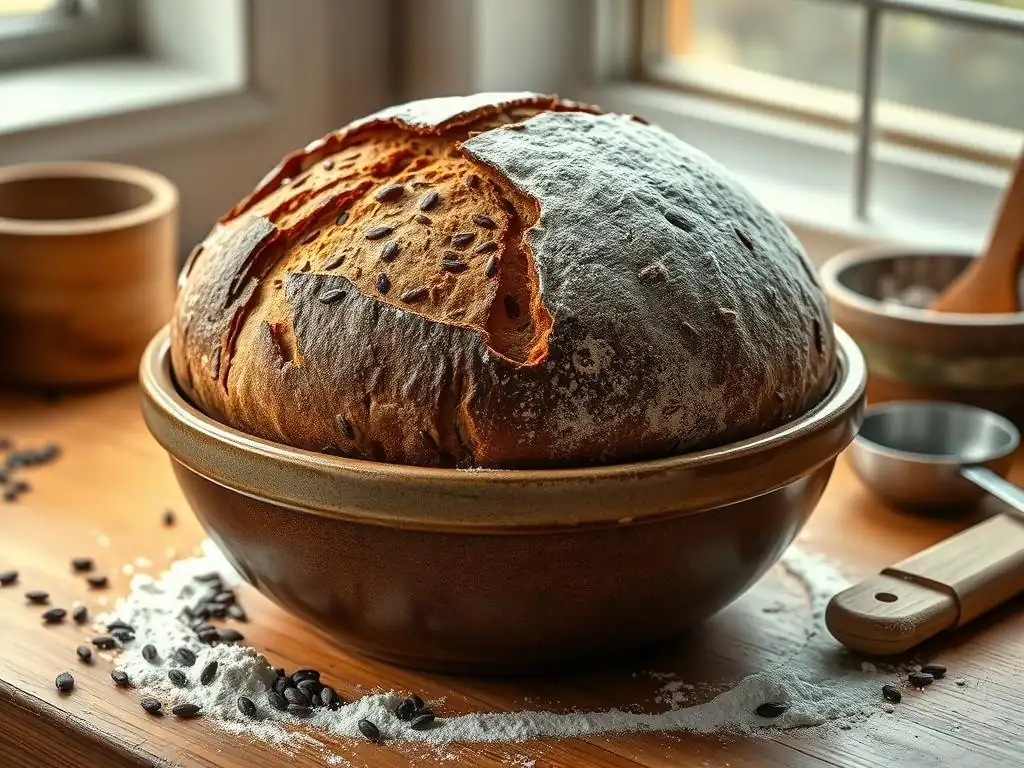
Dense Rye Bread: Identifying the Causes and Solutions
One of the most common frustrations when baking rye bread is ending up with a dense, heavy loaf instead of one with a pleasant crumb. This can be due to several factors, often related to managing the unique properties of rye flour. The most frequent culprits include insufficient leavening activity, inadequate hydration, improper mixing techniques, or issues with the rye bread rising time during fermentation or proofing. A dense crumb means the dough did not produce or retain enough carbon dioxide gas to expand properly.
To troubleshoot density, first check your leavening agent: is your yeast fresh and active, or is your sourdough starter vigorous? Ensure you're using the correct amount specified in the recipe. Next, review your hydration level; rye flour needs plenty of water, so ensure you're adding enough liquid. Avoid overmixing, which can damage the limited structure. Finally, assess your rye bread rising time: was it too short (under-proofed) or too long (over-proofed and collapsed)? Adjusting these factors – ensuring active leavener, proper hydration, gentle mixing, and correct rising times – will significantly improve your chances of achieving a lighter crumb.
Rye Bread That Doesn't Rise: Addressing Yeast Issues and Dough Strength
A rye loaf that barely rises can be disheartening. The primary reason is usually a lack of sufficient gas production or the dough's inability to hold onto the gas. Start by checking your leavening agent's viability. If using commercial yeast, ensure it's not expired and activate it in warm water to see if it bubbles. If using sourdough, make sure your starter is recently fed and active, showing significant bubbling and doubling within a few hours of feeding.
If the leavener is active, the issue might be with the dough's strength or environment. Is the dough too cold? Low temperatures drastically slow yeast activity. Ensure your proofing environment is warm enough (75-85°F). Is the dough too dry? Insufficient hydration can stiffen the dough and restrict expansion. Did you use enough salt? Too much salt inhibits yeast. While rye dough has less inherent strength than wheat, ensuring proper hydration and gentle mixing (avoiding overworking) helps preserve the limited structure it does have, allowing it to retain more gas and achieve a better rye bread rising time.
Over-Proofed Rye Bread: Recognizing the Signs and Preventing It
Over-proofing occurs when the dough ferments for too long, exhausting the yeast and potentially leading to the breakdown of the dough's structure by enzymes or acids. Signs of over-proofed rye dough include a rapid, excessive rise followed by a plateau or even a slight collapse. The dough may look very puffy and fragile, and the poke test will result in an indentation that stays or causes the dough to deflate slightly. The surface might look stretched thin, and large bubbles might be visible.
Over-proofing is often caused by too warm a proofing environment or simply letting the dough rise for too long. The key to preventing it is careful monitoring of the rye bread rising time. Learn to recognize the signs of just right proofing (dough looks visibly larger, feels airy, poke test springs back slowly).
If you suspect your kitchen is warm, reduce the recommended rising time or use cooler water when mixing the dough to slow fermentation. Baking slightly under-proofed rye bread is often preferable to baking an over-proofed loaf, as it will still get some oven spring, whereas an over-proofed loaf is likely to collapse.
Advanced Techniques for Enhanced Rye Bread Rise
Using a Pre-Ferment (Poolish or Biga) to Improve Rise
Incorporating a pre-ferment, such as a poolish or biga, can significantly improve the rise, flavor, and texture of rye bread, particularly in recipes that include a portion of wheat flour. A pre-ferment is a mixture of flour, water, and a small amount of yeast or starter that is allowed to ferment for several hours (or even overnight) before being added to the final dough. This process helps develop flavor and build dough strength in the portion of flour used in the pre-ferment.
While traditional poolish and biga use wheat flour, you can create rye-based pre-ferments or use a wheat pre-ferment in a mixed flour rye bread. The pre-fermented flour contributes acidity and enzymatic activity that can benefit the overall dough structure. The extended fermentation time also pre-develops gluten in the wheat portion (if used) and builds complex flavors. Adding a mature pre-ferment to the final mix provides a boost of active leaveners and pre-hydrated flour, often leading to a more vigorous and consistent rye bread rising time and improved oven spring.
The Importance of Dough Strength for a Good Rise
Although rye dough doesn't develop the same robust gluten network as wheat dough, maintaining what limited strength it has is vital for achieving a decent rise. "Dough strength" in rye context refers to the dough's ability to hold together and trap gas bubbles, primarily relying on the interactions between rye proteins, pentosans, and water. Factors that contribute to this limited strength include proper hydration, gentle mixing, and the presence of acids (from sourdough or other ingredients).
Over-hydration can make the dough too weak to hold gas, while under-hydration makes it too stiff to expand. Overmixing can break down the structure, while sufficient, gentle mixing helps align the protein and fiber components. Acids help firm up the dough and control enzymatic breakdown. Ensuring these factors are managed correctly optimizes the dough's ability to trap the carbon dioxide produced during the rye bread rising time, leading to a better final volume and crumb structure.
Scoring Techniques to Aid in Oven Spring
Scoring, or slashing, the surface of bread dough just before baking serves a functional purpose beyond aesthetics. As the bread enters the hot oven, the trapped gases expand rapidly – this is known as oven spring. If the surface crust has already begun to form, the expanding gases need a weak point to escape. Scoring provides controlled weak points, allowing the dough to expand predictably along the slashes. Without scoring, the crust might rupture haphazardly, or the loaf might not achieve its full potential volume.
For rye bread, which often has less dramatic oven spring than wheat, scoring is still beneficial. It helps direct the limited expansion and prevents the crust from tearing in undesirable places. Simple, straight slashes or a single long slash are common for rye loaves. Ensure your blade (a sharp razor blade or lame) is very sharp to make clean cuts without dragging the dough. Proper scoring, combined with optimal rye bread rising time and a hot oven, helps the loaf achieve its best possible shape and volume during the initial stages of baking.
Rye Bread Baking Tips for a Perfect Loaf
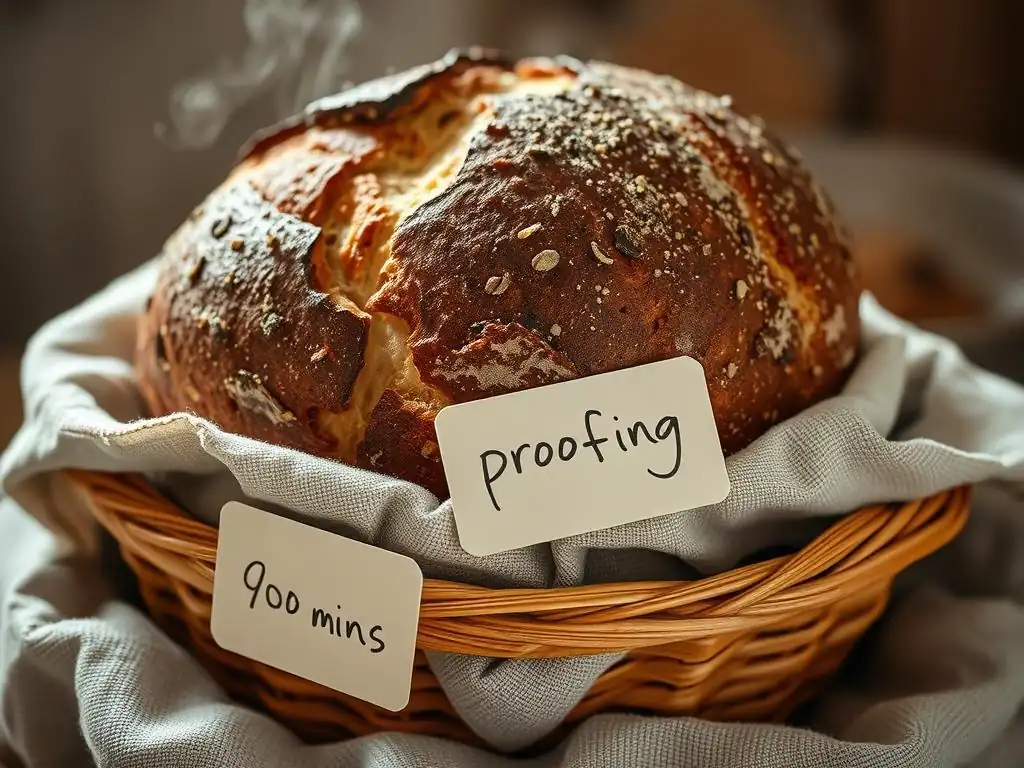
Oven Temperature and Baking Time for Optimal Results
Baking temperature and time are the final crucial steps in ensuring your perfectly risen rye bread transforms into a delicious loaf. Rye bread often benefits from baking at relatively high temperatures initially to encourage good oven spring, followed by a reduction in temperature to ensure the interior cooks through without the crust burning. A common approach is to preheat the oven to a high temperature, such as 450-475°F (230-245°C), load the bread, and then reduce the temperature to around 375-400°F (190-200°C) for the remainder of the bake.
The total baking time will vary depending on the size and density of the loaf, but a medium-sized loaf might bake for 45-60 minutes. You know the bread is done when the internal temperature reaches around 200-210°F (93-99°C) and the crust is a deep brown color. A well-baked crust provides structural support for the dense rye crumb. Getting the oven temperature and timing right complements the work done during the rye bread rising time, ensuring the final loaf is cooked through and has a good crust.
Steam Injection for a Crusty Rye Bread
Creating steam in your oven during the initial phase of baking is highly recommended for achieving a beautiful, crusty exterior on your rye bread. Steam keeps the surface of the dough moist and flexible during the first 10-15 minutes in the hot oven. This allows the dough to expand fully during oven spring without the crust hardening prematurely. Once the steam dissipates, the crust can then dry out and brown, developing that desirable crispy texture.
There are several ways to create steam at home. You can place a heat-safe pan on the bottom rack of your oven while preheating and carefully pour boiling water into it just before loading the bread. Another method is to bake the bread in a Dutch oven or covered pot, which traps the moisture released by the dough itself. Using steam is a simple yet effective technique that significantly improves the appearance and texture of the crust, enhancing the overall quality of the loaf that resulted from careful attention to the rye bread rising time.
Cooling and Storing Your Perfectly Risen Rye Bread
Once your rye bread is baked to perfection, the final step is often the hardest: waiting for it to cool completely. Rye bread, especially those with high hydration and a dense crumb, continues to cook and set internally as it cools. Slicing into a warm rye loaf can result in a gummy, sticky texture because the starches haven't fully gelatinized and set. Allow the bread to cool on a wire rack for at least 2-3 hours, or even longer for very large or dense loaves. This cooling period is essential for the texture to stabilize.
Proper storage helps maintain the bread's freshness. Once completely cool, store rye bread at room temperature. Avoid refrigerating it, as this can actually dry it out and make it stale faster. Wrap the loaf tightly in plastic wrap, beeswax wrap, or place it in a bread box or a paper bag inside a plastic bag.
For longer storage, rye bread freezes exceptionally well. Slice the cooled loaf and freeze slices in a freezer-safe bag for easy access. Enjoy the fruits of your labor, savoring the flavor and texture achieved through careful attention to the rye bread rising time and baking process!
Conclusion: Bake With Ease and Enjoy Your Perfectly Risen Rye Bread!
Recap of Key Tips for Achieving the Best Rye Bread Rise
Mastering the rise of rye bread is a rewarding challenge that leads to incredibly flavorful and satisfying loaves. We've explored the unique characteristics of rye flour, the different leavening options, and the critical environmental factors that influence how well your dough expands. Remember that rye dough behaves differently than wheat; it's stickier, less elastic, and won't typically double in volume. Success lies in understanding these properties and adjusting your techniques accordingly.
Key takeaways for achieving optimal rye bread rising time include ensuring your leavener is active, using proper hydration levels suited to the type of rye flour, employing gentle mixing techniques to preserve dough structure, maintaining a warm and consistent temperature during both bulk fermentation and proofing, and learning to recognize the visual and tactile cues that indicate your dough is perfectly risen (not under- or over-proofed) before baking. By paying close attention to these details, you can significantly improve the texture and flavor of your homemade rye bread.
Further Resources for Rye Bread Baking on BakeWithEase.com
Baking delicious rye bread is a journey, and we're here to support you every step of the way. This guide provides a strong foundation for understanding and optimizing the rye bread rising time, but there's always more to explore. BakeWithEase.com offers a wealth of additional resources specifically tailored for baking with ease, including a variety of rye bread recipes ranging from light deli-style rye to hearty pumpernickel.
Explore our collection of recipes to put these rising techniques into practice. Find detailed step-by-step instructions, ingredient breakdowns, and tips specific to each type of rye bread. We also have articles on troubleshooting other common baking issues, guides to different flours, and tutorials on advanced techniques like using pre-ferments or maintaining a sourdough starter. Continue your baking adventure with us and discover the joy of creating perfect loaves of rye bread at home.
Frequently Asked Questions
What is the ideal rye bread rising time?
The ideal rye bread rising time depends on factors like recipe, yeast type, and temperature, but generally ranges from 1-2 hours for the first proof and 30-60 minutes for the second. Watch for a significant increase in volume rather than strictly adhering to a specific time.
What factors influence rye bread rising time?
Several factors affect rising time, including yeast activity, room temperature, and the hydration level of the dough. Higher temperatures and more active yeast will result in faster rising.
My rye bread isn't rising, what could be the problem?
Possible causes include expired yeast, too cold of a temperature, or insufficient hydration. Test your yeast before starting and ensure a warm, draft-free environment for proofing.
Can I over-proof rye bread dough?
Yes, over-proofing can cause the dough to collapse and deflate. Look for signs like over-extension and a sour, alcoholic smell, indicating the dough has over-fermented.
How can I speed up rye bread rising time?
To speed up the rising time, try placing the dough in a warmer location, such as a slightly warm oven (turned off!) or a proofing box. You can also use more yeast, but this may affect the flavor.
Final Reflection: The Humble Rise of Rye, and the Rewards of Patience
The perfect rise in rye bread isn't just about achieving a beautiful loaf; it's a reflection of the care and attention we give to the process of creation. A seemingly simple act of baking becomes a metaphor for the dedication required in any endeavor, demanding patience, precision, and a deep understanding of the ingredients and their interplay. The right rise, achieved through understanding the nuances of hydration, fermentation, and proofing, is the key to unlocking the full potential of this complex and rewarding grain.
The journey of baking rye bread, with its unique challenges and satisfying results, mirrors our own personal journeys. The slow fermentation, the careful nurturing of the dough, the anticipation of the oven's warmth – these are all elements that resonate with the rhythms of life itself. As the dough rises, so too do our hopes and aspirations. The best things in life are worth waiting for,
a sentiment perfectly encapsulated in the slow, deliberate process of crafting a perfect rye loaf. This timeless wisdom applies not only to baking but also to the pursuit of excellence in any field.
Now, consider your own "dough." What projects, dreams, or relationships require the same patience and nurturing that a rye loaf demands? Take a moment to reflect on the areas of your life where a slower, more deliberate approach might yield richer, more fulfilling results. Embrace the rise, embrace the wait, and discover the unexpected rewards that await you. The journey, like the perfectly risen rye bread, will be worth the effort.
Unlock Your Rye Bread Potential!
Thanks for taking the time to explore the world of perfect rye bread with us! We hope you've gained valuable insights into achieving that incredible rise and flavor. Now it's time to put your new knowledge into practice.
- Bake your best rye yet! Try out one of the techniques from the article – perhaps the longer fermentation or the unique hydration method – and see the difference it makes. Share your baking journey in the comments below!
- Experiment with different flours: See how the rise changes by substituting a portion of your rye flour with whole wheat or even a bit of spelt.
- Share your success (or even your challenges!): Tag us on social media (@BakeWithEase) with your rye bread creations – we love seeing your baking adventures.
Ready to transform your rye bread baking? What unique ingredient will you try next?